
TL;DR: New to Taskade? Start with the 4-step tour: (1) create a workspace, (2) create your first project, (3) switch between the project views, (4) invite your team. This guide walks through each step with screenshots. Follow the steps in order for a working setup in a few minutes.
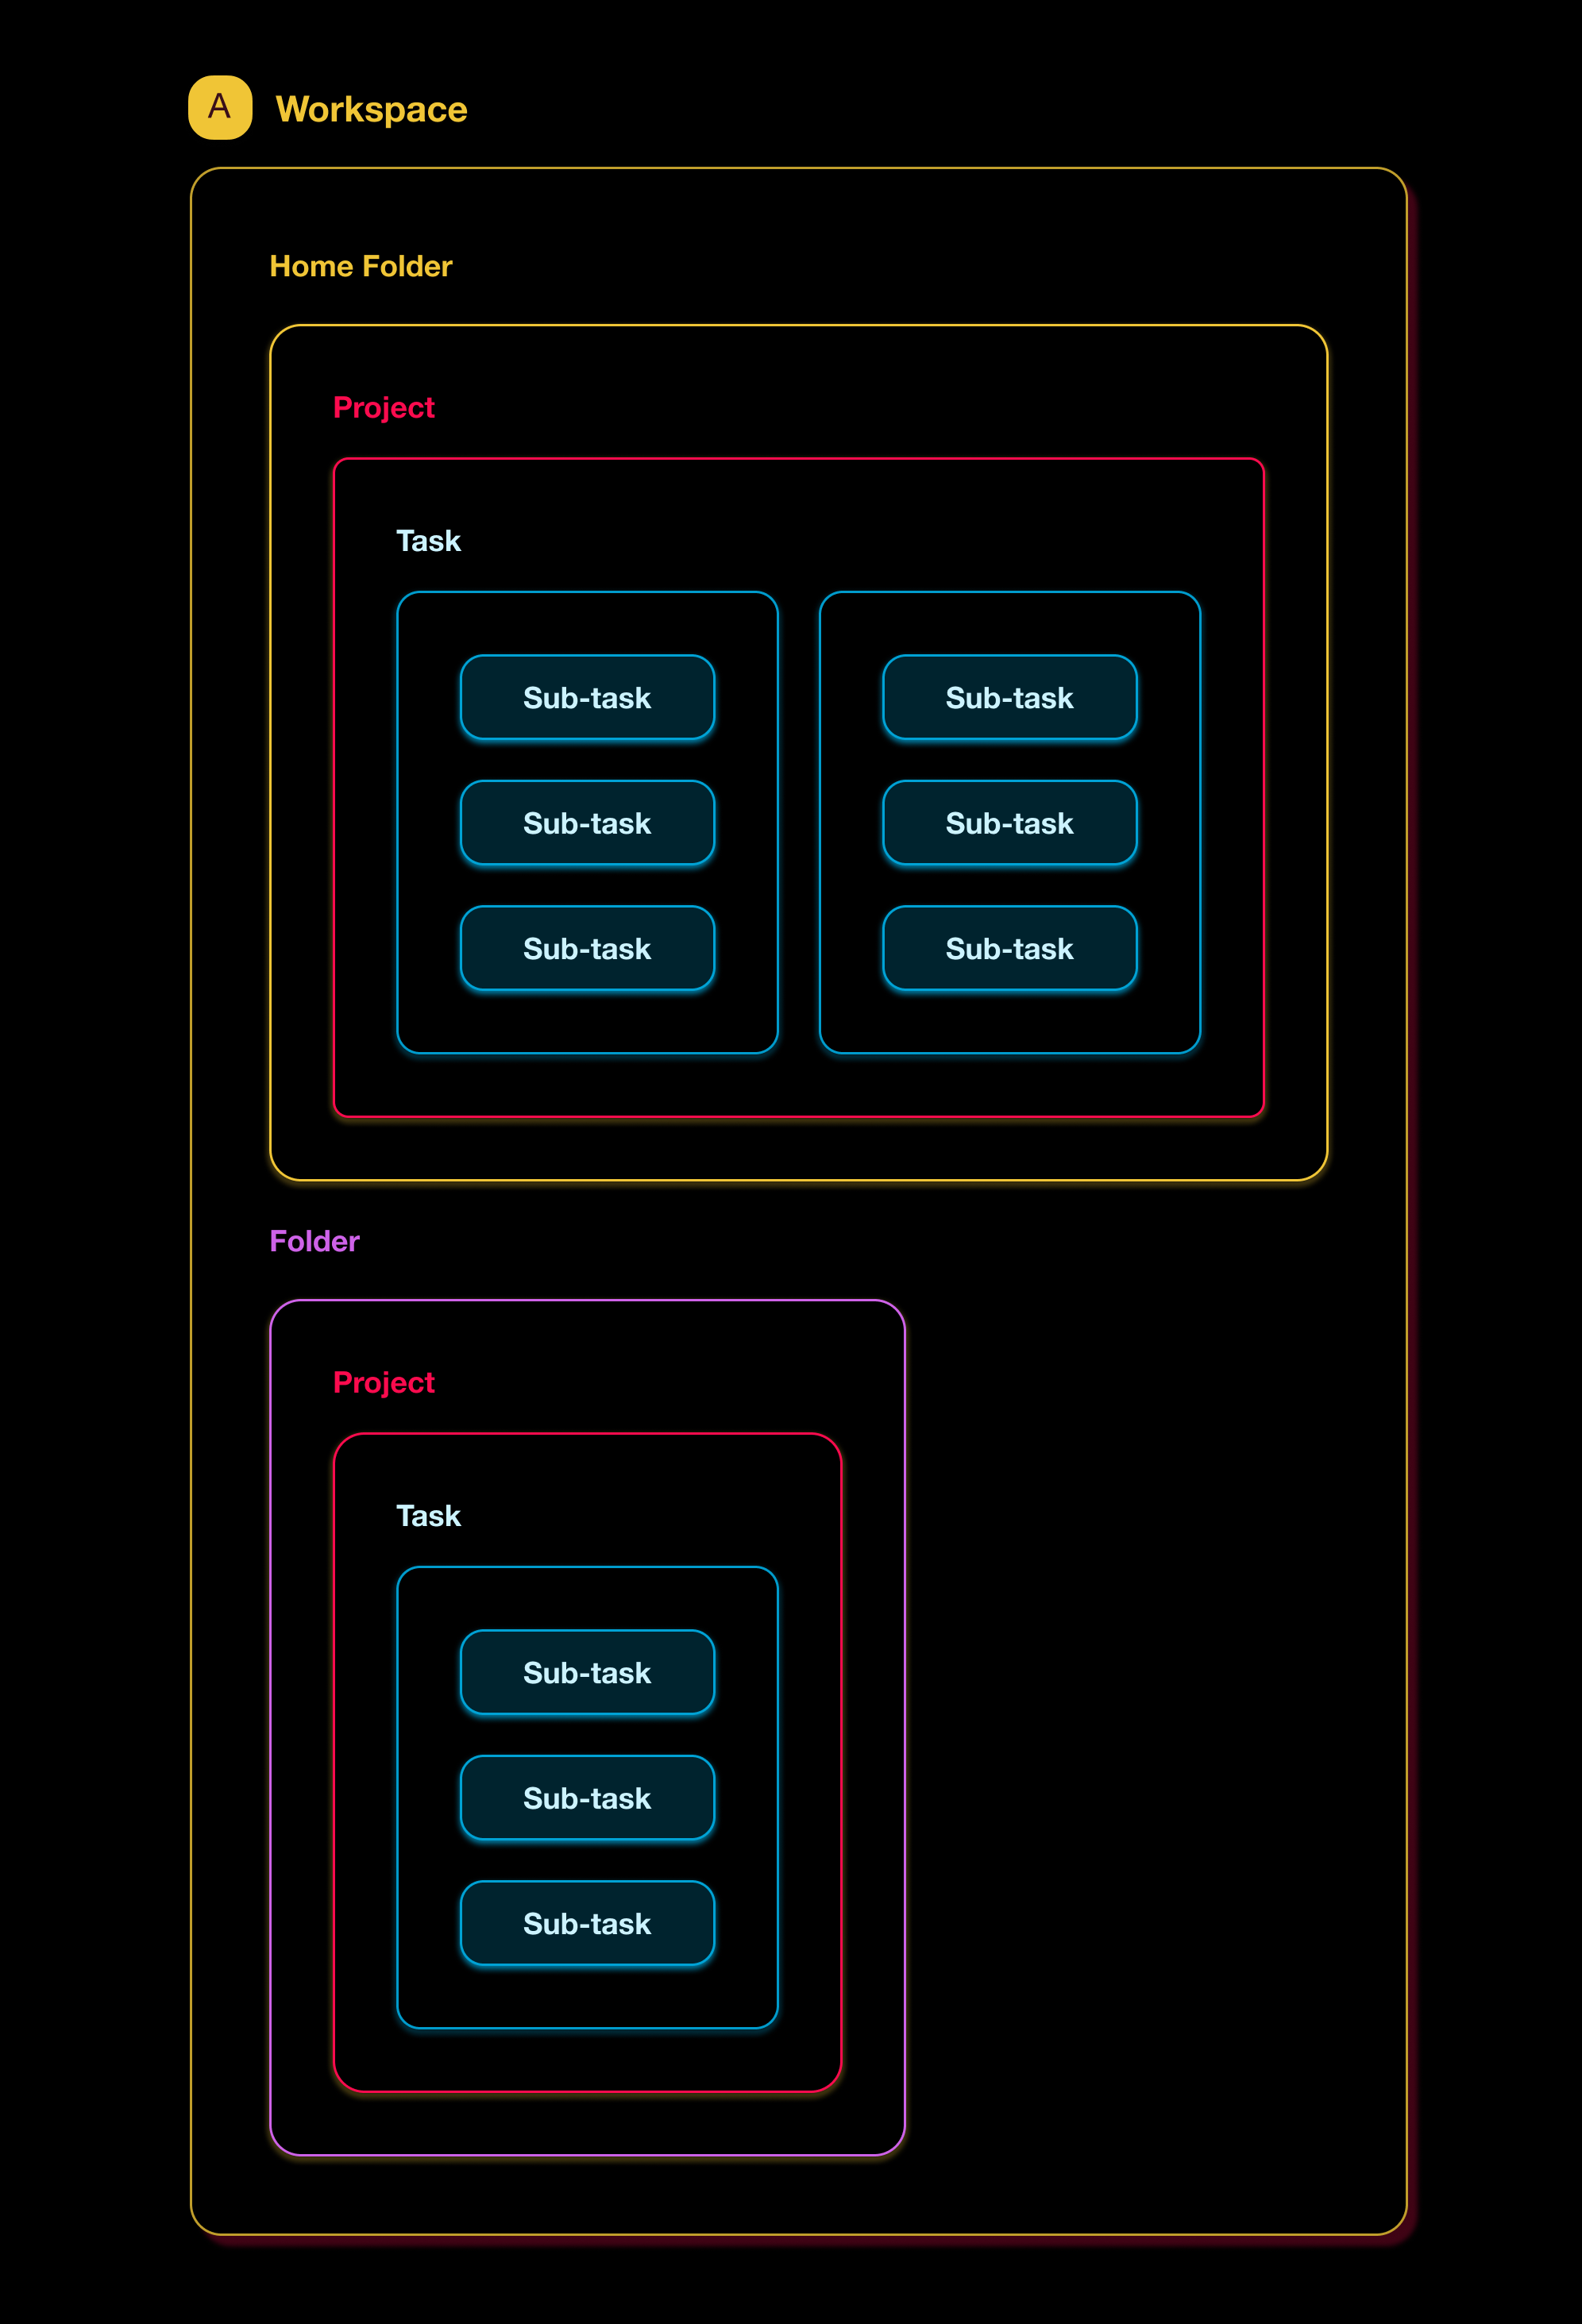
Here is how Taskade nests your work, from the top-level workspace down to a single task.
Overview
Taskade organizes everything from a top-level workspace down to a single task. You plan projects, run them across multiple views, and collaborate with your team in one place. This guide walks you through the essentials, from creating your first project to sharing it with your team.
The Hierarchy Structure
Taskade is built on a simple hierarchy that consists of 🗃 Workspaces, 🚋 Folders, and 📝 Projects. Projects are how you organise and plan all of the tasks in Taskade, so lets start with the project basics below.👇
How To Create A New Project
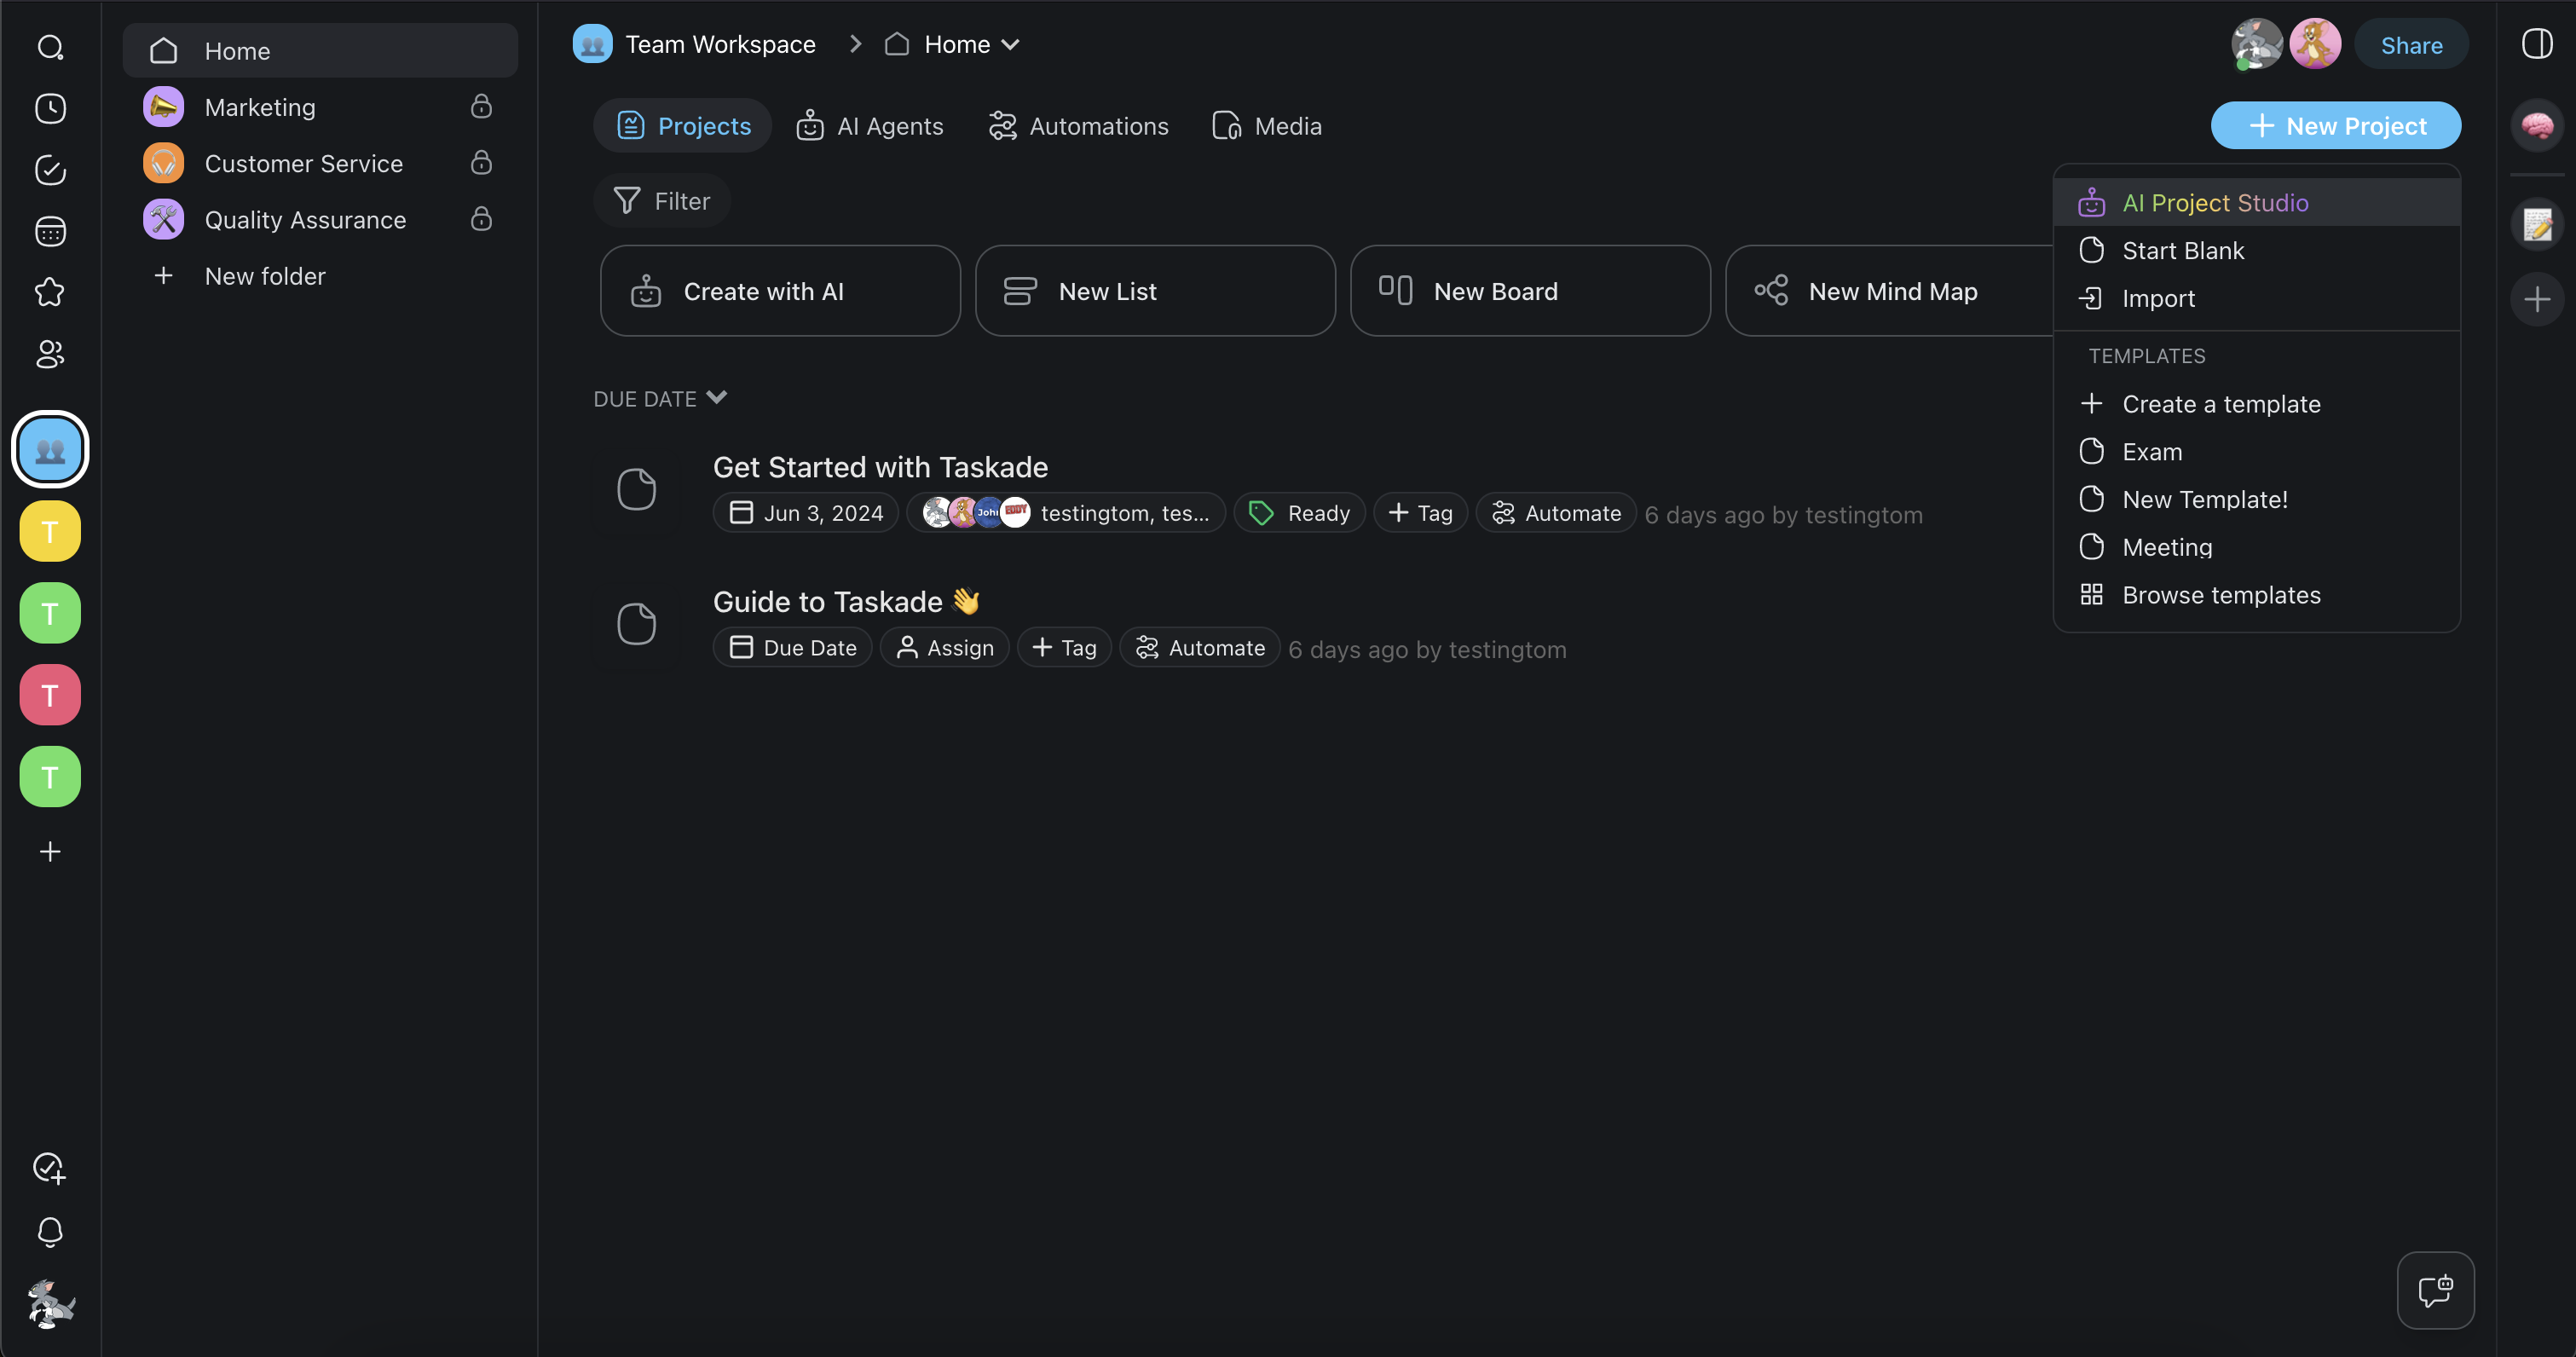
You can 📝 Create a Project for almost anything. Keep track of tasks, start a DIY project, or communicate with your team on the same page. Click anywhere in the project and start to type. Taskade reads each line in a project as a task.
New to vibe coding? Taskade Genesis lets you build complete apps by describing what you want in plain language. No coding required. Create your first app →
Organise Tasks
You can 🧠 Organize your tasks with the following features:
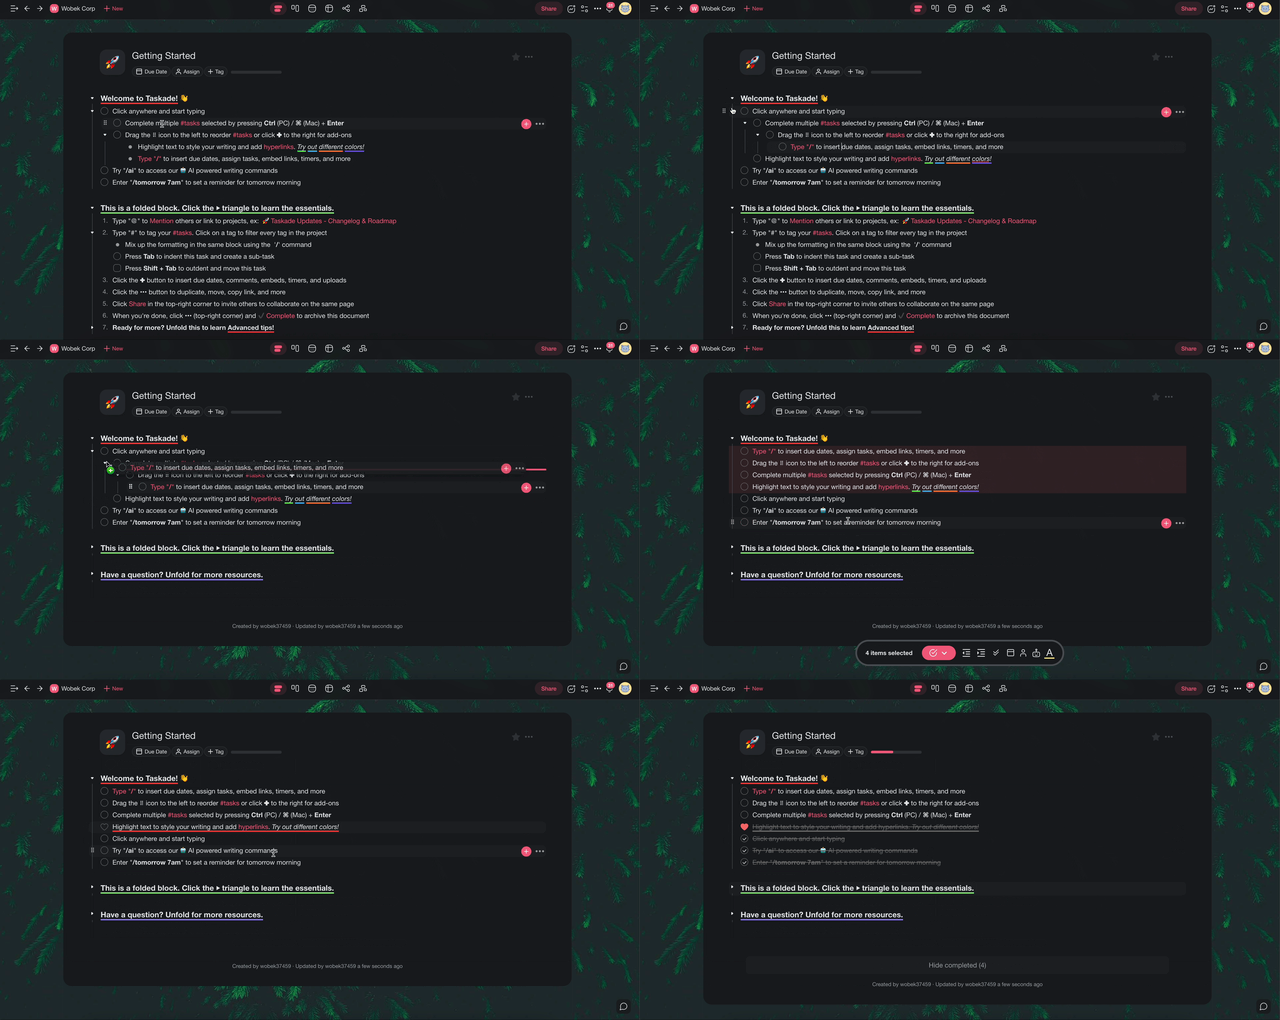
- 👉 Press TAB to indent and SHIFT + TAB to outdent tasks
- 🧱 Break down larger tasks into sub-tasks
- 🧘 This helps you focus and GTD
➡️ Fold & unfold sections by clicking the arrow next to a task.
Click and drag the Drag ⠟ Icon Menu to the left to reorder them.
Click on the Drag ⠟ Icon Menu for more formatting options.
🏁 Cross tasks off with Ctrl (PC) / ⌘ (Mac) + Enter
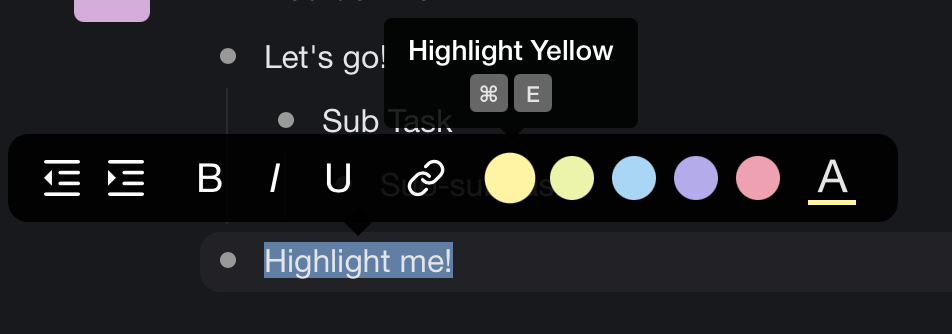
- 🎨 Select the text to highlight, bold, italicize, and underline your tasks.
Manage Tasks
Each task can have multiple add-ons attached. This can range from due dates to, file uploads or reactions. Click on the ✚ Icon to the right to access the list of Add-Ons.
- Use the / Slash command to access all Add-Ons, NLPs and more!
- 🤖 AI Assistant
- 📅 Set a Due Date for each task.
- 👤Assign a user to each task.
- 💬 Add Comments and discuss projects in real-time.
- 📎 Upload images, documents, and other files through several ways:
- Click on the "☁️ Upload File" button to add images and files
- Drag and & drop files into the comment window
- Drag & drop files into the chat window
🔗Embed media into your task
Create a ⏱️ Timer for your task
😊 React to a task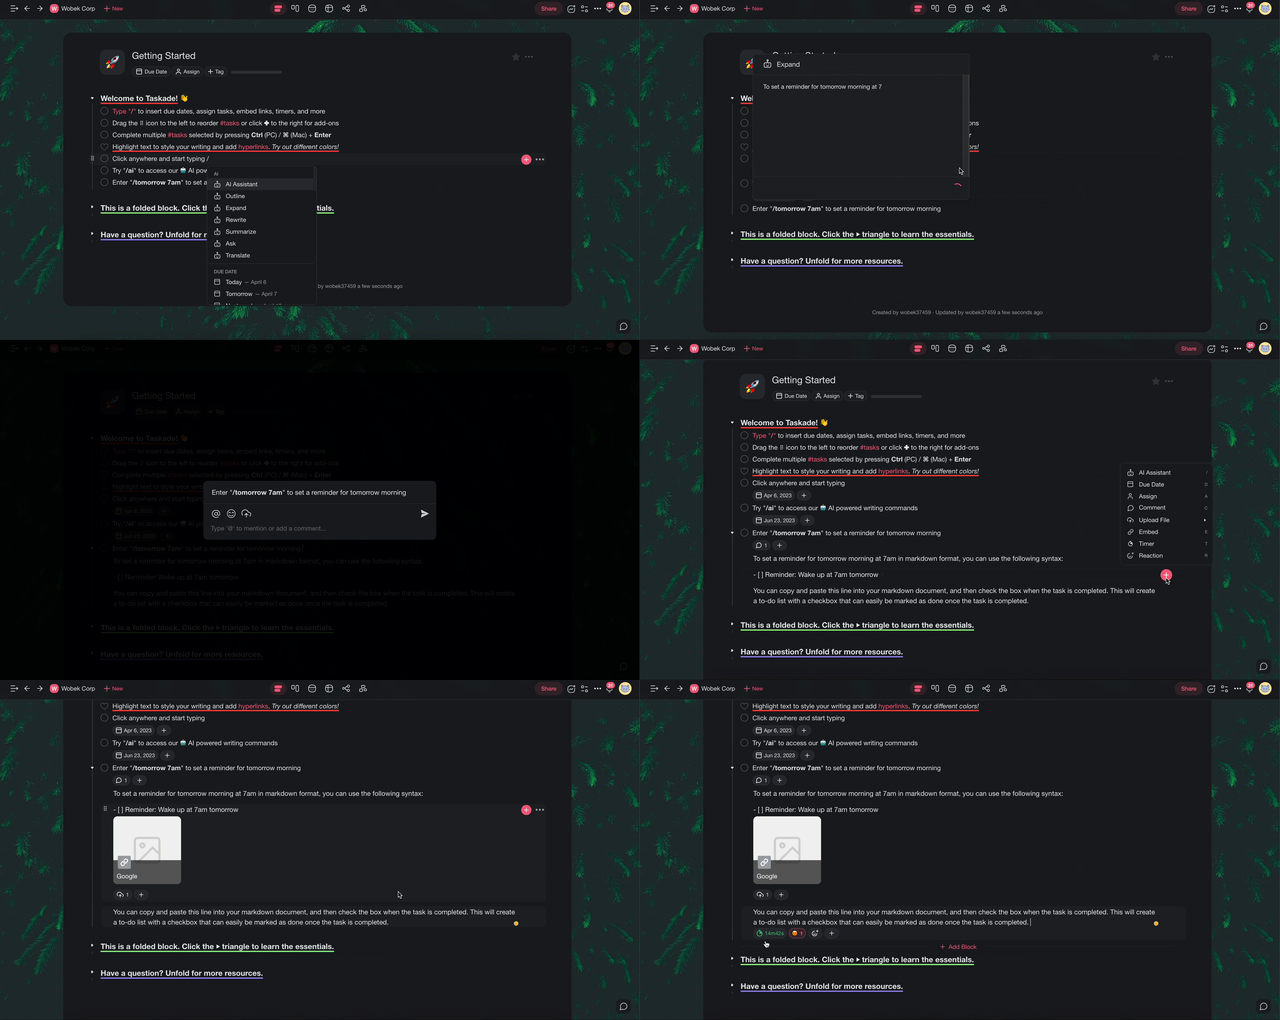
Linking Tasks And Projects
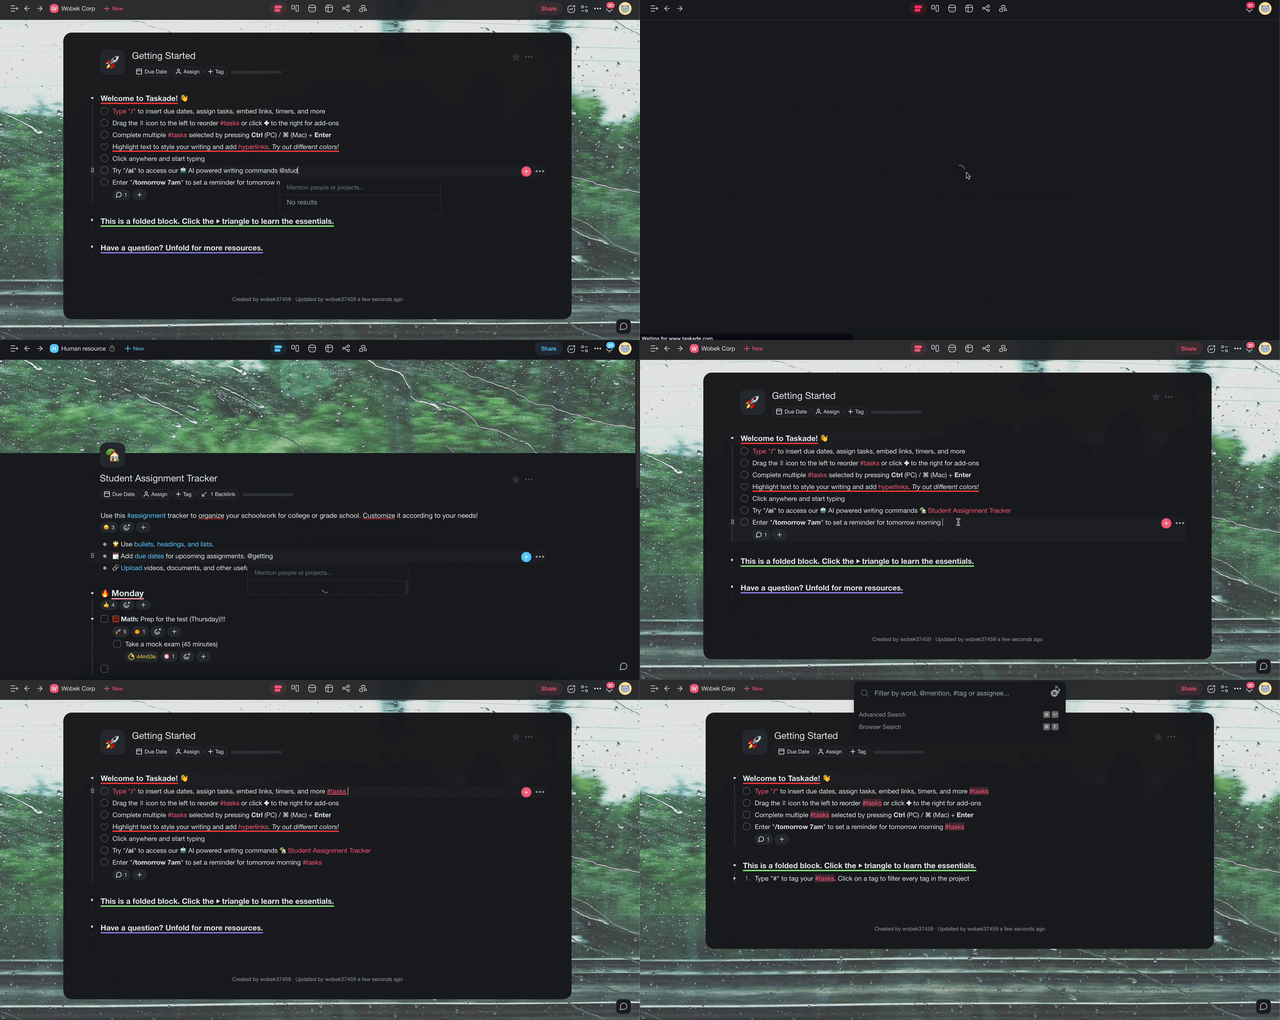
You can use the🕵️♀️ @Mention and #Tag feature to link users, other tasks and other projects together! This can help you build a 🧠 Second Brain.
Project Views
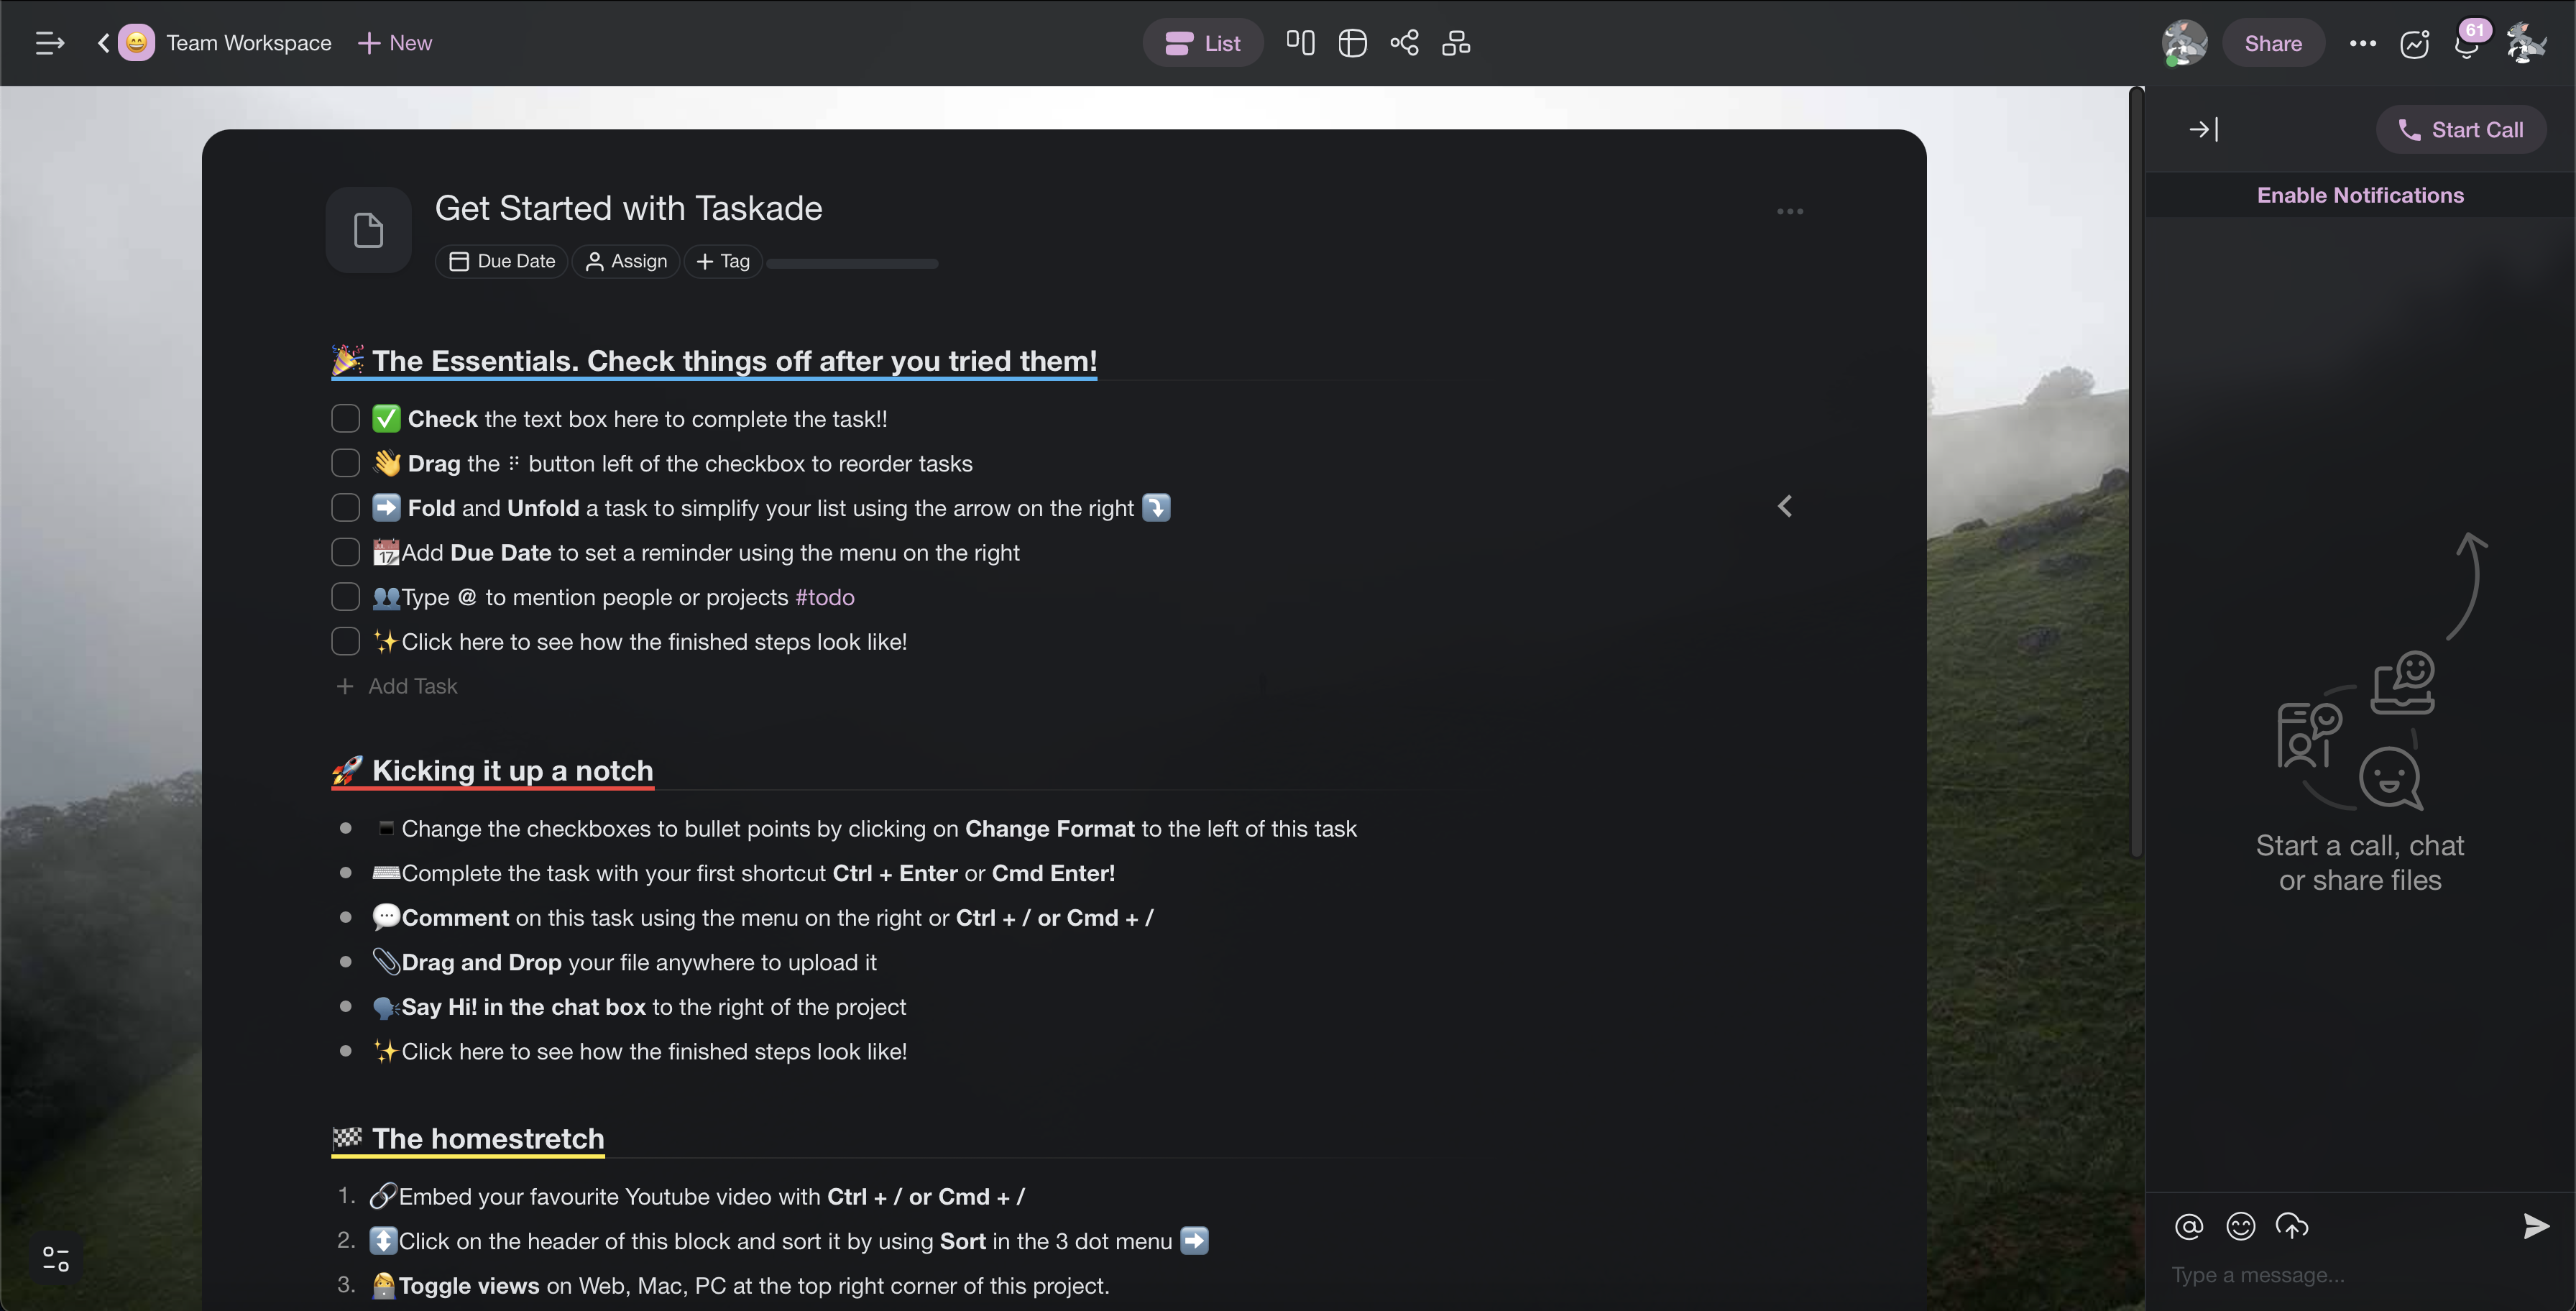
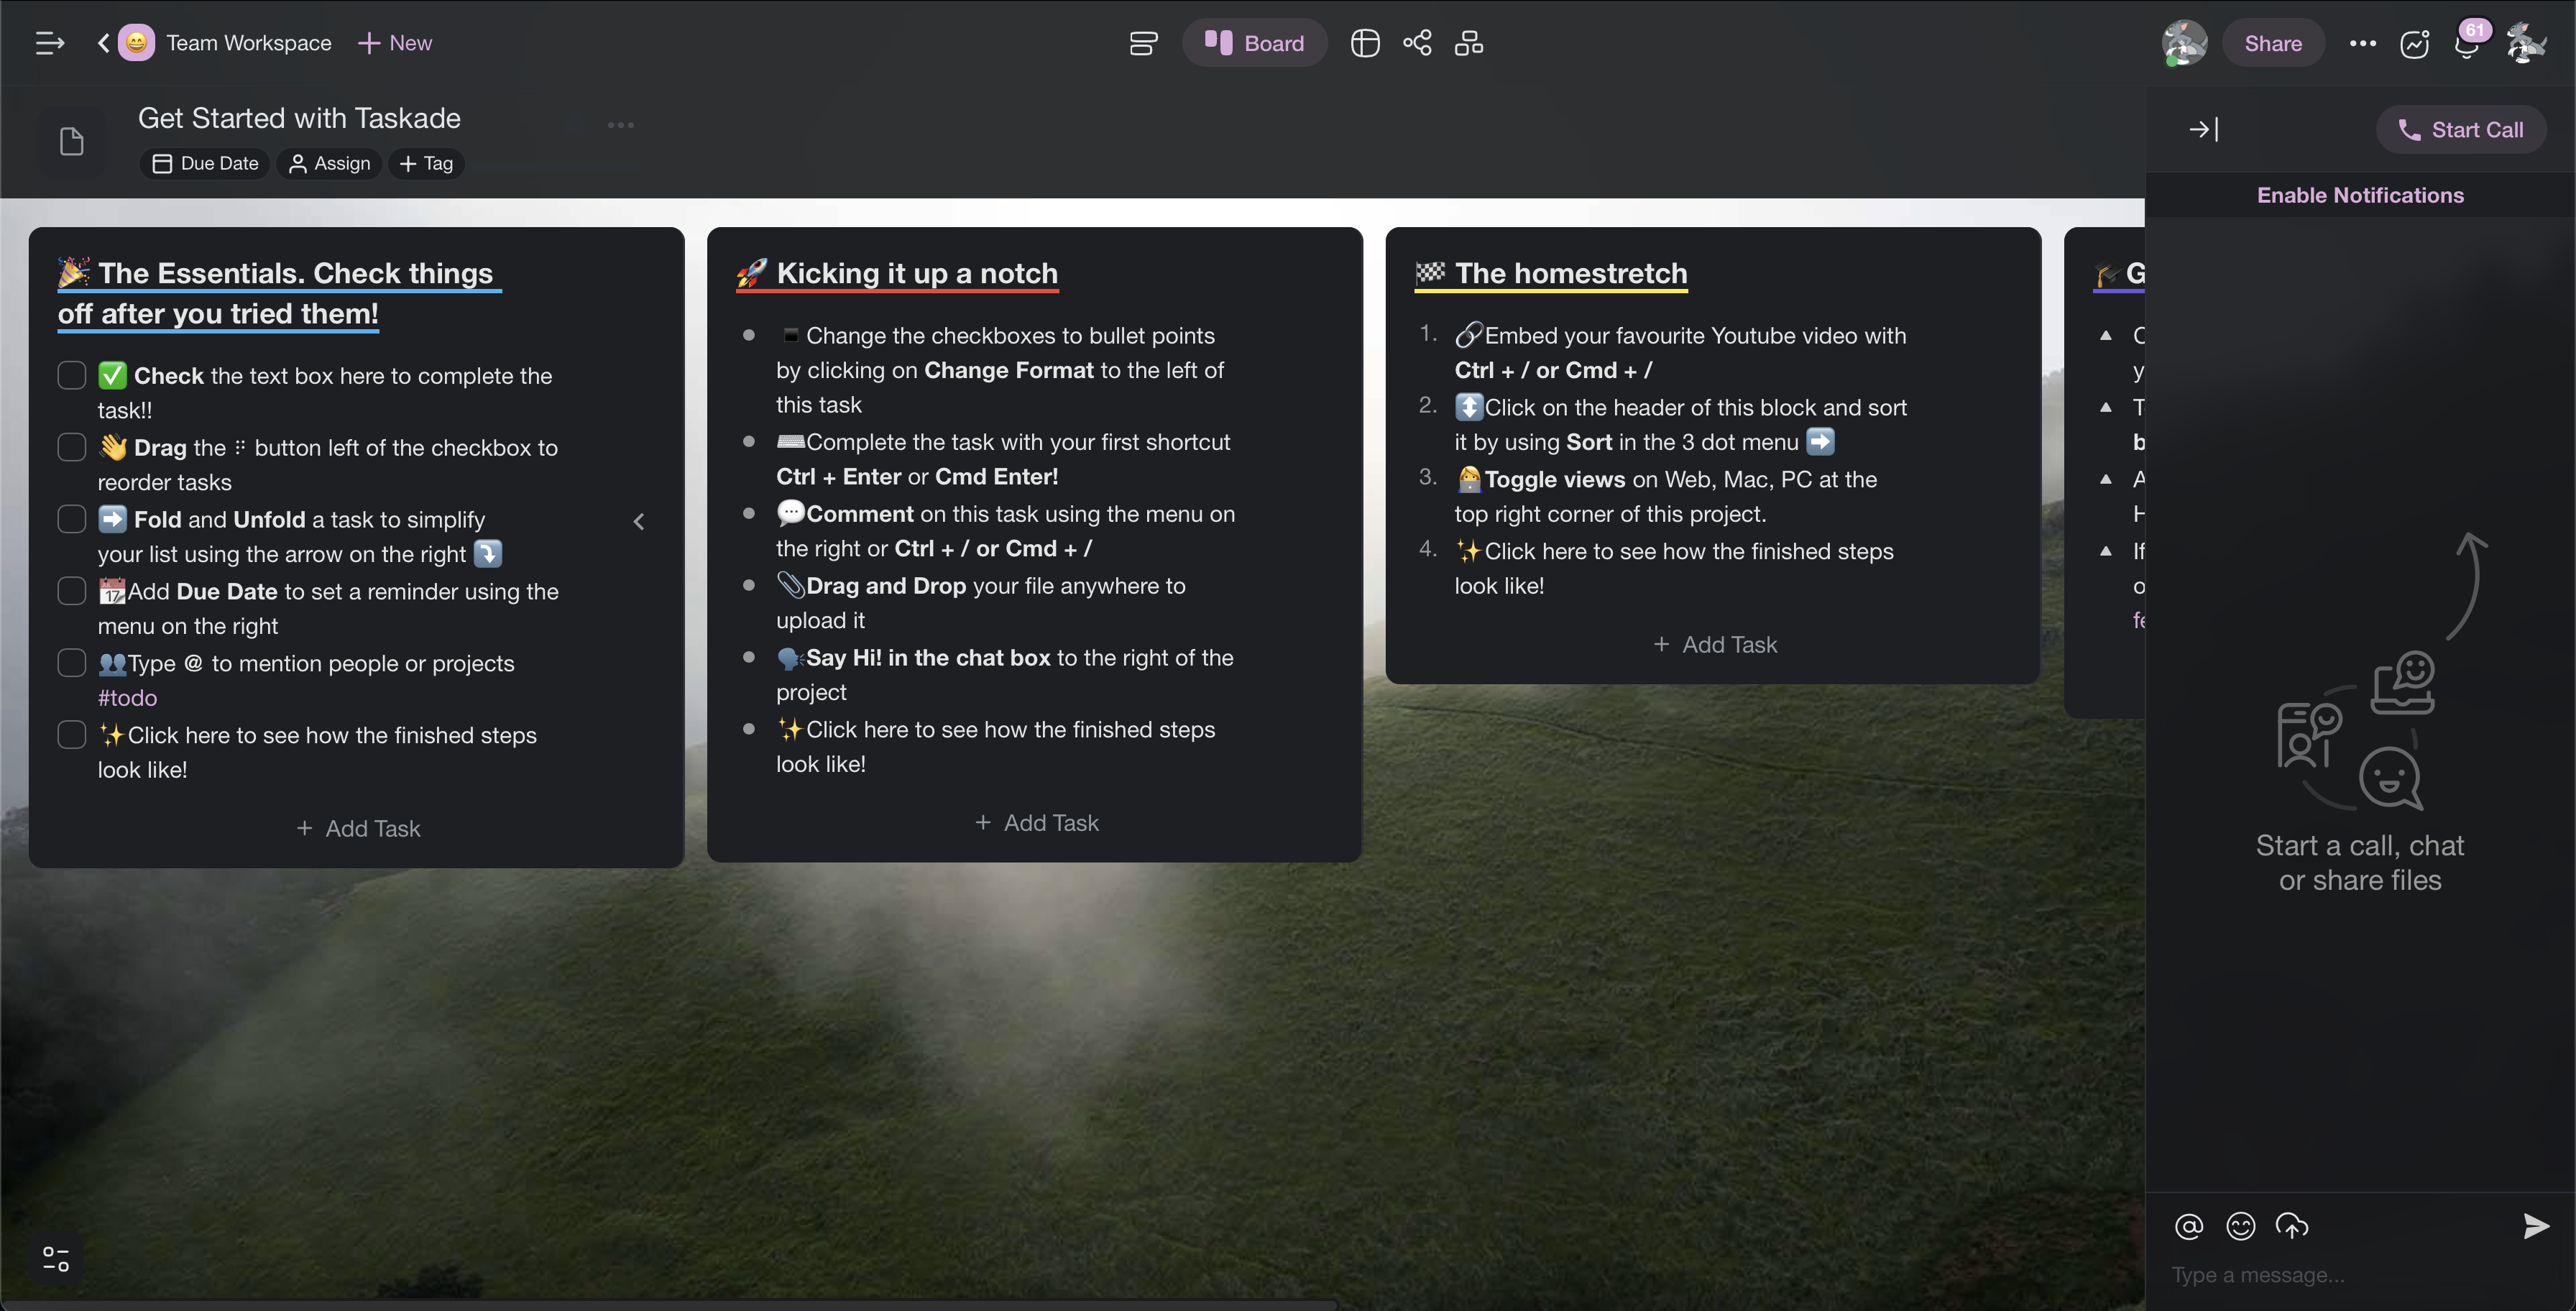
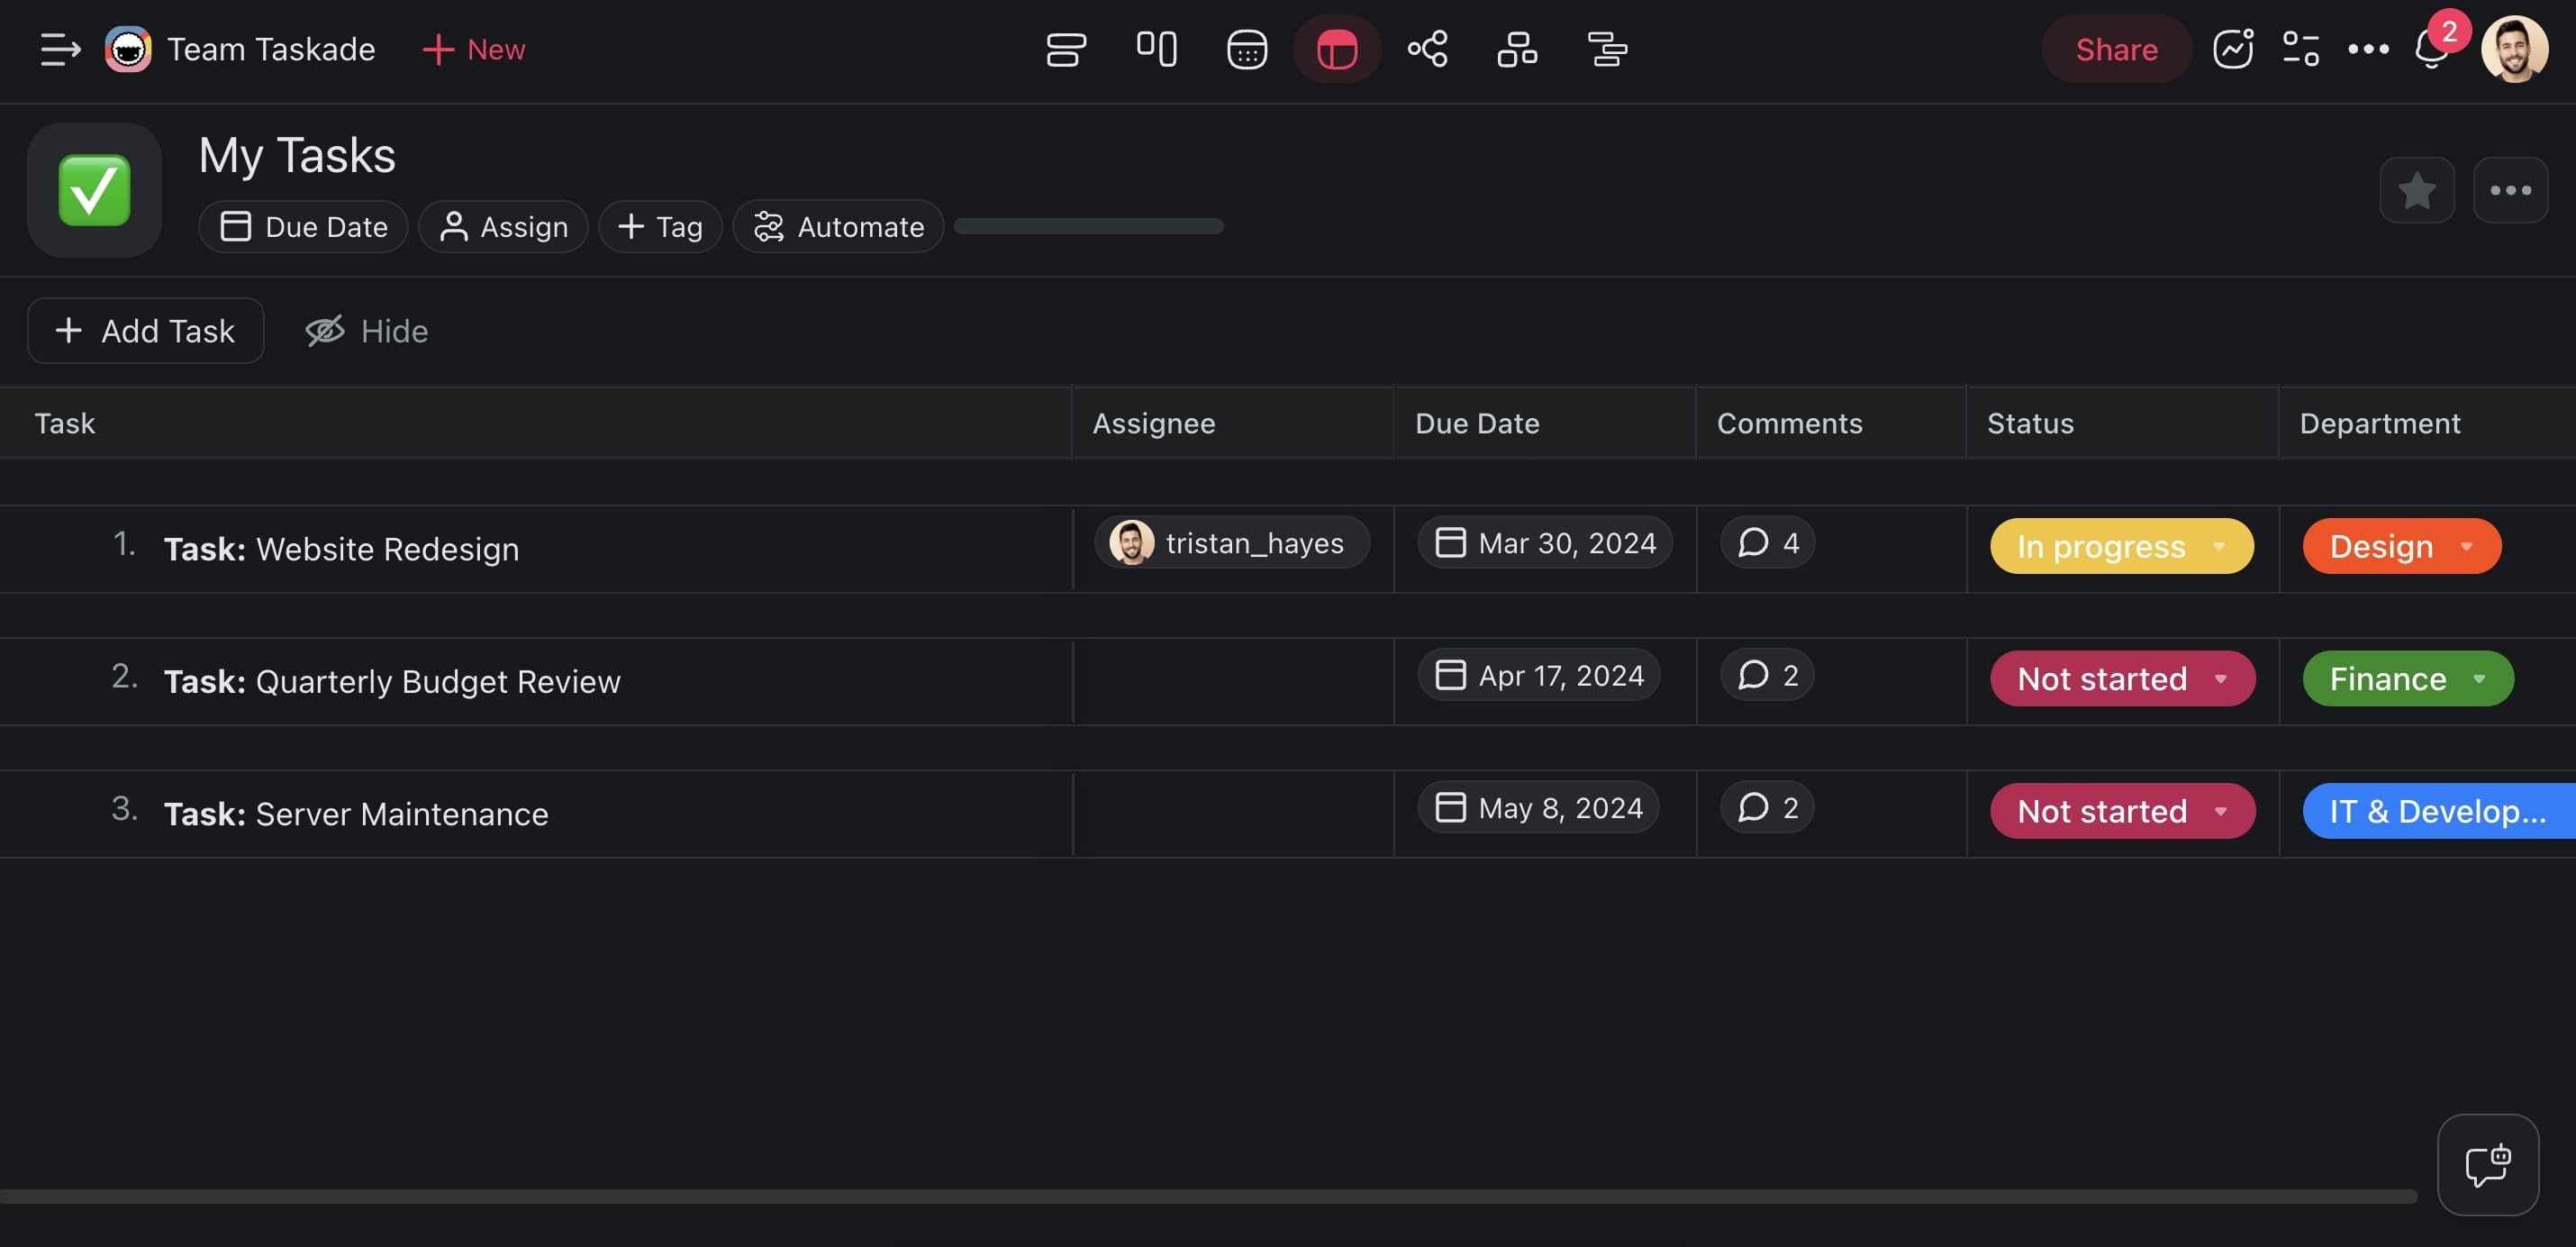
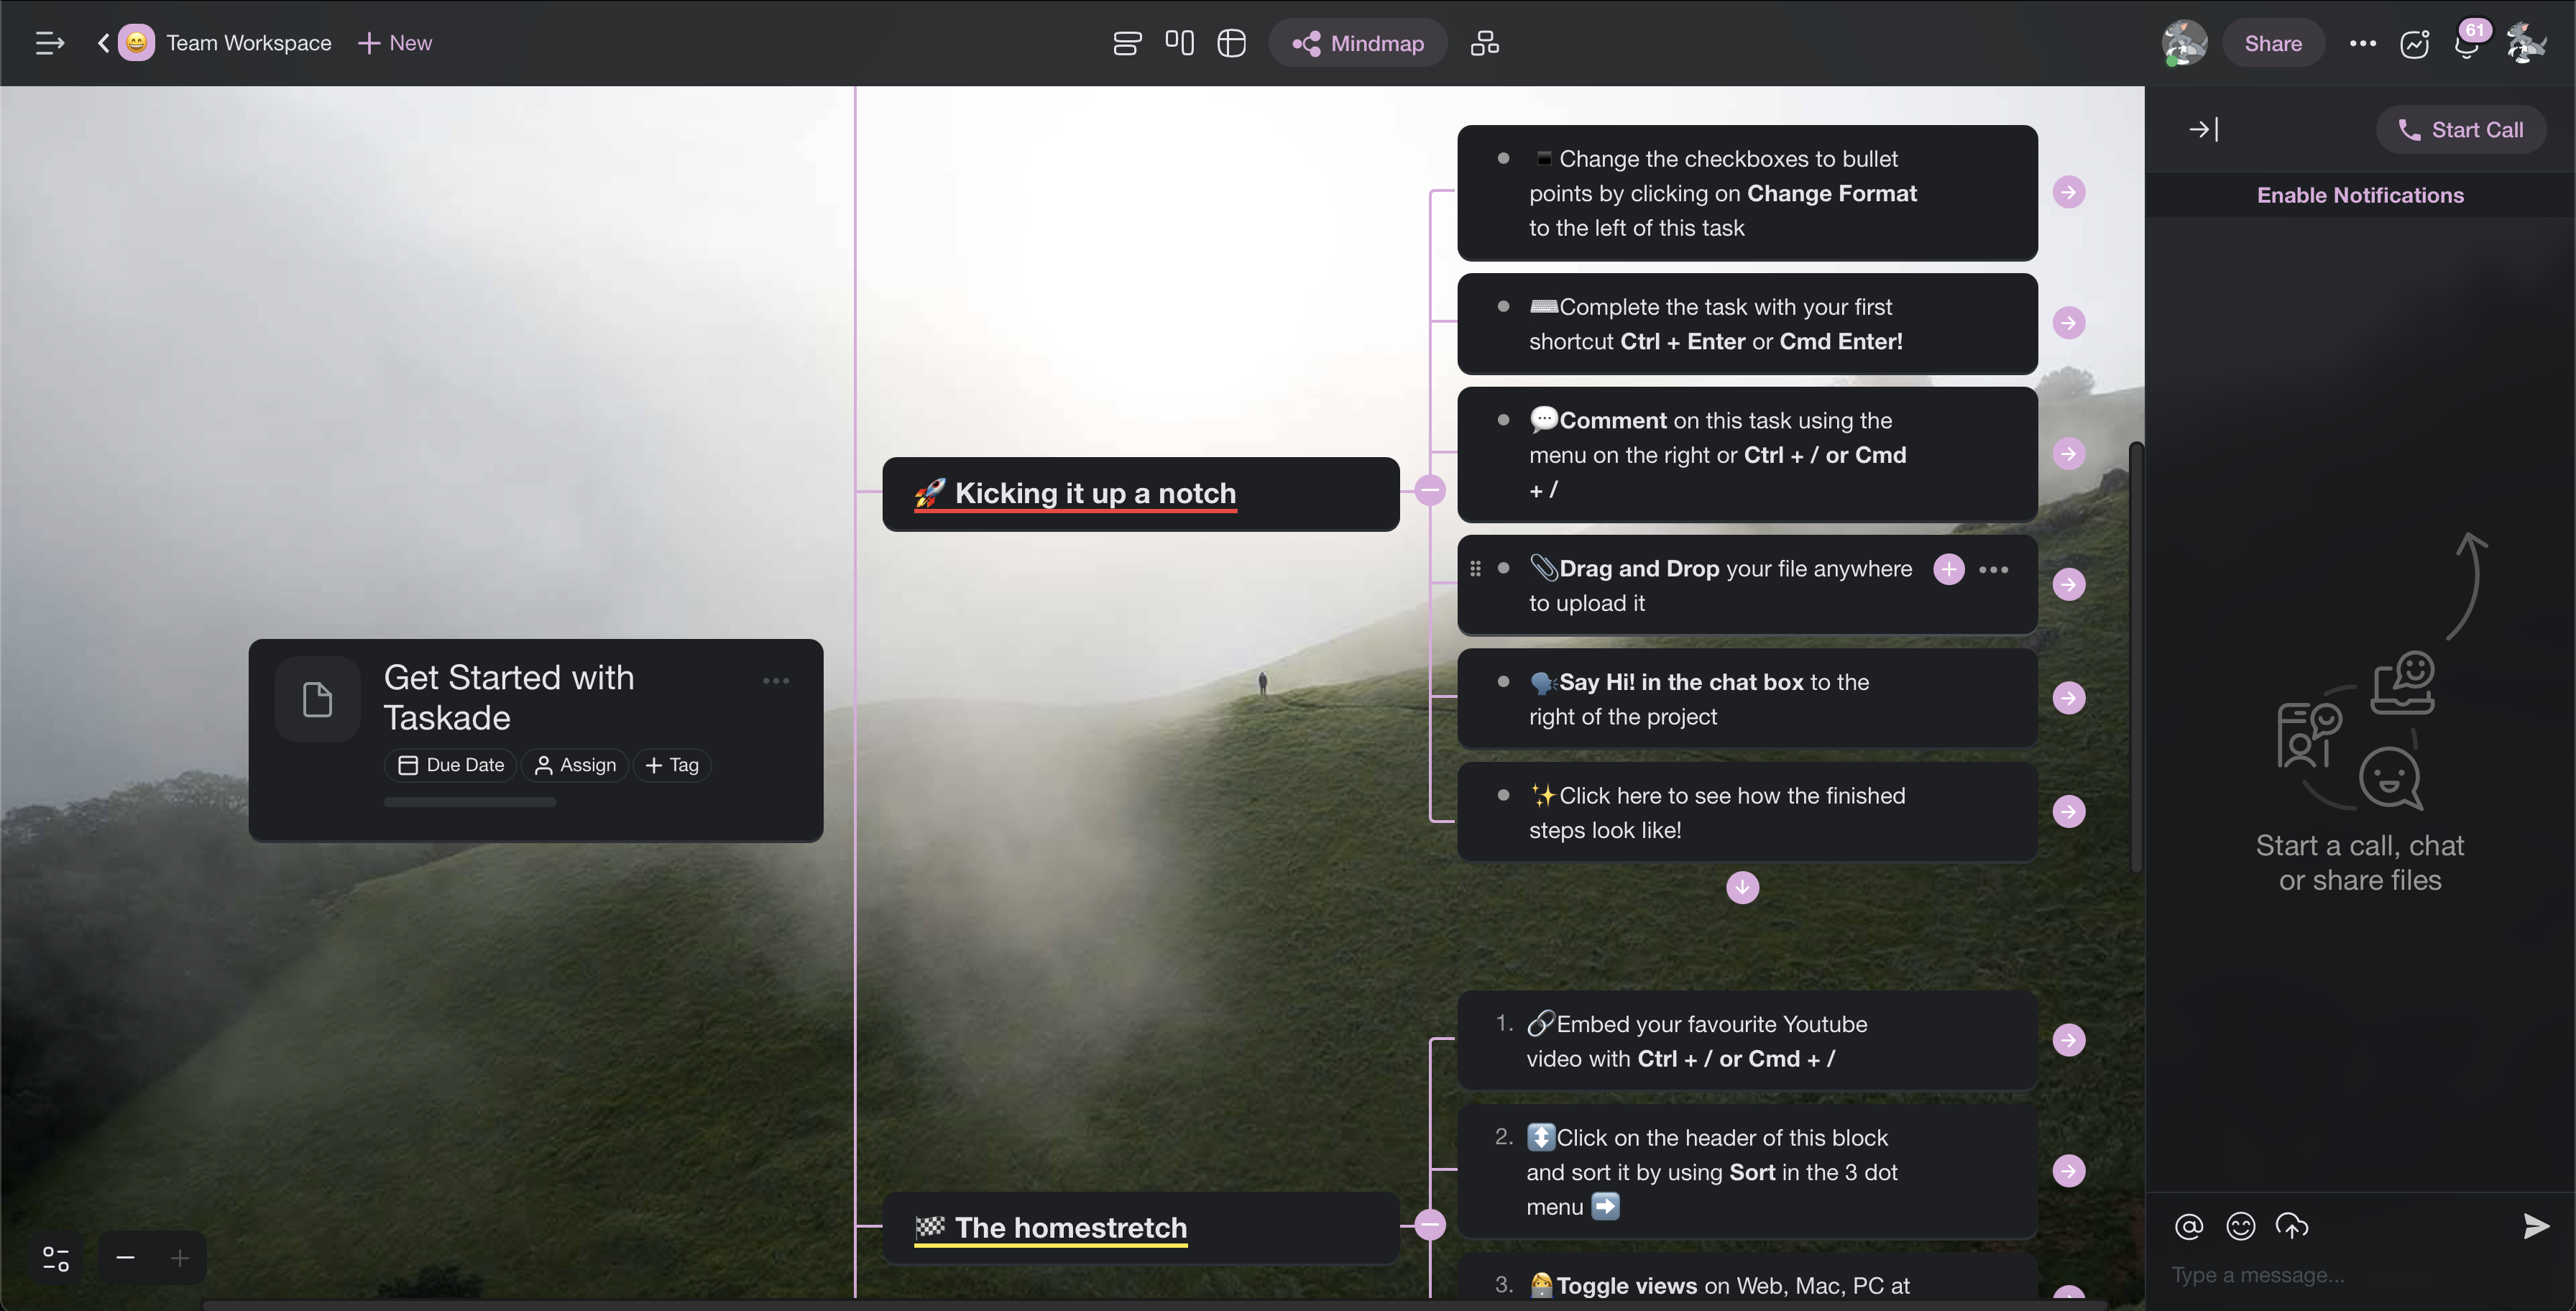
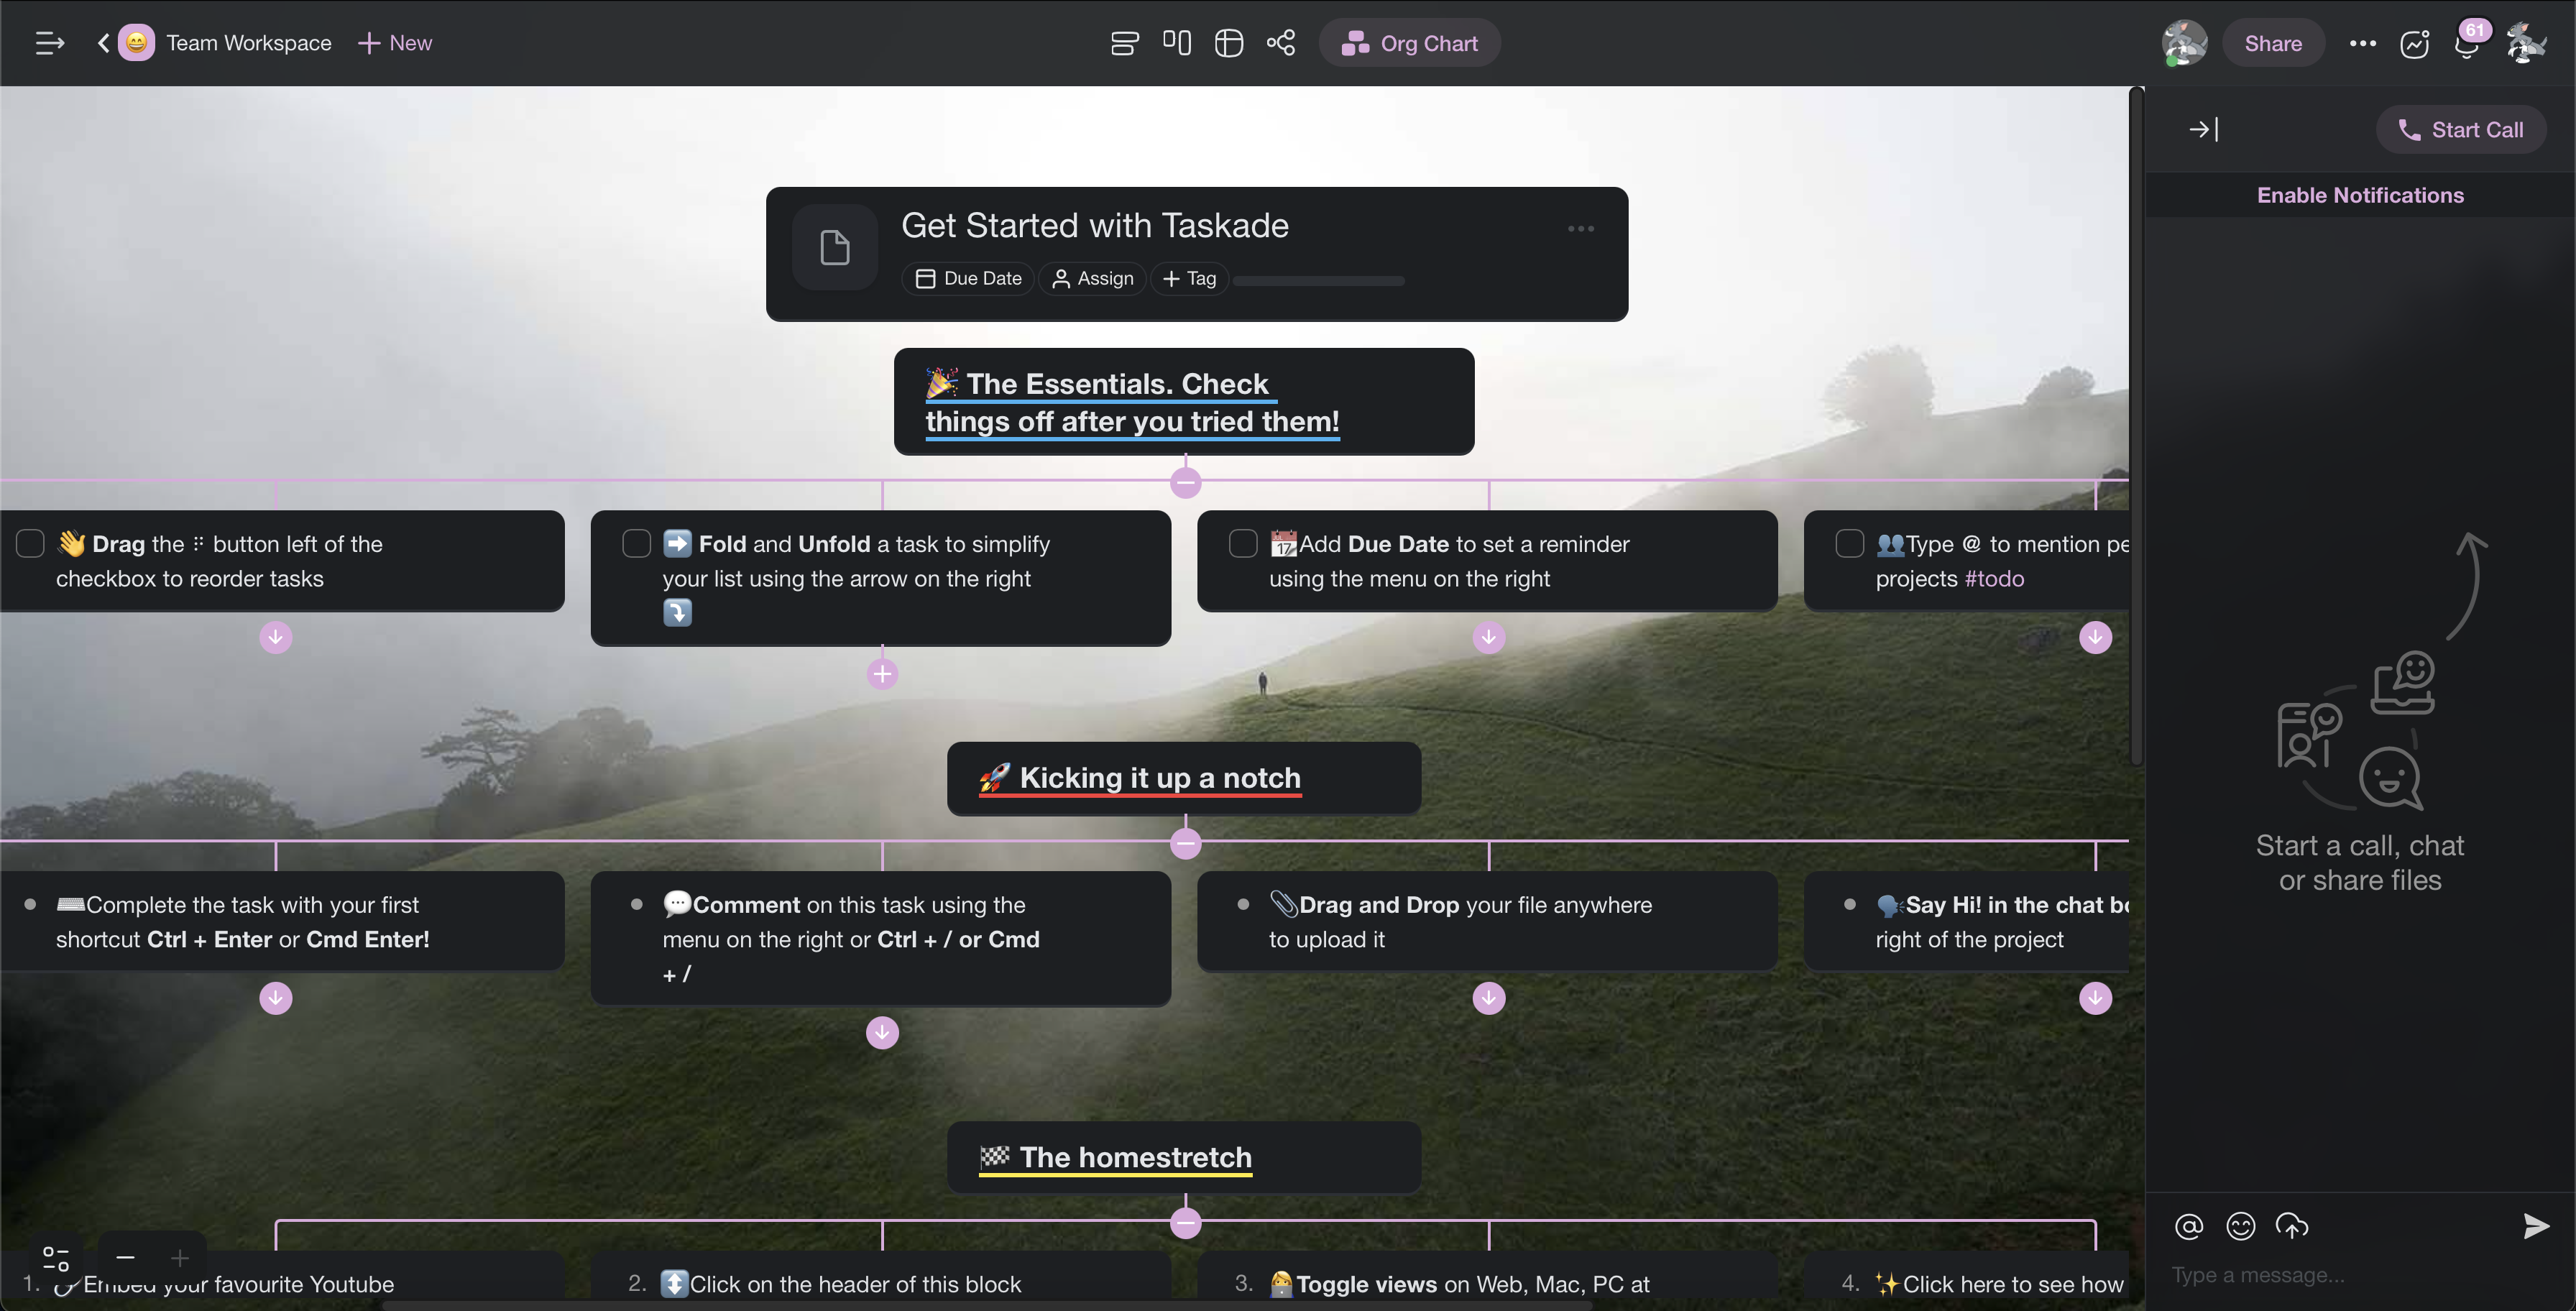
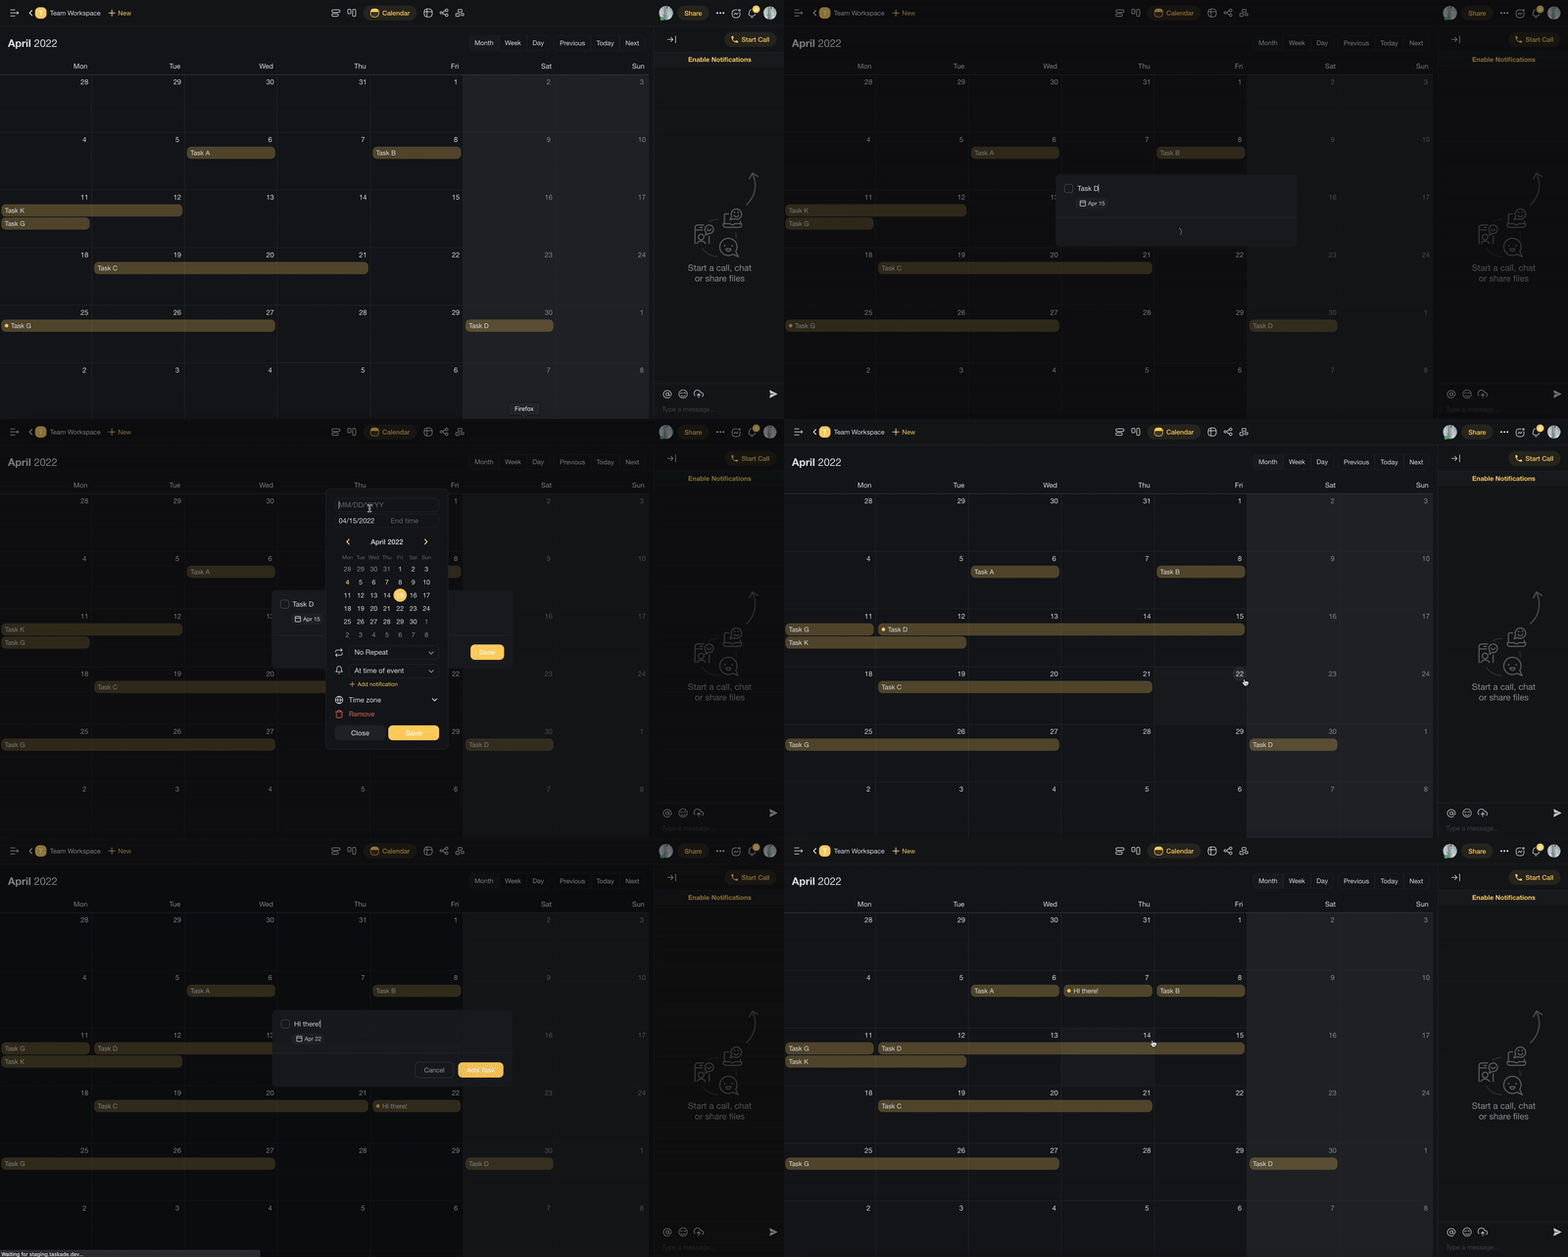
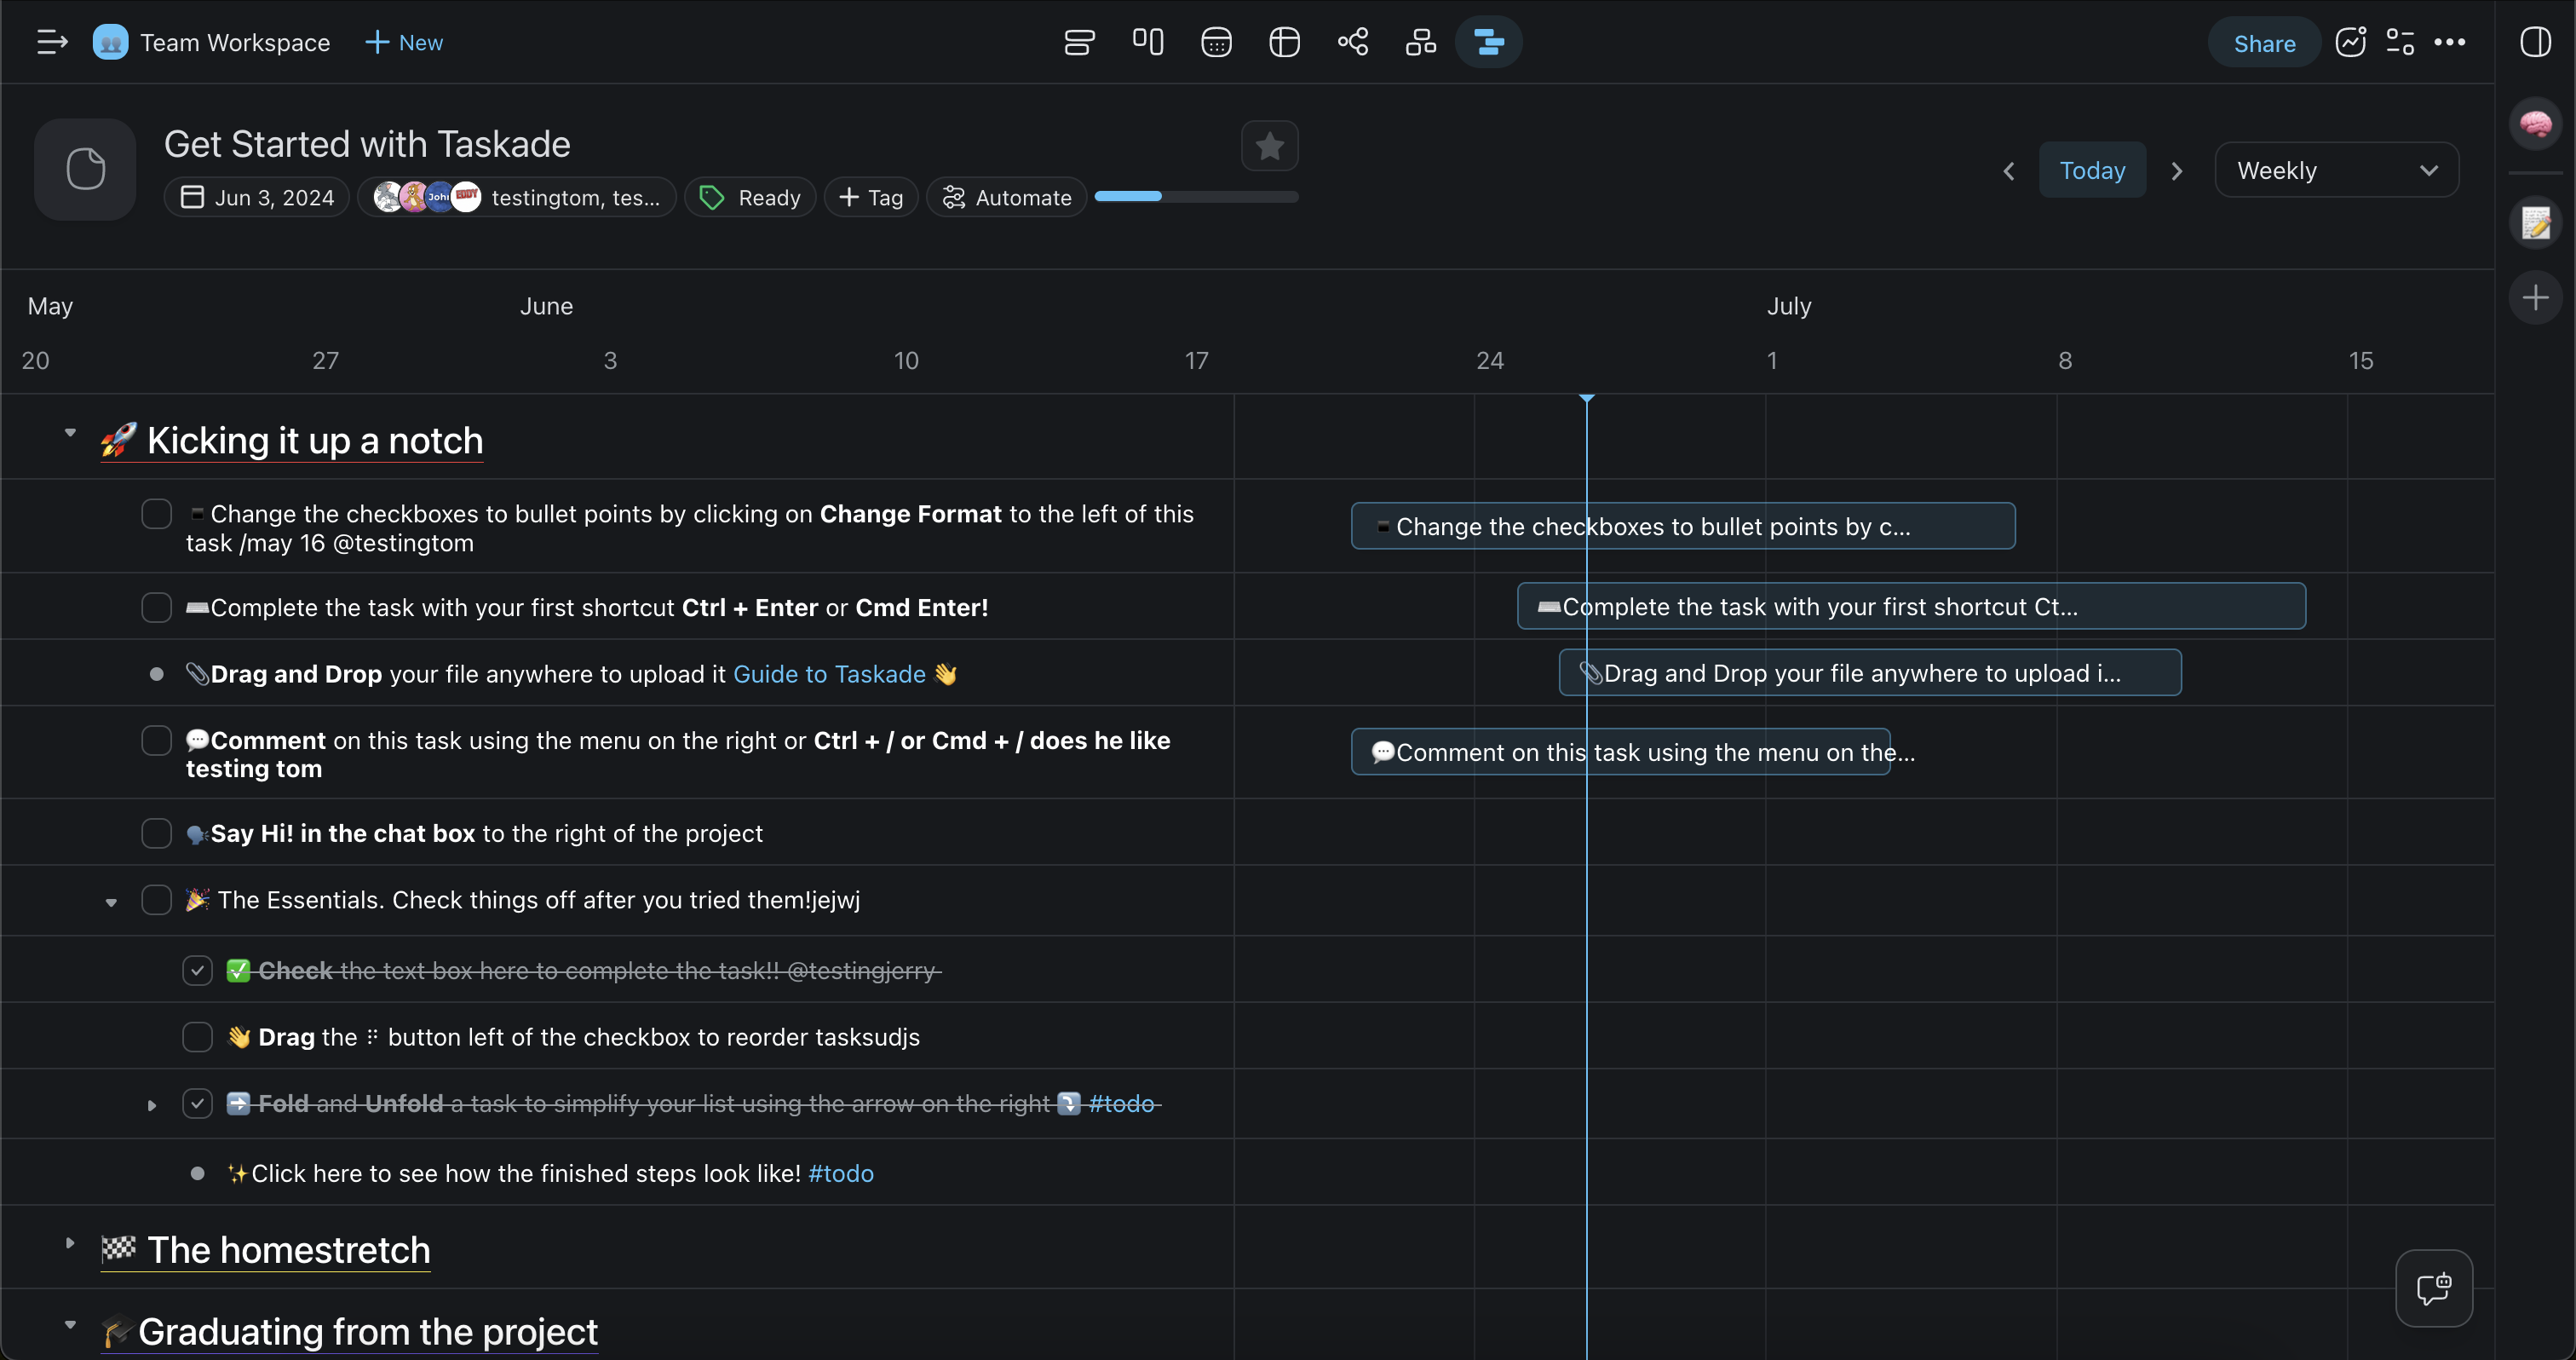
Taskade lets you visualise the same project in multiple ways! Toggle project views by clicking on the icons at the top of the project. We offer multiple views to choose from. List, Board, Table, and Mind Map are toolbar tabs. Docs (Beta), Gantt Chart, Calendar, Actionsheet, and Org Chart sit under More Views.

Sharing Your Project
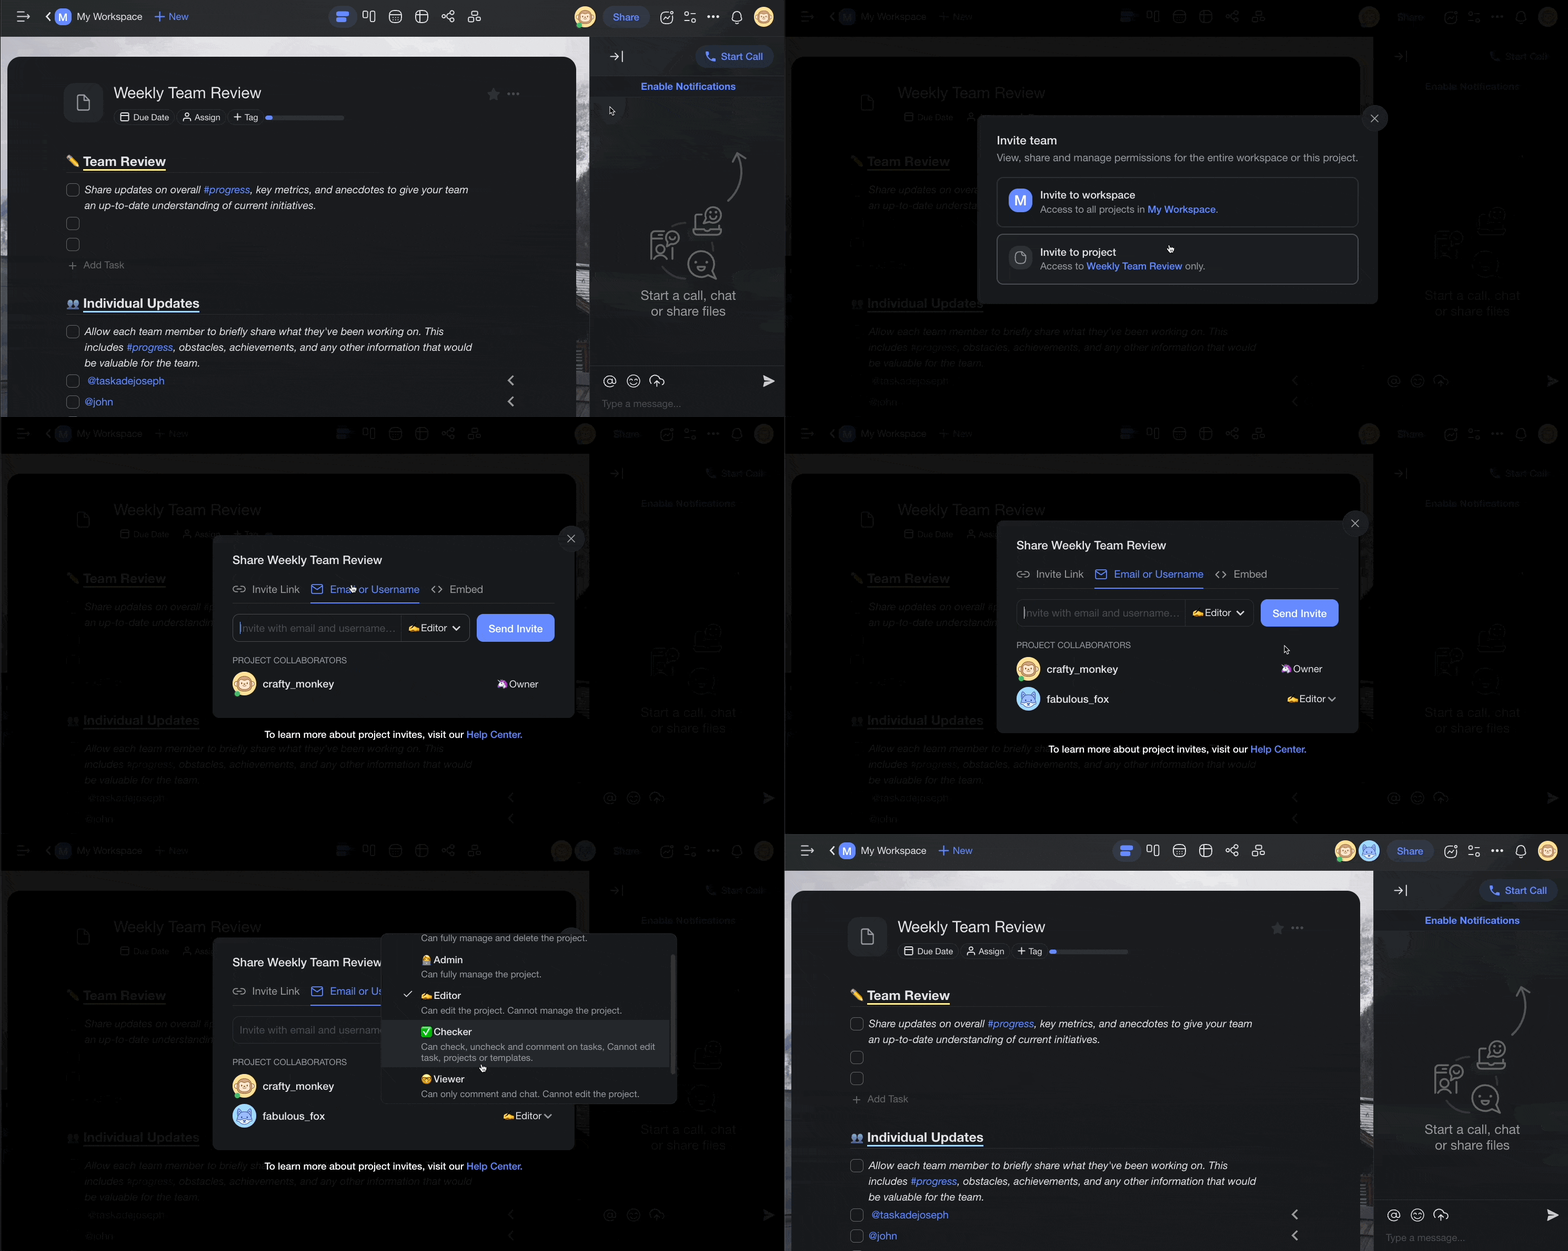
✍️ Work and chat in real-time on the same page. Share the Project with your team, define user roles, and get work done together!
Use Templates
📑 Choose from 300+ free templates to get started quickly. You can also create your own templates from scratch and automate time-consuming, repetitive tasks.
- Select a Workspace/Folder
- Click on Templates
- Create a Template
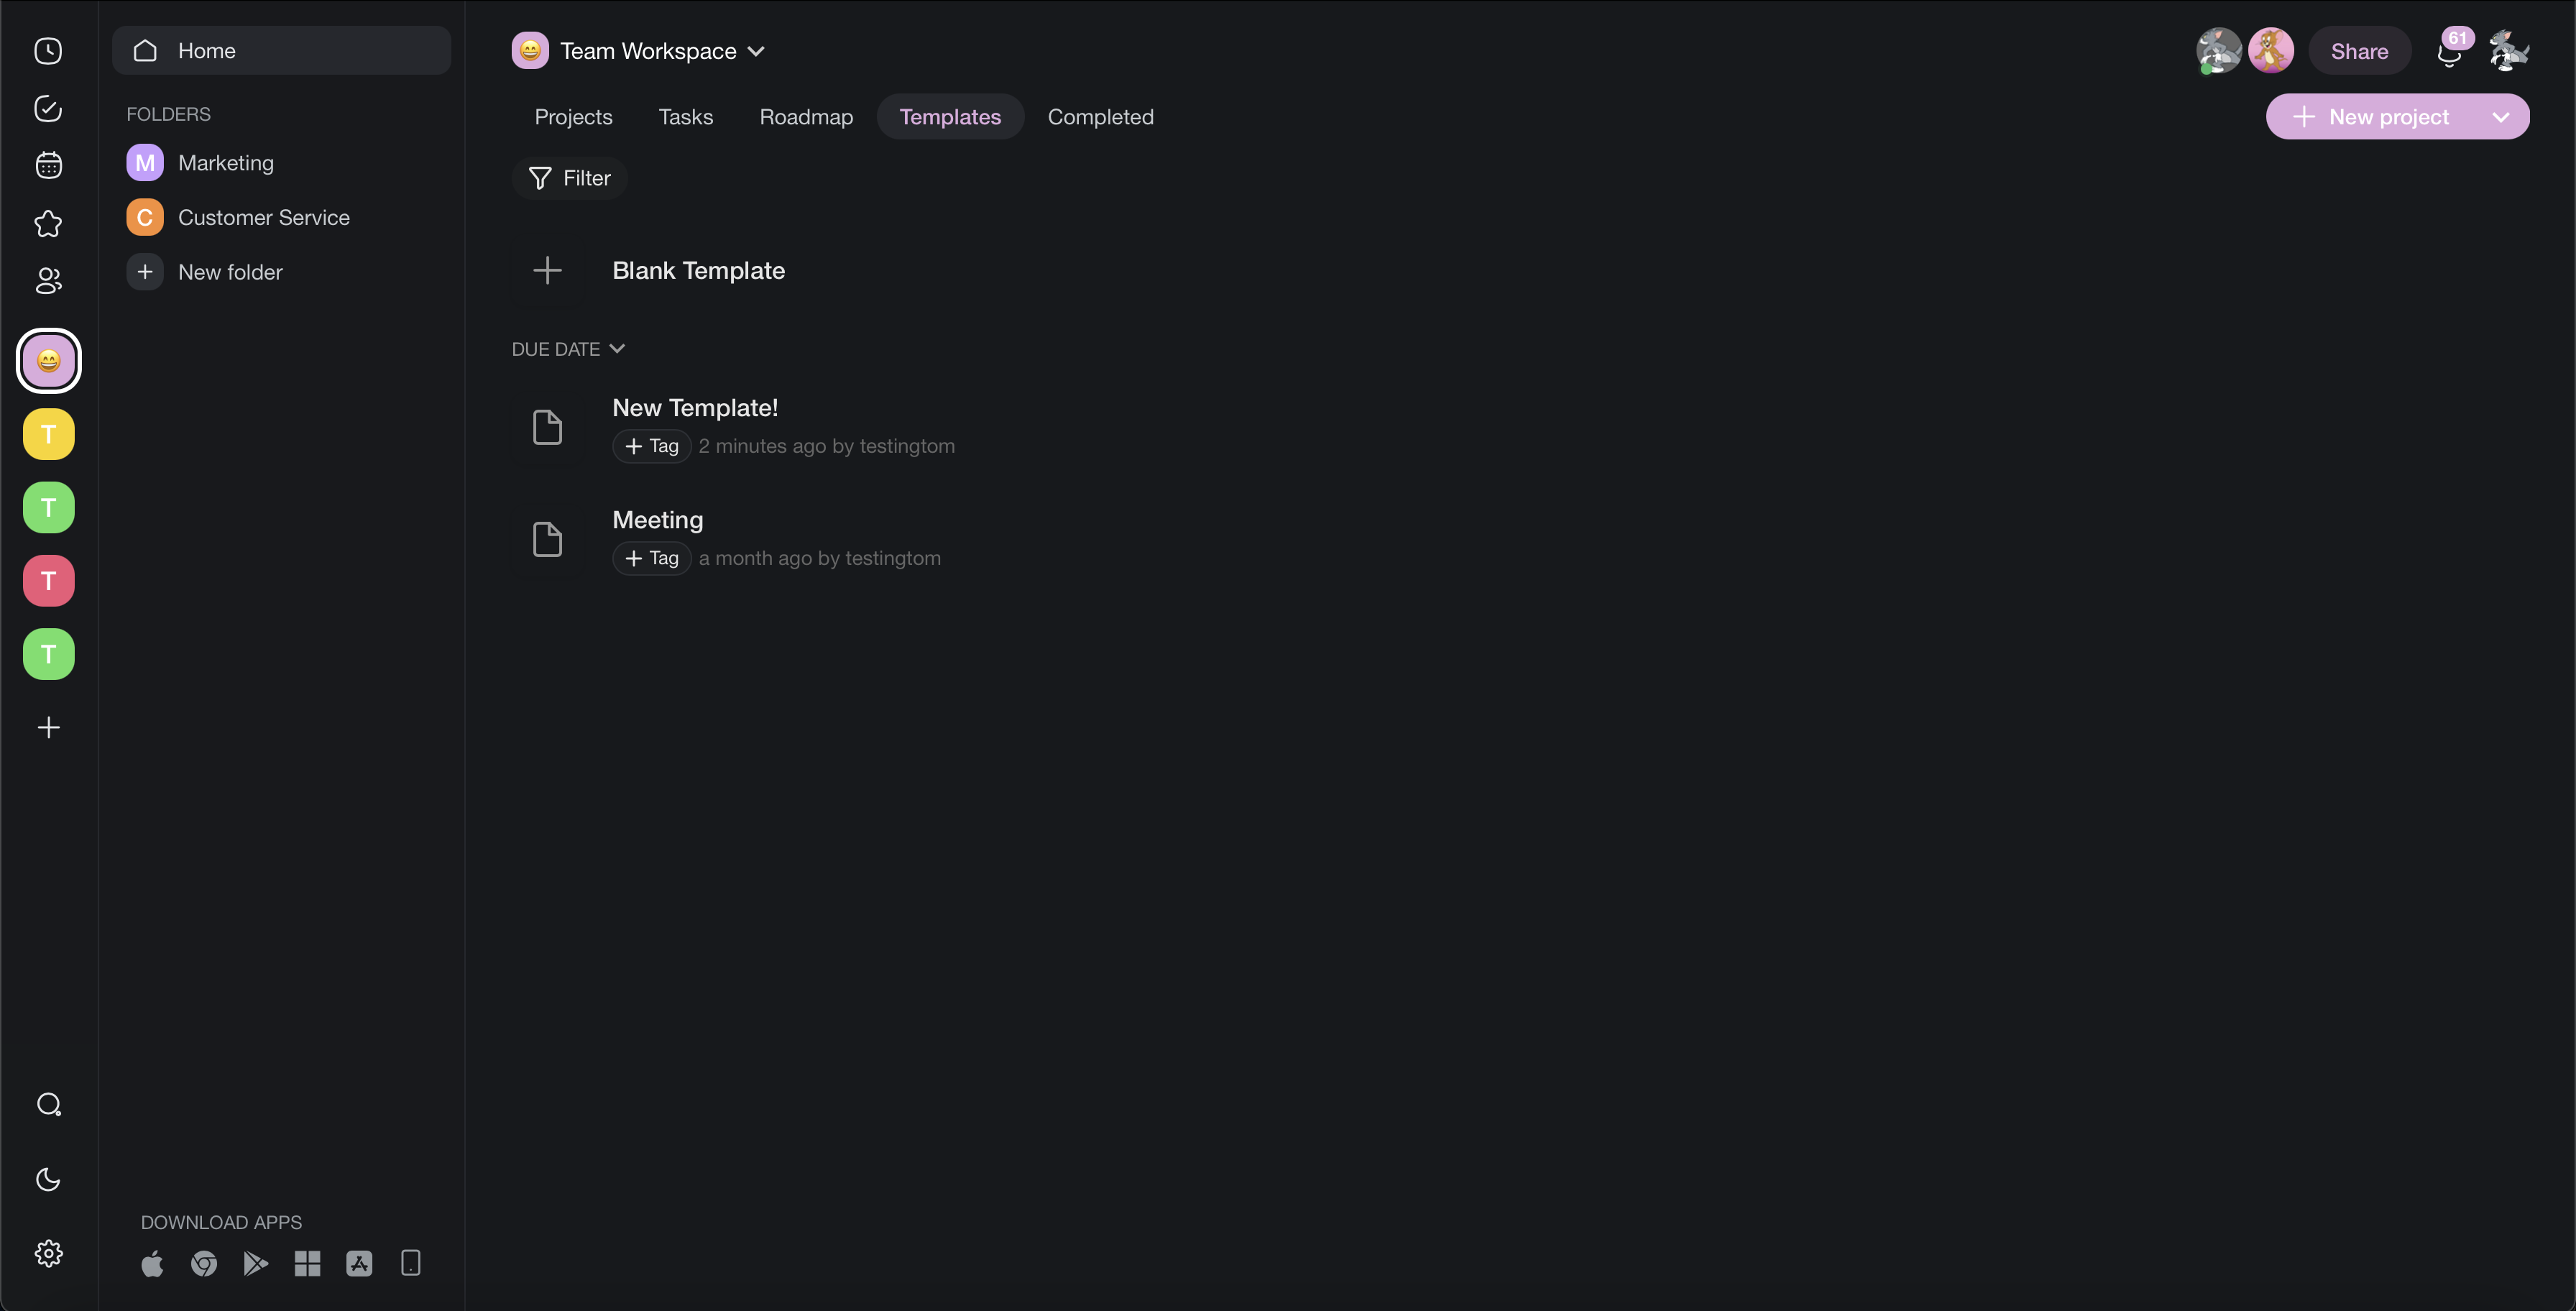
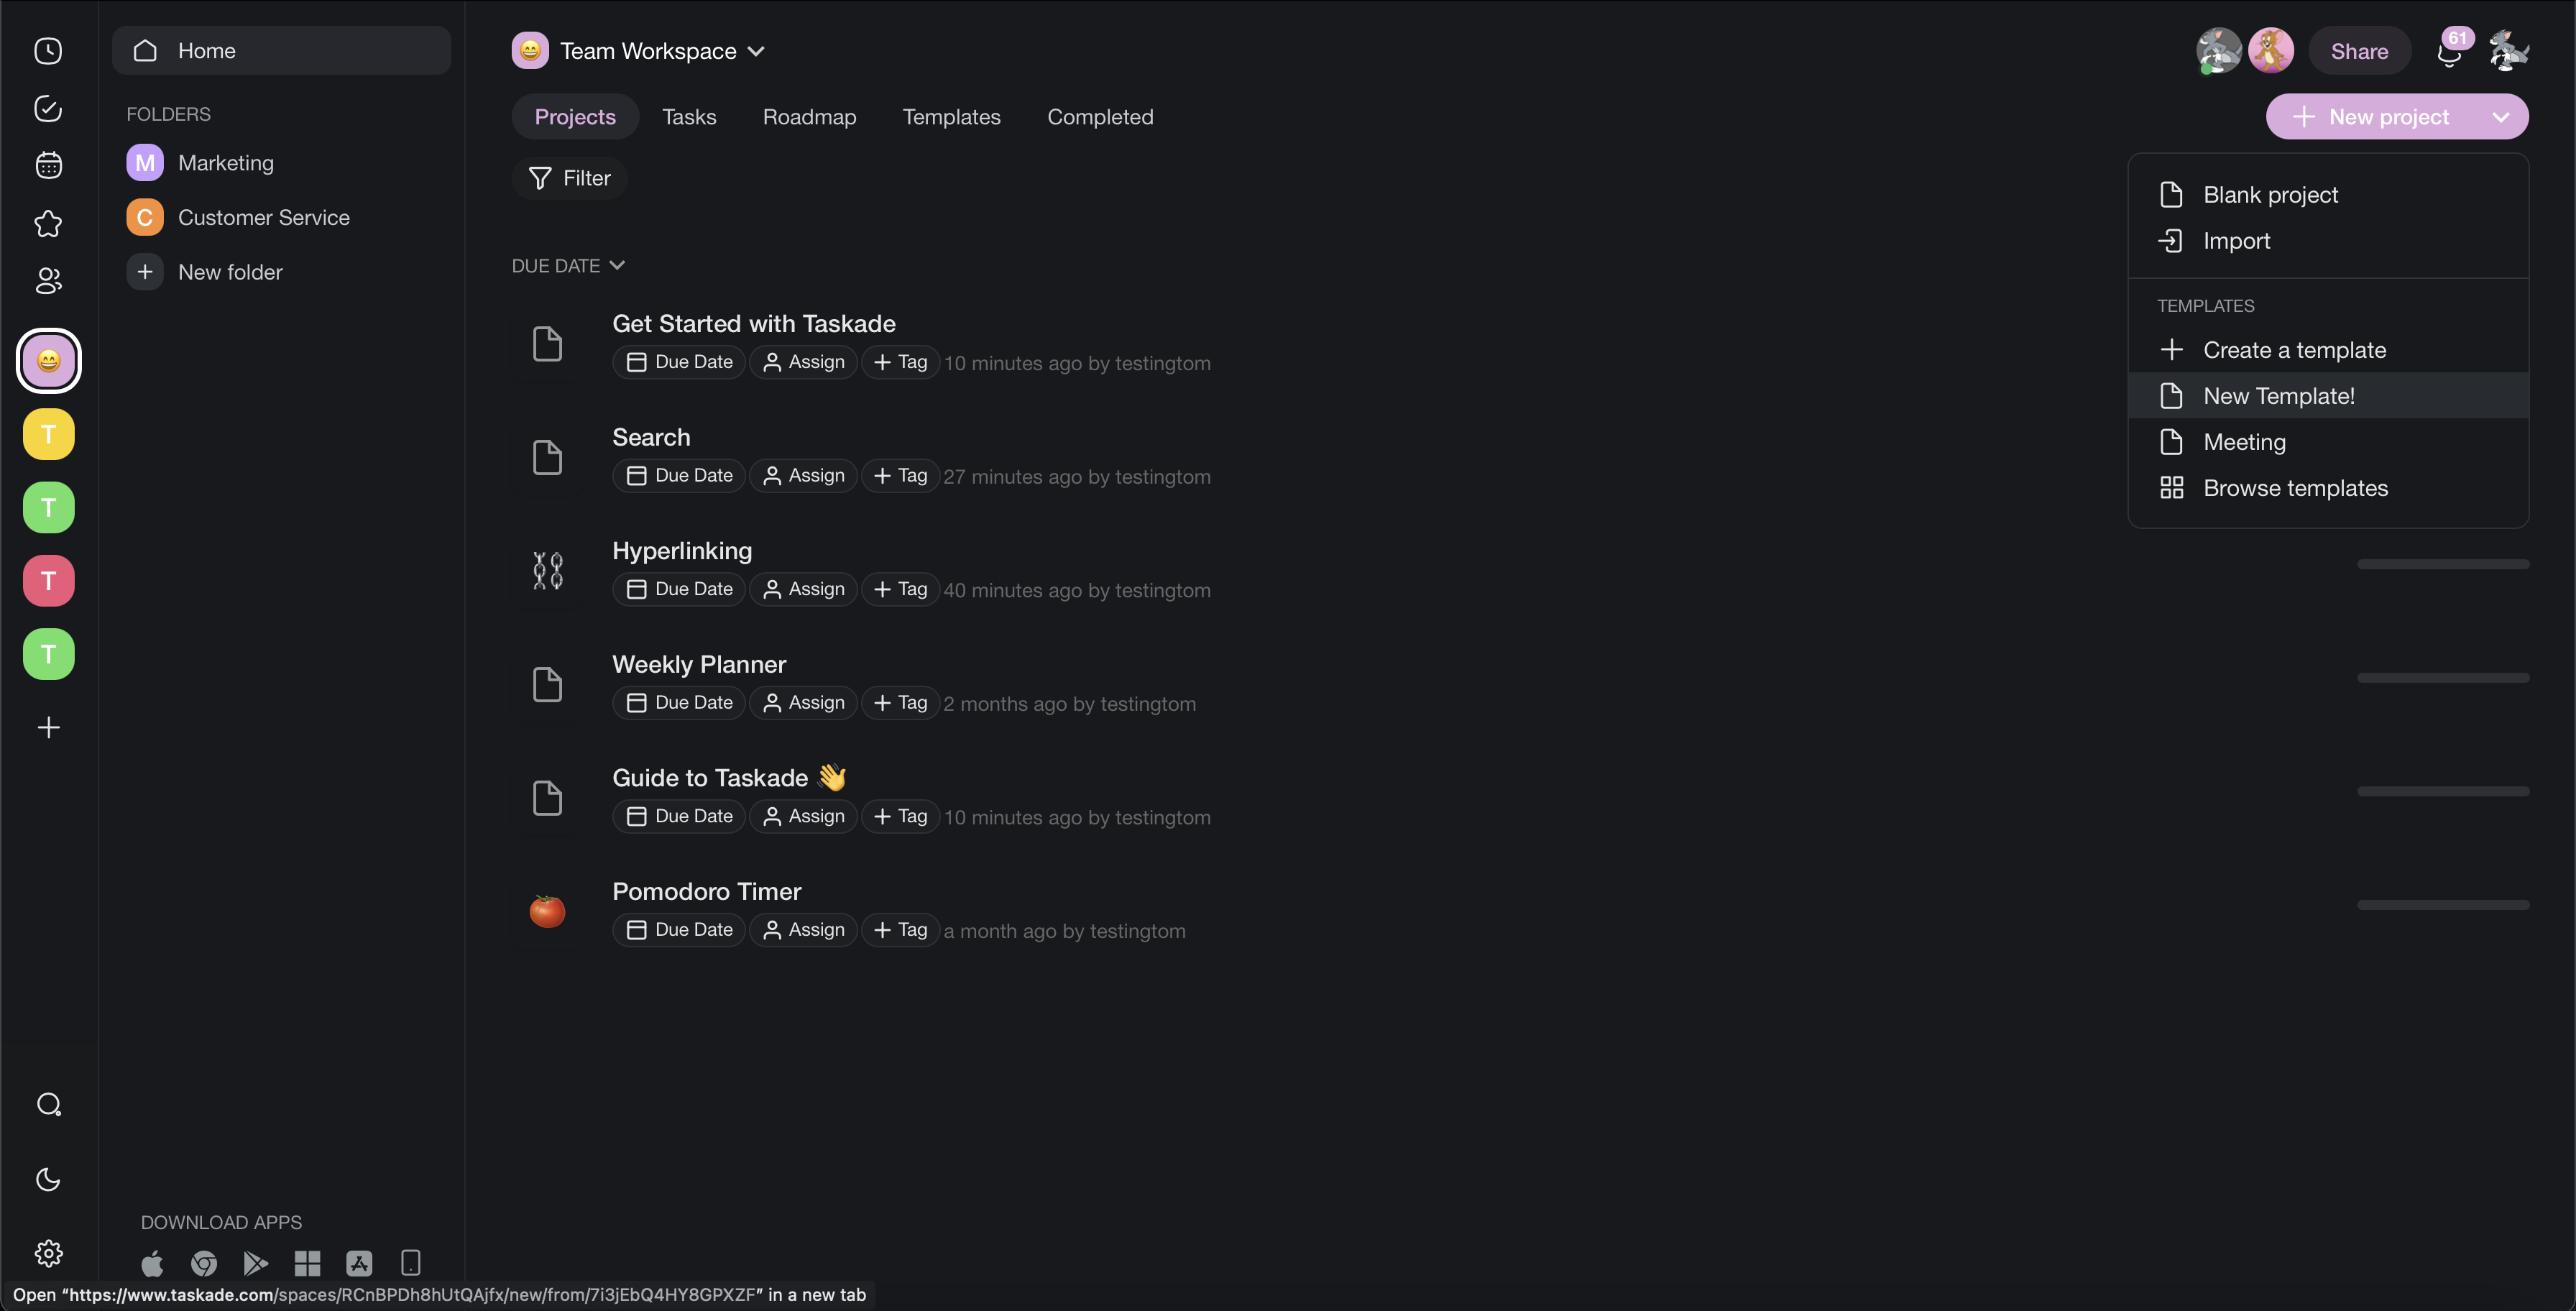
🌈 Reuse custom templates when starting a new project. All custom templates are shared with team members invited to a Workspace or Folder.
Check These Resources Next
- 🗃 Create a Workspace for your team projects
- 🗂️ Create a Folder for further organization
- 🔍 Search across Projects, Folders, and Workspaces.
- 🗓 Add tasks and Projects to a shared Calendar.
- 🗓 Sync your calendar with other apps through Calendar Integrations.
- Work faster with our ⌨️ Keyboard Shortcuts