TL;DR: Format any task on the fly (bold, italic, underline, strikethrough, color, highlight) using the inline toolbar, markdown, or keyboard shortcuts. Transform tasks into bullets, numbers, headings, or paragraphs without re-typing.
Every task starts as a plain bullet. Pick a task, open the format menu, and it becomes any of these without retyping.
What Is Project Formatting?
Every project is a collection of tasks. A task is just like a bullet point in the traditional sense. You can use the power of outlining to break down tasks into sub-tasks and style them according to your liking. Here's how to do that on Mac, Windows, and Linux.
Format Tasks and Sub-Tasks
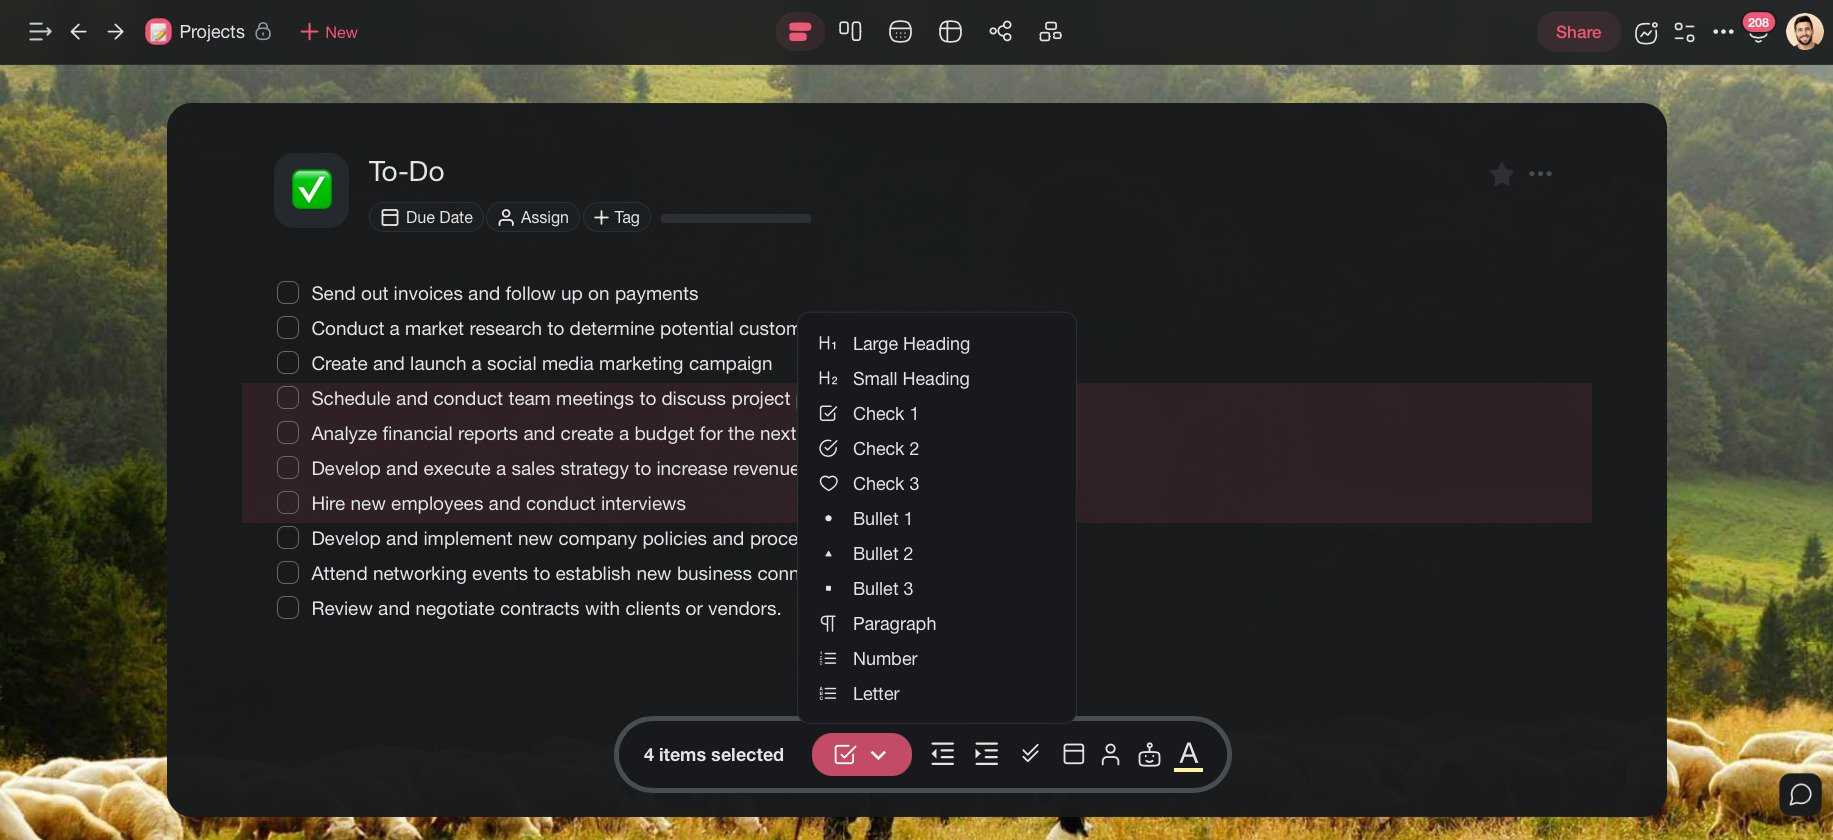
Taskade lets you turn your tasks into a checklist, heading, ordered list, or paragraph. There are also several bullet point styles you can choose from.
To format a task/sub-task:
- Select the task/sub-task you want to format
- Click the drag icon (⋮⋮) to the left of your task
- Click the first item on the list and select a format from the drop-down list
- You can also Type "/" followed by the desired format, .e.g "paragraph".
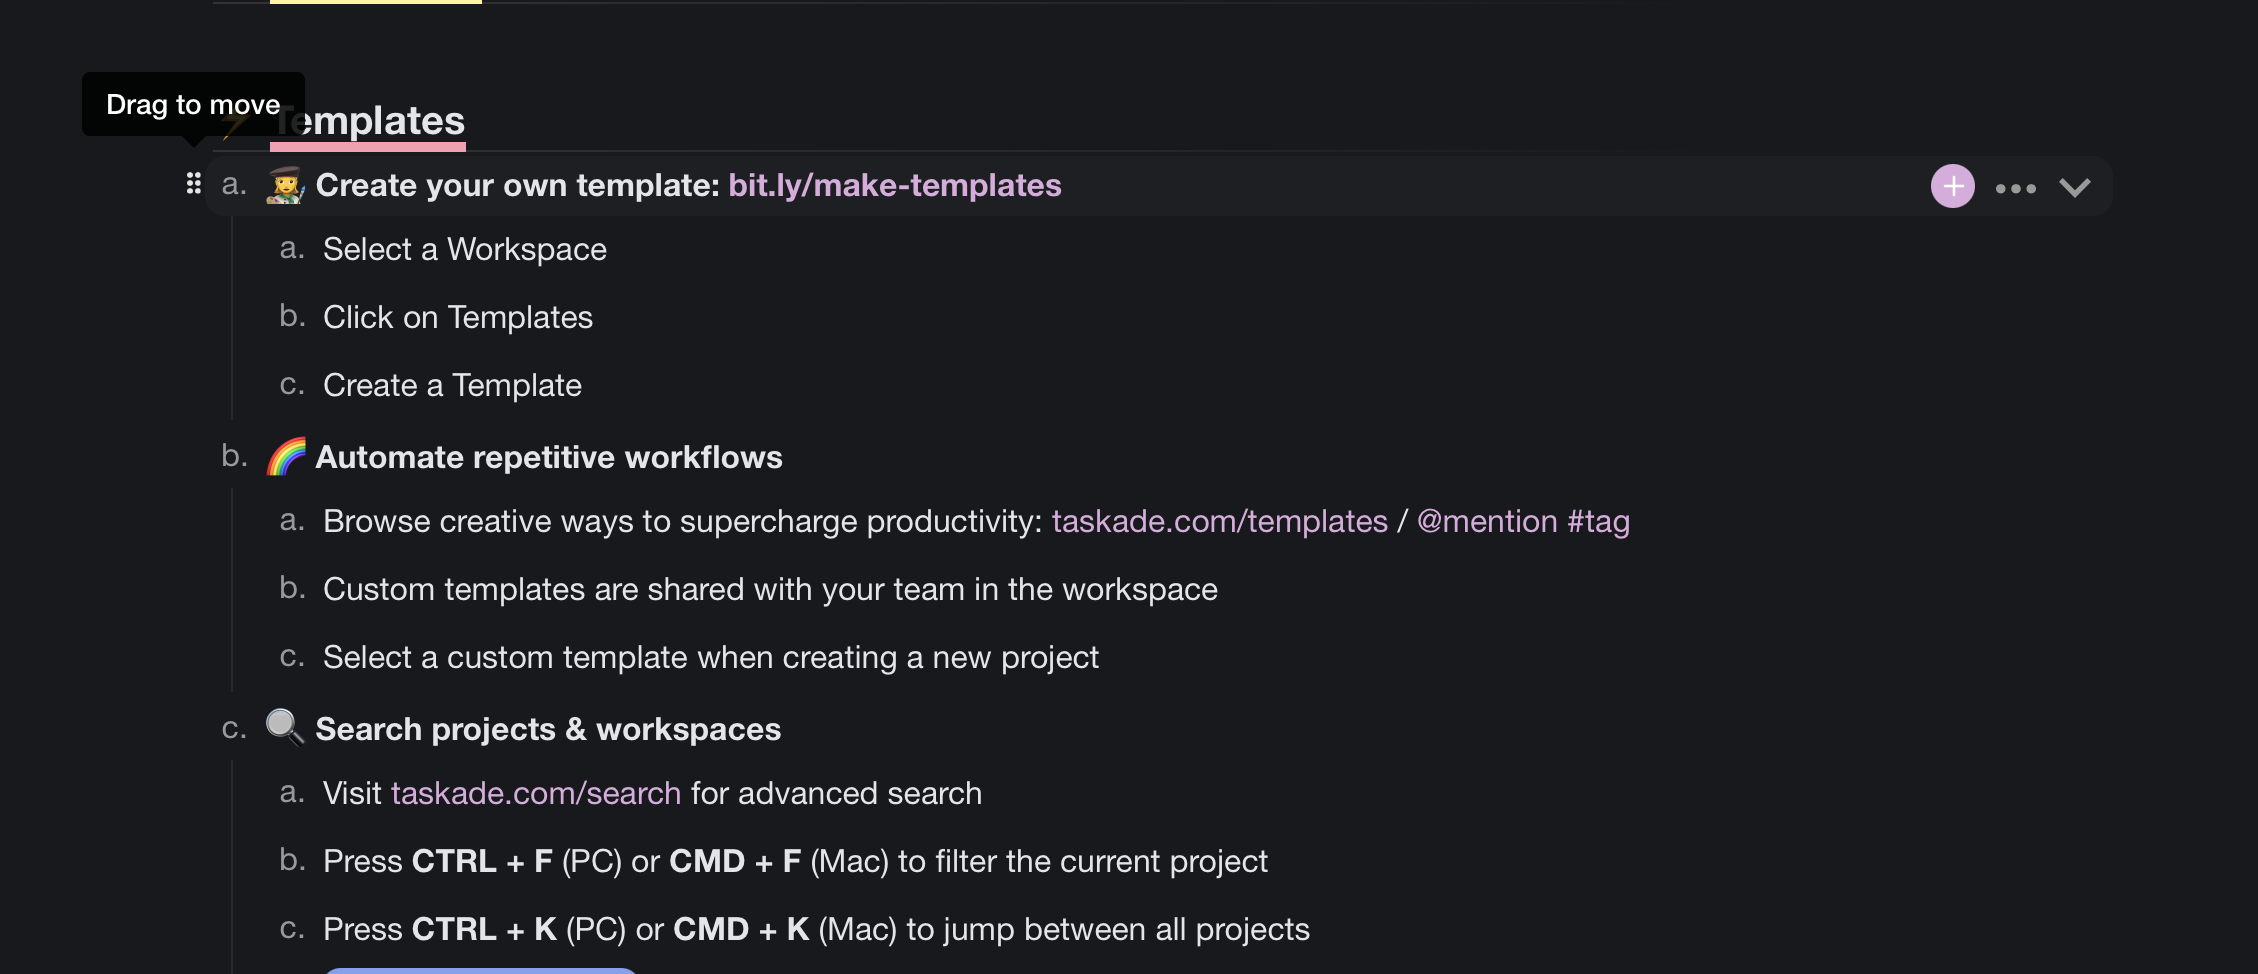
Drag to Reorder
You can reorder blocks of tasks/sub-tasks using the drag icon (⋮⋮) to the left of a top-level task. Use the drag & drop feature to quickly reorganize your lists.
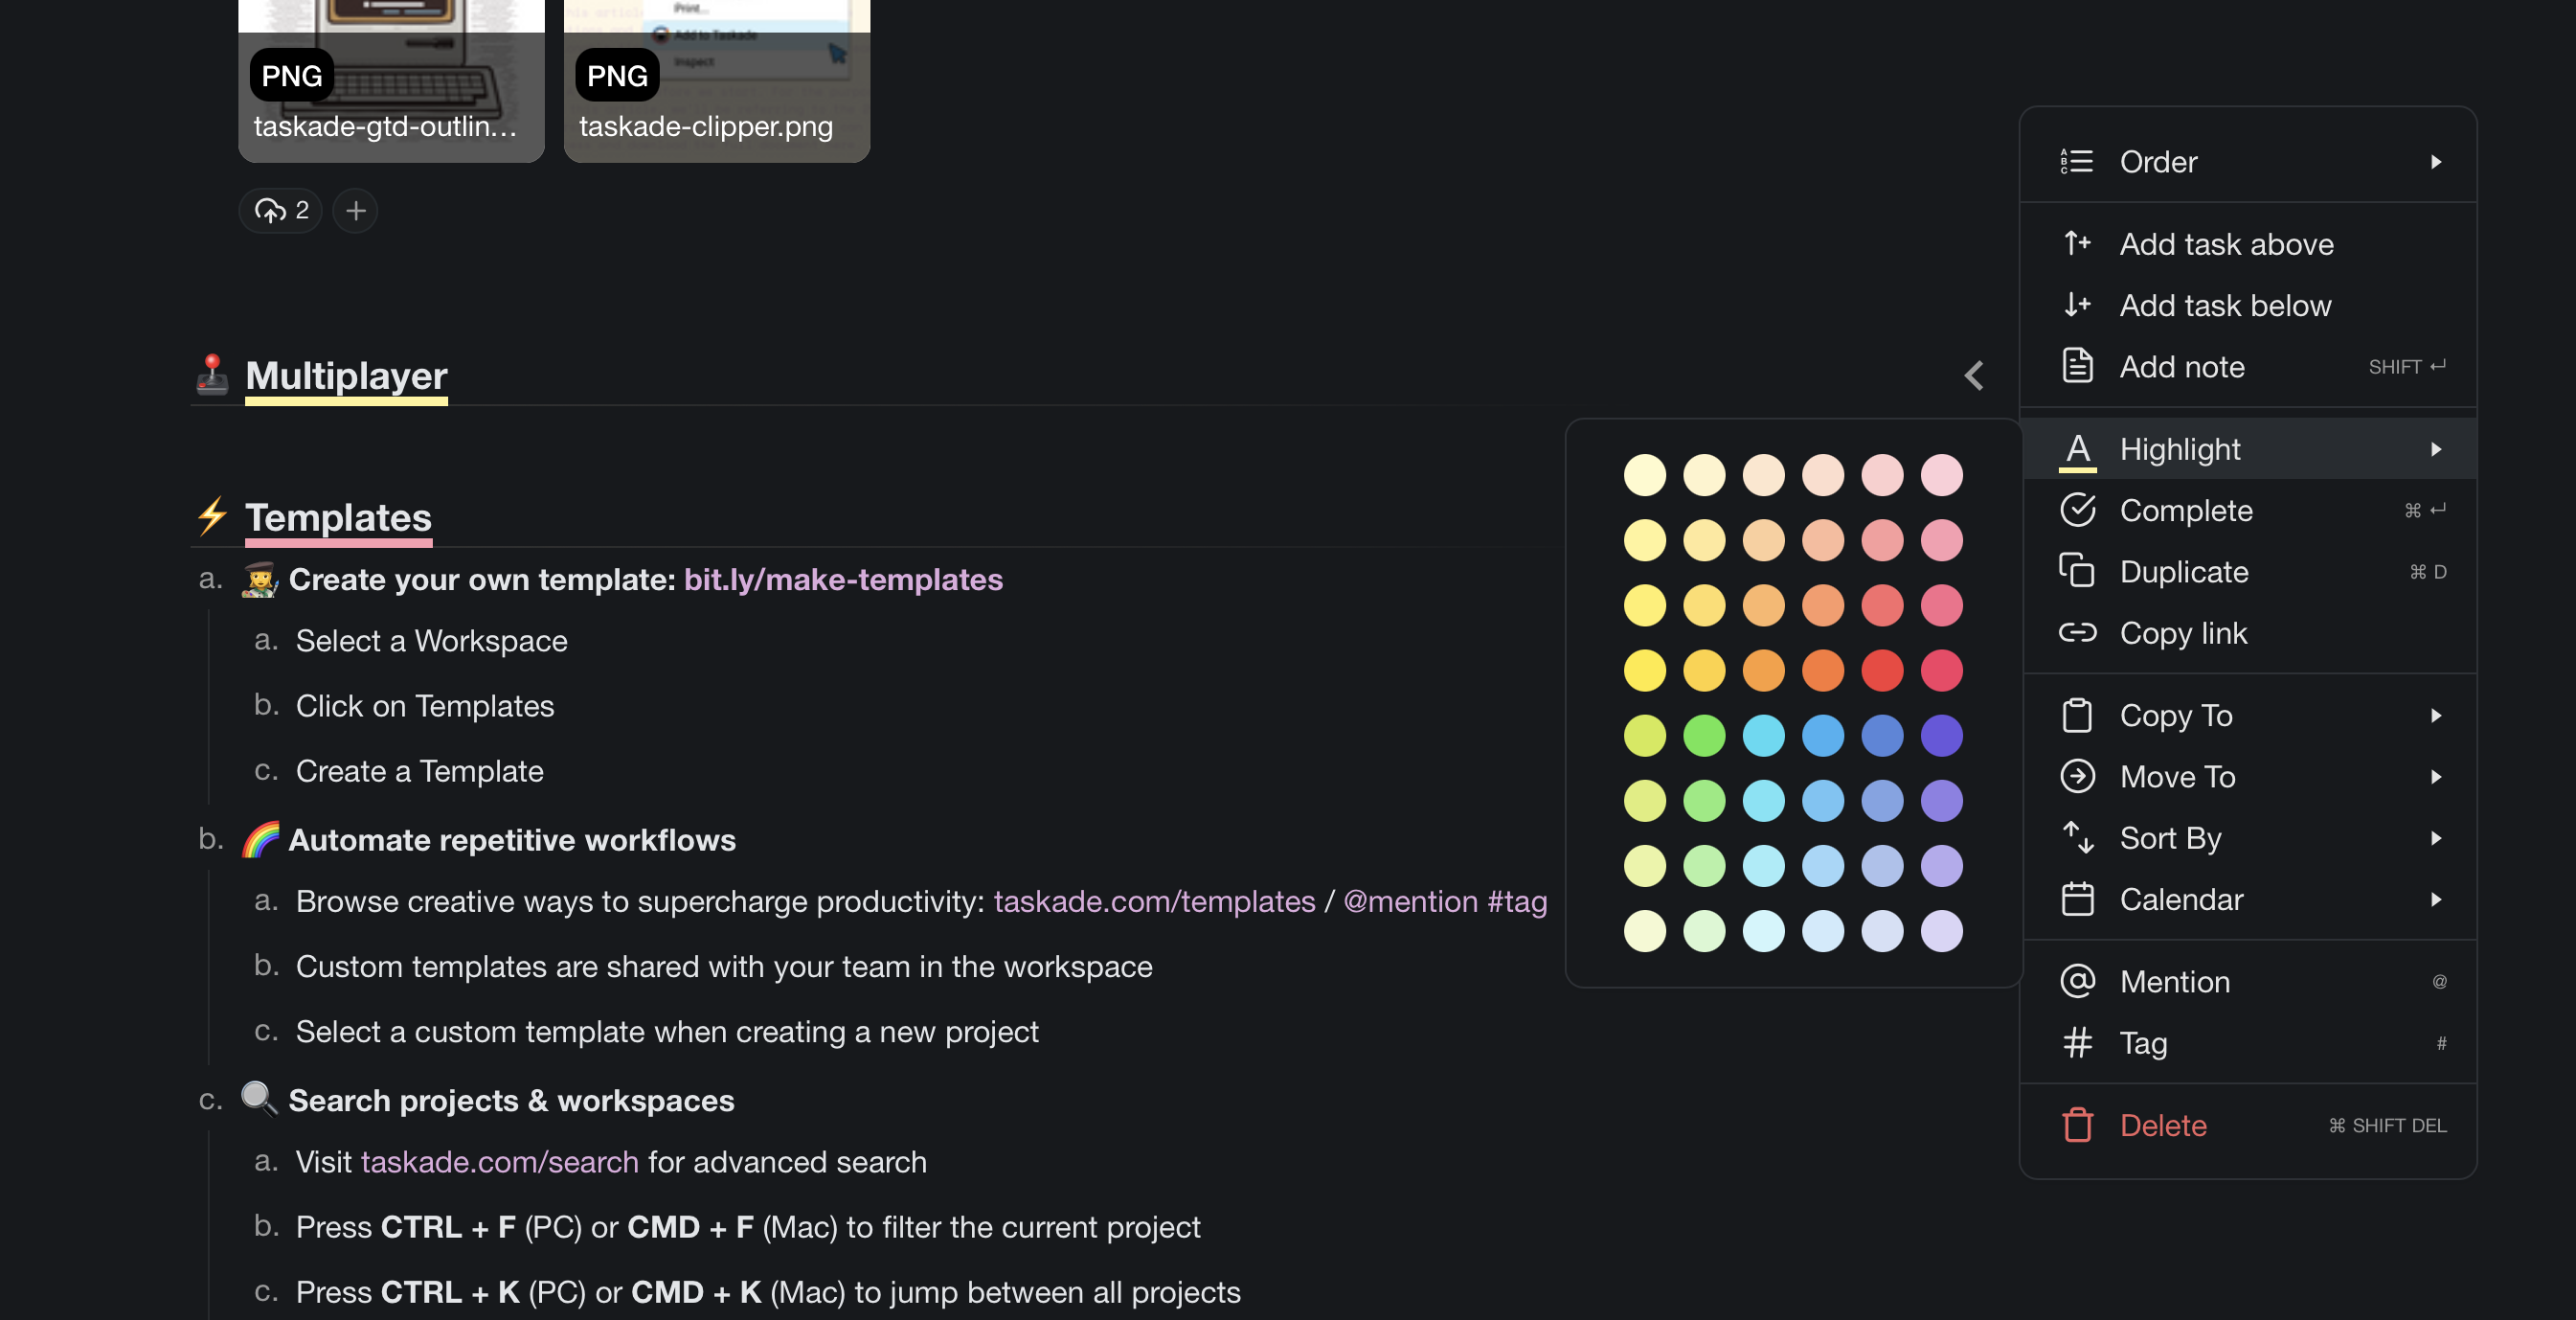
Highlight and Style
- Select a task or text, click the three dots ( ···) next to the task, and select A
- You can also use a ⌨️ ⌘ + E (Mac) or CTRL + E (PC) shortcut
- Alternatively, type "/" followed by a color, e.g. "red"
- To remove a highlight, select a color again or keep pressing ⌨️ ⌘/Ctrl + E.
Multi-Select Formatting
Need to format tasks in bulk? Highlight multiple tasks or lines of text with the mouse cursor and format them using one of the options from the previous section.
Add-Ons Menu
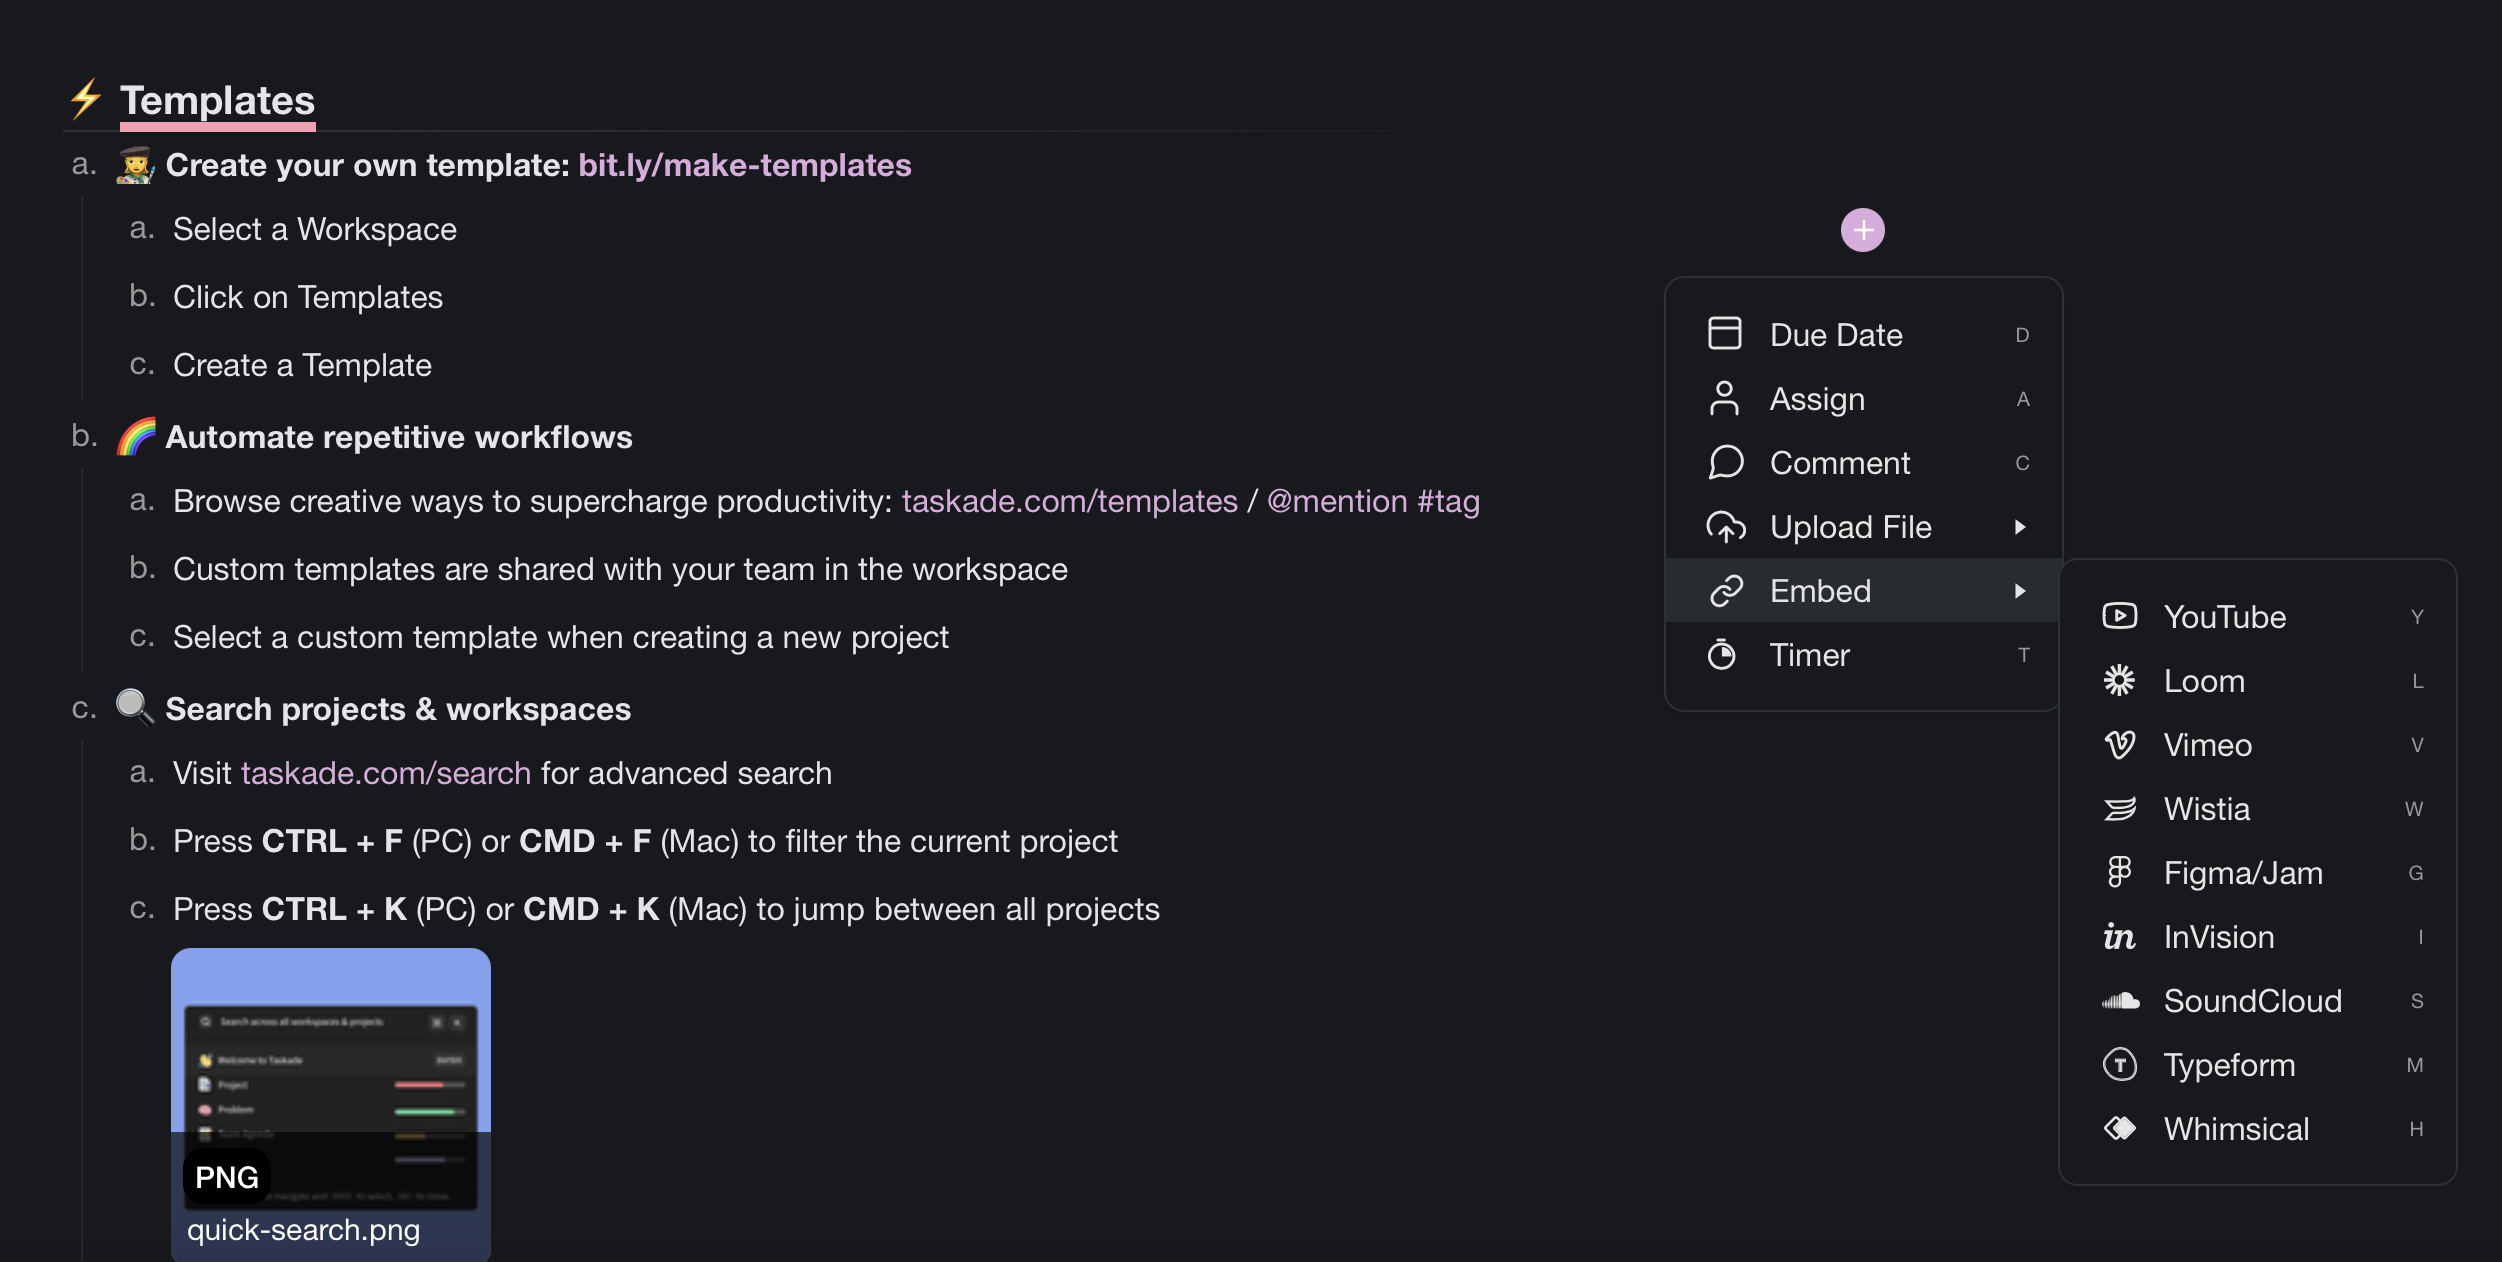
Take your tasks to the next level by creating due dates, writing comments, attaching files, and assigning tasks with the Add-ons Menu. To access the Add-ons menu:
Method 1: Click the ➕ icon next to a task and choose an Add-on from the list.
Method 2: Use the ⌨️ "⌘" + "/" keyboard shortcut and press a letter:
"D" = 🗓️ Due Date
"A" = 👤 Assign
"C" = 💬 Comment
"E" = 🔗 Embed
"T" = ⏱️ Timer
Method 3: Type "/" followed by the name of the Add-on, e.g. "timer".