
TL;DR: A workspace is the top level of the hierarchy: Workspace → Folder → Project → Block → Task. Each workspace has its own members, billing, agents, automations, and shared templates. Free plan includes one workspace; paid plans allow unlimited workspaces.
How a workspace organizes everything inside it:
Overview
A Workspace is a collection of folders, projects, and templates. Think of it as a centralized hub where you can organize, plan, manage, and collaborate with others. You can create separate workspaces for different teams, clients, or areas of your life.
Create a New Workspace
- Visit your Taskade dashboard and click the ➕ plus icon on the left.
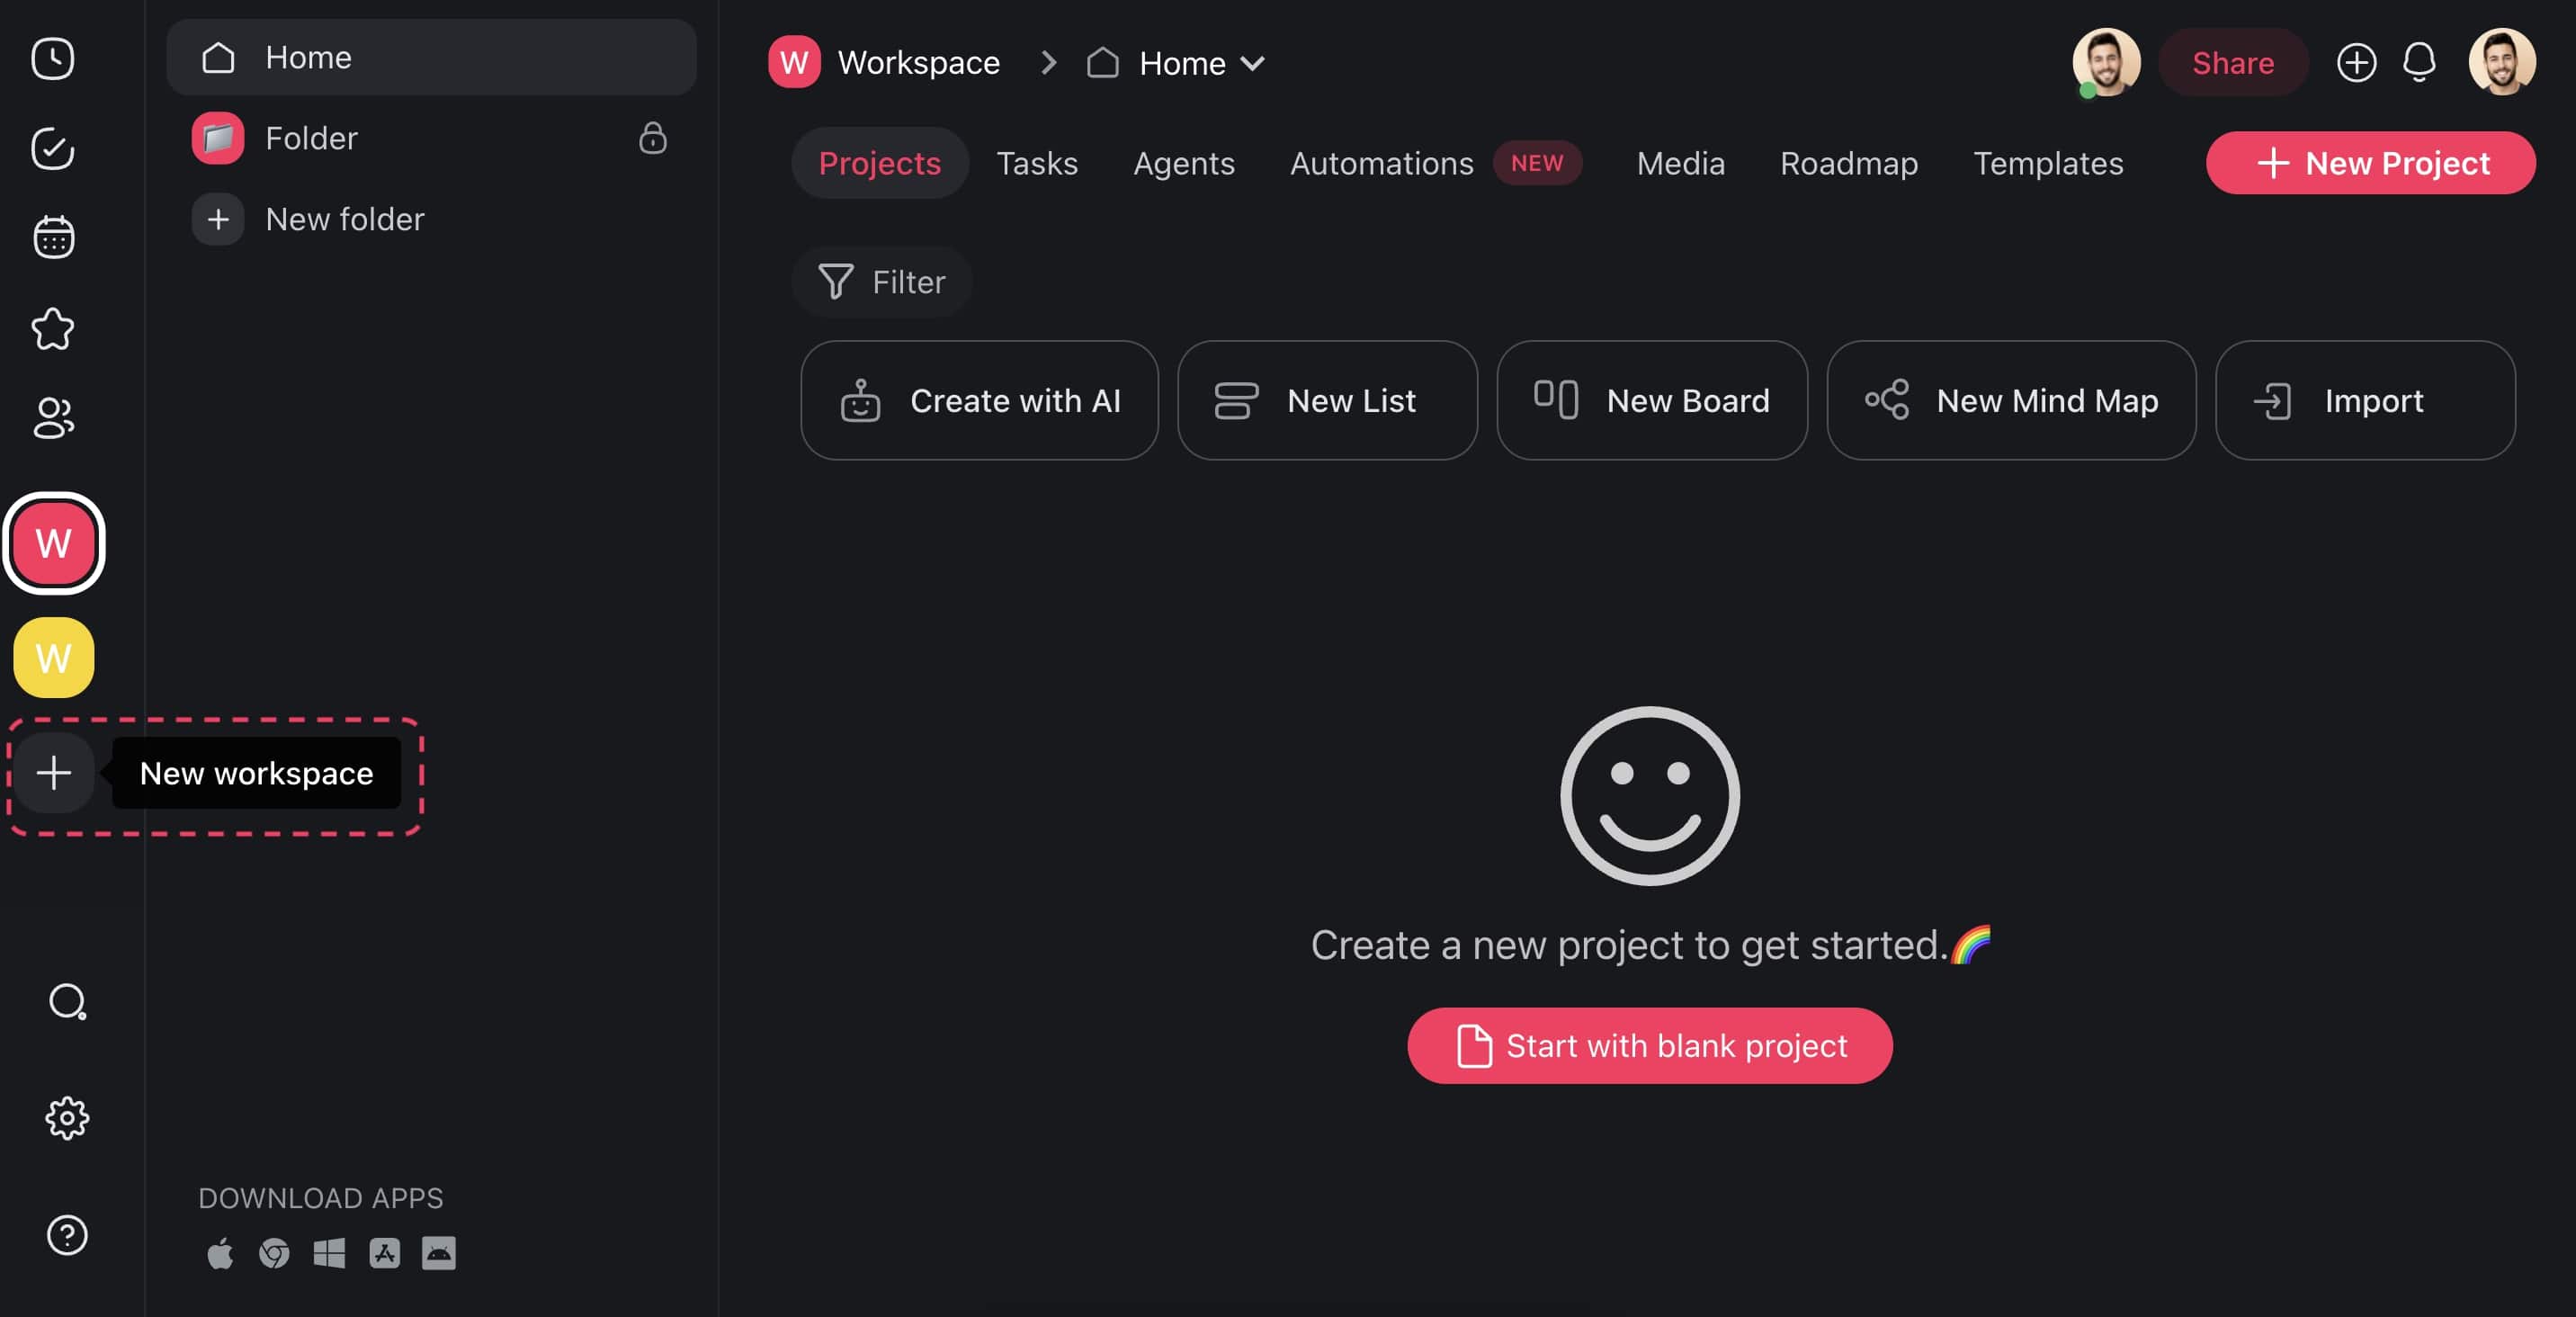
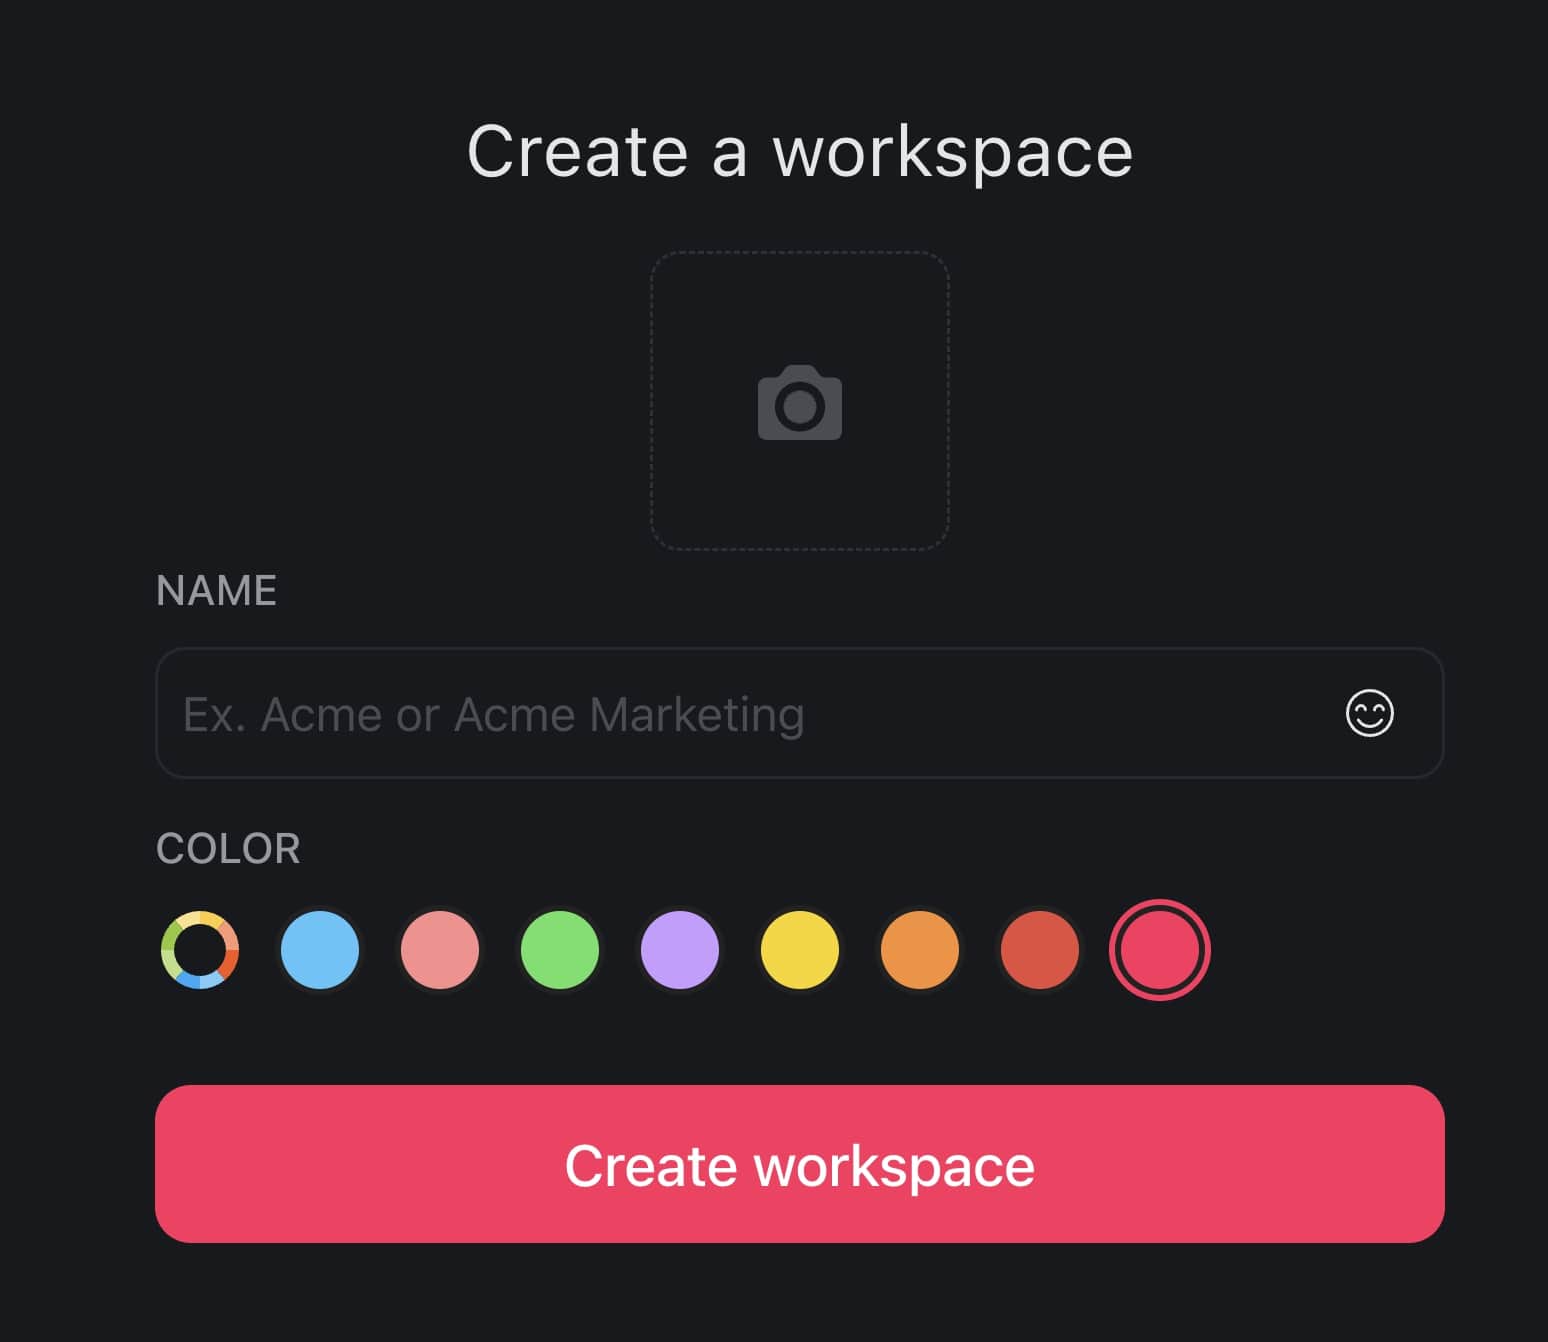
- Enter the name of your workspace and choose a color palette.
- You can also choose a logo from one of the available emojis or upload your own.
- You'll be prompted to invite new members to the workspace.
💡 Note: An upgraded workspace is required to set a workspace logo.
Share a Workspace
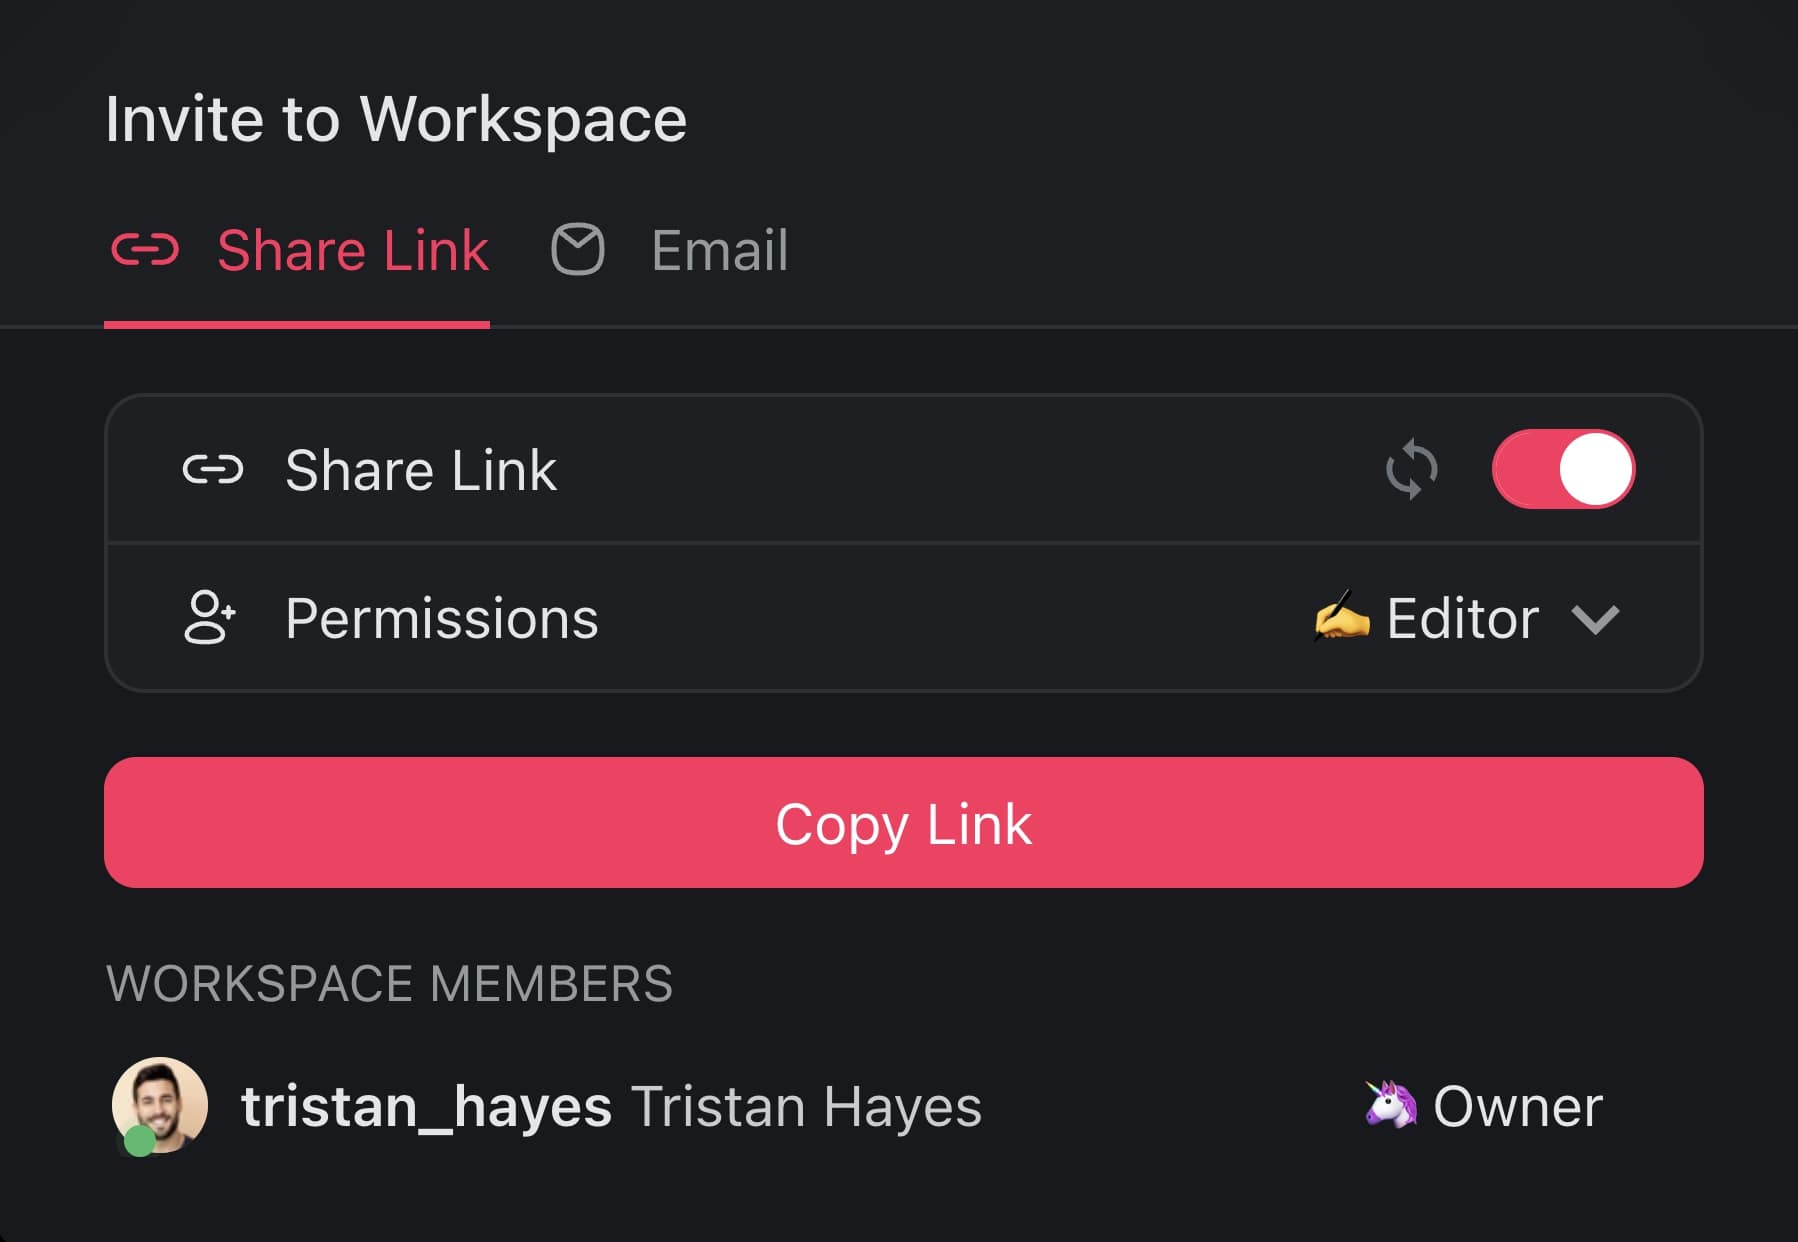
You can share your workspace with other people via email or username, or by using a link. Those who join will have access to the projects and templates in that workspace.
💡 Note: Sharing a workspace with other Taskade users doesn't automatically grant them access to all folders inside it. You need to share each folder manually.
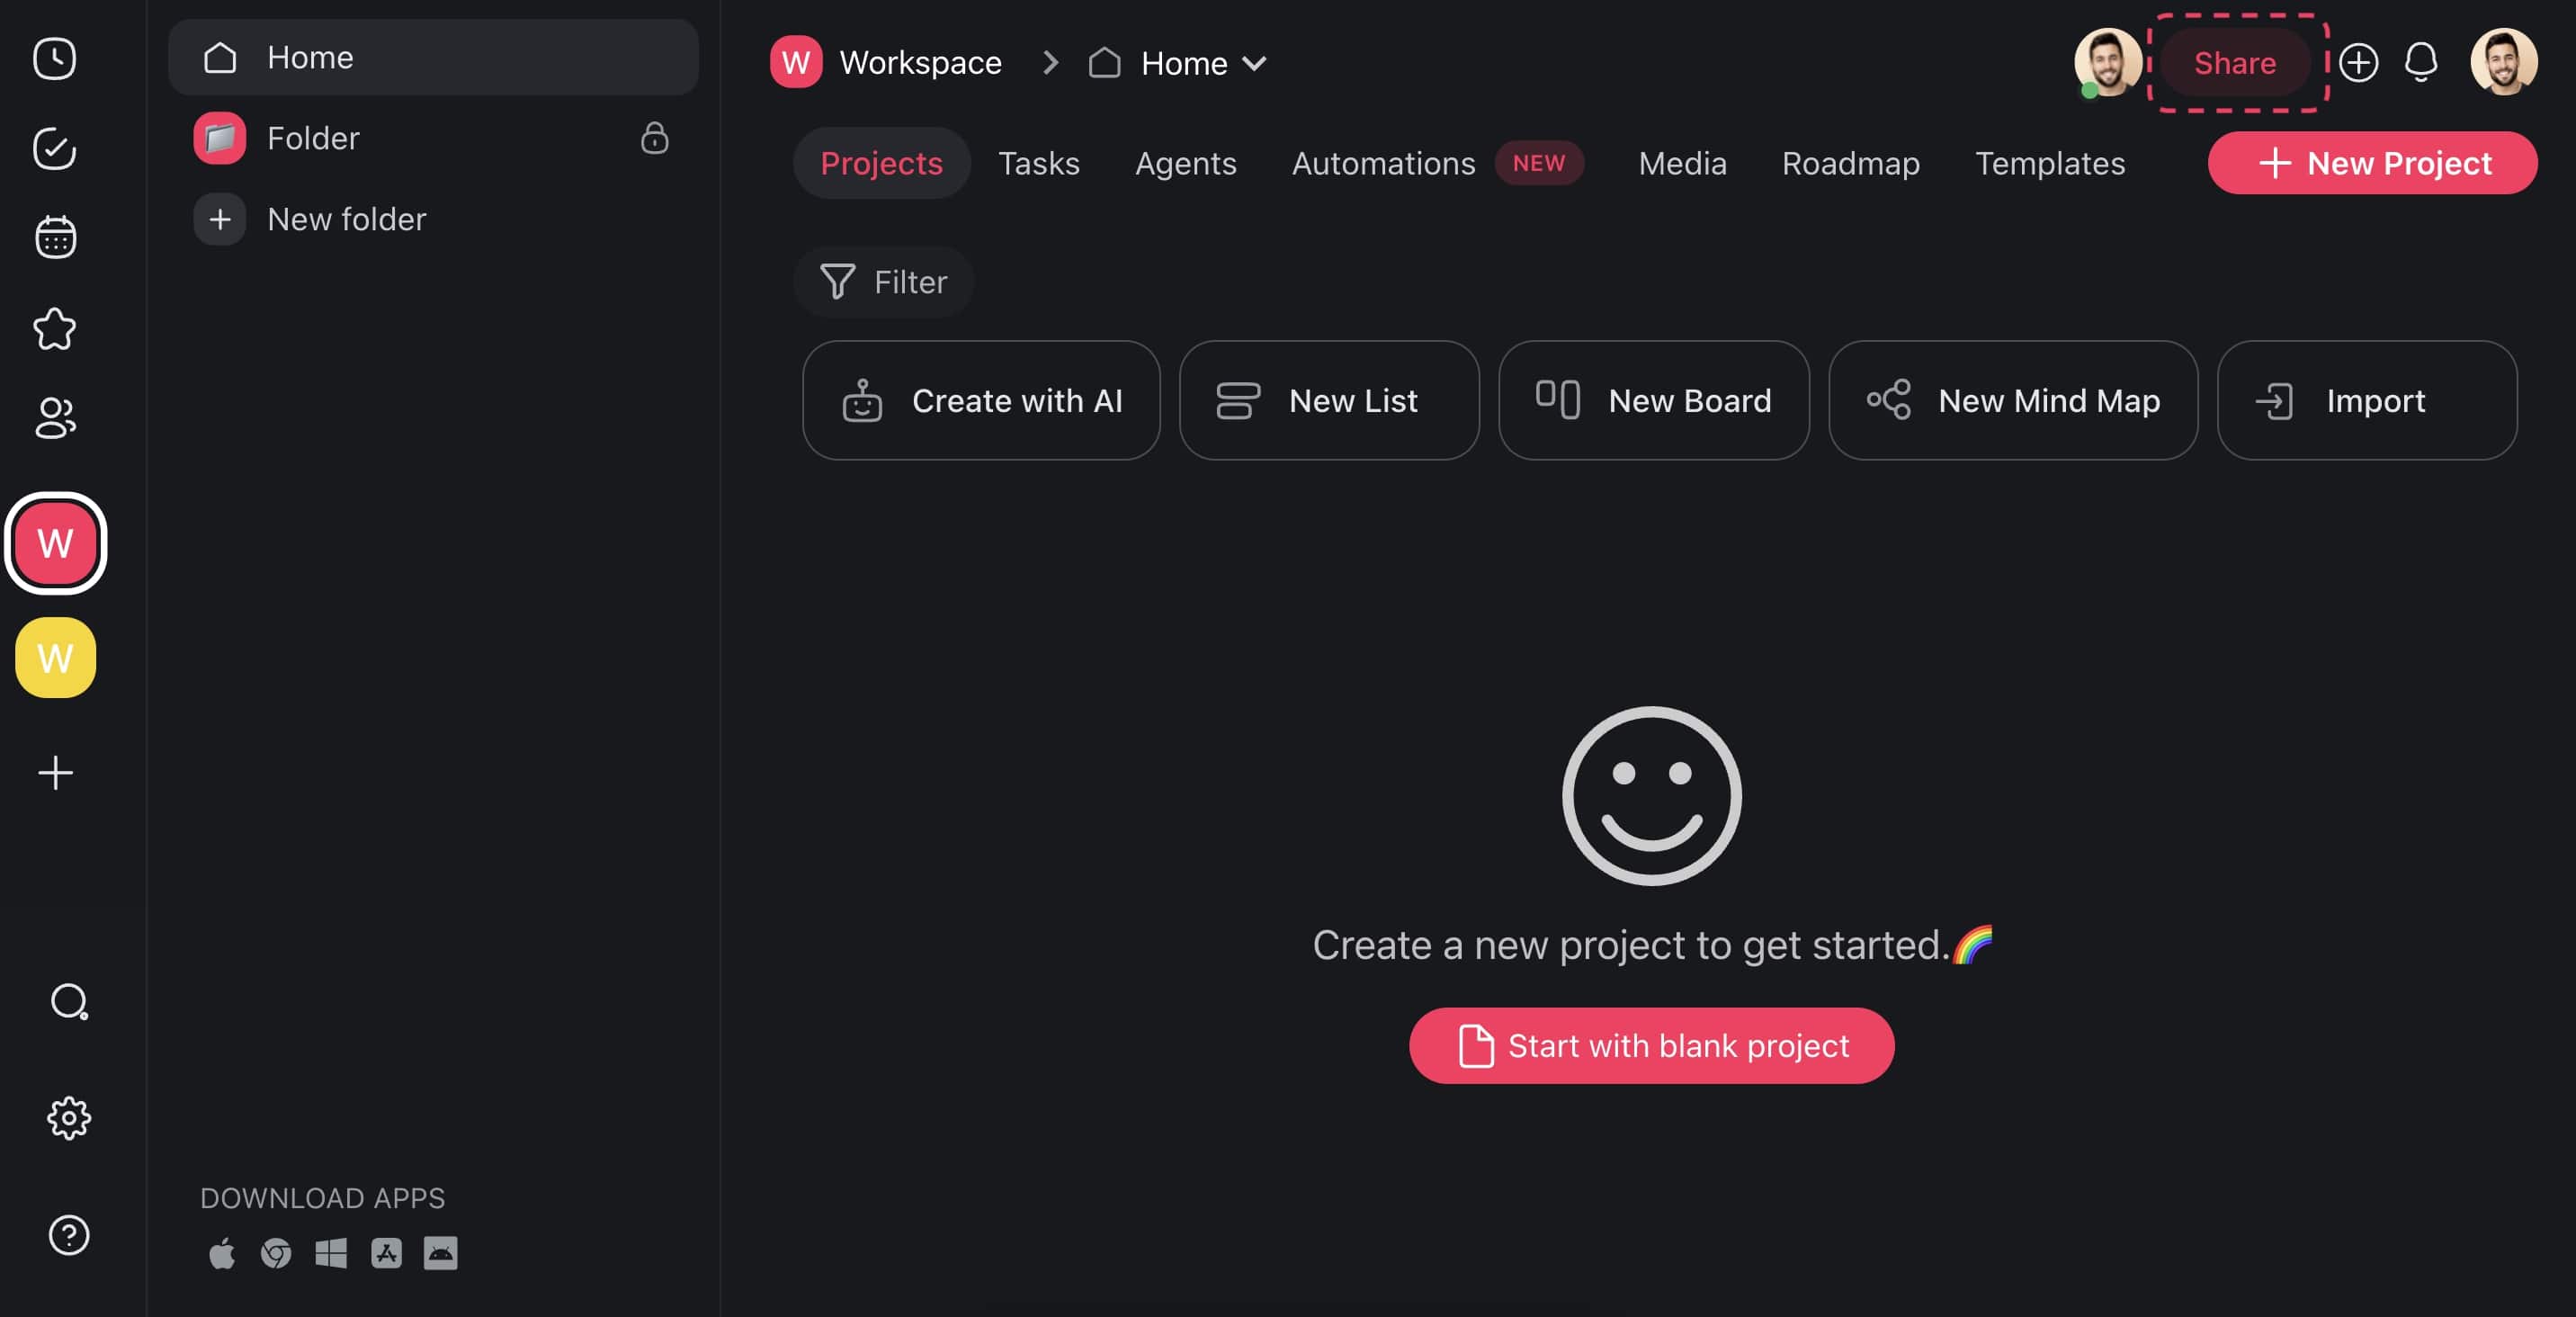
- Open your Workspace and click the Share button in the top right-hand corner.
- Copy the invite link and share it via email, text, or any other way.
- You can specify the level of access for users who join with the link.
- Alternatively, enter an email or Taskade username and click Send Invite to finish.
Tips
- Use workspace colors and icons to visually distinguish between workspaces in the sidebar.
- Create folders inside a workspace to organize projects by department, client, or project phase.
- Set user roles and permissions at the workspace level to control what members can do across all projects.
- You can be a member of multiple workspaces simultaneously — switch between them using the sidebar.