
Overview
Connecting Taskade with Google Calendar enables a powerful two-way sync between your tasks and calendar events. This integration ensures that your project timelines and task deadlines are always up-to-date and aligned with your calendar.
TL;DR: Keep your tasks and deadlines aligned with Google Calendar using a two-way sync. Taskade creates a managed "Taskade" calendar in Google, so tasks and projects with due dates appear as events, and events you add to that calendar show up in your Taskade Calendar view. Two-way sync requires a paid Workspace.
Two-Way Sync, Explained
Here is how the two-way sync flows in both directions through the shared Taskade calendar.
Two-way synchronization lets you see your Taskade projects and tasks in Google Calendar, and vice versa! You can use this feature to add events to a shared Google Calendar and let your clients know what you're working on in Taskade.
💡 Note: You need to upgrade your Workspace to use two-way sync.
Enable Two-Way Sync
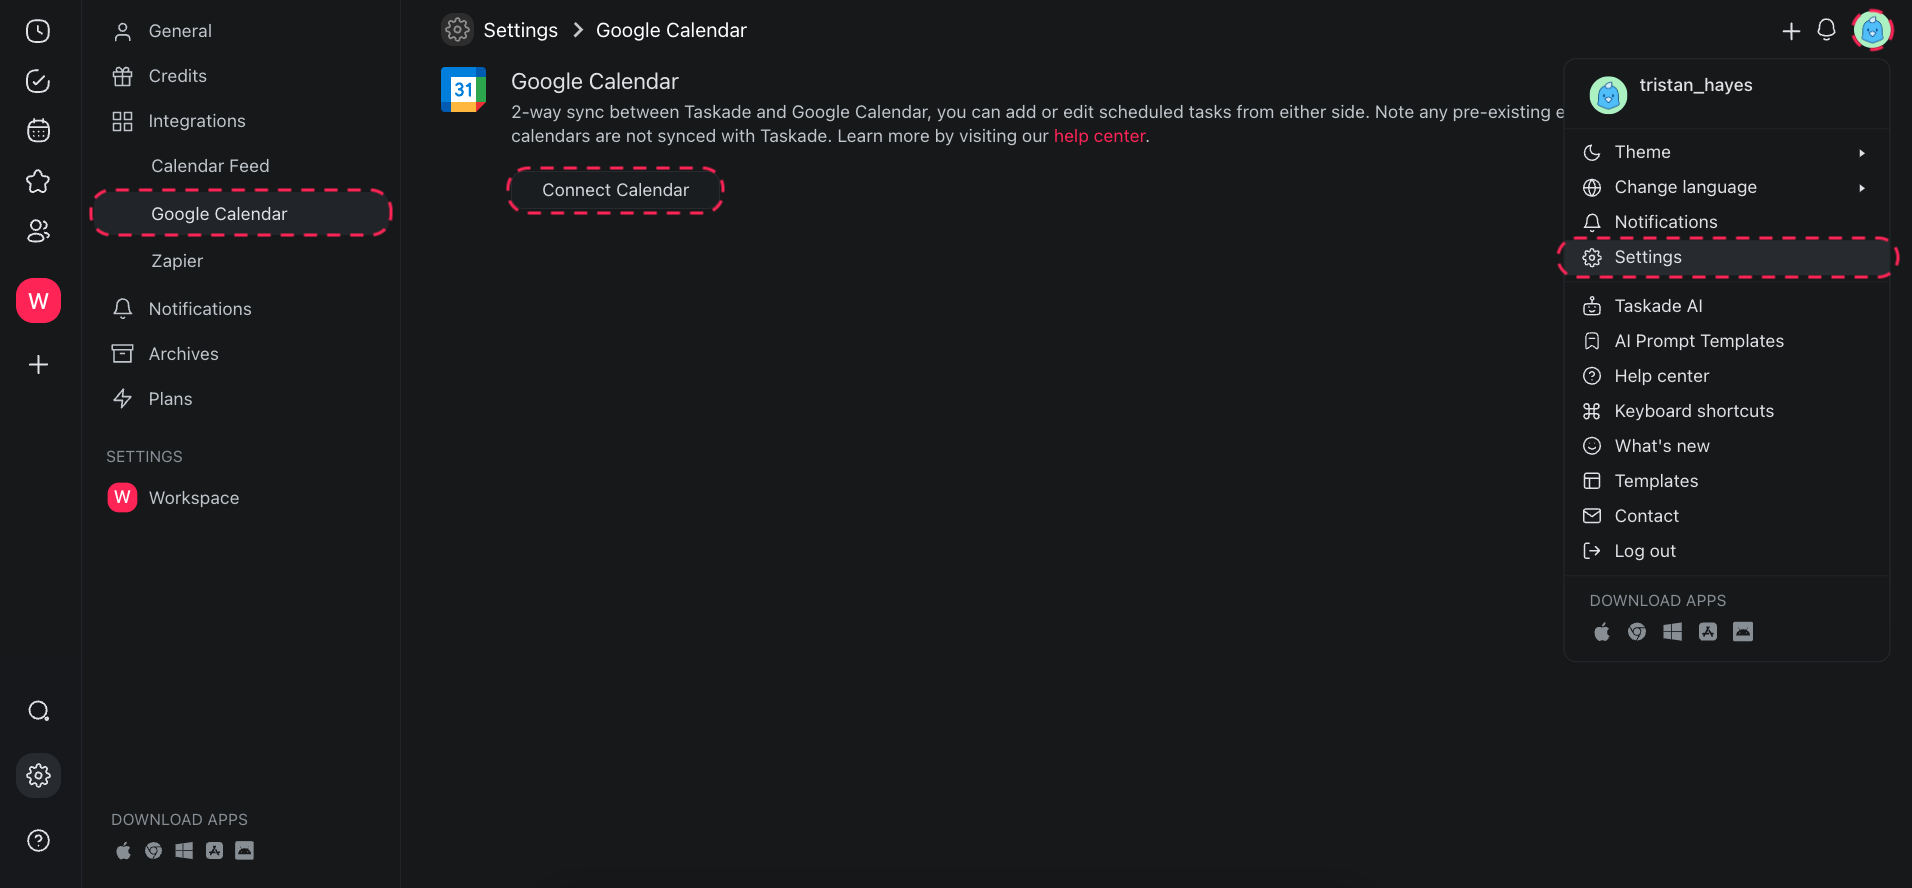
- Click your profile avatar (bottom-left) and select Settings.
- Choose Integrations from the pane on the left ➡ Google Calendar.
- Click Connect Calendar and follow the instructions.
- Click "Allow" when asked to grant Taskade access to your Google Calendar.
💡 Note: Taskade creates a managed calendar called "Taskade" in your Google Calendar and populates Tasks and Events from Taskade to Google Calendar through this calendar. The 2 way syncing is between this created calendar in Google Calendar and Taskade’s calendar. Other calendars within Google Calendar will not show up in Taskade’s calendar.
Add Tasks/Projects (Taskade)
You sync both projects and tasks between Taskade and the Google Calendar. There are three ways to do that:
- (method 1): Add Tasks with Due Dates
- Open the workspace or folder you synced in the previous step.
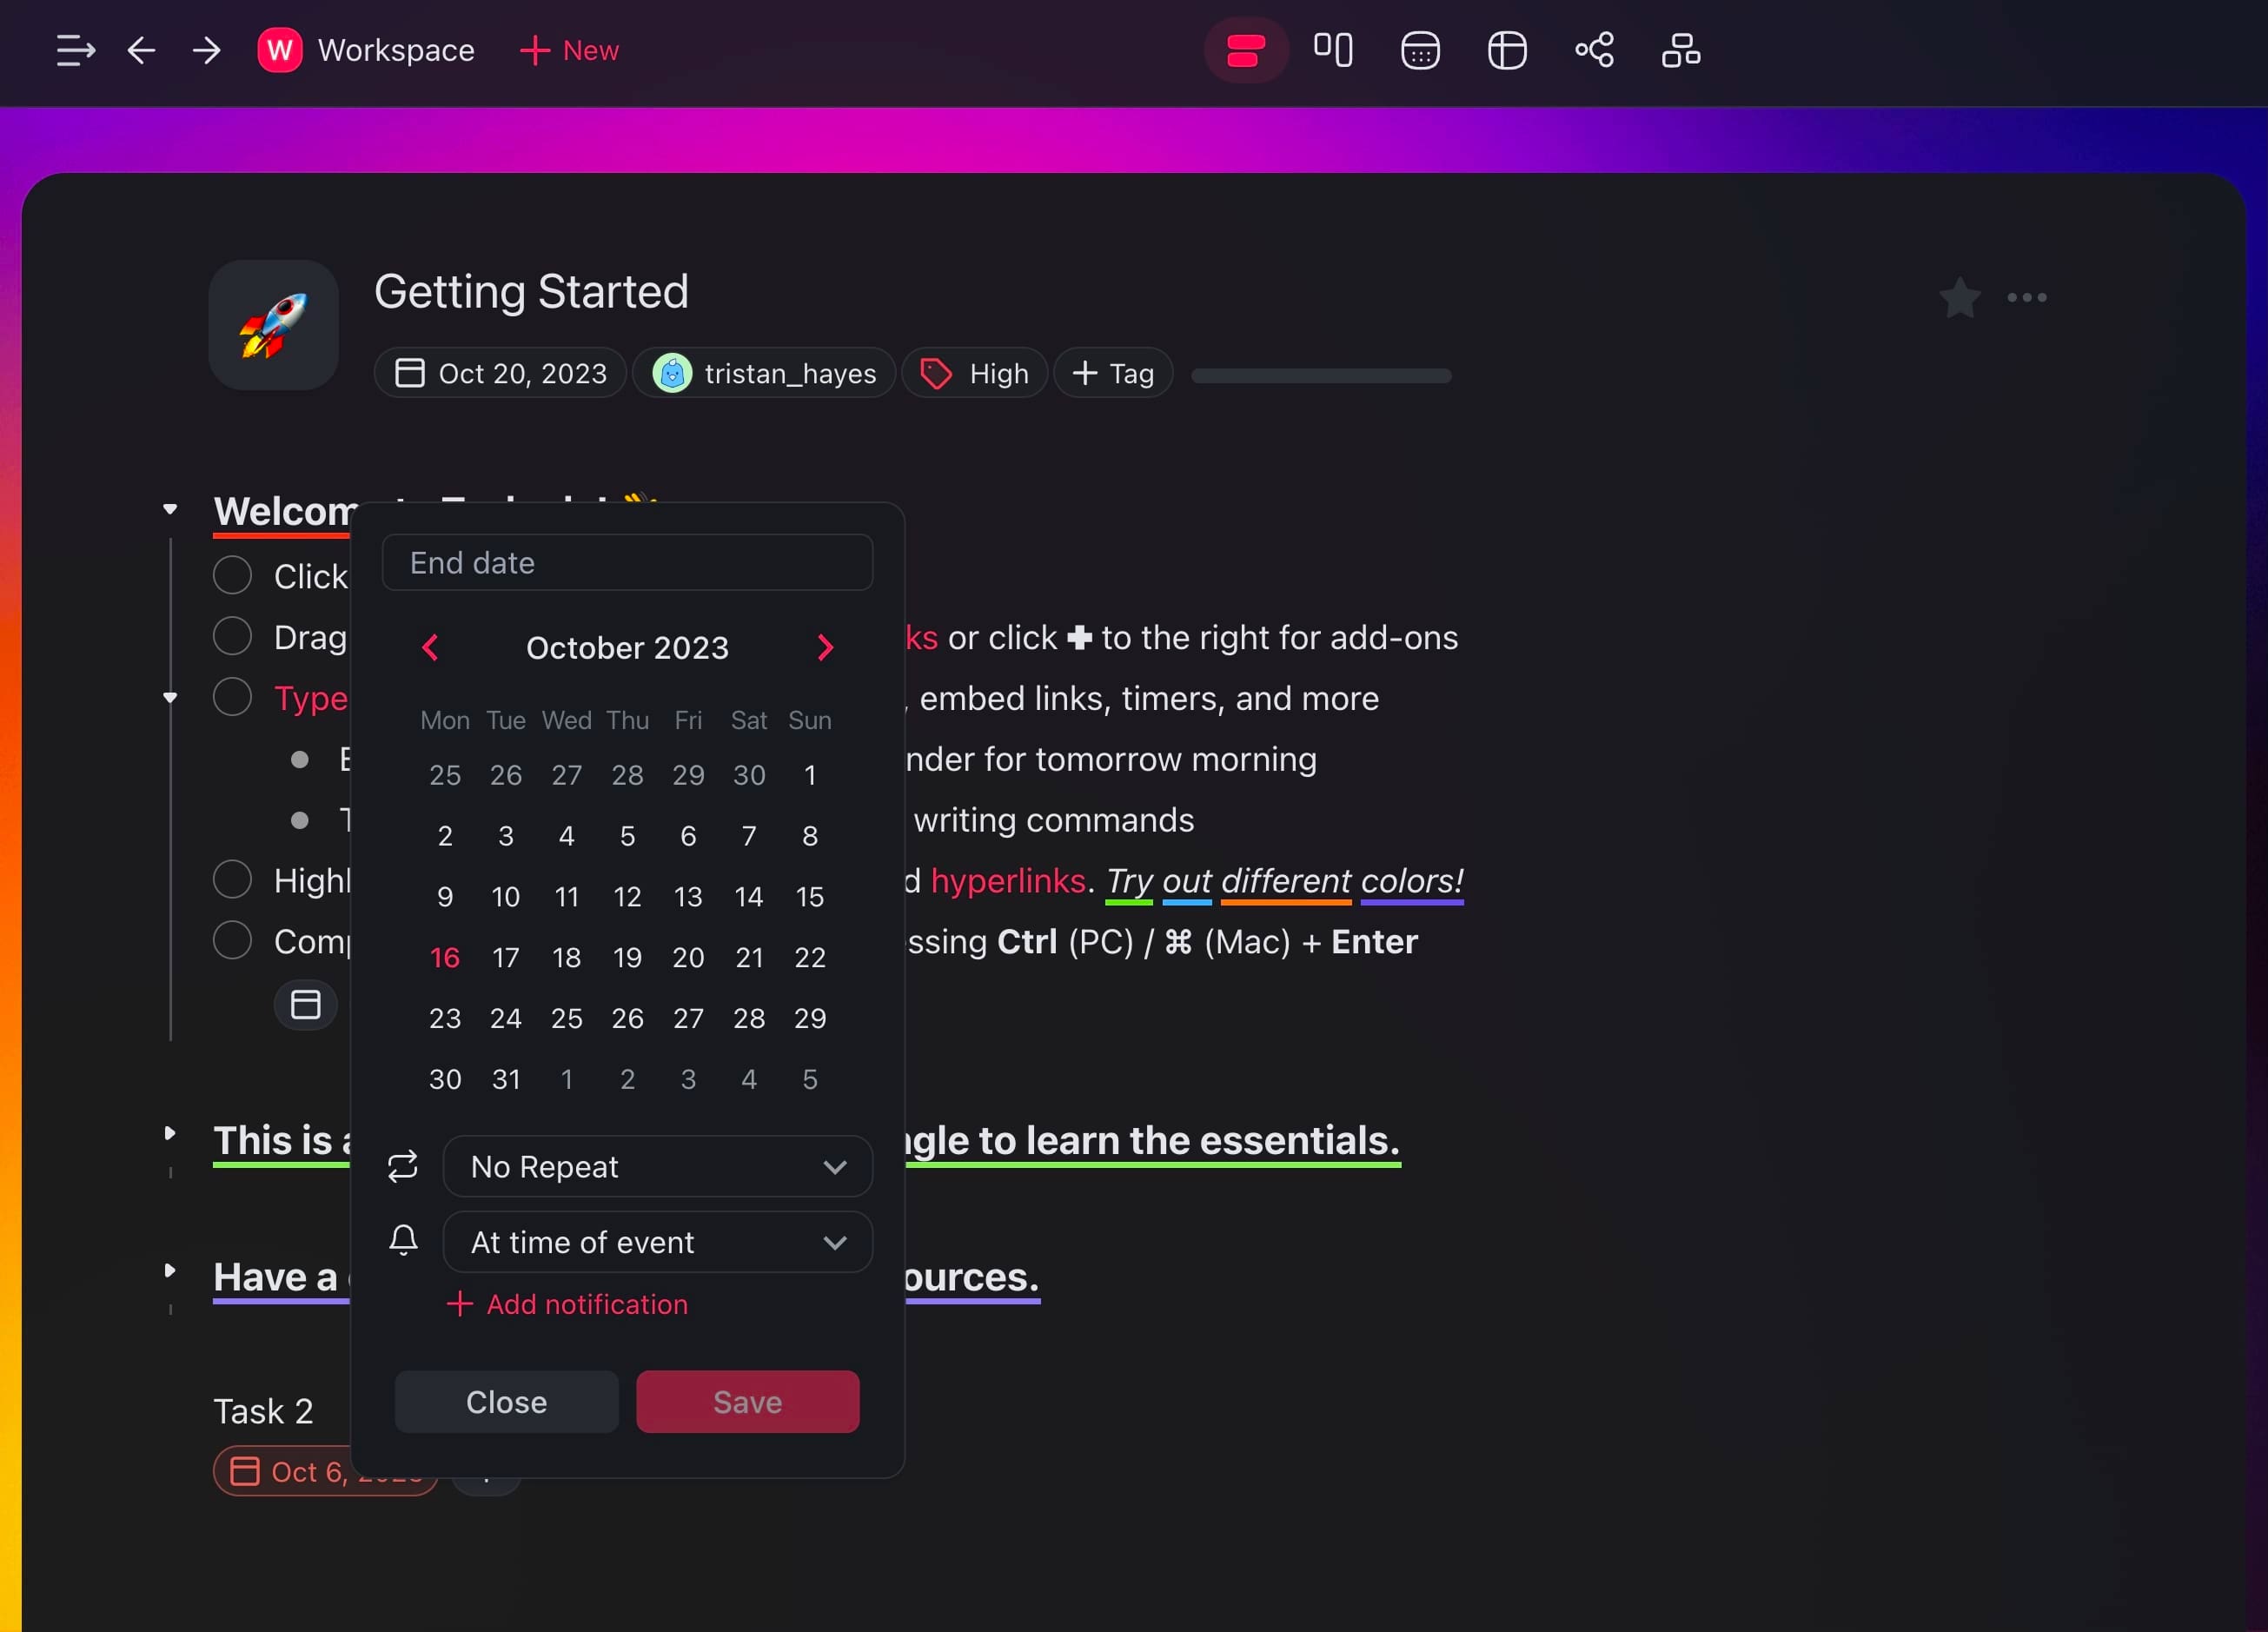
- Open a project and add a task.
- Click the ➕ button next to the task ➡ 🗓️ Due Date to add a due date.
- The new task will be added as an event to your Google Calendar.
(method 2): Add Projects with Due Dates
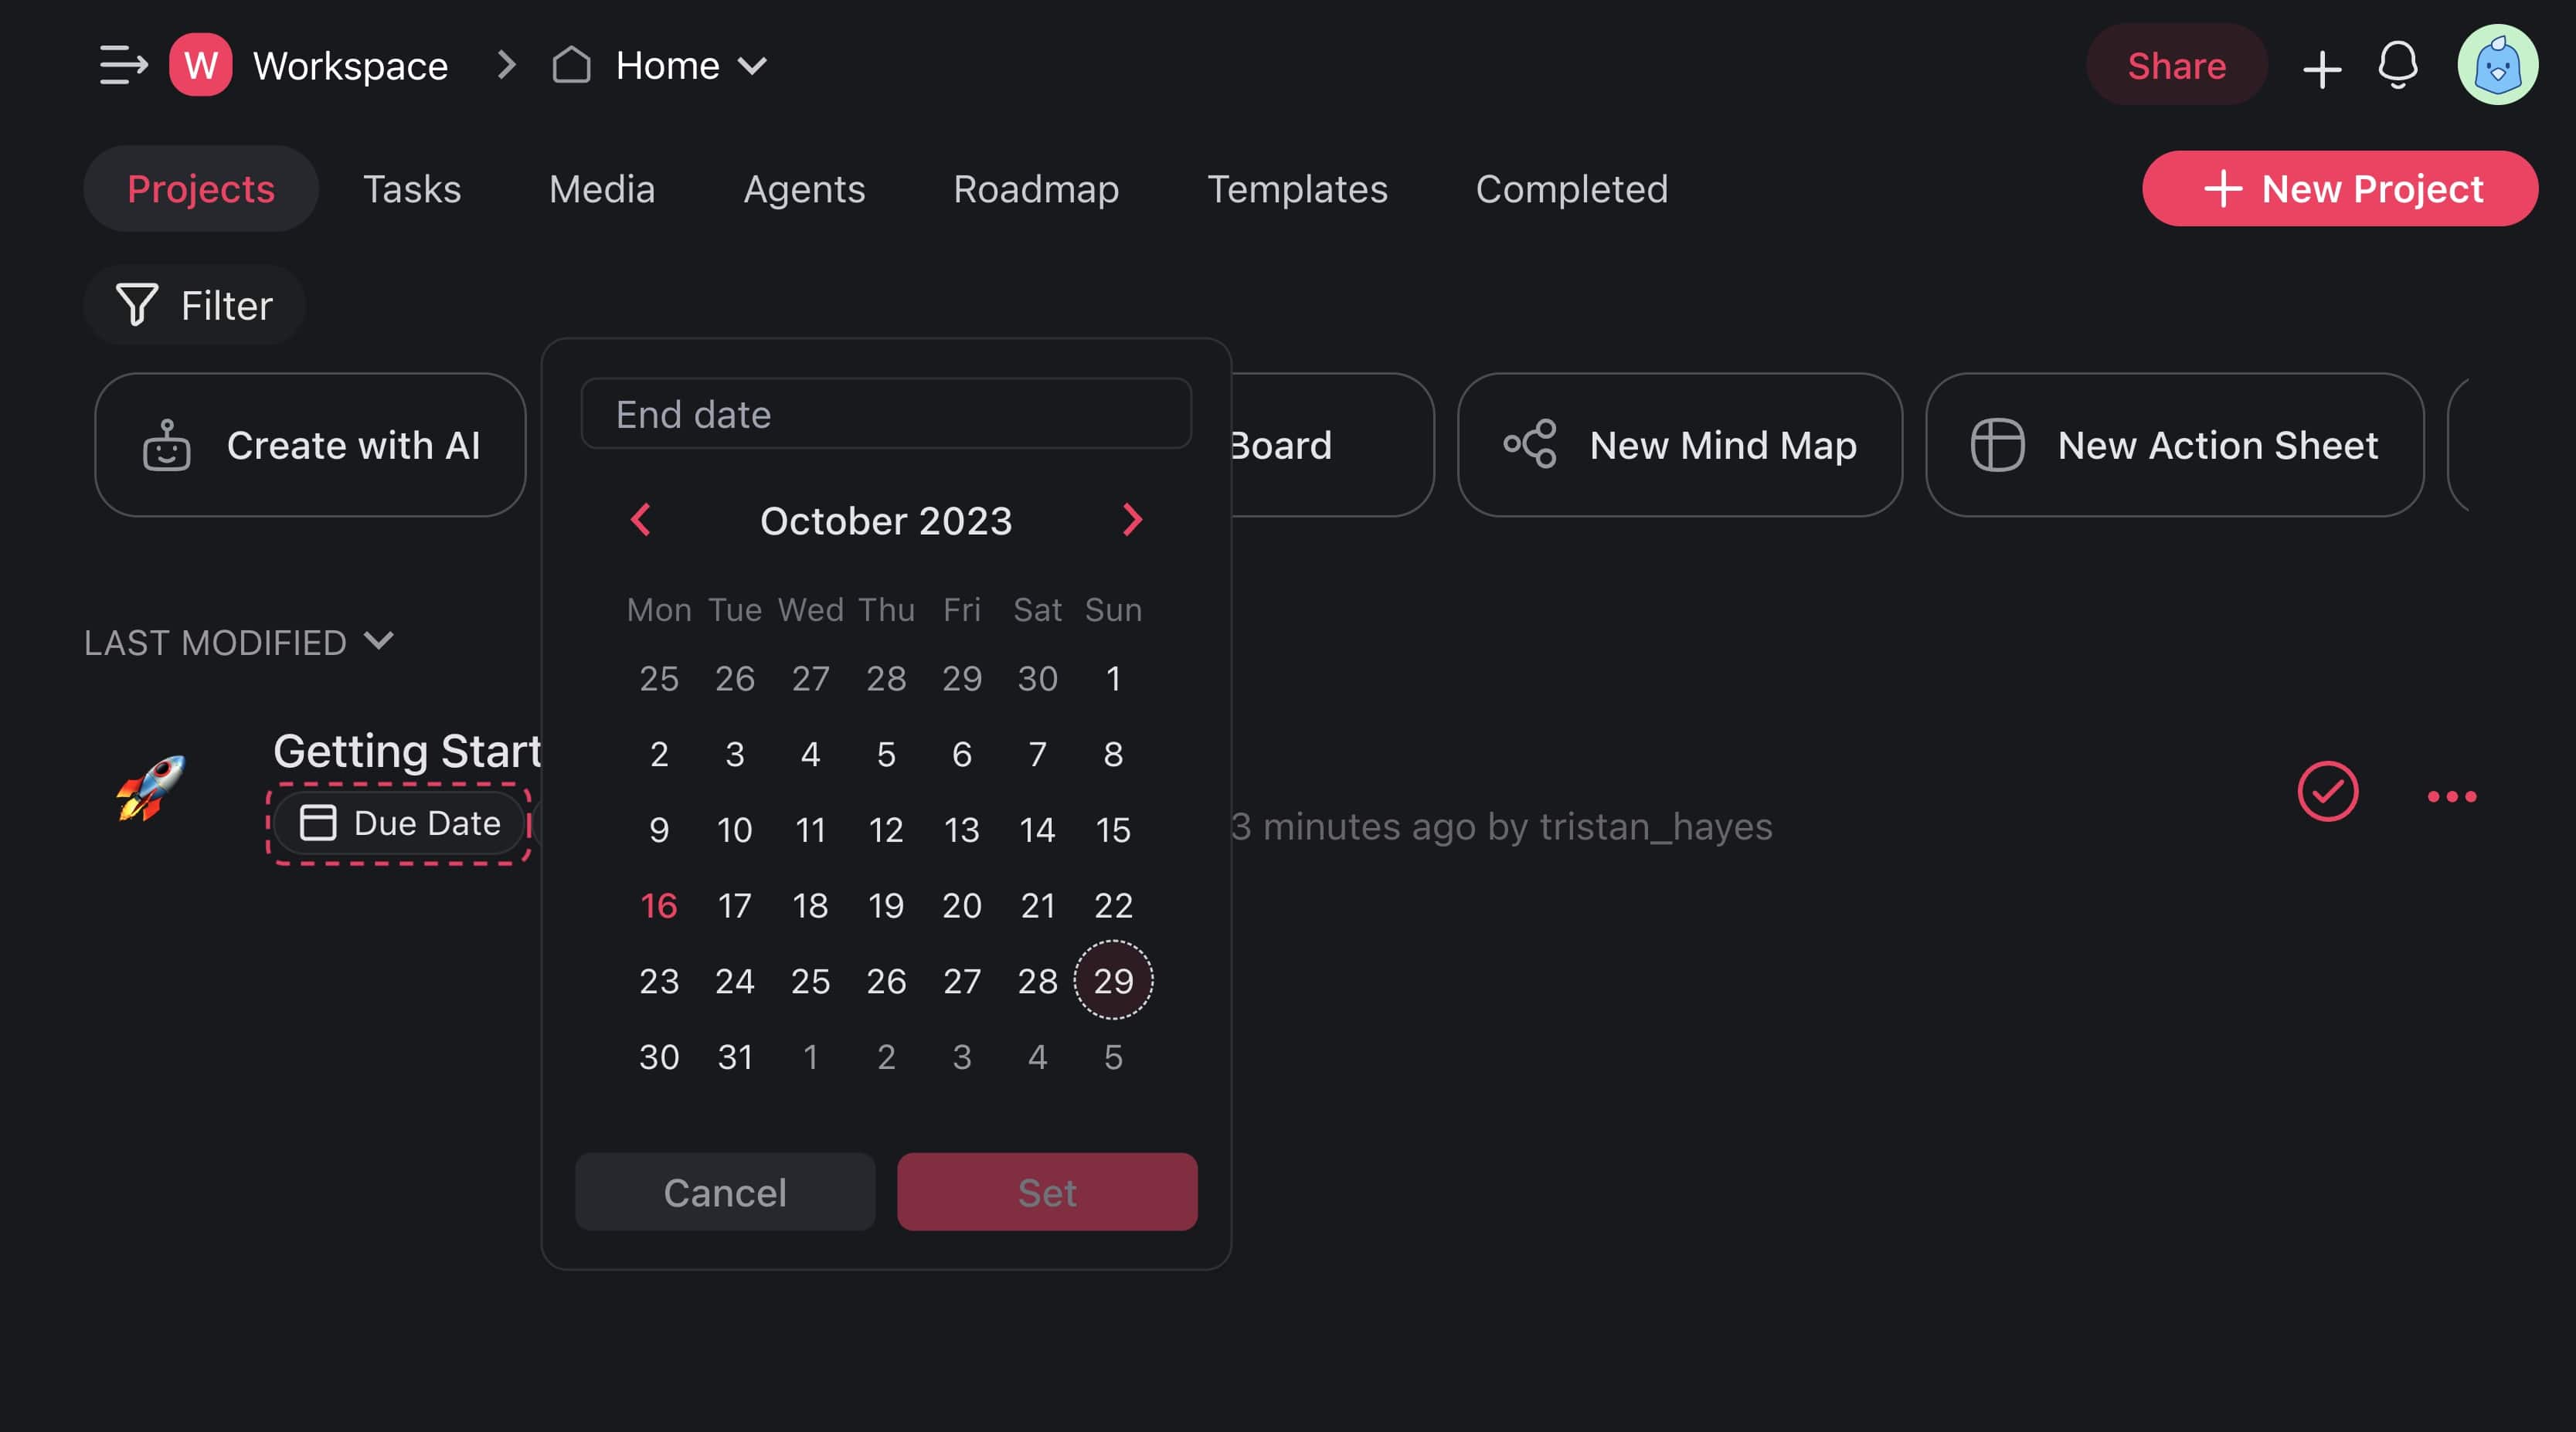
Open the workspace or folder you synced in the previous step.
Create a project or select one from the list and add a due date.
The new project will be added as an event to your Google Calendar.
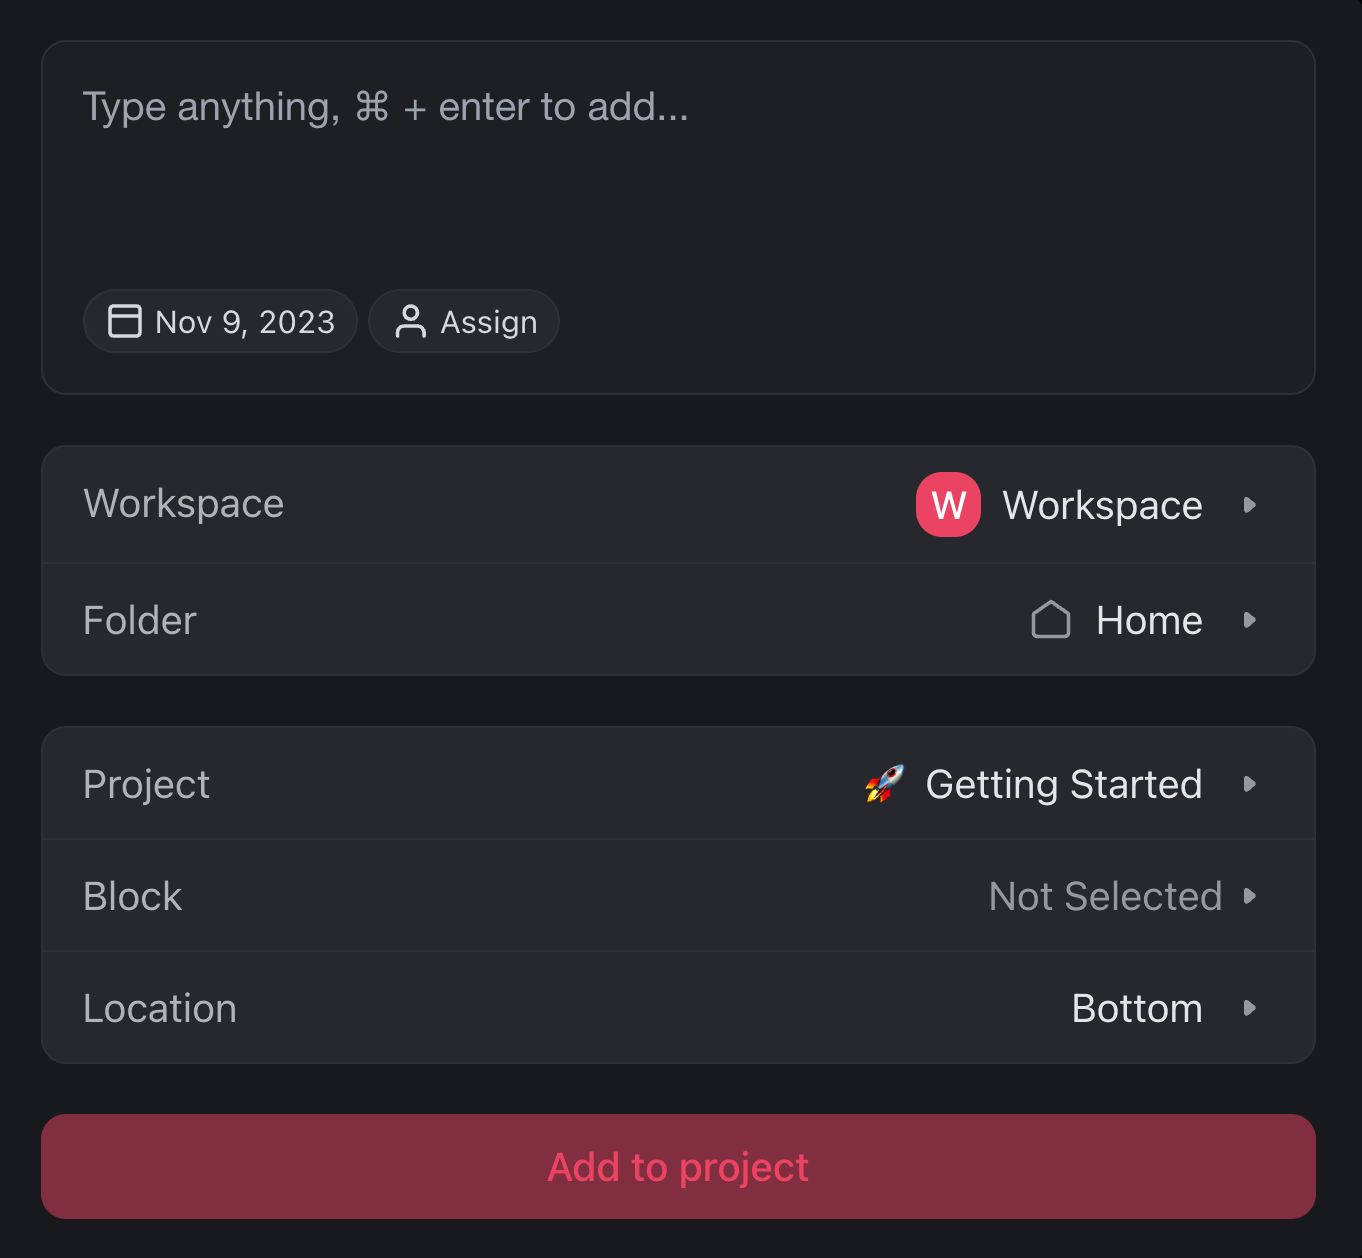
(method 3): Add Tasks Using the Calendar
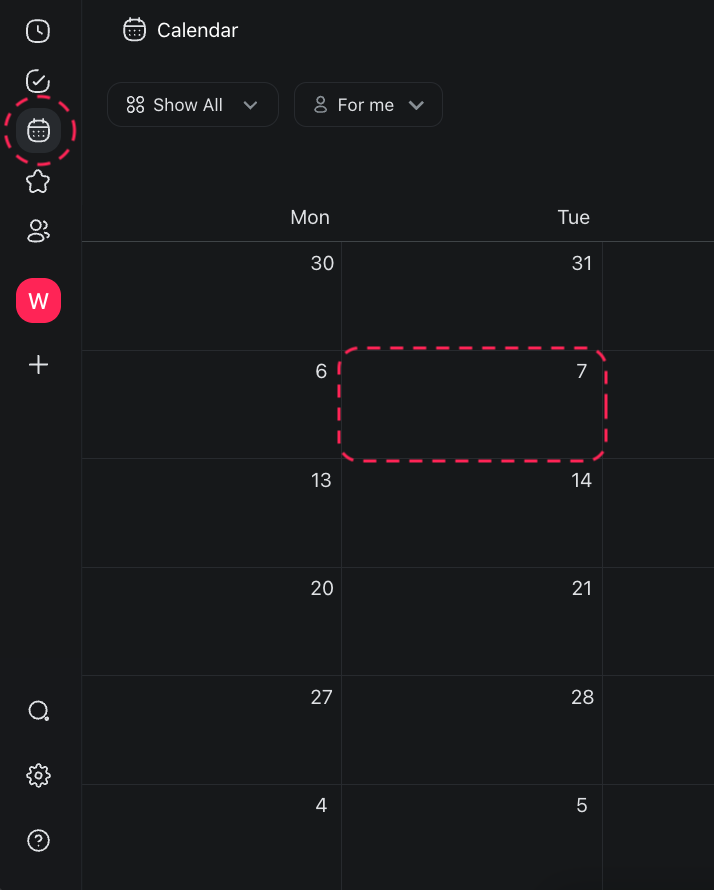
Open the workspace or folder you synced in the previous step.
Click the 🗓️ calendar icon in the left navigation pane.
Click any date cell in the calendar to open a pop-up menu.
Customize the task and set a due date ➡ click Add to project.
The new task will be added as an event to your Google Calendar.
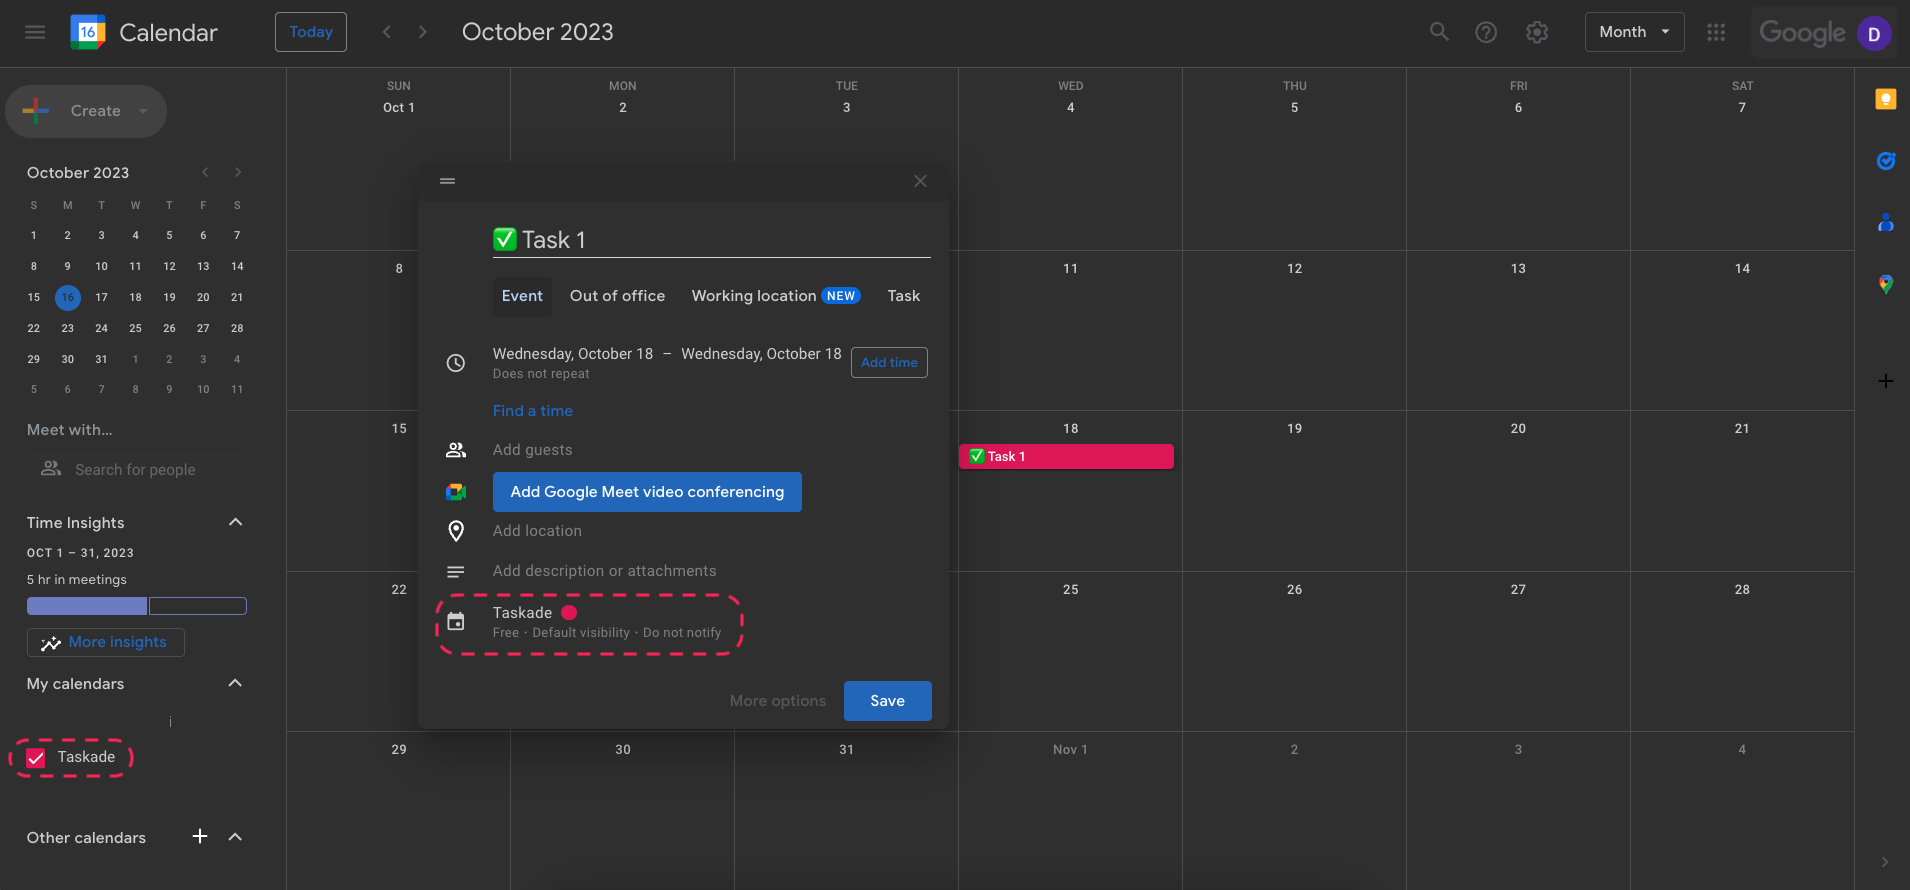
Add Events (Google Calendar)
- Select a day and add event details.
- Make sure the calendar selected is Taskade and click Save.
- The event (marked with a letter "G") is now visible in the Taskade Calendar.
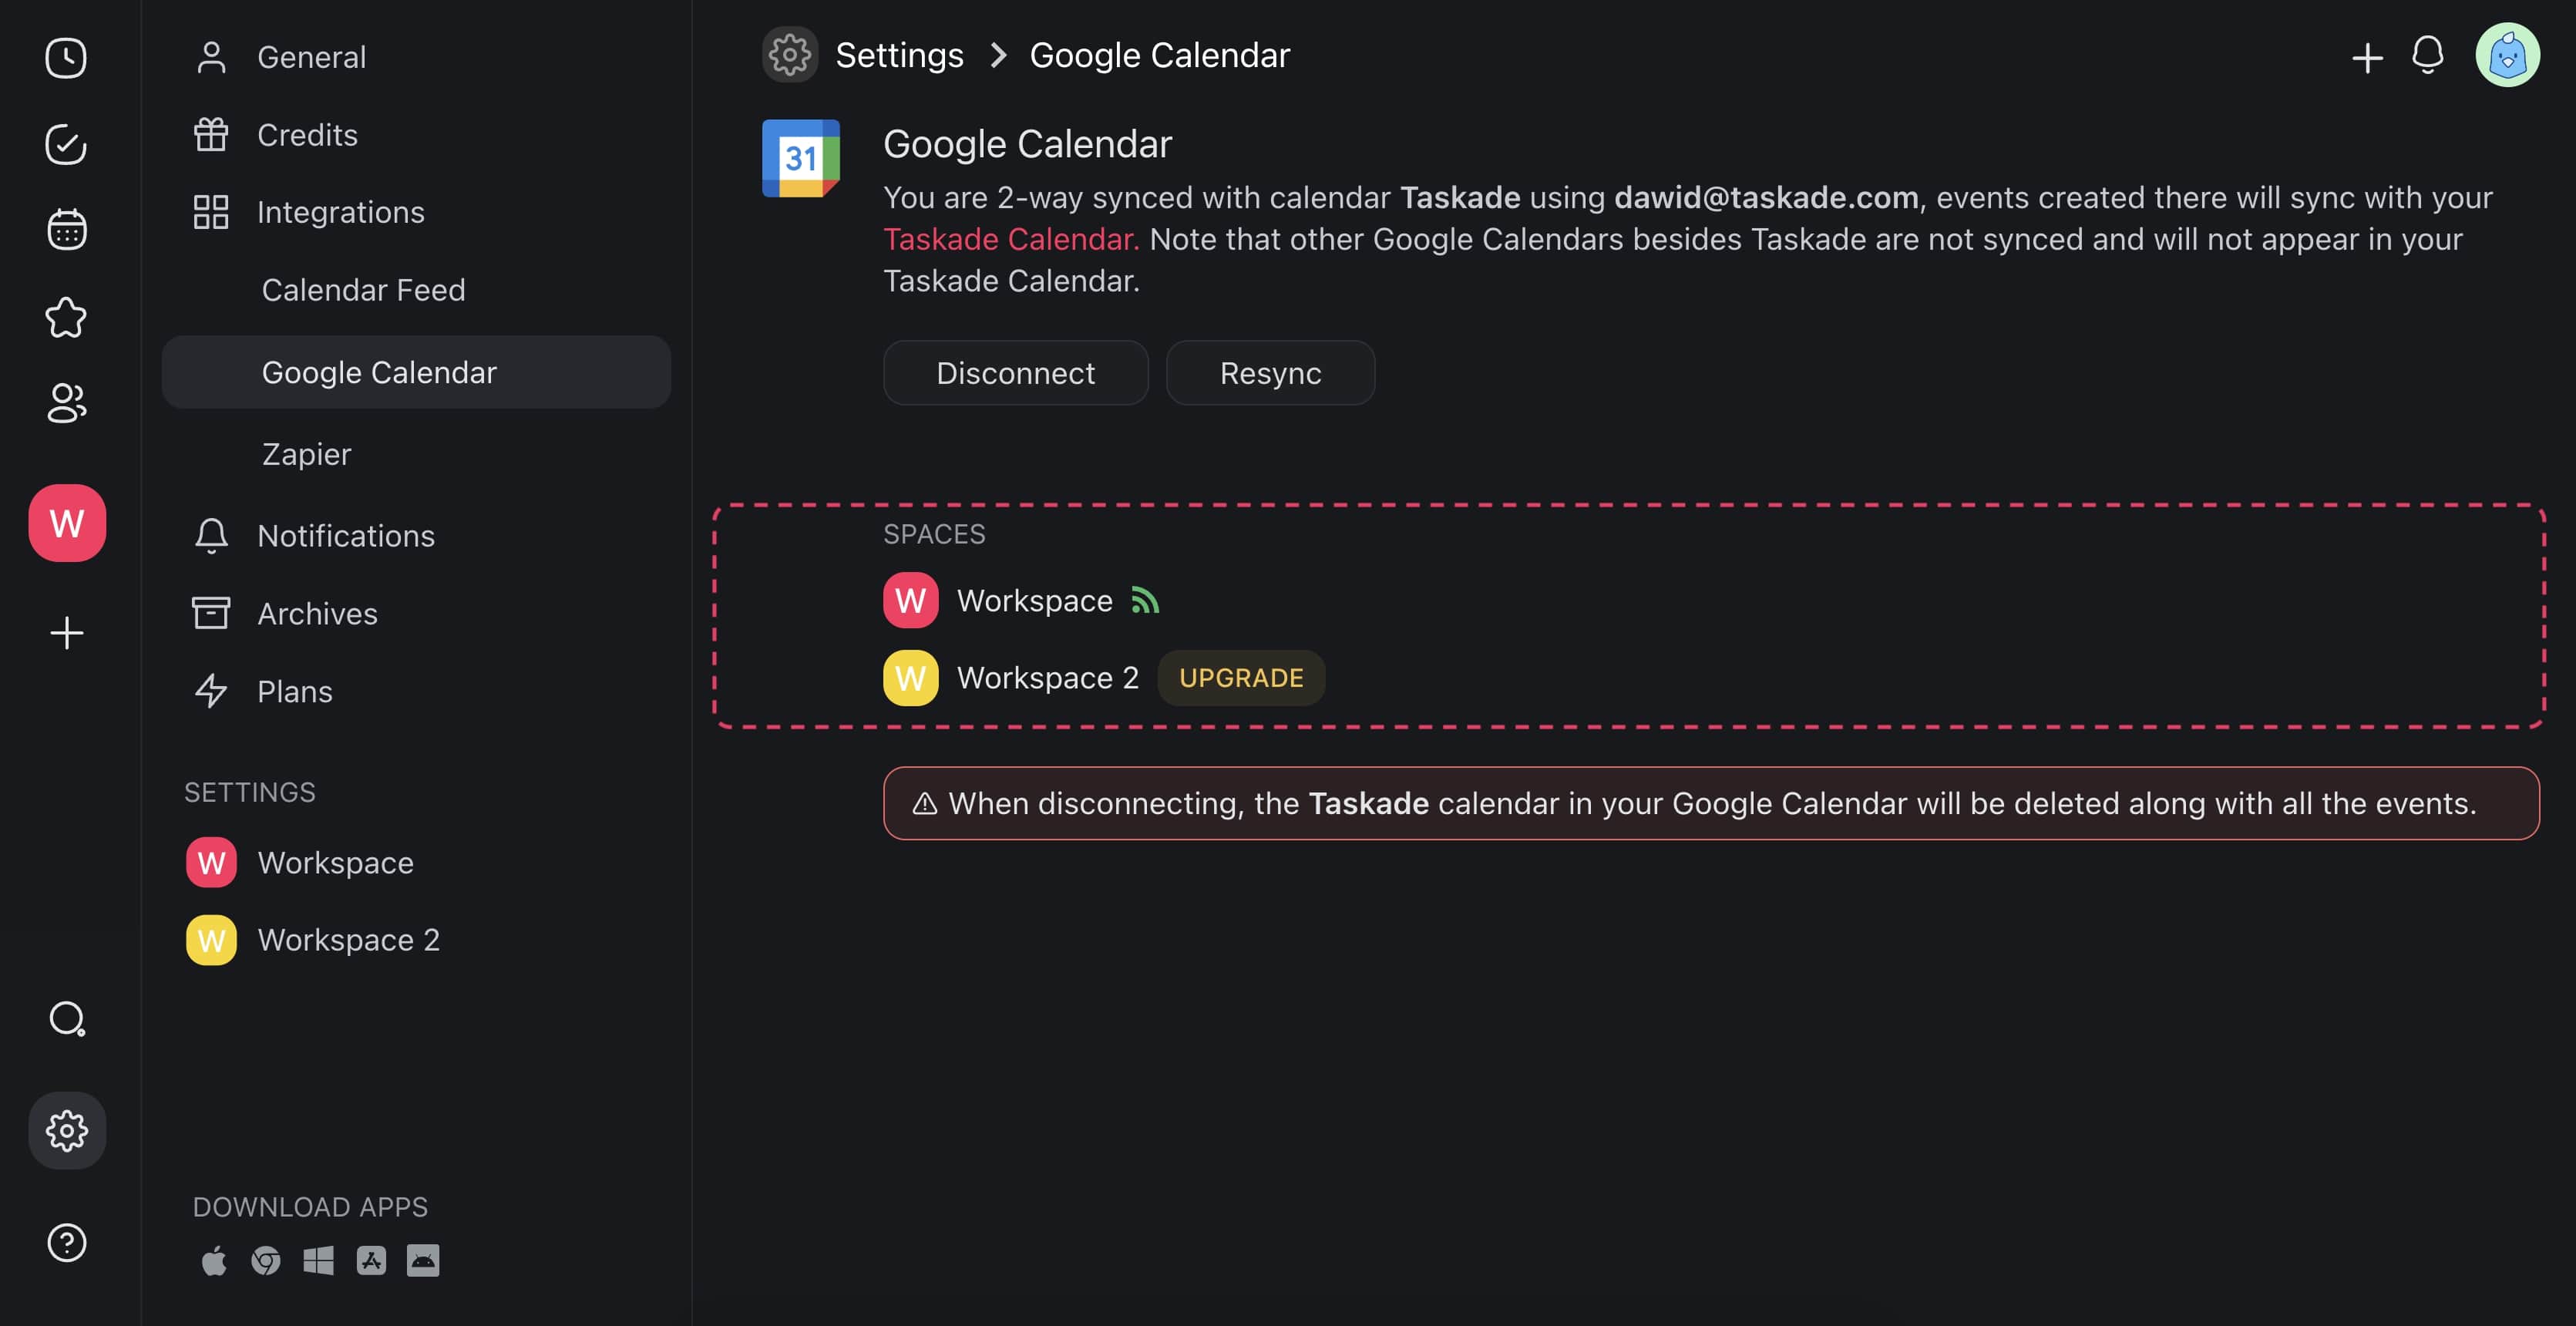
Check Sync Status
- Click your profile avatar (top-right) and select Settings.
- Choose Integrations from the pane on the left ➡ Google Calendar.
- Workspace/folders marked with marked with

have sync enabled. - Workspaces that are not synced will show an Upgrade button.
Remove Google Integration
Follow the steps below to disconnect Taskade from your Google Calendar:
- Click your profile avatar (top-right) and select Settings.
- Choose Integrations from the pane on the left ➡ Google Calendar.
- Click Disconnect to disable the integration.
Note: Disconnecting the Google Calendar from your Taskade account will delete the Taskade calendar in your Google Calendar along with any events you created.

Resync Google Calendar
Facing problems with the two-way sync? Here's how to fix them:
- Click your profile avatar (top-right) and select Settings.
- Choose Integrations from the pane on the left ➡ Google Calendar.
- Click Resync to refresh the integration.
Related guides
- Google Calendar · Calendar Feed — One-way iCal export
- Calendly — Automate meeting scheduling
- Project Calendar View — Visualize tasks on a calendar
- Automation Actions — Schedule-based triggers