TL;DR: Actionsheet is the classic, minimal spreadsheet companion to the full Table view, faster to scan, fewer columns, great for simple CRMs and task lists. It reads the same project data as every other view, so switching between Actionsheet and List, Board, or Calendar never duplicates work.
Here is how your tasks become a streamlined spreadsheet in the Actionsheet view.
Overview
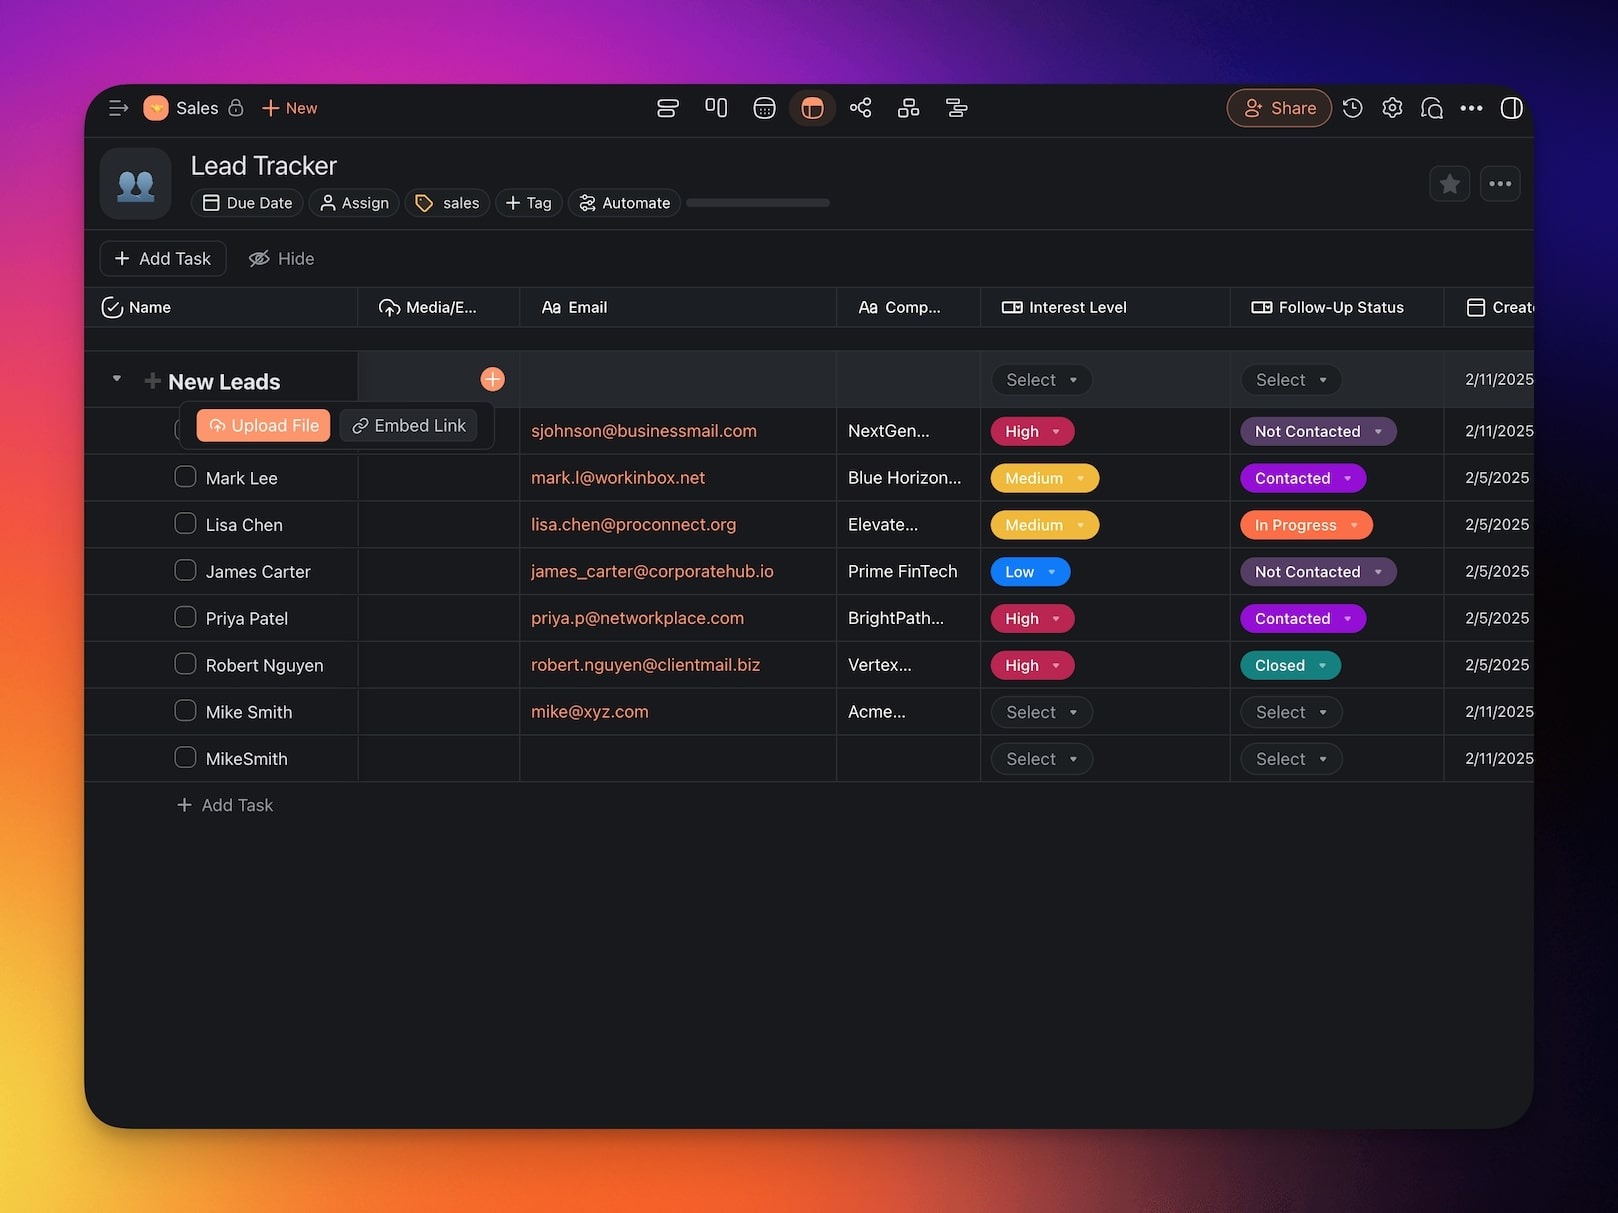
The Actionsheet view is a classic spreadsheet companion to the Table view. It allows you to manage tasks in a streamlined format organized into customizable lists.
This workflow is perfect for:
- Managing personal task lists
- Assigning tasks to team members
- Tracking project progress
- Managing customer relationships
- (optional) Browse our free task management templates for more ideas
Note: Only the List view is supported in Taskade mobile. Visit Project Views to learn more about other workflows in Taskade.
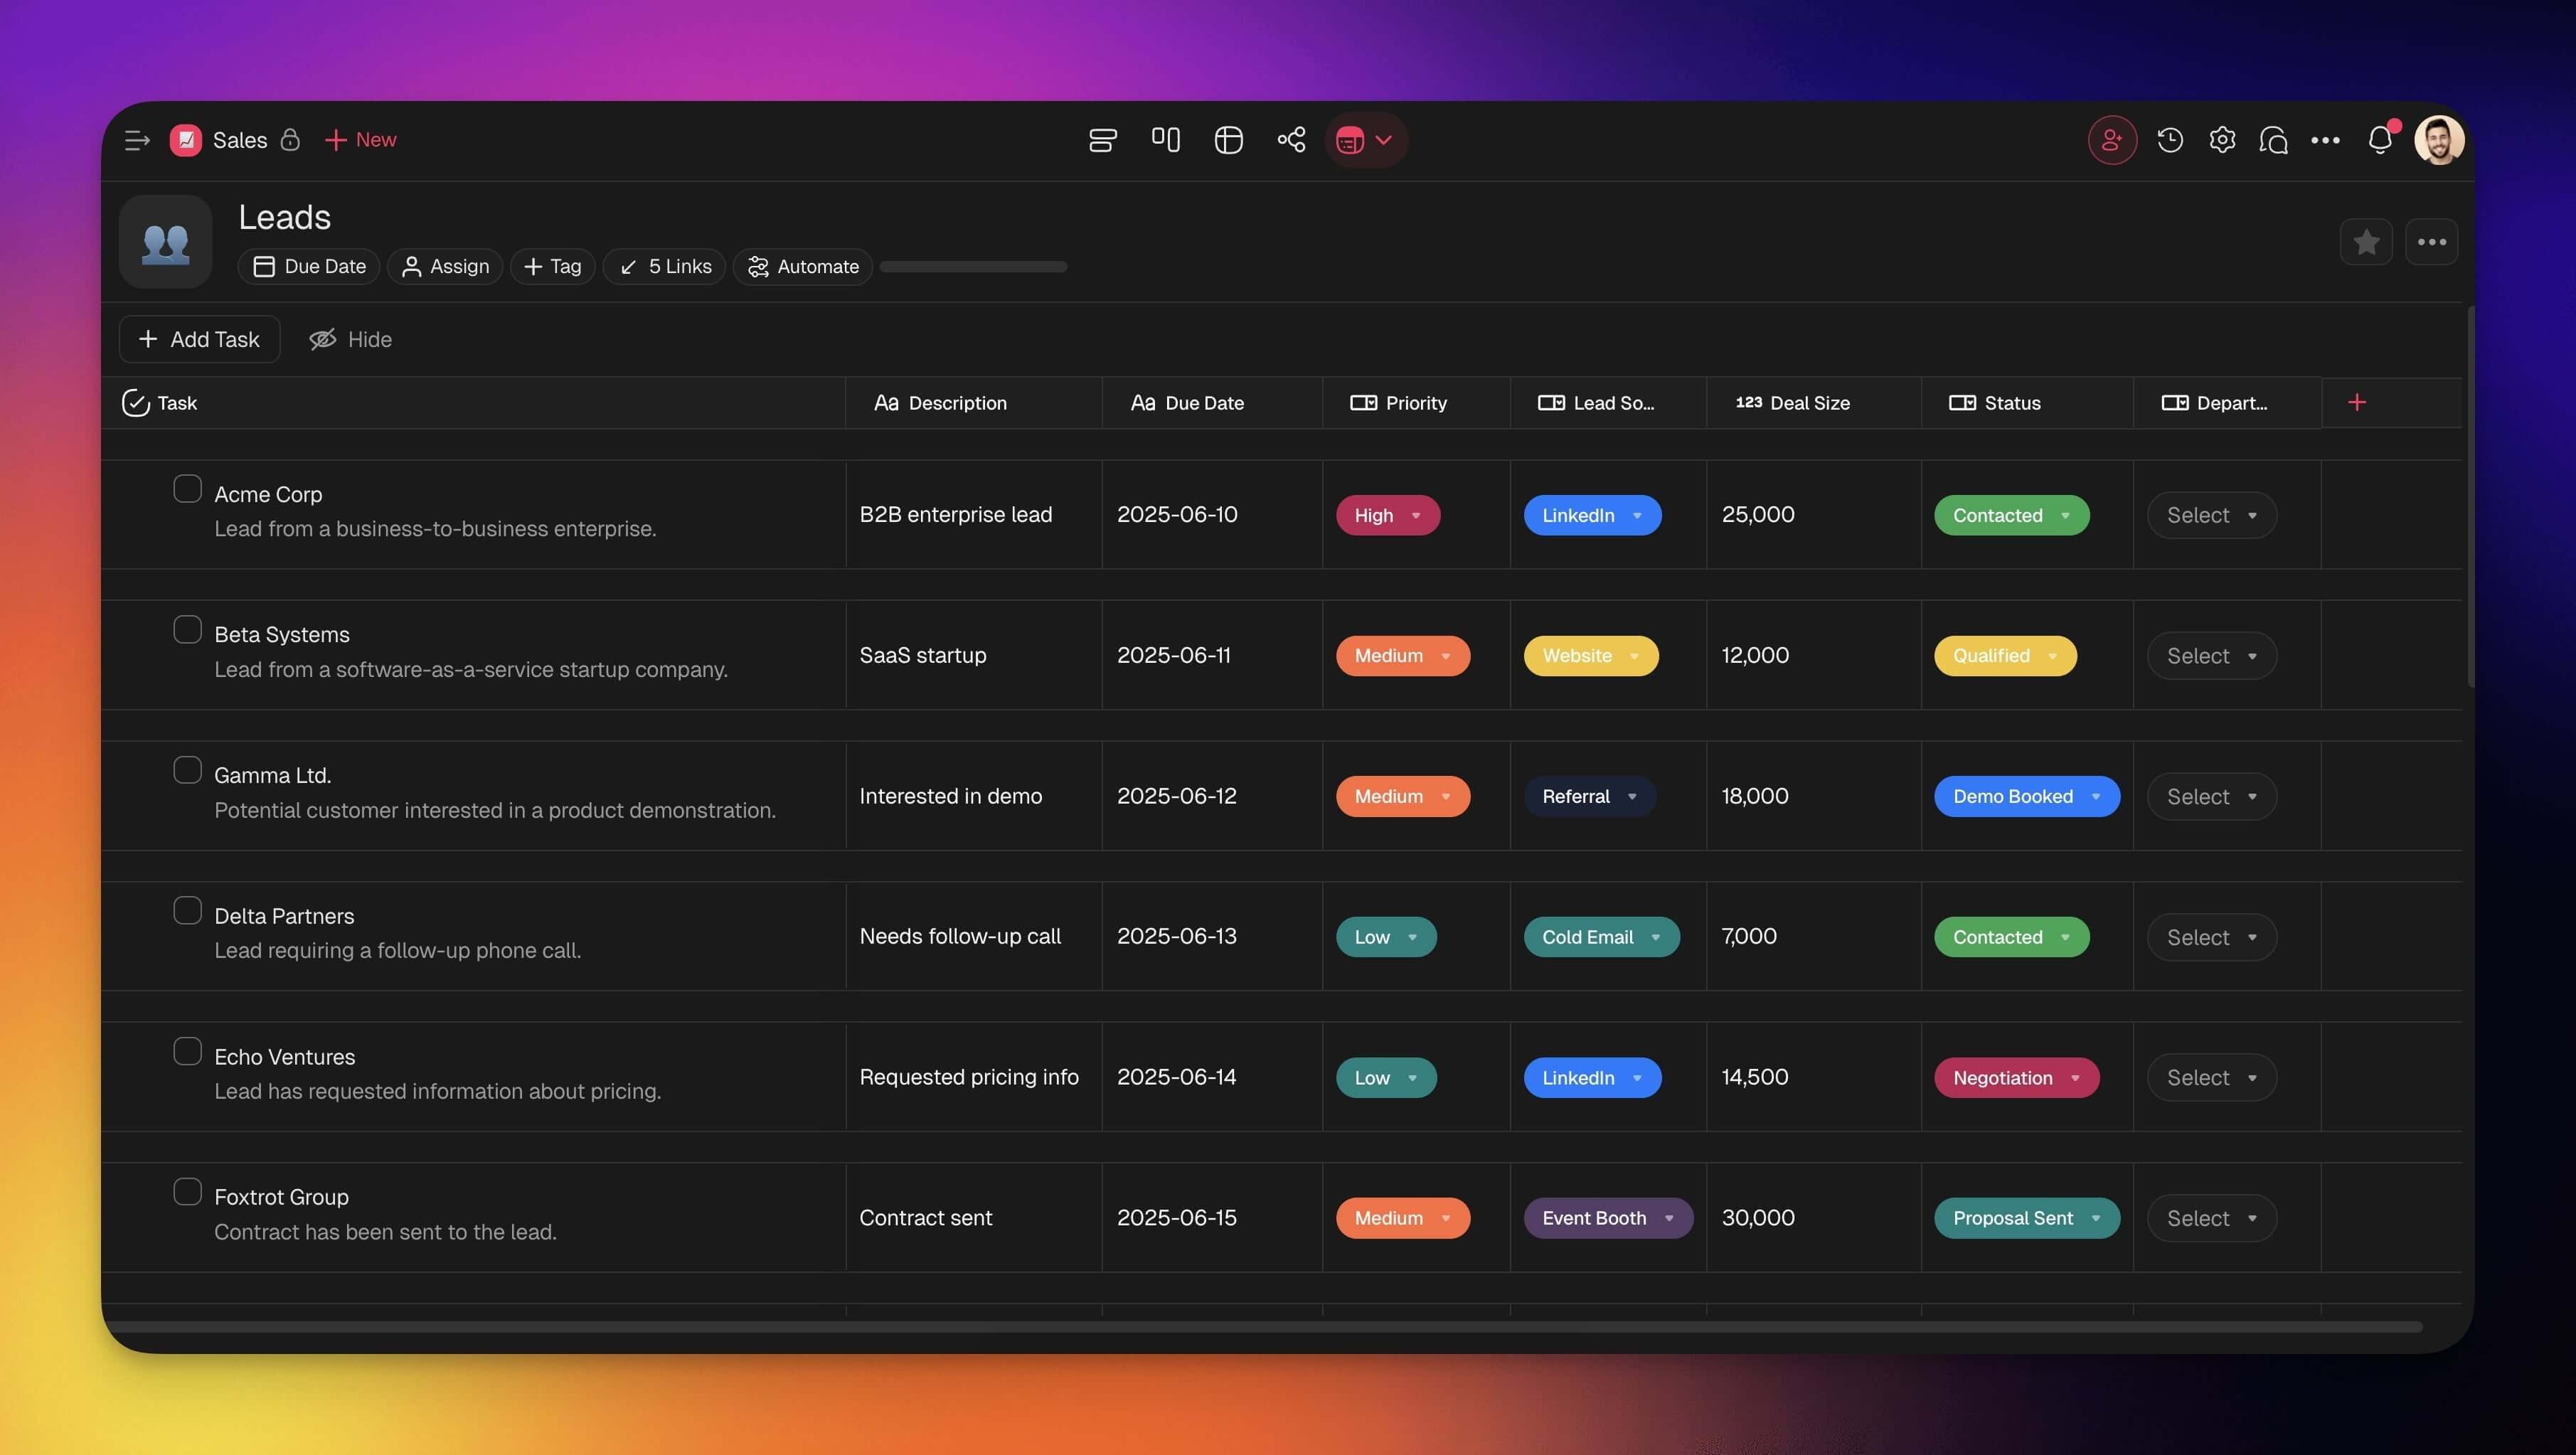
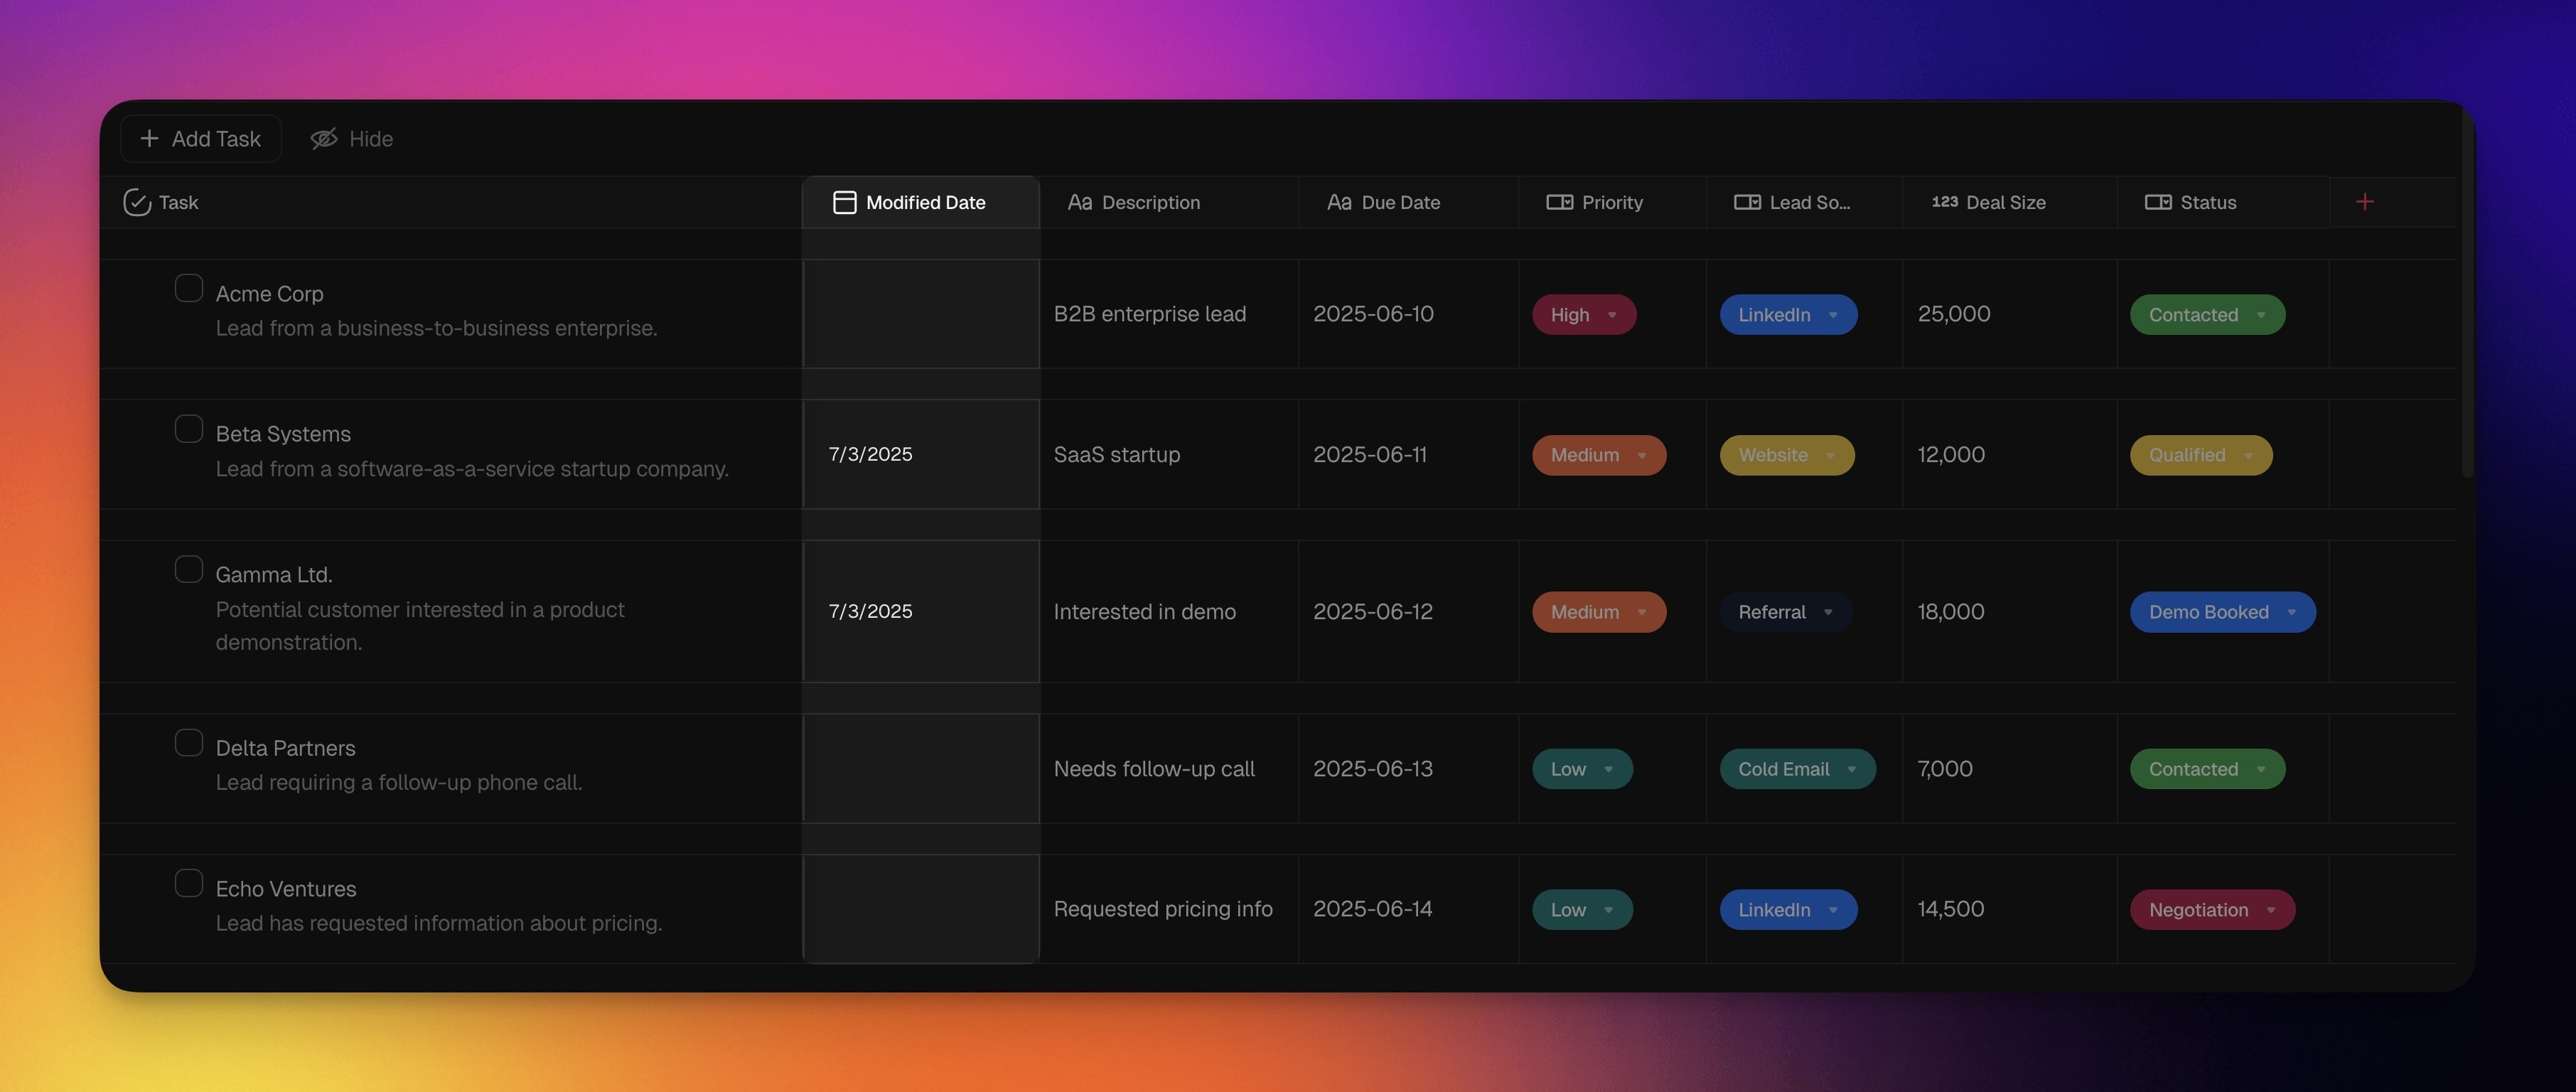
Manage Actionsheet Columns
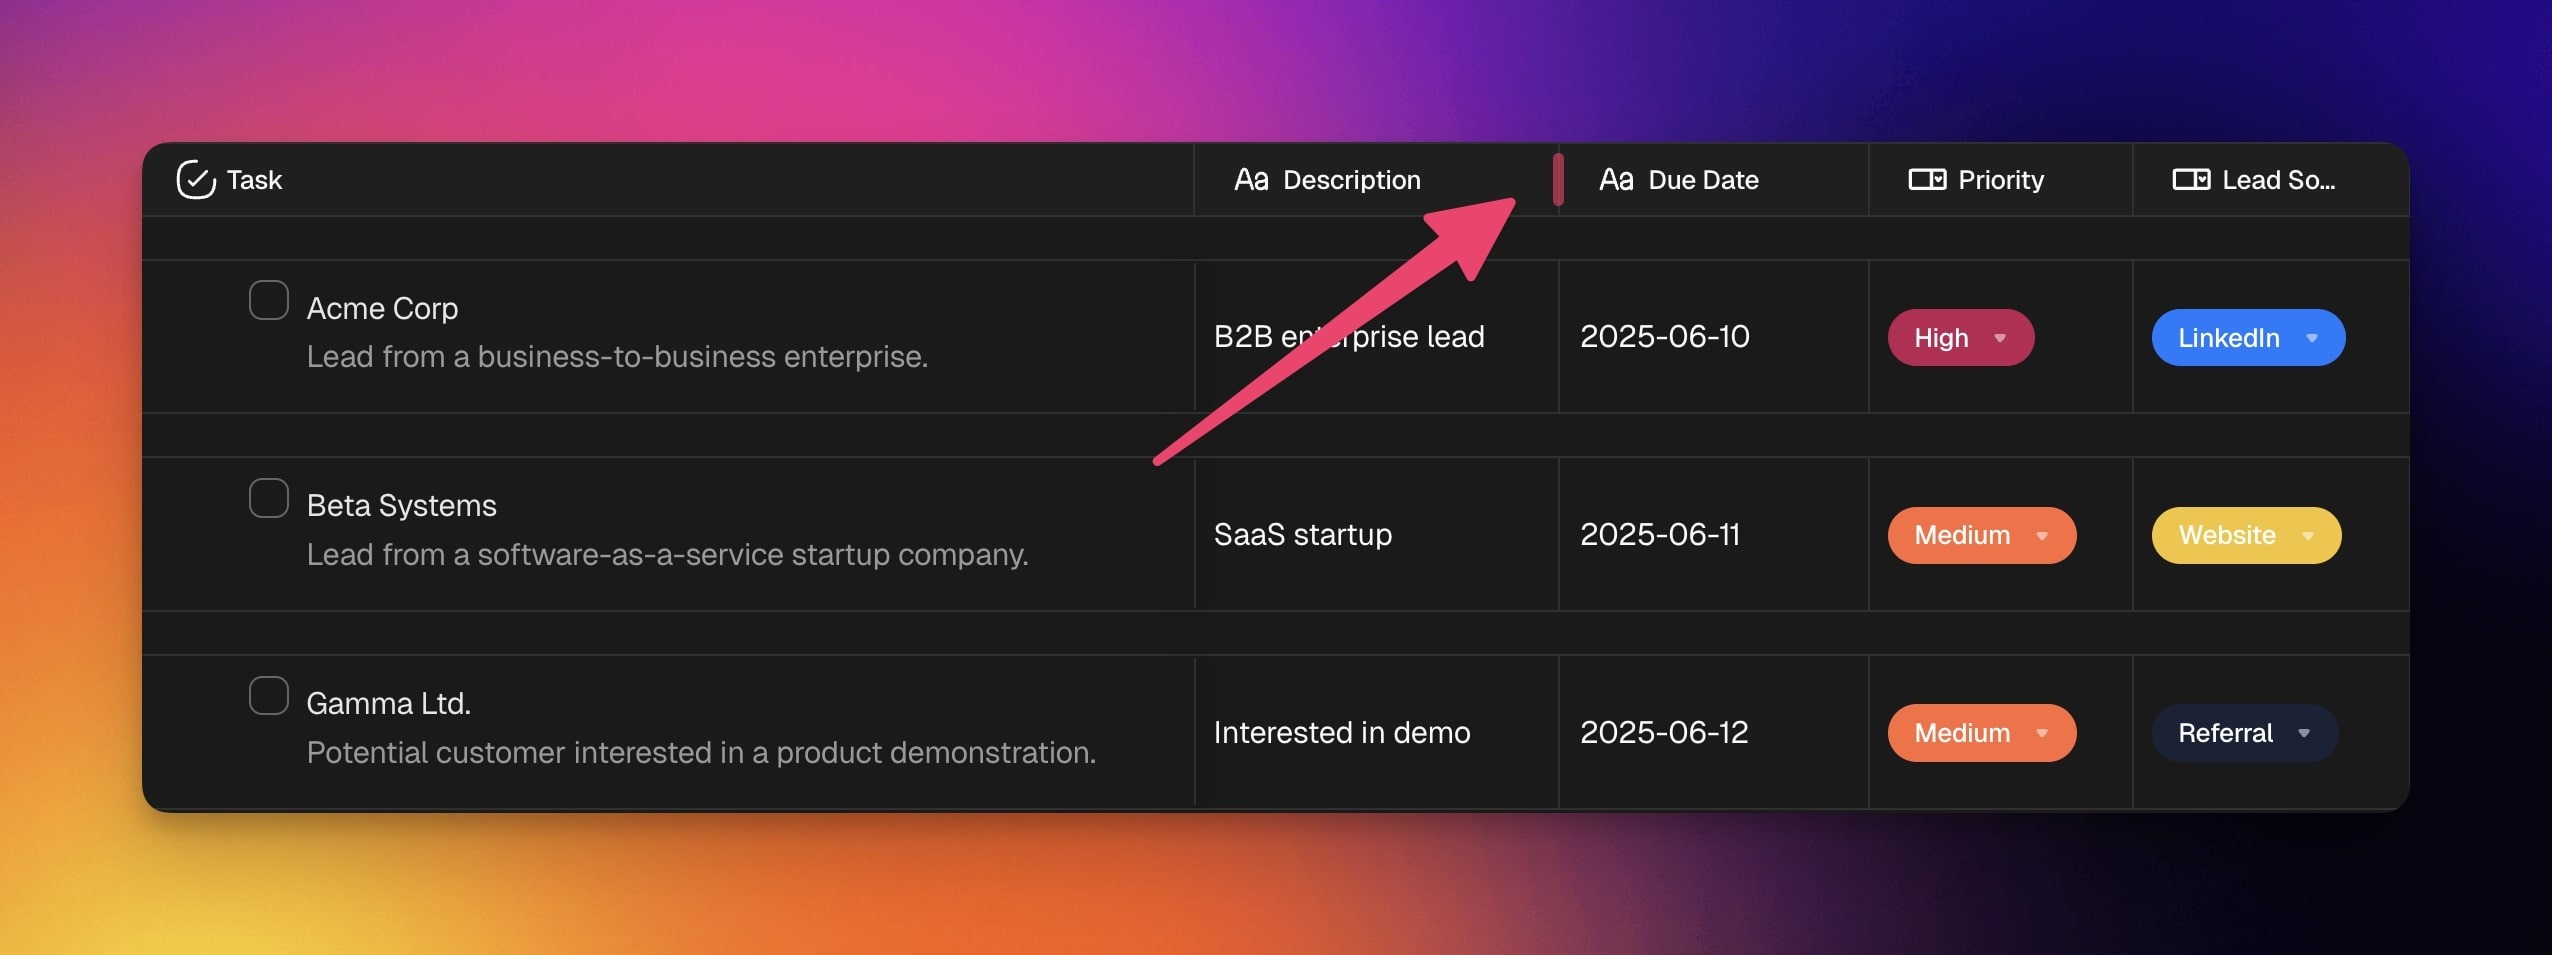
- Resize: Click and hold a column divider and drag it to the left or right.
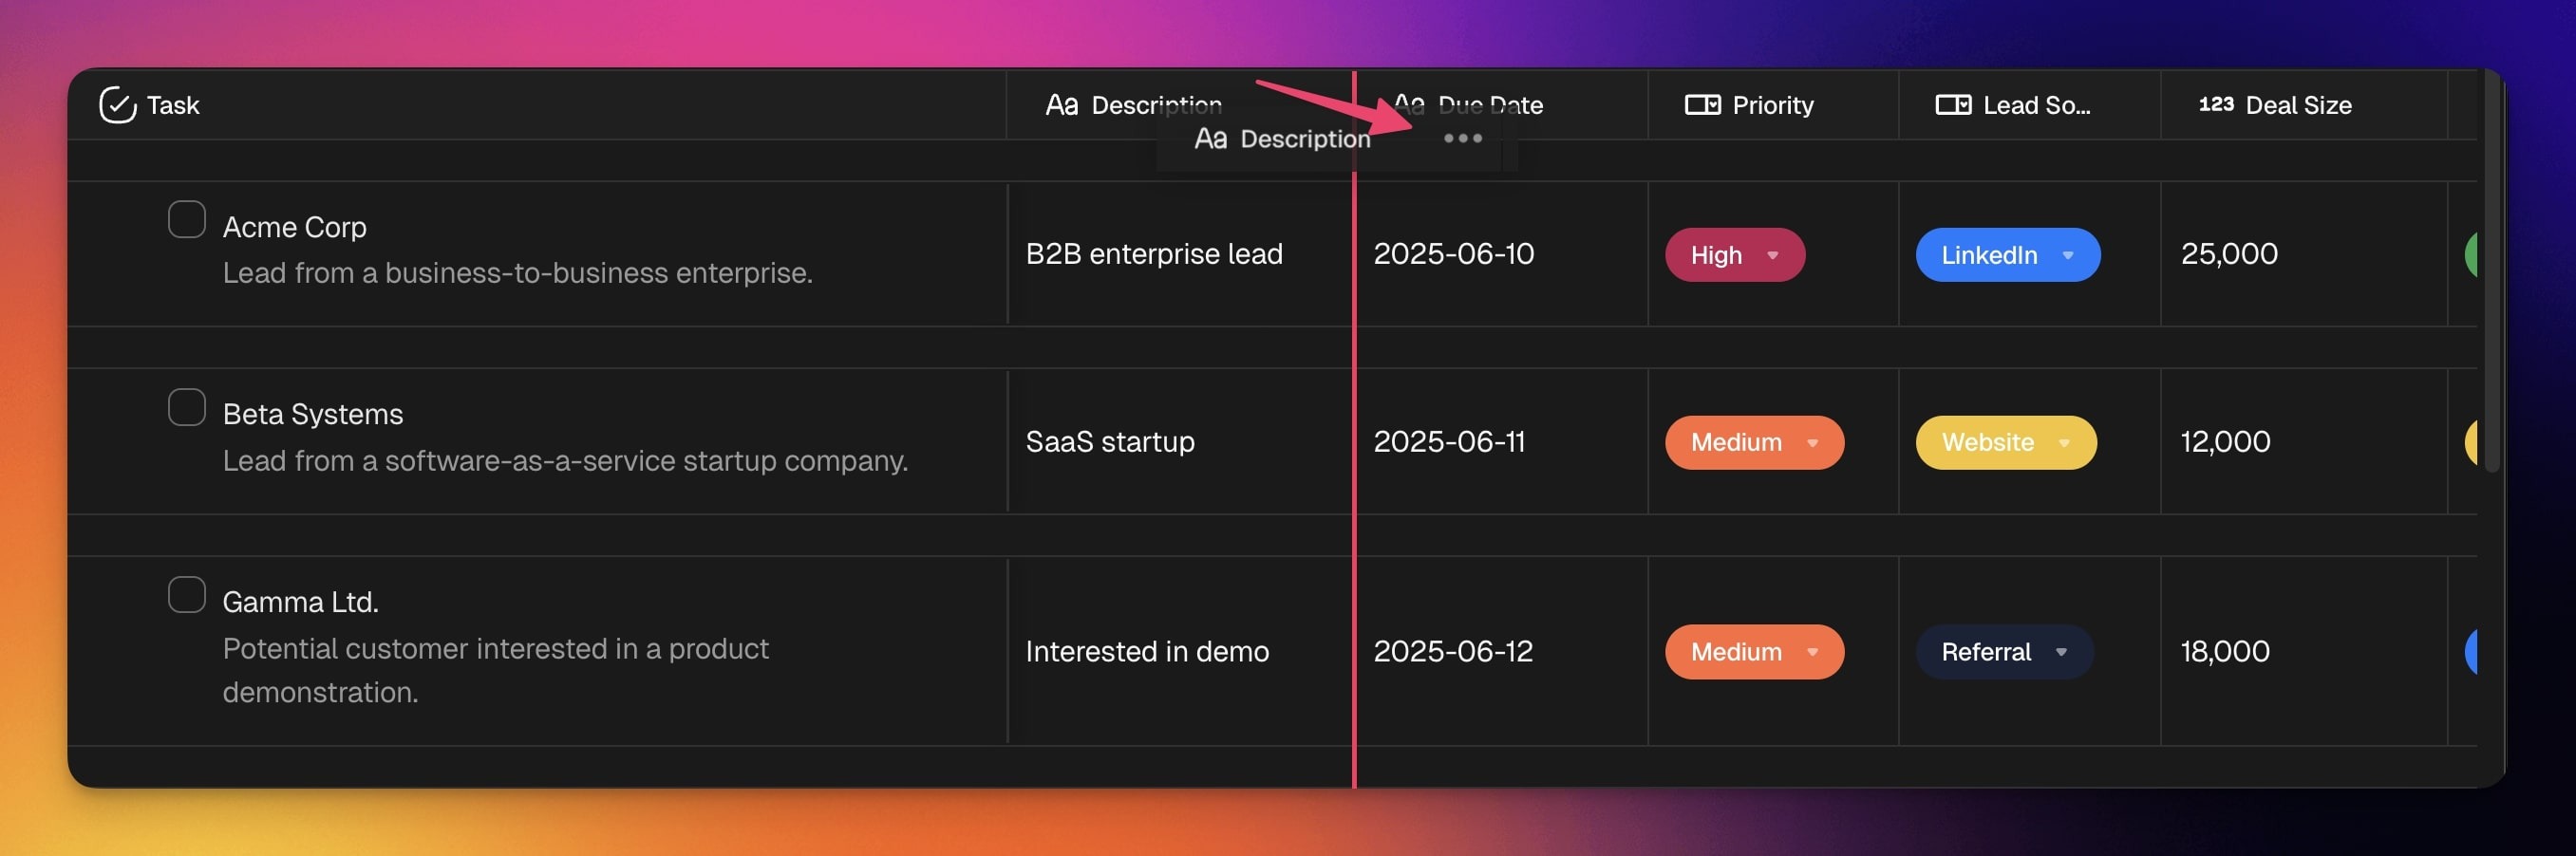
- Reorder: Click and hold a column header and drag it to the left or right.
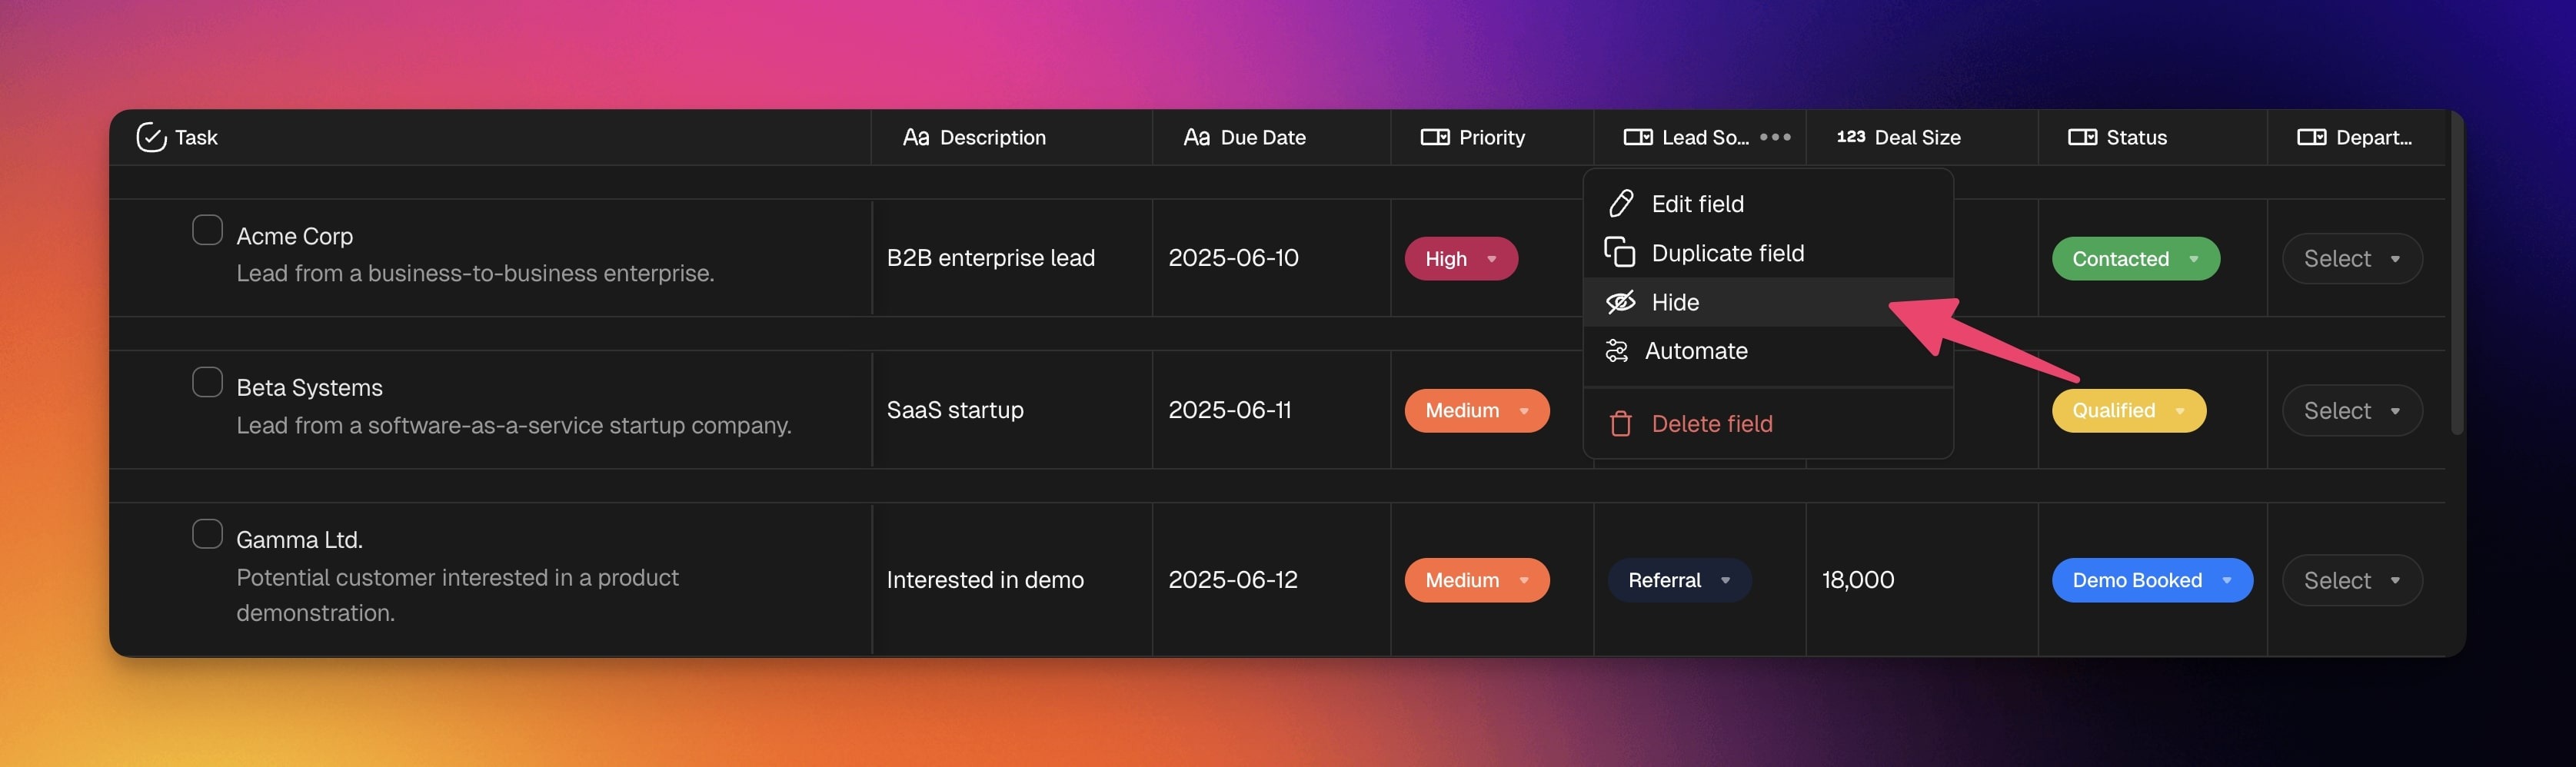
- Hide: Click ··· next to a column header ➡ Hide column.
Show : Click the ➕ button at the end of the actionsheet to add columns again.
You may need to scroll to the right to see the ➕ button.
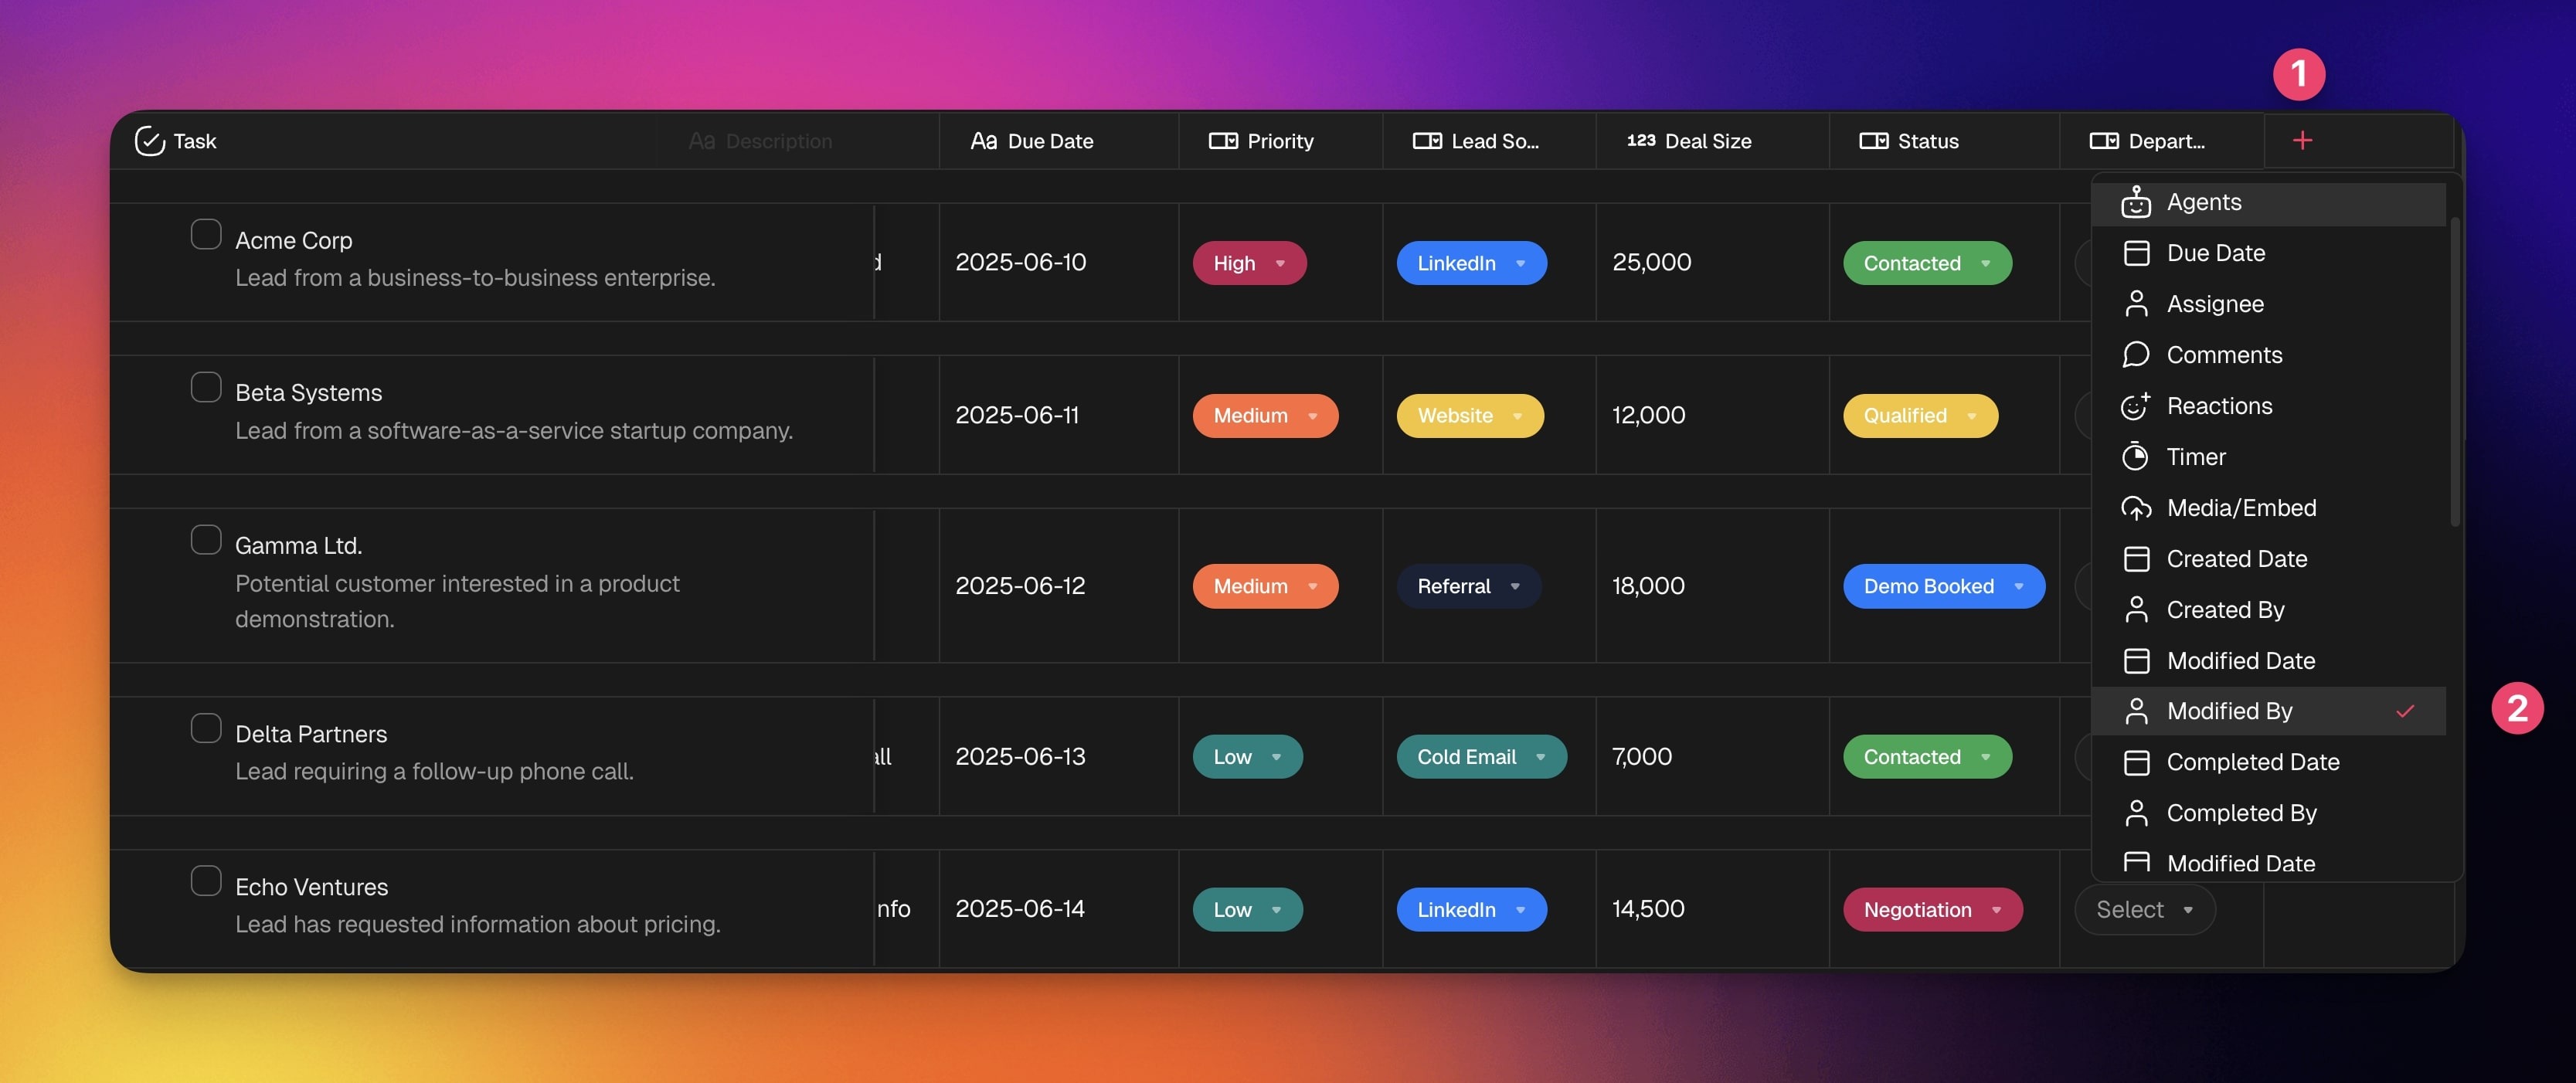
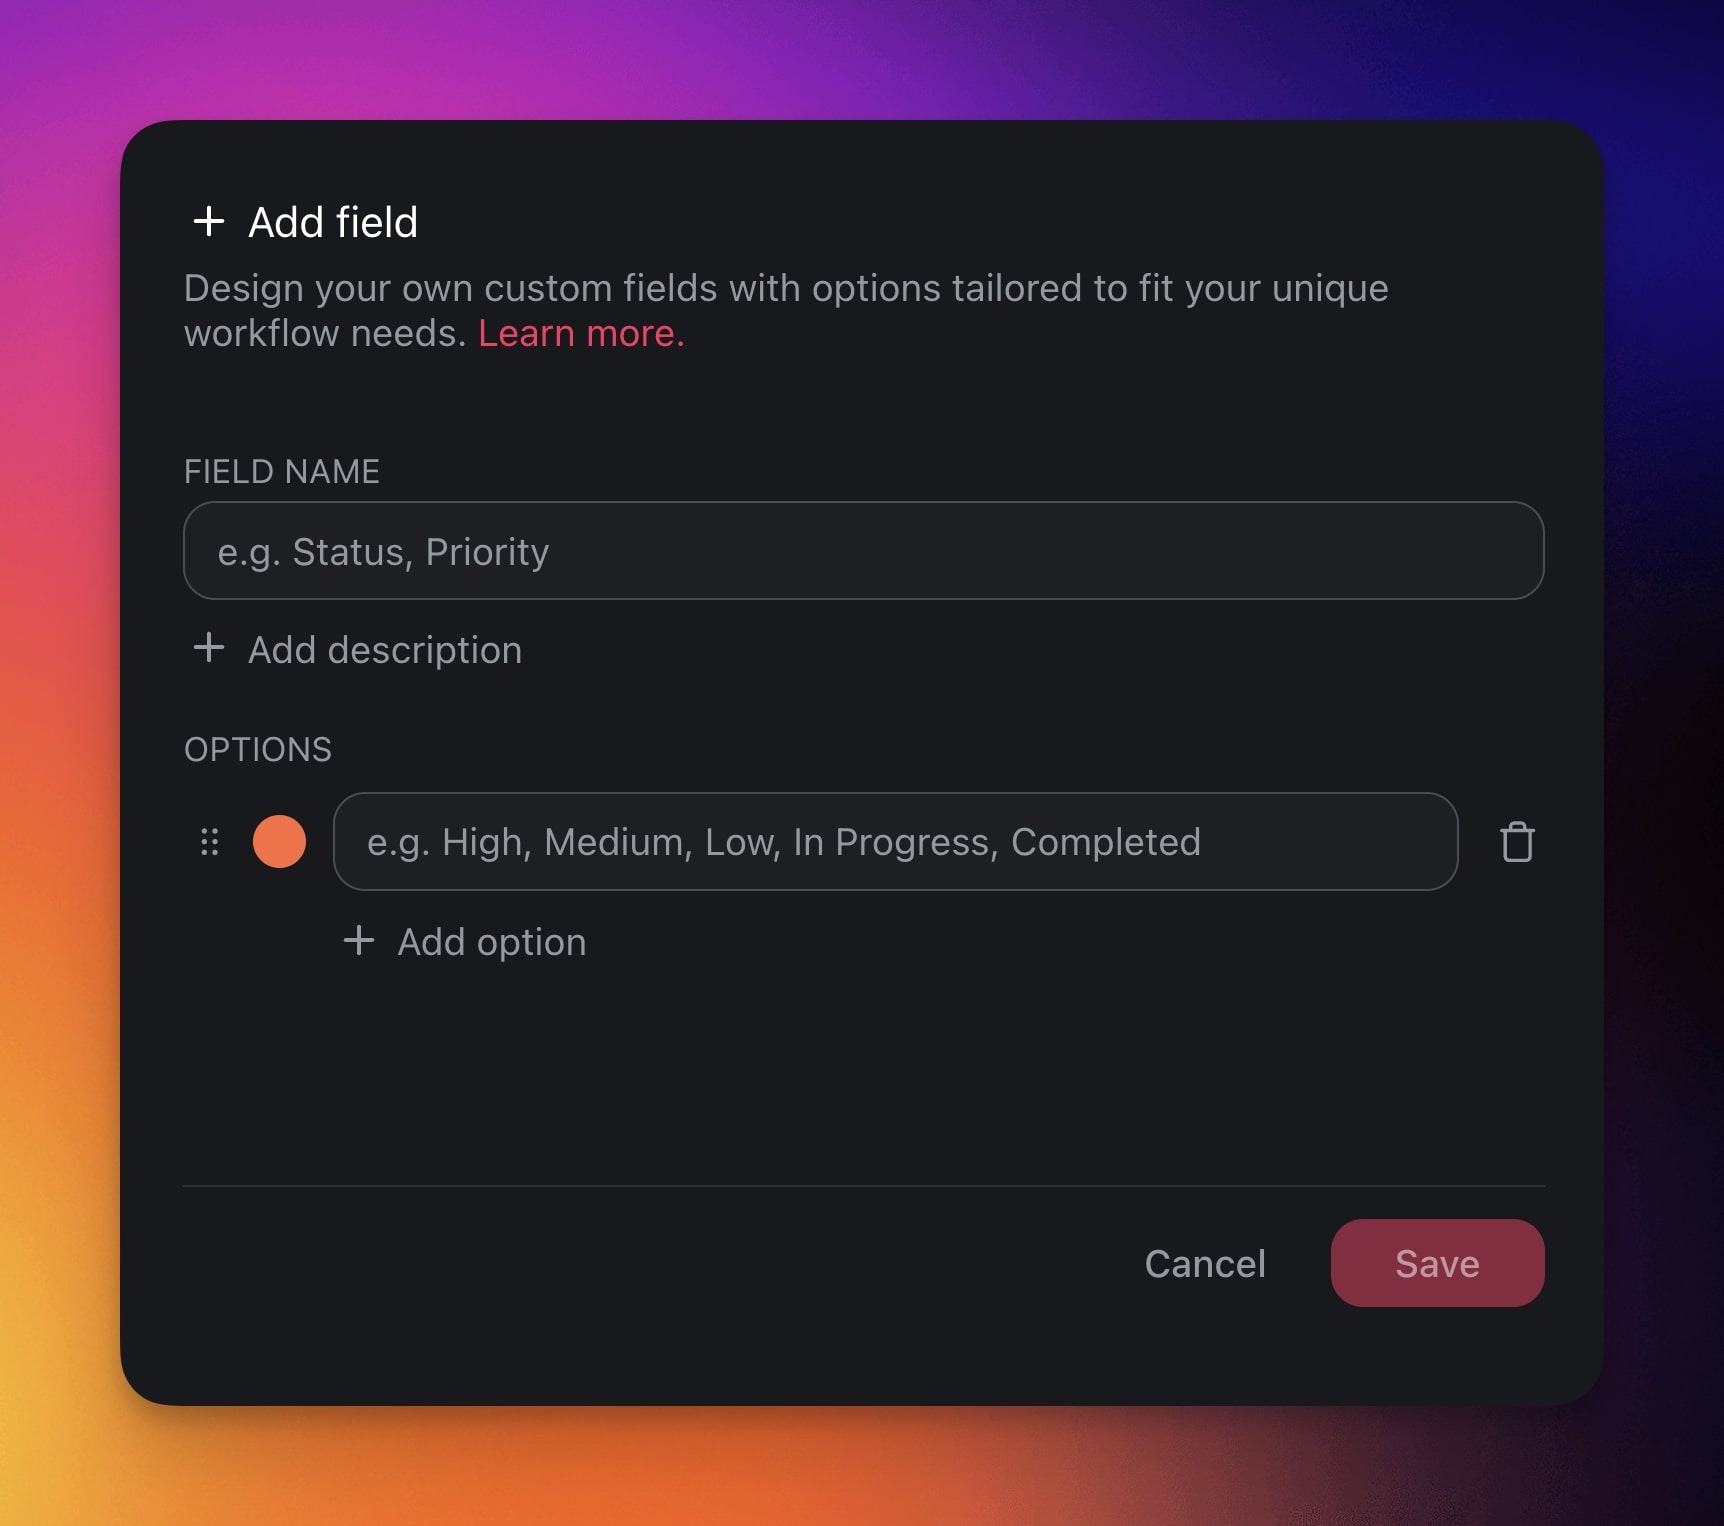
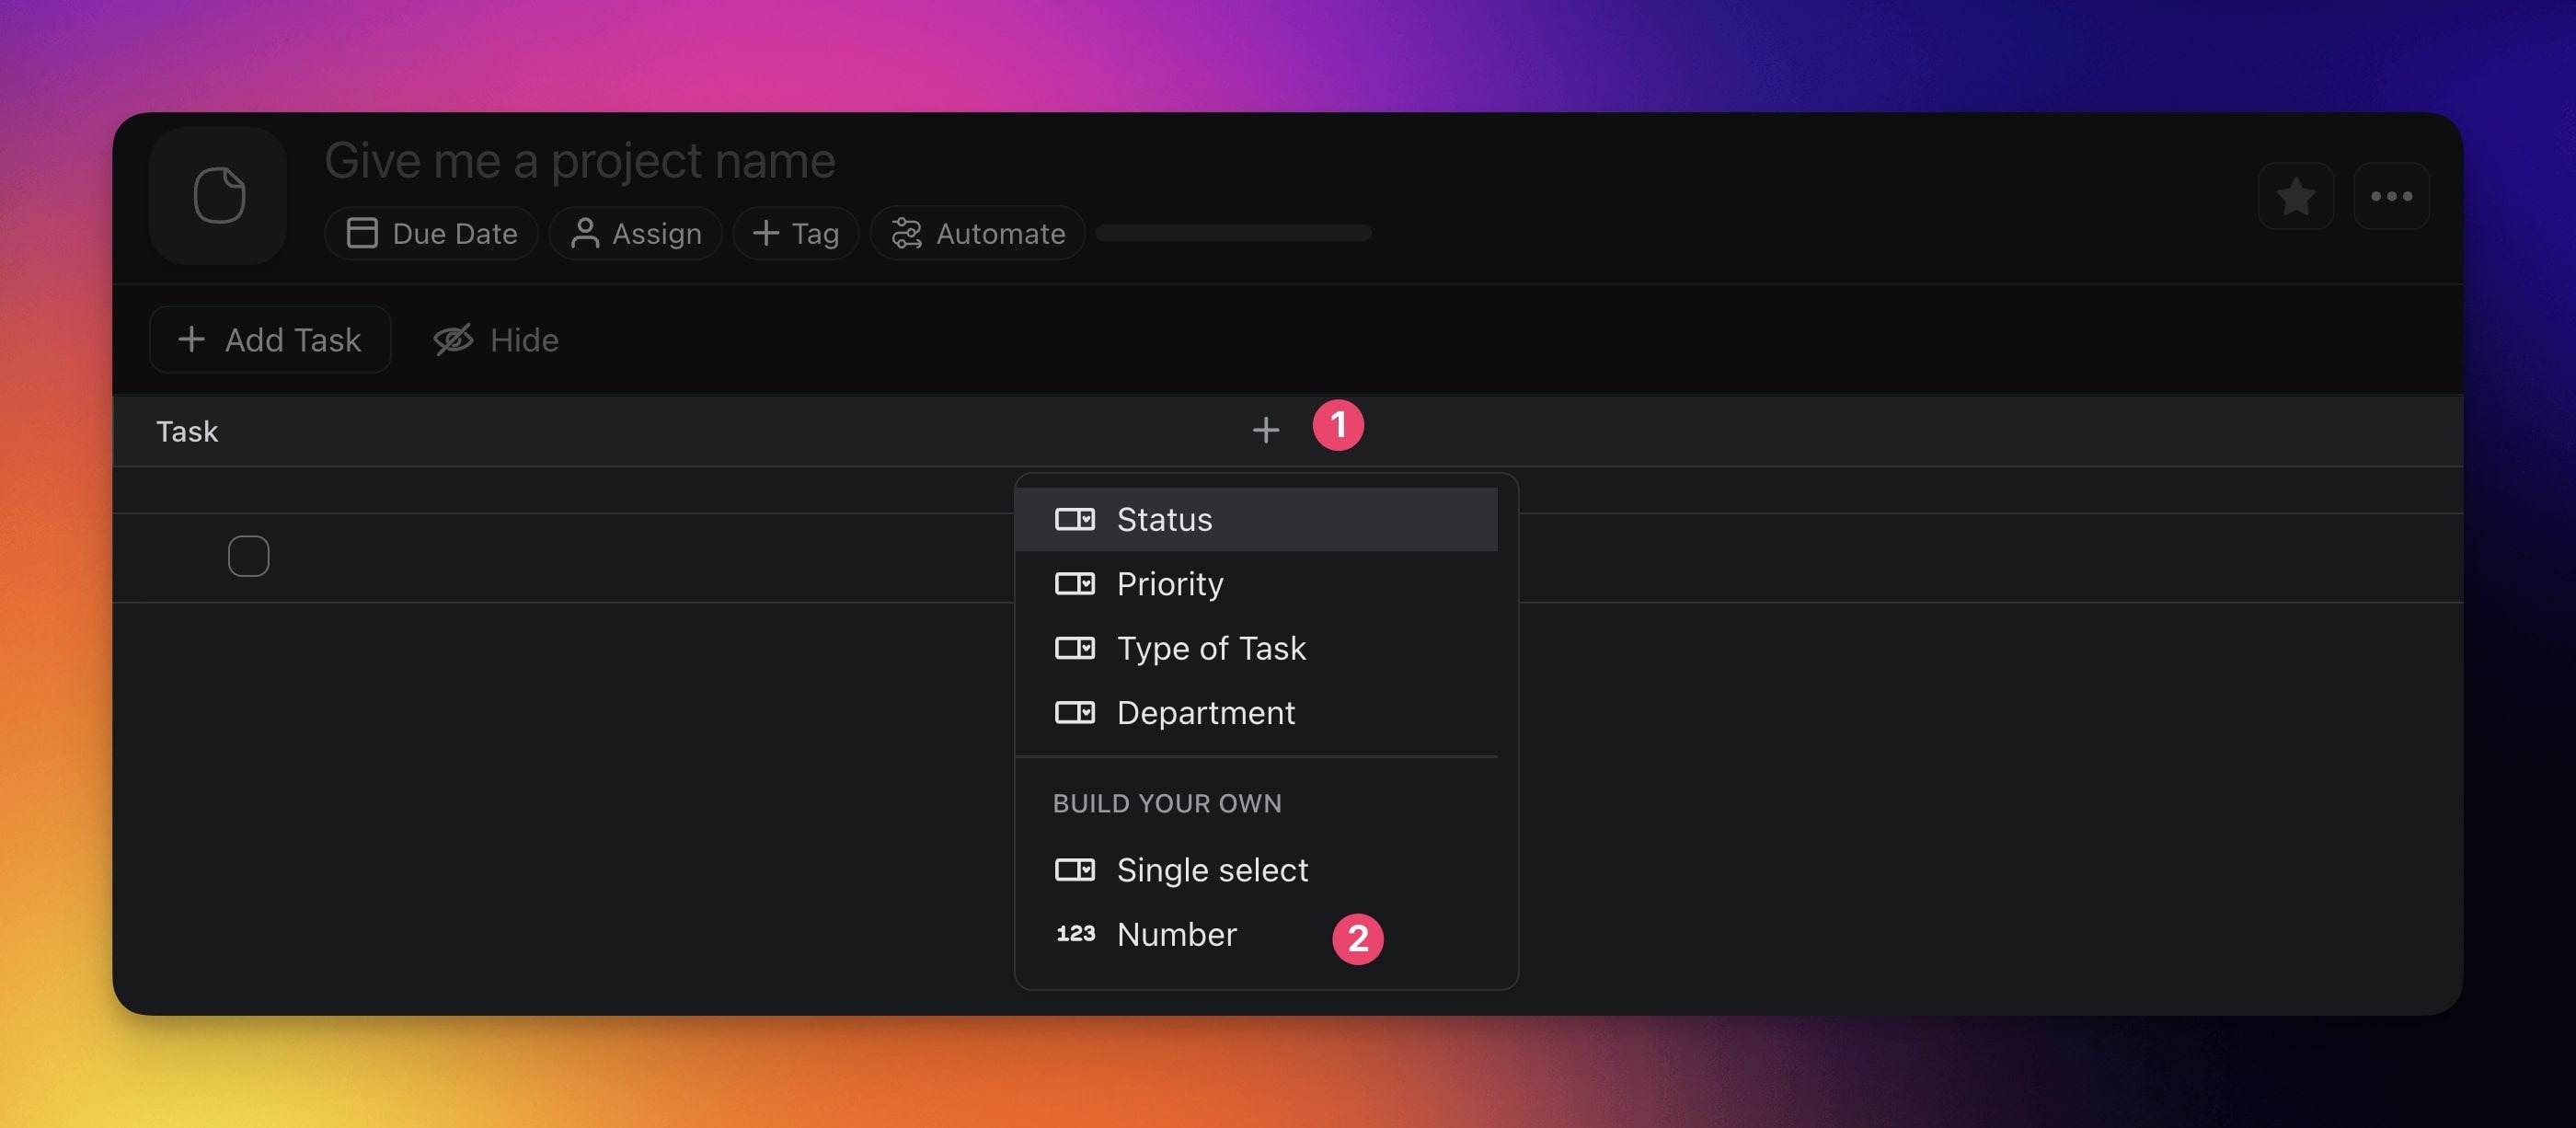
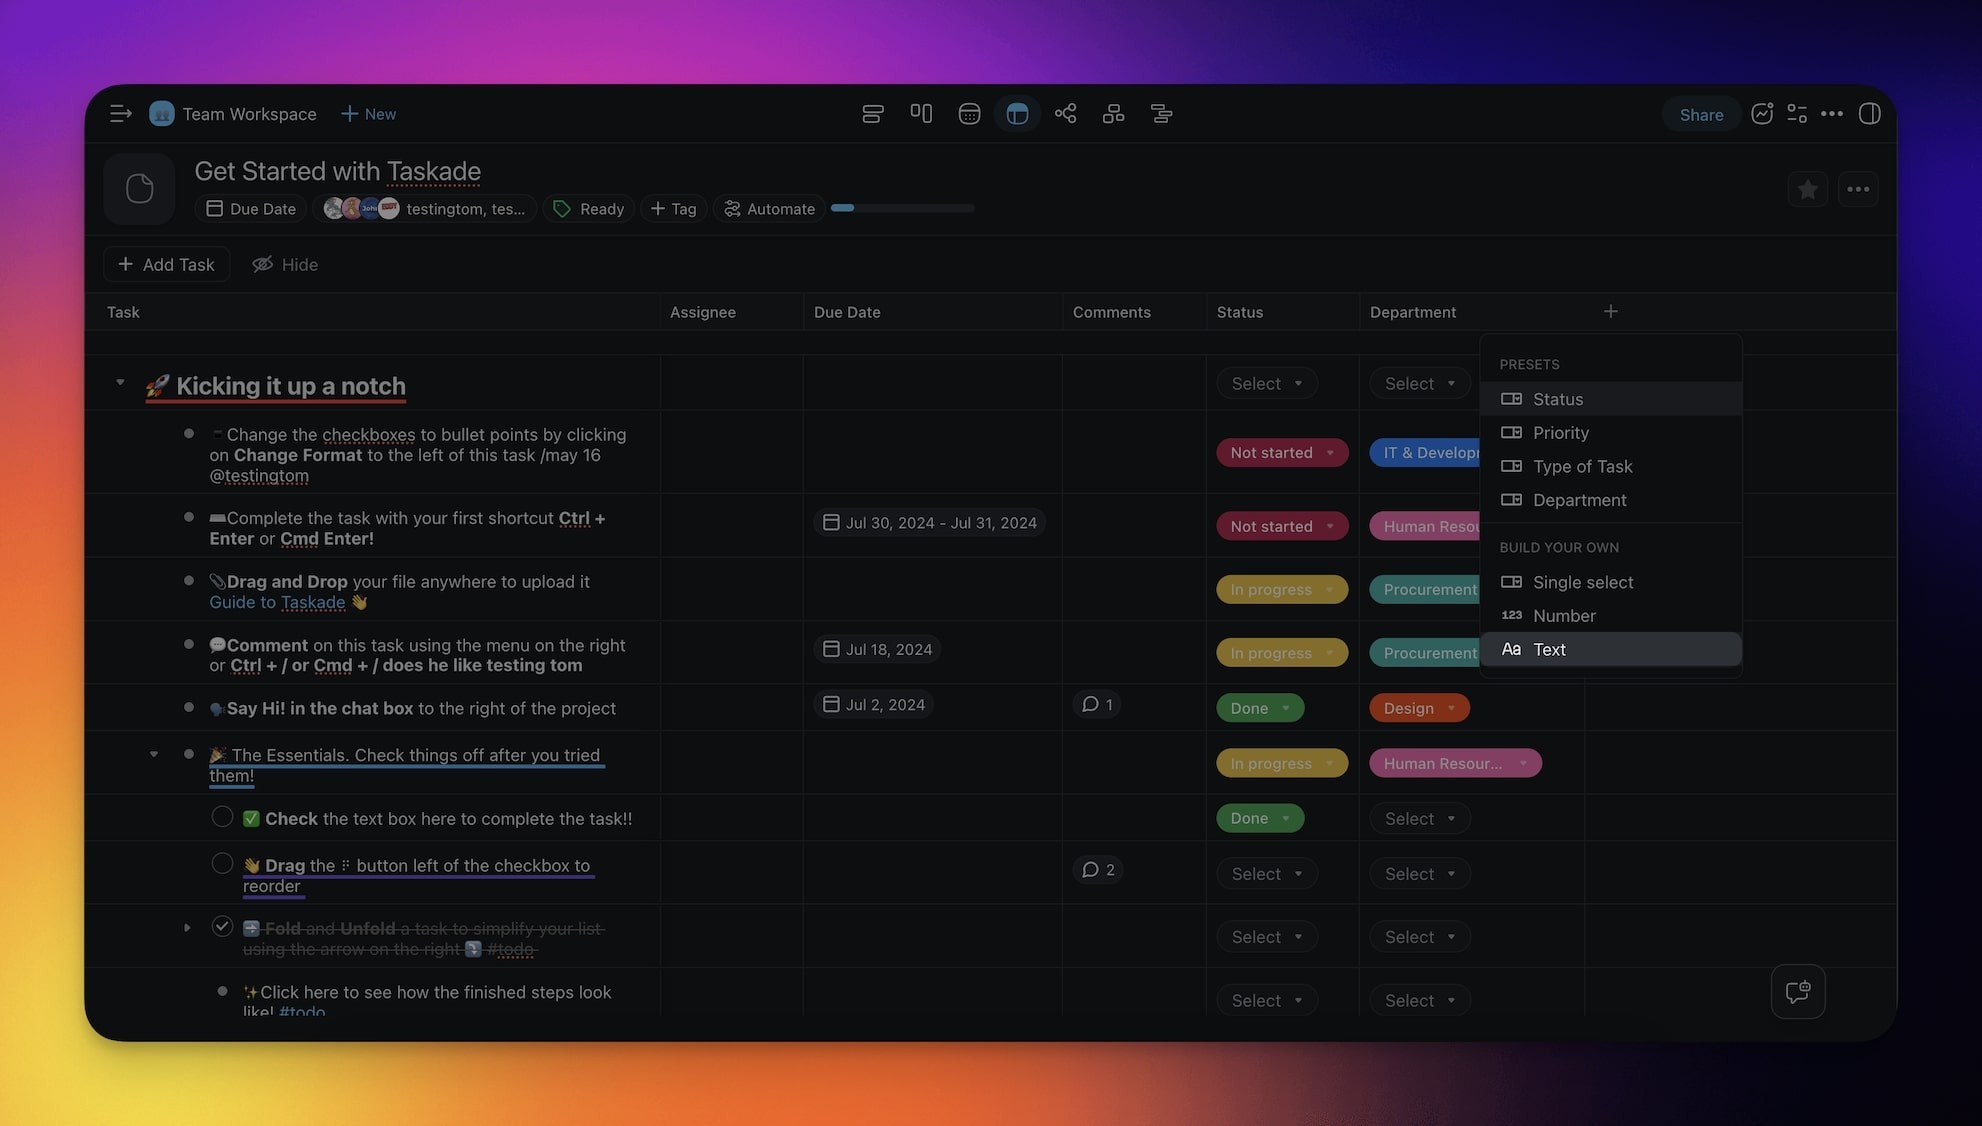
Add Custom Fields
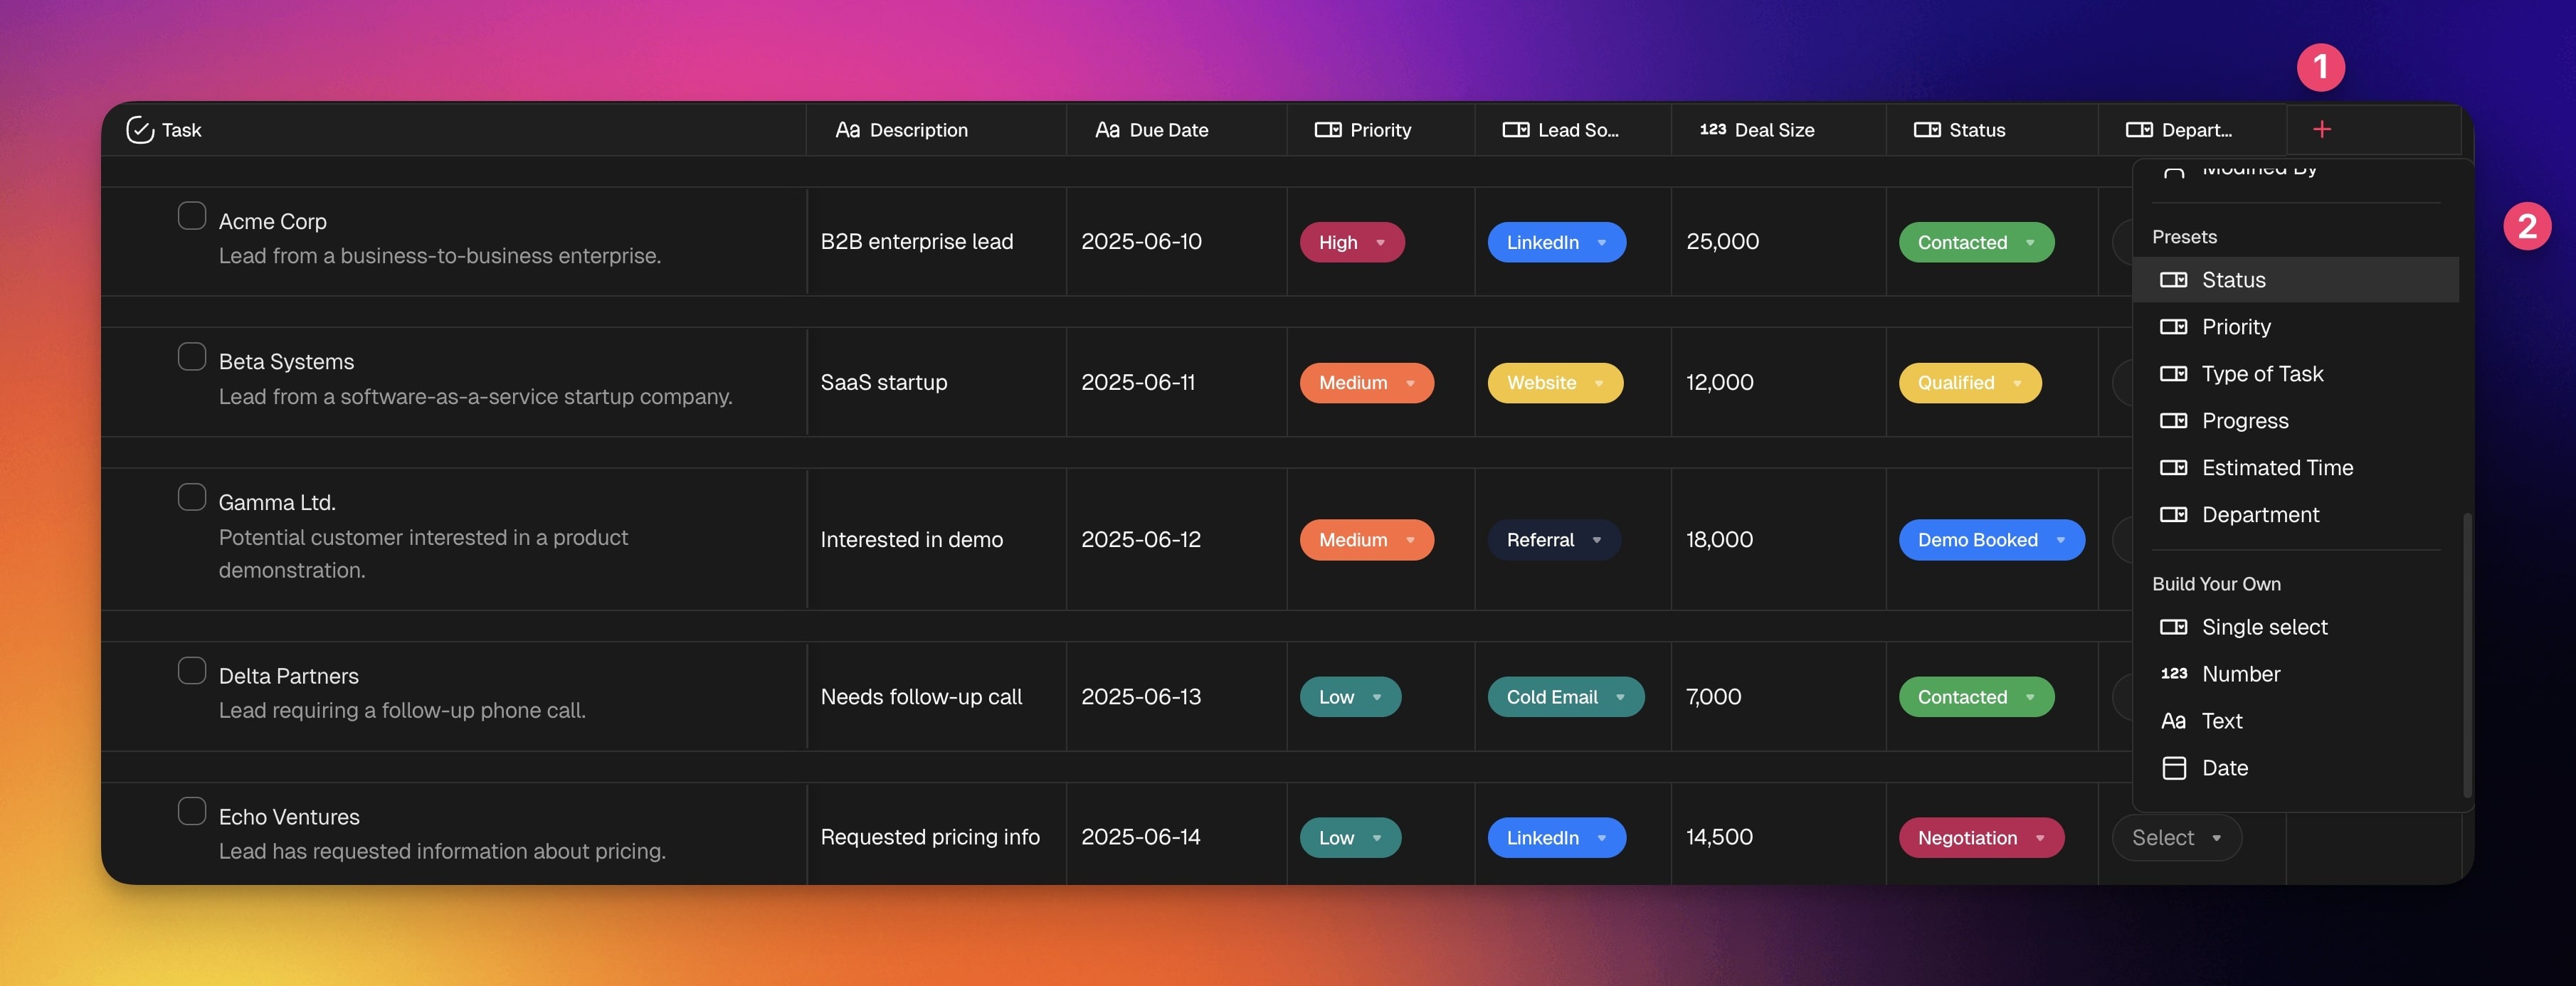
- Click the ➕ button next to the last column (you may need to scroll right).
- (method #1) Choose one of the available presets.
- (method #2) Choose Single select to add a custom field.
💡 Note: The custom fields you add in the Actionsheet view will be visible in other views. You can also add them at any time using Add-Ons.
Use Presets
Presets offer pre-defined field types to help you organize your work more effectively. Each preset is fully customizable to match the needs of your project.
Note: Actionsheet presets work across views, including Lists and Boards.
| ⚙️ Preset | 🔤 Description |
|---|---|
| Status | Tracks the progress of tasks. |
| Priority | Indicates the importance or urgency. |
| Type of Task | Categorizes tasks by their nature. |
| Progress | Shows the current progress of a task. |
| Estimated Time | Indicates the estimated task duration. |
| Department | Organizes tasks by team/department. |
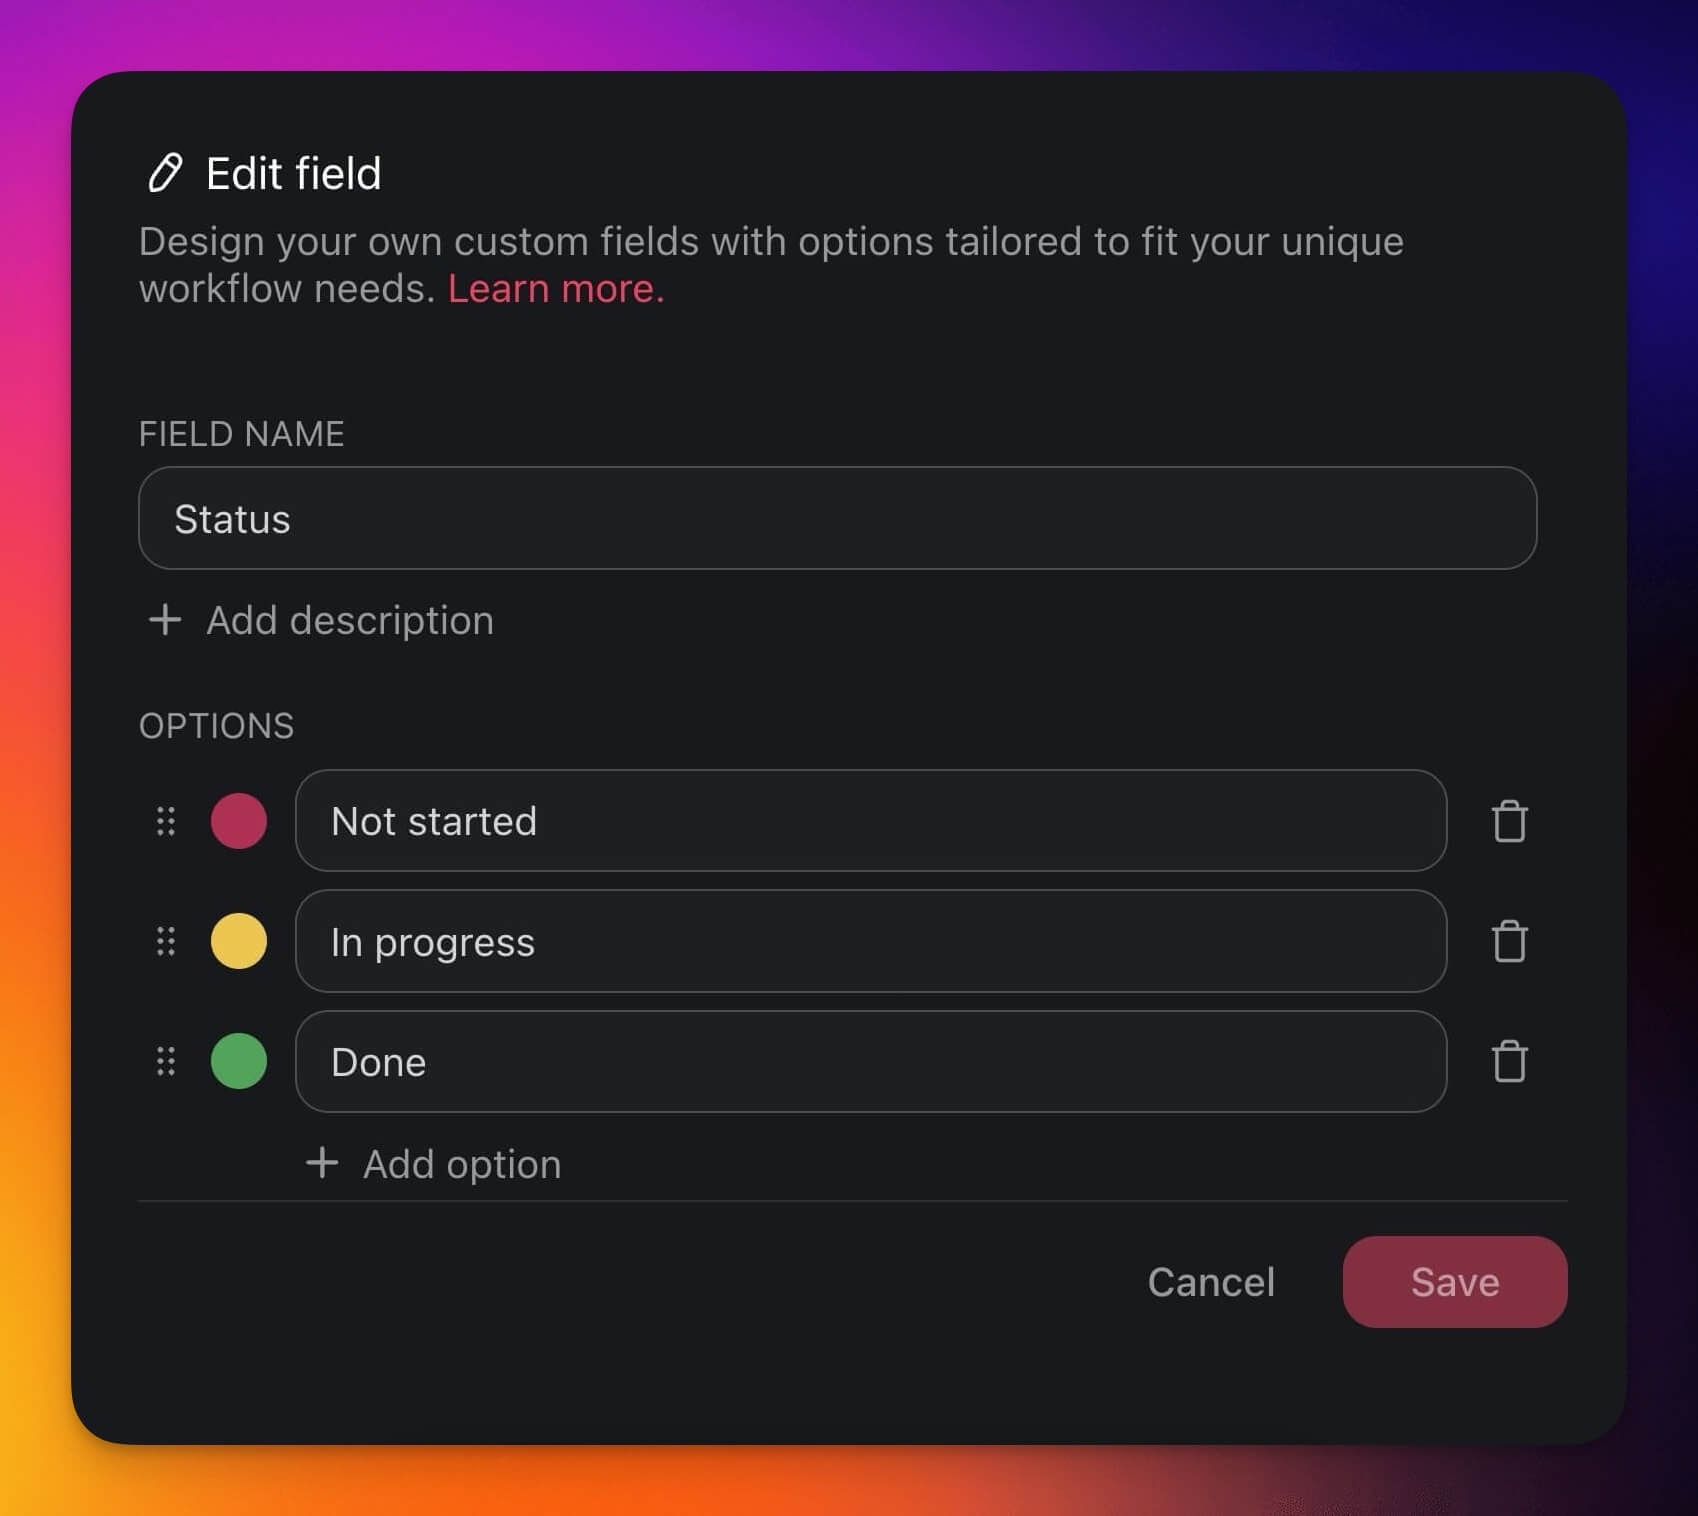
Edit Columns & Fields
- Click the ··· three dots next to a field name.
- Choose ✏️ Edit Field from the list.
- Edit the field name and available options.

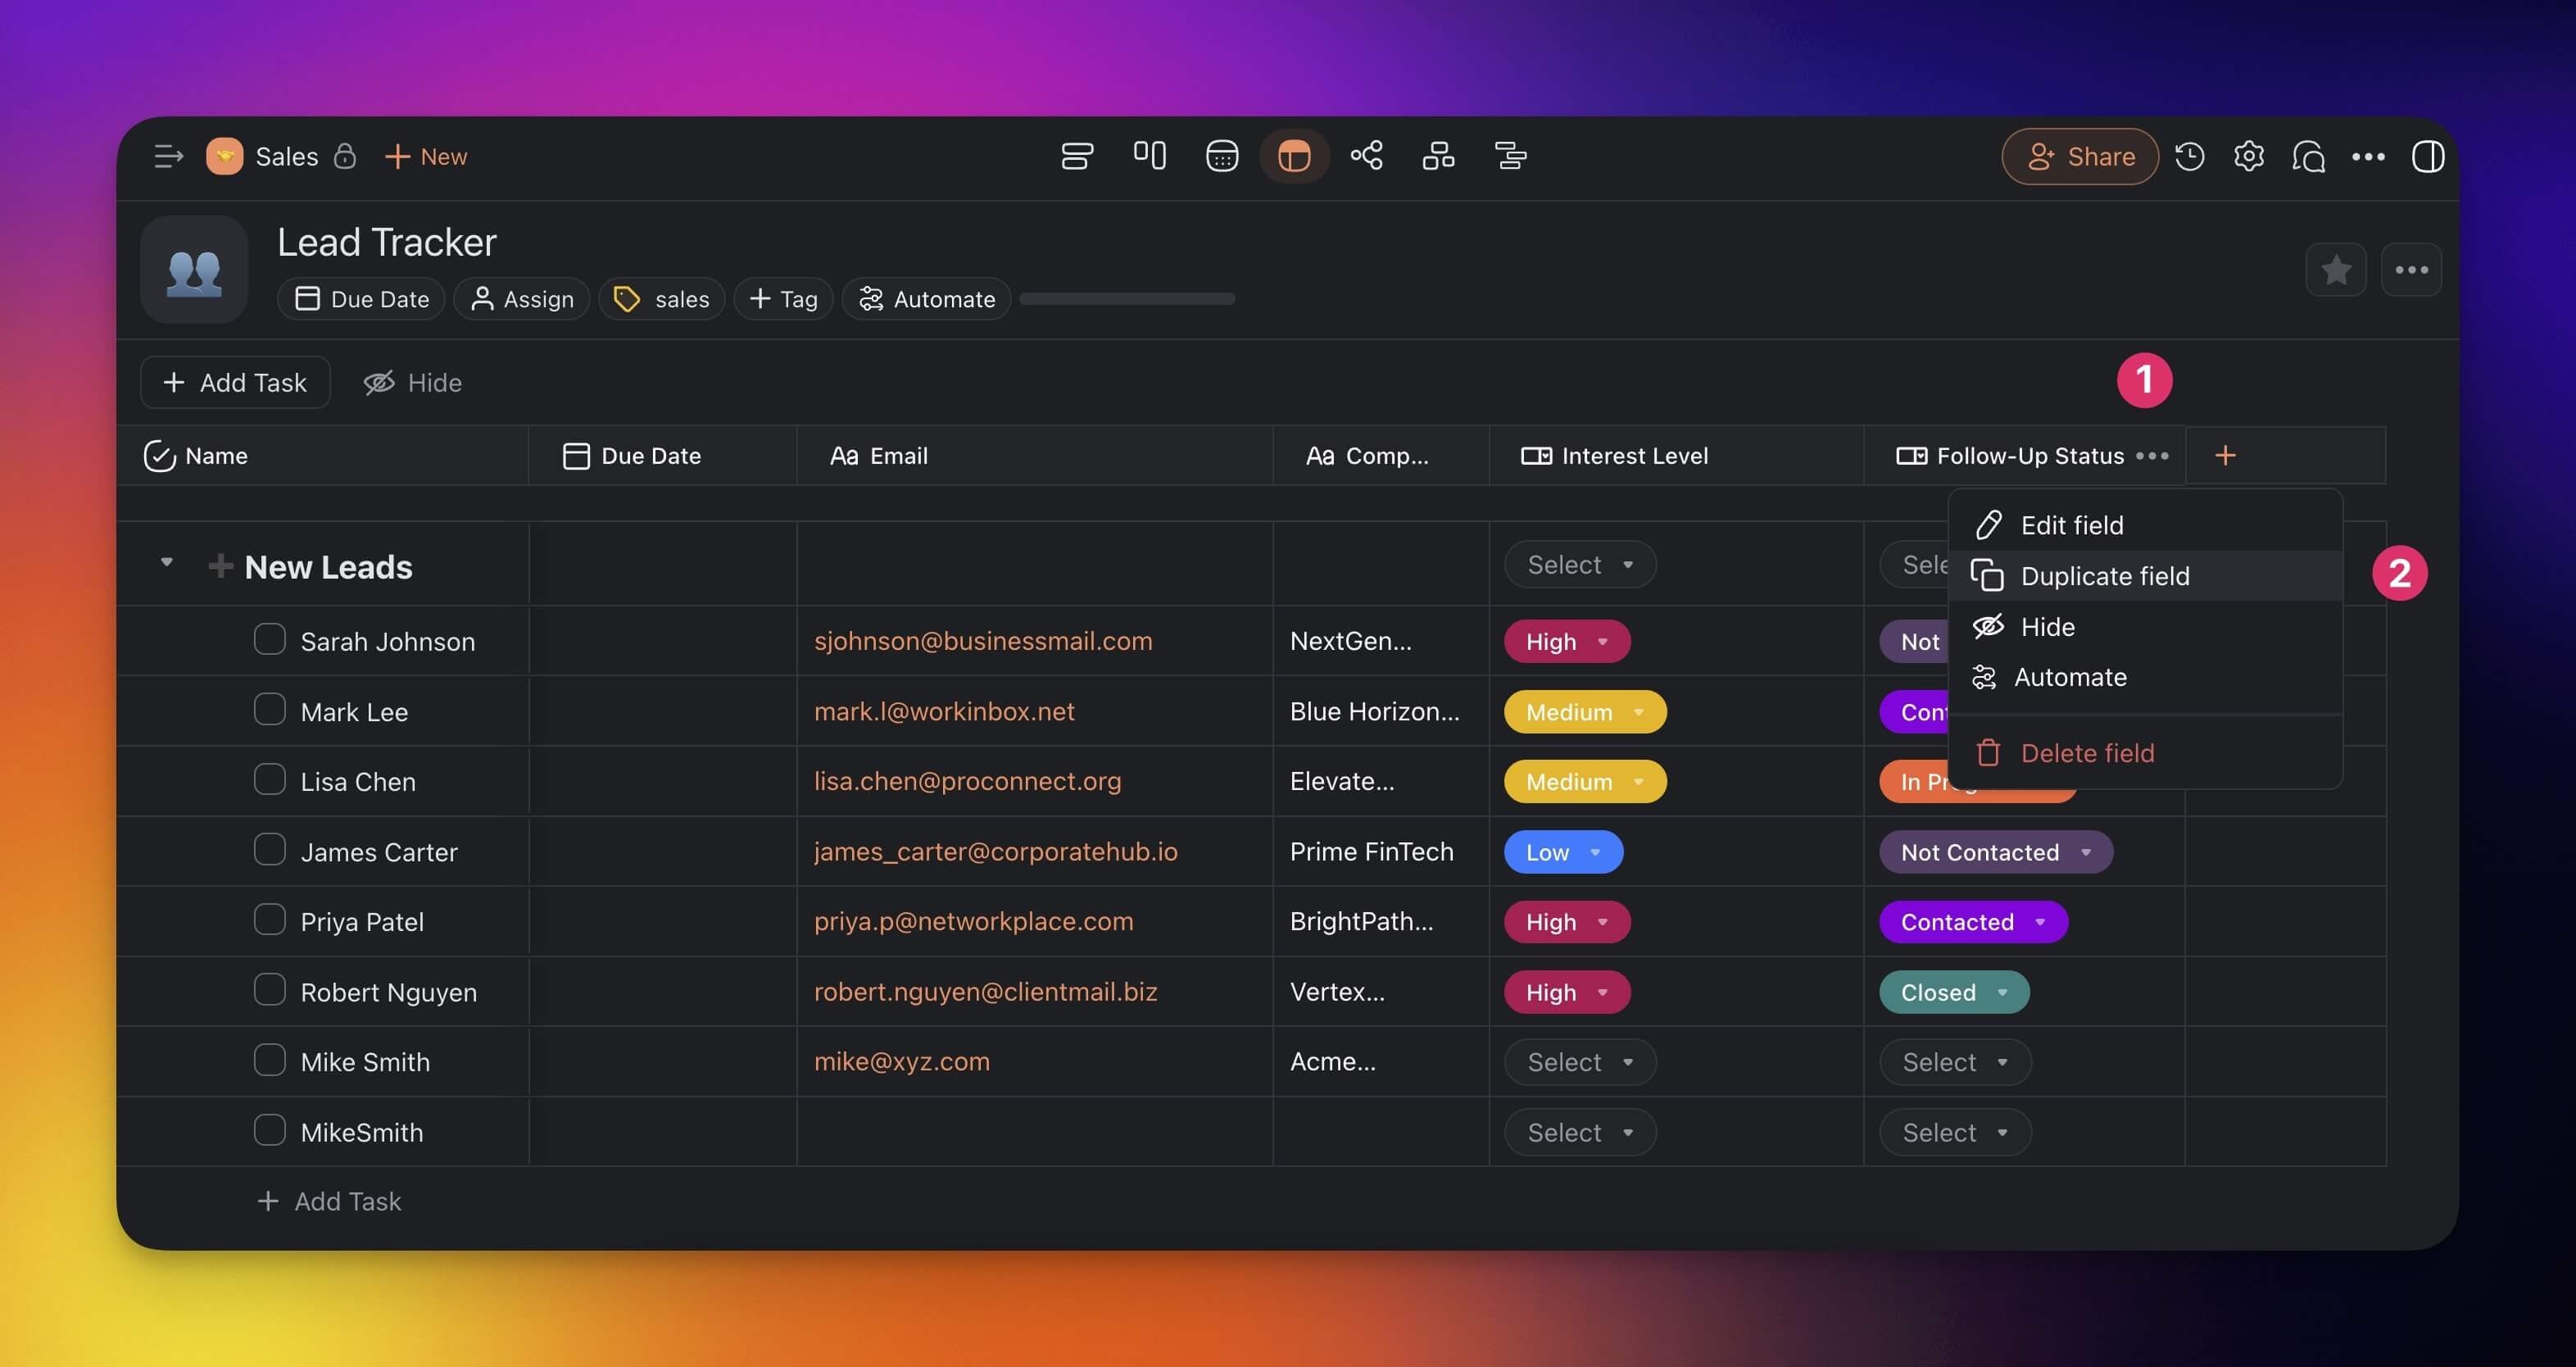
Duplicate Custom Fields
You can quickly duplicate a column with custom fields and adjust as needed.
- Click the ··· three dots next to a field name.
- Choose Duplicate field from the drop-down list.
Build Your Own Fields
Customize your Table view experience by creating fields tailored to your needs.
Add a Single Select Field
The Single select option allows you to create custom fields.
- Click the ➕ button next to the last column (you may need to scroll right).
- Choose Single select from the drop-down list.
Not sure where to start? Here are a few ideas:
| ⚙️ Preset | 🔤 Description |
|---|---|
| Project Phase | Mark the phase of the project. |
| Milestone | Signify project checkpoints. |
| Client | Associate tasks with specific clients. |
| Location | Specifies the location for tasks. |
| Cost | Lists the budget or actual cost. |
 |
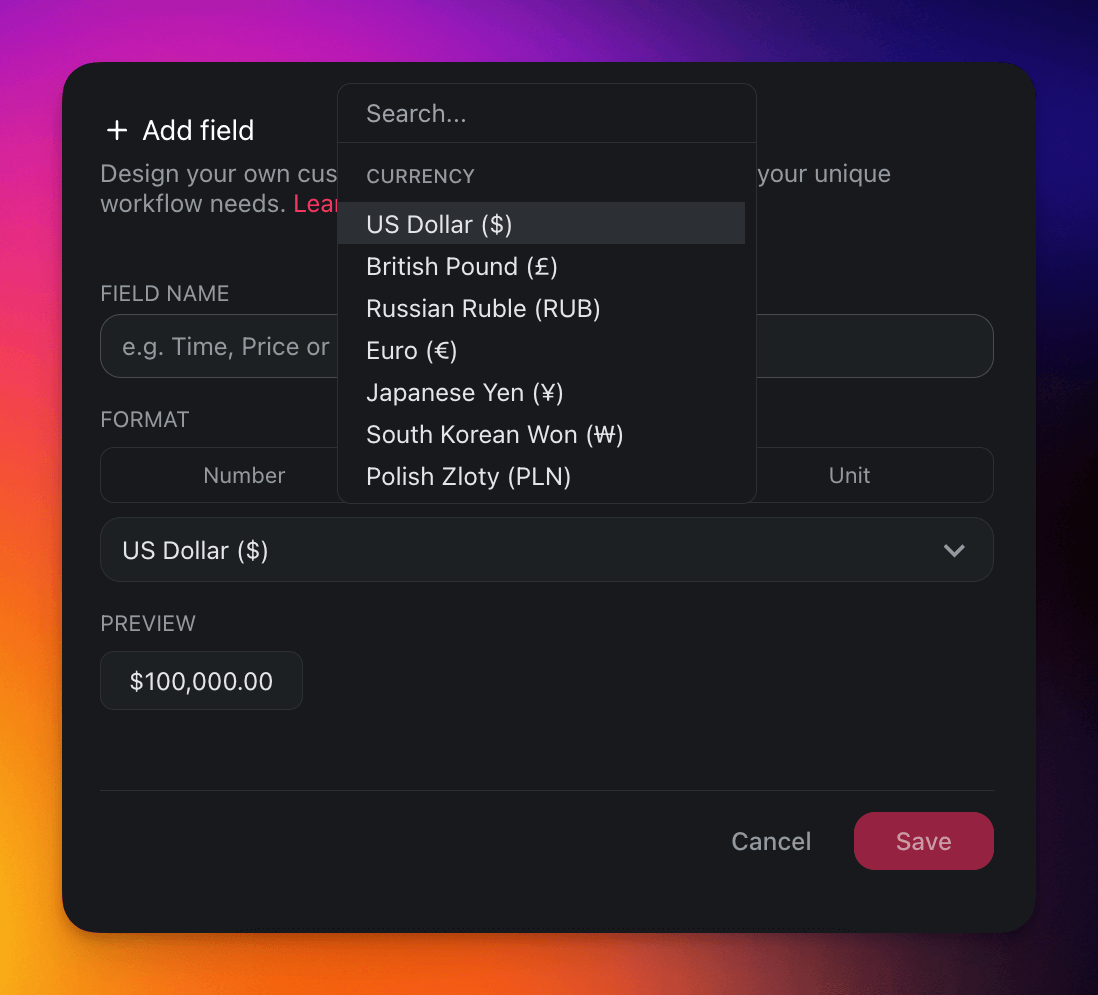
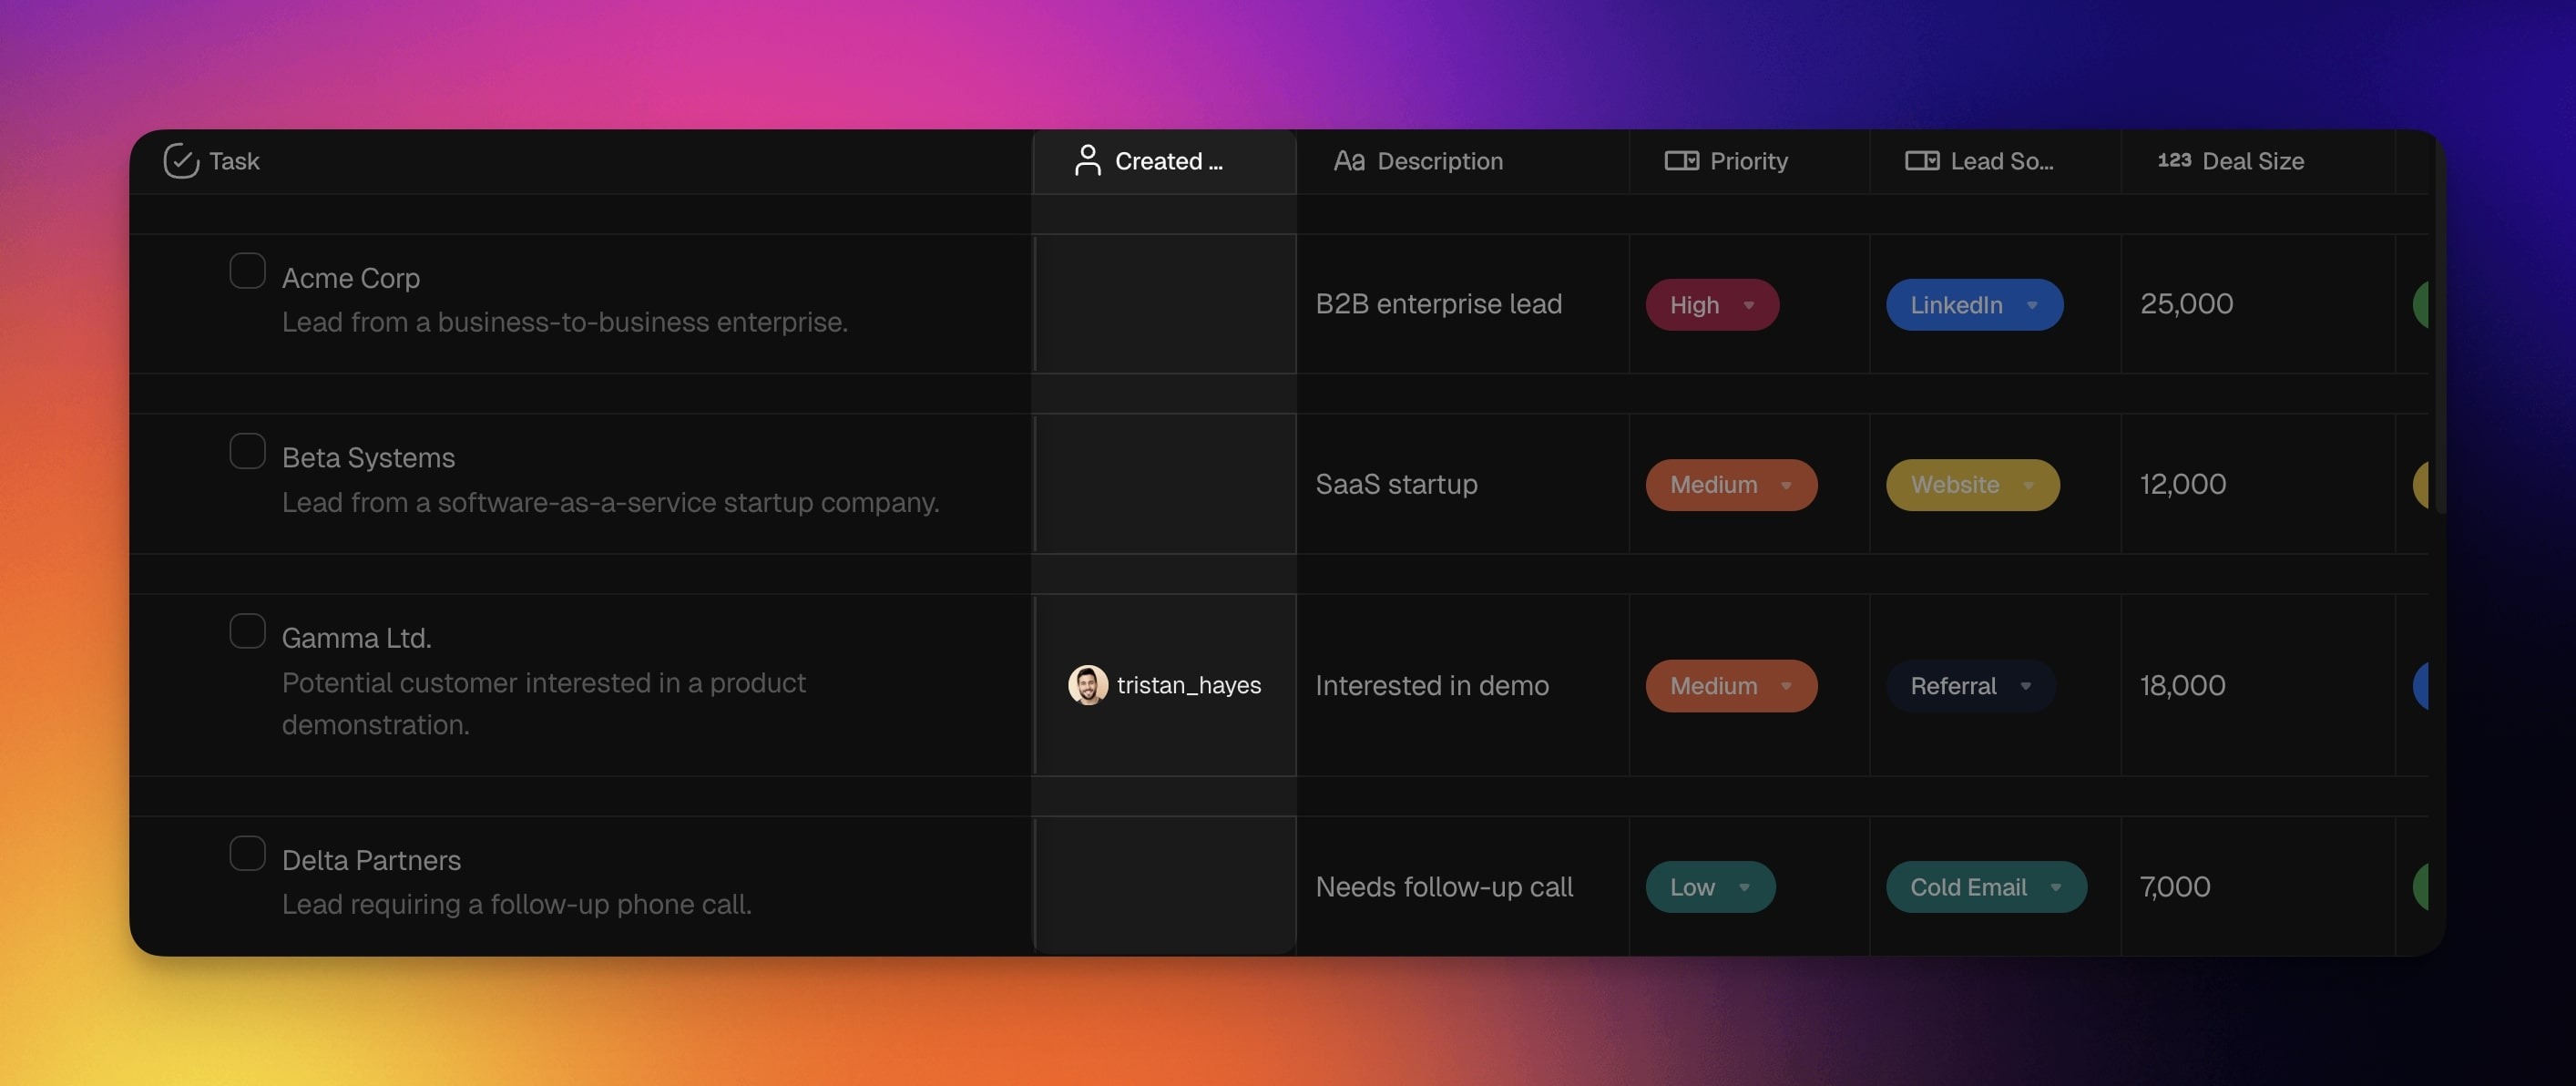
Add a Number Field
The Number option allows you to handle custom data in three formats.
- Click the ➕ button next to the last column (you may need to scroll right).
- Choose Number from the drop-down list.
| 🔢 Number | 💵 Currency | ⚛️ Unit |
|---|---|---|
| Add and work with plain numbers, perfect for quantifications, numerical records, or data analysis. | Add currency values, perfect for financial tracking, budgeting, and cost-related projects. | Represent your data in percentages, perfect for tracking completion rates and performance metrics. |
 |
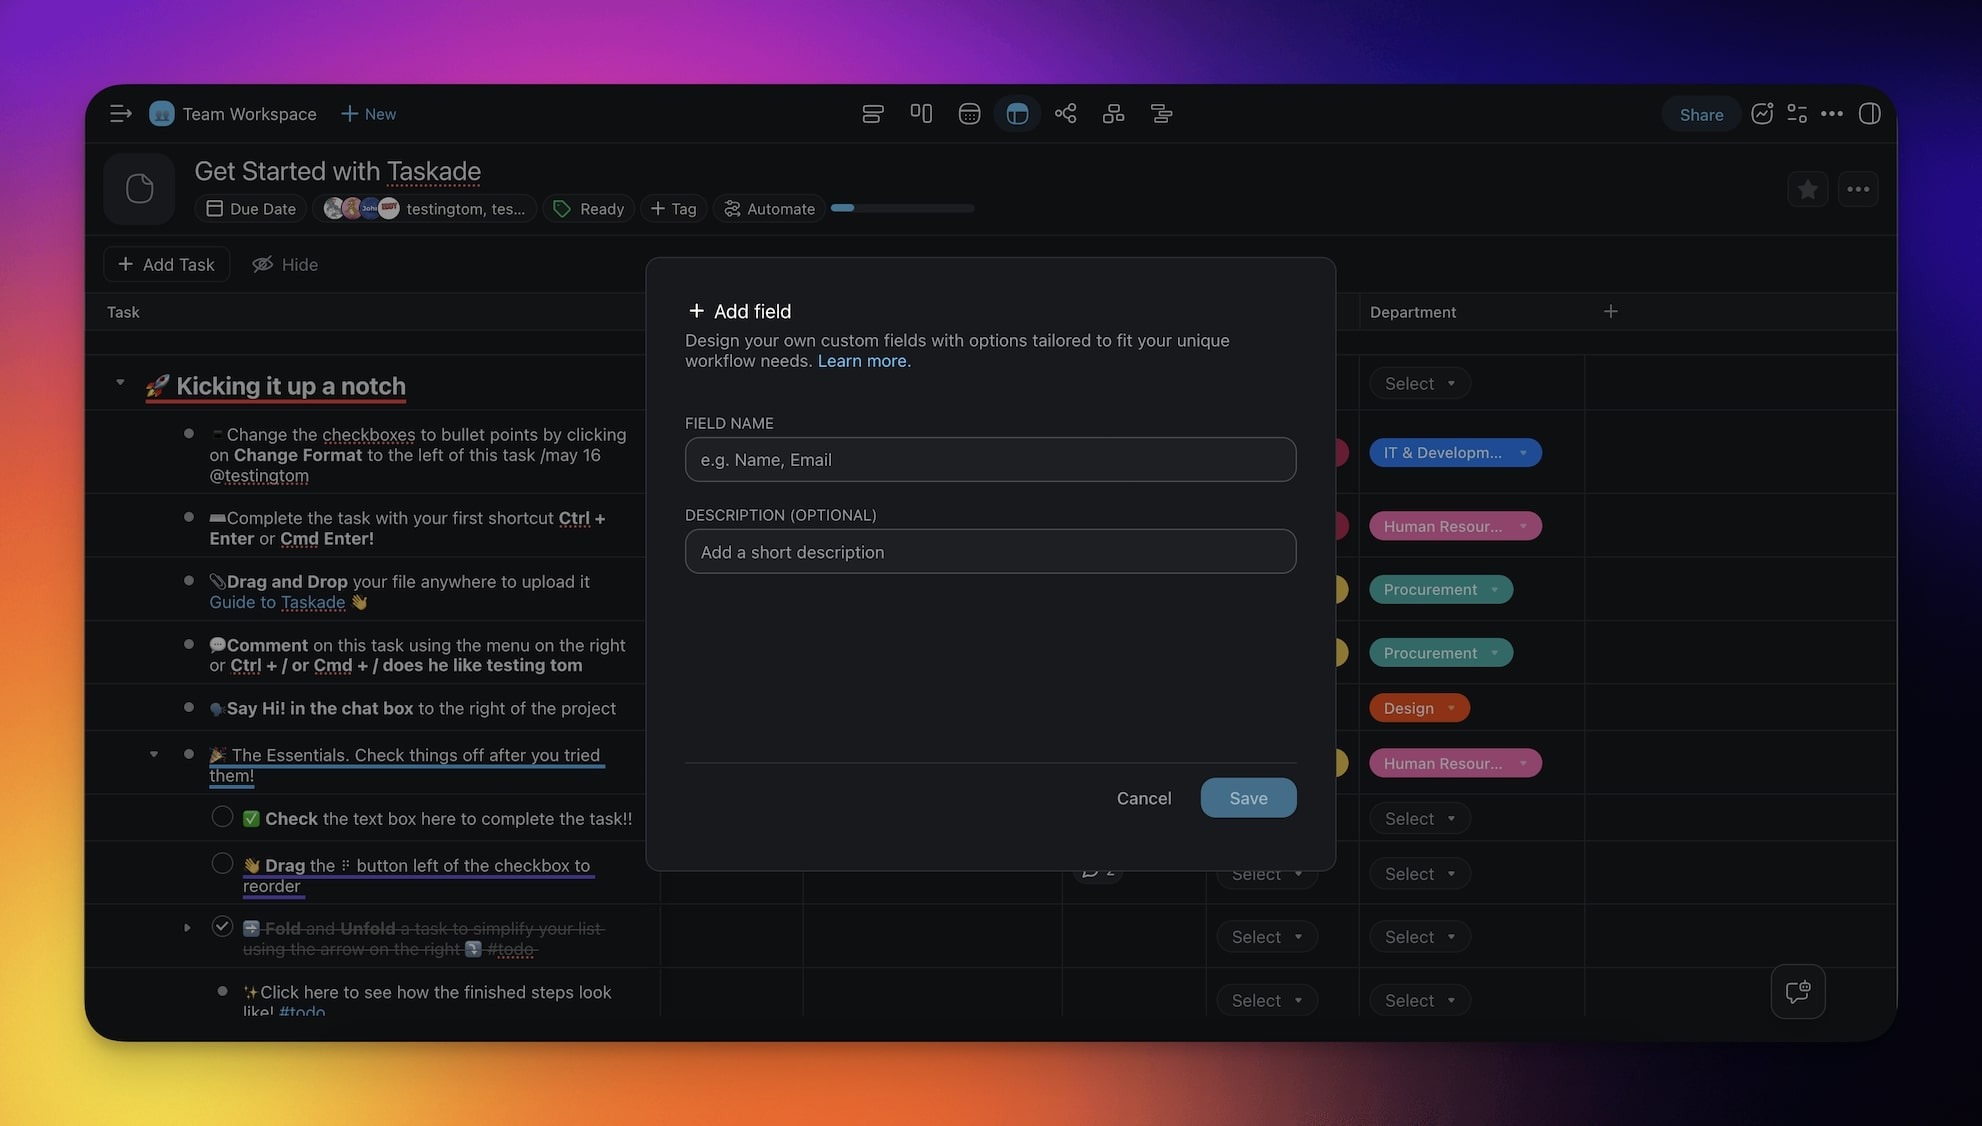
Add a Text Field
The Text option allows you to write short text within each row.
- Click the ➕ button next to the last column (you may need to scroll right).
- Choose Text from the drop-down list.
Use Table View Add-Ons
Add-ons are specialized tools that make your tables smarter. You can enable or disable the add-ons at any time based on your workflow needs.
Enable Add-Ons
Click the ➕ button at the end of the table (scroll right if needed).
Select an Add-On from the dropdown menu.
The new column will appear in the table.
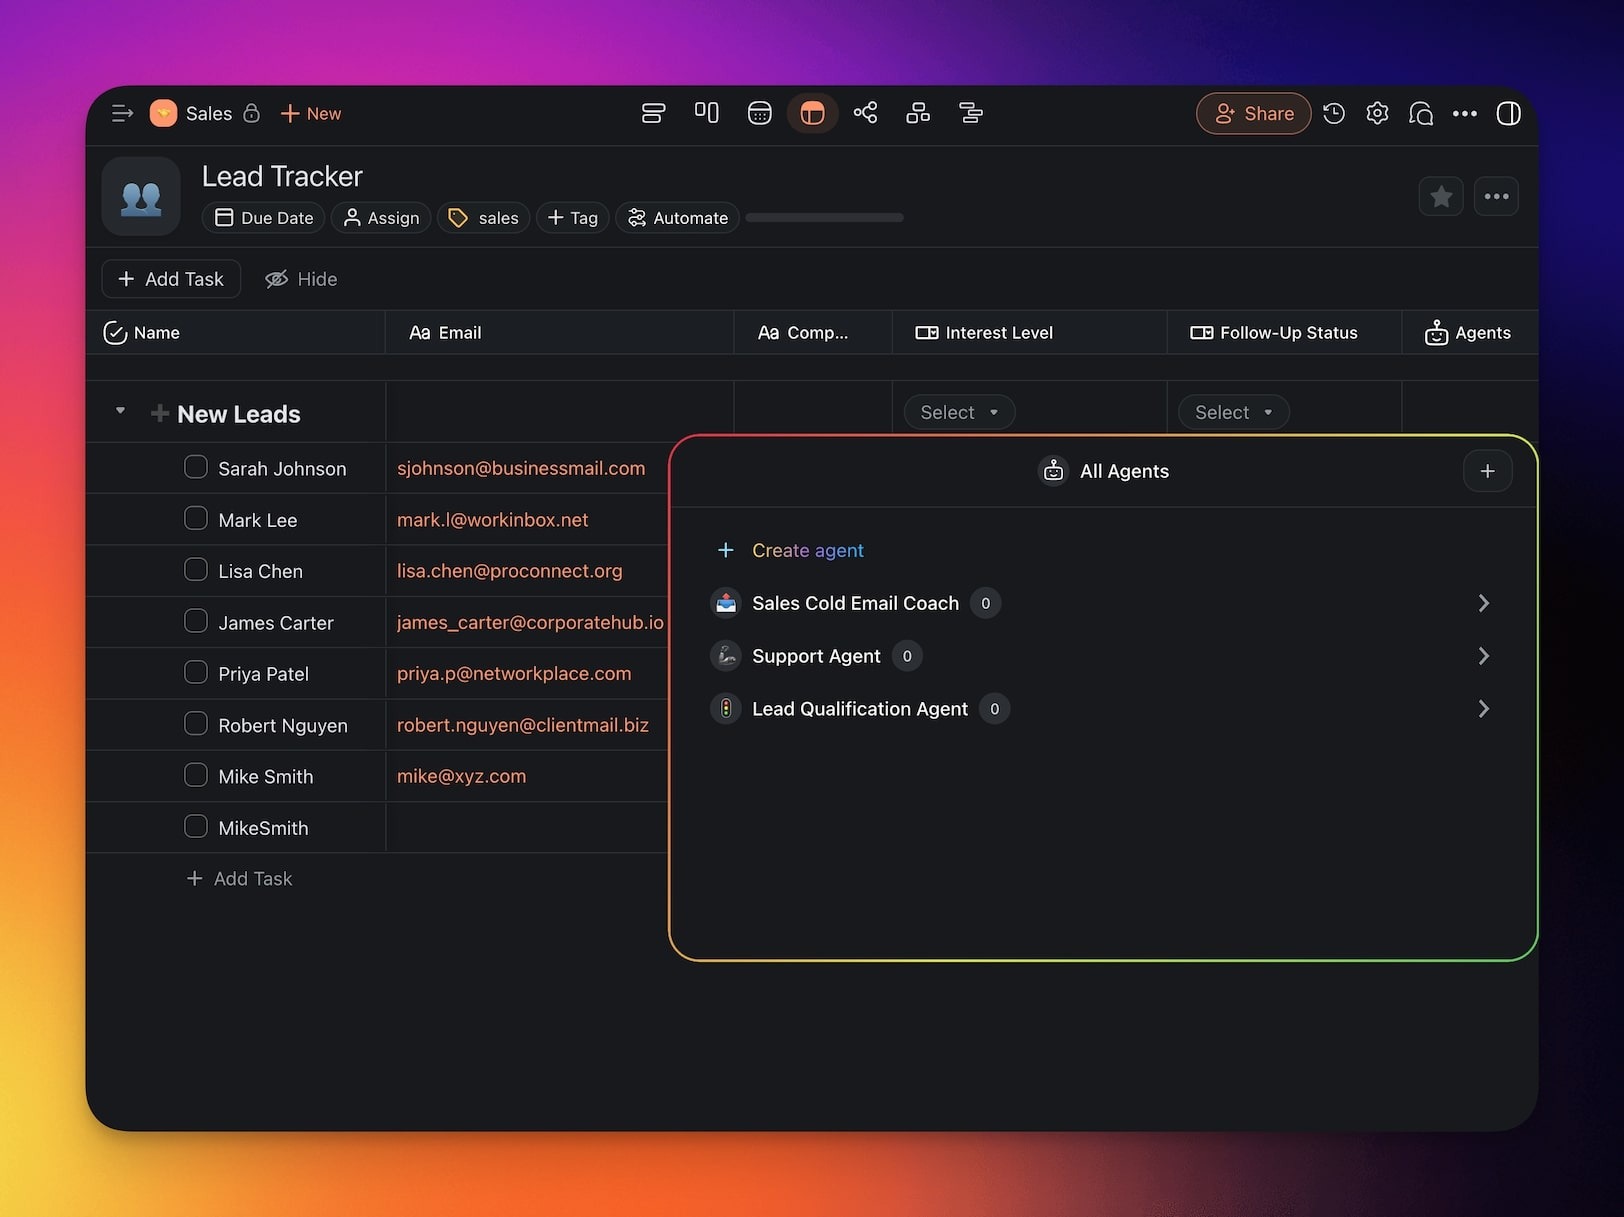
Agents
Assign tasks to one of your Custom AI Agents.
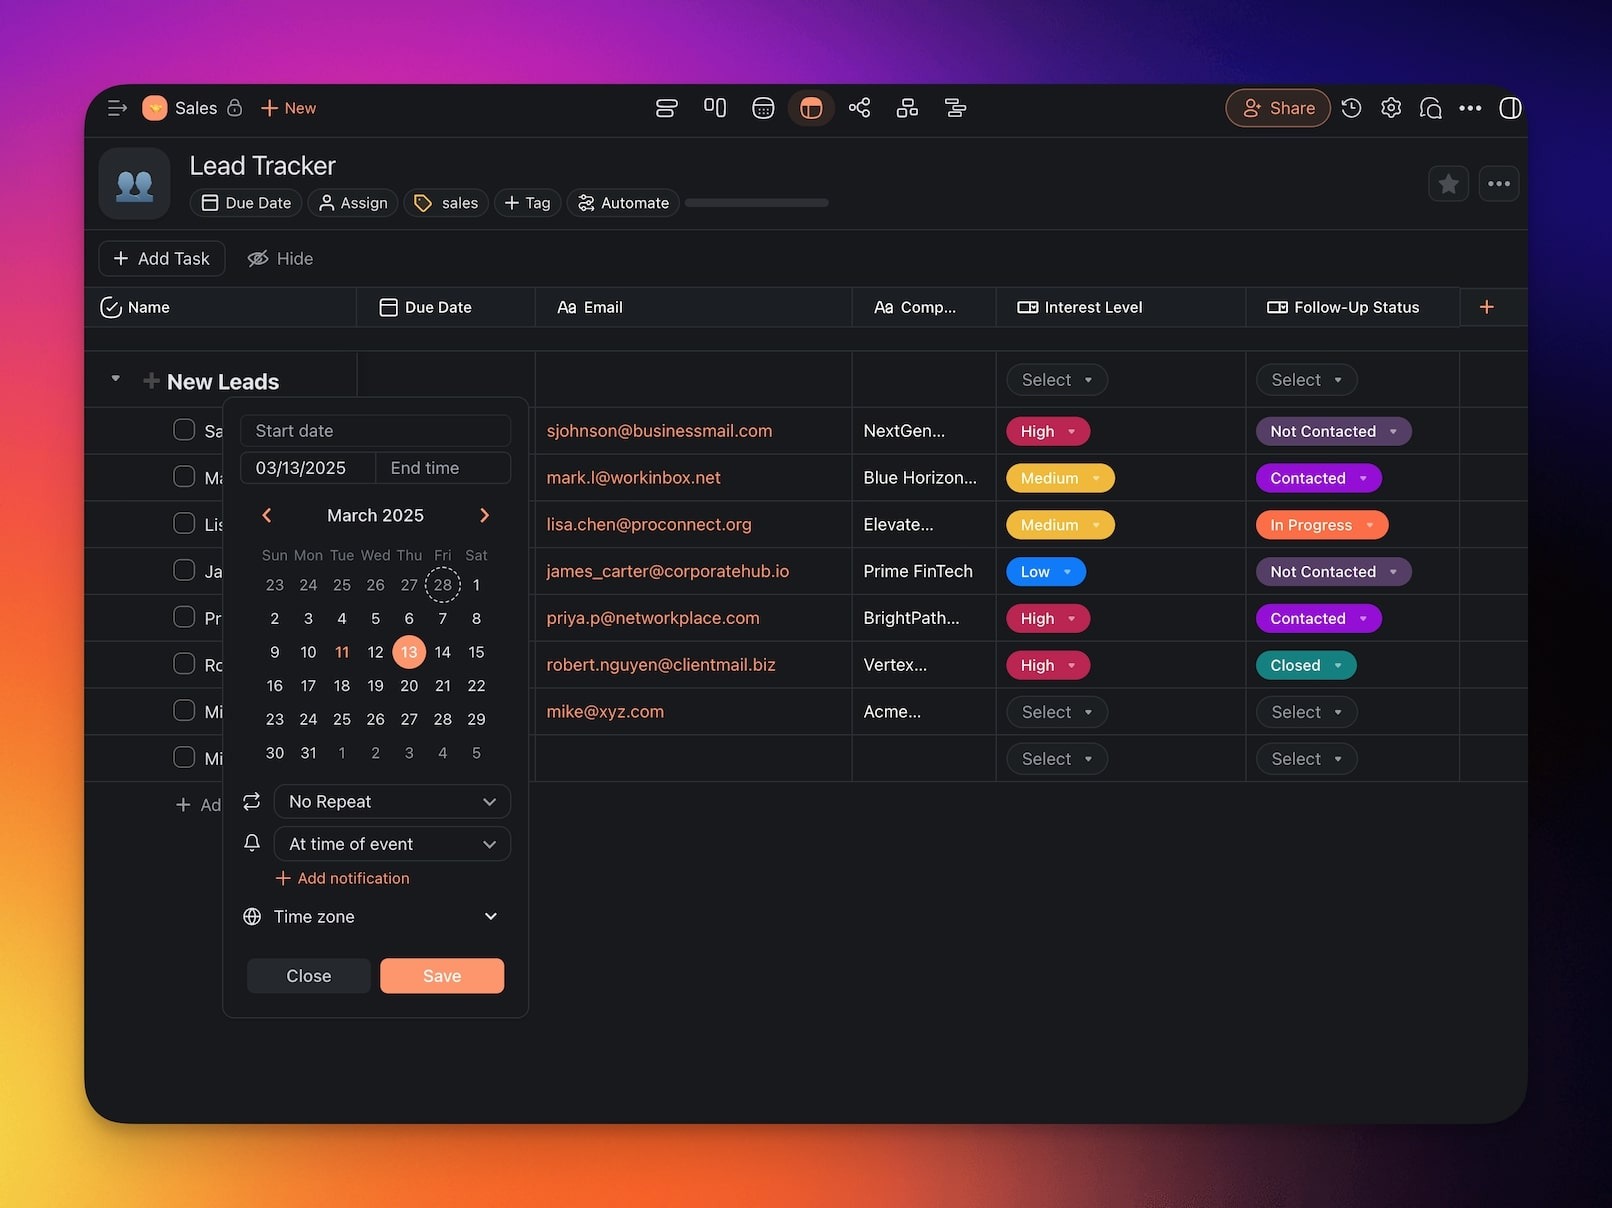
Due Date
Set deadlines for tasks to ensure that work is completed on time.
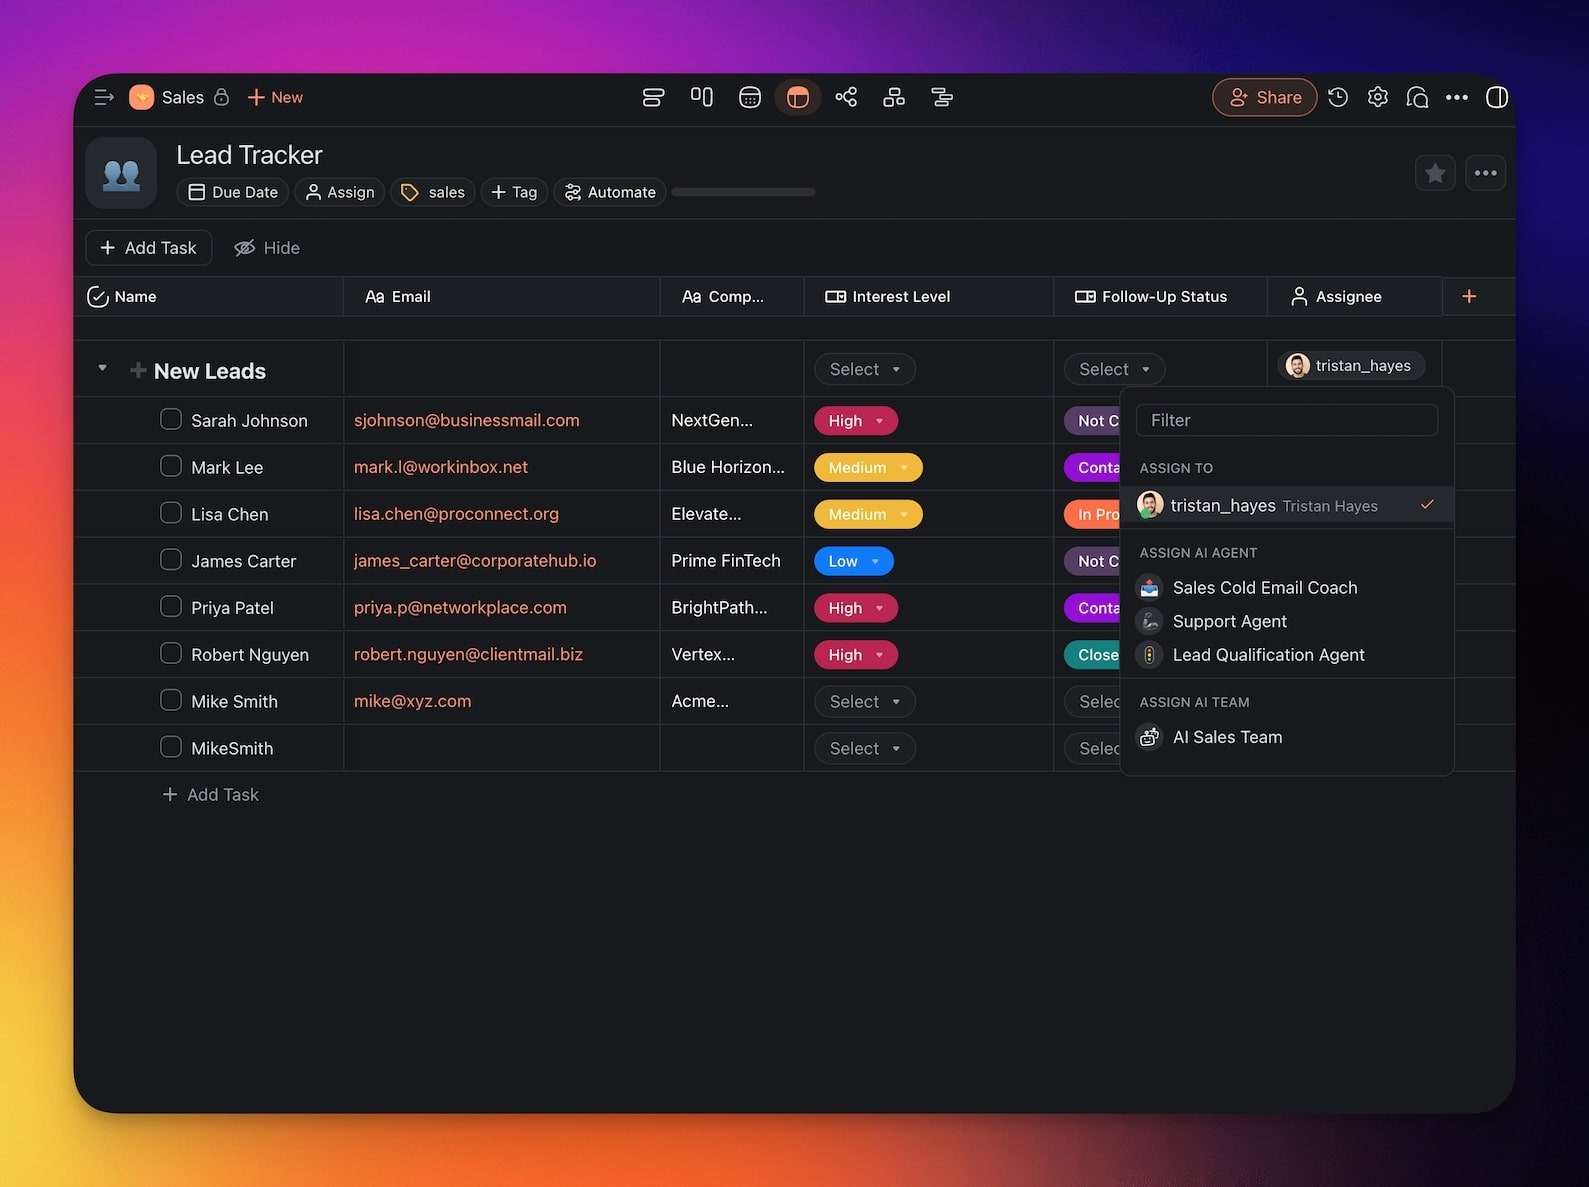
Assignee
Assign individual users to tasks.
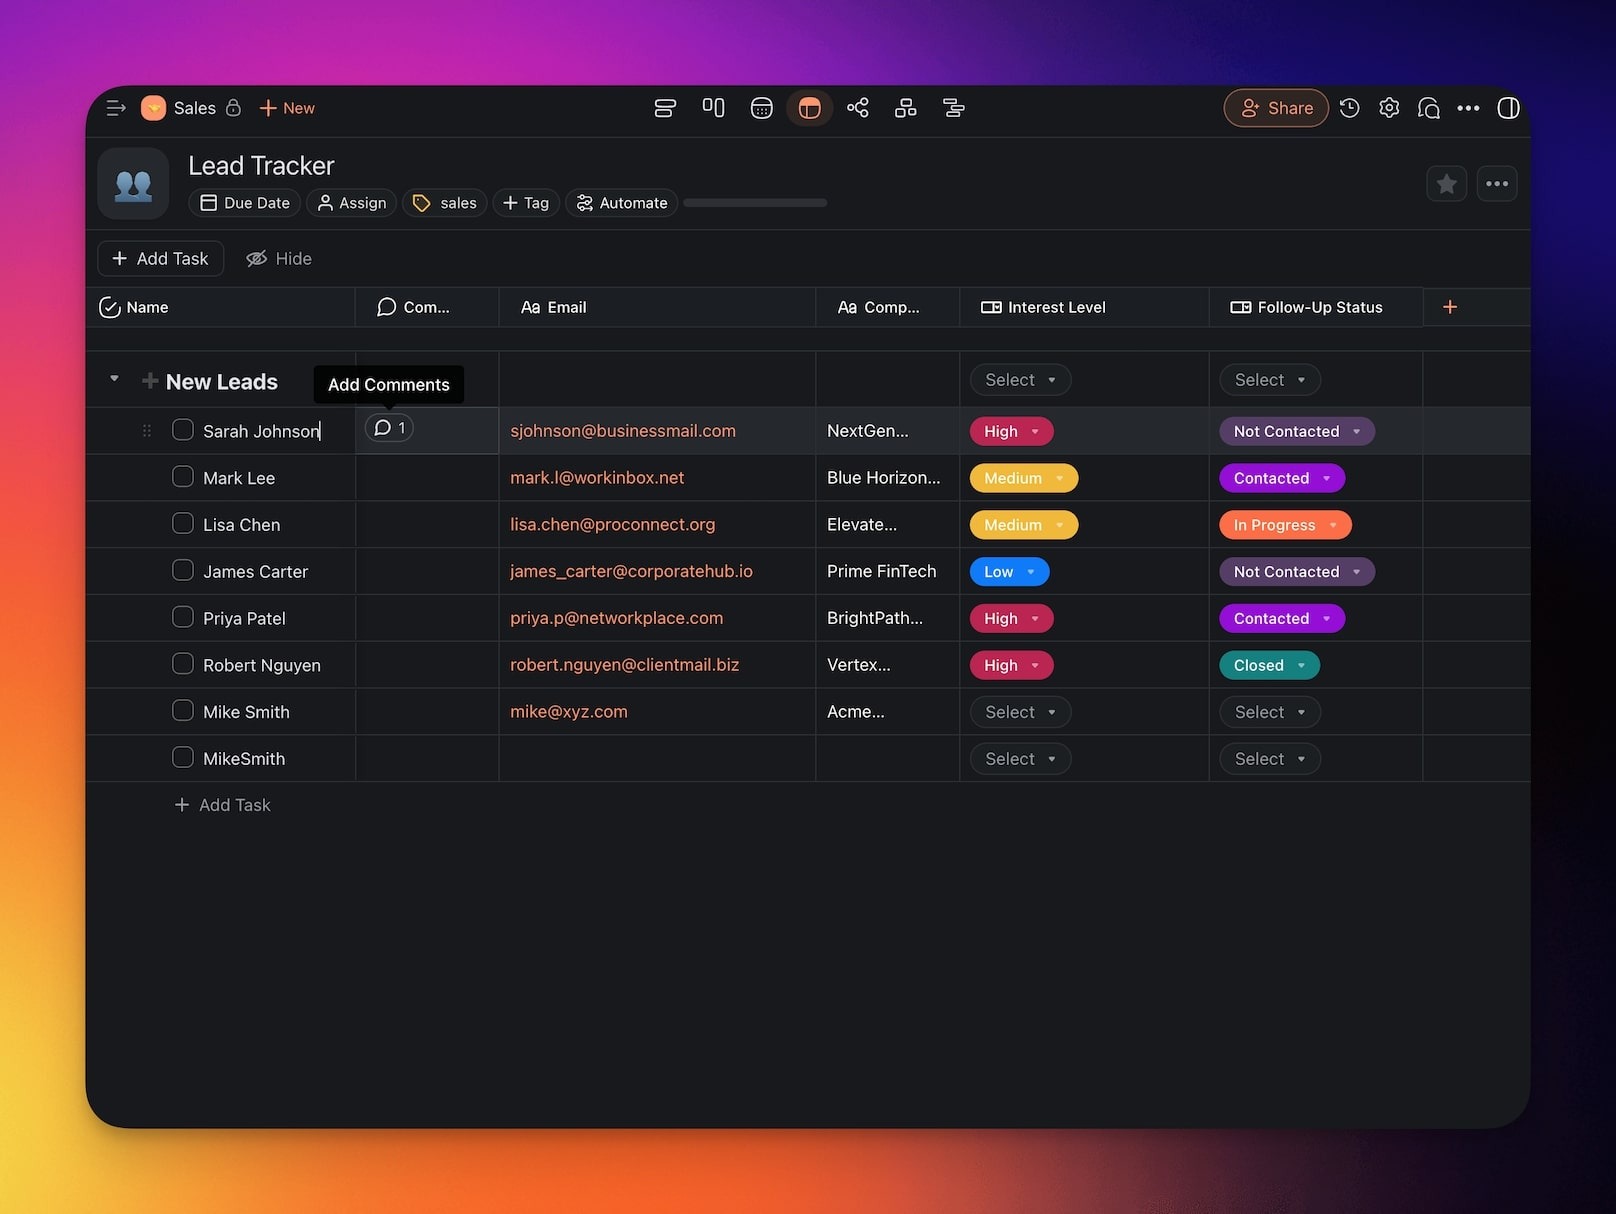
Comments
Add notes and discussions directly inside table rows.
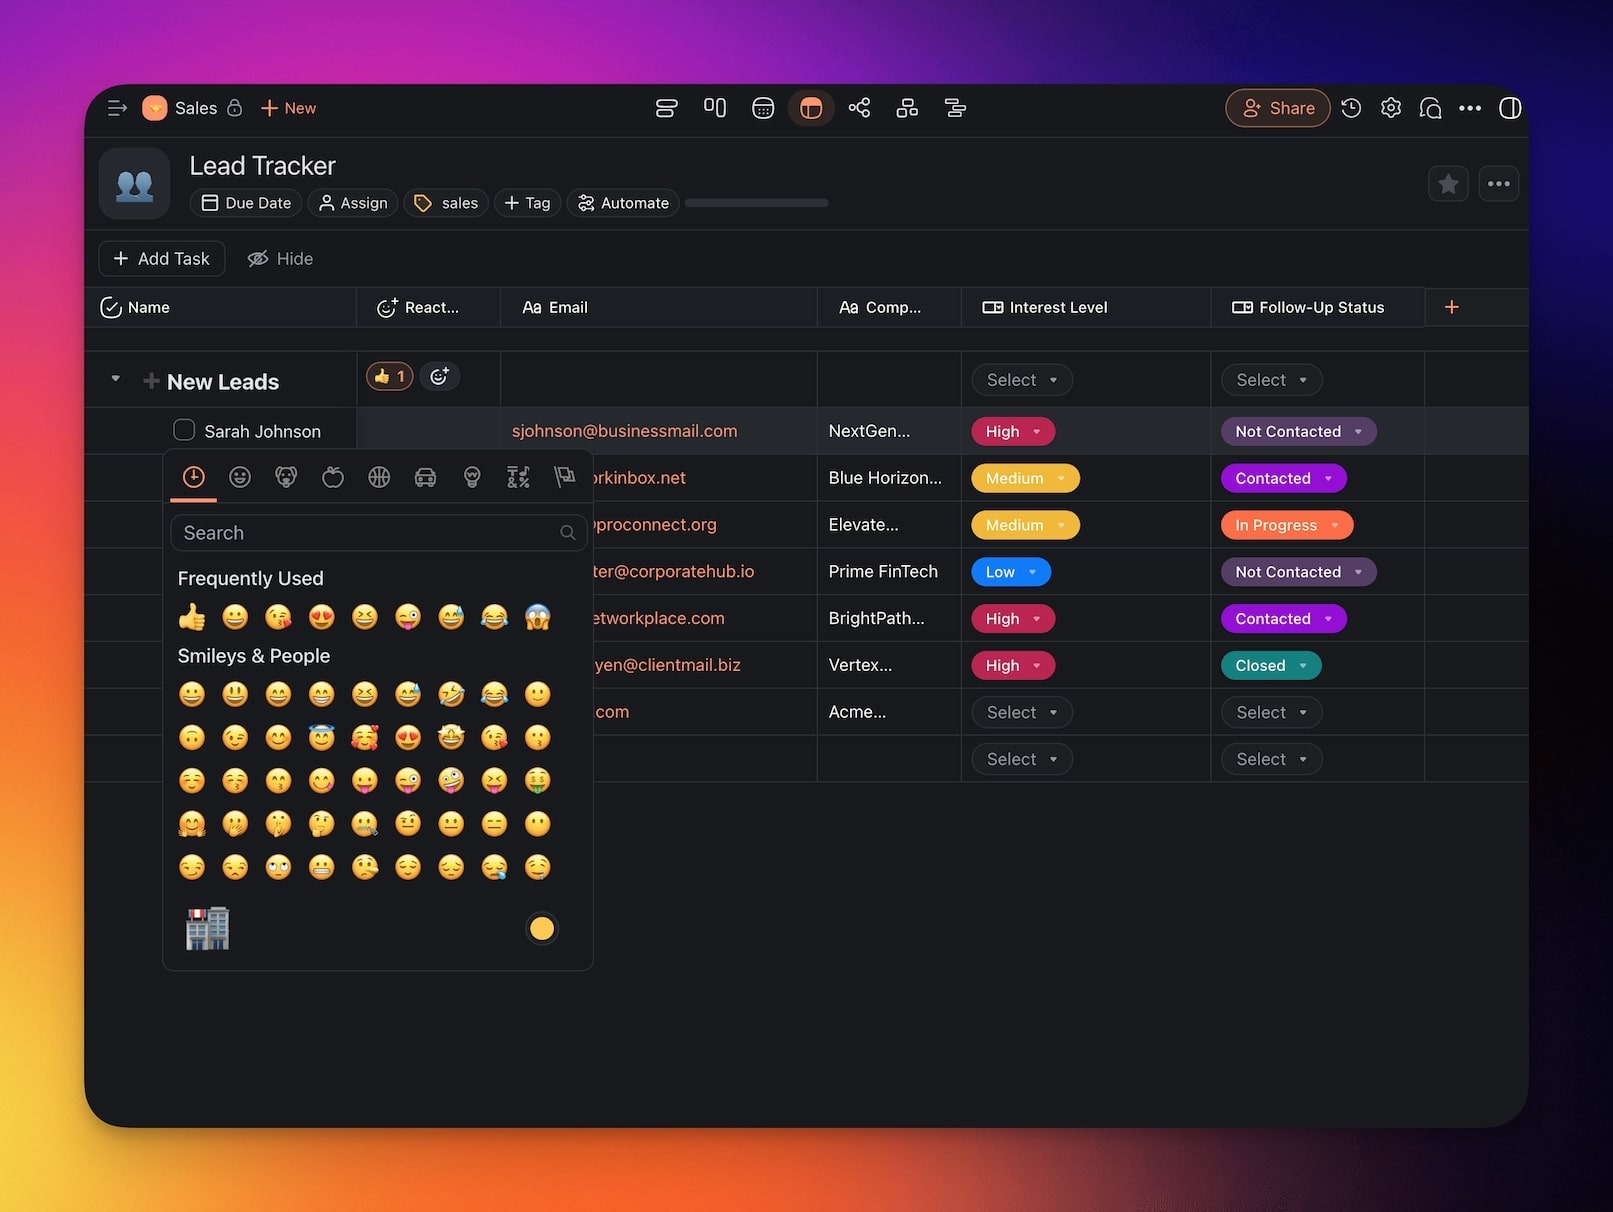
Reactions
Use emoji-based reactions to provide quick feedback on tasks.
Timer
Track the time spent on tasks.

Media/Embed
Attach images, videos, or other media files directly to tasks.
Created Date
Automatically log the date a task was created.

Created By
See who added the item to a table.
Completed By
Look up who completed individual tasks.
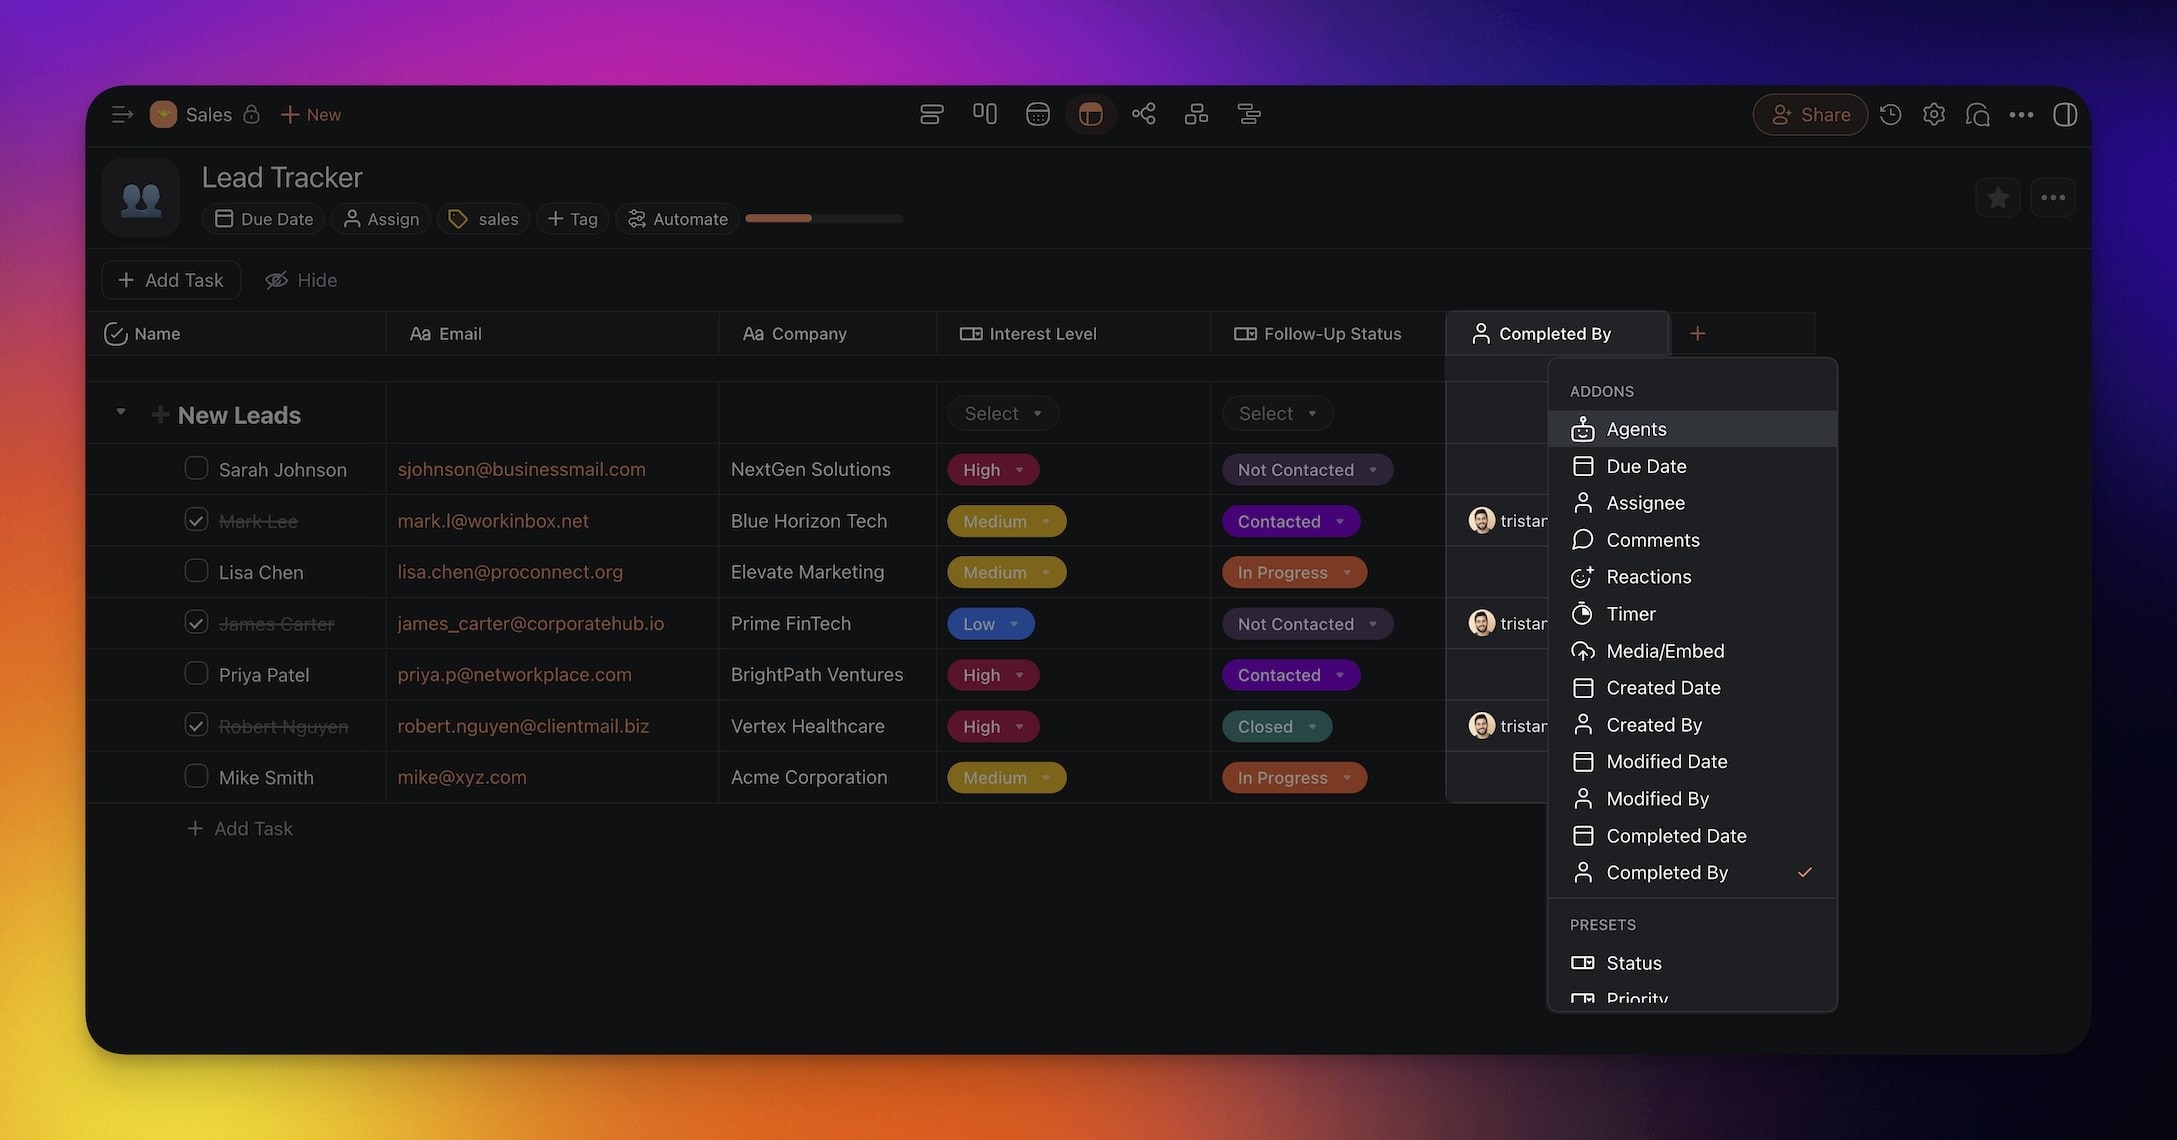
Completed Date
Keep track of task completion dates.

Modified By
See who made the last edit to the item.
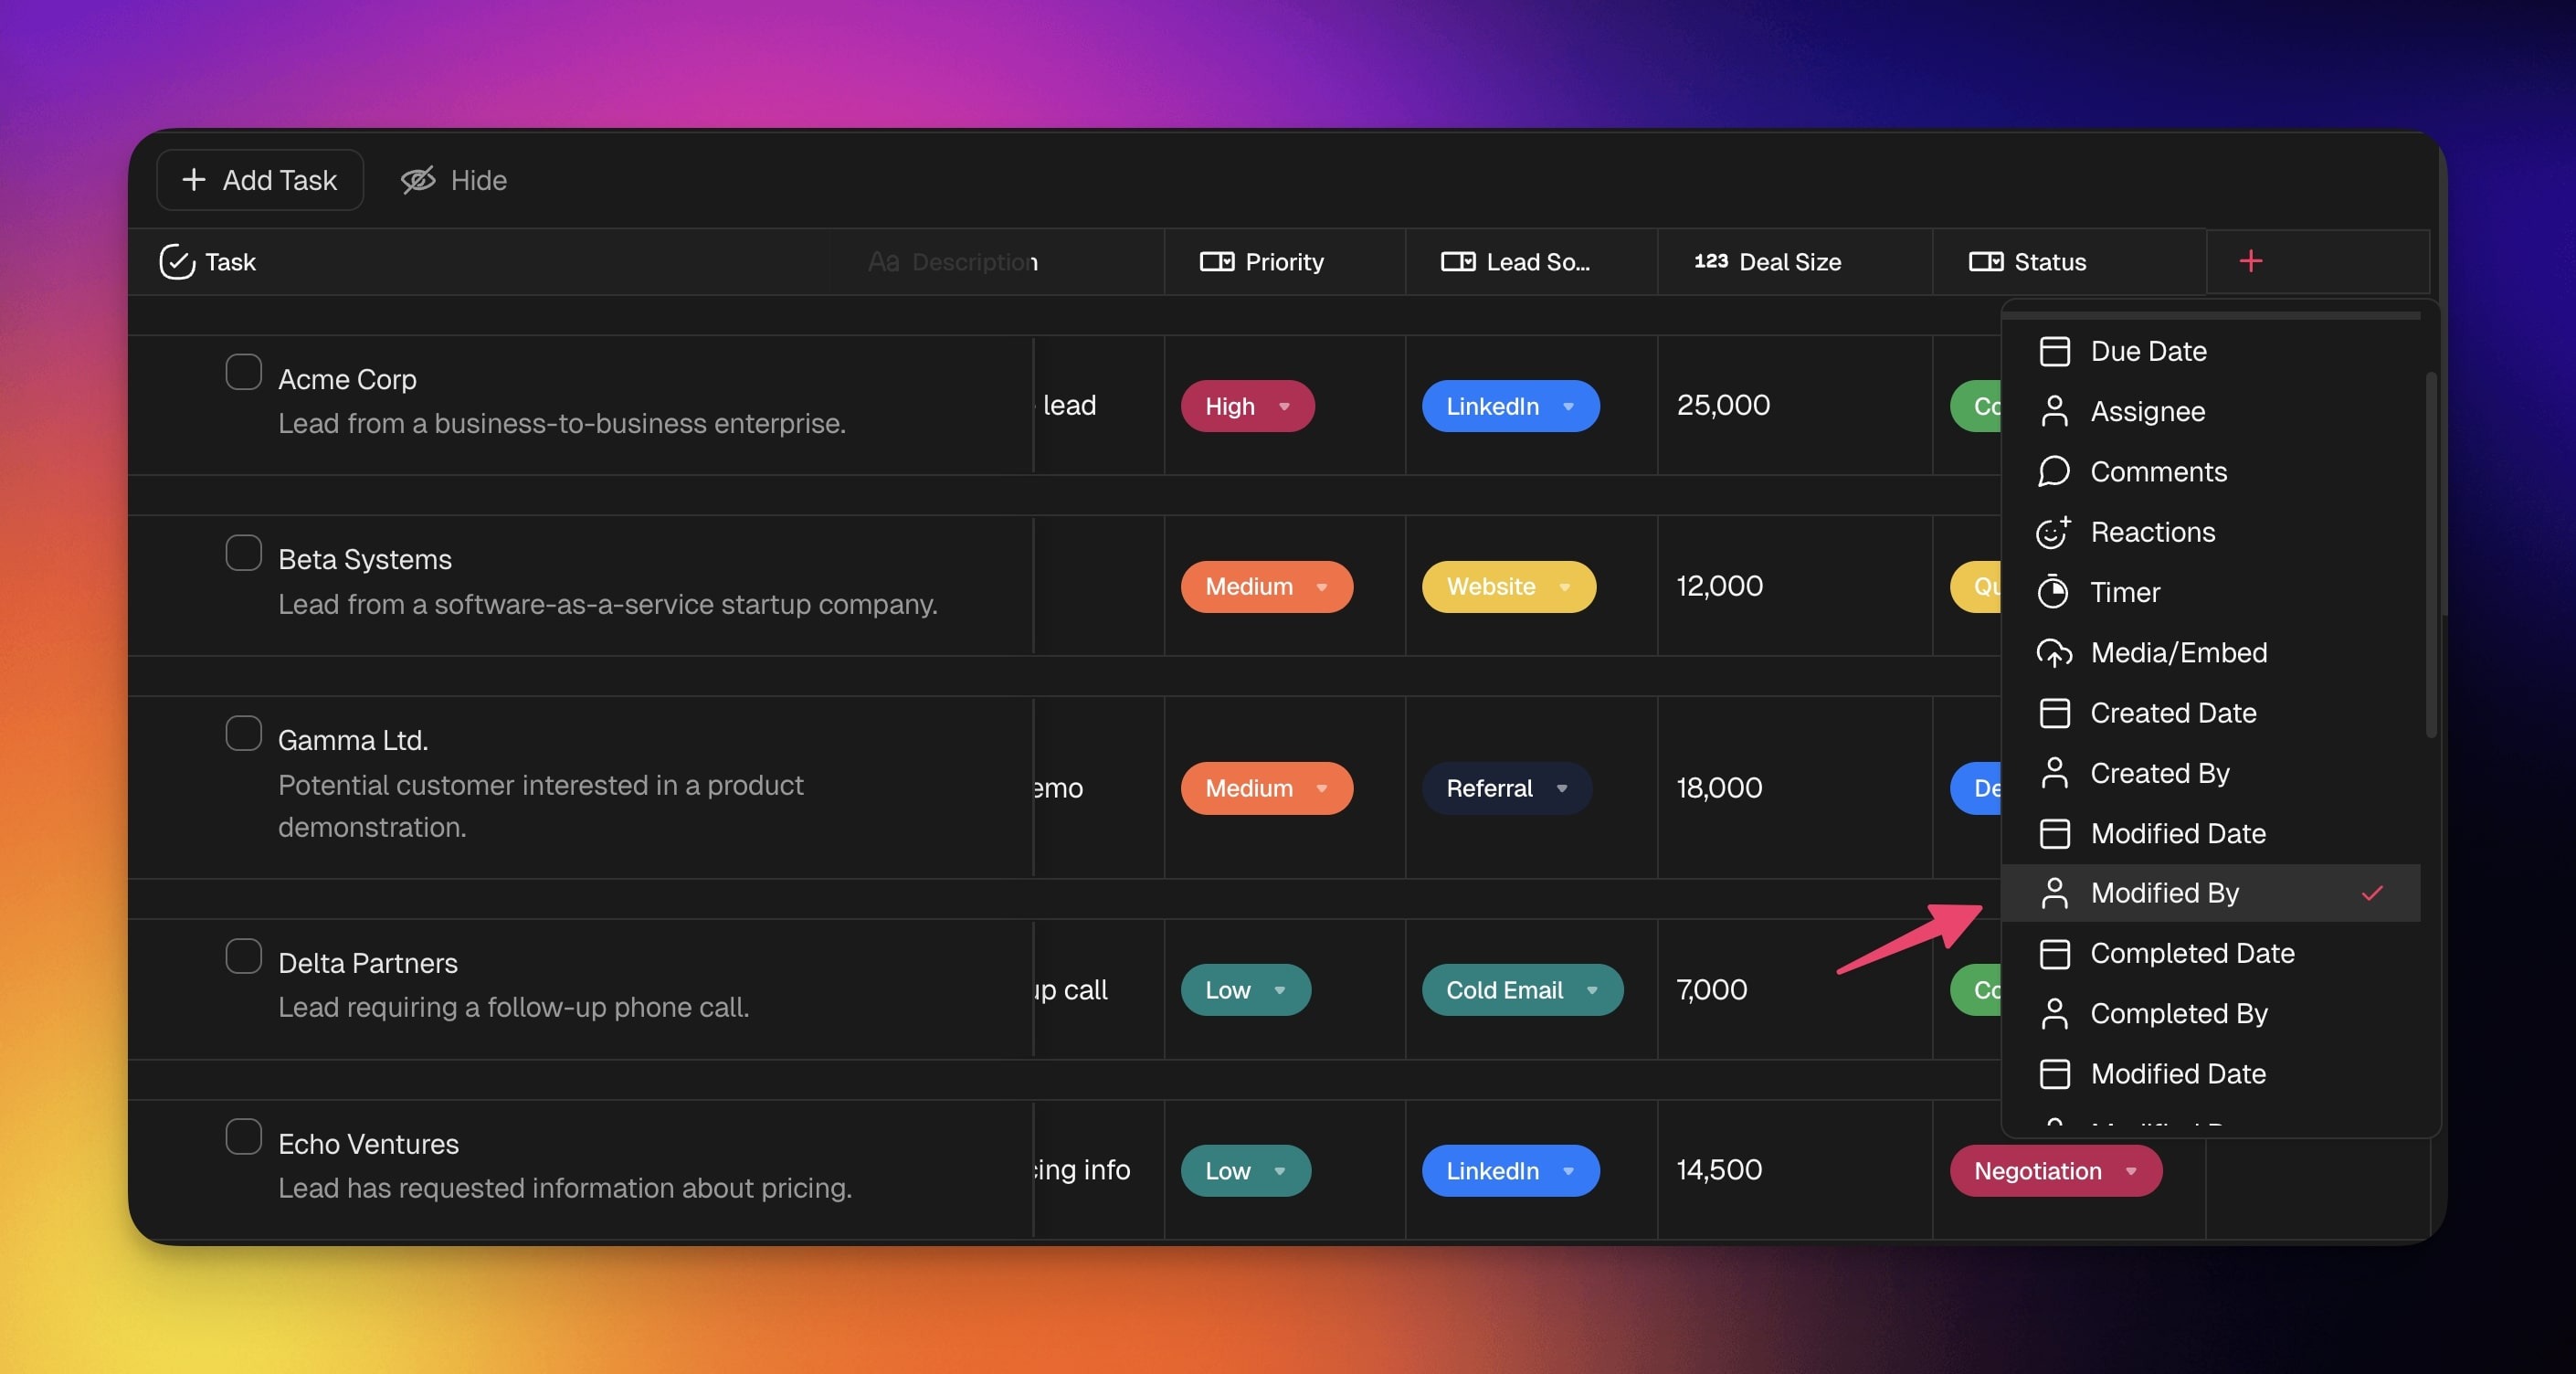
Modified Date
Display the date of the latest edit.