
TL;DR: Tags (
#label) group tasks across projects for flexible filtering and search. A single task can have unlimited tags, and tags appear in My Tasks, search, and every view's filter menu. Combine with custom fields for structured plus free-form categorization.
How a tag travels from creation to a filtered view.
Overview
Tags make it super easy to organize projects inside a workspace or team. You can create unlimited color-coded tags to group projects and filter workspaces. Tags work across all project views — List, Board, Calendar, and more.
Create a New Tag
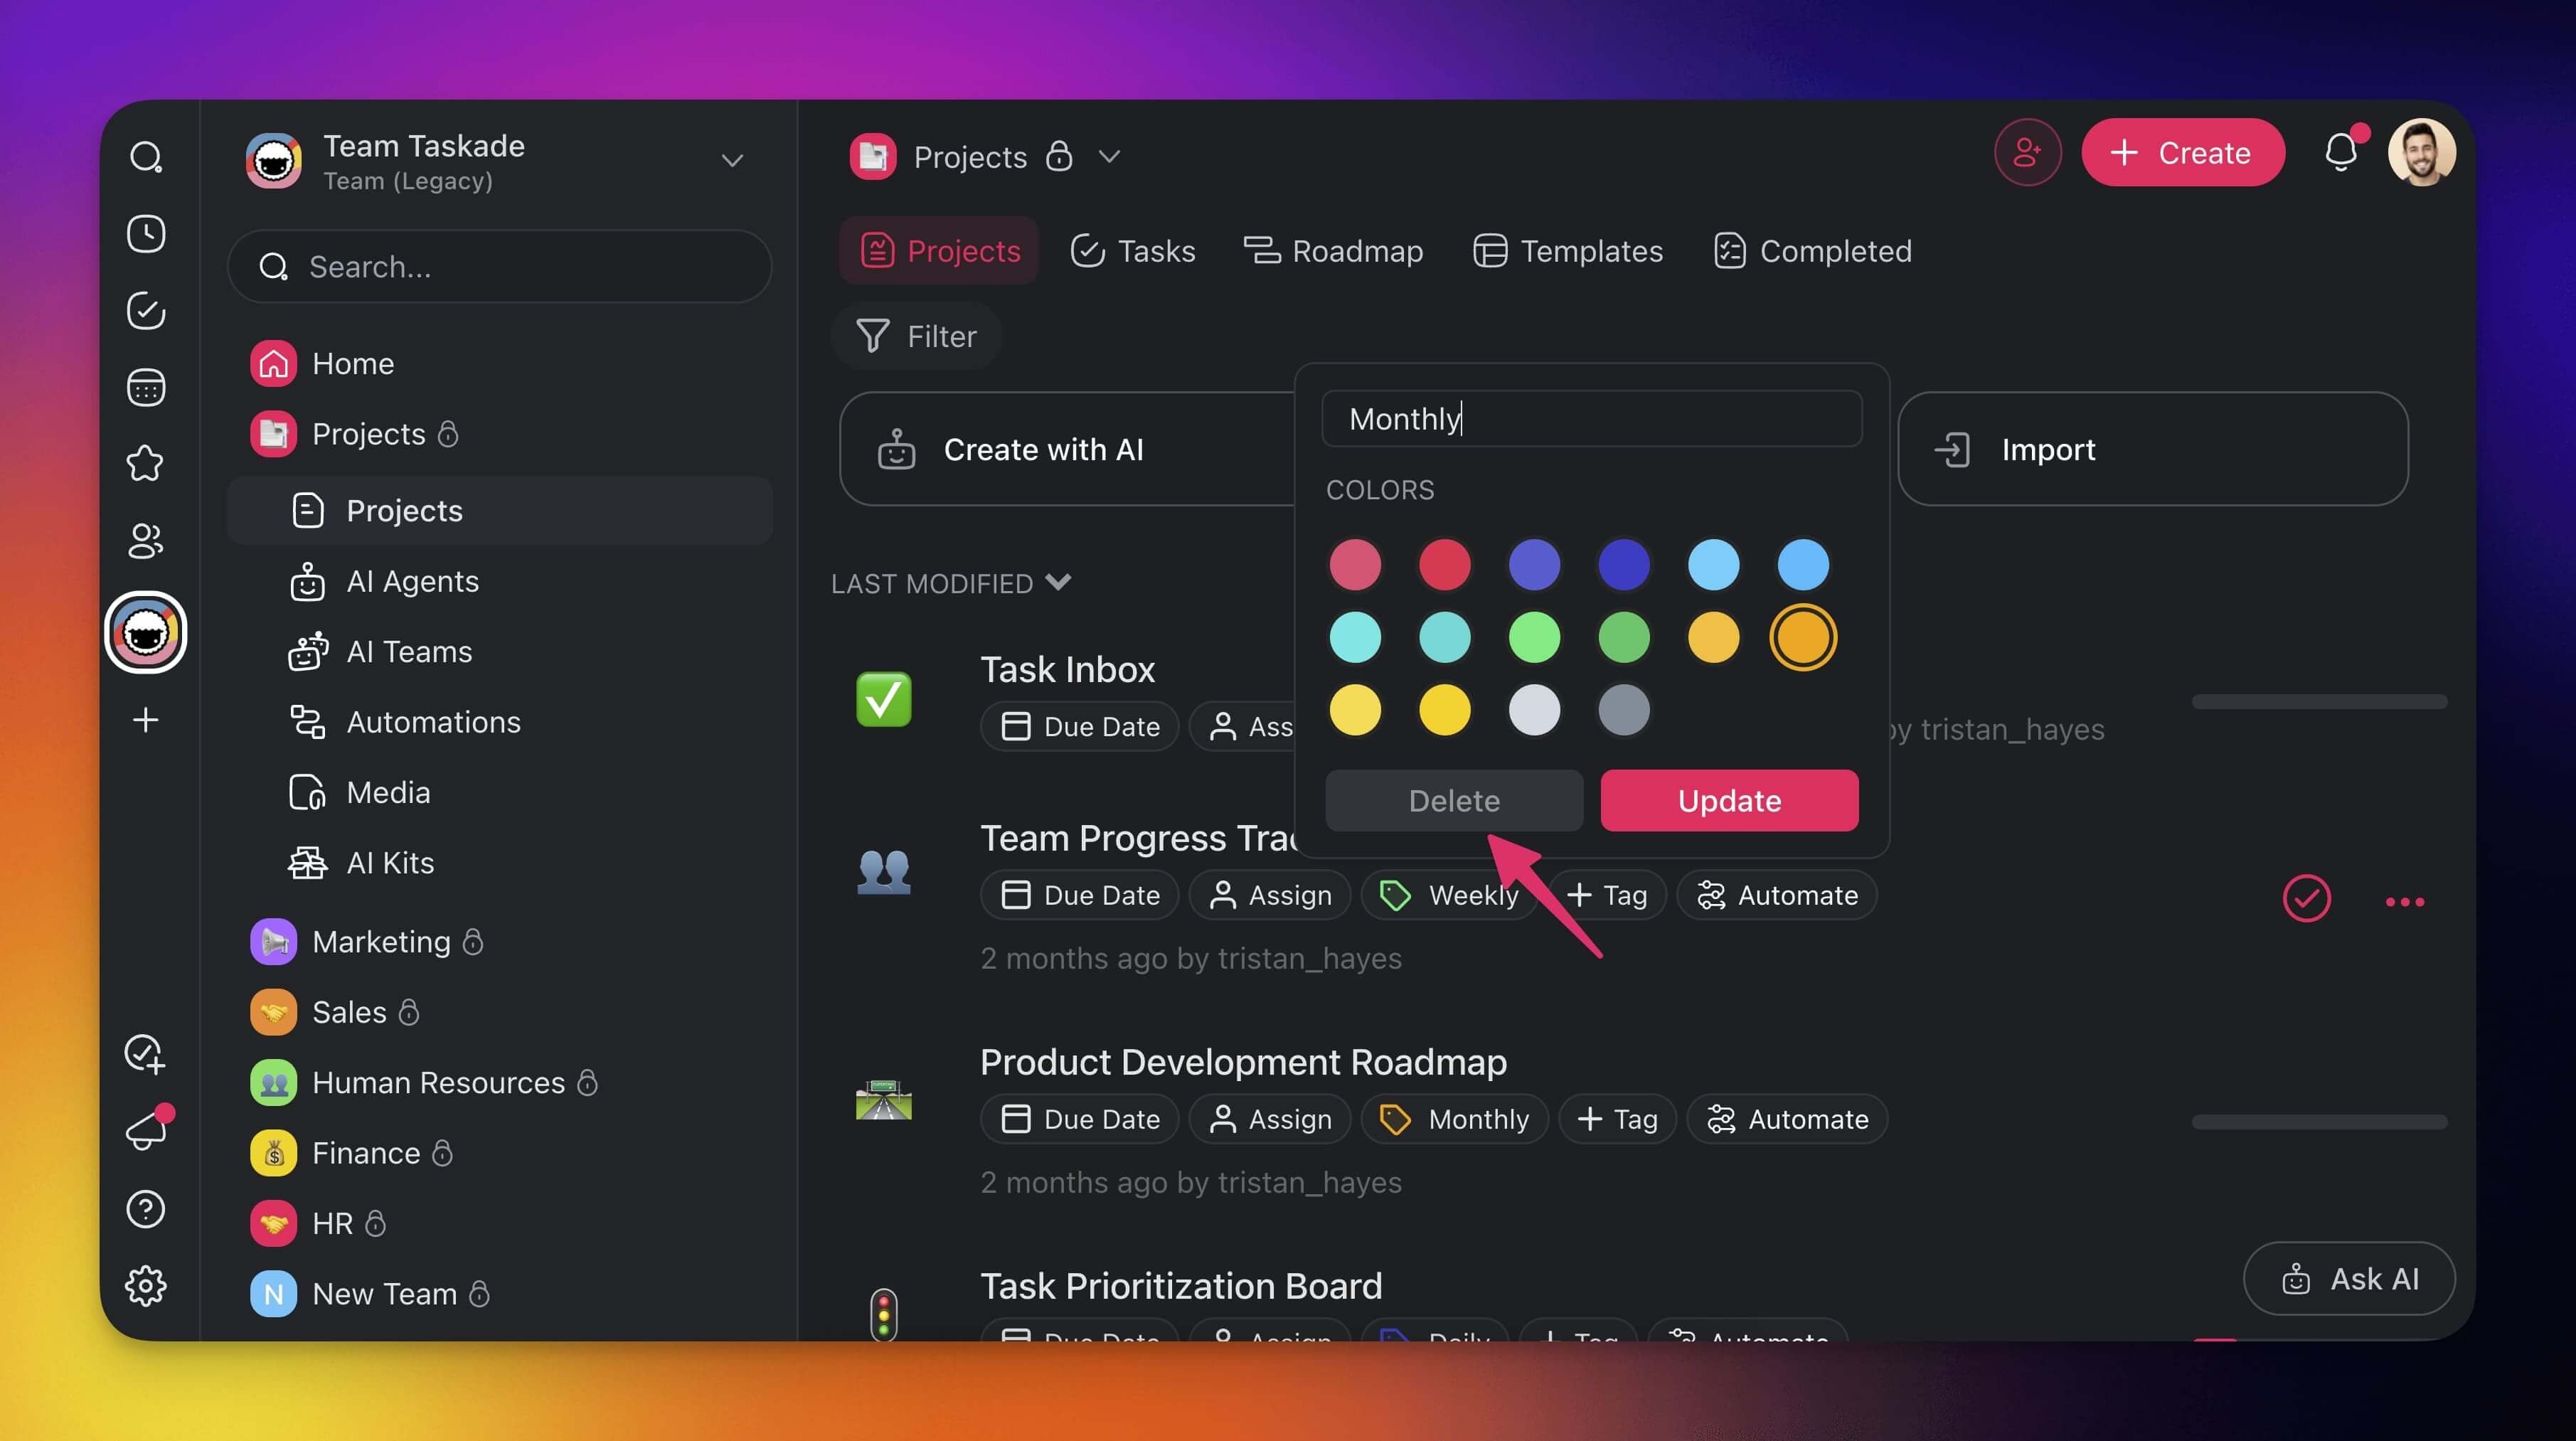
Open your workspace or team and click ➕ Tag (1).
Choose one of the existing #tags (2) or click ➕ New tag (3) to add your own.
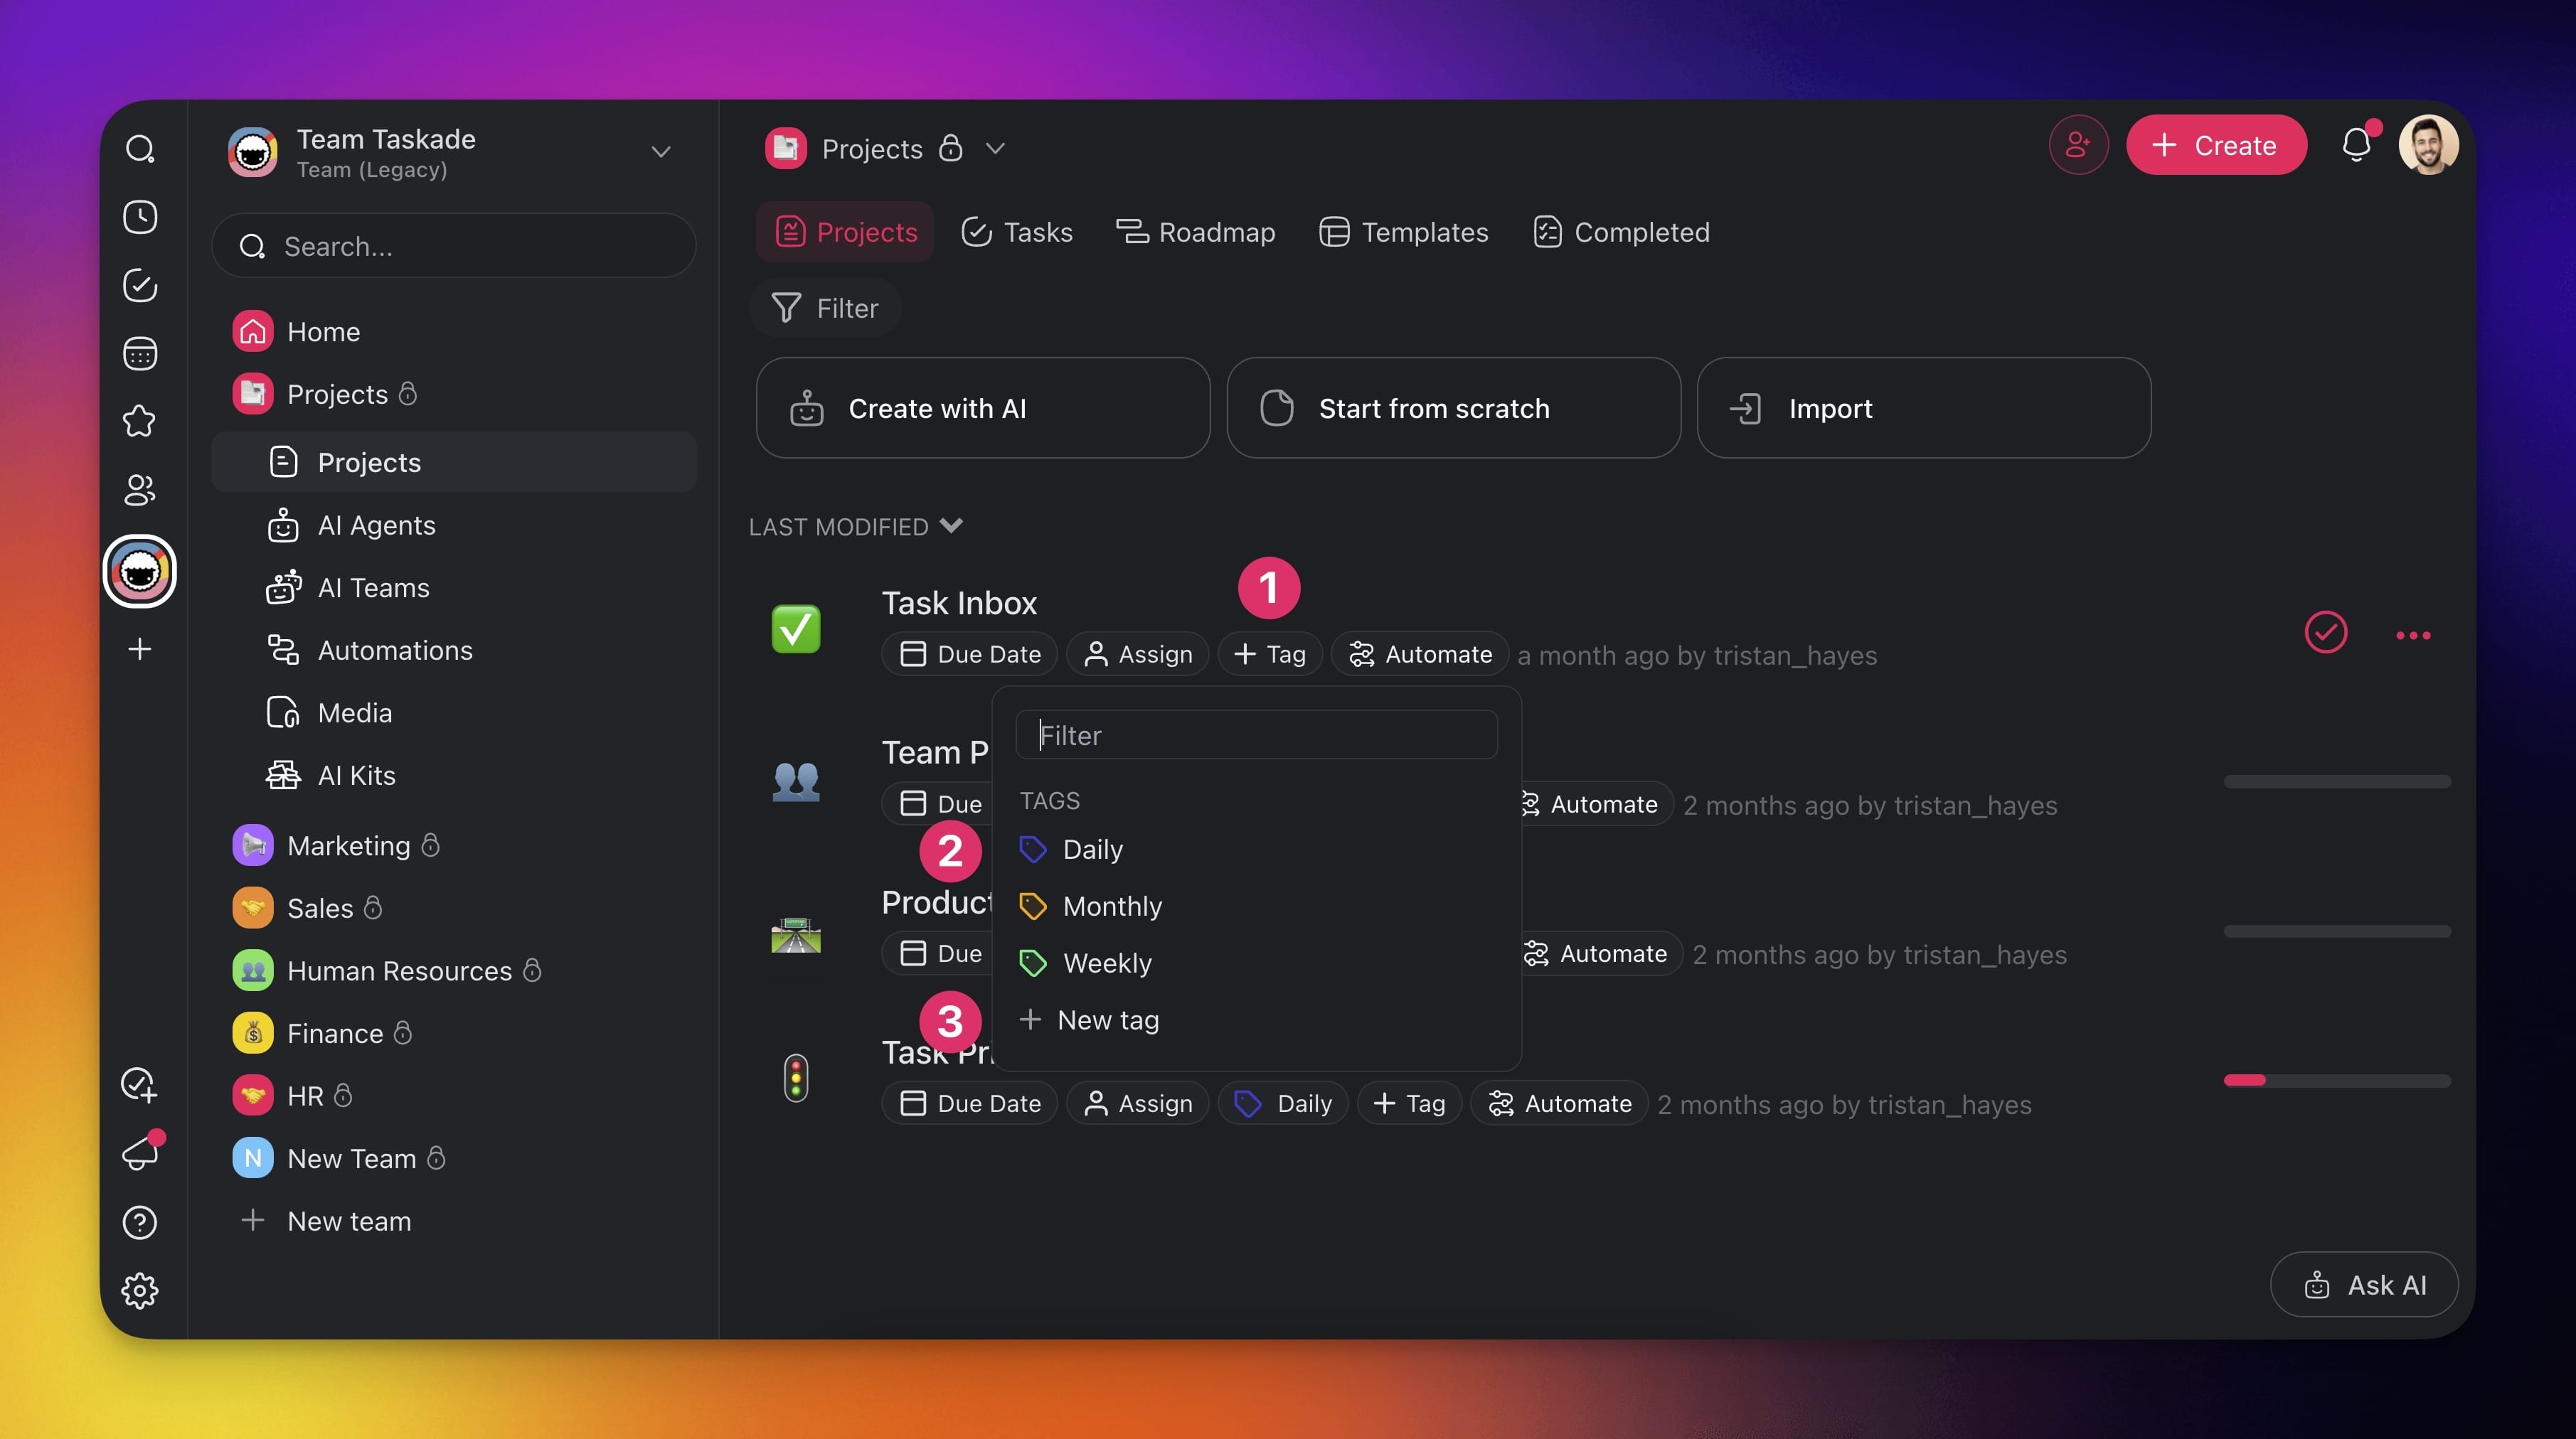
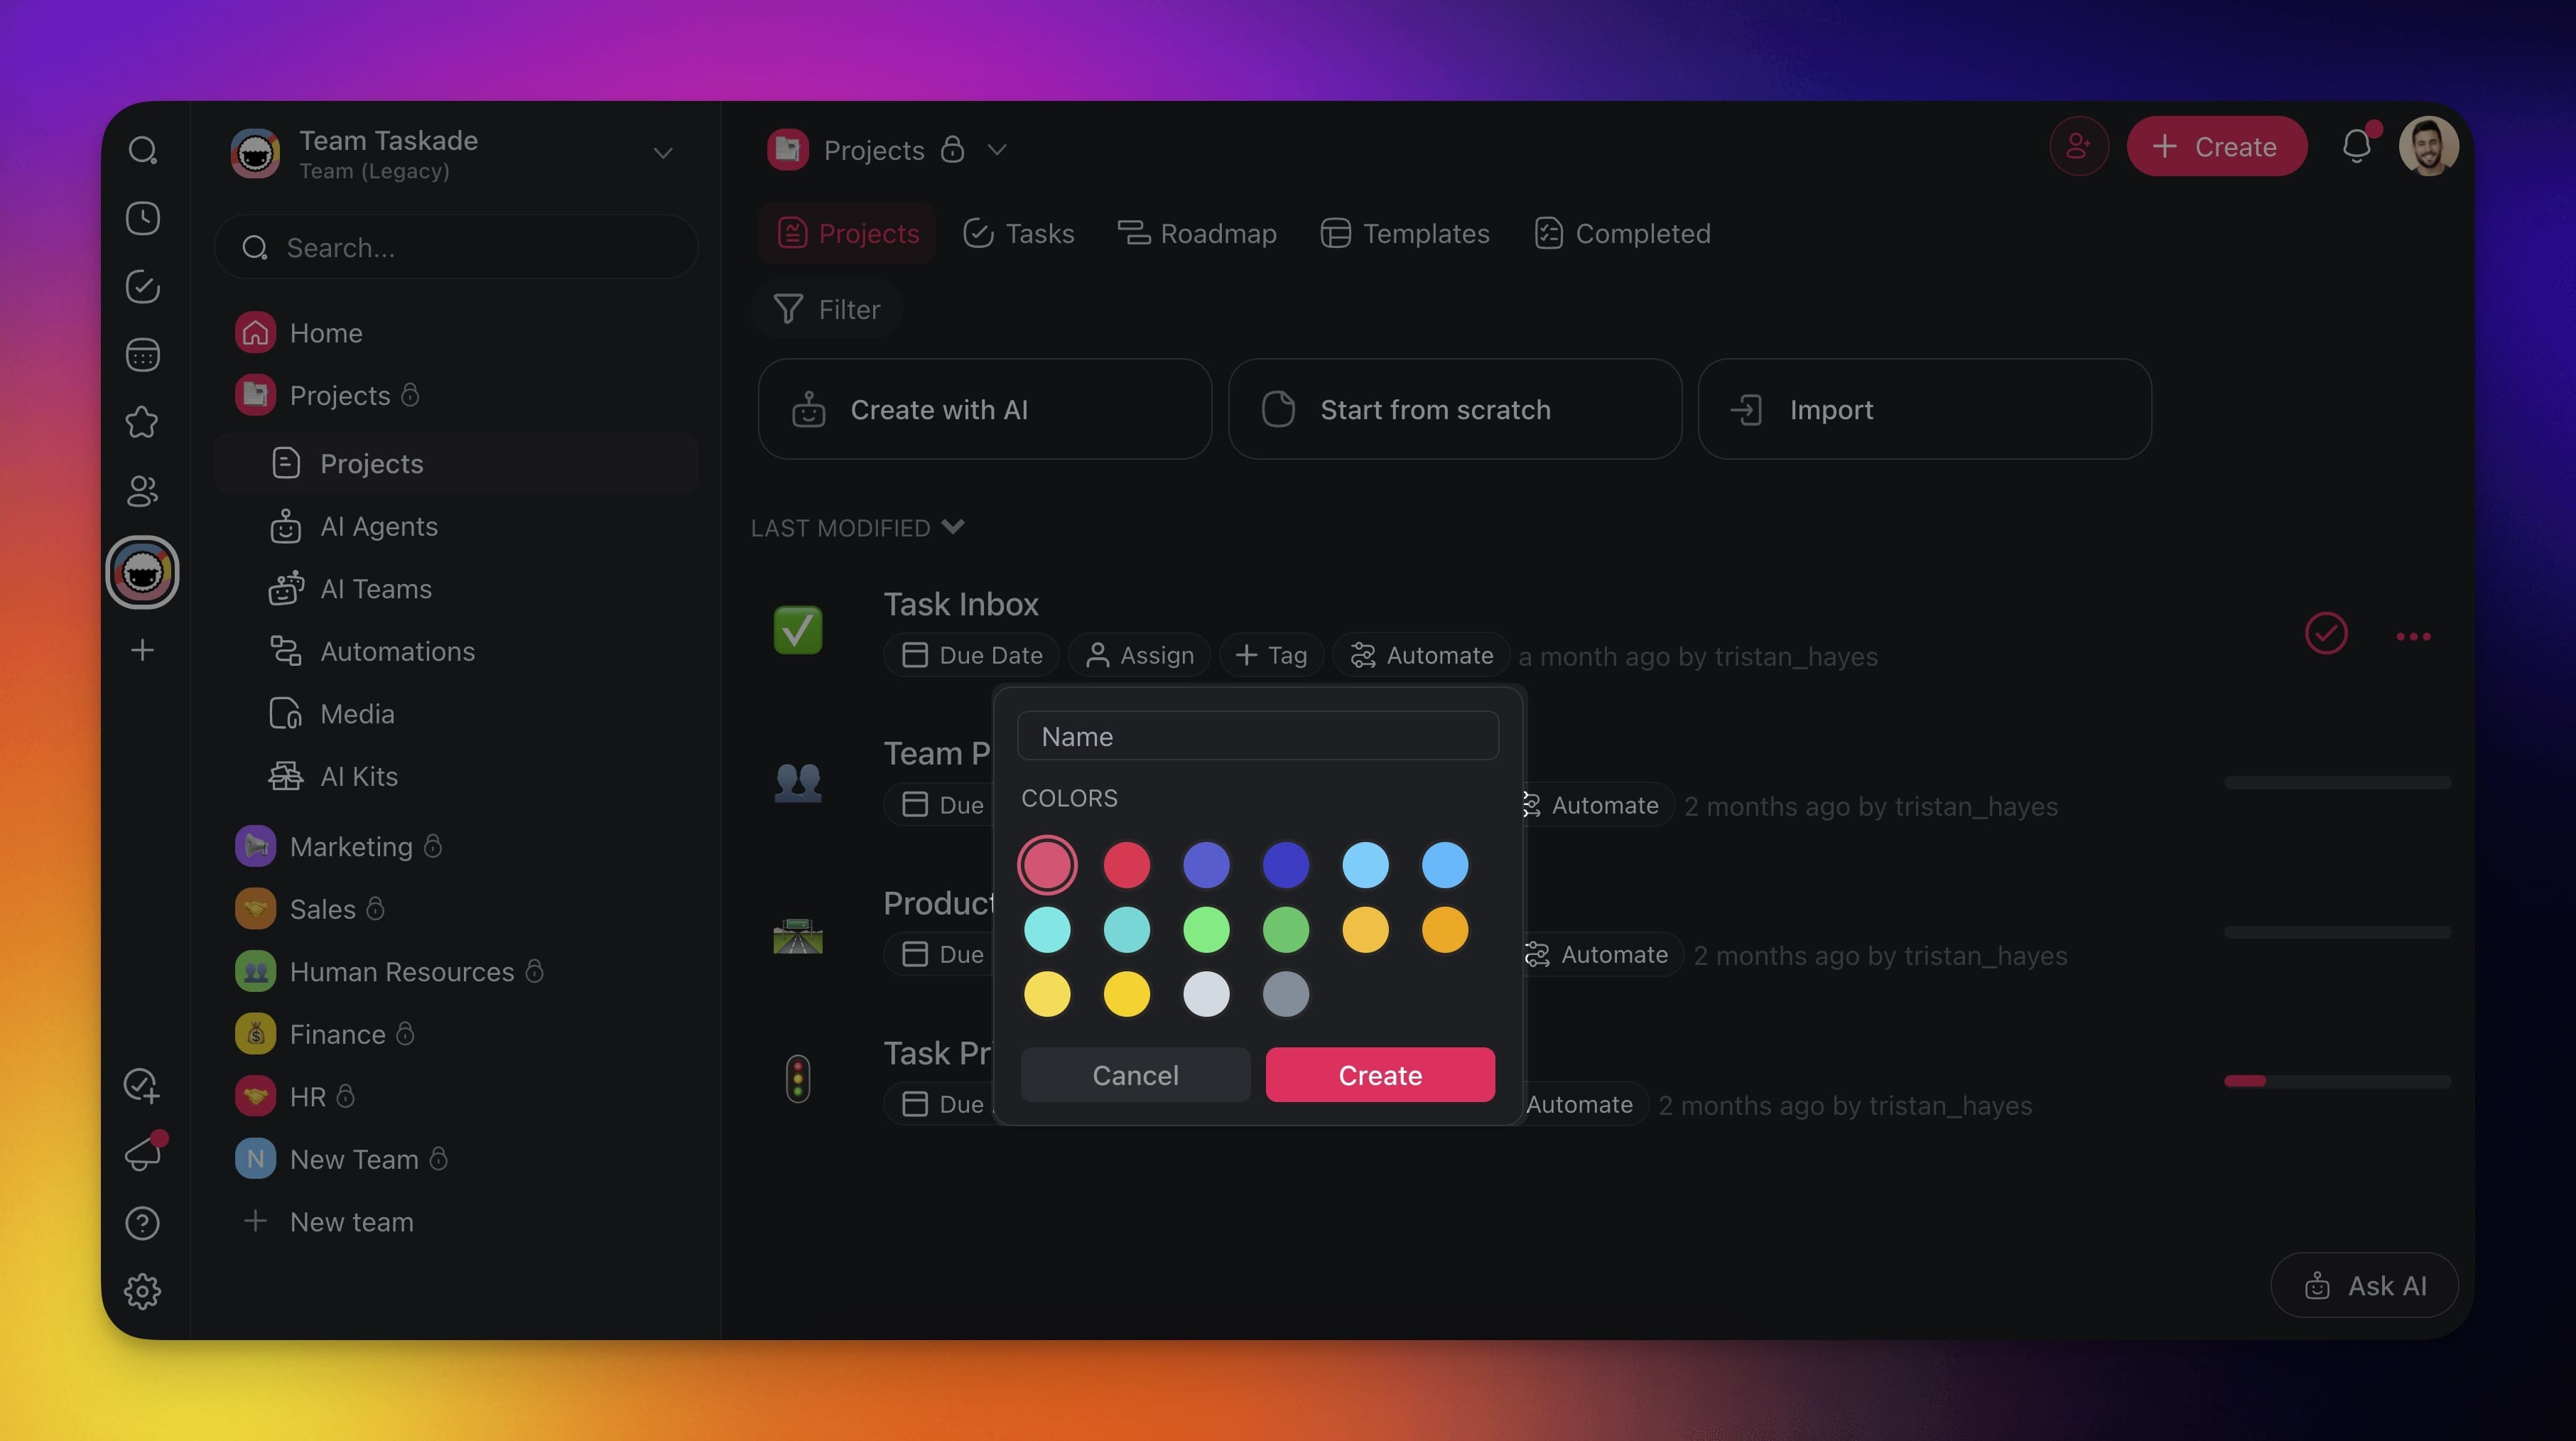
Name your #tag, choose a color, and click Create.
Filter a Workspace / Team
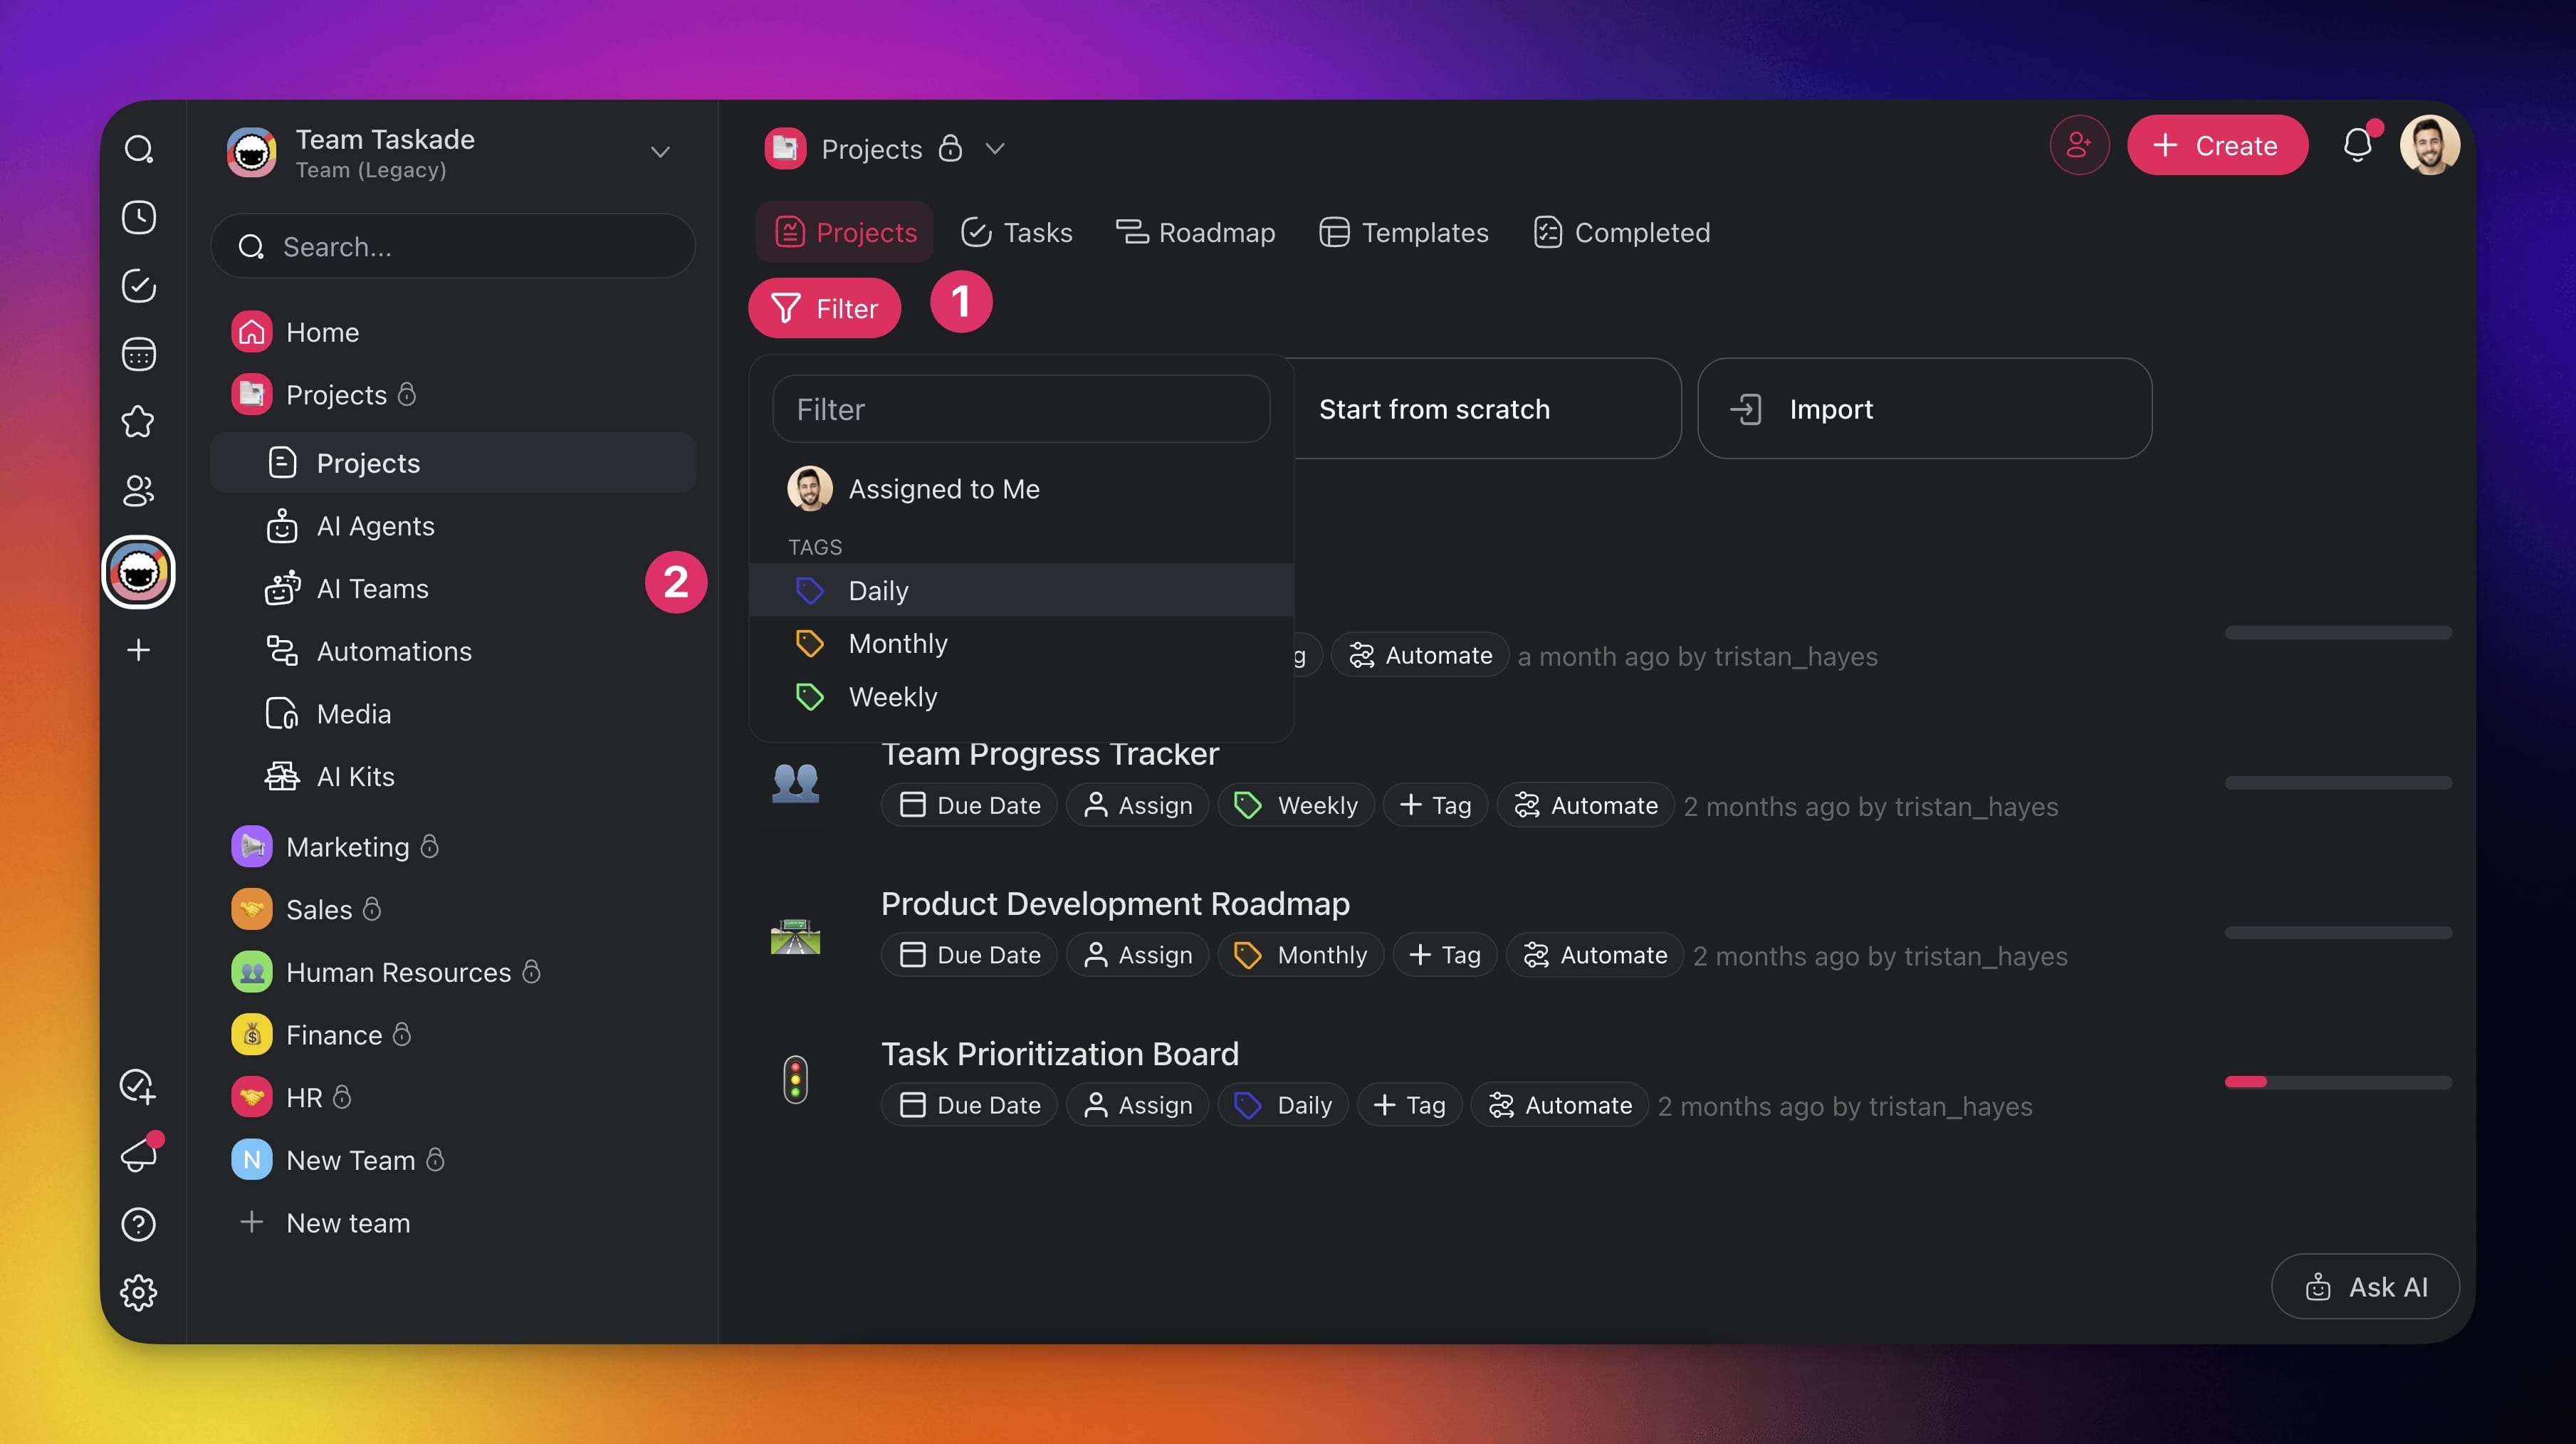
- Go to a workspace or team.
- Click Filter above the list of projects.
- Select any of the tags to filter
💡 Note: You can also filter by clicking tags below Project titles.
Edit or Delete a Tag
- Open your workspace or team and click ➕ Tag.
- Click the 🖊️ pen icon next to a tag.
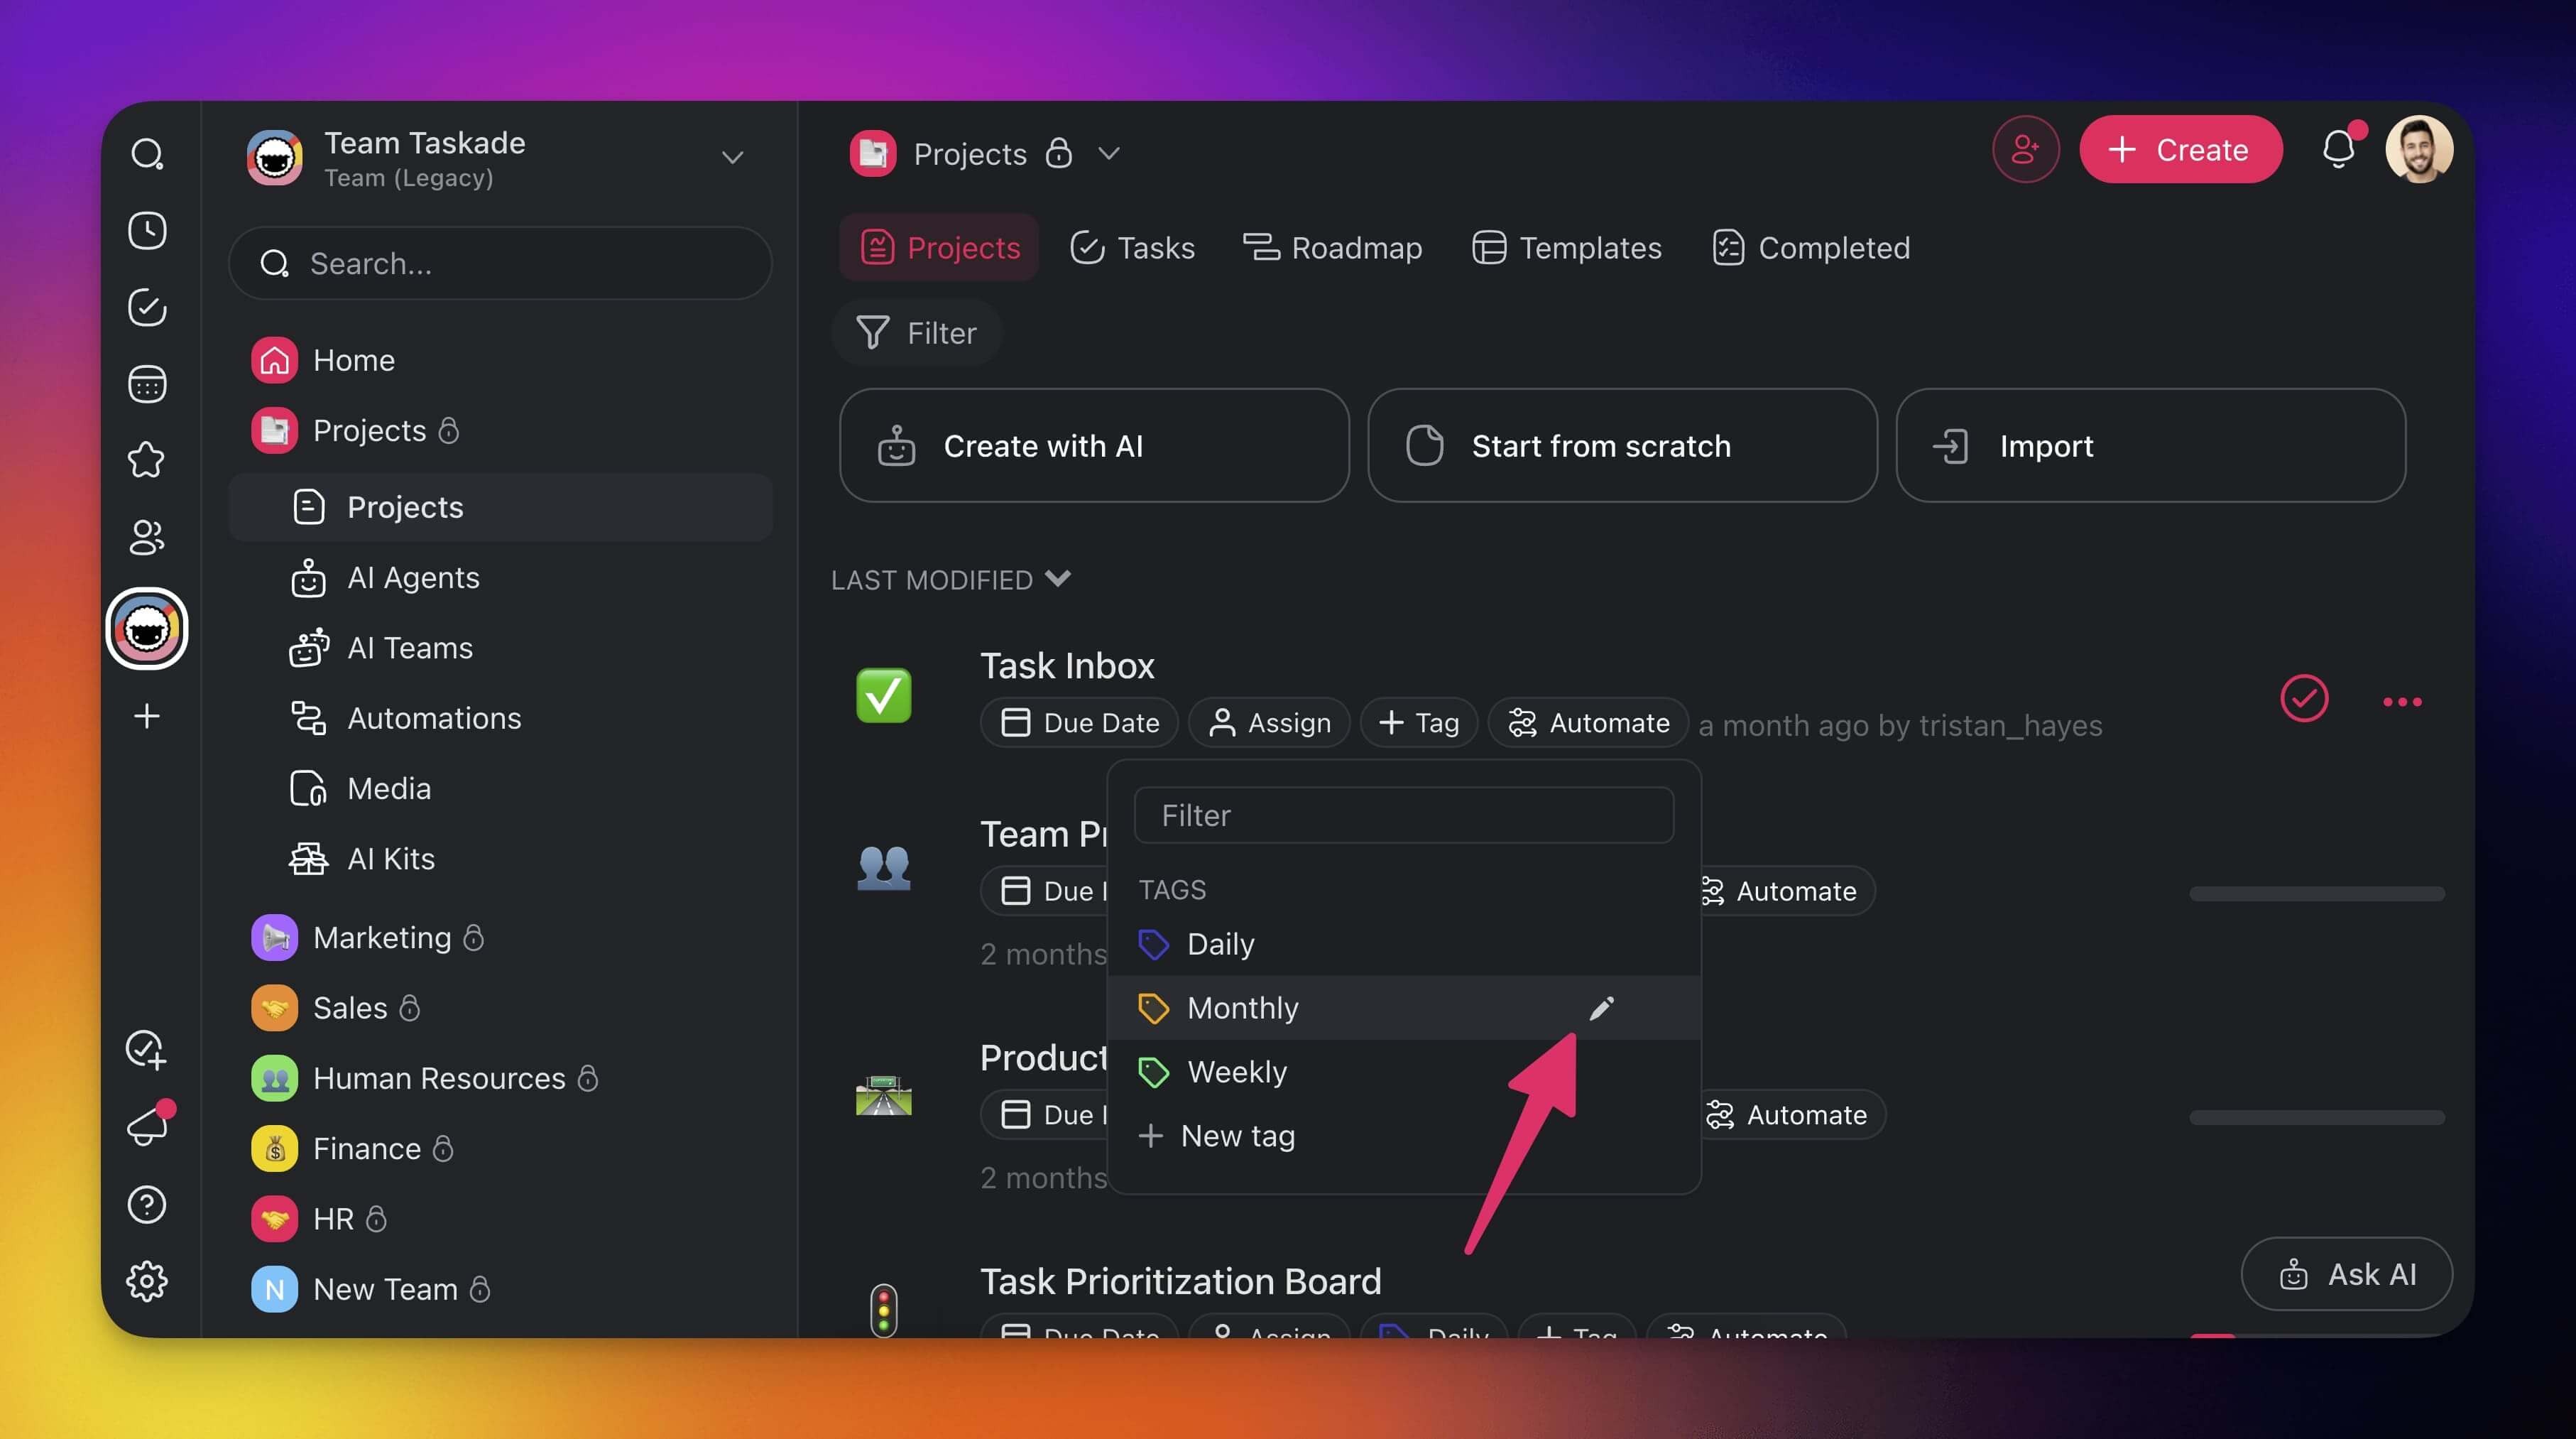
- Change the name, update colors, or Delete the tag.
Tips
- Use consistent naming conventions for tags across your workspace (e.g., prefix with a category like
design-,dev-,marketing-). - Assign distinct colors to high-priority or frequently used tags so they stand out at a glance in List and Board views.
- Combine tags with Folders for a two-level organization system — folders for broad categories, tags for cross-cutting labels.
- Tags are workspace-scoped, so every project inside a workspace or team shares the same tag set.
- Apply multiple tags to a single project for intersection filtering — for example, filter by both
urgentanddesignto find high-priority design work. - Use tags alongside Custom Fields and Due Dates for richer project metadata and more precise filtering.