
TL;DR: Blocks group tasks, notes, and media under H1/H2 headings so a single Taskade project can behave like a wiki, kanban, or database at once. Click ➕ Add Block to insert a new section, then build out tasks, tables, embeds, and AI prompts inside, all visible across all 7 project views.
Here is how a block fits into your project and shows up everywhere you work.
Overview
Every project in Taskade is a collection of tasks and subtasks you can arrange in many different ways. Blocks let you quickly populate your Projects with pre-defined sets of tasks or bullets you can fill with anything you want. Each block type serves a different purpose, from simple checklists to free-form paragraphs.
Add a Block
- Scroll to the bottom or the top of a project.
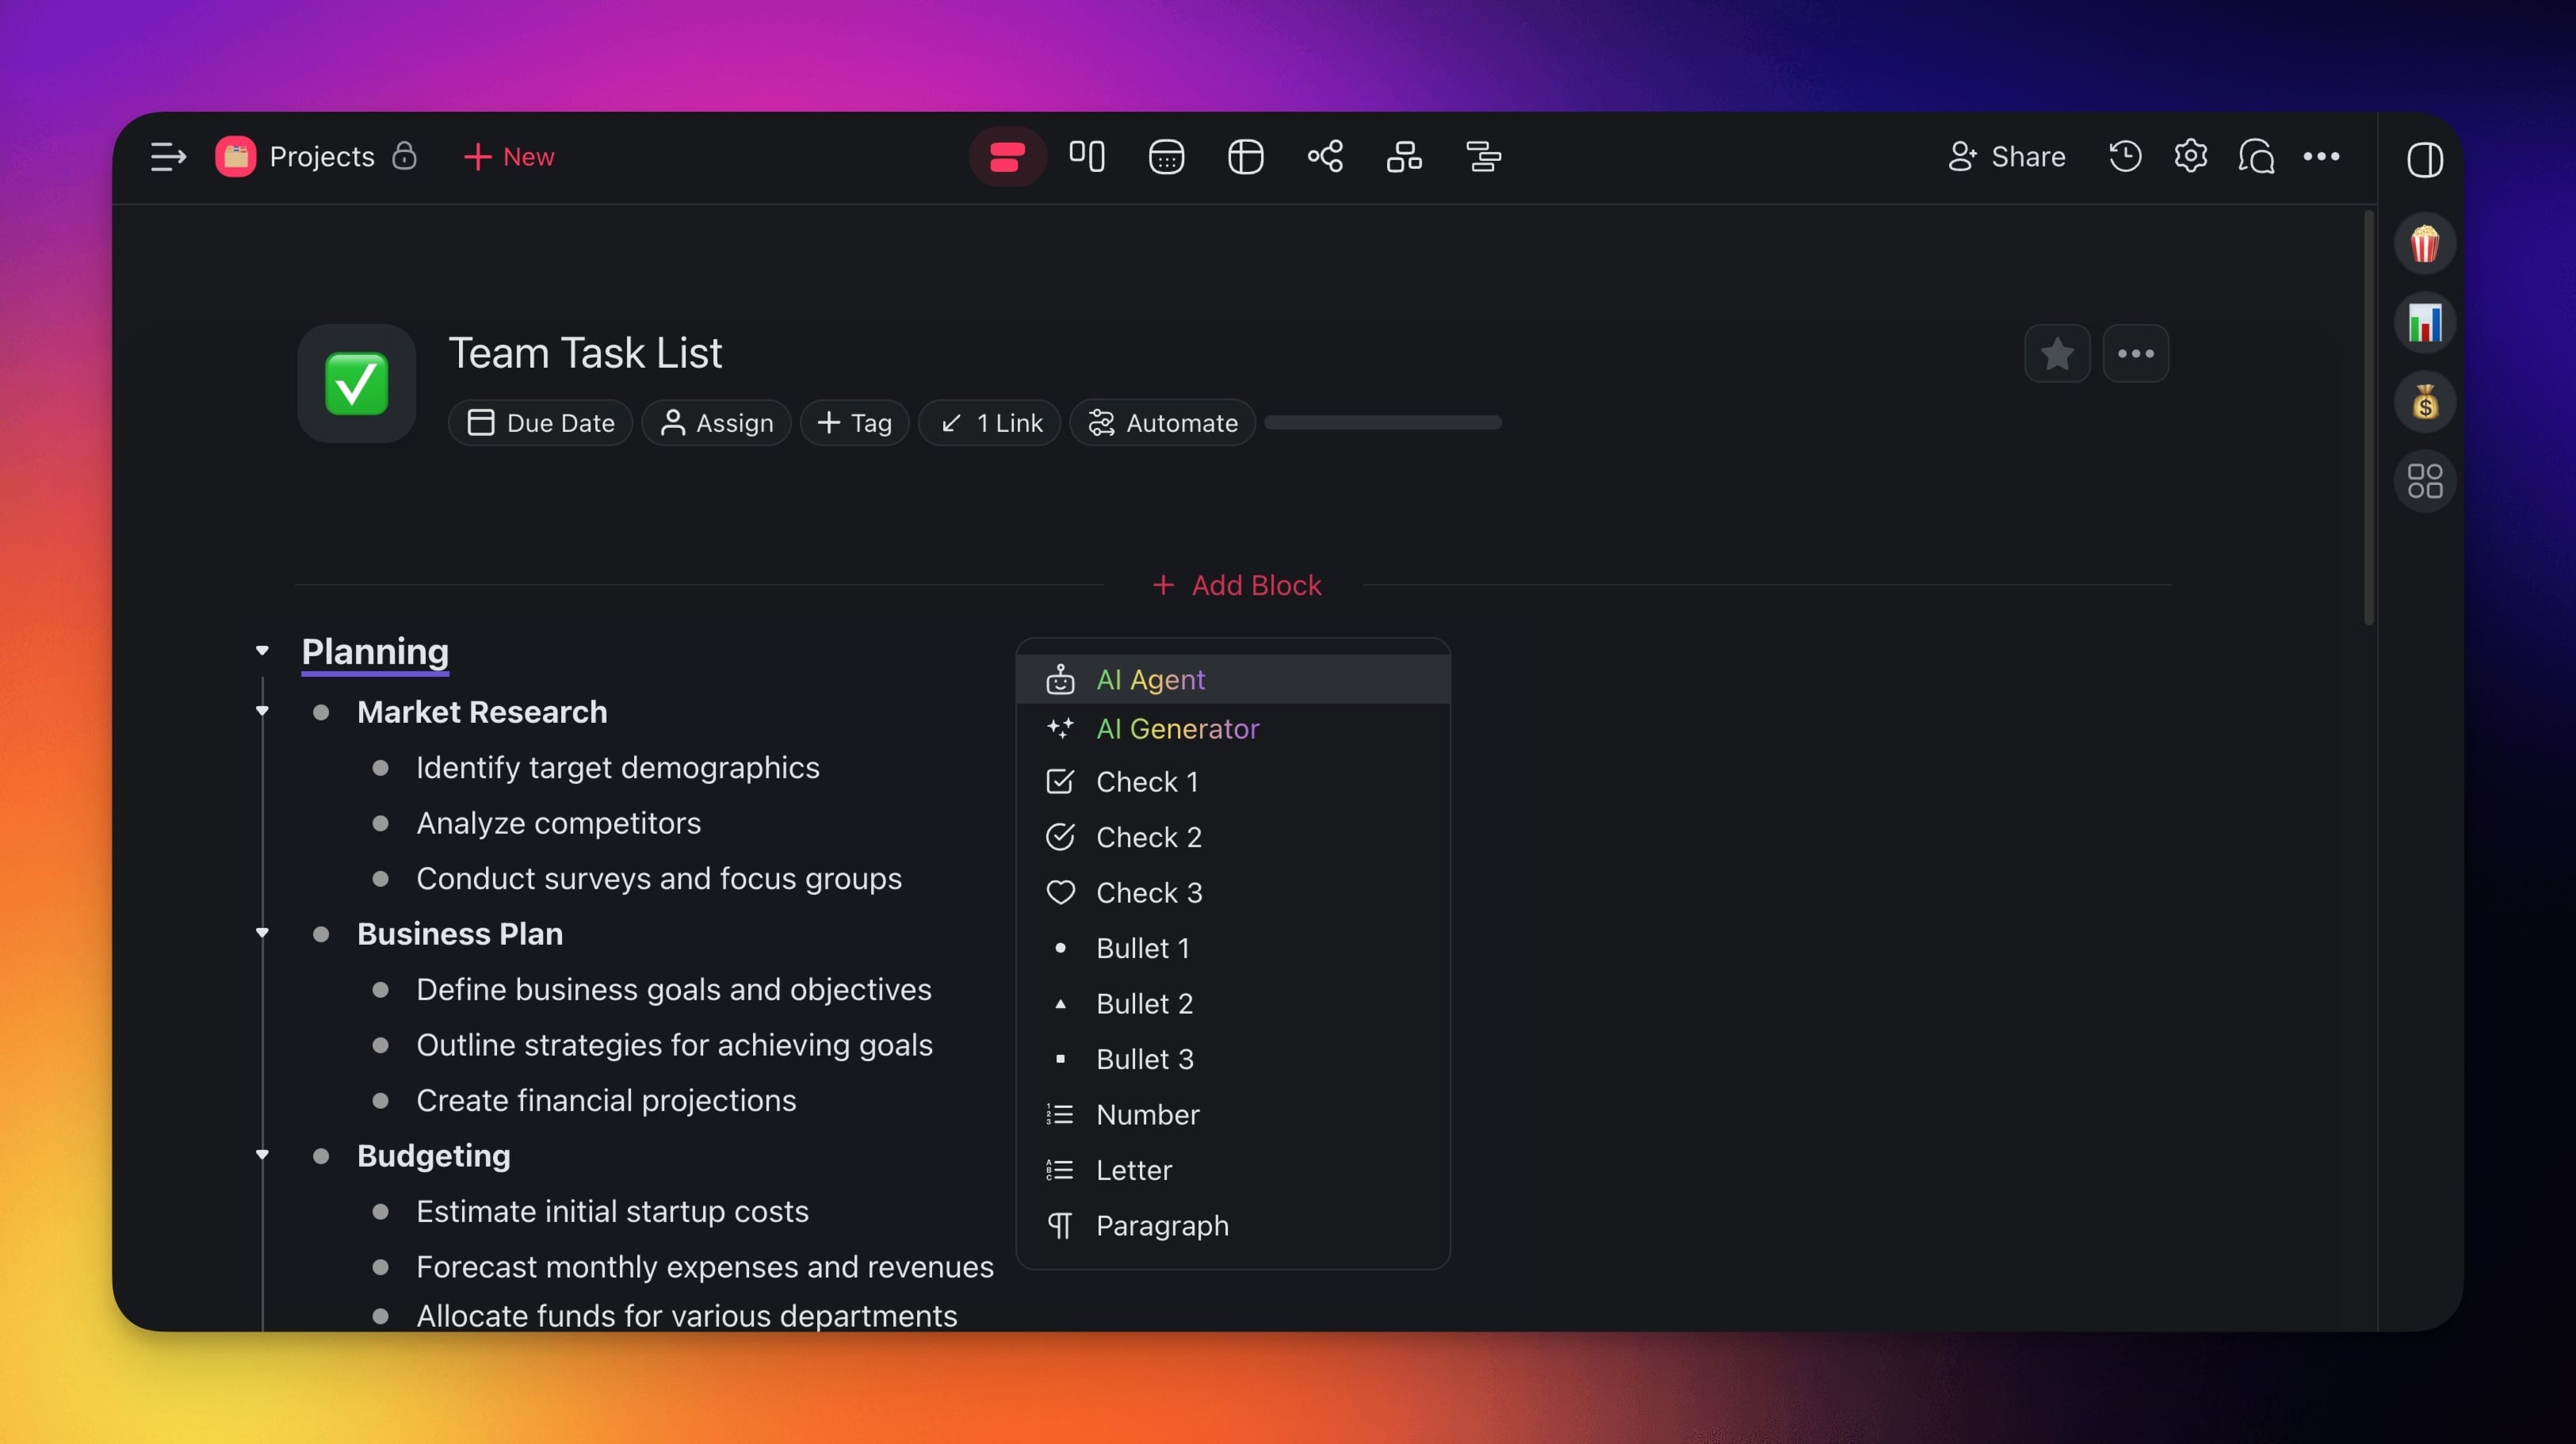
- Click ➕ Add Block.
- Pick one of the available options:
- ✅ Check — Interactive checkboxes for to-do items.
- 🟡 Bullet — Unordered bullet points for notes and lists.
- 1️⃣ Number — Automatically numbered items for sequential steps.
- 🔠 Letter — Alphabetically ordered items.
- ¶ Paragraph — Free-form text for documents and long-form content.
💡 Note: Don't forget to customize tasks and sub-tasks inside Blocks! Visit Editing & Formatting Projects to learn more about task formatting options in Taskade.
Add Block with Agents
You can quickly generate blocks with Taskade AI or your custom AI agents.
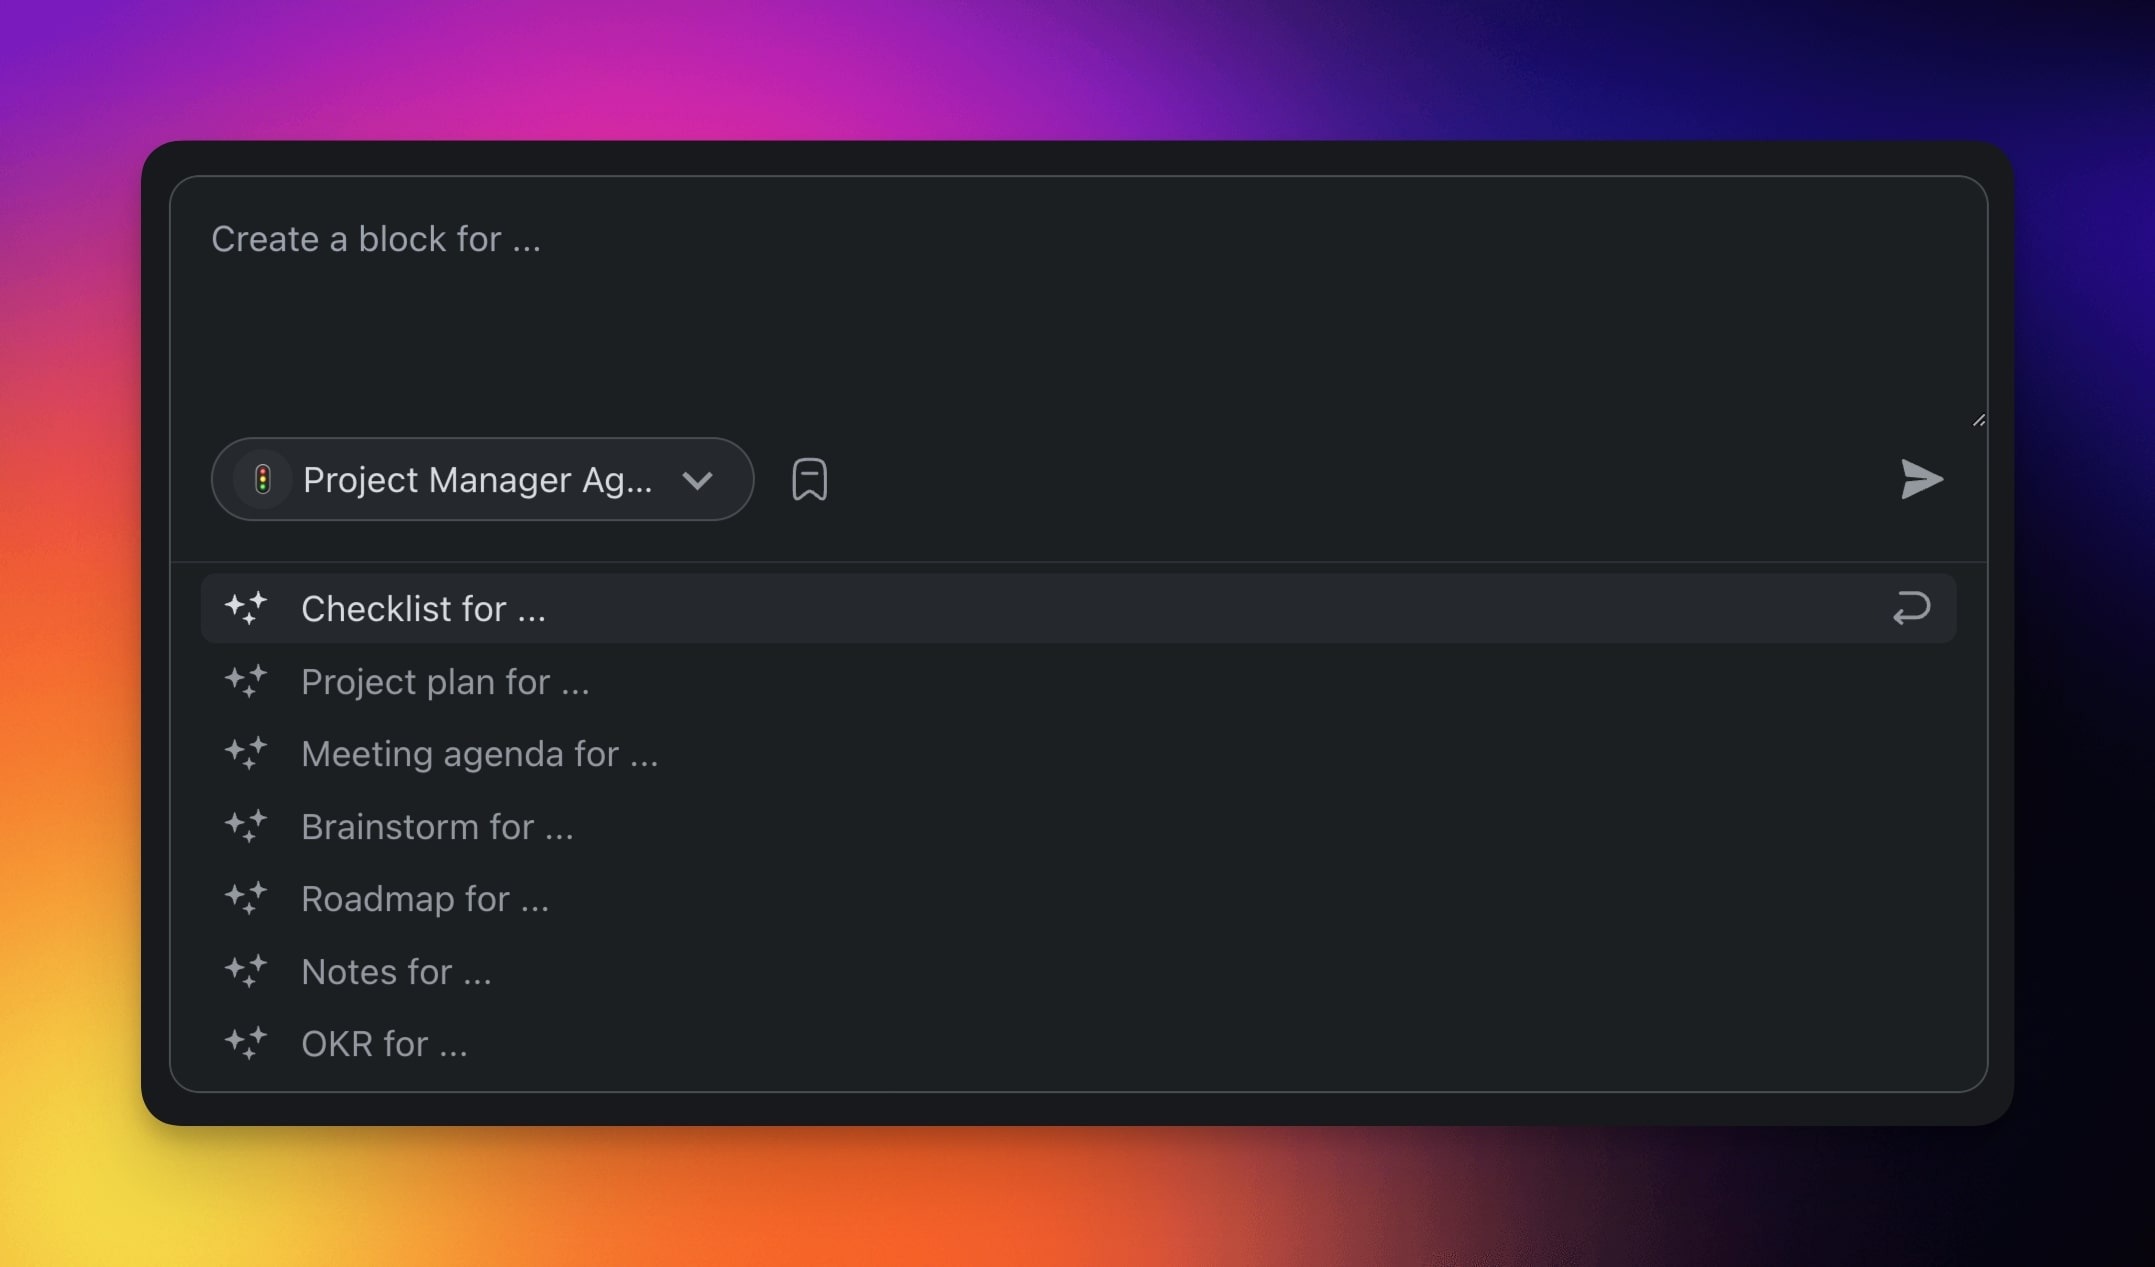
- Click ➕ Add Block.
- Choose AI Agent or AI Generator from the list.
- Describe the type of block/content you want to generate or use a template.
- Press ⌨️ Enter to create the block.
Block Types at a Glance
Check

Bullet
1️⃣ Numbered

Letter

¶ Paragraph

Tips
- Mix block types in a single project — for example, use a Check block for action items and a Paragraph block for meeting notes.
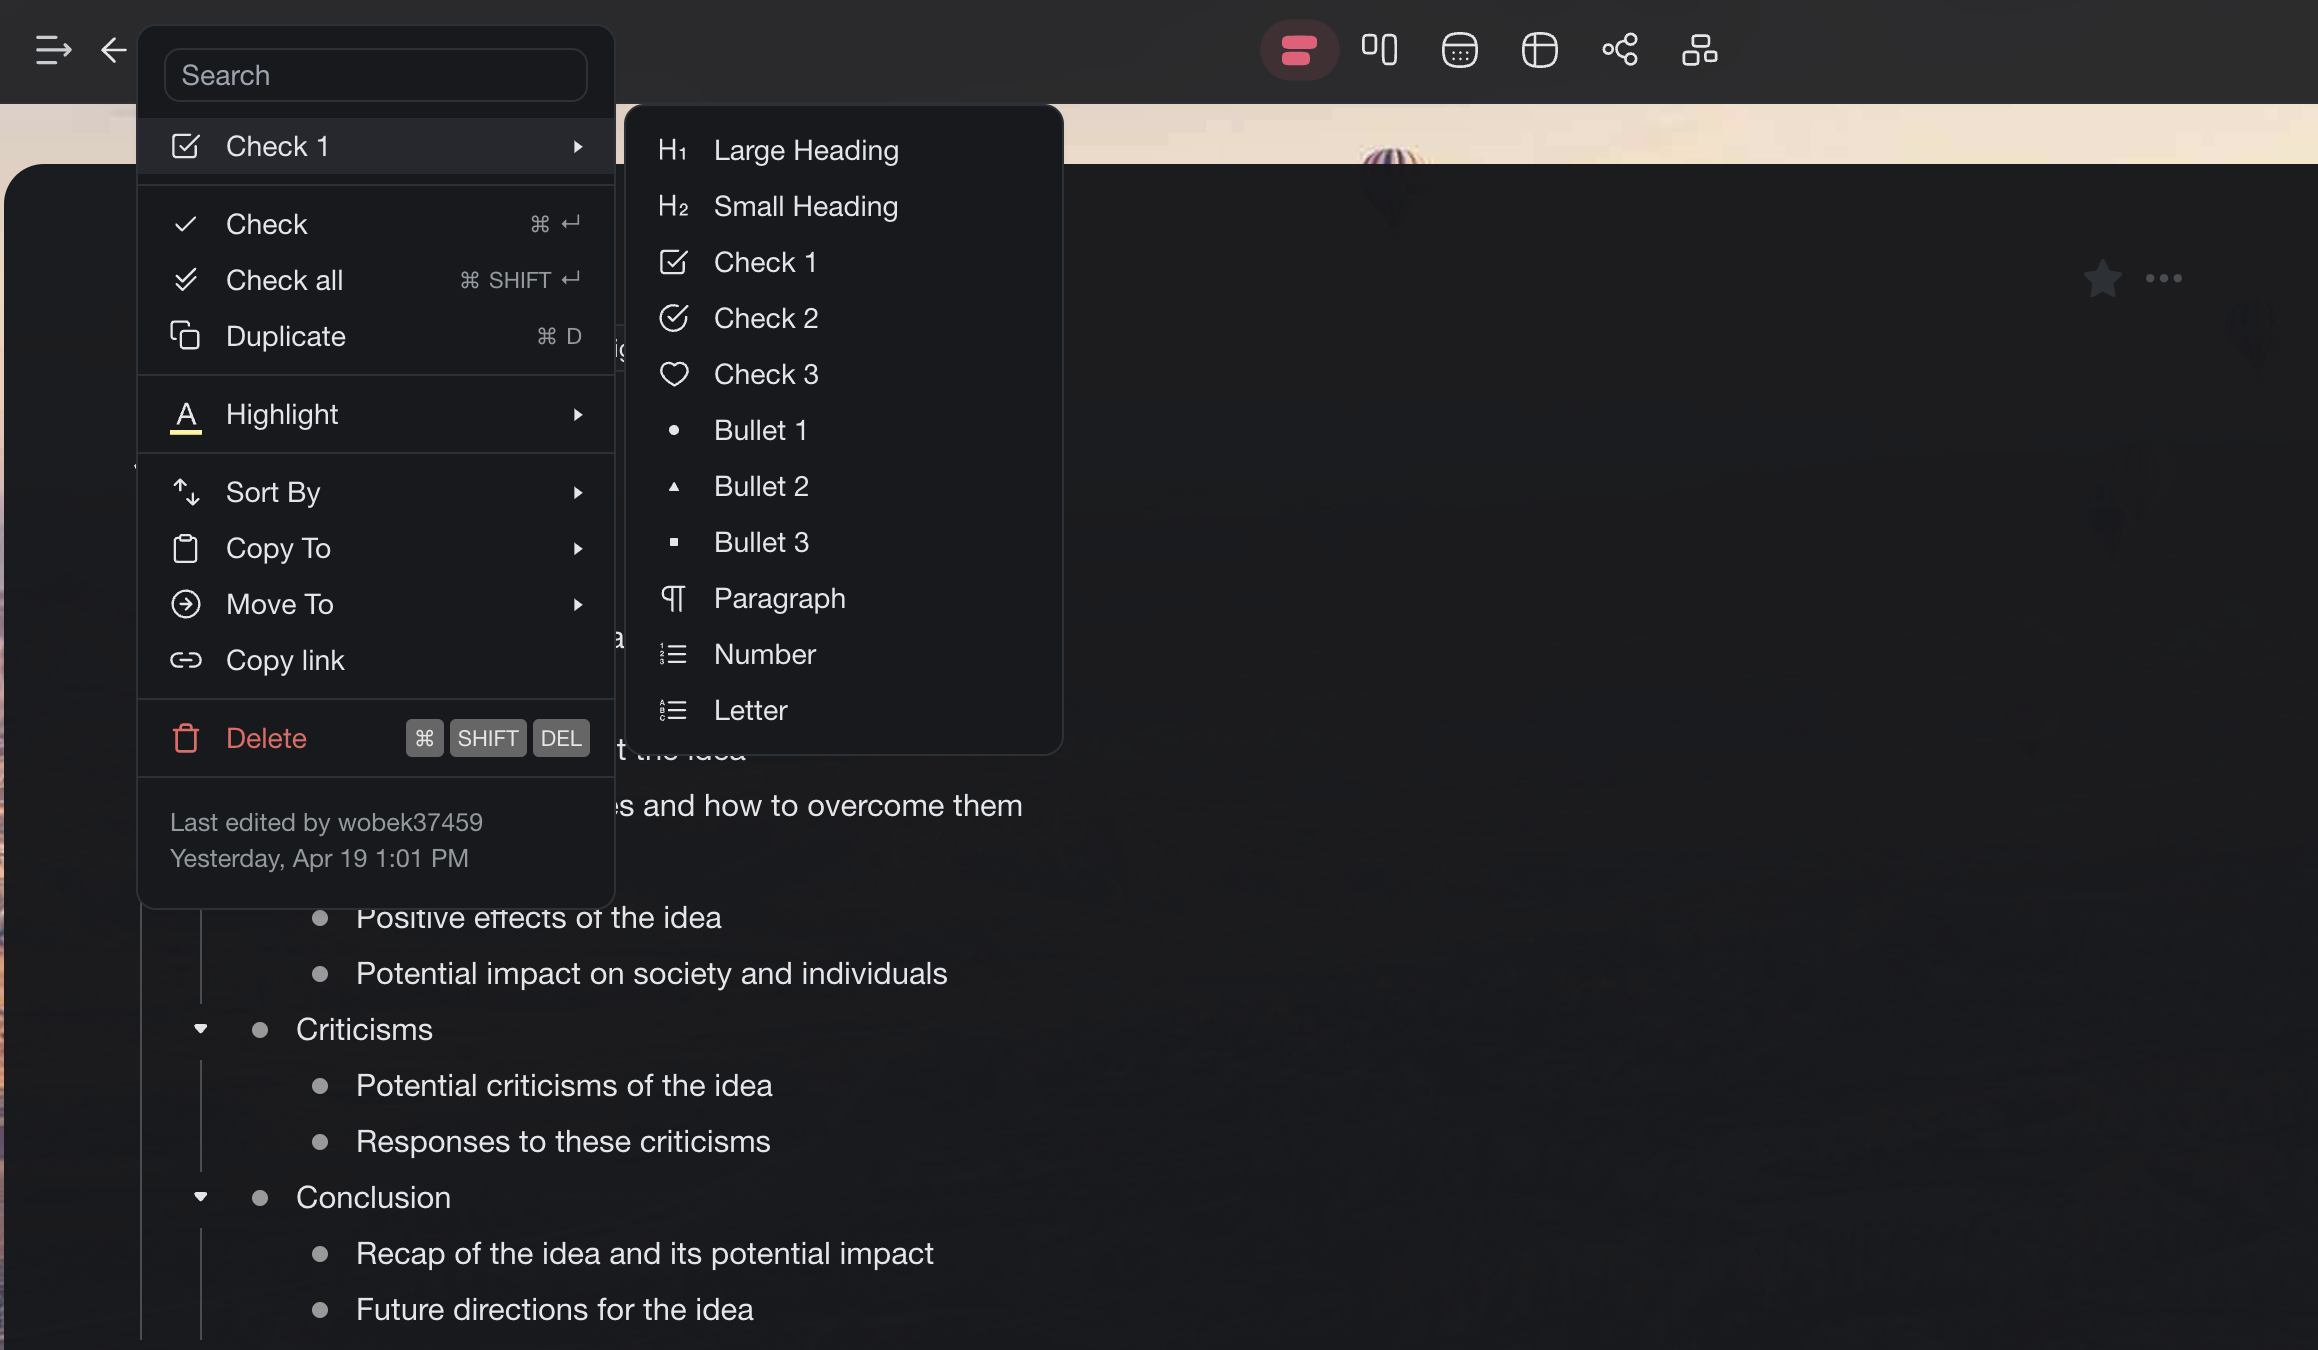
- Use the Drag Icon Menu to change a block's formatting type after it has been created.
- AI-generated blocks can be edited and restructured just like manually created content.
- Blocks work across all project views, so a Check block in List view becomes a card in Board view automatically.