
TL;DR: Set a due date on any task to see it on the Calendar and Gantt views. Add start dates for ranges, enable recurring tasks for daily or weekly cadences, and pair with reminders for push notifications. Type plain-English phrases like "next Monday" to schedule from the keyboard.
Here is how a due date flows from a single task into your schedule.
Overview
Put a deadline on any task and it lands on your Calendar and Gantt views automatically. Add start dates for multi-day ranges. Type plain-English phrases like "next Monday" to schedule from the keyboard. Pair a due date with a reminder so nothing slips.
Add Due Dates to Tasks
Select the task you want to schedule.
Click the ➕ button next to a task to open the Add-ons Menu.
- You can also use the ⌨️ Ctrl/Cmd + / shortcut.
Choose a start date, an end date, and a time.
- To select a single date, click on the date once.
- To select a range, click the "Start date" field and select an earlier date.
(optional) Enter a due time. If you set no time, the reminder defaults to midnight.
If you have notifications enabled, you will receive an alert when a task is due!
💡 Note: Visit Recurring Tasks to learn more.
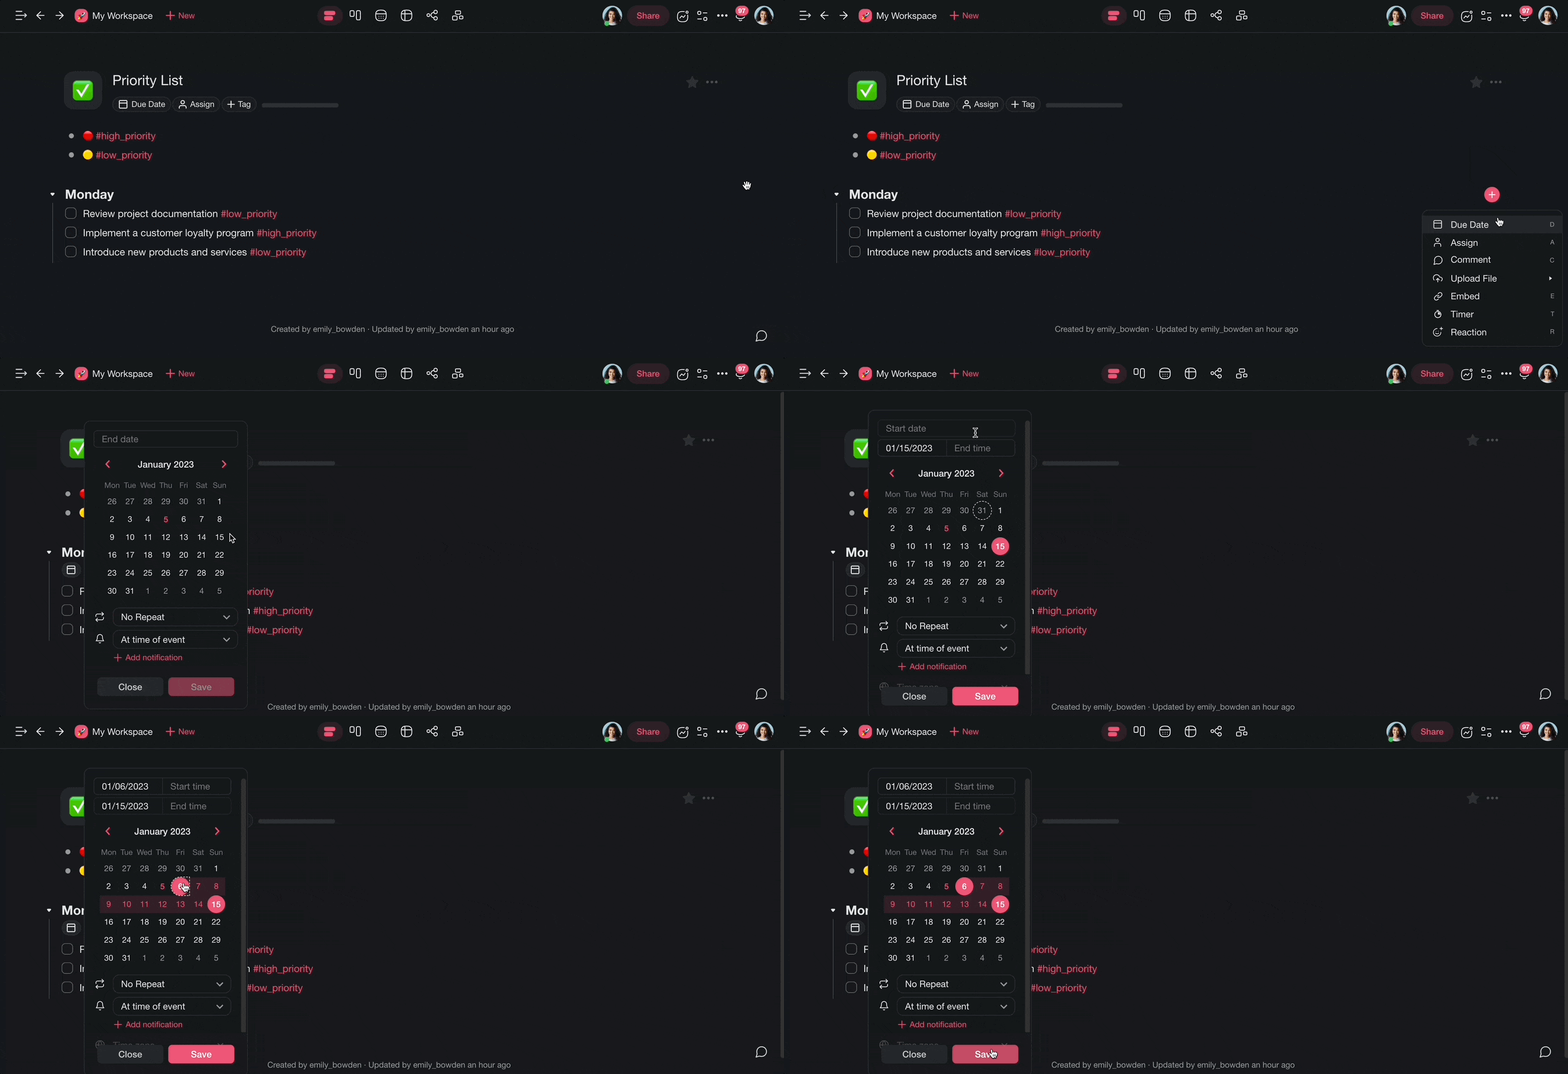
💡 Note: Tasks with due dates appear in the Calendar.
Edit a Due Date
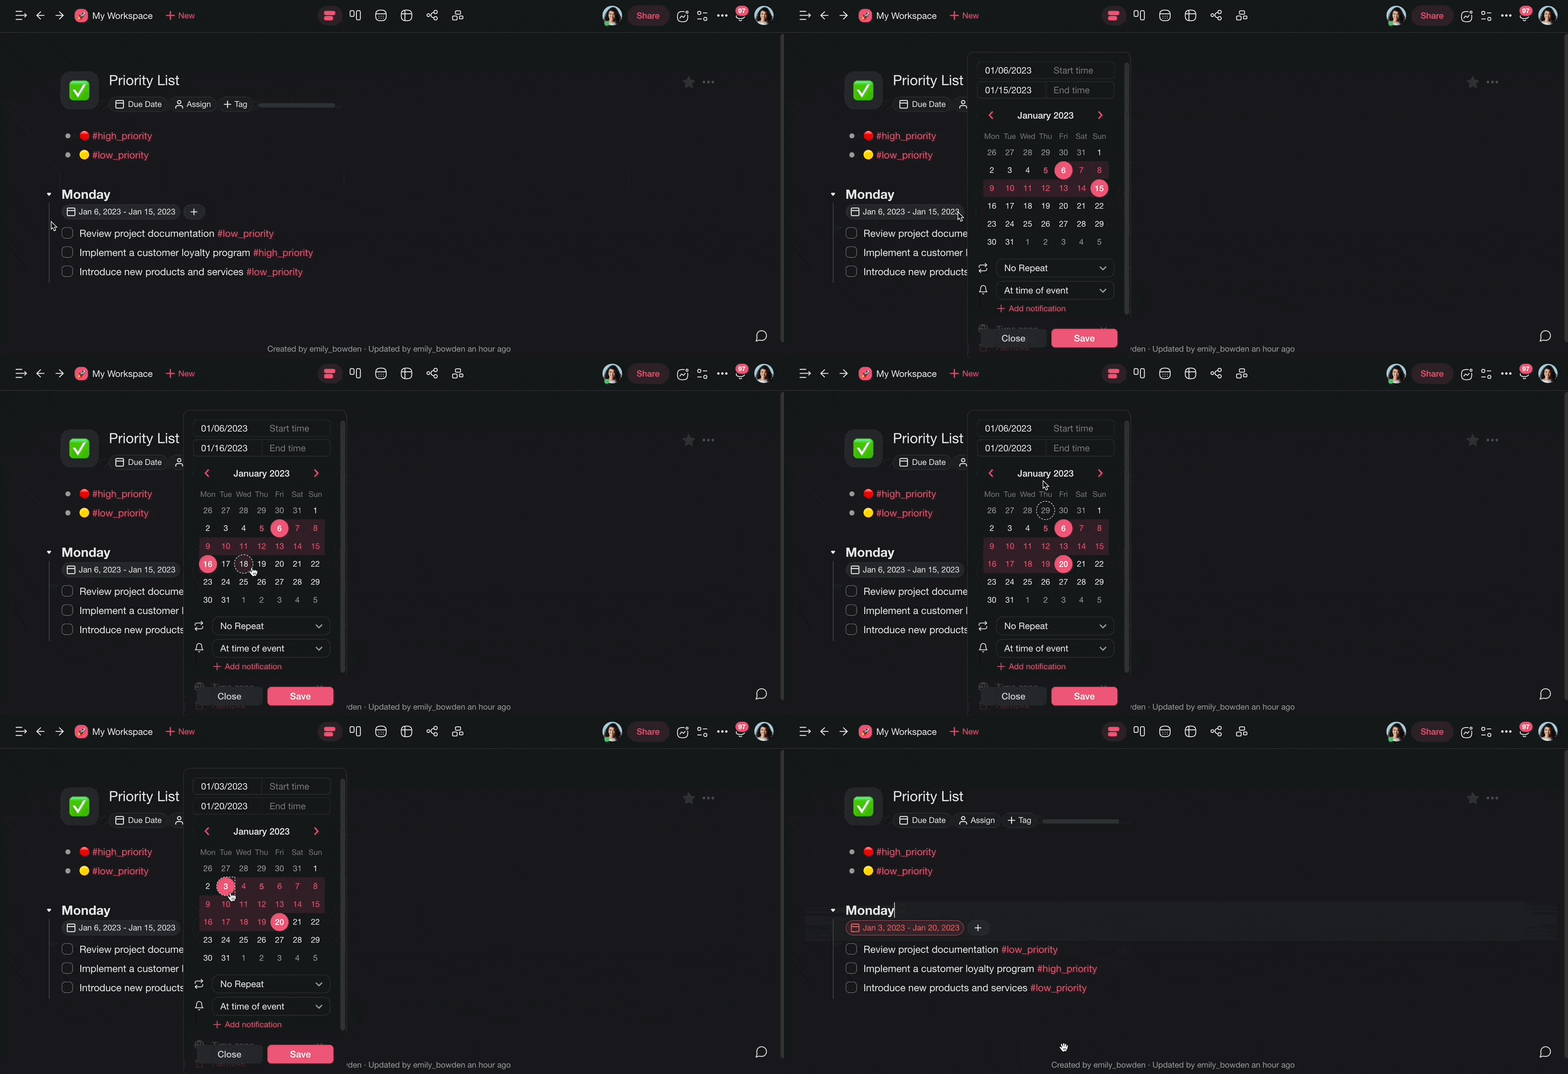
To change a due date, click the date box below a task. Then:
- Choose a new day to edit the End date field.
- Click the Start date field and choose a new day to edit the start date.
- Click Save to confirm.
Remove a Due Date
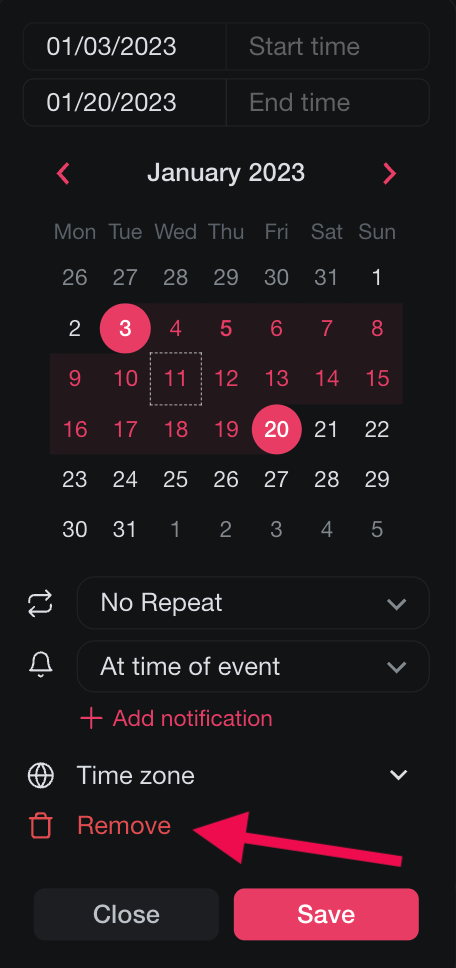
To delete a due date, click the date box below a task and select 🗑 Remove.
Add Due Dates to Projects
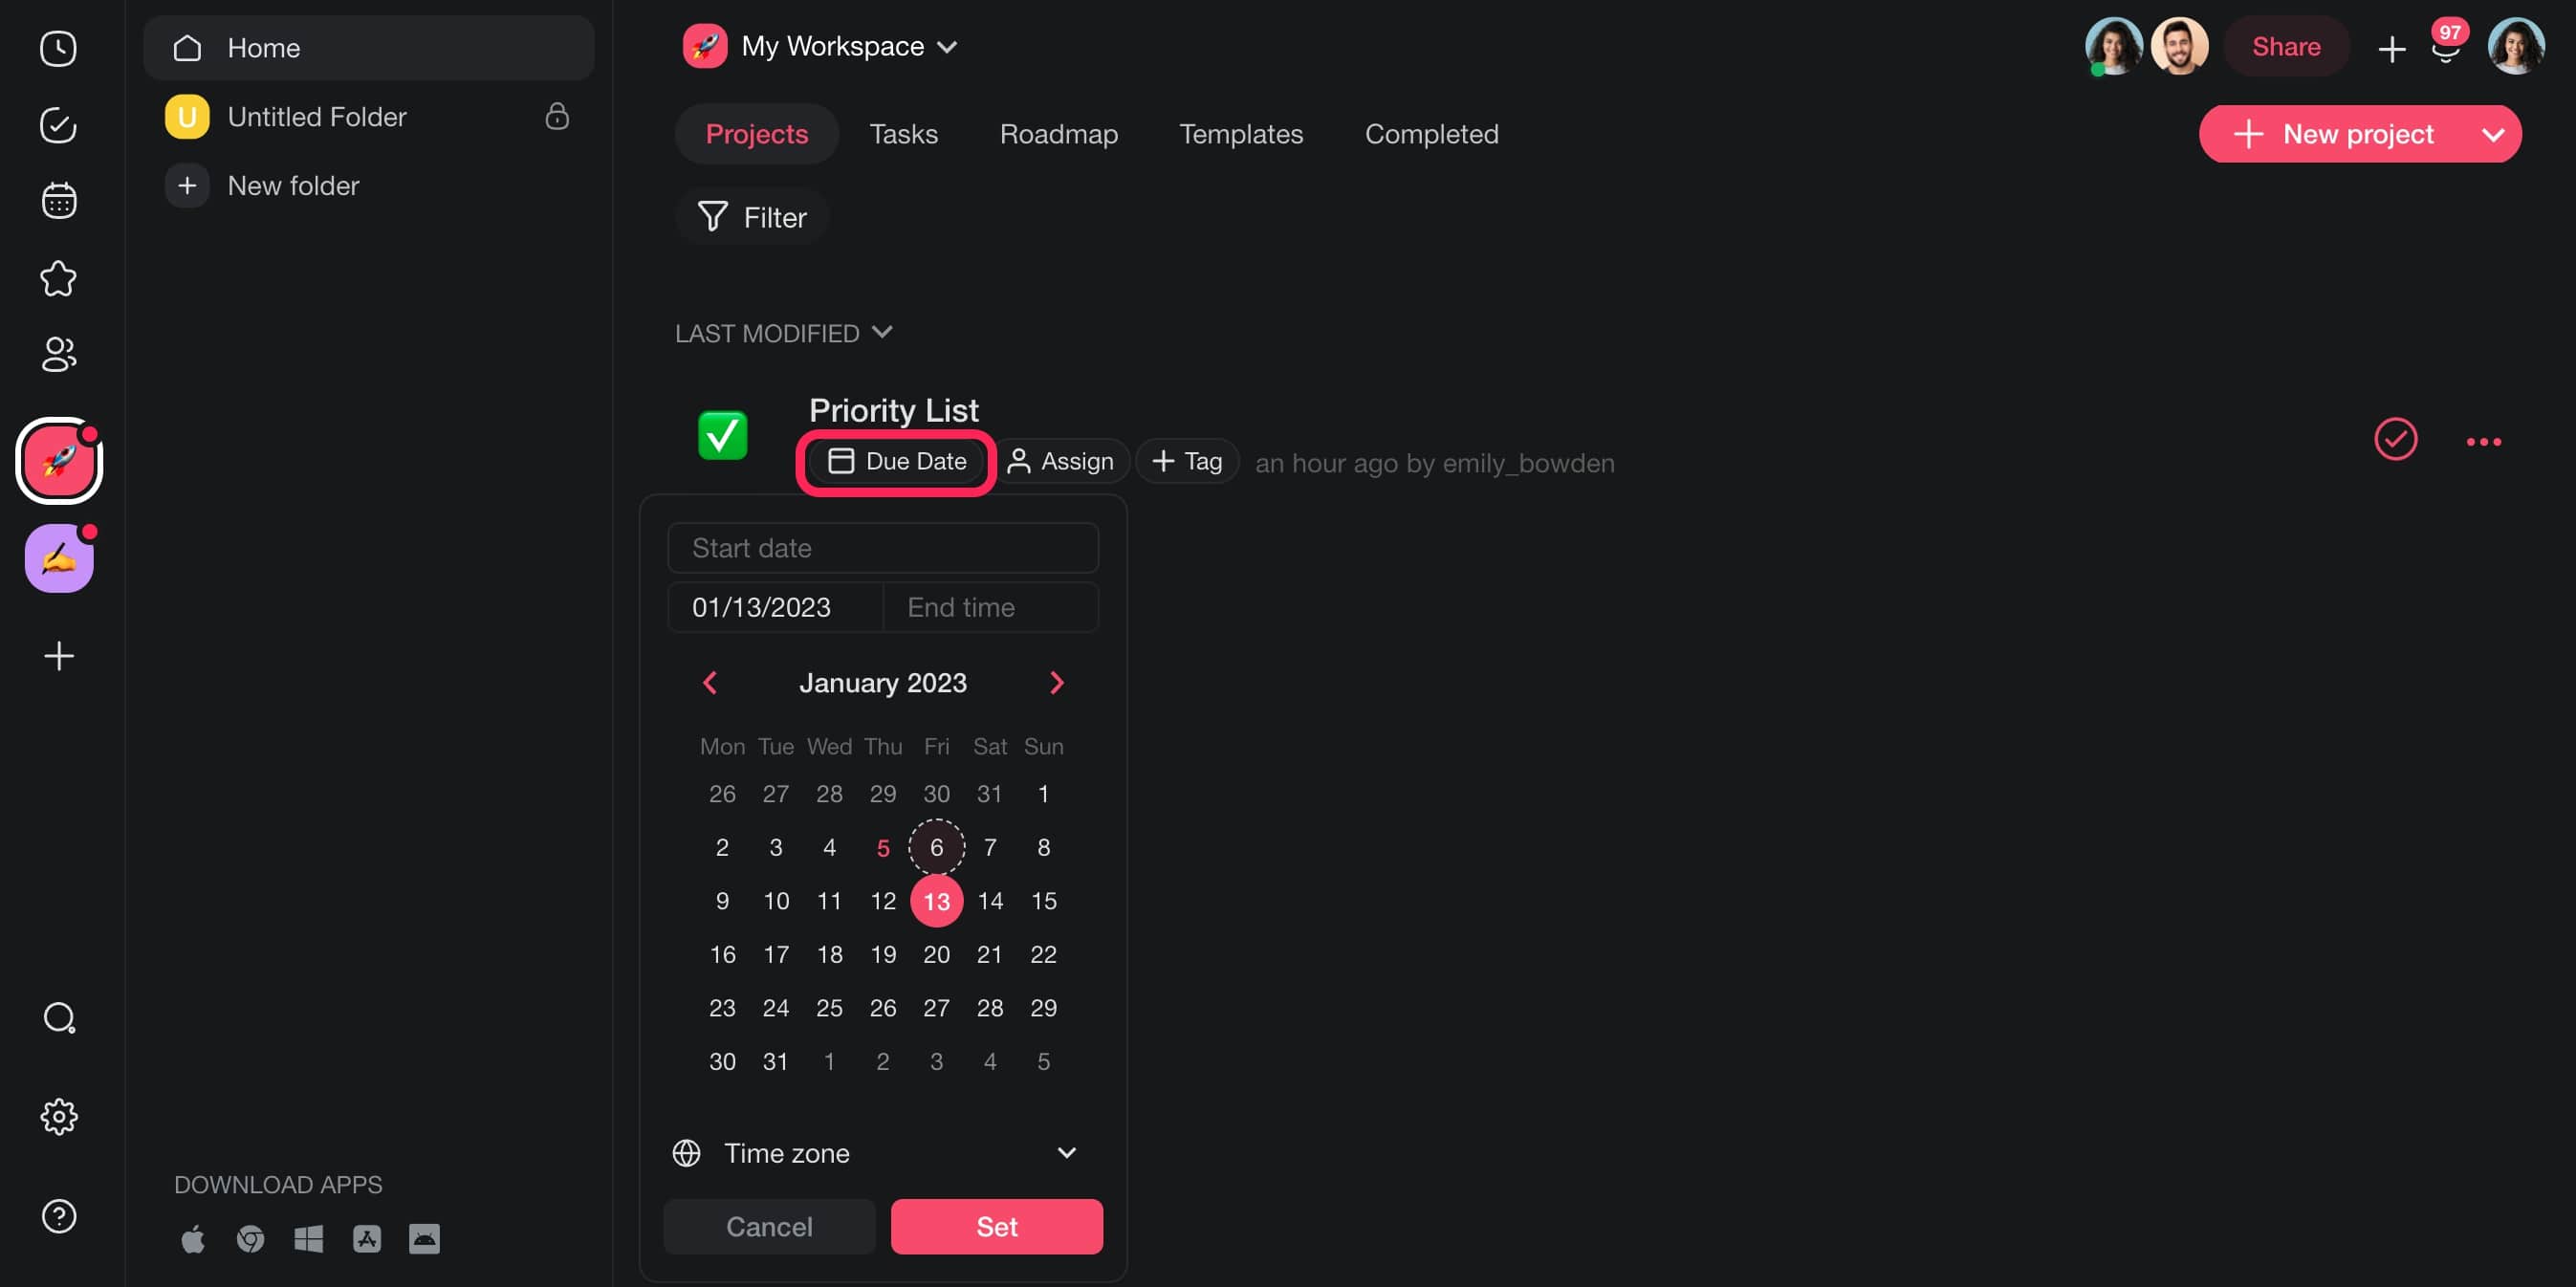
Add a date or date range to your projects to track schedules and deadlines. The project date range appears on the Calendar. Here is how:
Navigate to a workspace, folder, or project.
Click 🗓️ Due Date below a project title.
- To select a single date, click on the date once.
- To select a range, click on the start date you want.
(optional) Pick a time zone for your project.
Click Set to save changes.
Natural Language Due Dates
With natural language you can add dates to tasks from the keyboard. Follow these steps to use it in a project:
- Add a task or sub-task to a project.
- Press / to open a Slash Command Menu.
- Type a due date and time with an expression from the table.
| today/tomorrow | May 1st | May 1st 5 pm |
|---|---|---|
| yesterday | 1st May | May 1st 2023 at 5 pm |
| next week | 1st May 2023 | 5 pm May 1st |
| last/next Monday | May 4th 2023 | 1st May 2023 5 pm |
 |
How Taskade Reads Your Dates
Taskade uses Natural Language Processing (NLP), so you can add dates to tasks fast. When you create a new task or sub-task, you can define its due date with everyday speech. For example: "attend a team meeting tomorrow."
Note: Visit Create, Edit, & Manage Due Dates to learn more.
Schedule Tasks
Follow these steps to schedule tasks with natural language:
- Add a task or sub-task to a project.
- Press / to open the slash command pop-up.
- Type the date and time with an expression from the table.
- Open the Calendar and check that the task is there.

Due Dates Set by the API or an AI Assistant
Due dates do not have to be typed by hand. Connect Google Calendar to your workspace first. A due date set through the Taskade API then lands on that calendar, the same as a hand-typed due date. A due date set by an AI assistant over MCP works the same way.
Two things to know before you rely on it:
- The workspace must be on a paid plan or an active trial. Google Calendar sync is not part of the free plan.
- A due date set by an automation action stays inside Taskade. That one does not push to Google Calendar.
Date / Time Examples
| today / tomorrow | May 1st | May 1st 5 pm |
|---|---|---|
| yesterday | 1st May | May 1st 2023 at 5 pm |
| next week | 1st May 2023 | 5 pm May 1st |
| last / next Monday | May 4th 2023 | 1st May 2023 5 pm |