
Overview
A field-service operator sends technicians out with paper work orders. Every signed sheet comes back as a phone photo taken in a driveway. Build an app that accepts that photo and reads the words off the page. The office then gets one dashboard row per job, with the customer, the address, and the date filled in.
Three pieces do the work. A published form with a File field collects the document from whoever is holding it. An automation reads the page and pulls out the values you name. A Project holds one row per document, with the original file attached to the row.
TL;DR: Build a document intake app in Taskade Genesis with a few small prompts. A technician photographs a signed work order. The form sends the file to your automation. The Convert File to Text step reads the page. The dashboard then shows a named row per job. Build the app →
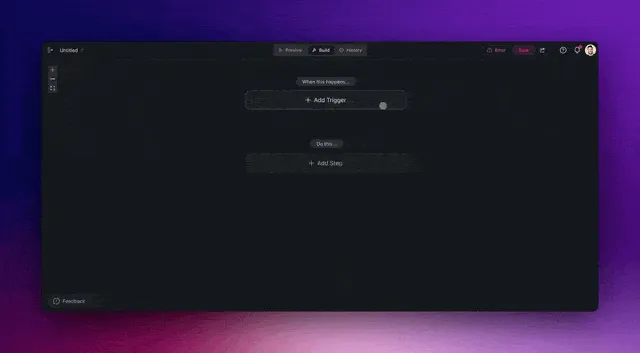
What you will build
- A Work Orders Project in Table view holding one row per job.
- A published intake form with a File field, a customer field, and a technician field.
- An automation that reads the uploaded page and pulls out the values you name.
- A dashboard with a row per document, the file attached, and a status column.
- Sign-in so only your technicians can submit.
Read it top to bottom. The technician never sees the middle. They open a link, pick the photo, and tap submit. Everything after that runs in the workspace the office already lives in.
Build it one prompt at a time
One prompt, one feature. Build the shell, look at it, then add the next piece. Small prompts land closer to what you meant, and you can see which step changed something when you check the result.
Step 1. Generate the app
Open Taskade Genesis and paste this.
Build a work order intake app for a field-service company. Work order fields: customer, service address, job number, date of service, technician, status (Received, Reviewed, Invoiced). Connect a Work Orders Project as the live database. Show a dashboard listing every work order by date.
Taskade Genesis ships a Work Orders Project, a dashboard, and a published app. Every card and row carries the record's real name, so a job reads Harbor View Plumbing · 14 Aug on the dashboard instead of a placeholder.
Step 2. Add the upload field
Paste this next.
Add an intake form to the app. Fields: technician name, customer, a File field labeled "Photo or scan of the signed work order", and an optional notes box. Submitting the form creates a new Work Orders row with status Received.
The File field is the piece that matters here. When someone picks a file in the form of your published app, that file goes to the automation as a real stored file. It also lands in your workspace Media Files, where you can open it. A file that arrives through a webhook behaves the same way. See File Uploads in Your App for the field as the sender sees it. See Build a Form with Conditional Logic to branch the questions underneath it.
Step 3. Read the page
Paste this.
On form submit, run an automation that reads the uploaded file and returns its text. Use the Convert File to Text step. Send every upload through that one step.
The Convert File to Text step reads the words off the page. A scanned work order and a photo taken on a phone both come back as text, and so does a typed PDF sent from the office. One step covers all of them, so the automation has a single path rather than a sort by file type. Read How Taskade Reads Scanned Documents for the format list and where the reading happens.
Step 4. Turn the text into fields
Paste this.
Add an Ask Agent step after the text step. From the work order text, return: customer name, service address, job number, date of service, technician name, parts used, and total. Return each one as its own named field.
Name the fields you want and the app defines each one, then feeds it the values from the document. The report comes back reading Job 4417 · 118 Harbor View Rd · 14 Aug rather than a wall of raw text you have to re-read.
Fill the Prompt field on the Ask Agent step. The optional input below it can stay blank. The step reads what the step before it handed over.
Step 5. Write the row
Paste this.
Write each named field into the matching column on the Work Orders row created by this submission. Attach the uploaded file to that same row. Set status to Reviewed when every required column has a value, and leave it Received when one is missing.
Now the row and the document travel together. An office manager opens the job, sees the parsed values, and clicks through to the original photo without leaving the record.
Step 6. Publish and invite
Paste this, then click Publish.
Publish the app. Require sign-in. Technicians can submit the form and see only the jobs they submitted. Office staff see every job on the dashboard.
Turn on Taskade Genesis Auth so only invited people can open the app, then invite your crew from App Users. Publishing covers the link, the address, and who sees what.
Two different sign-ins are easy to mix up. App sign-in is for the people using the app you published, your technicians in this case, and it is set up on the app itself. Workspace single sign-on is how your own staff sign in to Taskade, and it is included from the Business plan up. See pricing for what each plan covers.
What your technicians see
The person in the truck gets one screen. Nothing to learn, nothing to install.
+--------------------------------------------------+
|  [Logo]        Submit a work order               |
+--------------------------------------------------+
|  Technician   [ D. Okafor            v ]         |
|  Customer     [ Harbor View Plumbing   ]         |
+--------------------------------------------------+
|  Photo or scan of the signed work order          |
|  [  Choose file  ]   IMG_4417.HEIC  ok           |
+--------------------------------------------------+
|  Notes  [ Replaced pressure valve, tested ]      |
+--------------------------------------------------+
|              [  Submit work order  ]             |
+--------------------------------------------------+
The office sees the other half. One row per document, named for the customer, with the photo on the row and the parsed columns beside it.
+-----------------------------------------------------------+
|  Work Orders                             12 this week      |
+-----------------------------------------------------------+
|  Customer            Job     Date     Tech    Status  File |
|  Harbor View Plumb.  4417    14 Aug   D.O.    Review  IMG  |
|  Coastal HVAC        4418    14 Aug   R.M.    Invoic  PDF  |
|  Mercer Property     4419    15 Aug   D.O.    Receiv  IMG  |
+-----------------------------------------------------------+
What goes in, what comes back
| What goes in | What comes back | Where it lands |
|---|---|---|
| A phone photo of a signed work order (HEIC or JPG) | Customer, address, job number, date, technician, parts | A named row in Work Orders, photo attached |
| A scanned job sheet saved as an image-only PDF | The same named fields, read off the page | The same row, PDF attached |
| A typed PDF quote sent from the office | Line items and totals as named fields | A row on the matching job |
| A supplier parts list in Excel (XLSX) | Part numbers and quantities as text | A row per delivery, file attached |
| A CSV export from your dispatch system | Rows of jobs, ready to match on job number | The Work Orders Project |
| A DOCX service agreement | Terms, dates, and signatory as named fields | The customer record, document attached |
Every one of these enters the same way. Someone picks a file in the form. Taskade stores the file with the submission and shows it in the workspace Media Files. The Convert File to Text step then reads it. See Databases in Projects to shape the columns that hold the values.
If the CSV in that table holds all of your jobs today, read moving a trades Excel job log onto a dispatch board. It covers the change from that spreadsheet to the app that the intake form feeds.
Make it yours
Six directions worth building next. Each one is a single prompt on top of the app you already have.
- Add an approval gate. Ask for a supervisor tick before status can move to Invoiced. Rows sit in a Pending view until someone signs off.
- Notify a channel on submit. Add a Slack or Gmail step at the end of the automation so dispatch sees the job the moment the technician taps submit.
- Group by client. Add a Client column and a dashboard view grouped by it. Every property manager gets their own stack of jobs.
- Export monthly. Add a schedule trigger that rolls last month's rows into a summary and emails it to the office on the first. See Automation Triggers.
- Send the invoice from the same row. Chain the intake app into invoice automation so a reviewed work order becomes a branded invoice without re-typing the totals.
- Give customers a view. Publish a second surface where each customer signs in and sees only the completed jobs you match to them. Start from Build a Customer Portal.
What to know before you launch
Keep scans and photos under 20 MB. That is the ceiling for reading words off an image, which is the path a phone photo and a scanned work order take. Both usually sit well under it. Typed PDFs and spreadsheets are read as text instead, so what limits those is your plan's upload size rather than this number.
The reading happens inside the automation. It is the Convert File to Text step that reads the page. Dropping a file into a chat and asking an agent about it is a different path, and so is the Convert Media to Project step. If you want the words on the page turned into fields, put the Convert File to Text step in the automation.
Reading off the page covers scanned or image-only PDF, PNG, JPG, WebP, and HEIC/HEIF. HEIC is what an iPhone camera produces, so a technician can submit straight from the camera roll. GIF and BMP sit outside that list, so save those as PNG before uploading. The step also accepts these formats: PDF, Word (DOCX), PowerPoint (PPTX and PPT), Excel (XLSX and XLS), EPUB, CSV, TXT, and Markdown.
Check each step as you build it. After a test submission, open the automation History tab. Look at what the reading step returned before you wire the next step to it. Six small prompts with a look in between beats one long prompt you have to unpick.
Related guides
- File Uploads in Your App. What happens to a file someone picks in your published app.
- How Taskade Reads Scanned Documents. Formats, scope, and where the reading happens.
- Convert File to Text. The step that turns a document into text your later steps can use.
- AI Forms. The full form field catalog and trigger settings.
- Agent Action. Pull named fields out of the text in one step.
- Build a Form with Conditional Logic. Branch the questions under the upload.
- App Users and Sign-In. Invite technicians and decide who sees which jobs.
- Publish Your App. Links, addresses, and access.
- Automate Invoices and Receipts. Turn a reviewed work order into a sent invoice.
- Build workflows that run themselves. Automation patterns beyond intake.