
Overview
Give every customer a branded place to sign in and see only what belongs to them. That is the outcome. A mental-health clinic gives each client a private portal where they see their own records and nobody else's. A consultancy gives clients a login on the firm's own web address, with the firm's logo and colors. You describe the portal in plain words and Taskade Genesis builds it.
Here is how the pieces fit. A Project holds your customer records and acts as the database. Taskade EVE drafts the sign-in copy, role labels, and dashboard layout in your voice. Automations email invites, log activity, and notify your team when a customer takes an action. The published app is a branded portal your customers visit, sign in, and use every day.
TL;DR: Turn a prompt into a working customer portal in Taskade Genesis. A clinic shows each client only their own records. A consultancy gives clients a branded login on its own web address. Add Taskade Genesis Auth for sign-in, invite App Users, gate views with the 7-tier role system, and connect a Project as the live database. Free to start, production from $6/mo. Build the portal.
Clone these live apps
Want to see a finished portal before you build your own? Open one of these live, working apps. Each one is a real Taskade Genesis app you can preview in your browser, then clone into your own workspace and rename in minutes. Start from a working example instead of a blank page.
| Live app | What it does | Preview |
|---|---|---|
| Client Portal Dashboard | A branded home base where each client signs in and sees their account, documents, and status. The clinic and consultancy examples both start here. | Open demo → |
| Event Management Portal | A portal for attendees and organizers. Guests see their schedule and tickets. Your team sees the full guest list and check-in status. | Open demo → |
To clone, open a demo, click Use this app, and it lands in your workspace ready to rebrand. Then follow the steps below to add sign-in and gate the views.
What You Will Build
- A Customers Project in Table view holding accounts, contacts, and status.
- A Branded portal with a public landing page and a private members area.
- A Sign-in flow powered by Taskade Genesis Auth.
- Role-gated views so each customer sees only their data.
- An Activity feed that updates the moment a teammate or customer changes anything.
Read the diagram left to right. A visitor arrives, signs in, and the portal checks their role. A clinic client tagged as a Viewer only ever reaches their own records. Your team reaches the full dashboard. Both read from and write to the same Customer Project, so there is one source of truth.
Who is this for
| You run | Your customers get | They never see |
|---|---|---|
| A mental-health clinic | Their own records, notes, and appointments | Any other client's data |
| A consultancy or agency | A branded login, deliverables, and invoices | Internal margins or other accounts |
| A SaaS or B2B team | Plan, onboarding checklist, support thread | The full customer list |
| An events business | Tickets, schedule, and updates | The master guest list |
Step 1. Generate the Portal
Open Taskade Genesis and paste this prompt.
Build a branded customer portal.
Customer fields: name, email, account, plan, status, last_active.
Include a public landing page, a sign-in screen, a private dashboard,
a documents tab, a support ticket form, and an activity feed.
Use role-gated views: Editors see all customers, Viewers see only their own row.
Connect the customers Project as the live database.
Taskade Genesis ships a Projects workspace, a published portal, three automations, and Taskade EVE ready to answer customer questions inside the portal.
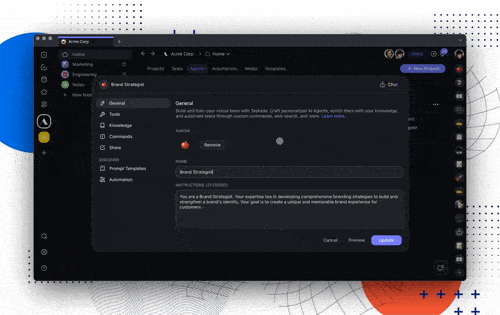
Step 2. Add Sign-In With Taskade Genesis Auth
Open Settings in your new app. Pick Sign-in.
- Toggle on Taskade Genesis Auth. This adds a real sign-in screen to the portal.
- Pick the sign-in methods you want: email link, Google, or both.
- Set the after-sign-in route. Most teams send users straight to the dashboard.
Save. The portal now asks every visitor to sign in before showing customer data. See Taskade Genesis Auth for the full sign-in setup.
Step 3. Invite Your First App Users
Open the App Users tab. This is the list of people allowed to sign in to the portal.
- Click Invite.
- Paste customer emails, one per line.
- Pick a role for each: Editor for team members, Viewer for customers.
Taskade sends a branded invite email. The customer clicks the link, picks a password, and lands in their portal. See App Users and Sign-In for bulk invites and password resets.
Step 4. Gate Views by Role
Open the dashboard tab. Click any block you want to gate.
- Click Visibility.
- Pick the roles allowed to see the block.
- Save.
Taskade Genesis uses the 7-tier role system: Owner, Maintainer, Editor, Commenter, Collaborator, Participant, Viewer. Most portals use three: Owner (you), Editor (team), Viewer (customer). A Viewer signed in as [email protected] only sees the Acme row in the customers Project.
Step 5. Connect a Project as the Database
Open the Data tab on the dashboard.
- Pick Use a Project as the database.
- Pick your
customersProject. - Map portal blocks to Project columns (status, plan, notes).
Every edit a customer makes in the portal writes back to the Project. Every edit your team makes in the Project shows up in the portal. One source of truth, no sync jobs.
Common Portal Patterns
| Pattern | How Taskade Genesis handles it |
|---|---|
| Client onboarding | Add a checklist block on first sign-in. Status writes to the customer row. |
| Document delivery | Upload to the documents tab. Customer downloads from their portal page. |
| Support tickets | Form submission creates a new row in a tickets Project. Taskade EVE drafts the reply. |
| Billing summary | Pull invoice rows from a Project. Show only paid status to Viewers. |
| Account managers | Tag a teammate as the owner of each row. Slack notification fires on status change. |
| Self-service updates | Customer edits their own row. Automation pings the account manager. |
Use case: SaaS customer success portal for a 50-customer B2B
A small SaaS team wires their portal in an afternoon. Each row in a customers Project is one account. The portal page shows the customer their plan, their onboarding checklist, and their last support thread. Viewers see only their own row, gated by Taskade Genesis Auth.
- Day 1: One Taskade Genesis prompt, the portal renders. Two team members fill in five rows by hand.
- Day 2: Customers receive their sign-in links. The first three log in within the hour and tick off onboarding items themselves.
- Day 7: A weekly automation pulls each customer's status from the Project and posts a digest to a Slack channel. The account manager touches each customer once a week instead of chasing email.
This is the smallest version of a portal that earns its keep. Scale up from here.
How the portal gets smarter over time
Your portal is built on Workspace DNA: Memory, Intelligence, and Execution feeding each other in a loop. Every customer action makes the next one easier. A consultancy that runs this loop for a quarter ends up with a portal that already knows each client's history, drafts replies in the firm's voice, and updates itself without anyone touching a spreadsheet.
Memory is the Customer Project that holds every record. Intelligence is Taskade EVE reading that history to draft a reply or a digest. Execution is the automations that send the email and log the result. Each loop writes new records back into Memory, so the portal is never starting from scratch. See Taskade as a CRM for the data side and App Analytics to watch the loop in action.
What your client sees
A signed-in Viewer at the clinic or consultancy lands on a clean page scoped to them. Here is the rough layout.
+--------------------------------------------------+
|  [Logo]            Welcome back, Acme            |
+--------------------------------------------------+
|  Status: Active        Plan: Standard            |
+--------------------------------------------------+
|  Your records          |  Documents              |
|  - Intake form  done   |  - Agreement.pdf        |
|  - Session notes       |  - Invoice-04.pdf       |
|  - Next appt: Jun 12   |  - Care plan.pdf        |
+------------------------+-------------------------+
|  Need help?  [ Open a support ticket ]           |
+--------------------------------------------------+
The same app shows your team the full list instead, because the role check swaps the view. One app, two experiences.
Publish on a Custom Domain
When the portal feels right, click Publish.
- Pick a custom domain like
portal.yourbrand.com. - Add your logo and brand colors. Taskade EVE rewrites the theme on confirm.
- Drop the link in your welcome emails or signature.
Every sign-in feeds the workspace. Customer activity, support tickets, and account history all live in one place. The portal gets smarter the more customers use it.
Frequently asked questions
Can each customer see only their own records?
Yes. That is the core promise. Gate the views by role and tag each customer as a Viewer. A clinic client signed in as [email protected] only sees their own row in the Customer Project, never anyone else's. Your team, tagged as Editor or Owner, sees the full list. See Gate Views by Role above.
Do I need to know how to code?
No. You describe the portal in plain words and Taskade Genesis builds it. Taskade EVE writes the sign-in copy, role labels, and dashboard layout for you. The fastest start is to clone the Client Portal Dashboard above and rebrand it.
Can I put the portal on my own web address?
Yes, on the Business plan and above. Publish to a custom domain like portal.yourbrand.com so a consultancy's clients sign in on the firm's own branded address. Add your logo and colors and Taskade EVE rewrites the theme on confirm.
Where is the customer data stored?
In a Taskade Project that acts as the live database. Every edit a customer makes writes back to the Project, and every edit your team makes shows up in the portal. One source of truth, no separate sync jobs. See Taskade as a CRM for how to structure the data.
How much does a customer portal cost to run?
You can start free. Production portals start at $6/mo on the Starter plan. Custom domains and Taskade Genesis Auth branding unlock on the Business plan at $40/mo. This replaces dedicated portal software that often runs $50 to $300 per month.
Can the portal notify my team when a customer takes action?
Yes. Automations watch the Customer Project and fire an email or Slack message the moment a customer updates their row, submits a ticket, or finishes onboarding. Taskade EVE can draft the first reply so an account manager just reviews and sends.