
Overview
The Agent Tool trigger allows AI agents to initiate automated workflows during conversations. It also connects agents to third-party tools.
TL;DR: The Agent Tool trigger fires when an AI agent invokes your automation mid-conversation. This turns any automation into a custom tool that the agent can call on top of its large built-in toolkit. Pair it with Agent Tools to react to agent requests and run real steps like writing to a Google Sheet.
The Agent Tool trigger is what makes any automation callable by an AI agent. Every agent gets a growing toolbox of automations it can invoke mid-conversation, on top of its large built-in toolkit.
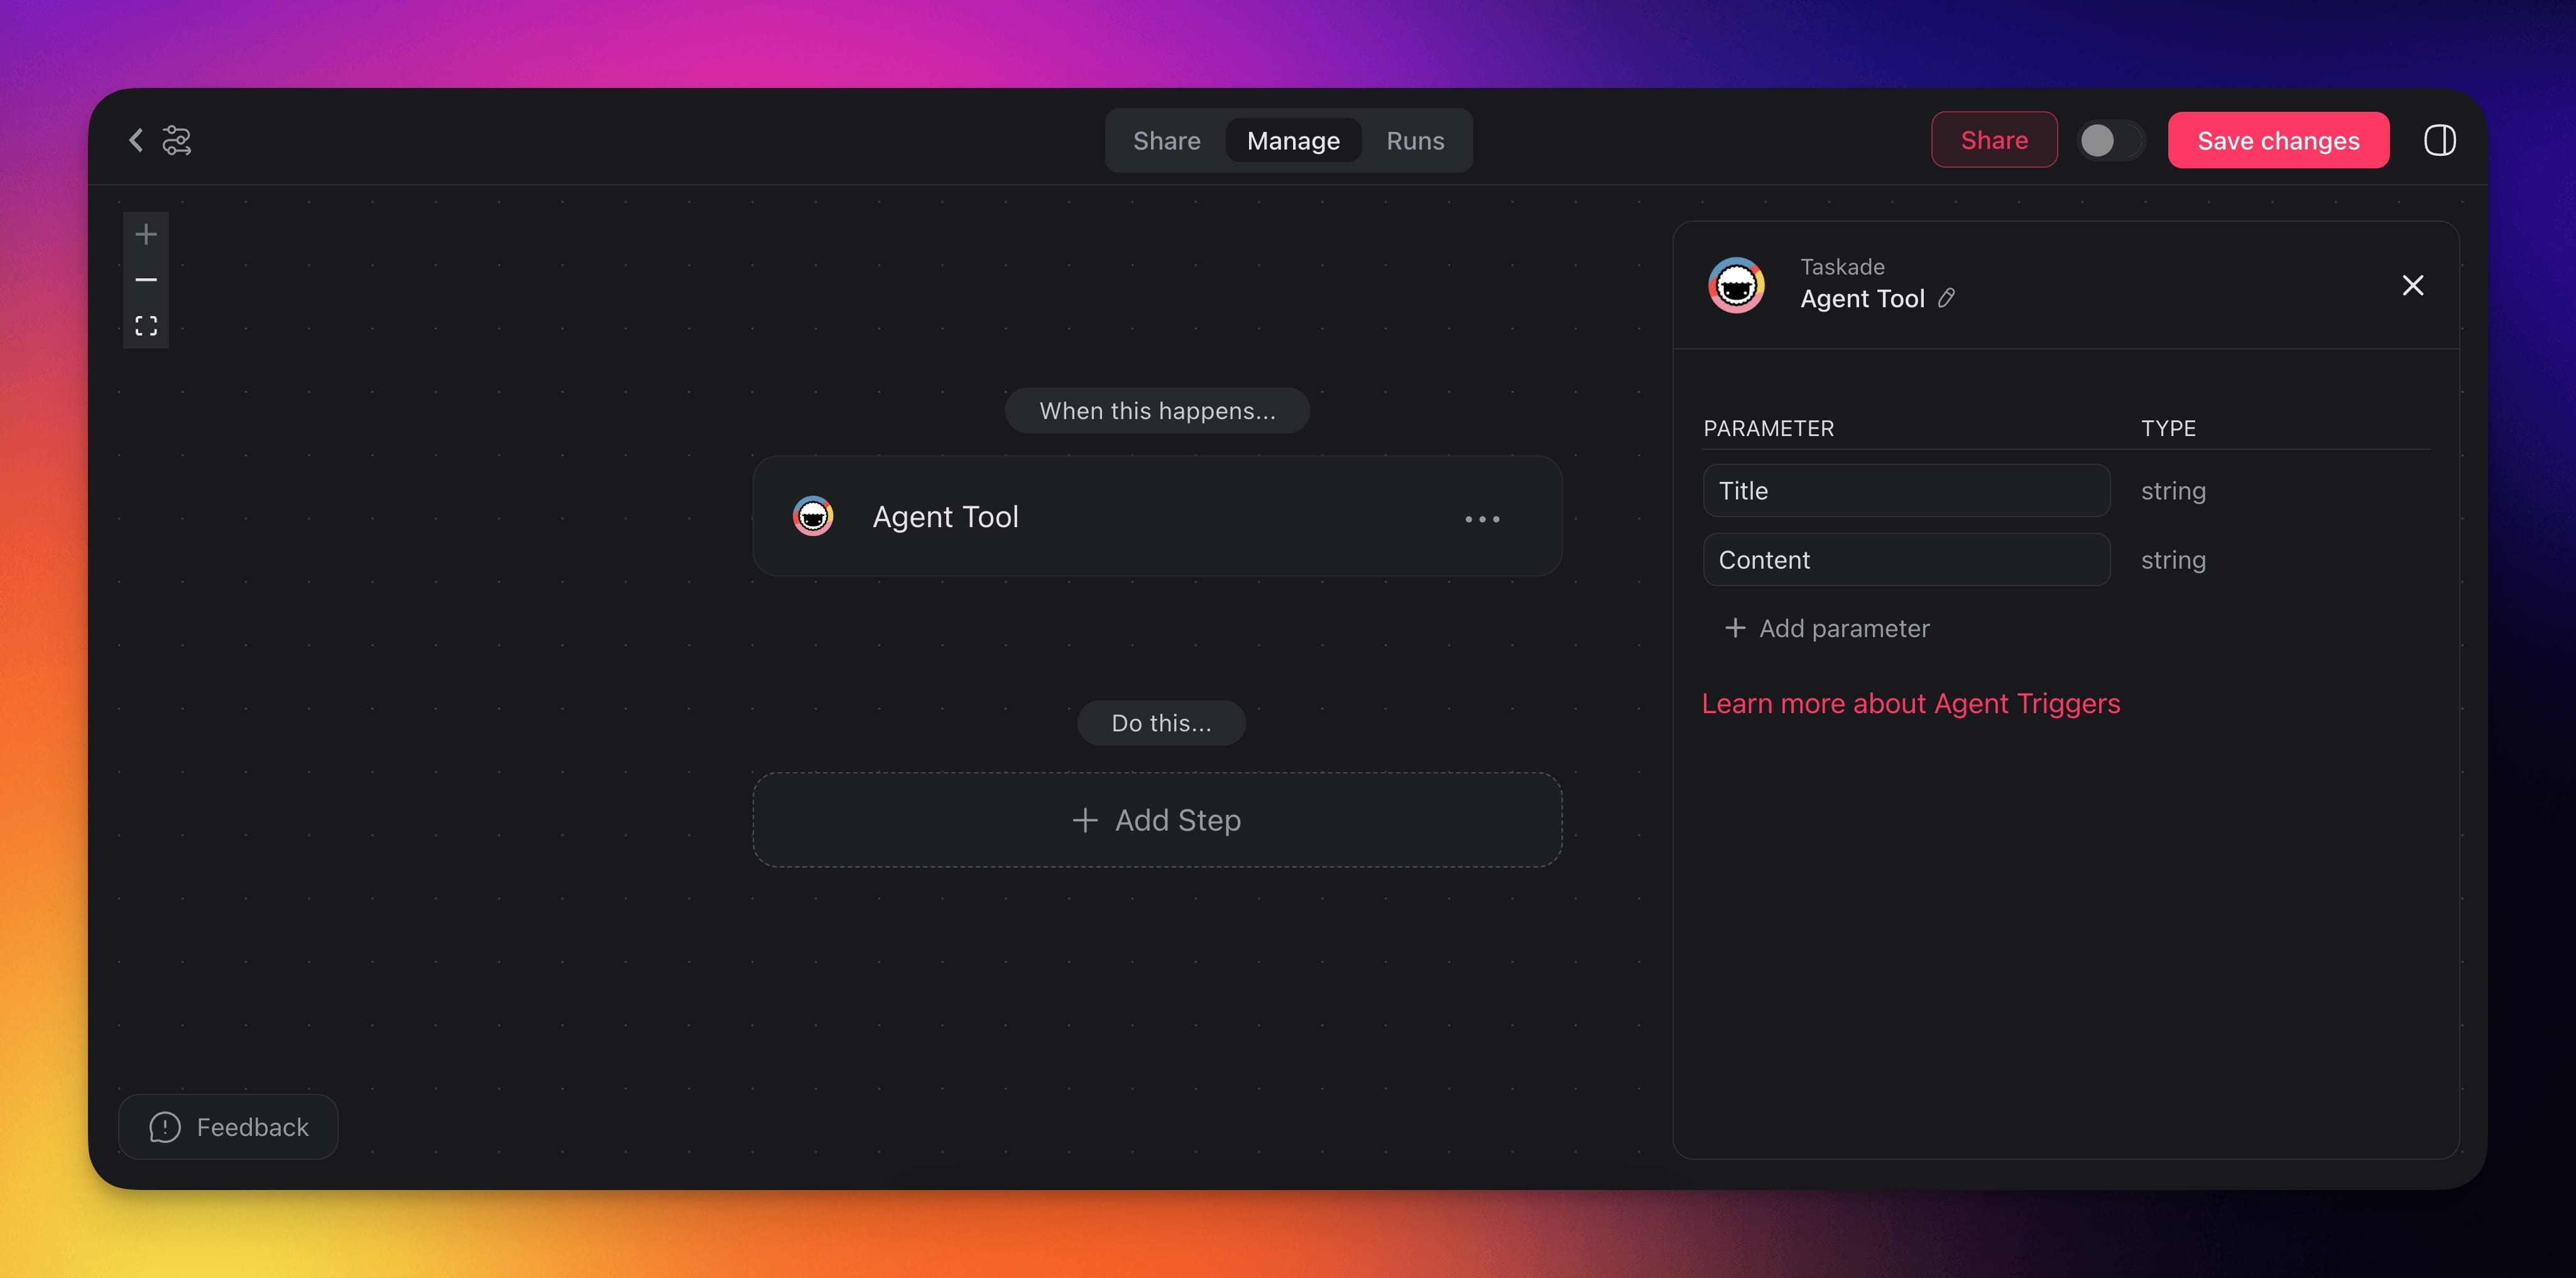
Convert Automations into Tools
The Agent Tool trigger works in sync with Agent Tools in your Custom AI Agents. The trigger exposes the automation as a new tool that can be used by the agent.
🧩 Example: An automation with a Google Sheet action and the Agent Tool trigger becomes a tool the agent can call.
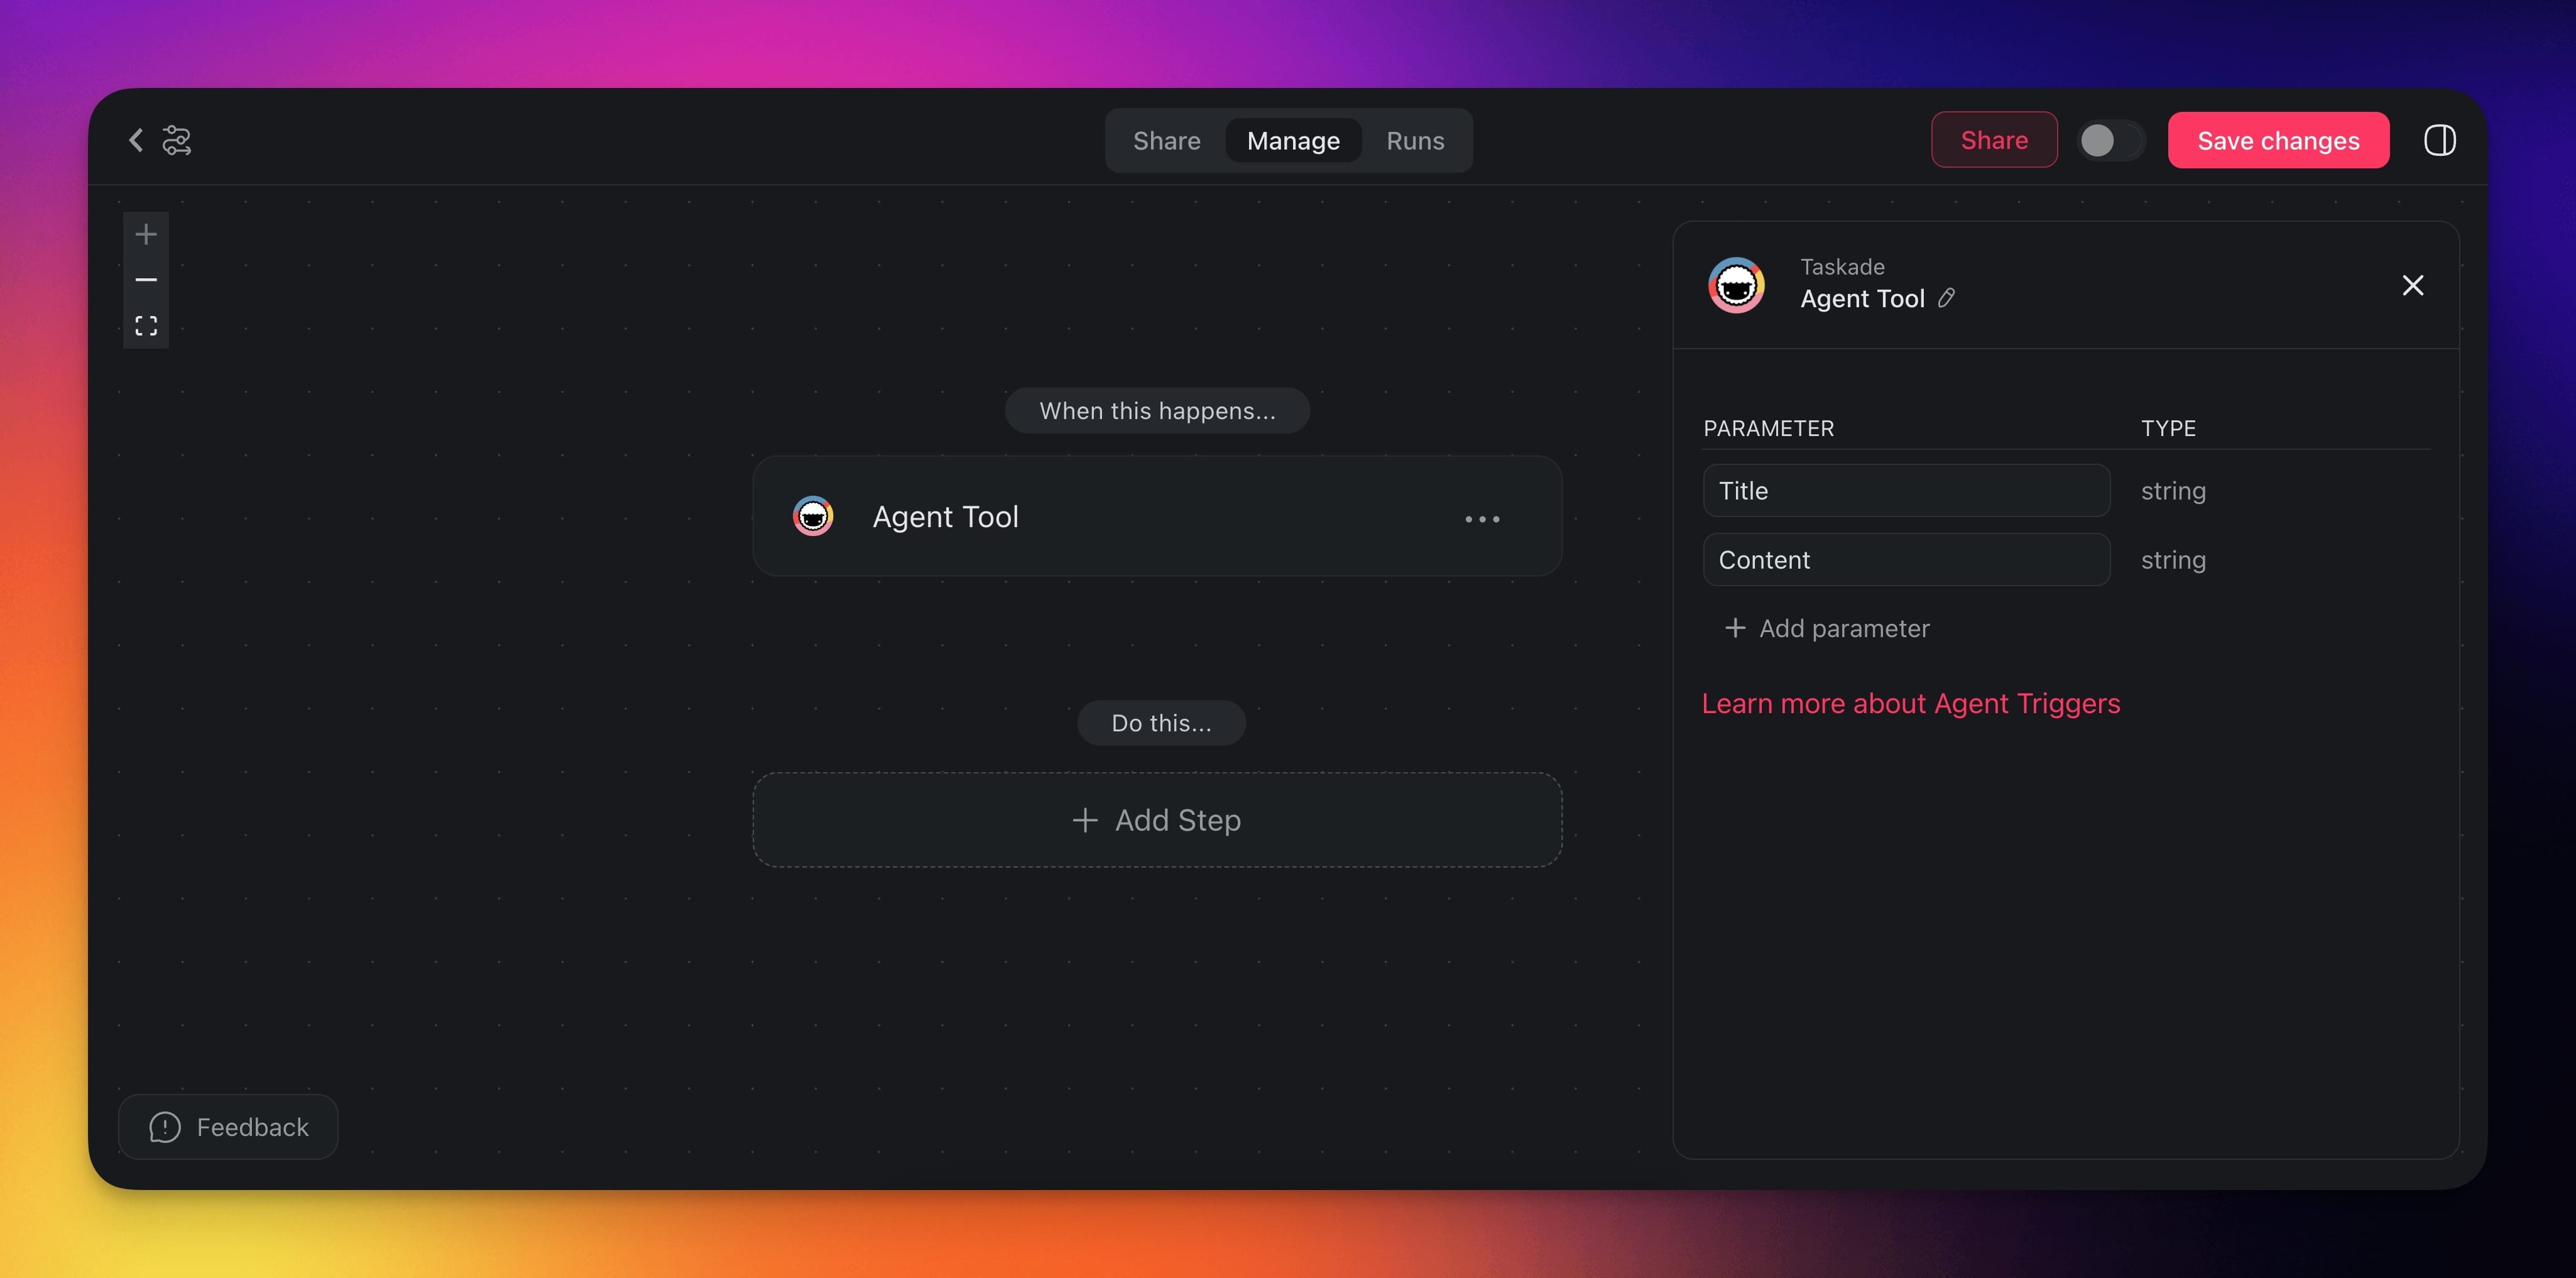
1) Set Up Parameters
Parameters are a way to divide and categorize information to be used in the subsequent actions. In this example, we are going to define Title and Content. This helps the AI understand which information goes in which parameter.
Note: There is no limit on how many parameters you can use in a trigger. Keeping to the essentials gives better, more reliable results.
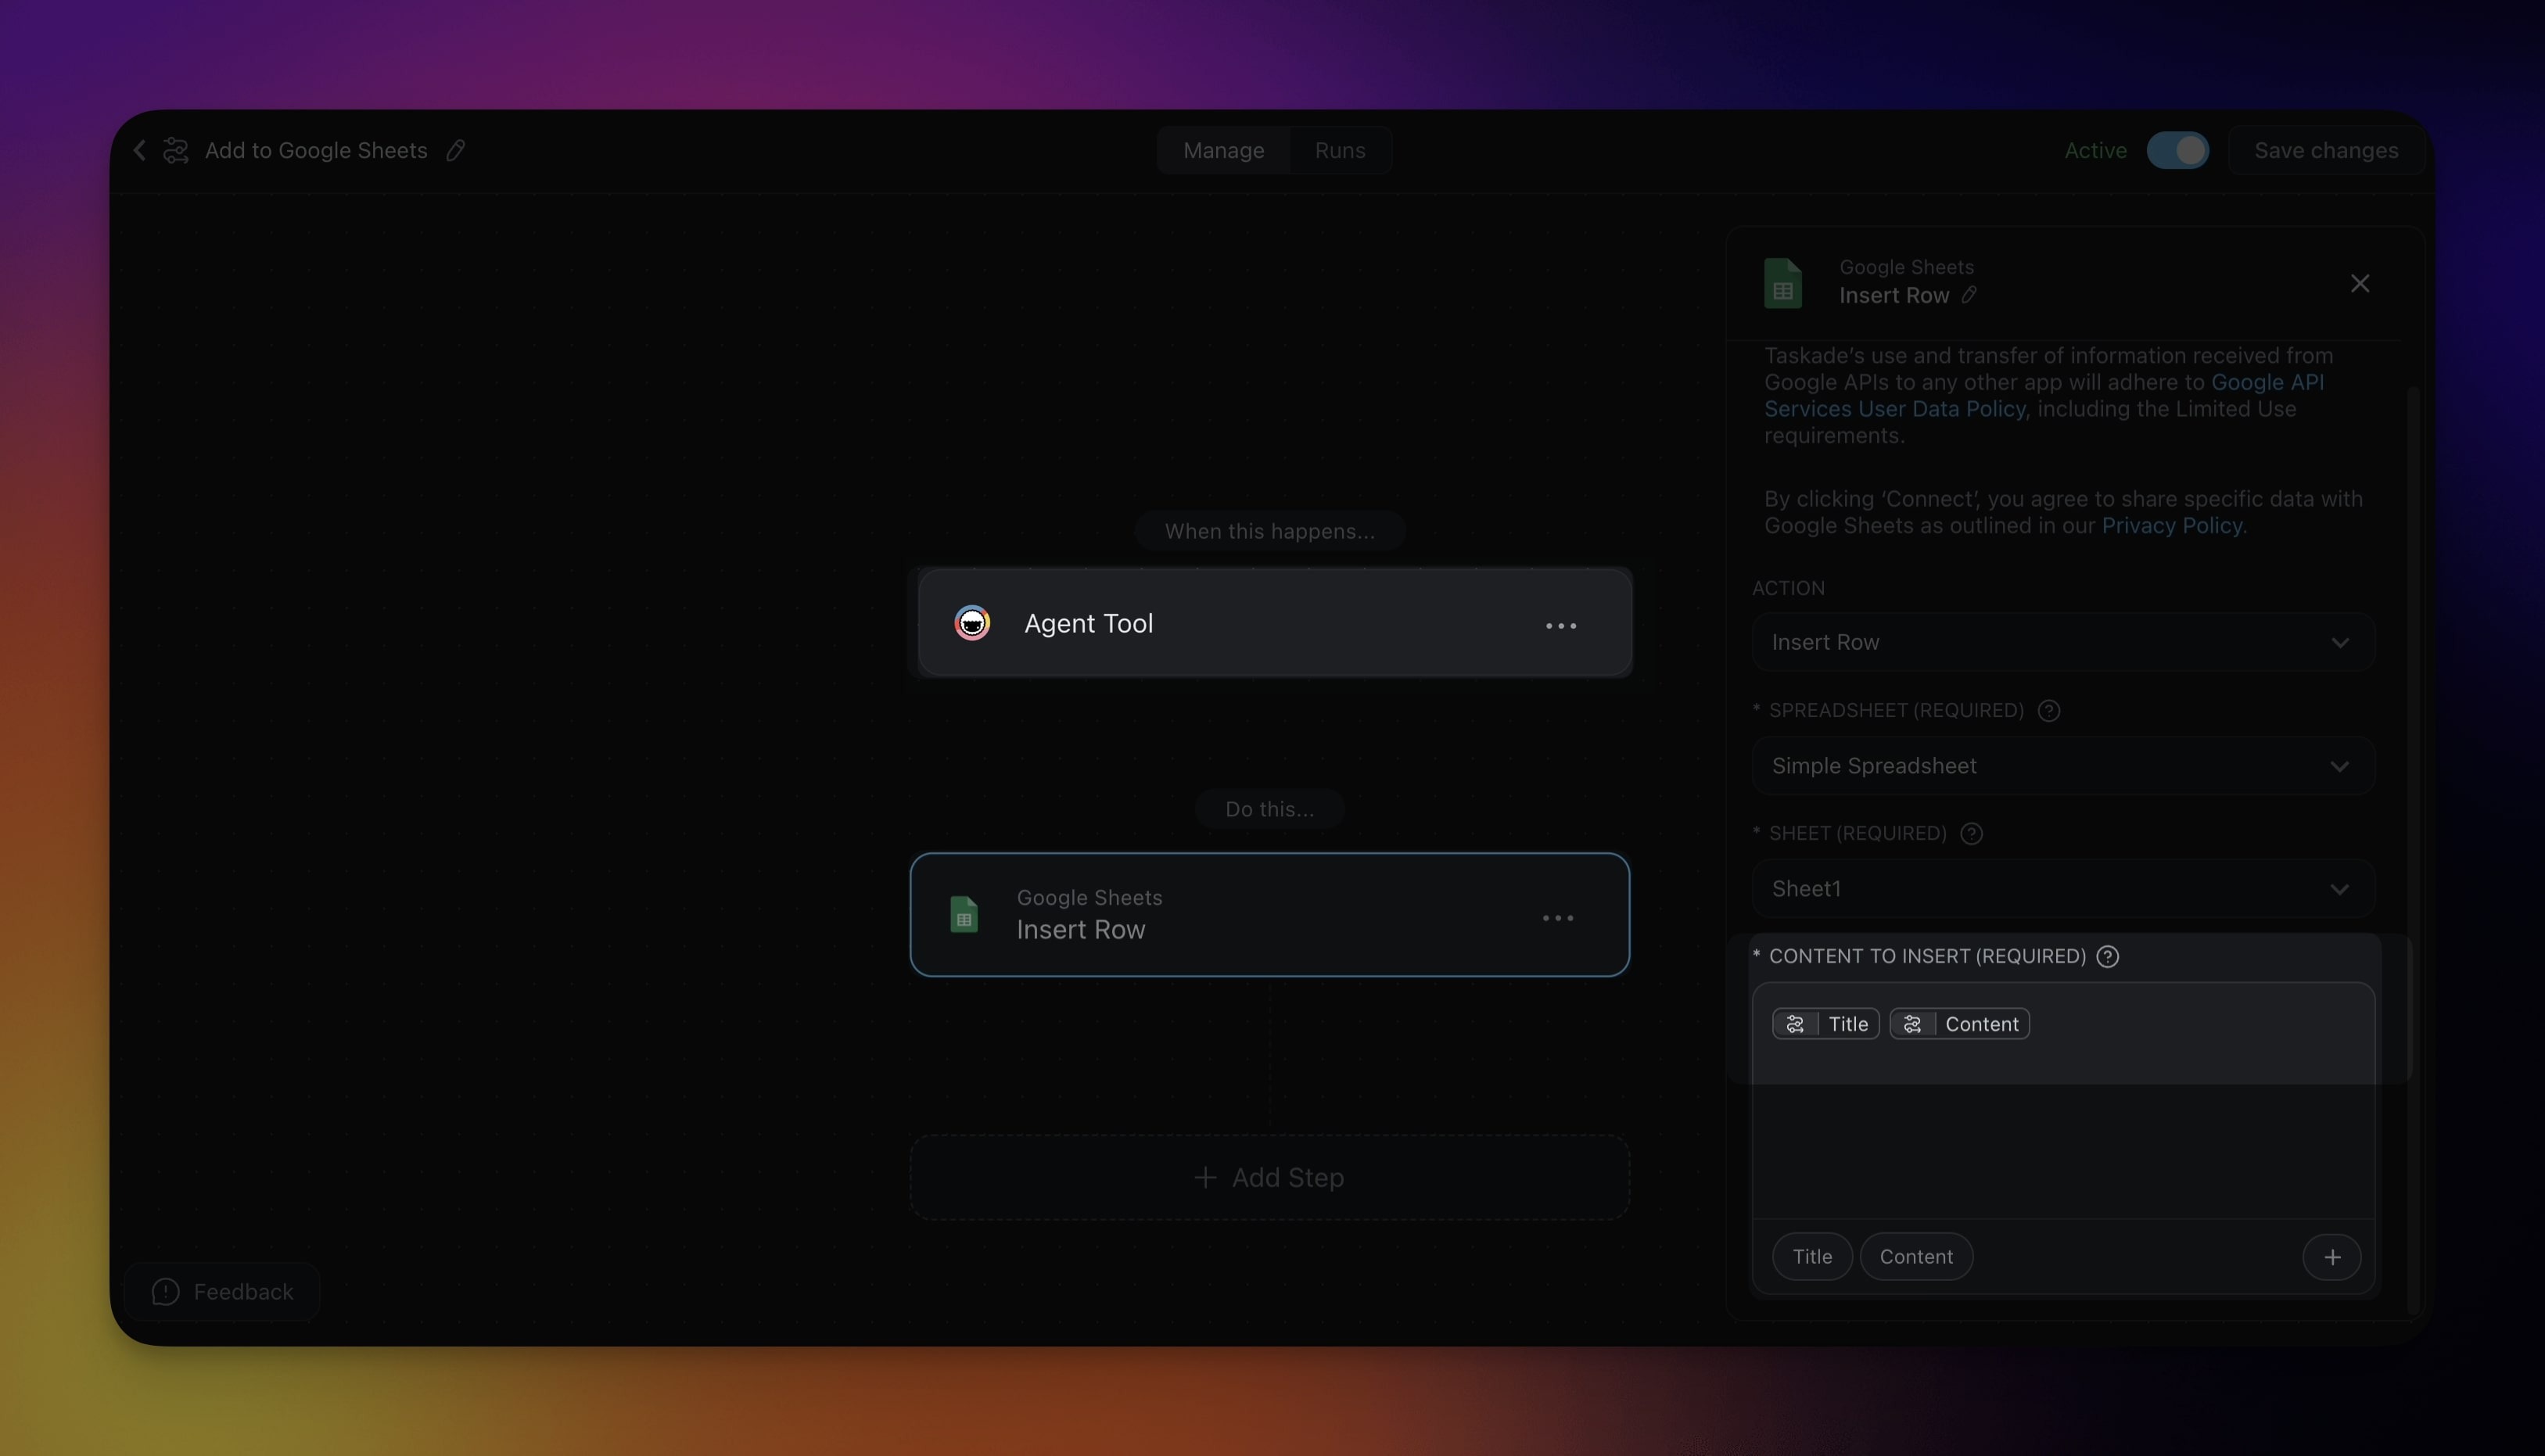
2) Reference Parameters
After you set up the parameters, use them in the next Action. In this example, the parameter sits in the input field for the Insert Row Google Sheets Action.
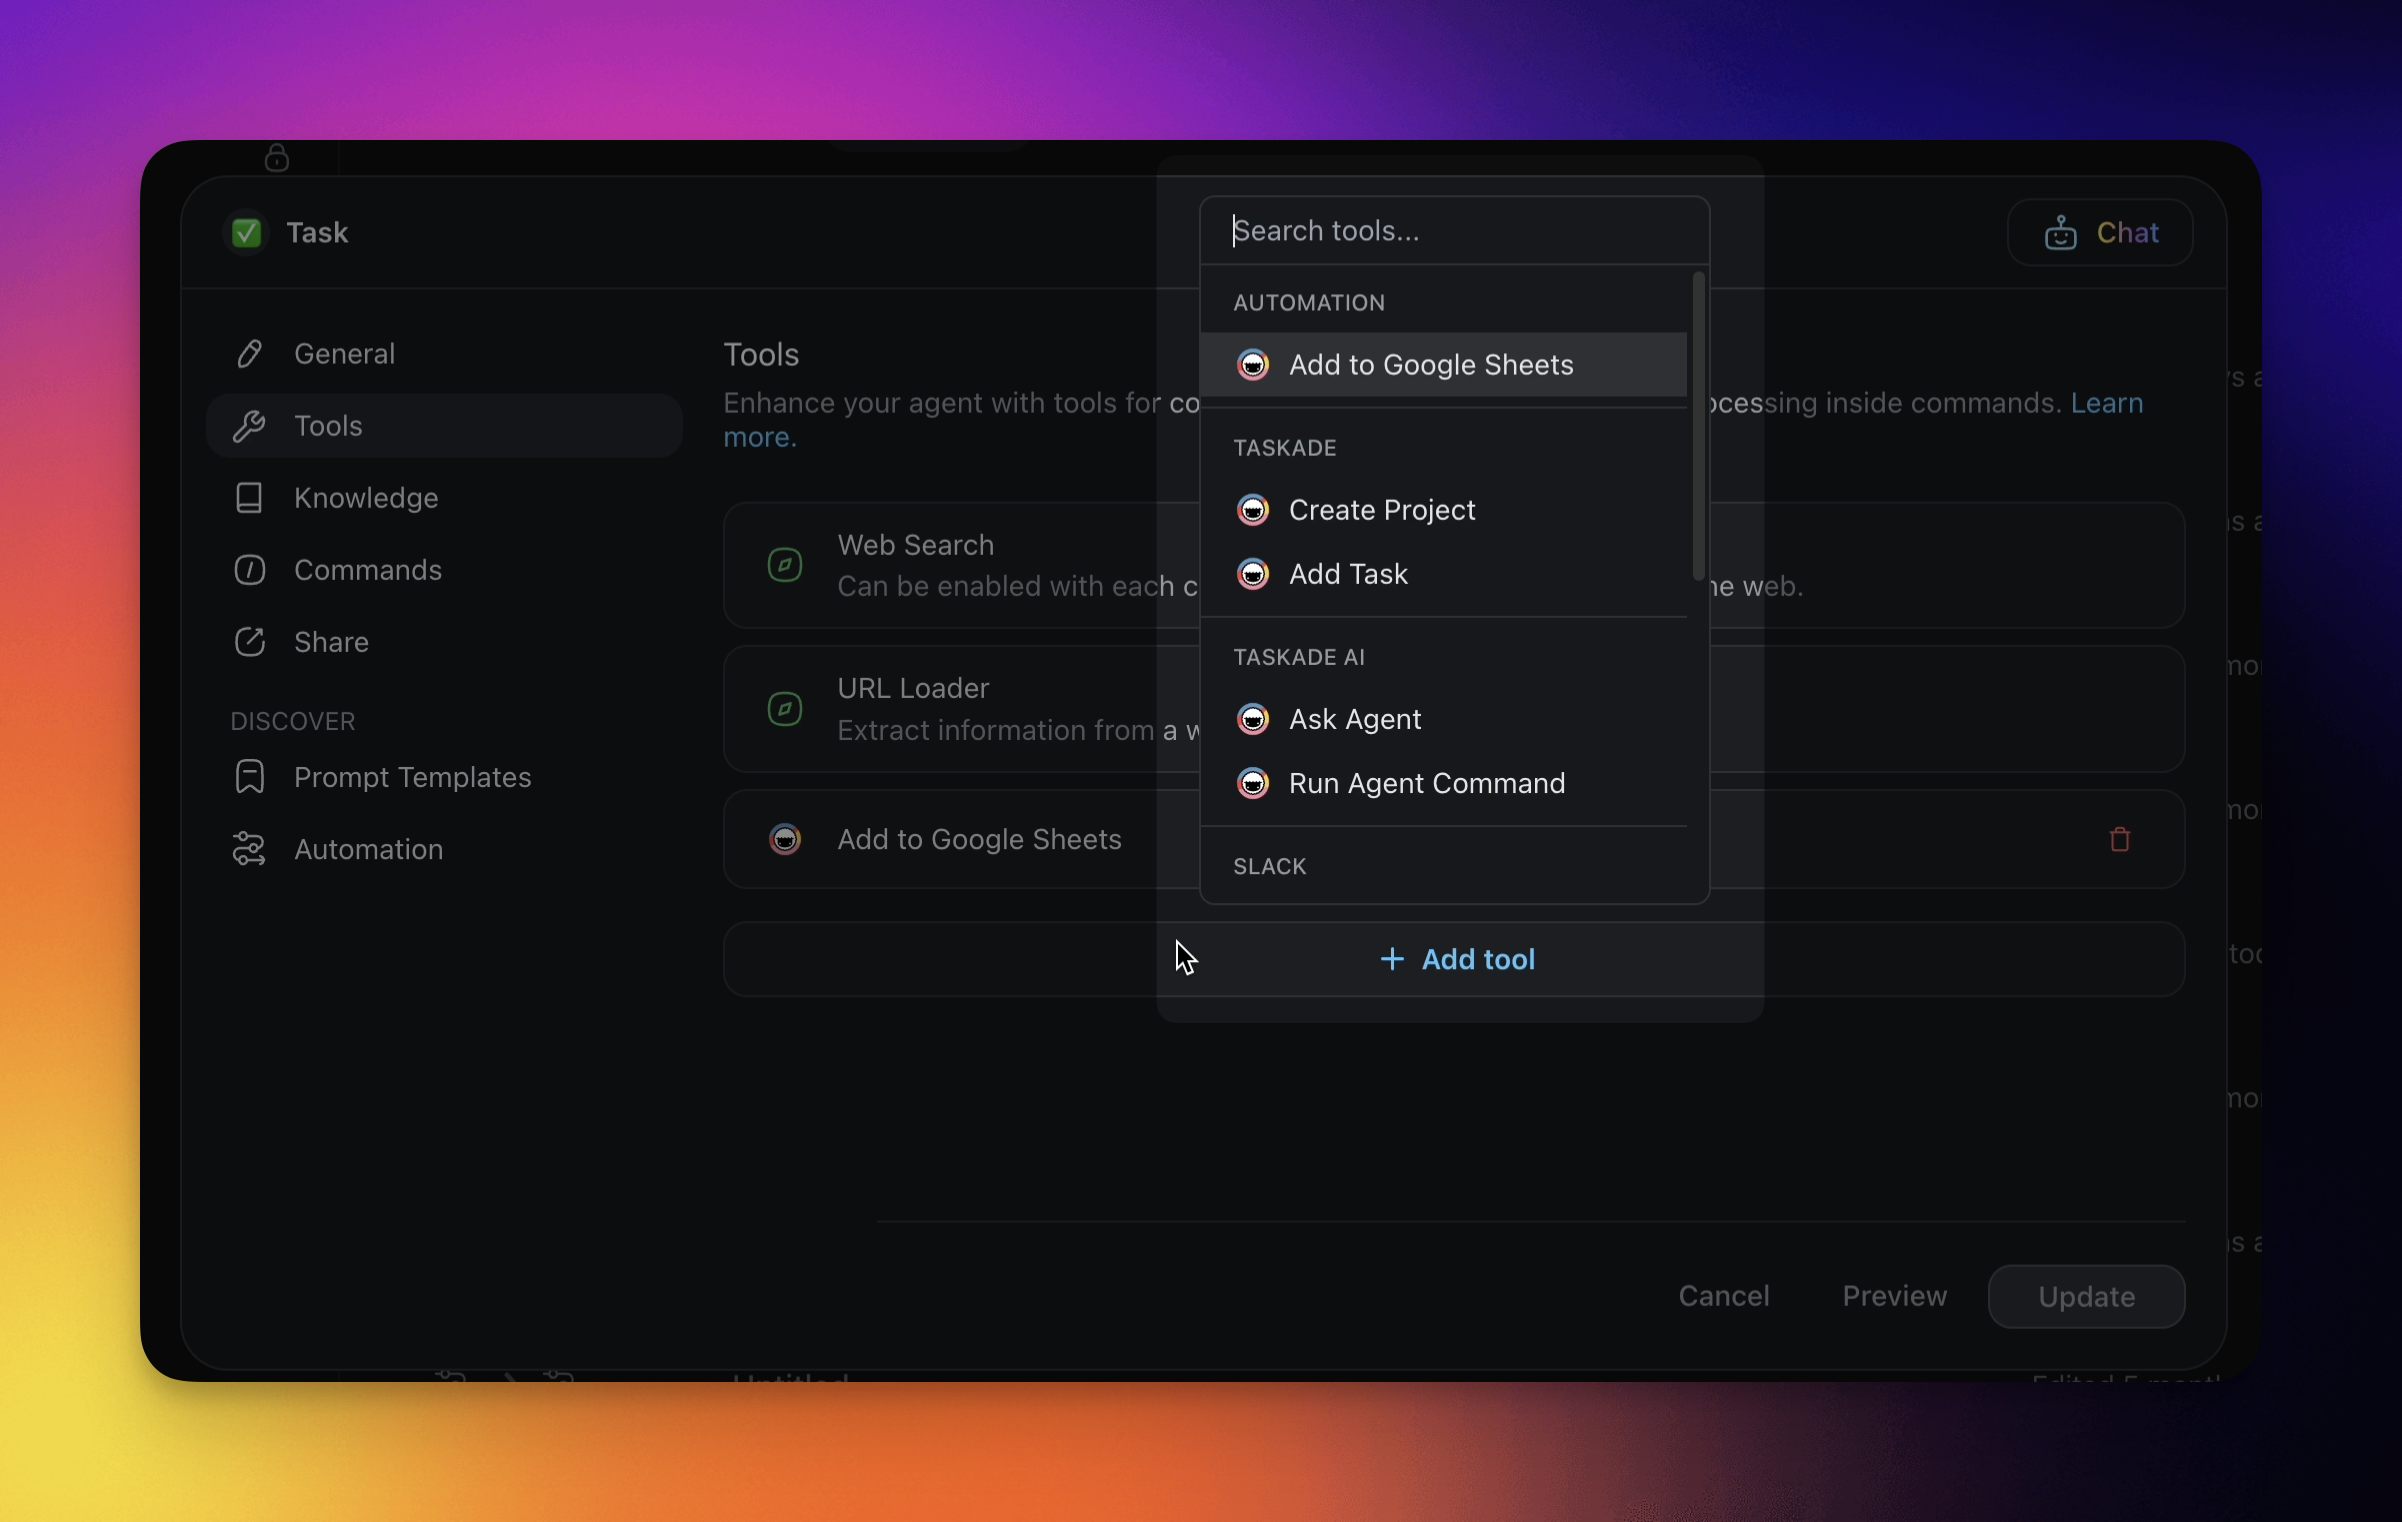
3) Name the Automation
Name the automation appropriately, as the AI will use its name to determine when to call it. Next, add the automation to your agent's tools and enable it.
4) Interact with the Agent
Chat with the agent and mention the name of the automation to call the tool.
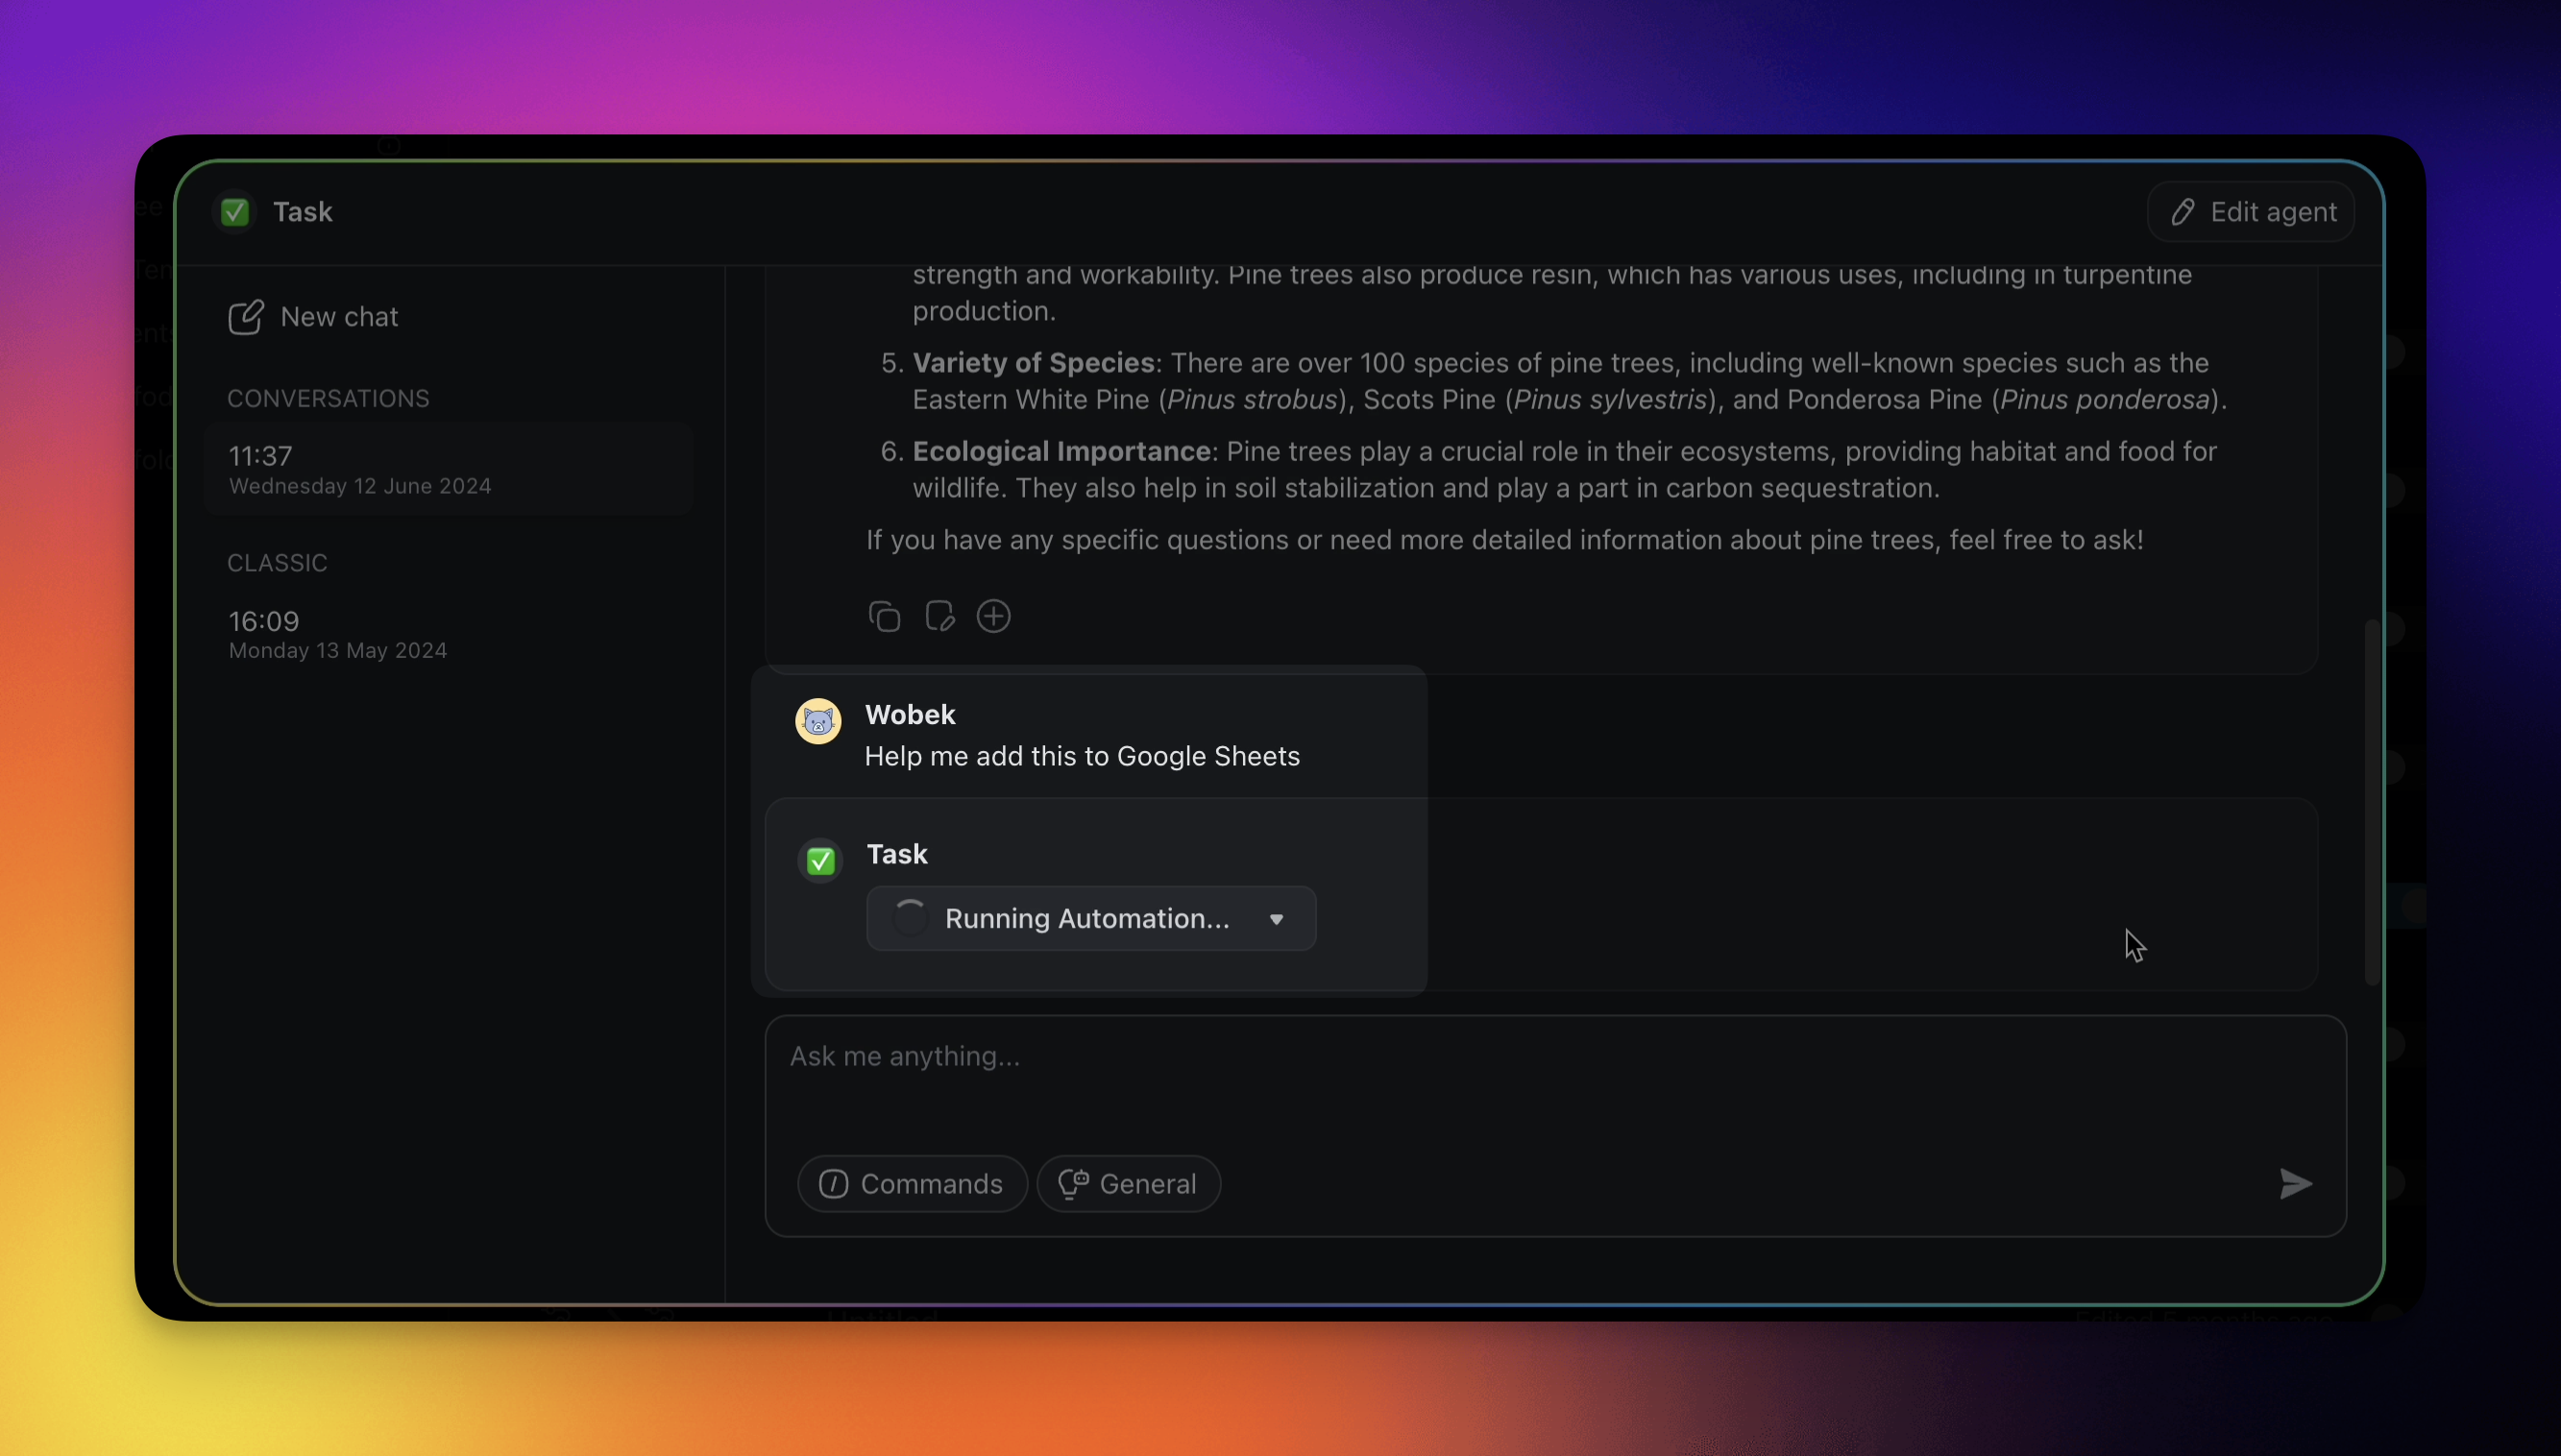
5) Approve the Trigger
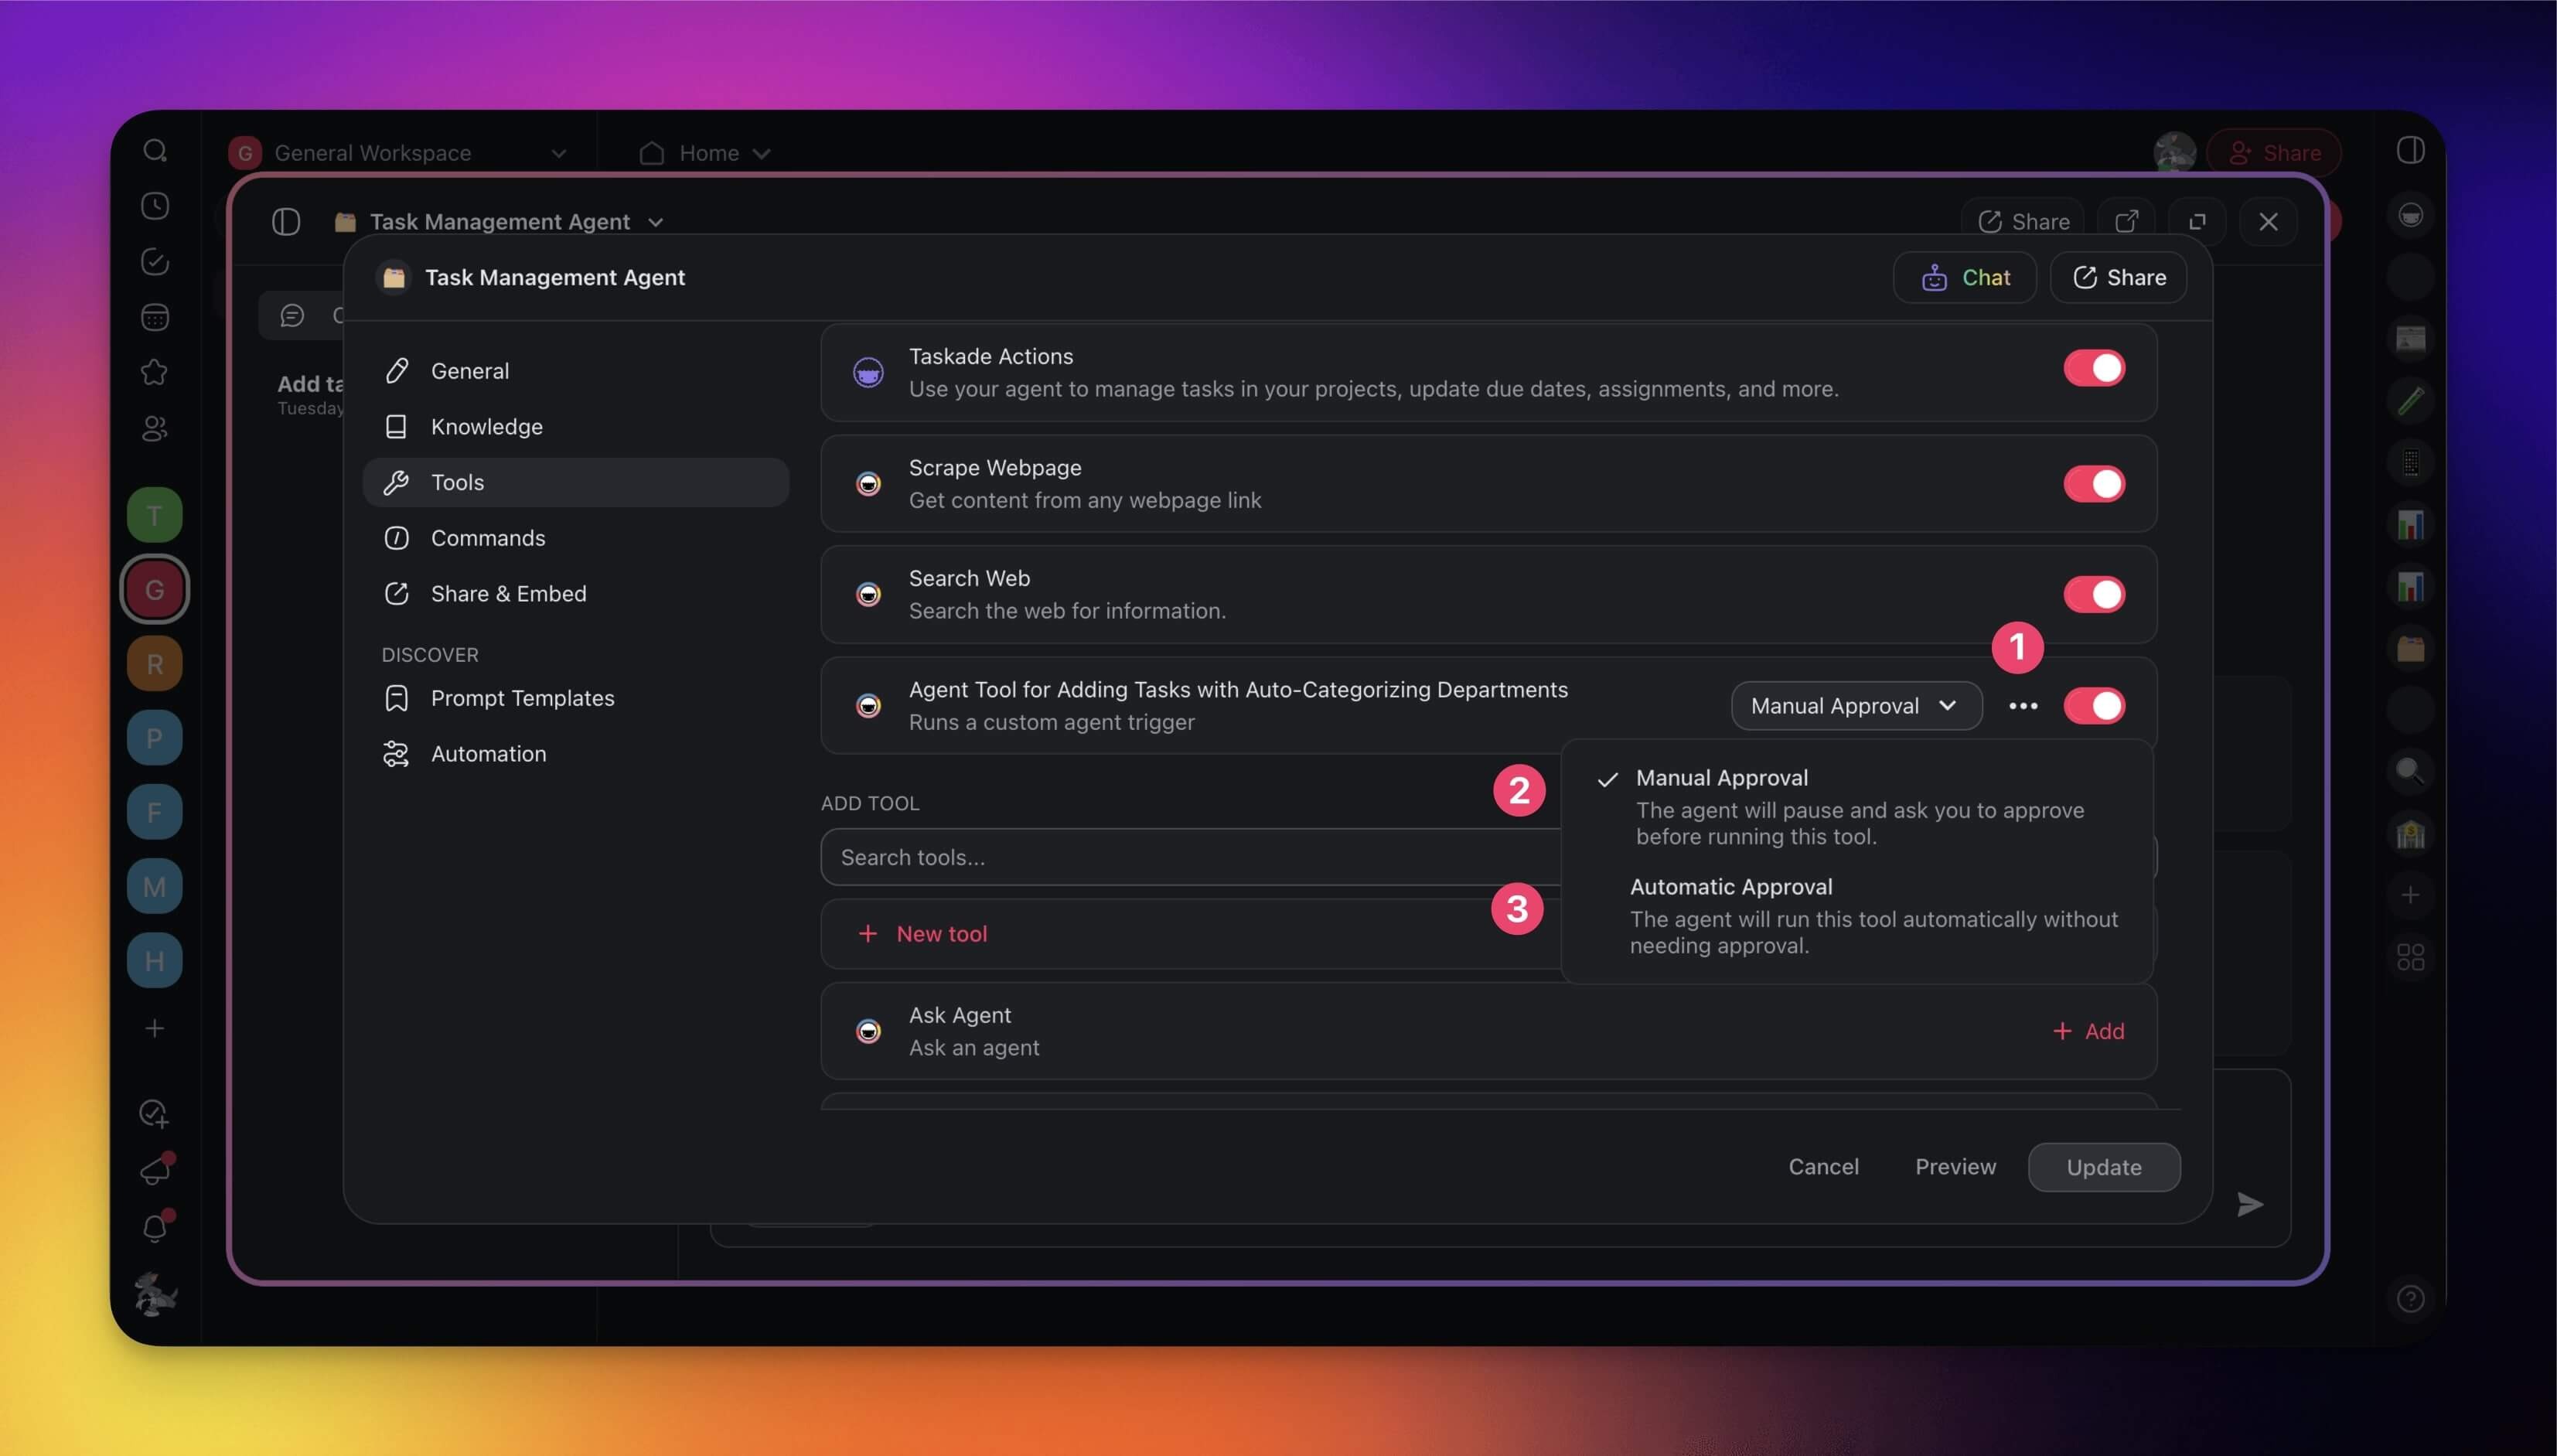
By default, agents ask for your approval before they use a tool. But you can turn on automatic approval. Agents then act on their own.
To change approval settings:
❶ Click the three dots ··· next to the agent tool and choose one of the options:
❷ Manual Approval: The agent will pause and ask you to approve.
❸ Automatic Approval: The agent will run the tool automatically.
(optional) Define Output
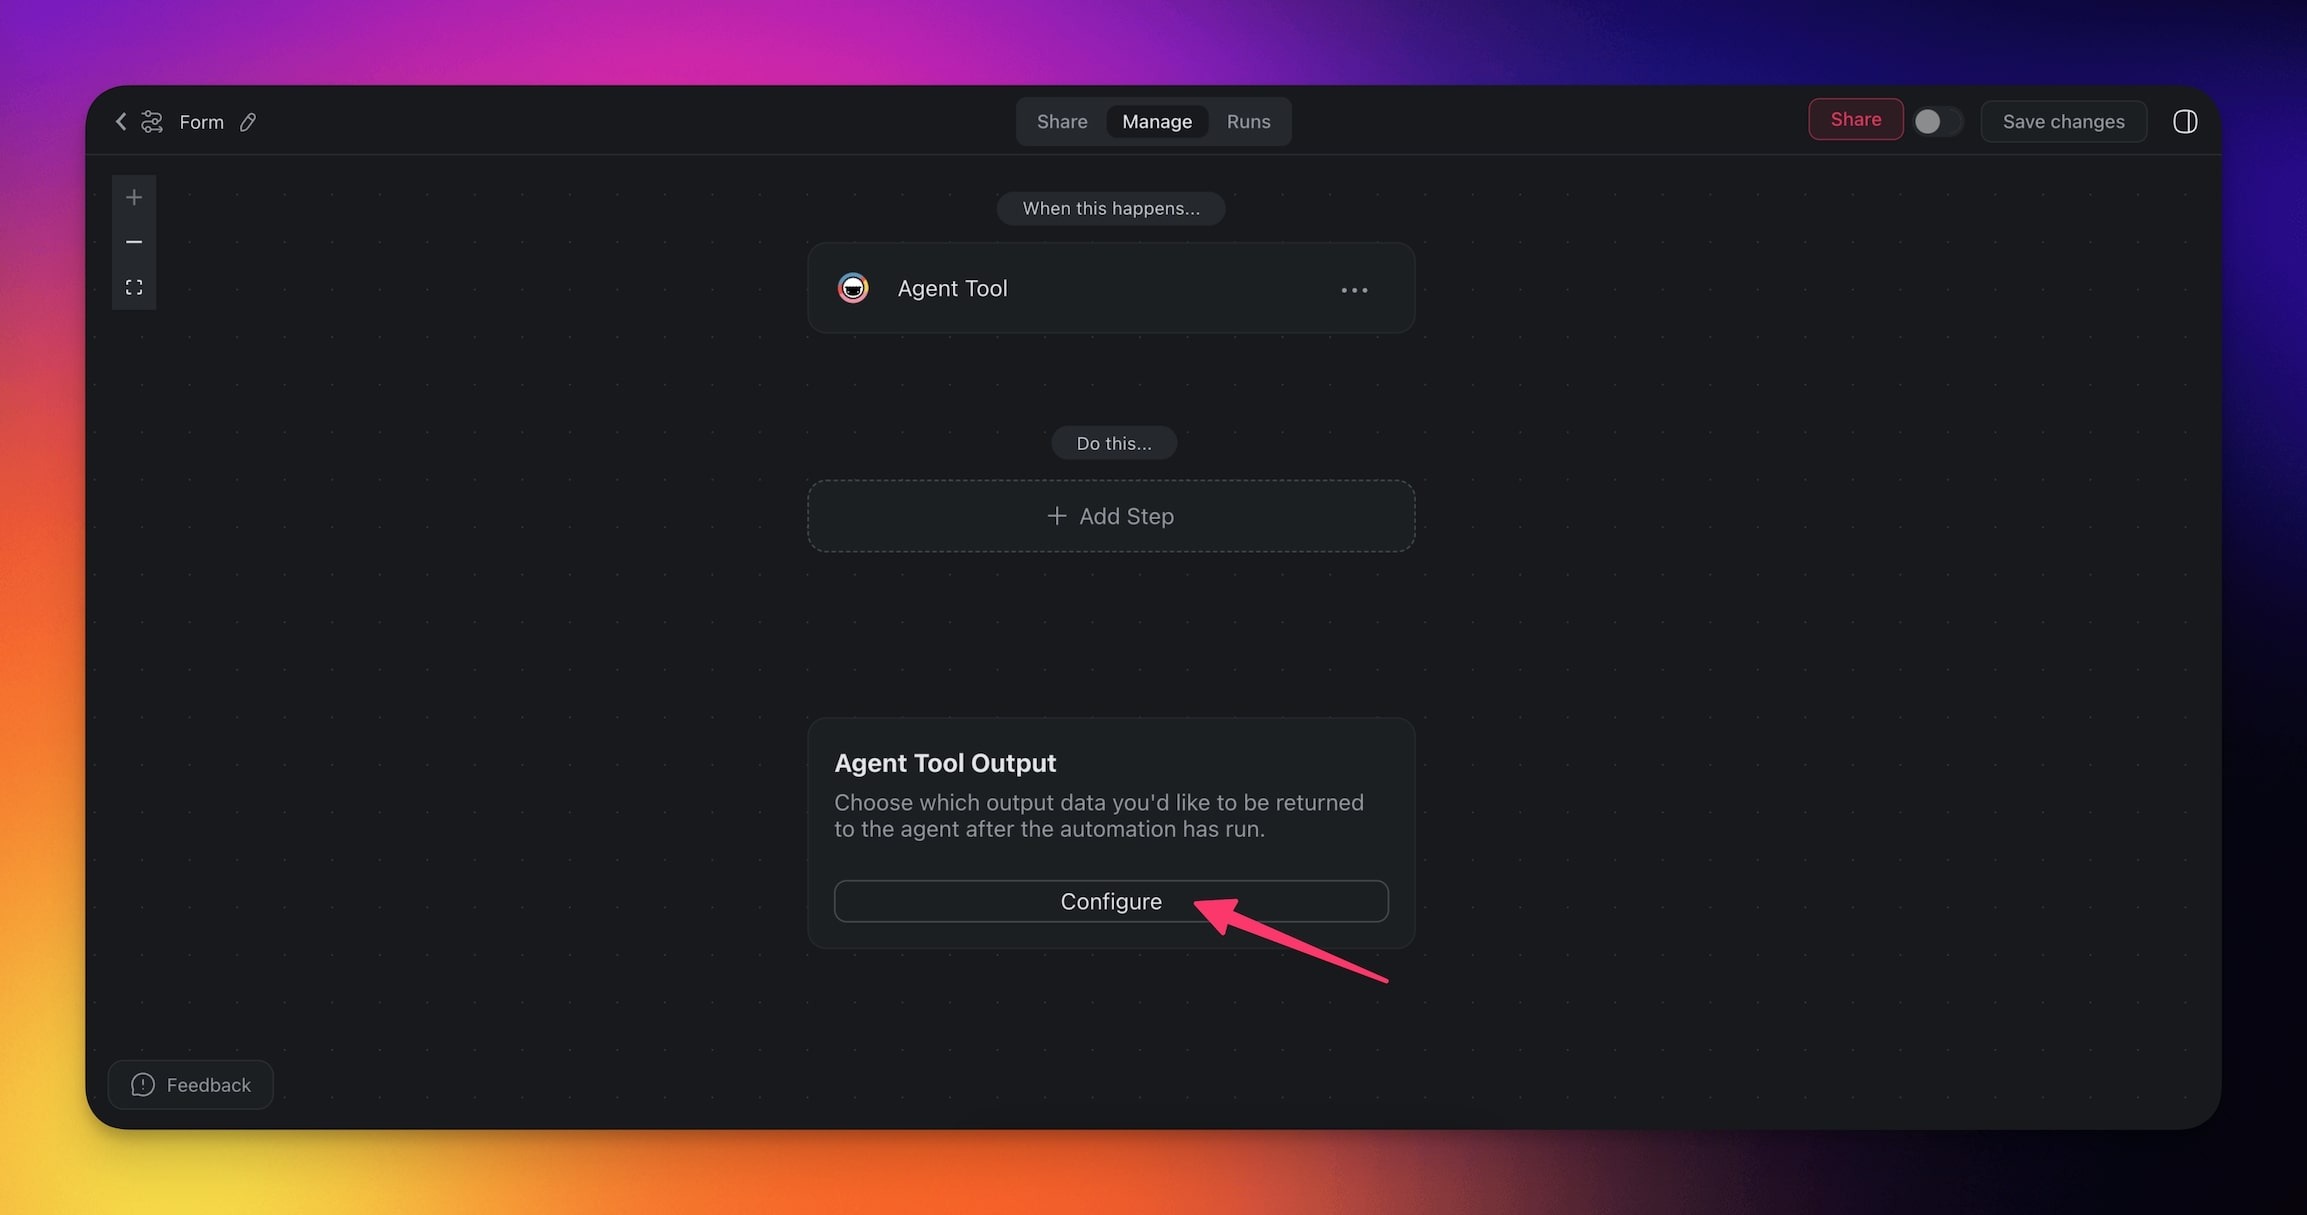
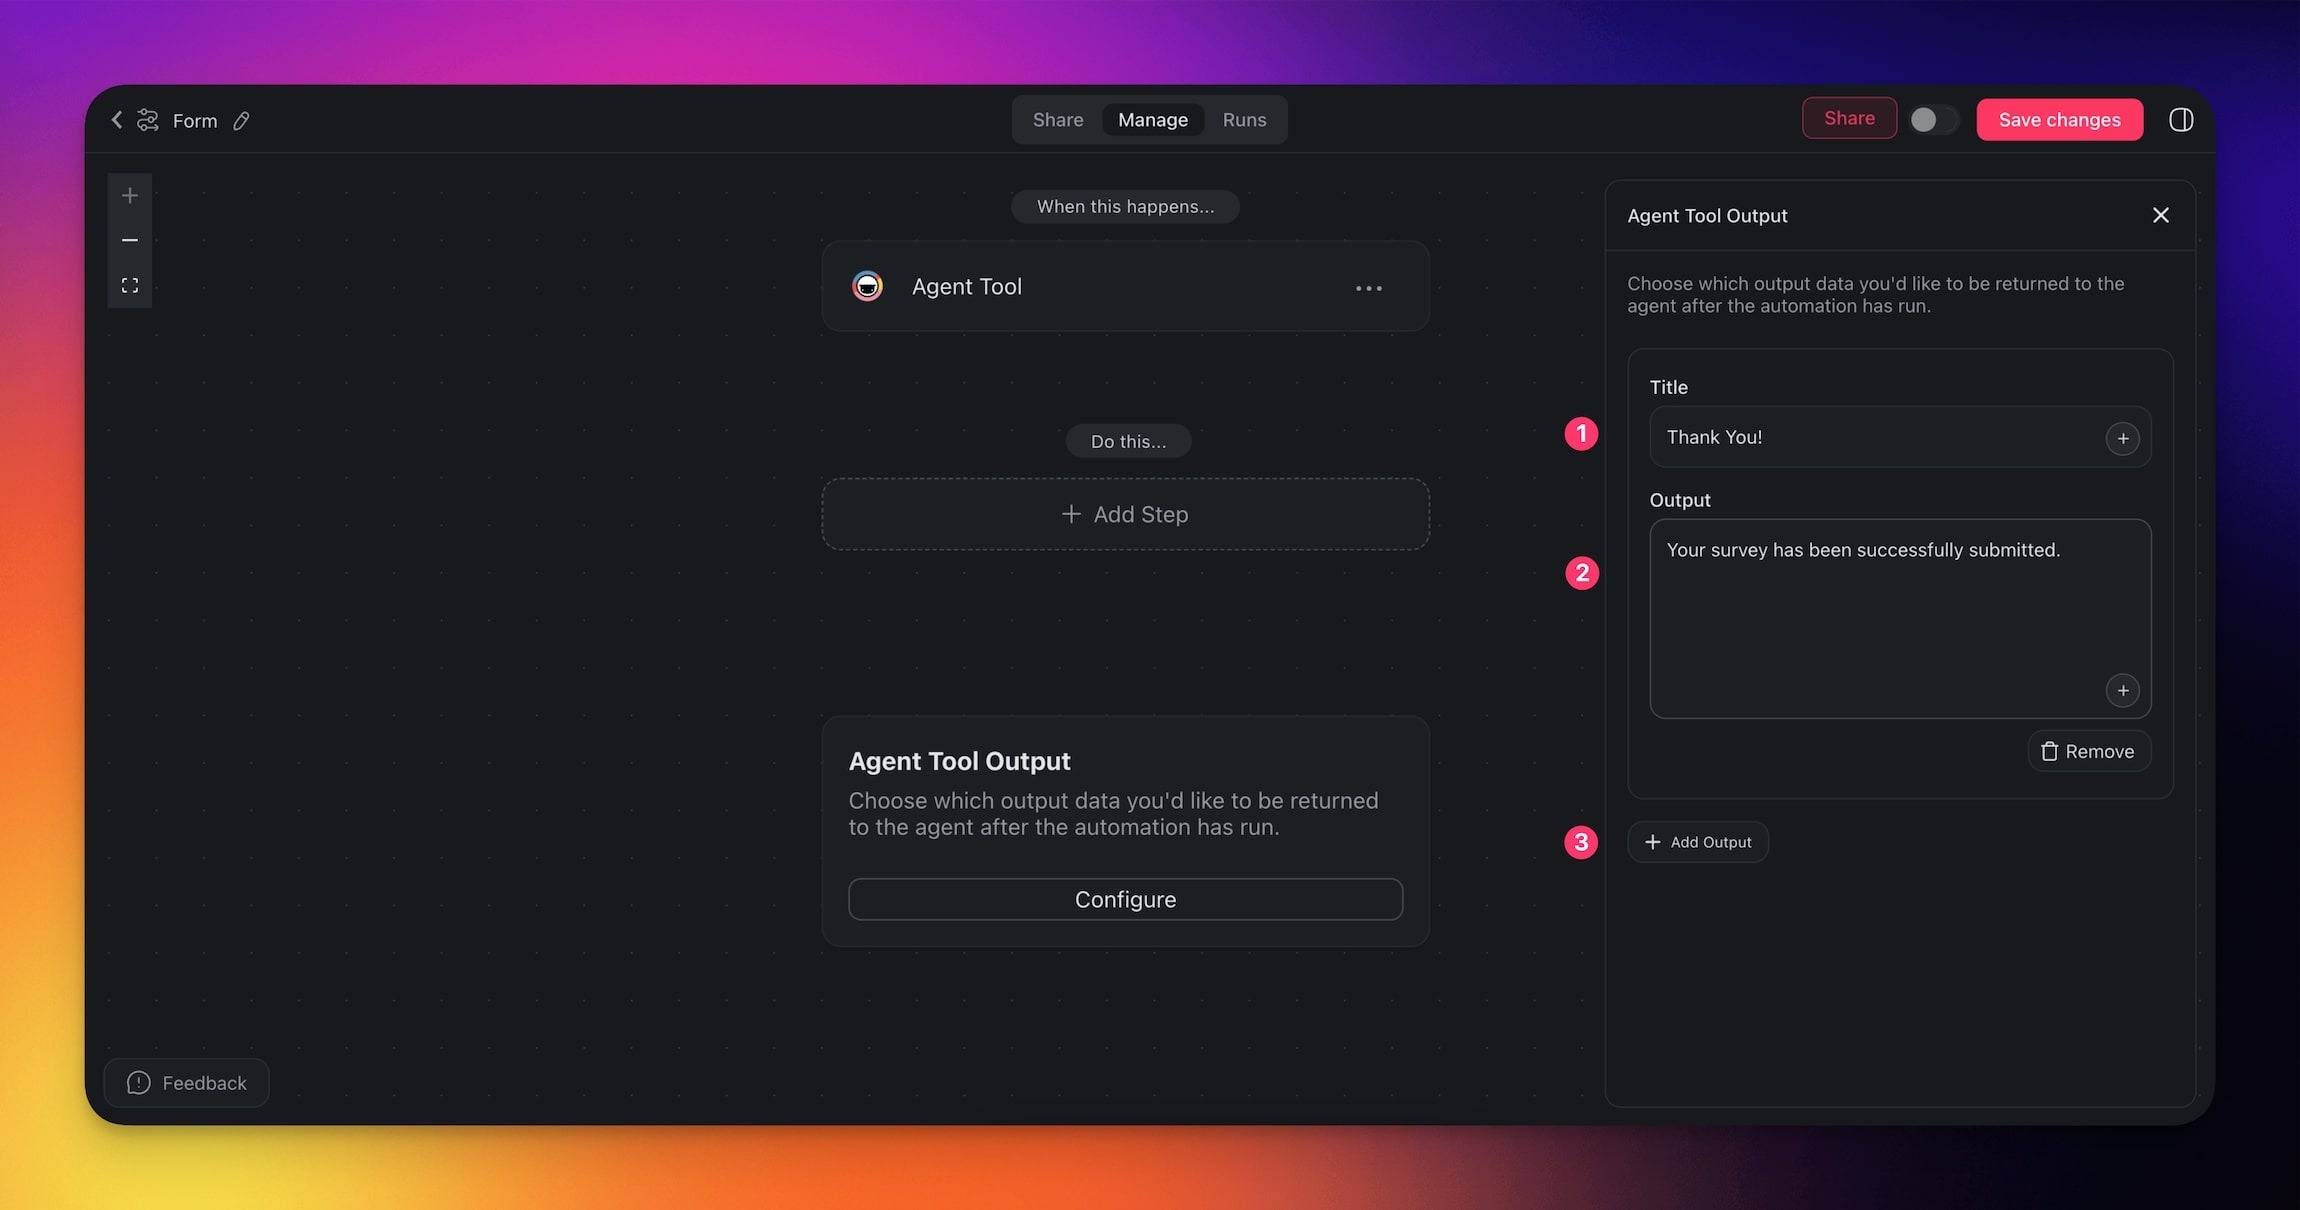
You can control the output of custom agent tools using the Agent Tool Output field at the bottom of your automation. Here is how to set it up:
- Add a new agent tool and set up its parameters.
- Click configure in the Agent Tool Output block.
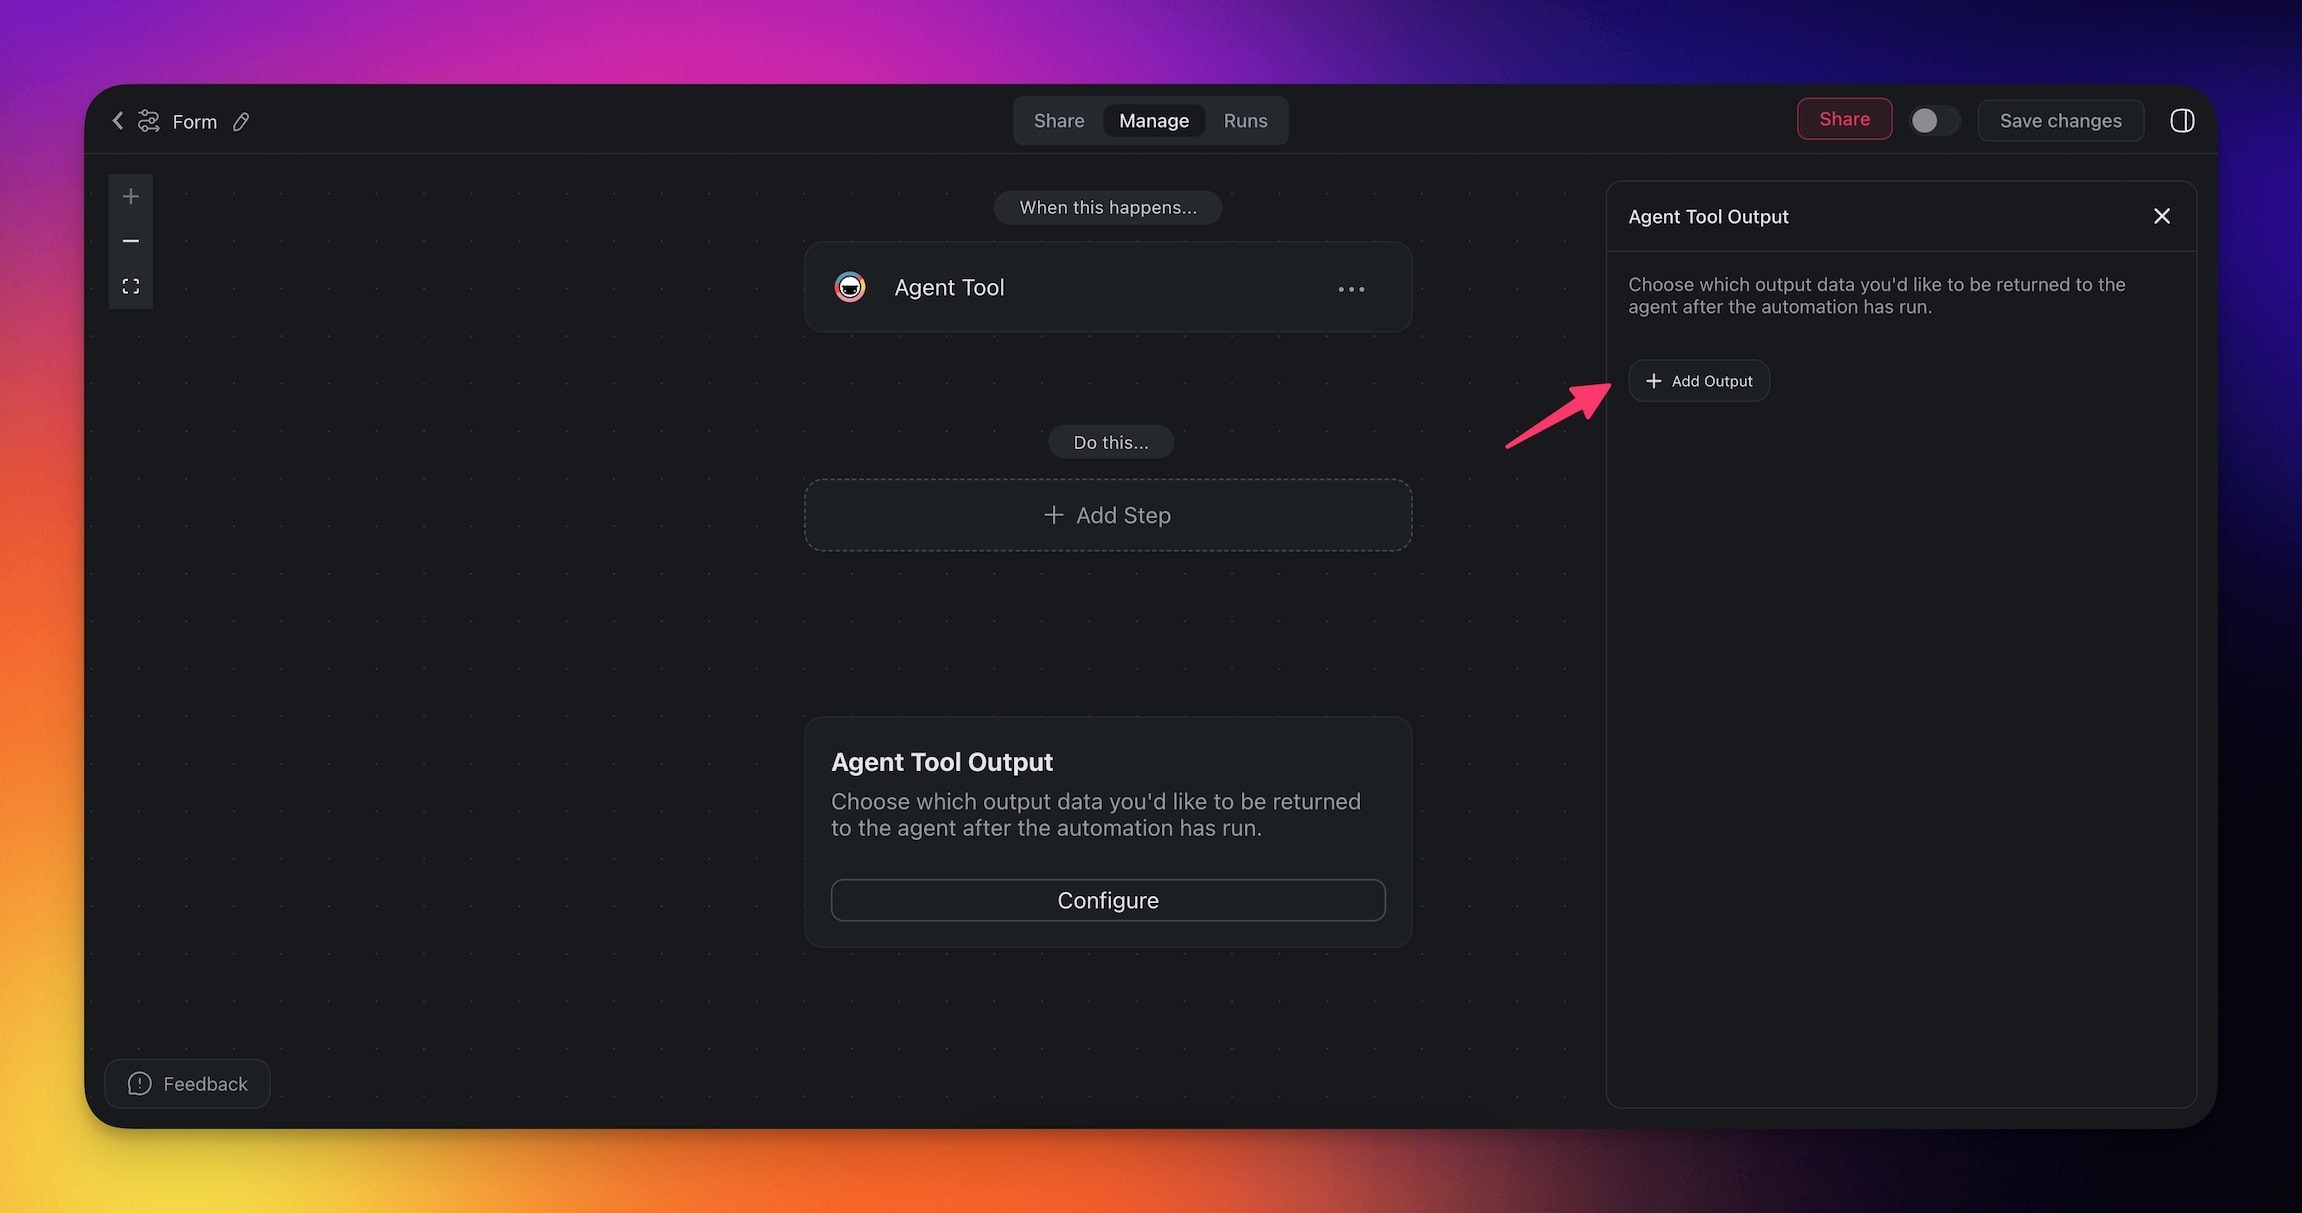
- Click ➕ Add Output in the right sidebar.
Set the (1) Title and (2) Output.
(optional) Click Add Output again to include additional content.
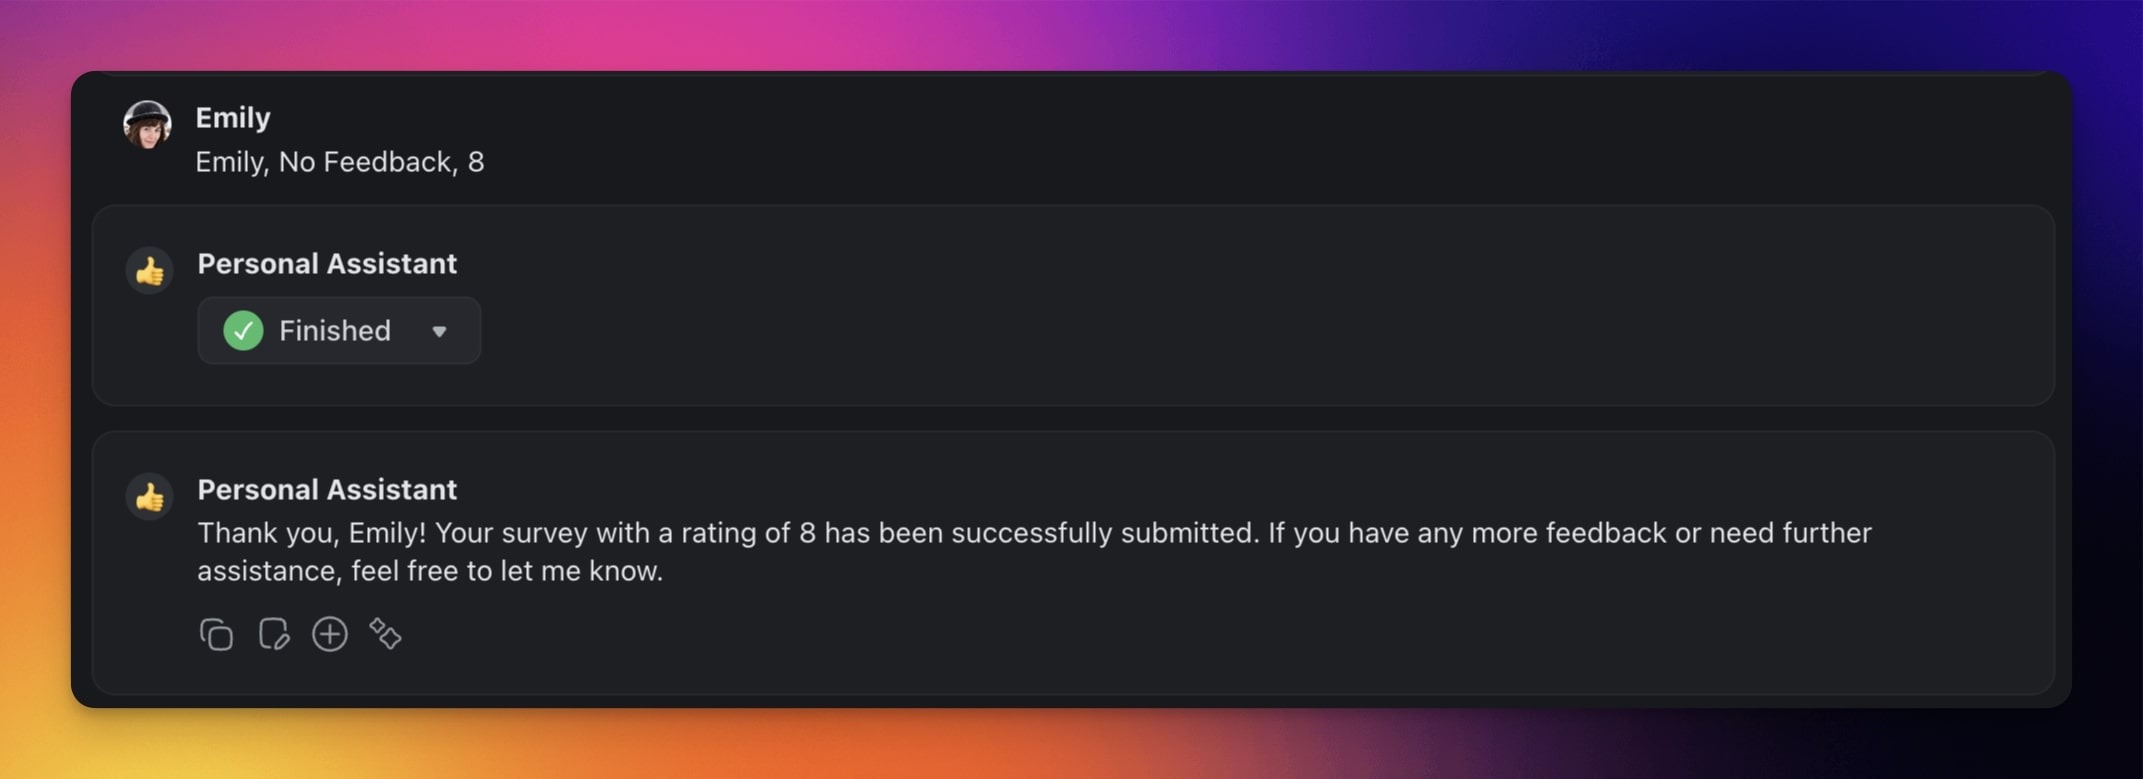
- Trigger the agent tool in an interaction with your agent to prompt the response.
Related guides
- Tools for AI Agents. The built-in toolkit alongside your custom tools
- Custom AI Agents. Enable custom tools on agents
- Agent Action. Outbound direction (flow calls agent)
- MCP Connectors. How external AI clients like Claude Desktop or Cursor reach into your workspace over MCP
- HTTP Request. Turn any web service into an agent tool