
Overview
The Branch step lets you create different paths within your workflow, depending on certain conditions. It chooses the best route based on the situation. Pair Branch with an Ask Agent step before it and you get AI-classified routing:
TL;DR: Branch is a control-flow action you drop into an automation to split it into conditional paths, routing each item down a different route based on its data. It supports up to 7 paths plus a fallback, so your automation always continues even when nothing matches. See Available Conditions.
Create Branches
- Start by setting up a trigger for your automation.
- Add the Branch action to the automation flow.
- Define the conditions that will trigger each path.
- Within each path, click ➕ Add Step to specify what happens next.
- You can either finish the automation here or continue with additional actions.
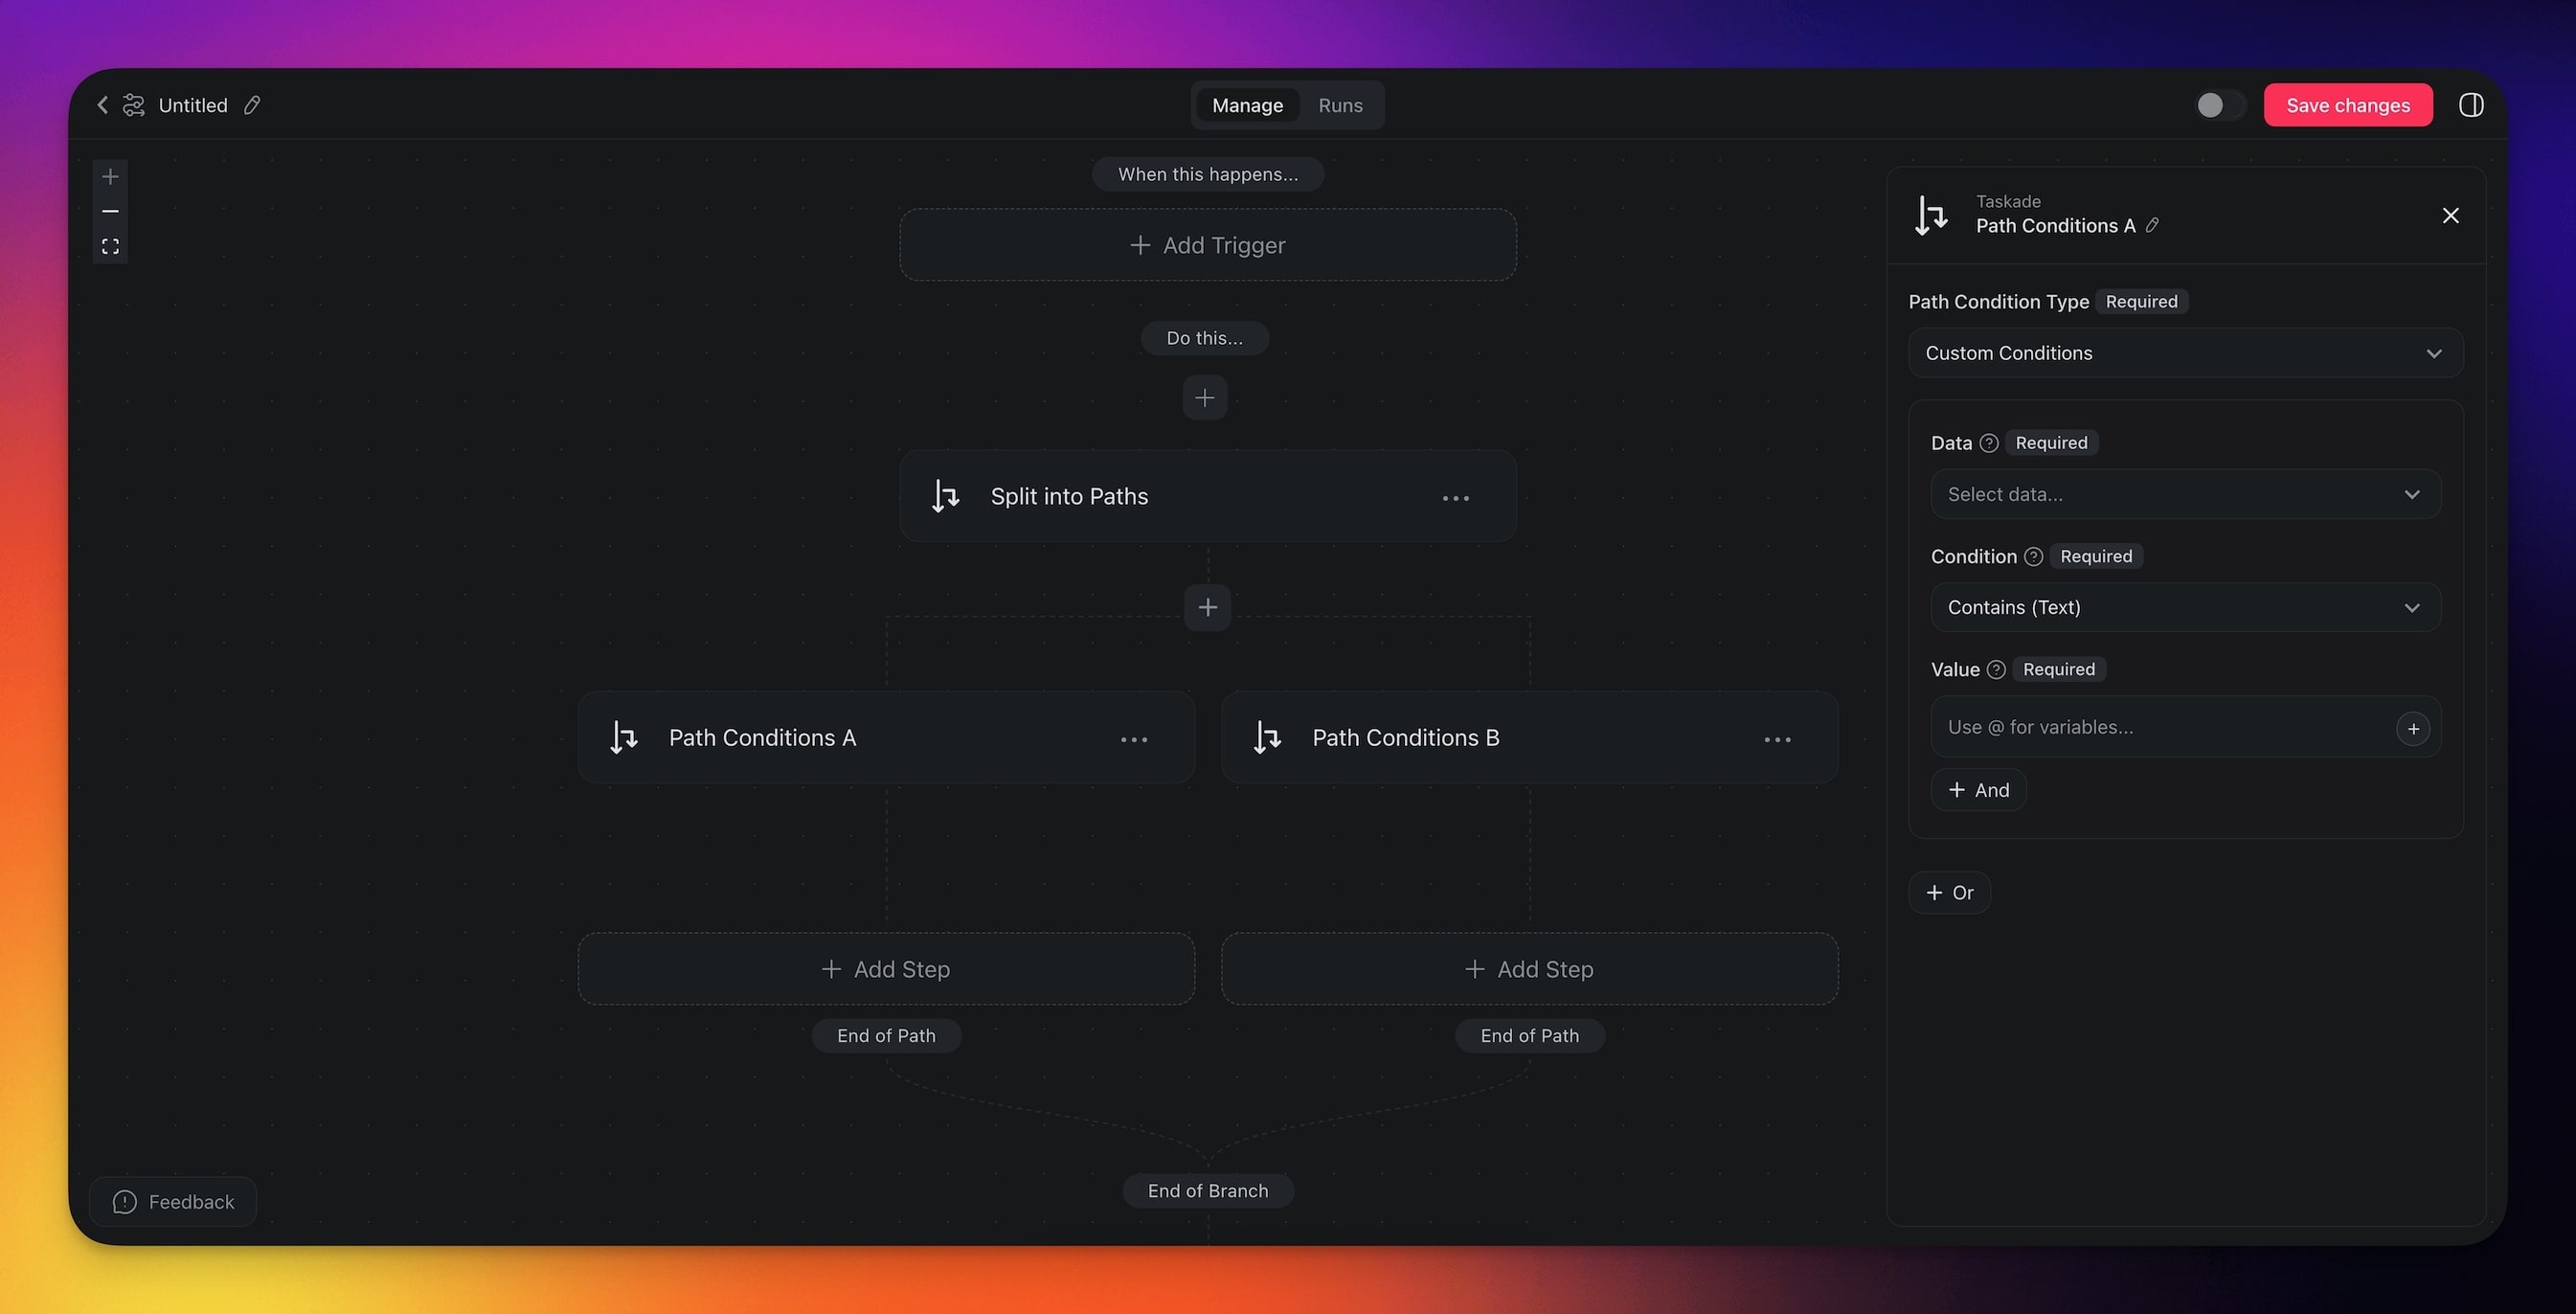
Branching Settings
Connector options give you full control over the Filter Data automation:
| 🏷️ Field | 🔤 Description |
|---|---|
| Data | Choose the input data. |
| Condition | Specify conditions for the data filter. |
| Value | Enter the value to compare against. |
💡 Note: Click ➕ Add to add more conditions that must all be true for the automation to proceed. Click ➕ Or add an alternative condition, meaning that either the first set of conditions or the new set can trigger the automation.
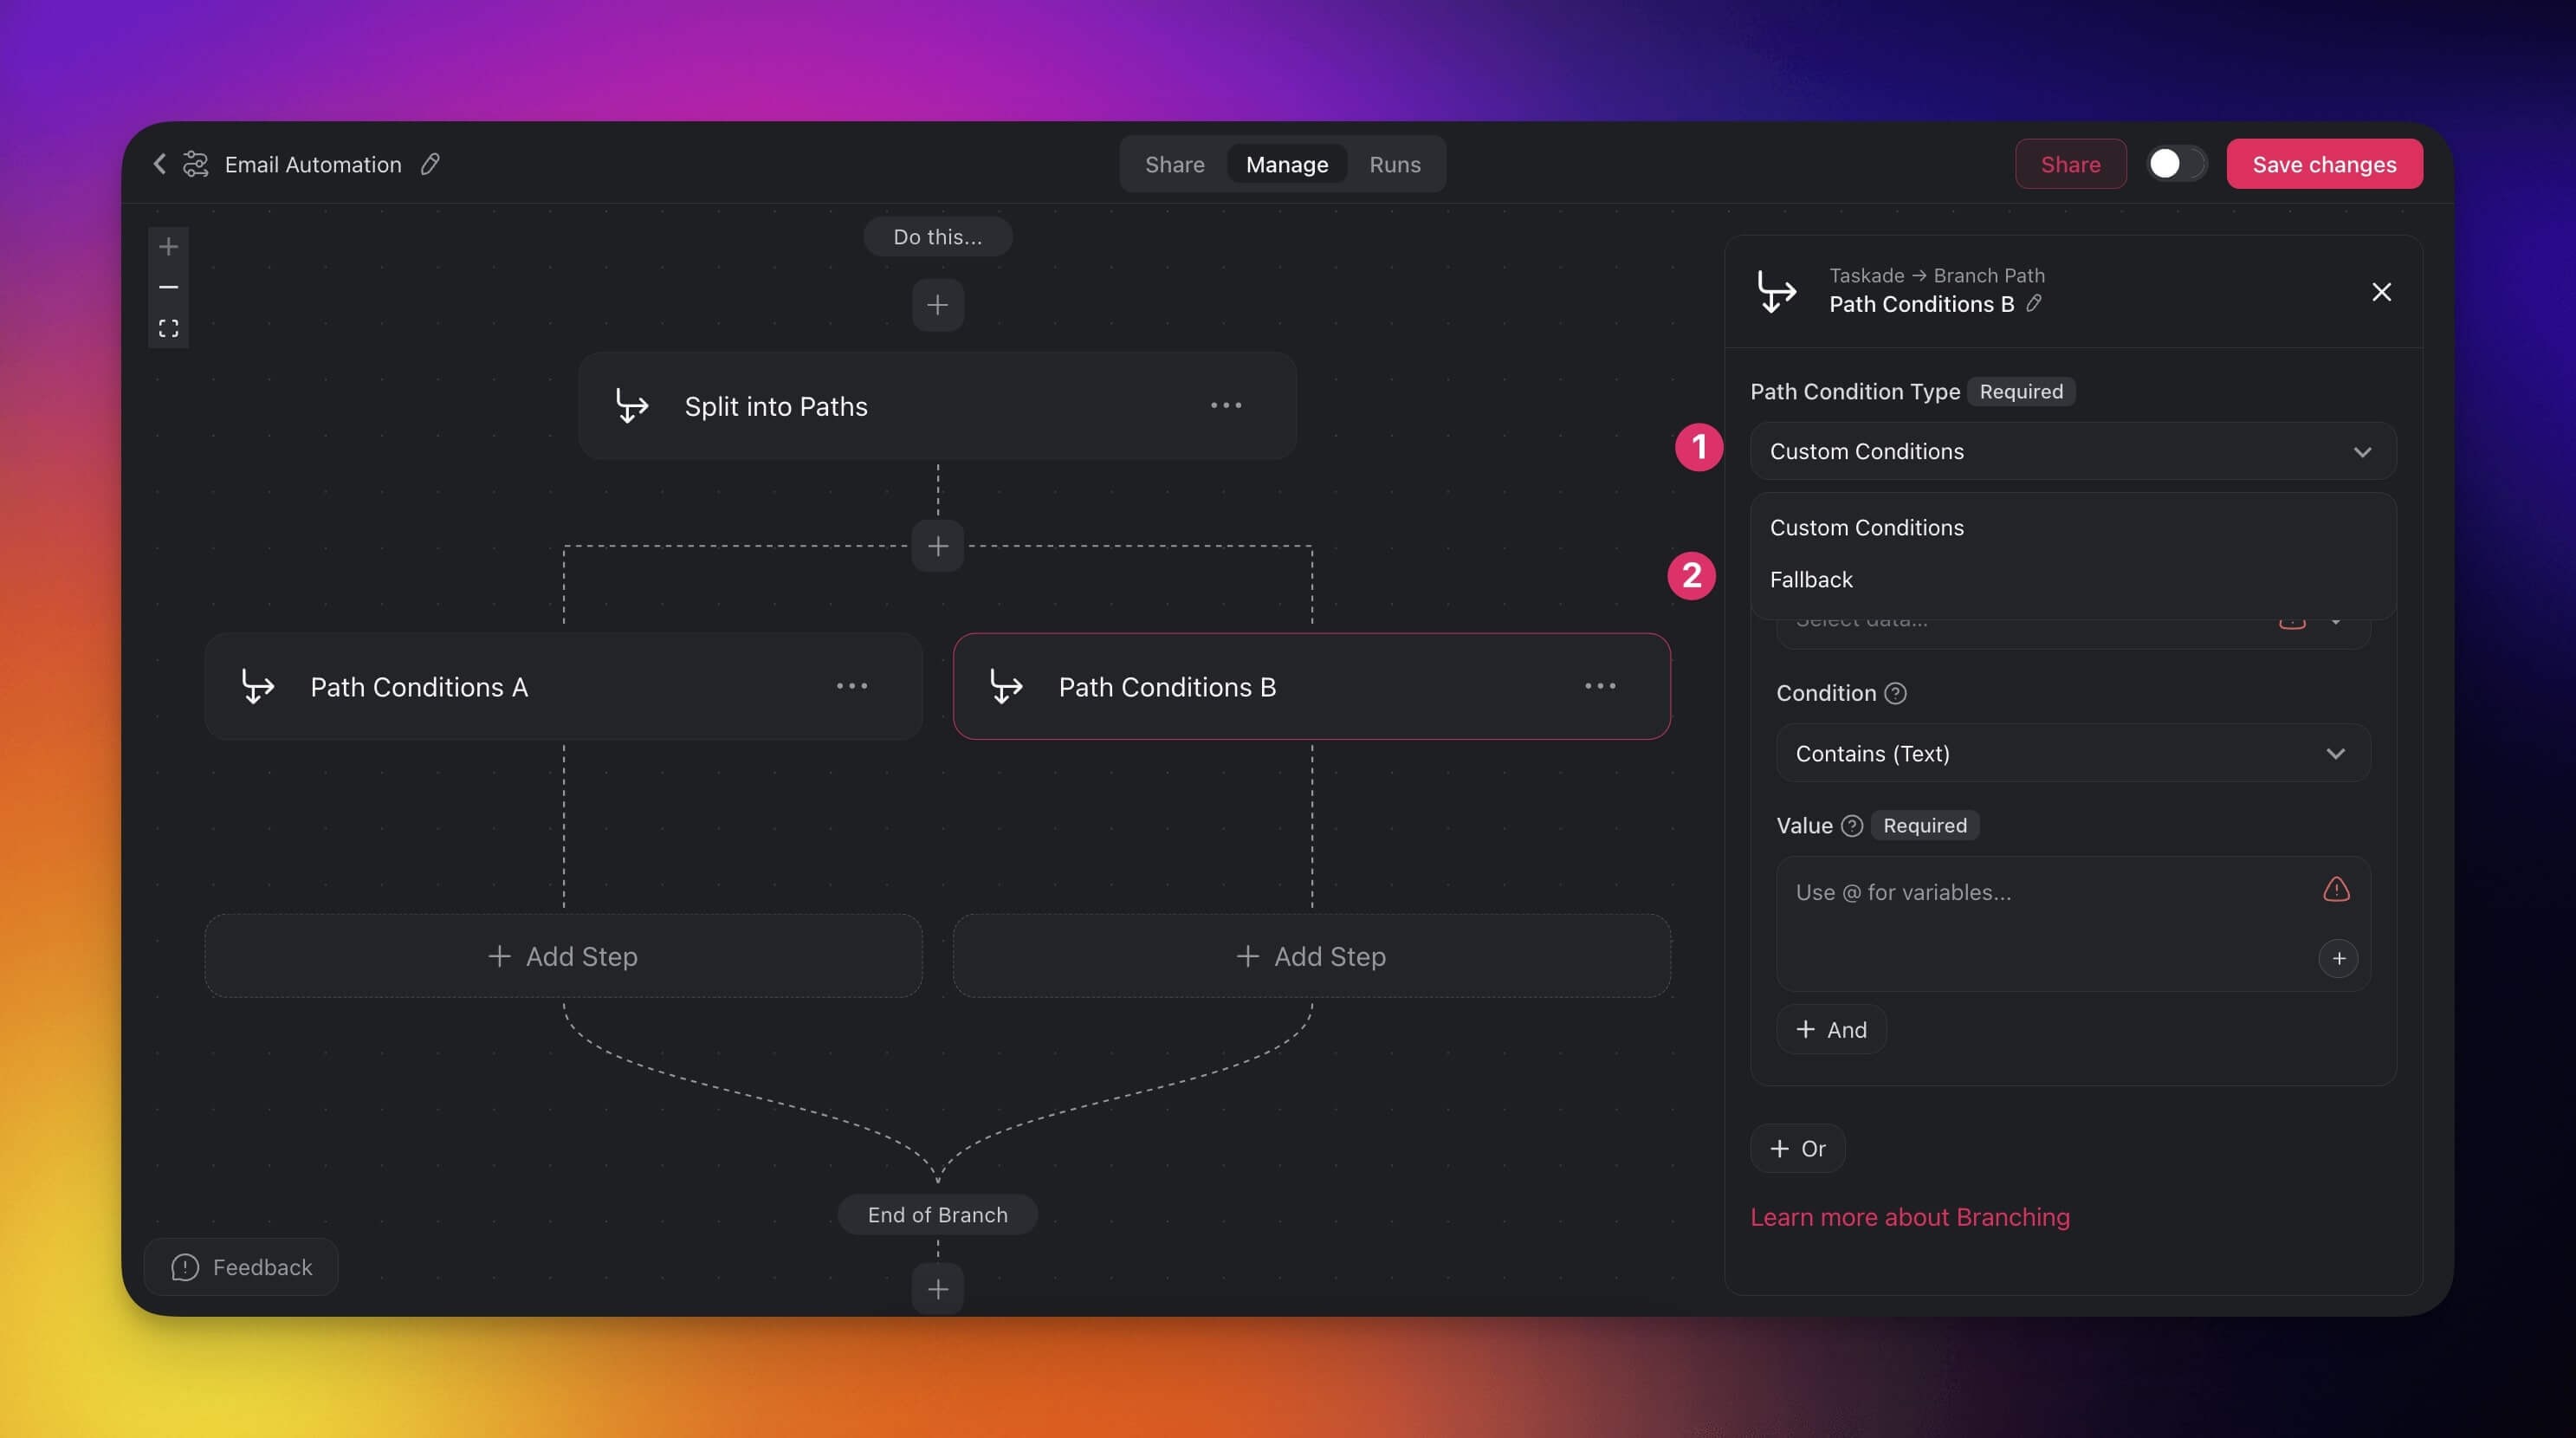
Fallback
The fallback option ensures that your automation continues even if no conditions are met. If none of the defined paths match, the workflow will follow a fallback route.
Set up a fallback path:
- Add the Branch action to your automation.
- Define conditions for each path.
- In the last branch, set the Path Condition Type to Fallback.
Note: The Branch action supports up to 7 paths, but you can add more by setting the last path’s Condition Type to Fallback and adding another Branch action after it. Repeat this process to build more advanced automation flows.
Use Cases
Not sure how to use the Branch action? Here are a few ideas:
| 🪄 Use Case | 🔤 Description |
|---|---|
| Task prioritization | Automatically route tasks to different workflows based on priority levels (e.g., High Priority goes to urgent queue, Low Priority to a regular queue). |
| Project status updates | Depending on project status (e.g., "In Progress," "Completed"), trigger different actions like notifying stakeholders or archiving completed tasks. |
| Client communication | Direct client inquiries to different paths based on urgency or type (e.g., support requests go to customer service, while sales inquiries go to sales team). |
| Client onboarding | Customize the onboarding process for new clients by branching the workflow based on client type (e.g., small business vs. enterprise). |
| Approval processes | Route tasks through different approval paths depending on the task's nature (e.g., financial approvals vs. content approvals). |
Chaining Branches for Complex Logic
Each Branch action supports up to 7 paths. If you need more, chain multiple Branch actions in sequence:
- Create your first Branch action with up to 7 paths
- On any path that needs further routing, add another Branch action
- This creates a decision tree — each level can split into 7 more paths
Example: Customer routing with 10+ segments
| First Branch | Second Branch (on Path 1) |
|---|---|
| Path 1: Region contains "Americas" | Path 1a: Country matches "US" |
| Path 2: Region contains "Europe" | Path 1b: Country matches "Canada" |
| Path 3: Region contains "Asia" | Path 1c: Country matches "Brazil" |
| Fallback: Other regions | Fallback: Other Americas |
Tips for Effective Branching
- Order matters: Paths are evaluated top to bottom — put the most common condition first for clarity
- Always set a Fallback: The fallback path catches anything that doesn't match your conditions, preventing automation dead-ends
- Use "contains" for flexibility: "contains" is more forgiving than "matches" — it catches partial matches like "urgent" within "this is urgent"
- Combine with AI agents: Use an Ask Agent action before the Branch to have the AI classify or extract data, then branch on the agent's output
- Test each path: Use the Preview feature to send test data through each branch and verify the routing
Pro tip: Combine branching with AI Agent Automation for intelligent routing. Have an agent analyze incoming data and output a category, then branch on that category. This gives you AI-powered decision-making within your automation flow.
Available Conditions
When setting up branch conditions, you can compare data using these operators:
Text Conditions
| Condition | What It Checks | Example |
|---|---|---|
| matches | Text is exactly equal | Subject matches "Sales Inquiry" |
| contains | Text includes a word or phrase | Message contains "urgent" |
| starts with | Text begins with a value | Email starts with "support@" |
| ends with | Text ends with a value | Domain ends with ".edu" |
| is empty | Field has no value | Phone number is empty → skip SMS |
| is not empty | Field has a value | Email is not empty → send follow-up |
Each condition also has a negative version: "does not match", "does not contain", "does not start with", "does not end with".
Combining Conditions
- AND — all conditions must be true (e.g., "Subject contains 'urgent' AND Priority is not empty")
- OR — any condition can be true (e.g., "Source matches 'web' OR Source matches 'referral'")
Tip: Use the@ symbol in the Value field to reference data from the trigger or previous actions. For example, type@ to insert the task name from a trigger into your branch condition.
Example: Route Support Tickets by Priority
Here's a practical example using branch conditions:
| Path | Condition | Action |
|---|---|---|
| Path 1 | Priority contains "urgent" | Send Slack alert to #critical channel |
| Path 2 | Priority matches "low" | Add to backlog project |
| Fallback | No conditions match | Assign to general inbox |
Related guides
- Loop Action — Iterate over each matched item
- Filter Data — Drop items before they reach Branch
- Agent Action — Classify with AI before branching
- AI Categorize — Preset routing with AI classification
- Structured Output — Typed agent output for branch conditions
- Automation Triggers — What fires a branch
- Automations: Overview — Full automation anatomy