
Overview
Notion is a popular workspace tool for notes, databases, wikis, and project management. Taskade imports Notion content from Markdown files. When you export from Notion, regular pages become .md files and databases become .csv files. Taskade reads both formats.
TL;DR: Move your Notion pages and databases into Taskade by exporting as Markdown and CSV, then dropping the files into the Import dialog. Pages land as projects you can open across multiple project views, and databases become tables via CSV import.
Export Non-Database Pages
Open Notion and click ···(ellipsis) in the top-right corner.
Choose Export from the drop-down list.
Select Markdown & CSV in the Export format field.
- (optional) Choose Include subpages to export subpages as separate files.
Click Export to download a ZIP archive with the exported files.
Unzip the archive to access individual .md and .csv files.
Note: Databases are exported as .csv files, with .md files for each subpage.
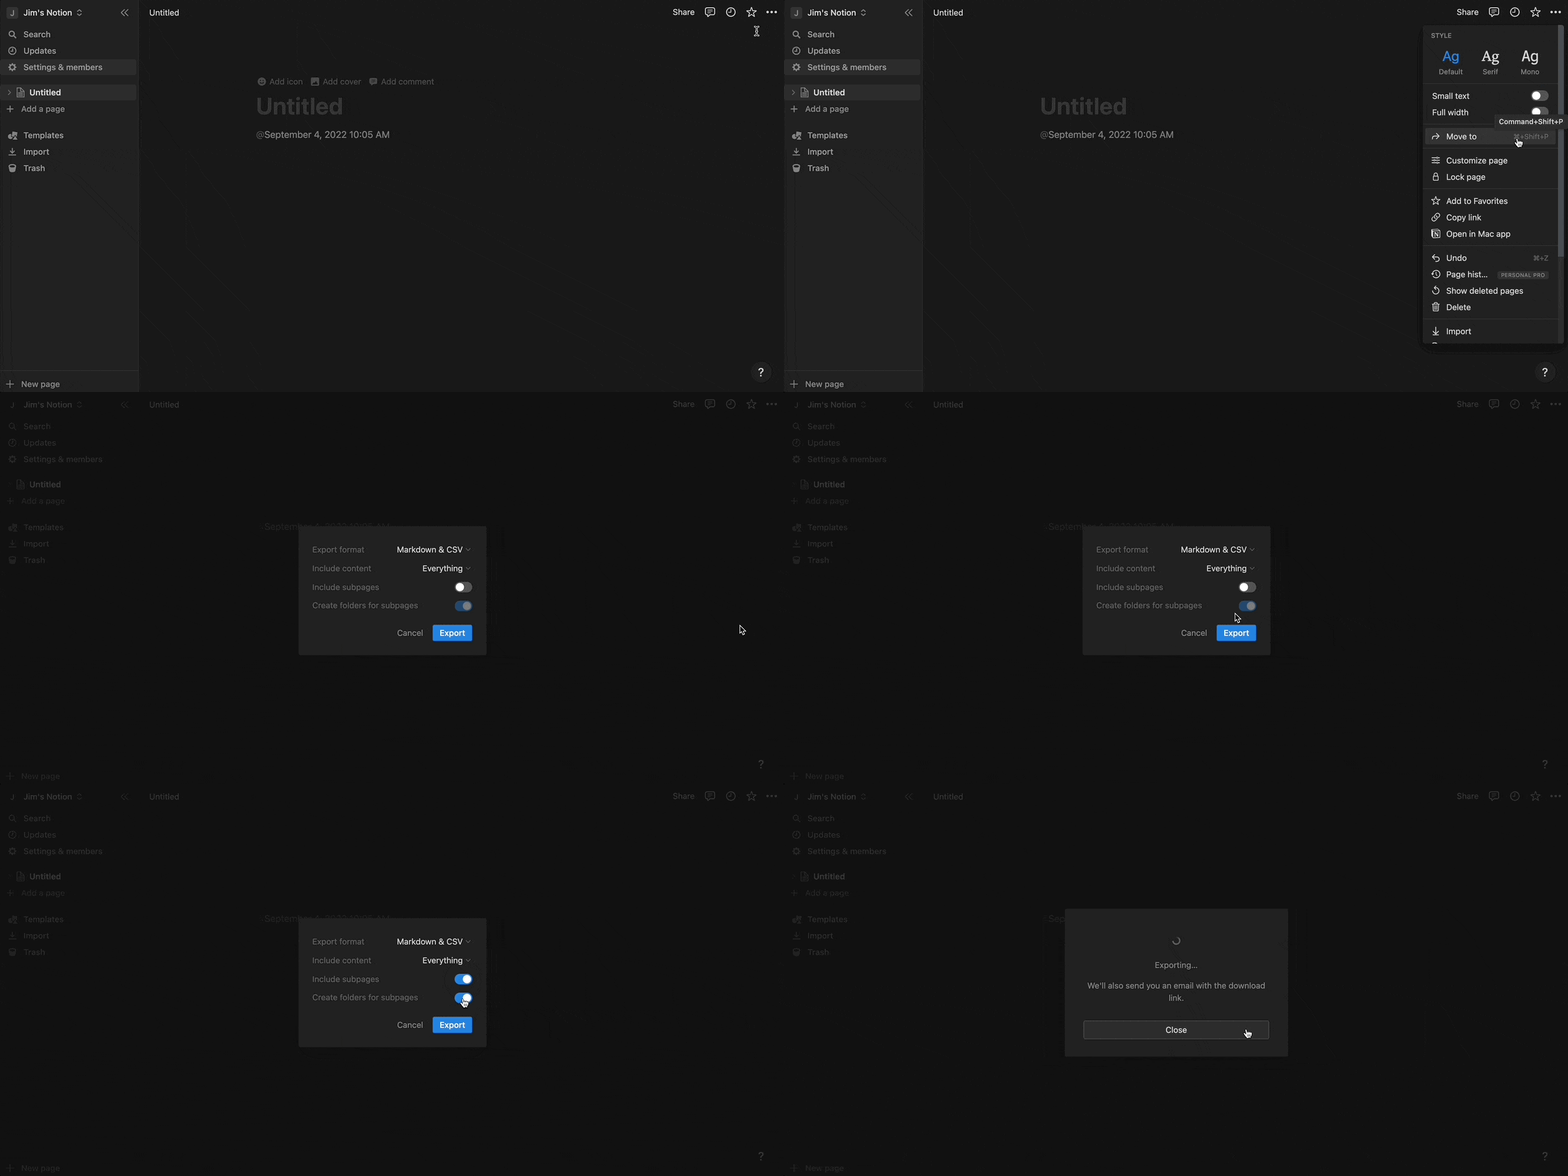
To export your entire Notion workspace, go to Settings & Members ➡ Settings ➡ Export all workspace content. This downloads everything as a single ZIP file.
Import to Taskade
- Go to your workspace or folder.
- Click the arrow next to the ➕ New Project button.
- Select Import, then drag your Notion .md files into the Import with AI tab. To paste content instead, click Paste Text & Markdown.
- Click Create Project to finish.
💡 Note: You can select or drag-and-drop multiple .md files at once.
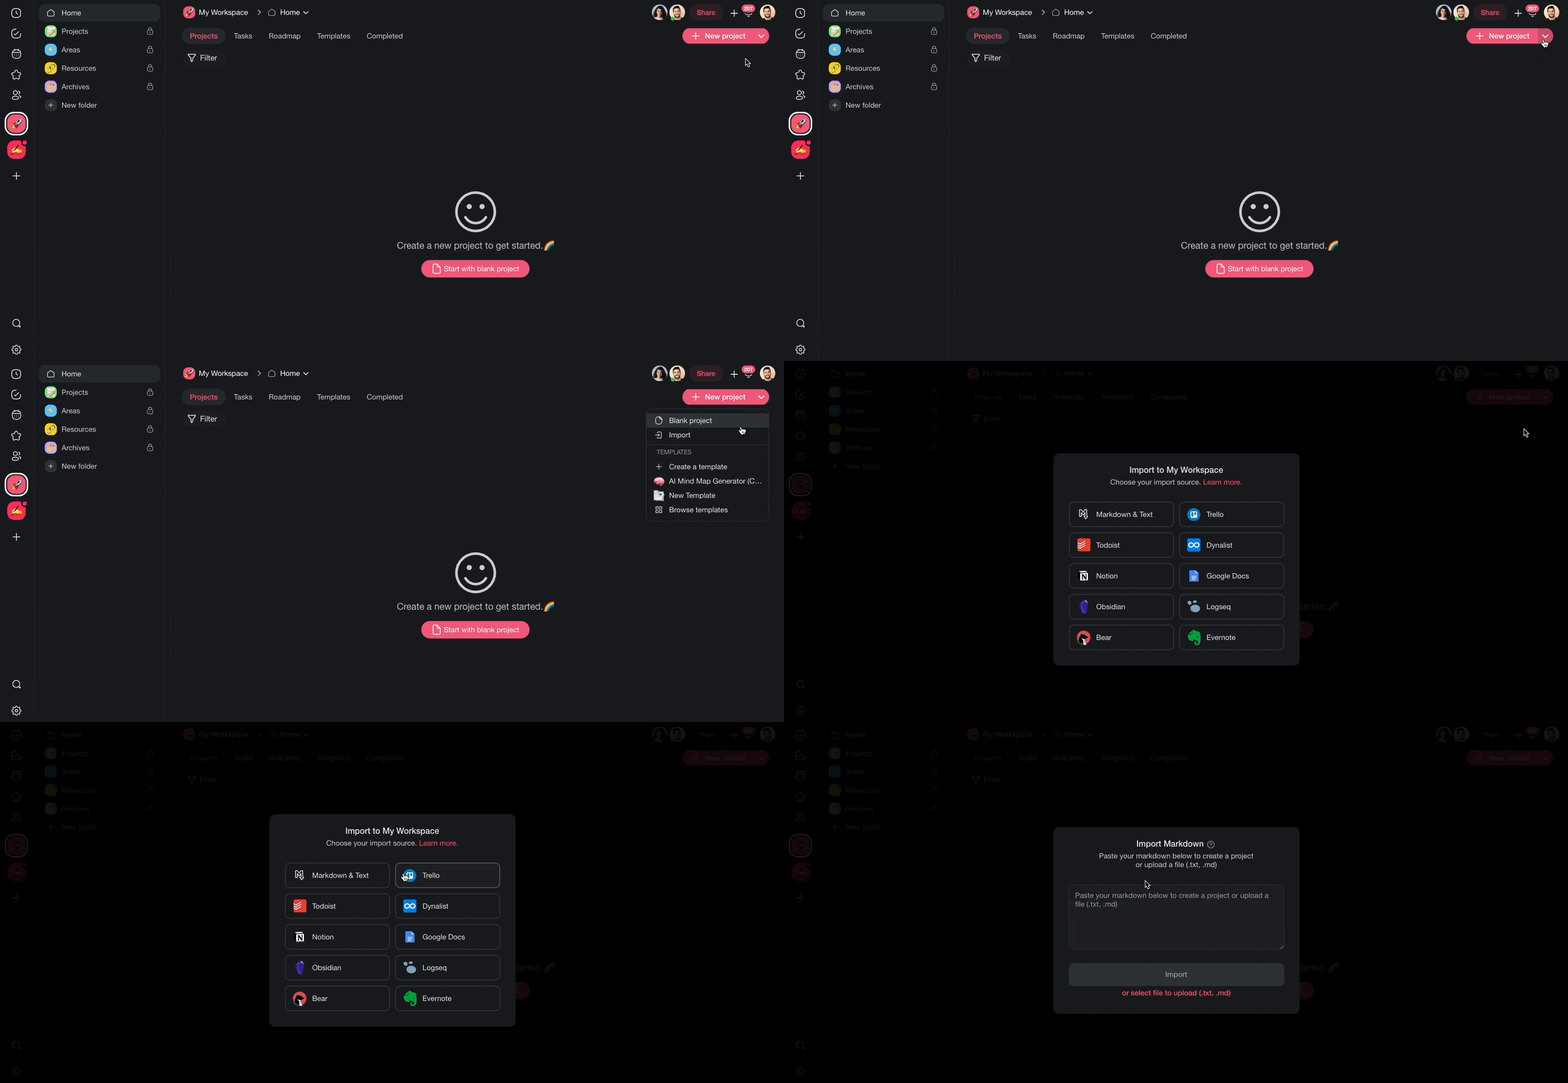
For Notion databases exported as .csv files, use the Import CSV tab in the Import dialog to bring them into Taskade as structured projects. See Import CSV Spreadsheets for details.
🗂 Your pages become projects and your databases become Tables inside one workspace:
Team Workspace
├─ 📁 Wiki
│   ├─ 📄 Onboarding Guide
│   └─ 📄 Brand Assets
└─ 📁 Projects
    ├─ 📊 Roadmap (Table view)
    └─ 📄 Launch Plan
Rebuild your Notion hierarchy with folders and sub-projects, then open any page across all project views.
After Import
After your Notion pages land in Taskade, you can organize and extend them:
- Switch views: Use Board, Table, Mind Map, or any of Taskade's project views to see your content from different angles.
- Rebuild your wiki: Organize imported pages into folders and workspaces to recreate your Notion workspace hierarchy.
- Use AI agents: Ask Taskade AI to summarize, rewrite, or generate follow-up tasks from your imported content.
- Add to agent knowledge: Upload important pages as agent knowledge so AI agents can reference them.
- Set up automations: Use automations to act on imported tasks automatically.
Tips
- The Markdown export drops Notion's internal page links and database relations. Use Taskade's internal linking to reconnect related pages after import.
- For best results, import databases separately with the CSV import method.
- For large Notion workspaces, import sections at a time and organize them into Taskade folders as you go.
Notion → Taskade Mapping
| Notion | Taskade |
|---|---|
| Page | Project |
| Database | Project (Table view) |
| Property | Custom field |
| Sub-page | Sub-project / Folder |
| Comment | Comment (role-based access from Owner to Viewer) |
See Custom AI Agents/GPTs and Import Markdown, Sort & Add Notes.
Bring It Into Taskade Genesis
Your imported page is now part of your Workspace DNA. Open the project's ··· menu and choose Add to Agent Knowledge so a custom agent answers questions from it. Start an automation from the project to act on new or changed tasks. Then open Taskade Genesis and describe the app you want on top of that data, such as a team wiki portal, a CRM, or a tracker. For a web page or a video you want to keep alongside it, save the link in the Media Files tab (see Import a Website URL).