
Overview
Agent Chat is a revolutionary way of interacting with AI that lets you experience the power of tailored, context-aware responses from your custom AI agents. Every chat thread carries the agent's persistent memory, enabled tools, and choice of 15+ frontier models from OpenAI, Anthropic, Google, and leading open-source providers.
TL;DR: Chat with your custom AI agents to get tailored, context-aware answers grounded in your own knowledge and memory. Each thread can call 34 built-in tools, run multiple agents at once, switch between 15+ frontier models, and turn replies into projects or automations.
What Happens Behind One Agent Chat Message
Every message triggers a loop: retrieve → plan → tool call → synthesize → write memory. That's why Taskade agents feel smarter over time. The memory grows with every chat.
Powered by Taskade Genesis. Taskade is now a full-stack AI productivity platform. Build apps, deploy agents, and automate workflows from a single prompt. Learn more about Taskade Genesis.
Note: New to AI agents? Read our Custom AI Agents guide first.
Agent Chat vs. Generic AI Chats?
Every custom AI agent you create comes with a unique knowledge base, tone, and style. This means that the answers and guidance provided by agents are more tailored and specific compared to regular AI chats.
Here are a few more differences:
| 🟢 AI Agent Chat | 🔵 Generic AI Chats | |
|---|---|---|
| Knowledge Base | Fully customizable; agents can learn and adapt from your specific projects and the knowledge you upload to your workspaces. | Based on general, broad knowledge with no customization. |
| Tone and Style | Tailored to your preferences and needs. Interactions match your desired tone and style. | Standard, one-size-fits-all responses that require additional prompts to customize tone and style. |
| Context Awareness | Agents are context-aware, capable of understanding and integrating information from your projects to provide contextually relevant answers. | No context awareness. |
| Response Relevance | Delivers highly relevant and focused responses that are directly aligned with your tasks and projects. | Responses can be vague or off-topic, often requiring additional clarification. |
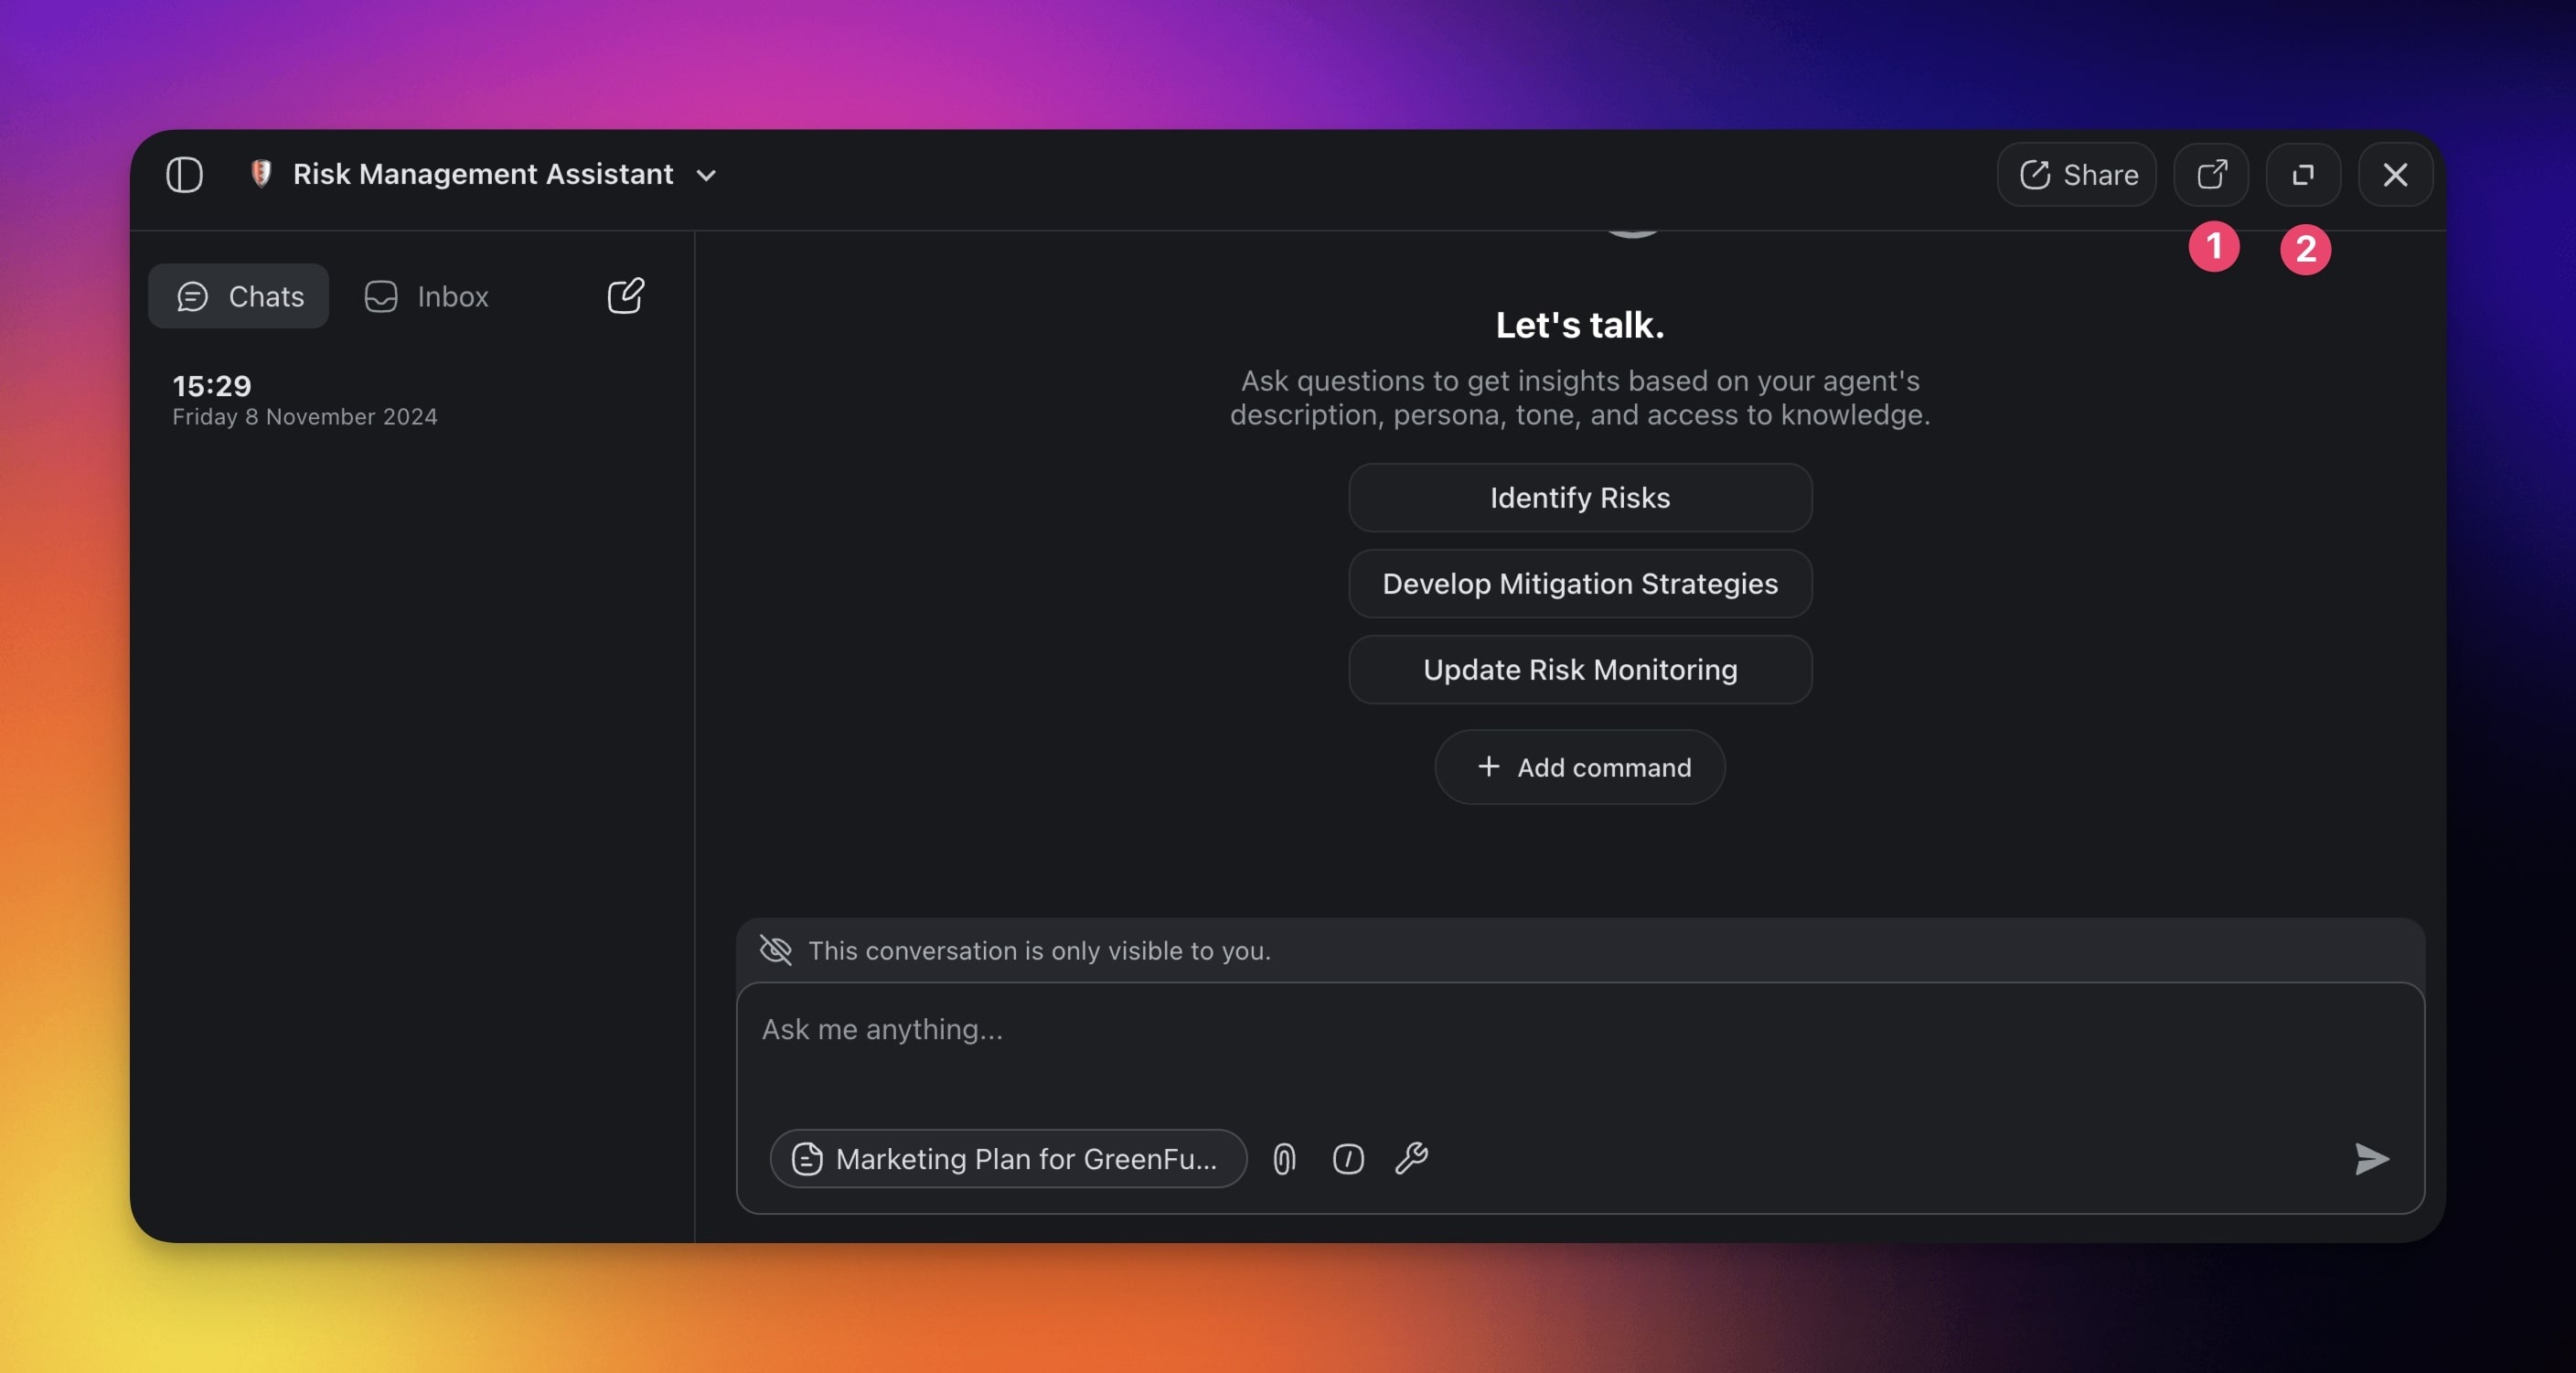
Start an Agent Chat
You can interact with your custom AI agents in many different ways:
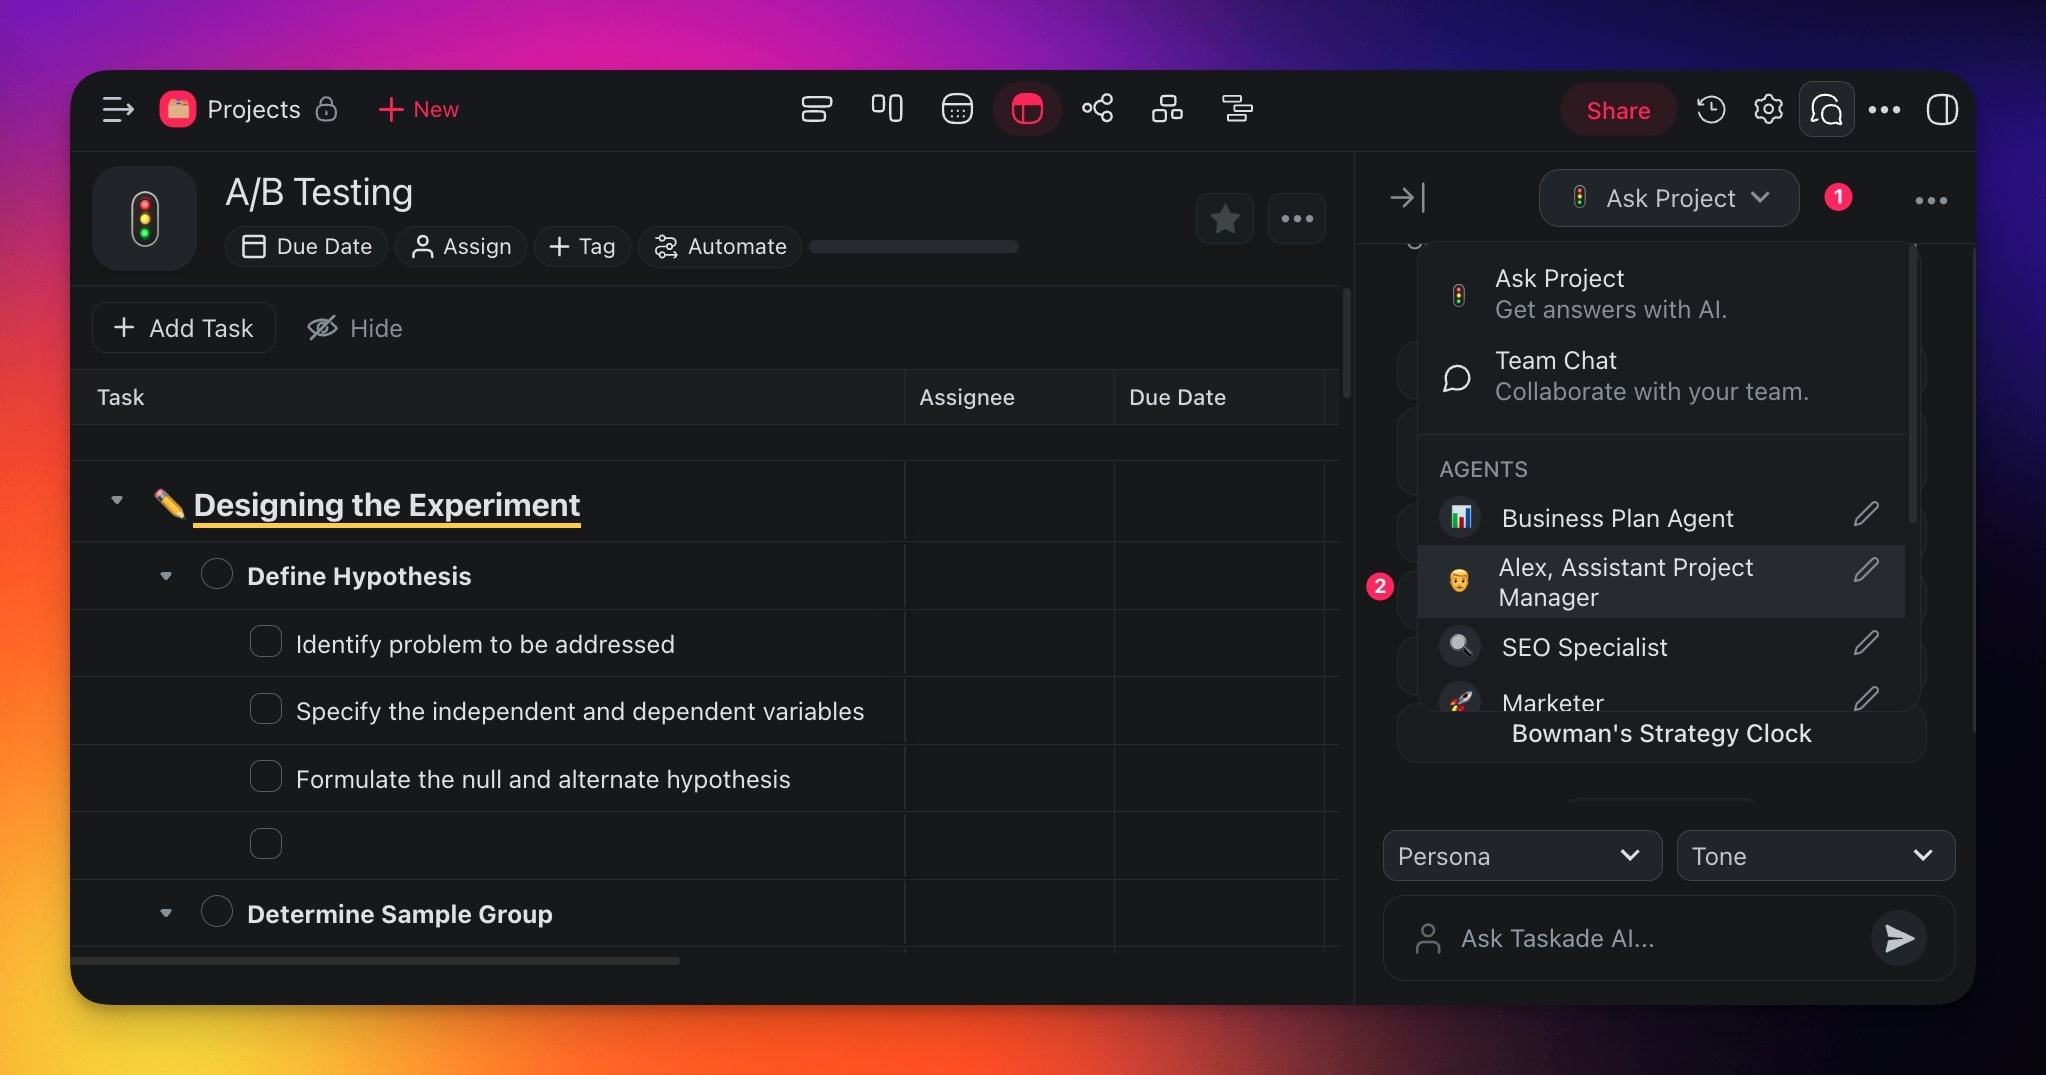
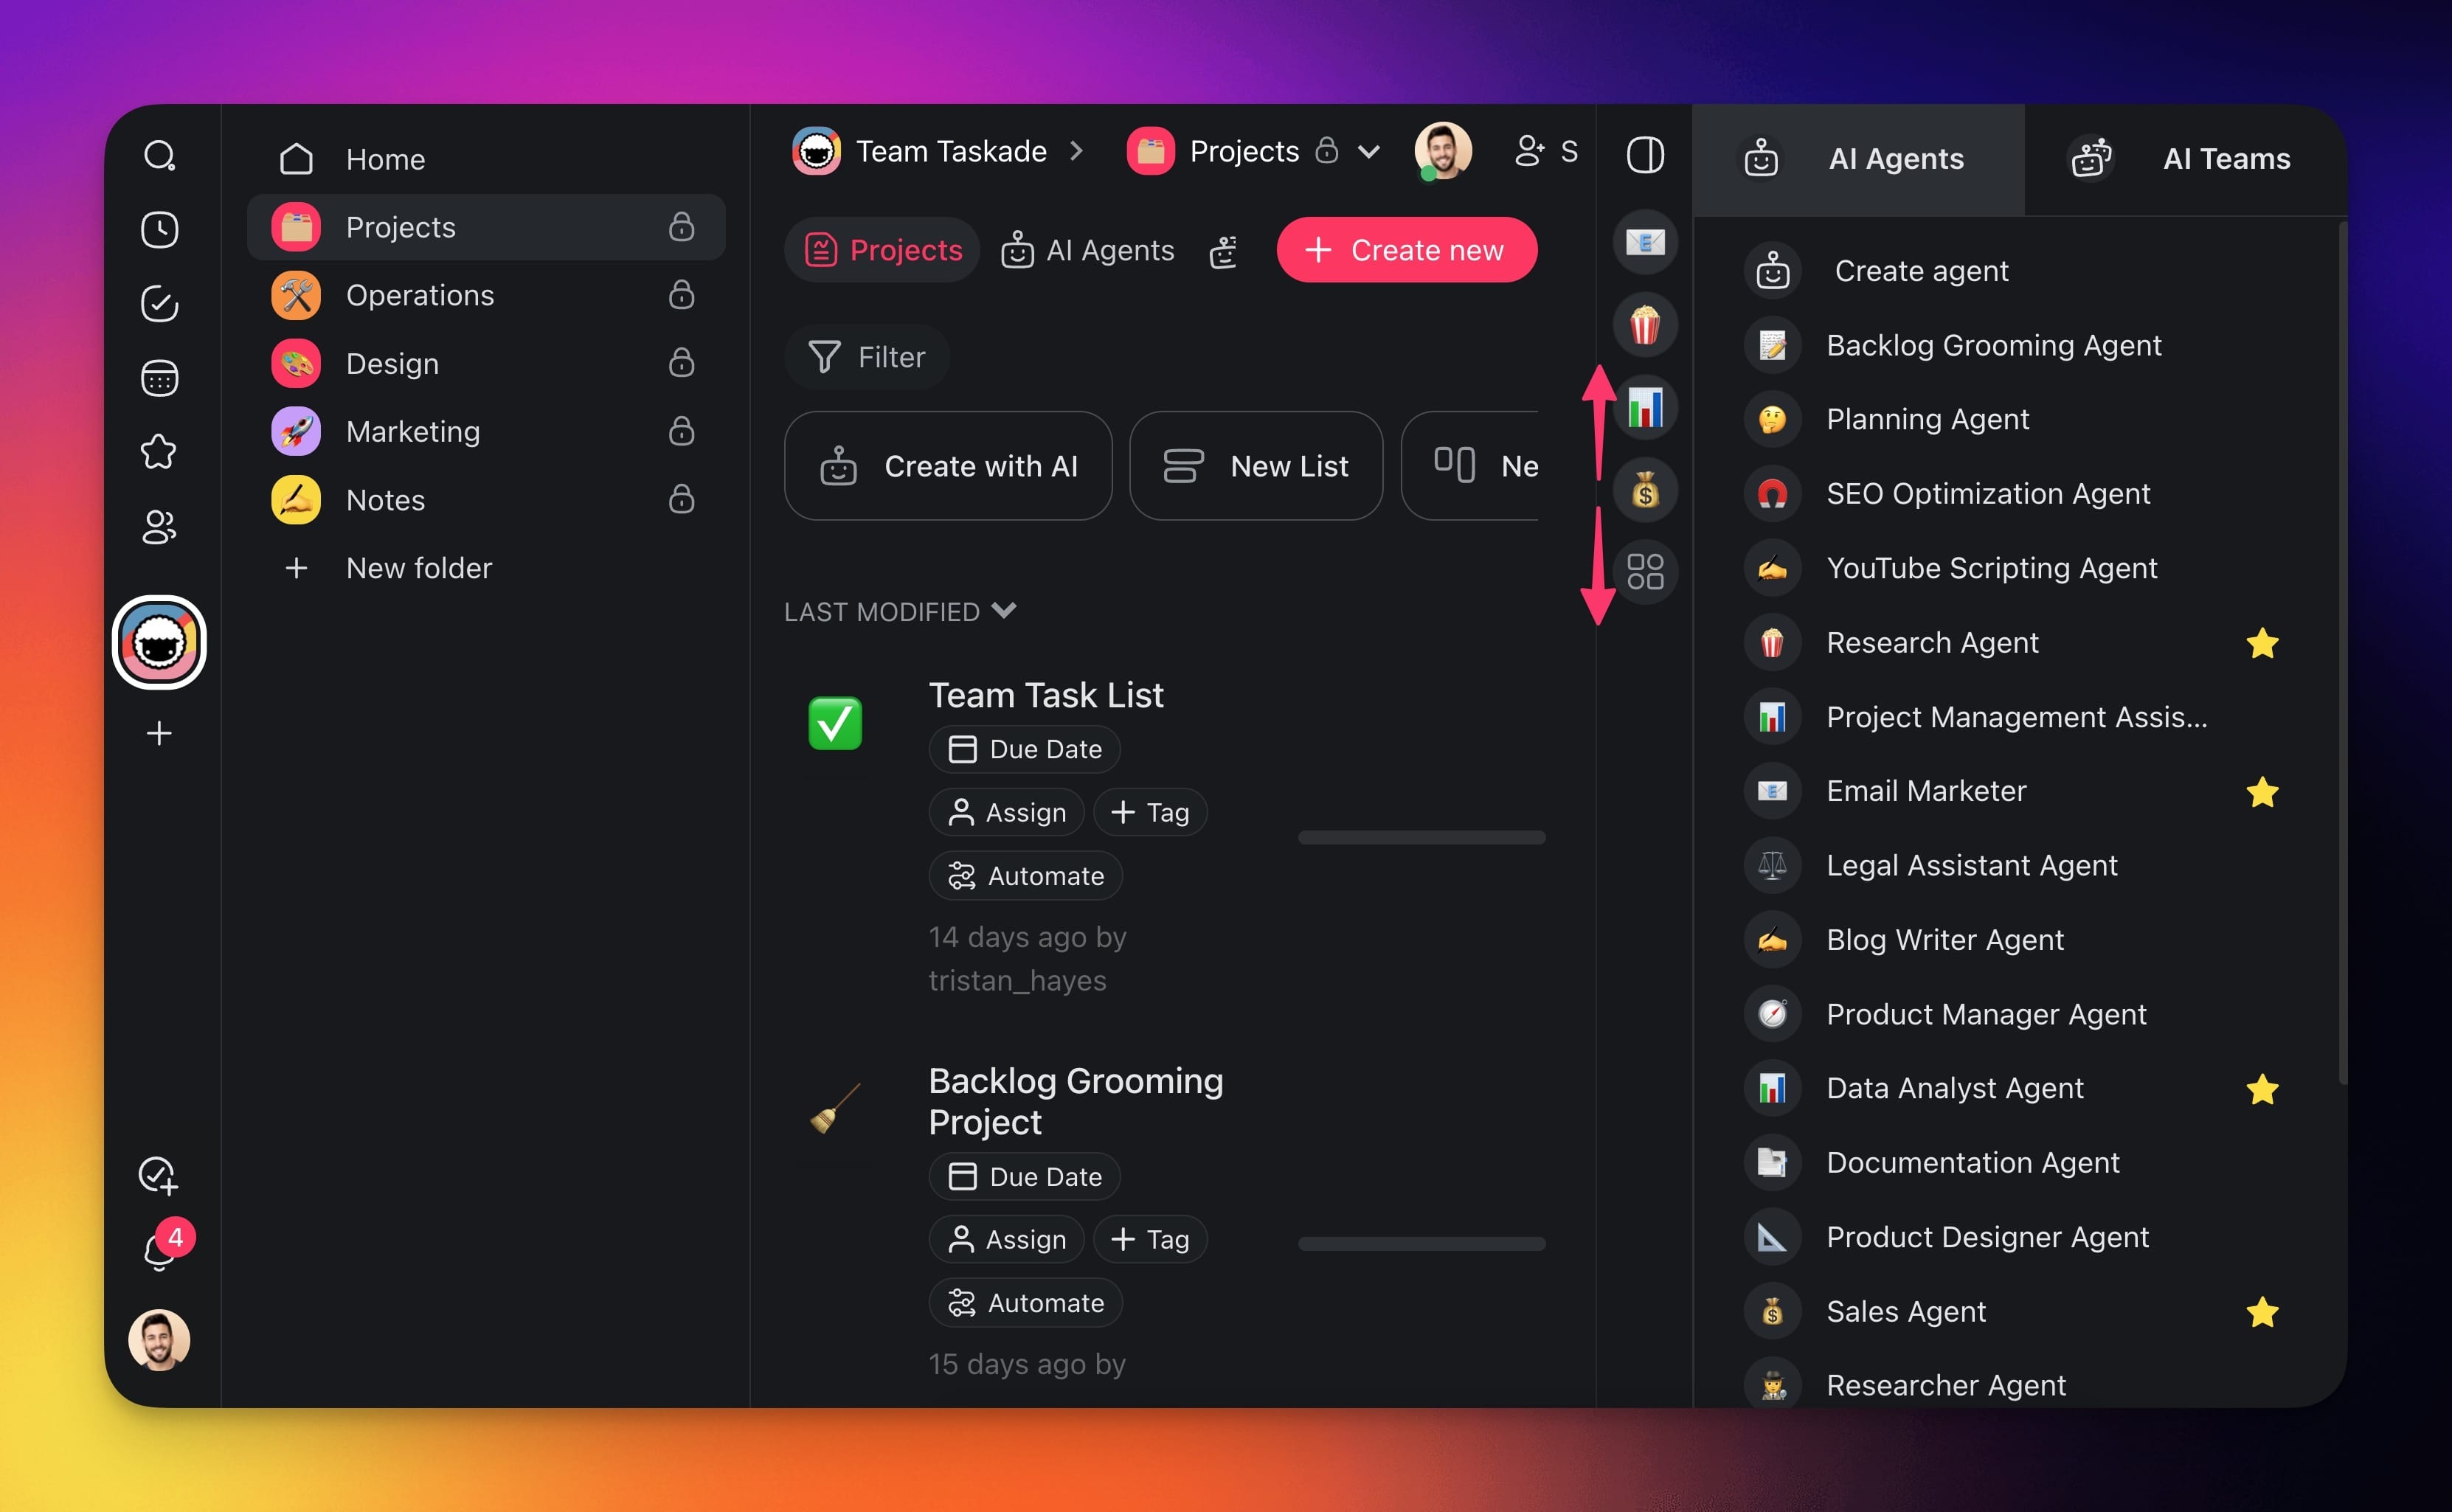
(method 1): Agents Tab
- Navigate to the Agents tab at the top of your workspace.
- Select your custom AI agent.
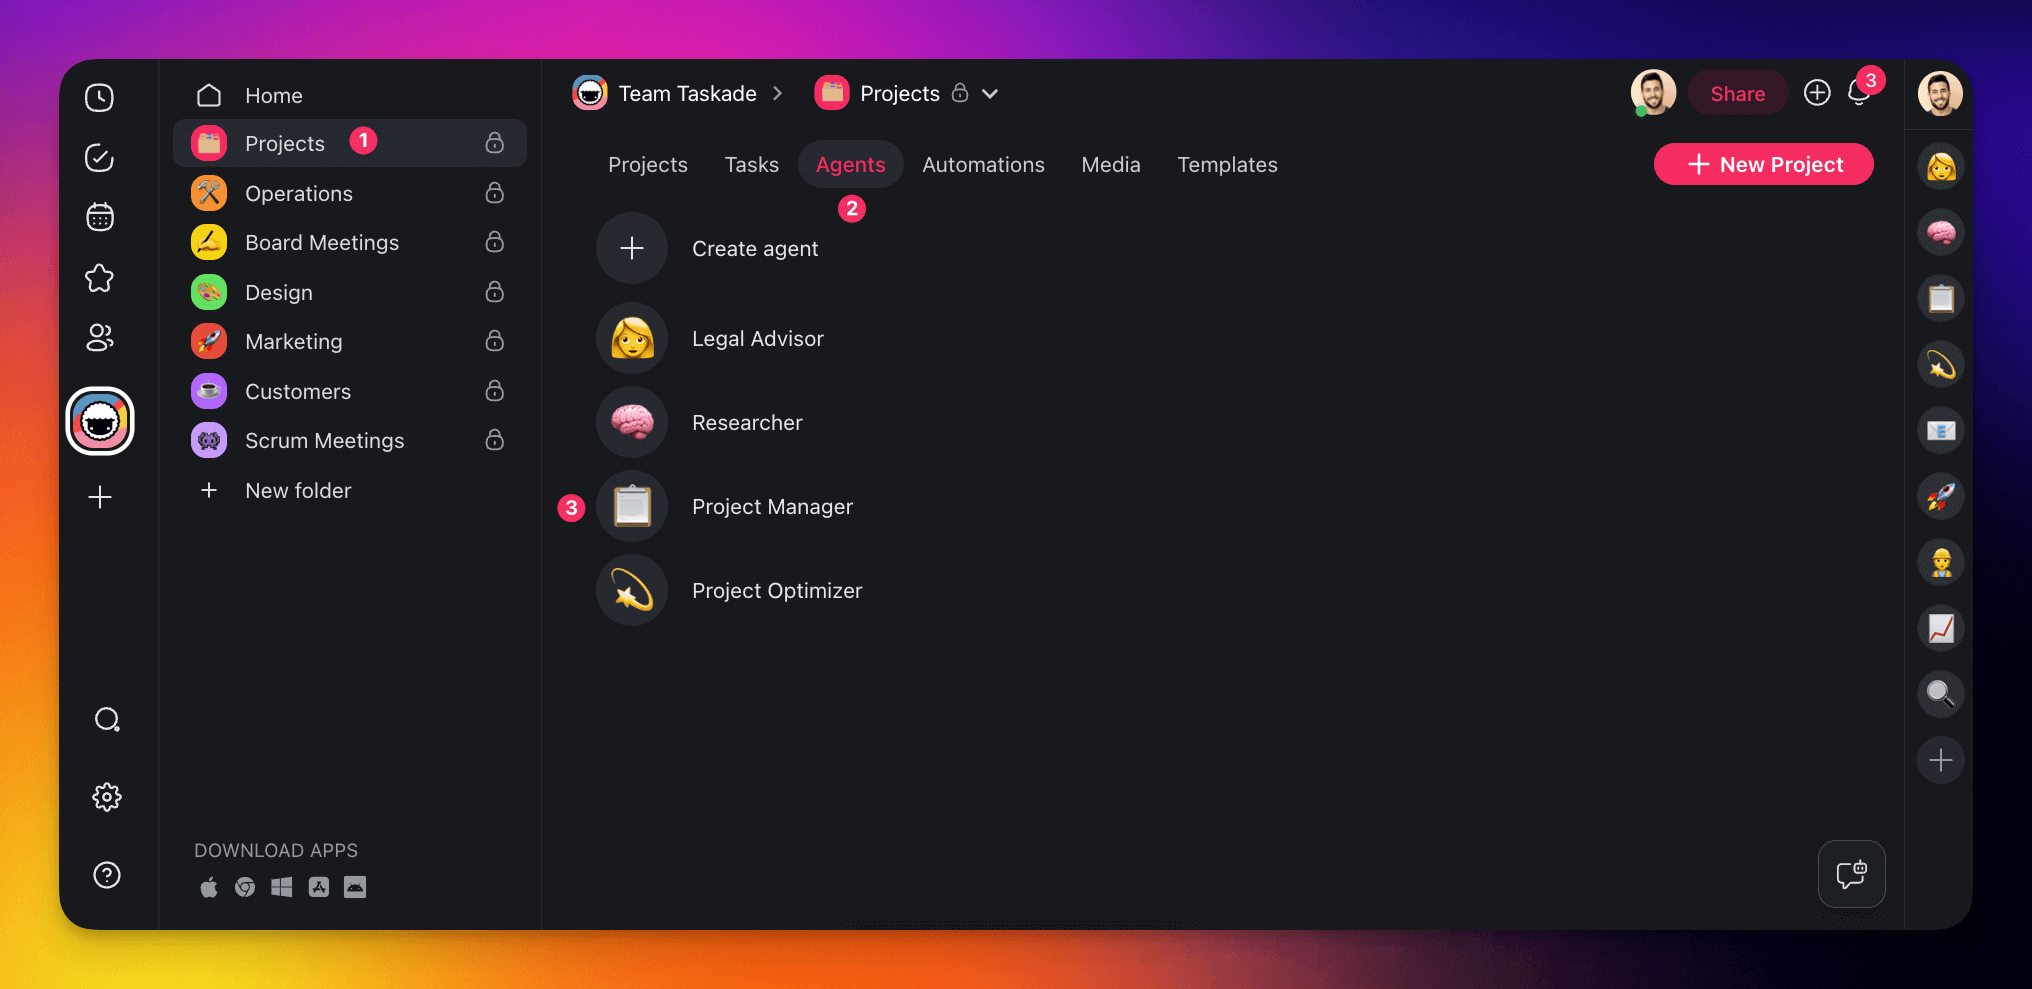
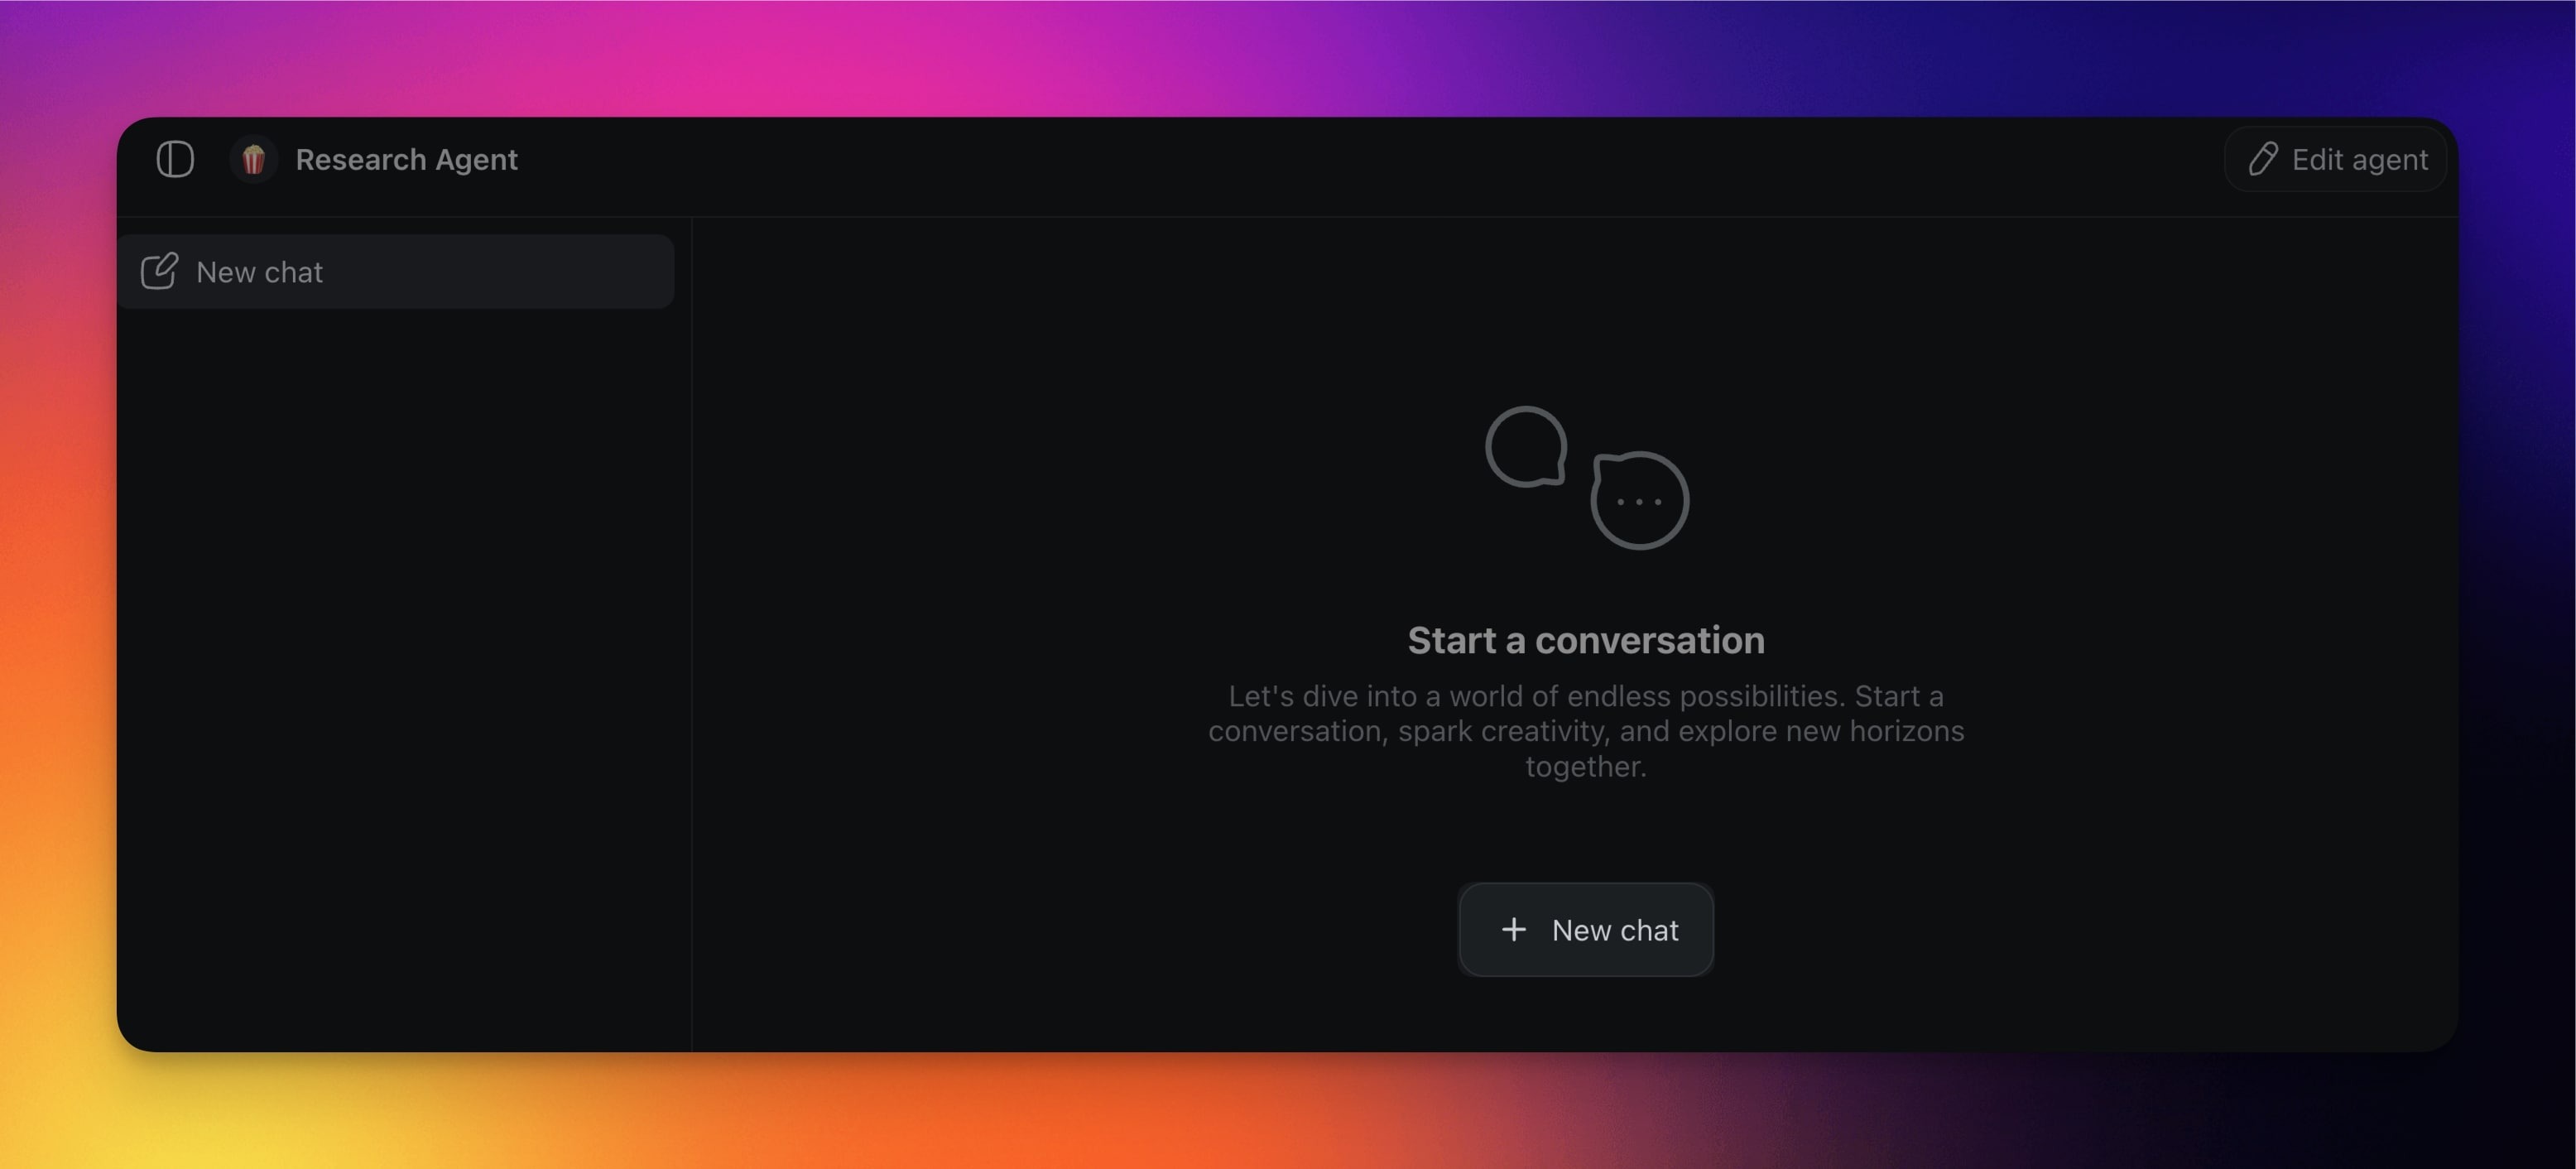
- Click ➕ New chat to start a new conversation.
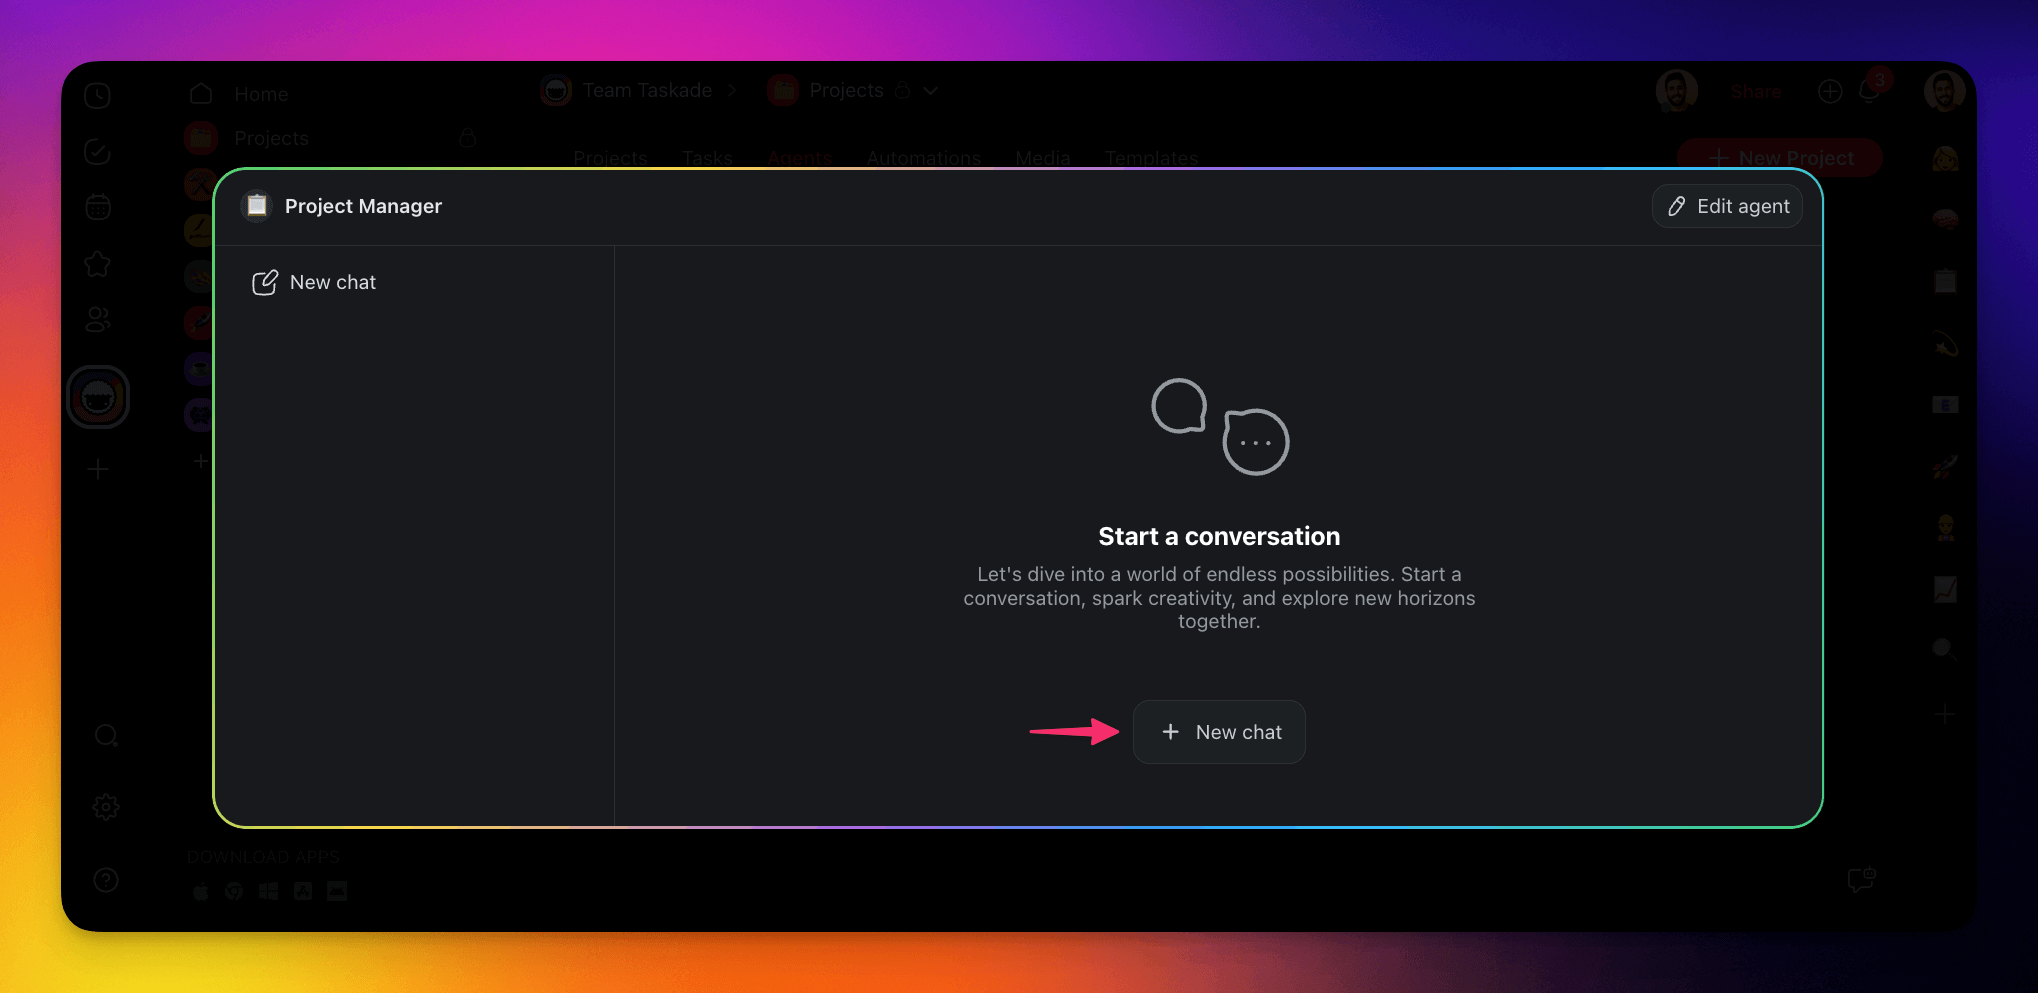
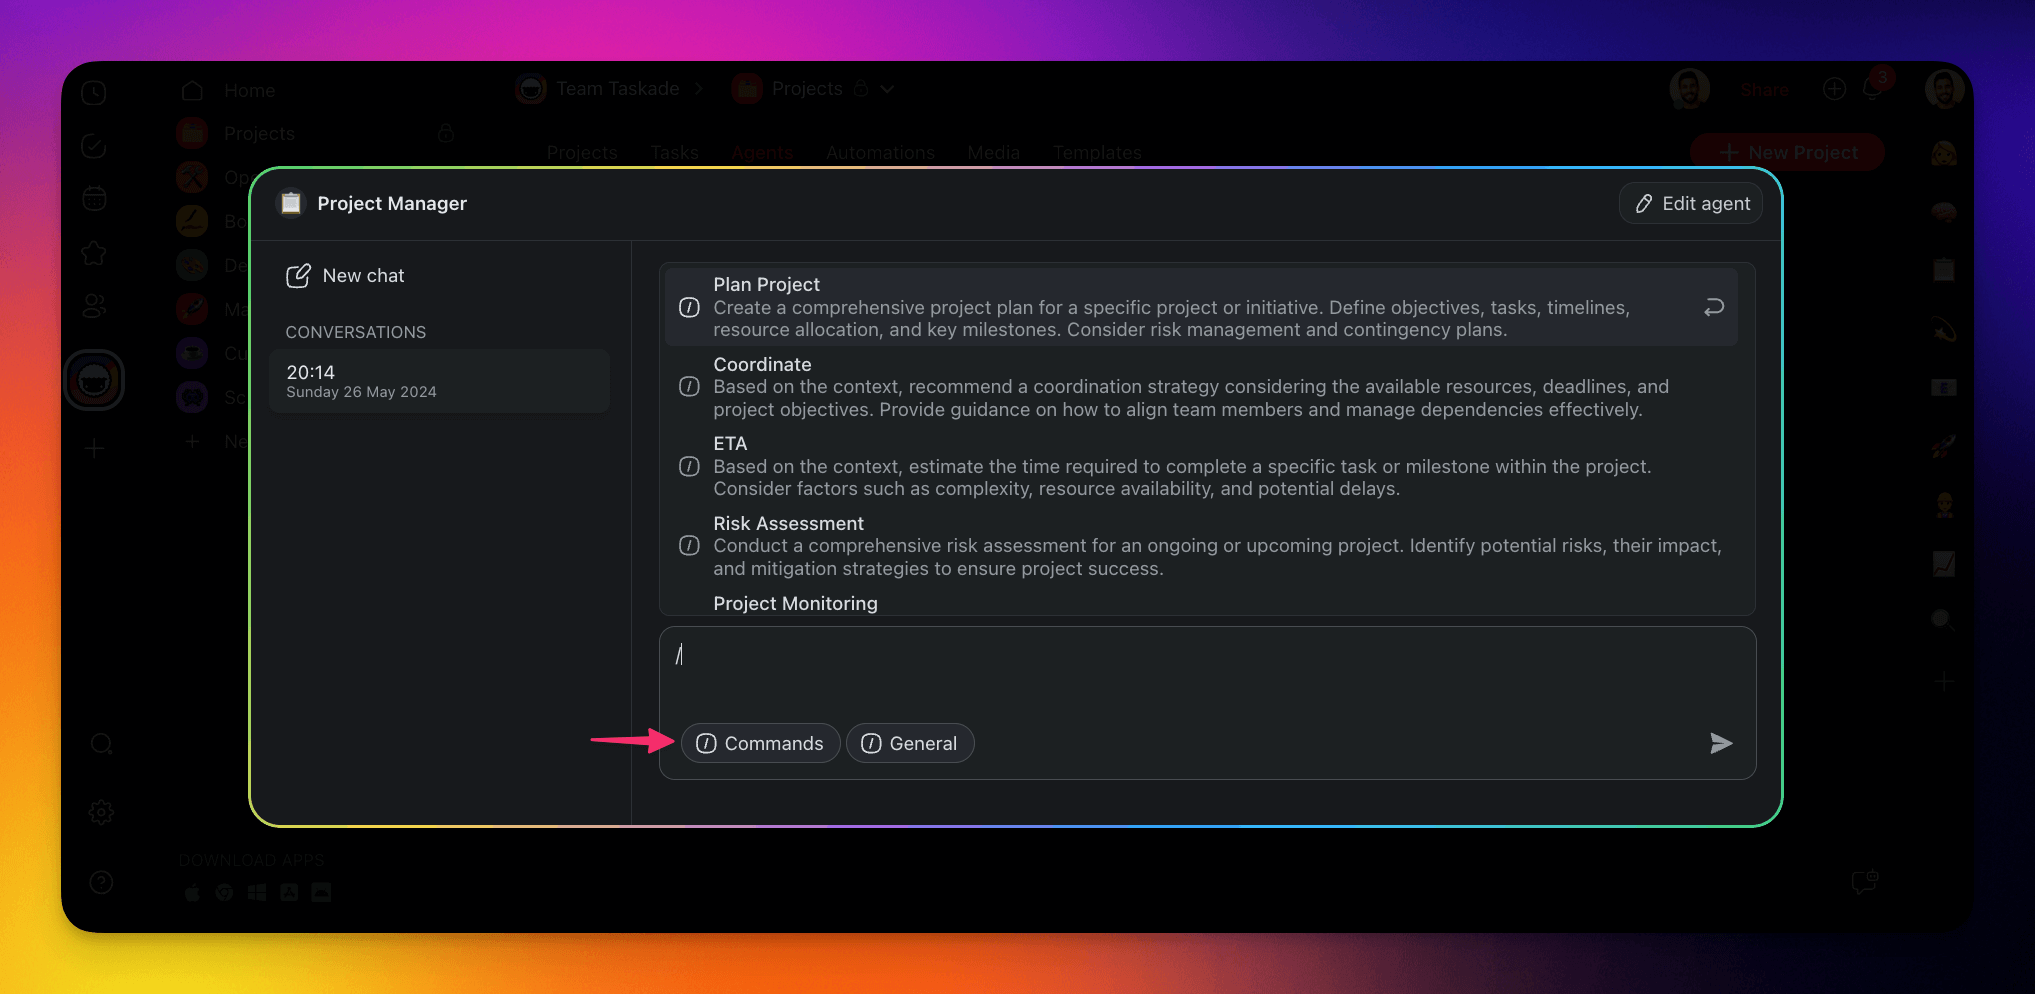
Ask your agent questions or type / to show a list of custom agent commands.
You can also click the Commands button underneath the chat window.
Note: Once activated, the commands still require prompts for context.
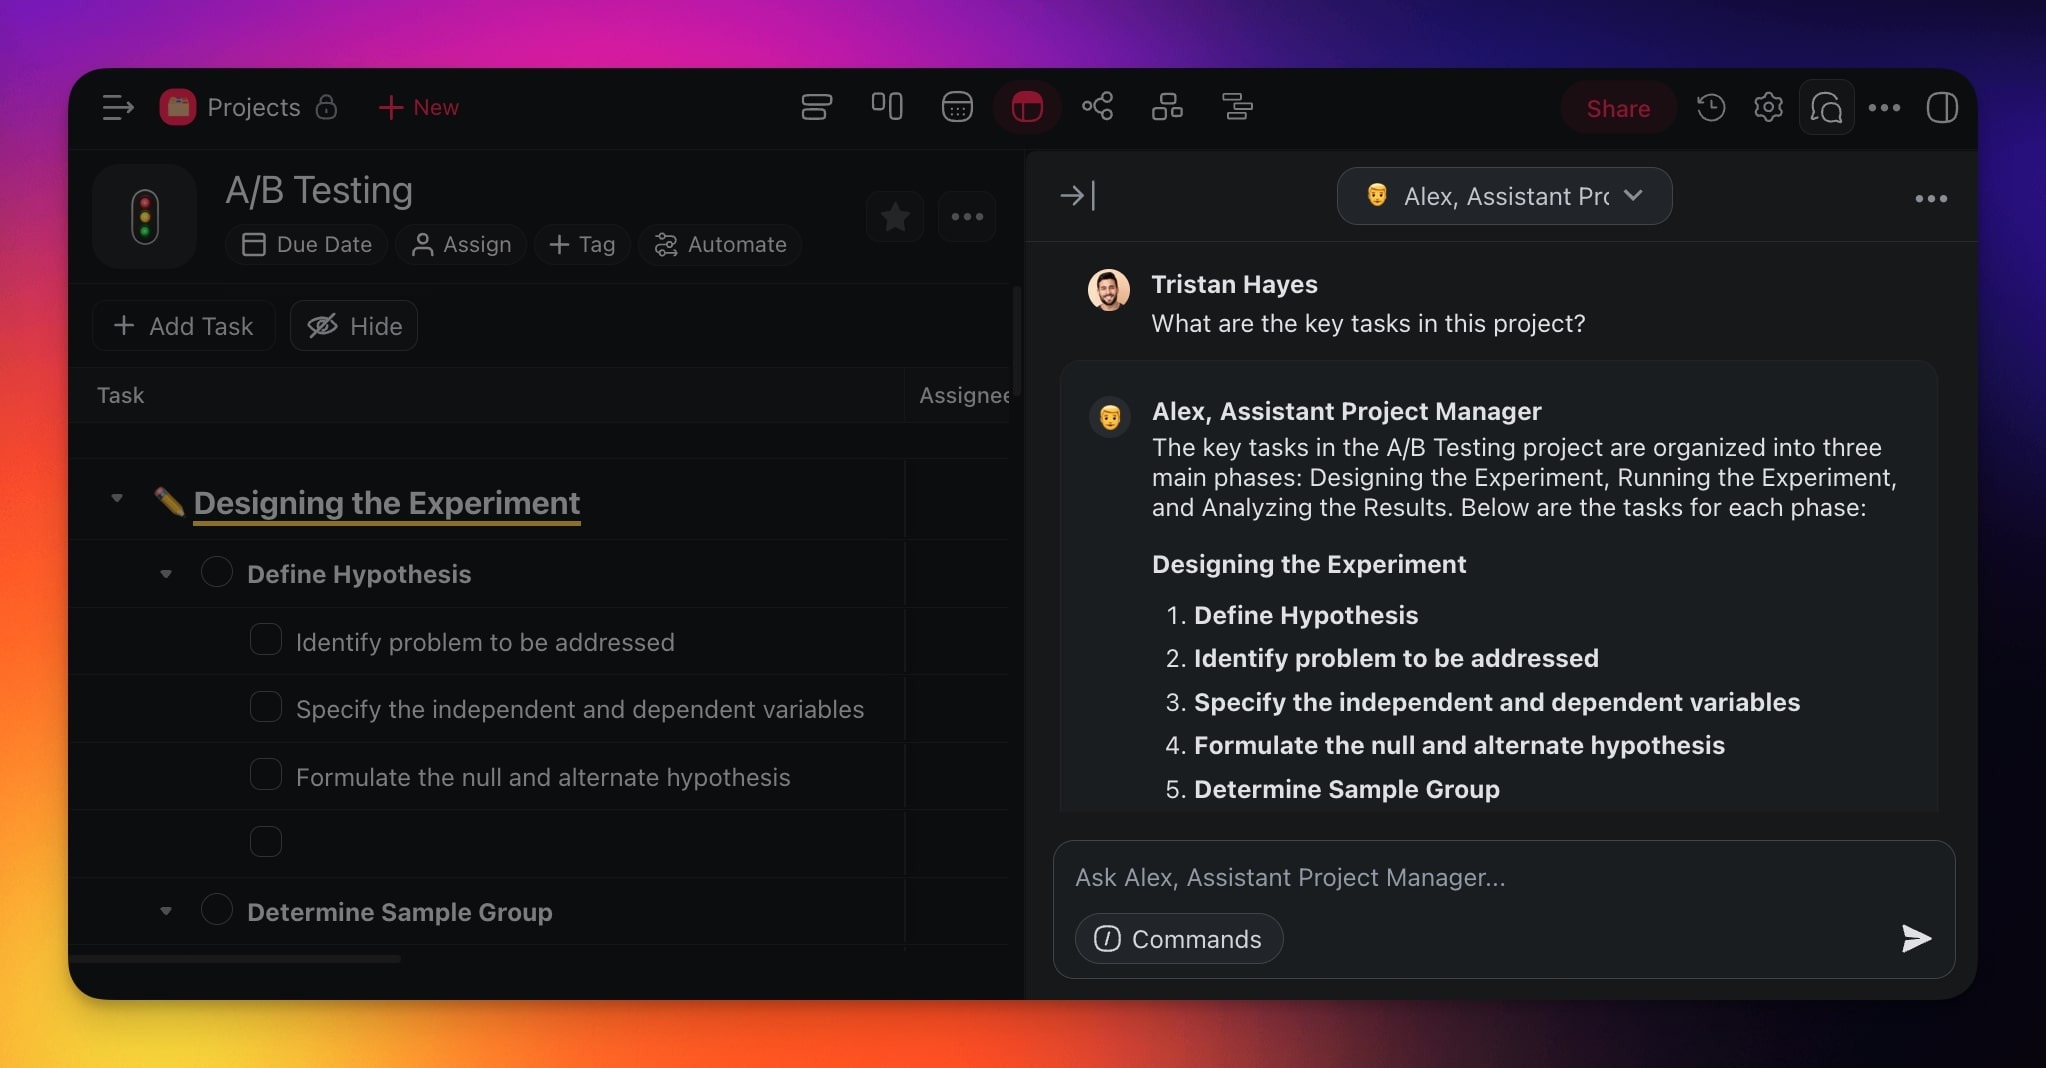
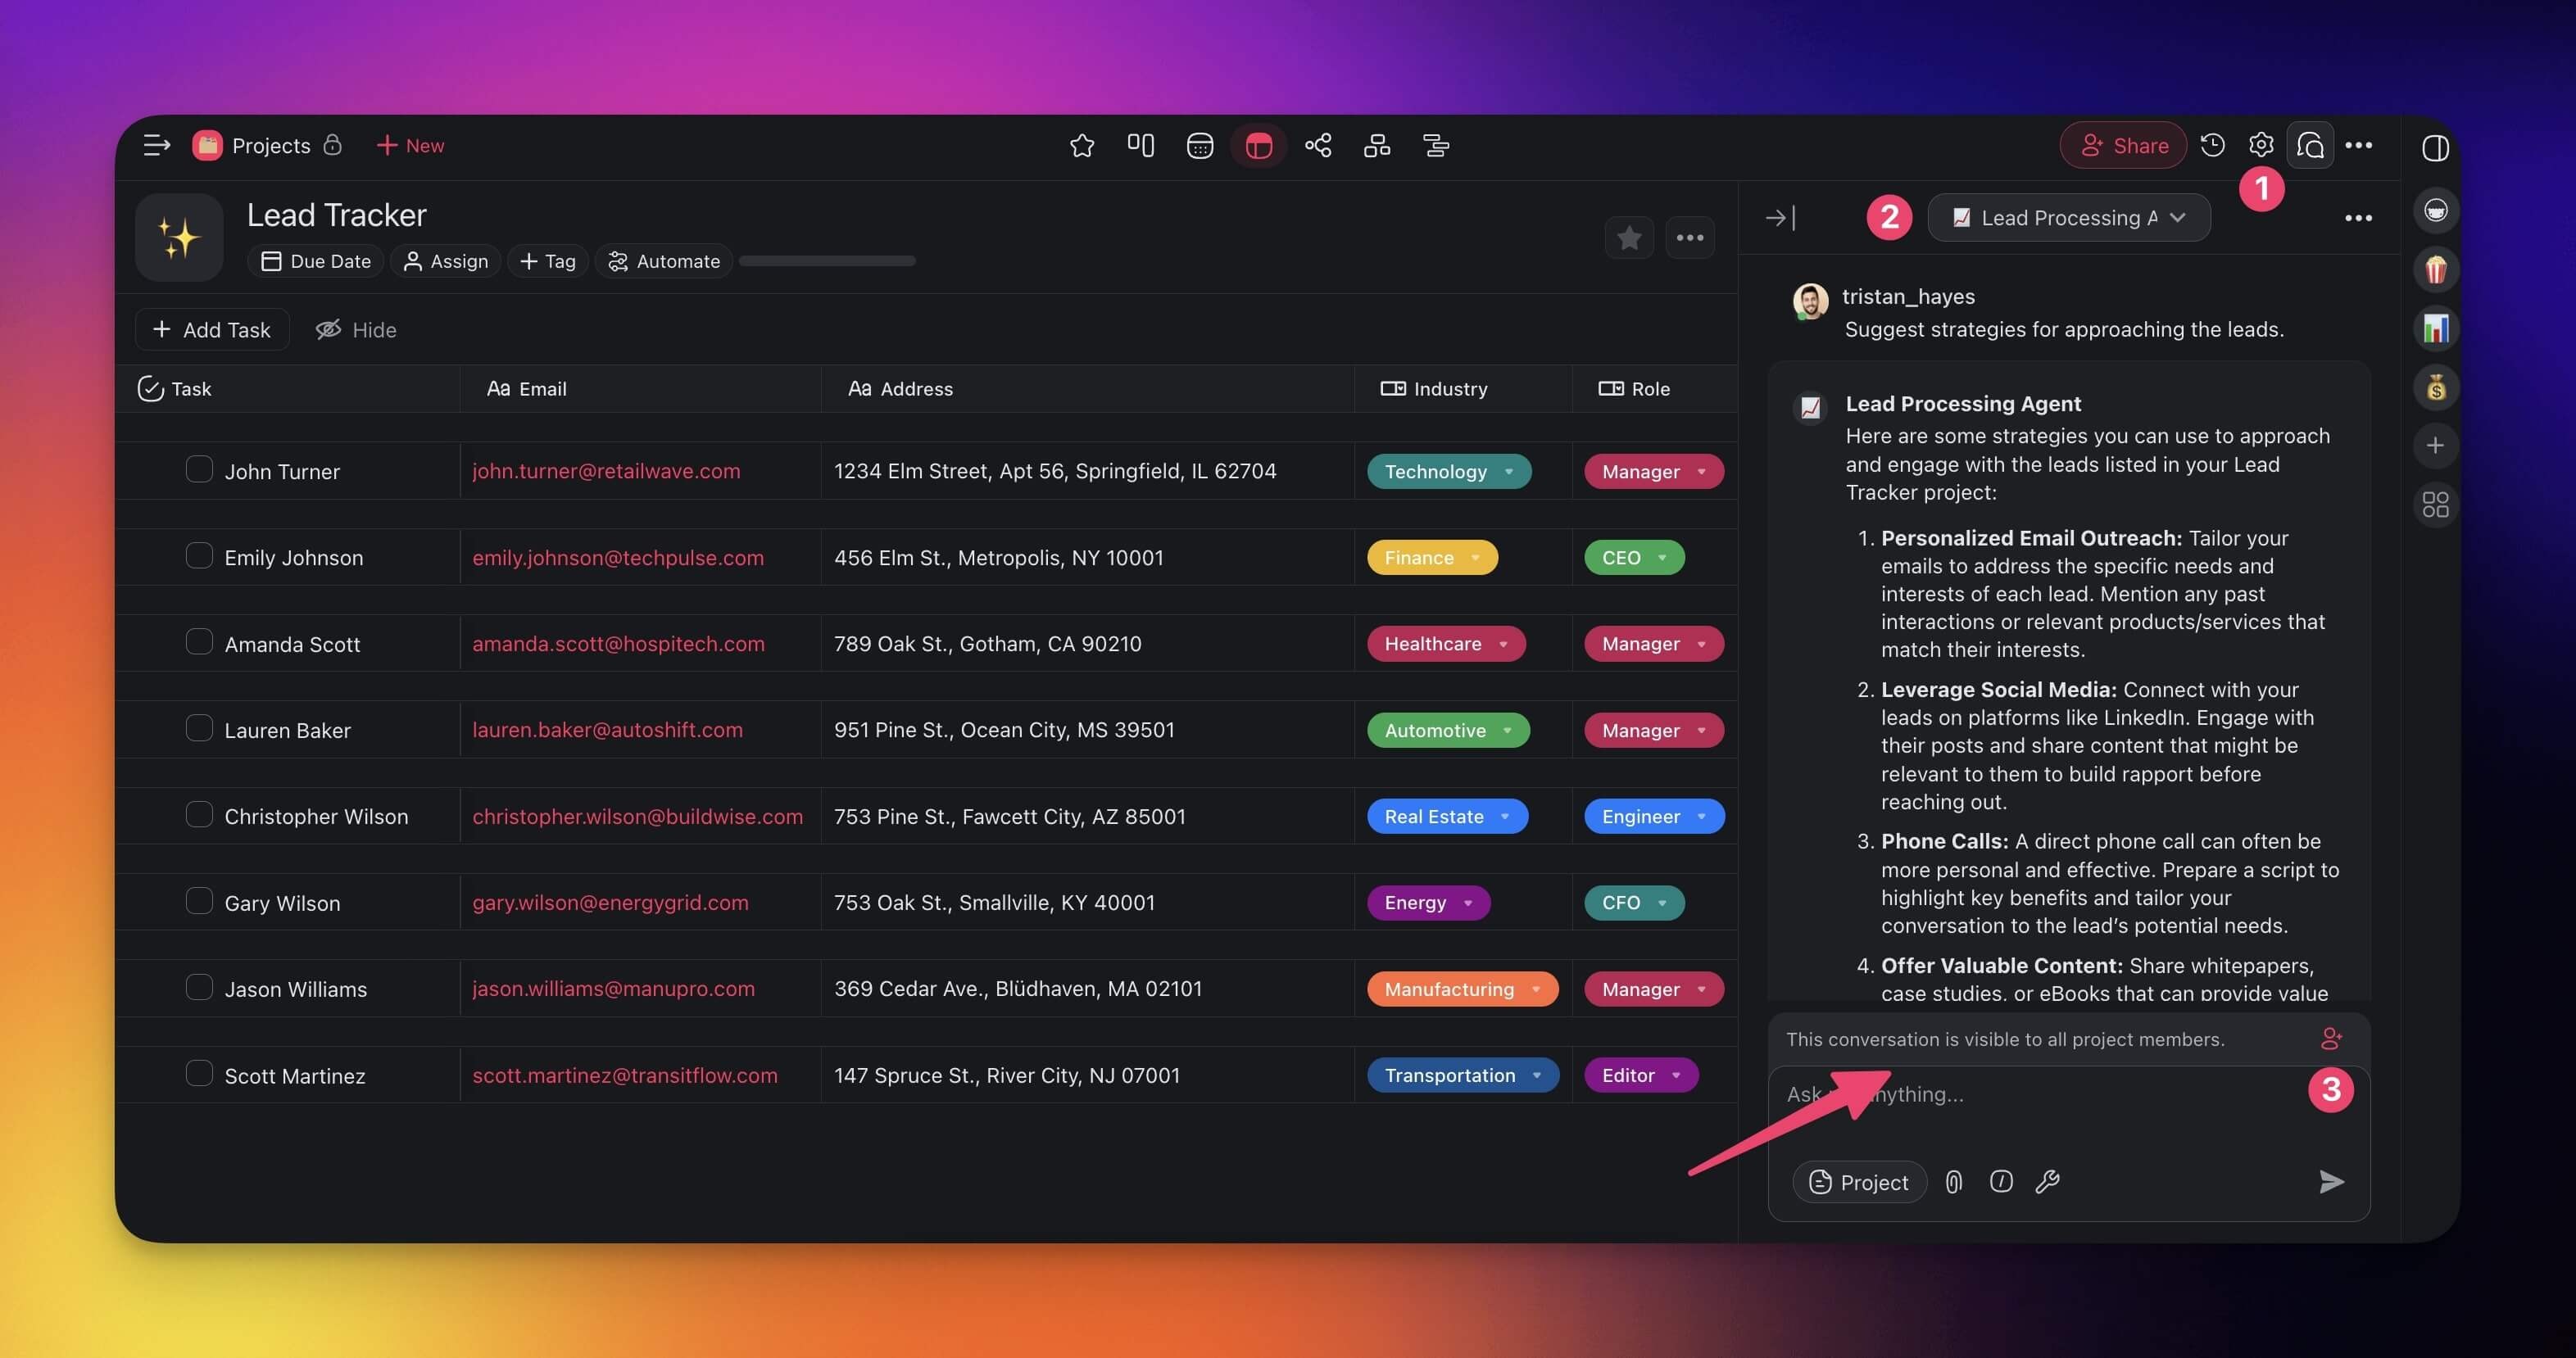
(method 2): Project Chat
- Open a project and click the chat balloon icon 💬 (top-right).
- Use the drop-down menu at the top of the chat to choose an agent.
- Chat with your agent or type / to use custom agent commands.
- Click Copy to save the output, or Add to Project to paste it into the editor.
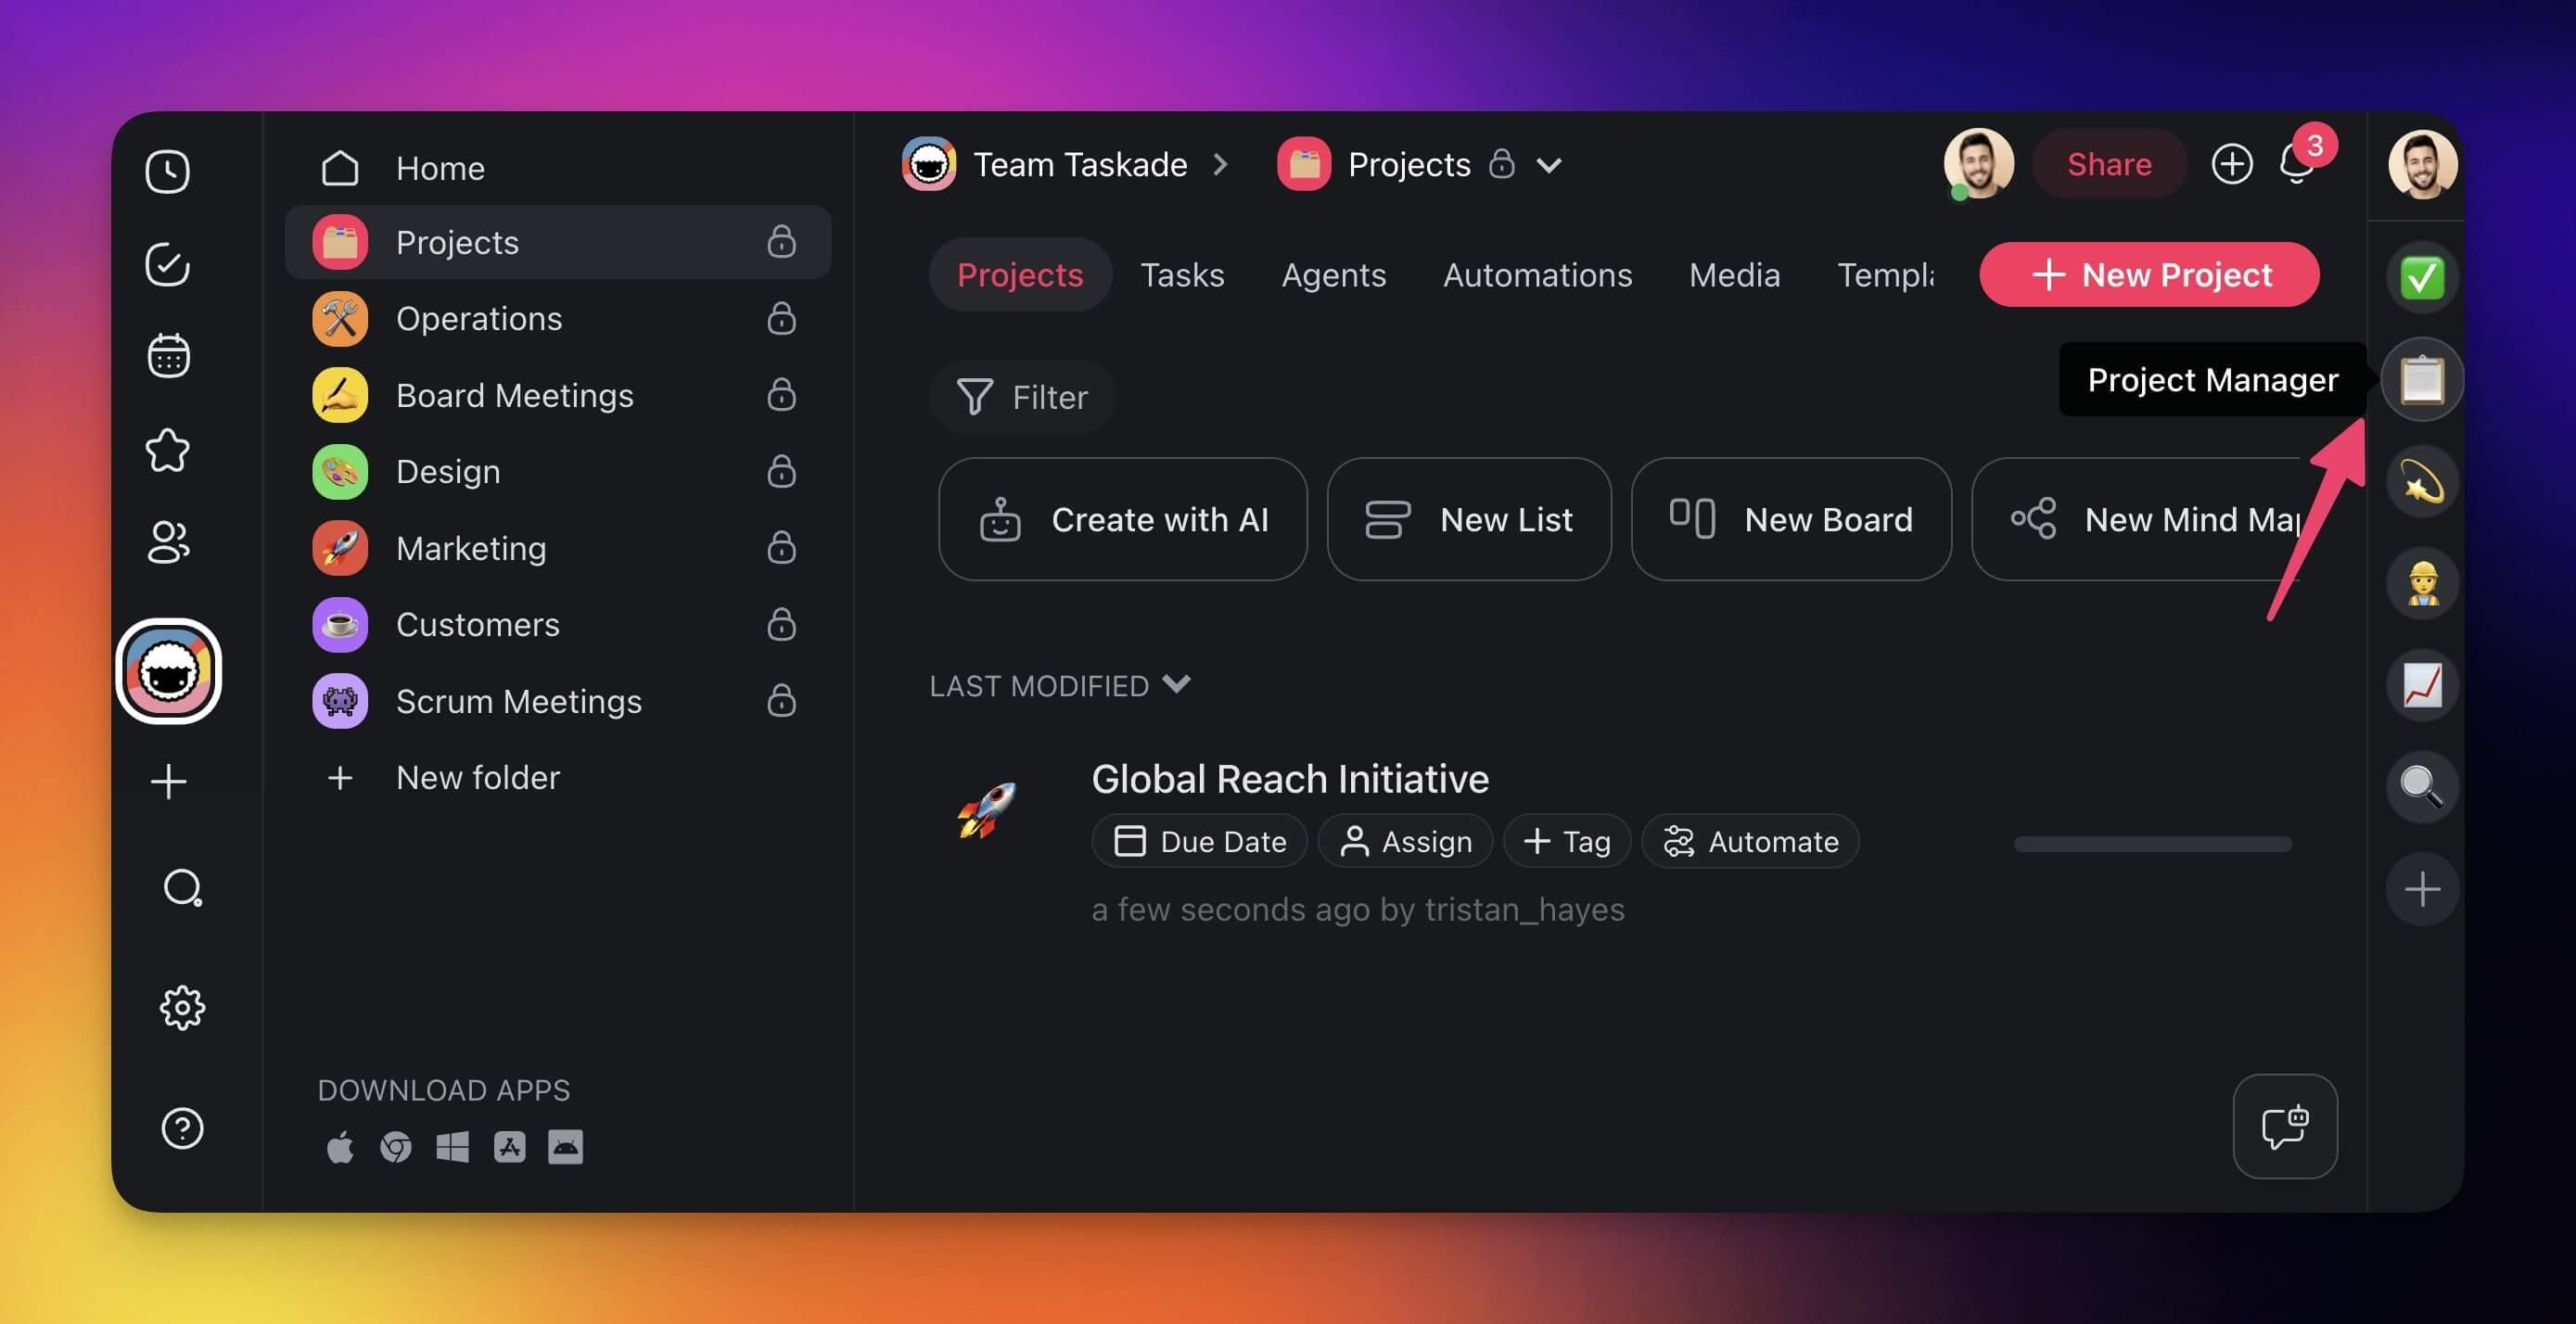
(method 3): Agent Toolbar
- Create agents following the steps in this article.
- Agents will be added to a sidebar on the right.
- Click avatars in the sidebar to interact with your agents.
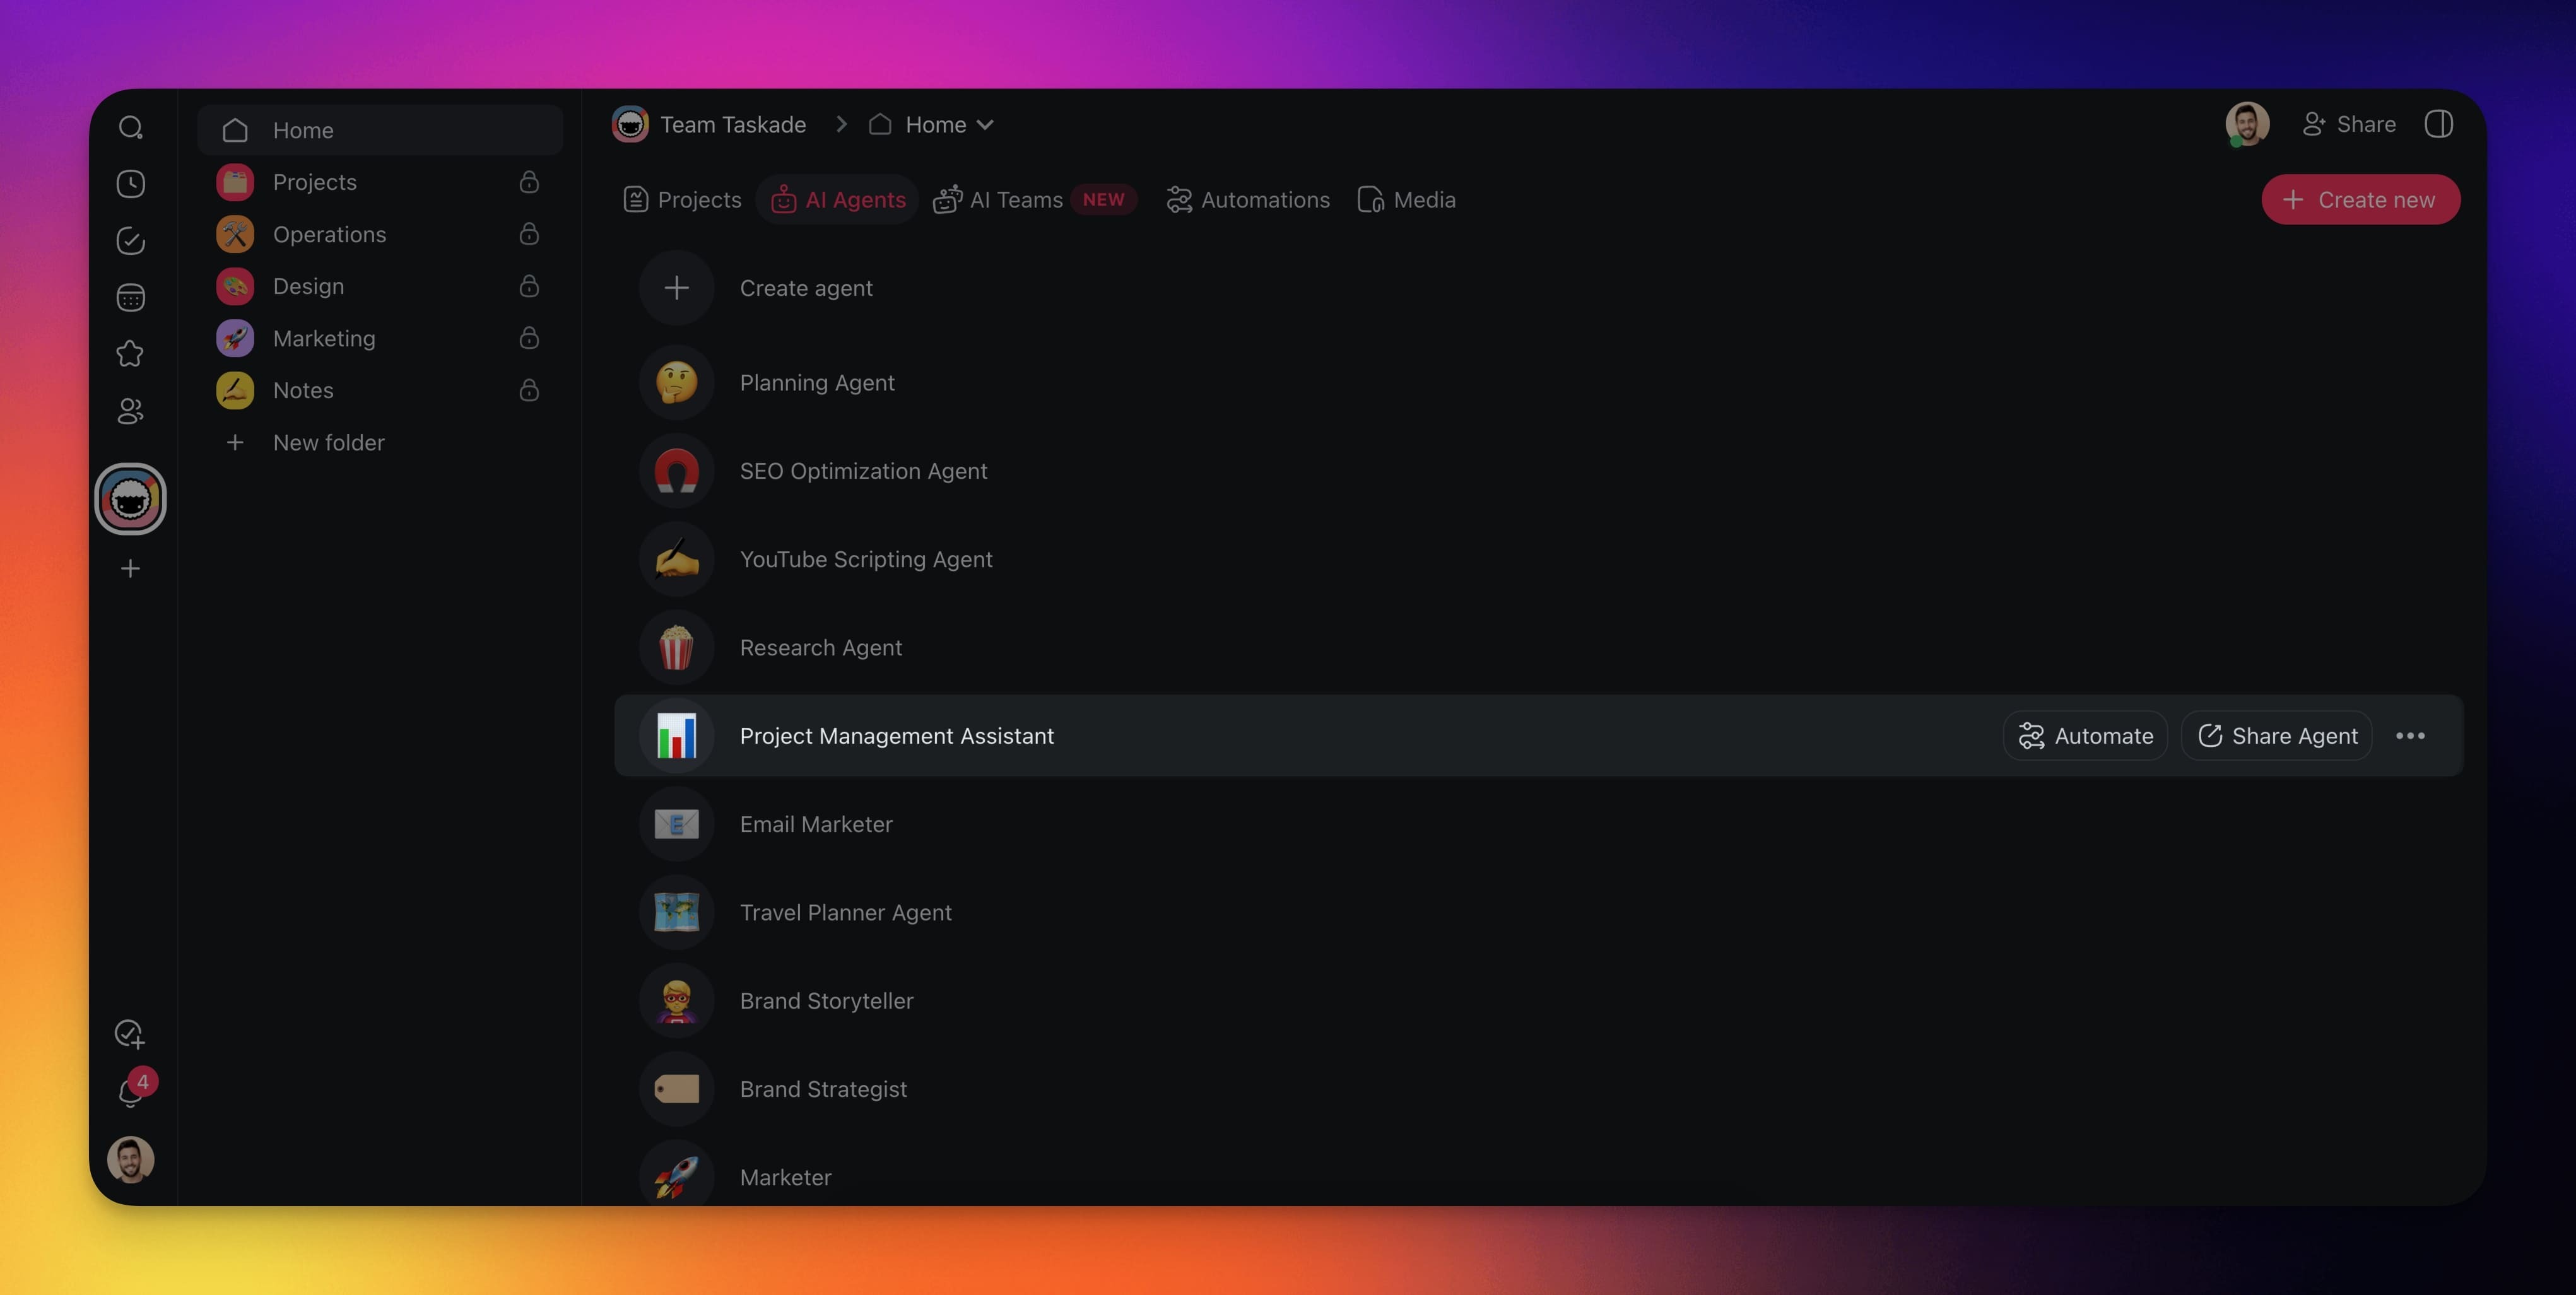
Want to share your custom agent with your team? Follow these steps:
- Navigate to the 🤖 Agents tab.
- Hover the mouse cursor over an agent.
- Click the Share Agent button on the right.

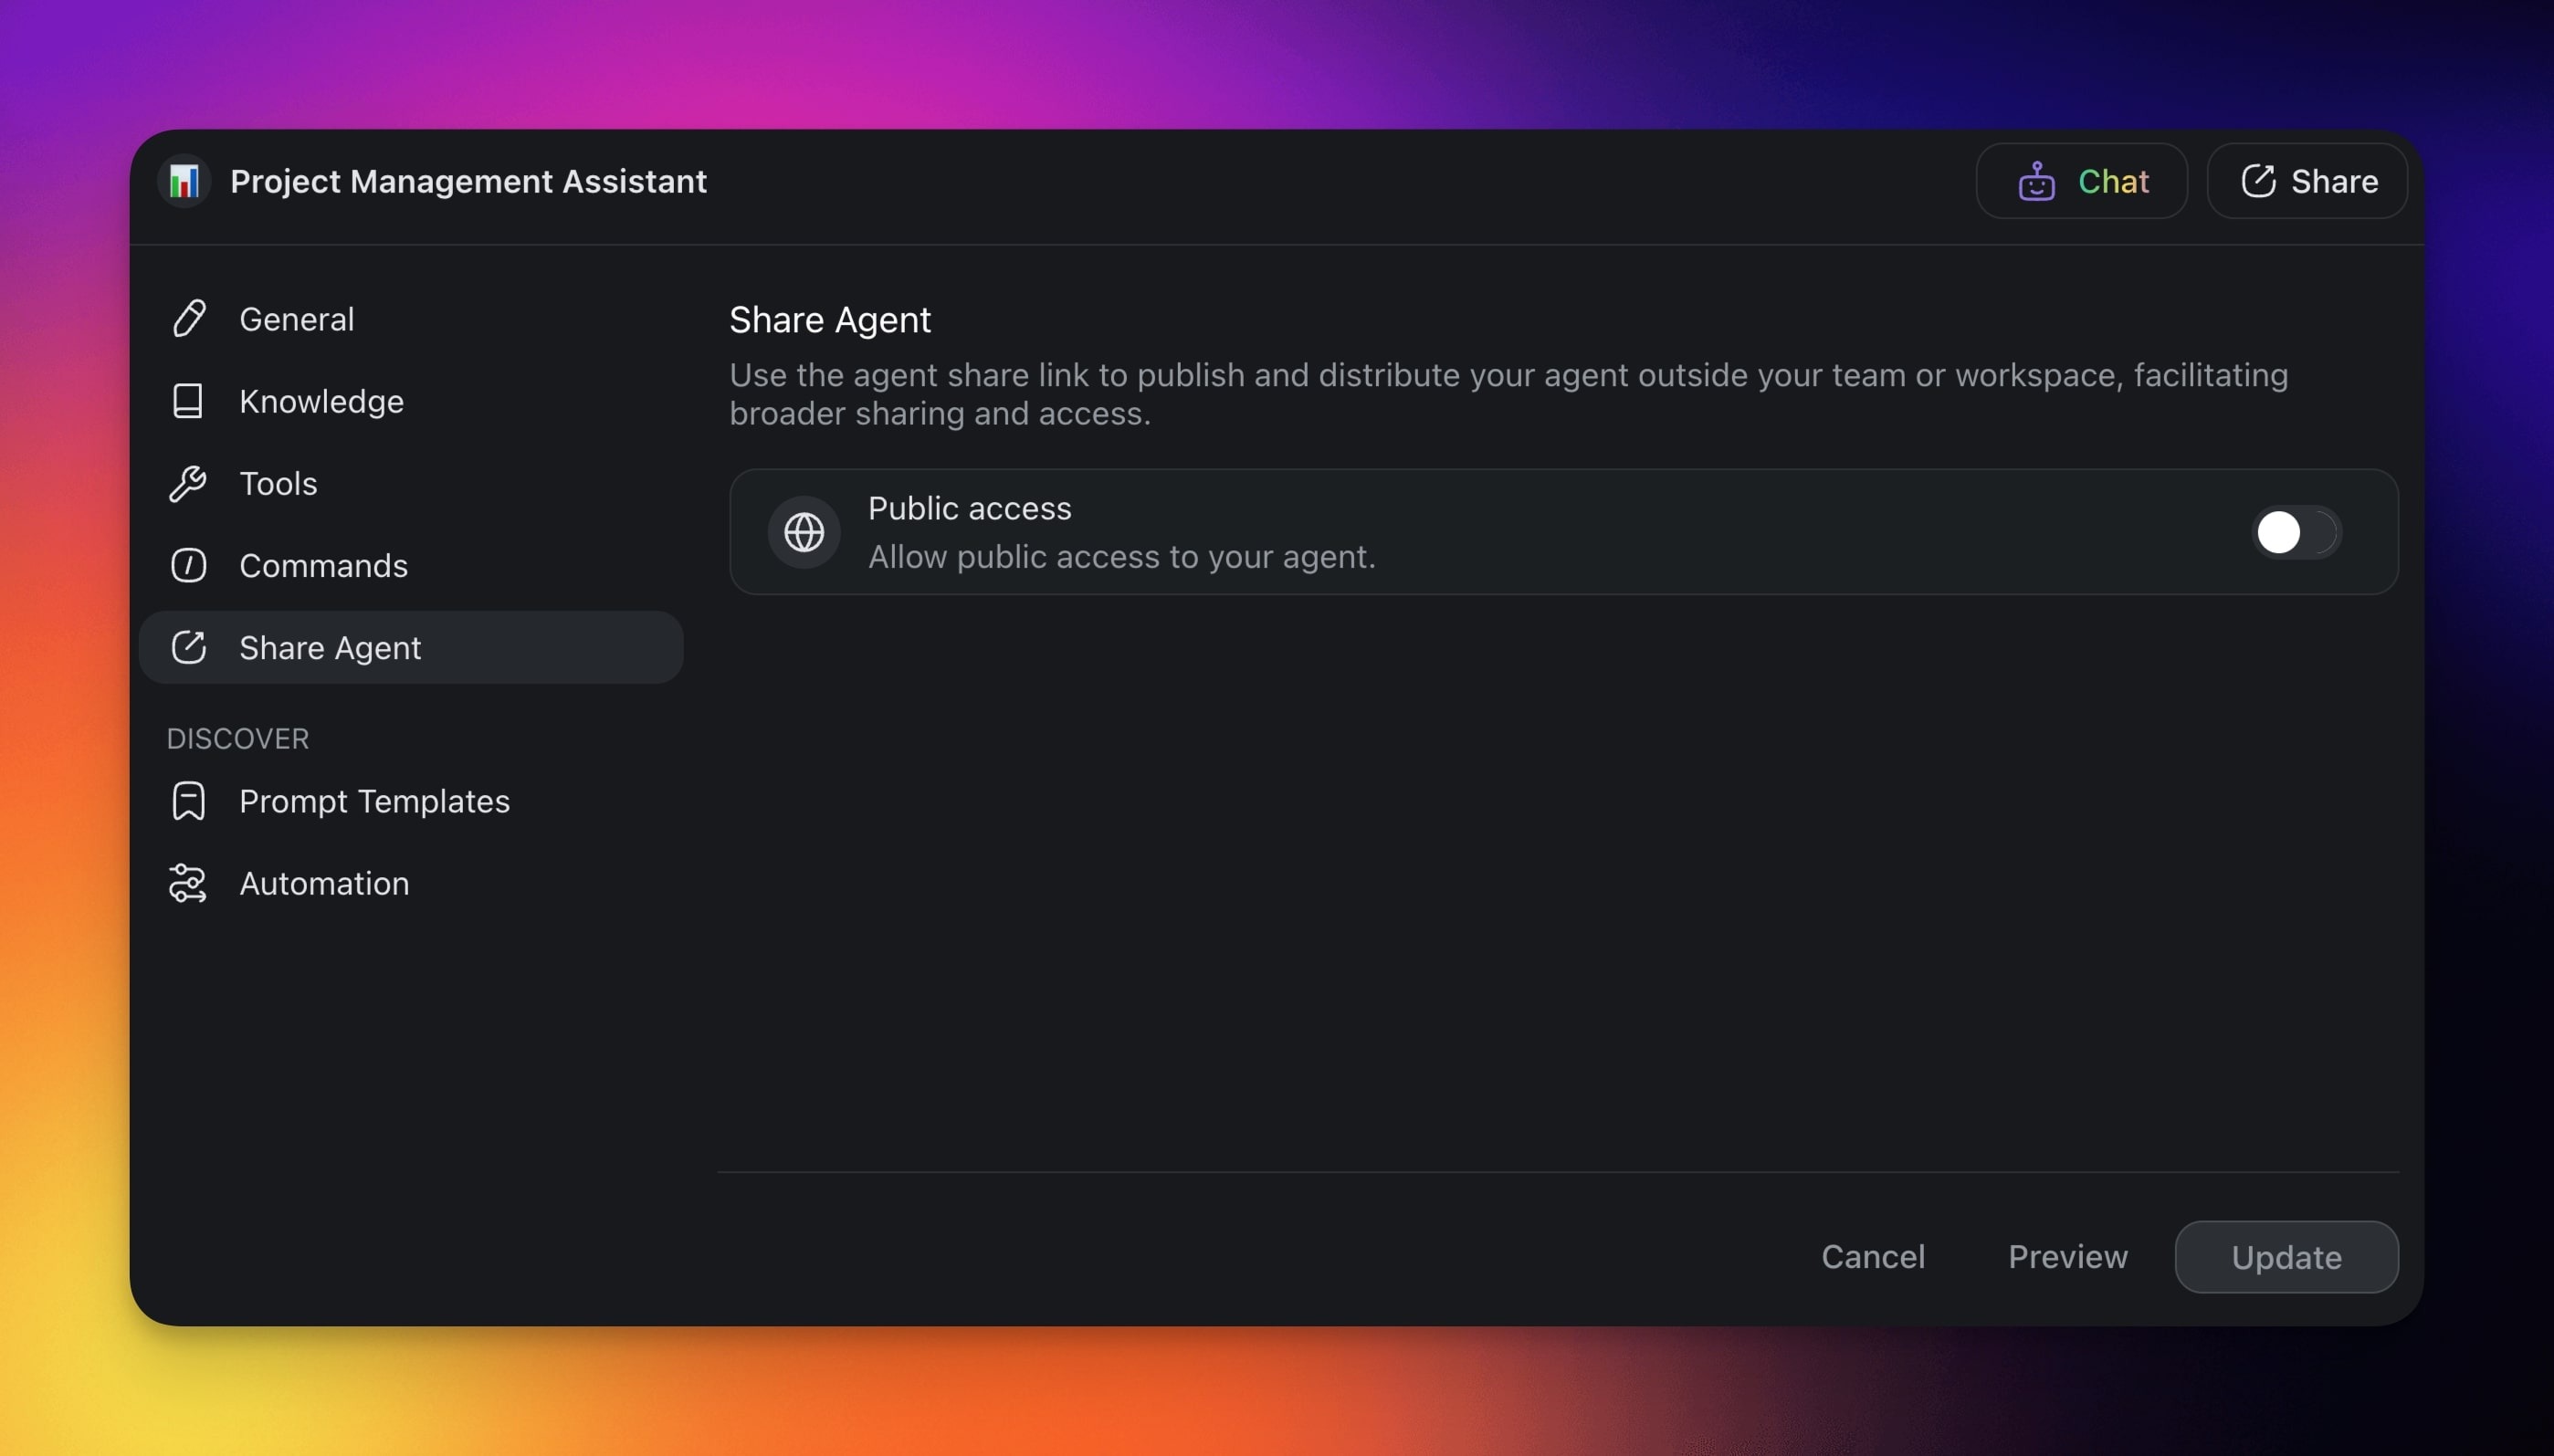
- Enable the Public access toggle.

You can now customize the public agent:
Mode: Choose the level of interactions with the agent.
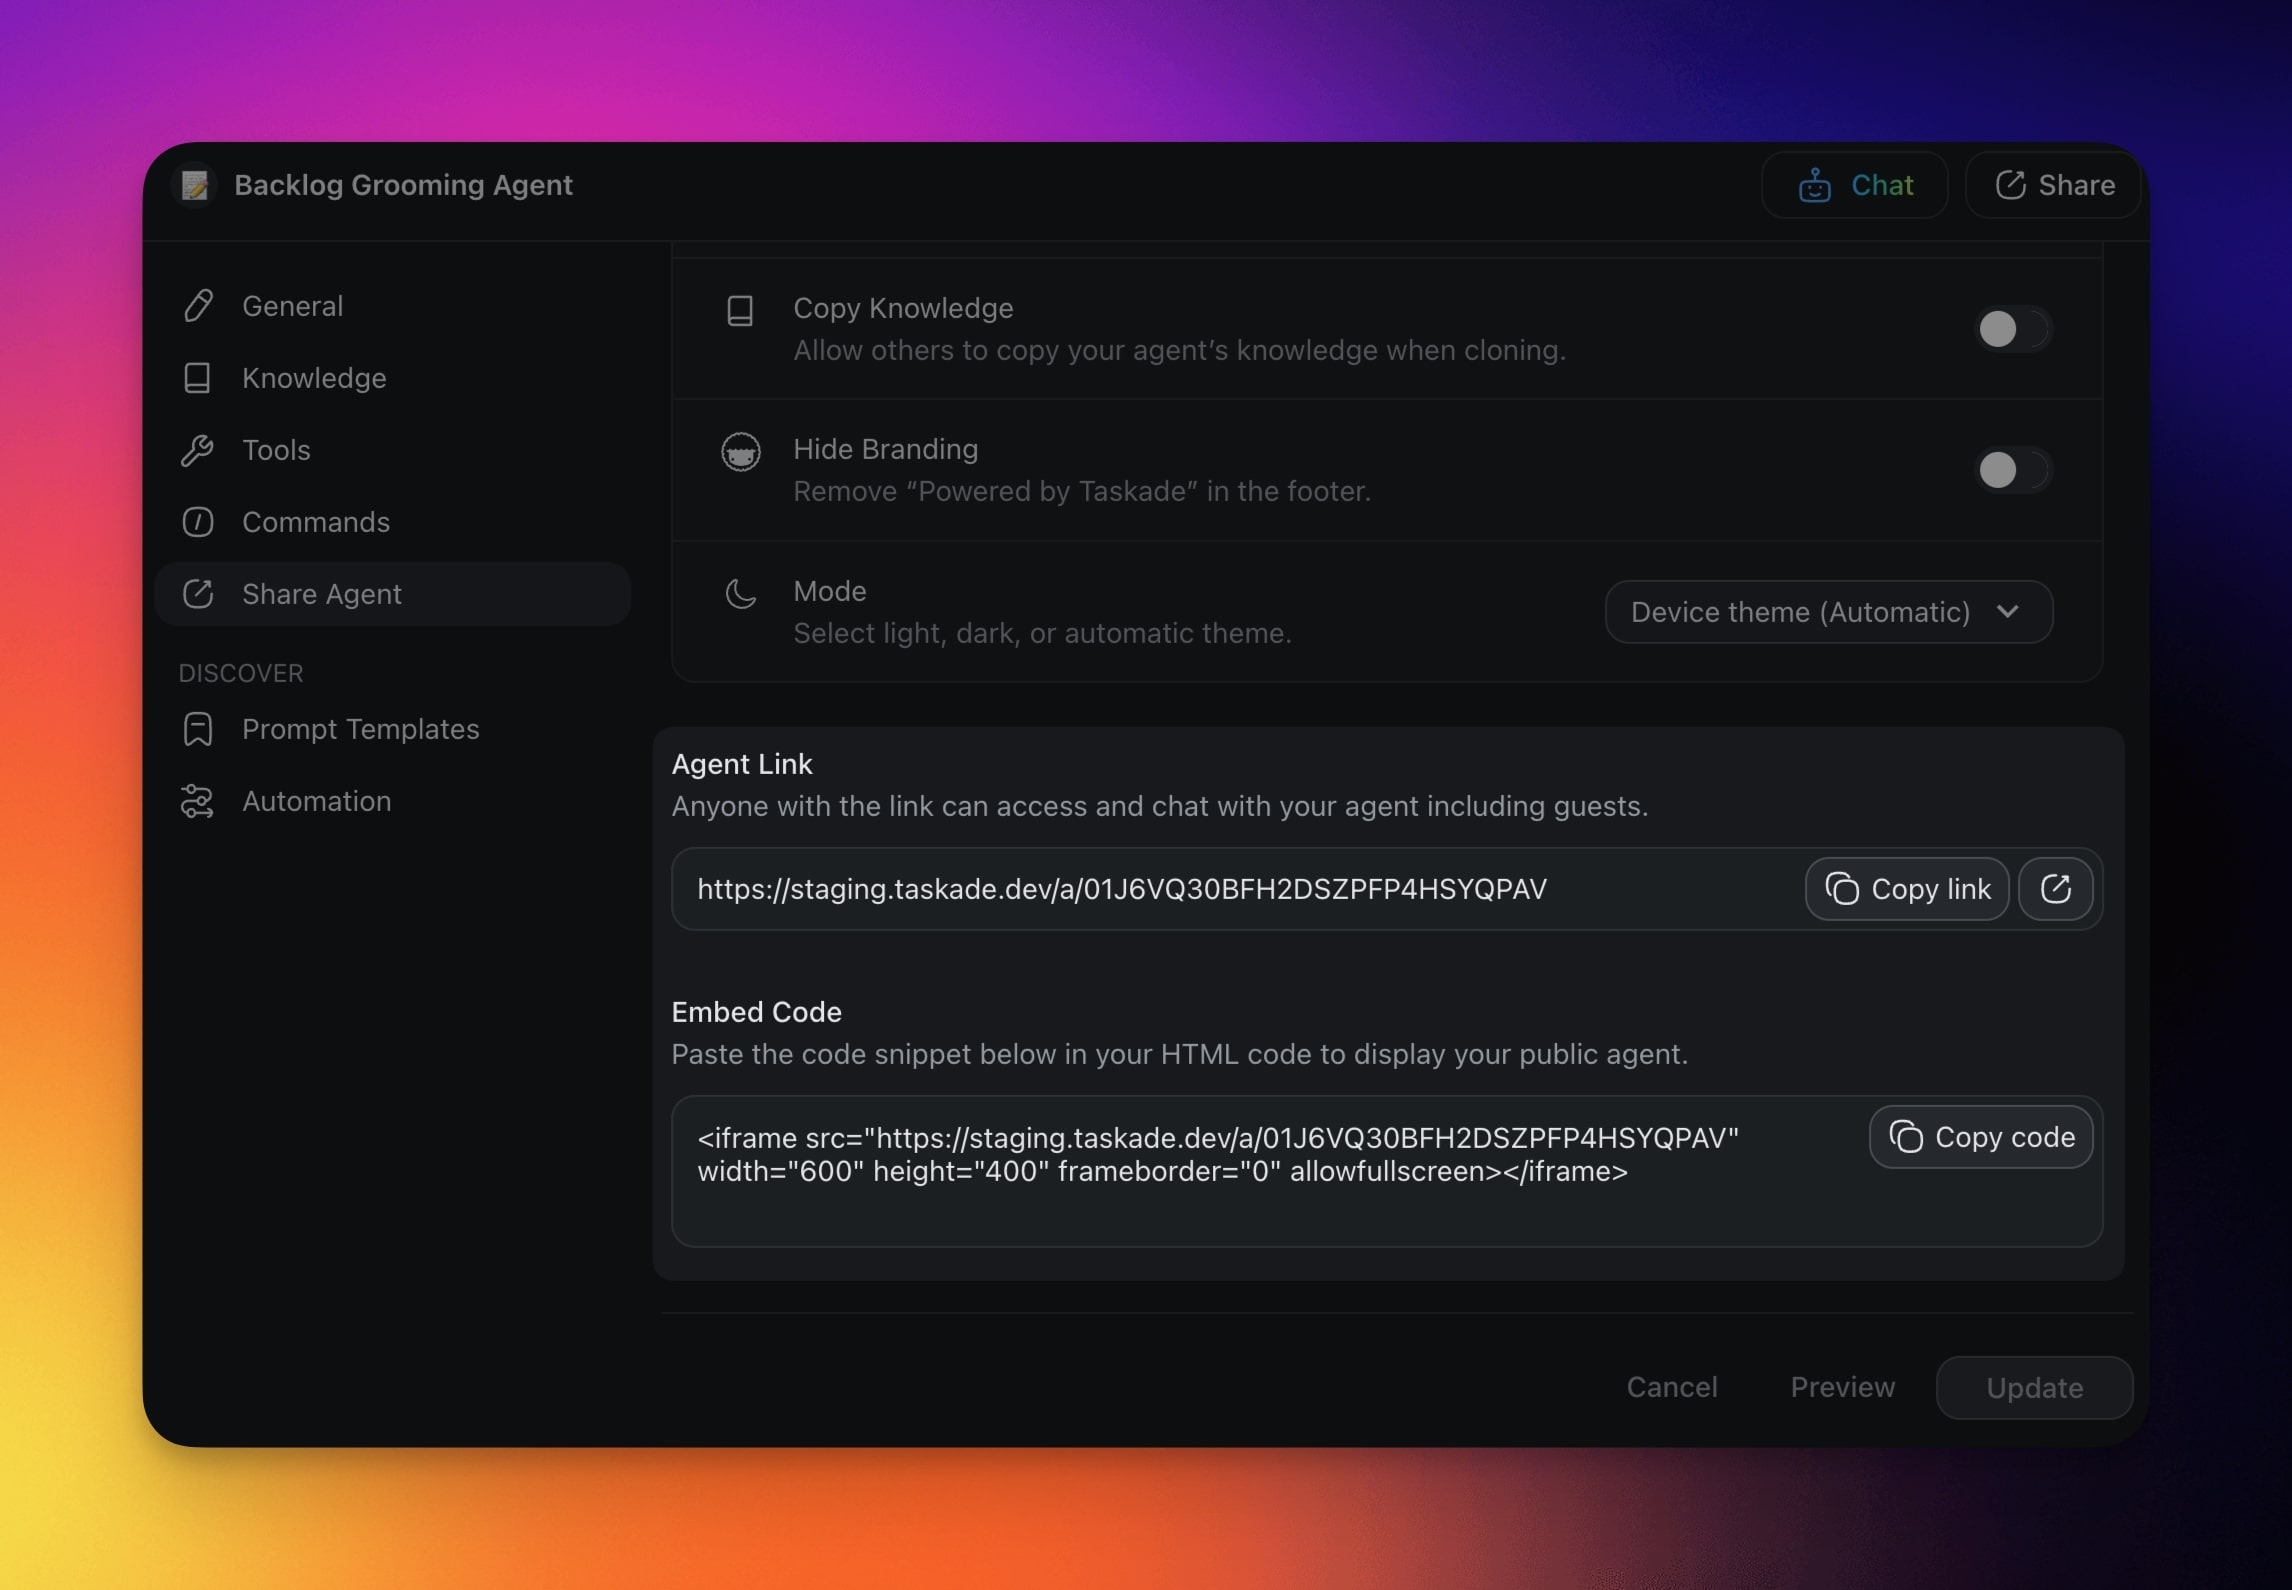
Copy Knowledge: Decide if you want to allow others to copy agent knowledge.
Hide Branding: Remove Taskade branding in the agent footer.
Theme: Select light, dark, or automatic theme.
Background: Select or upload a custom background.
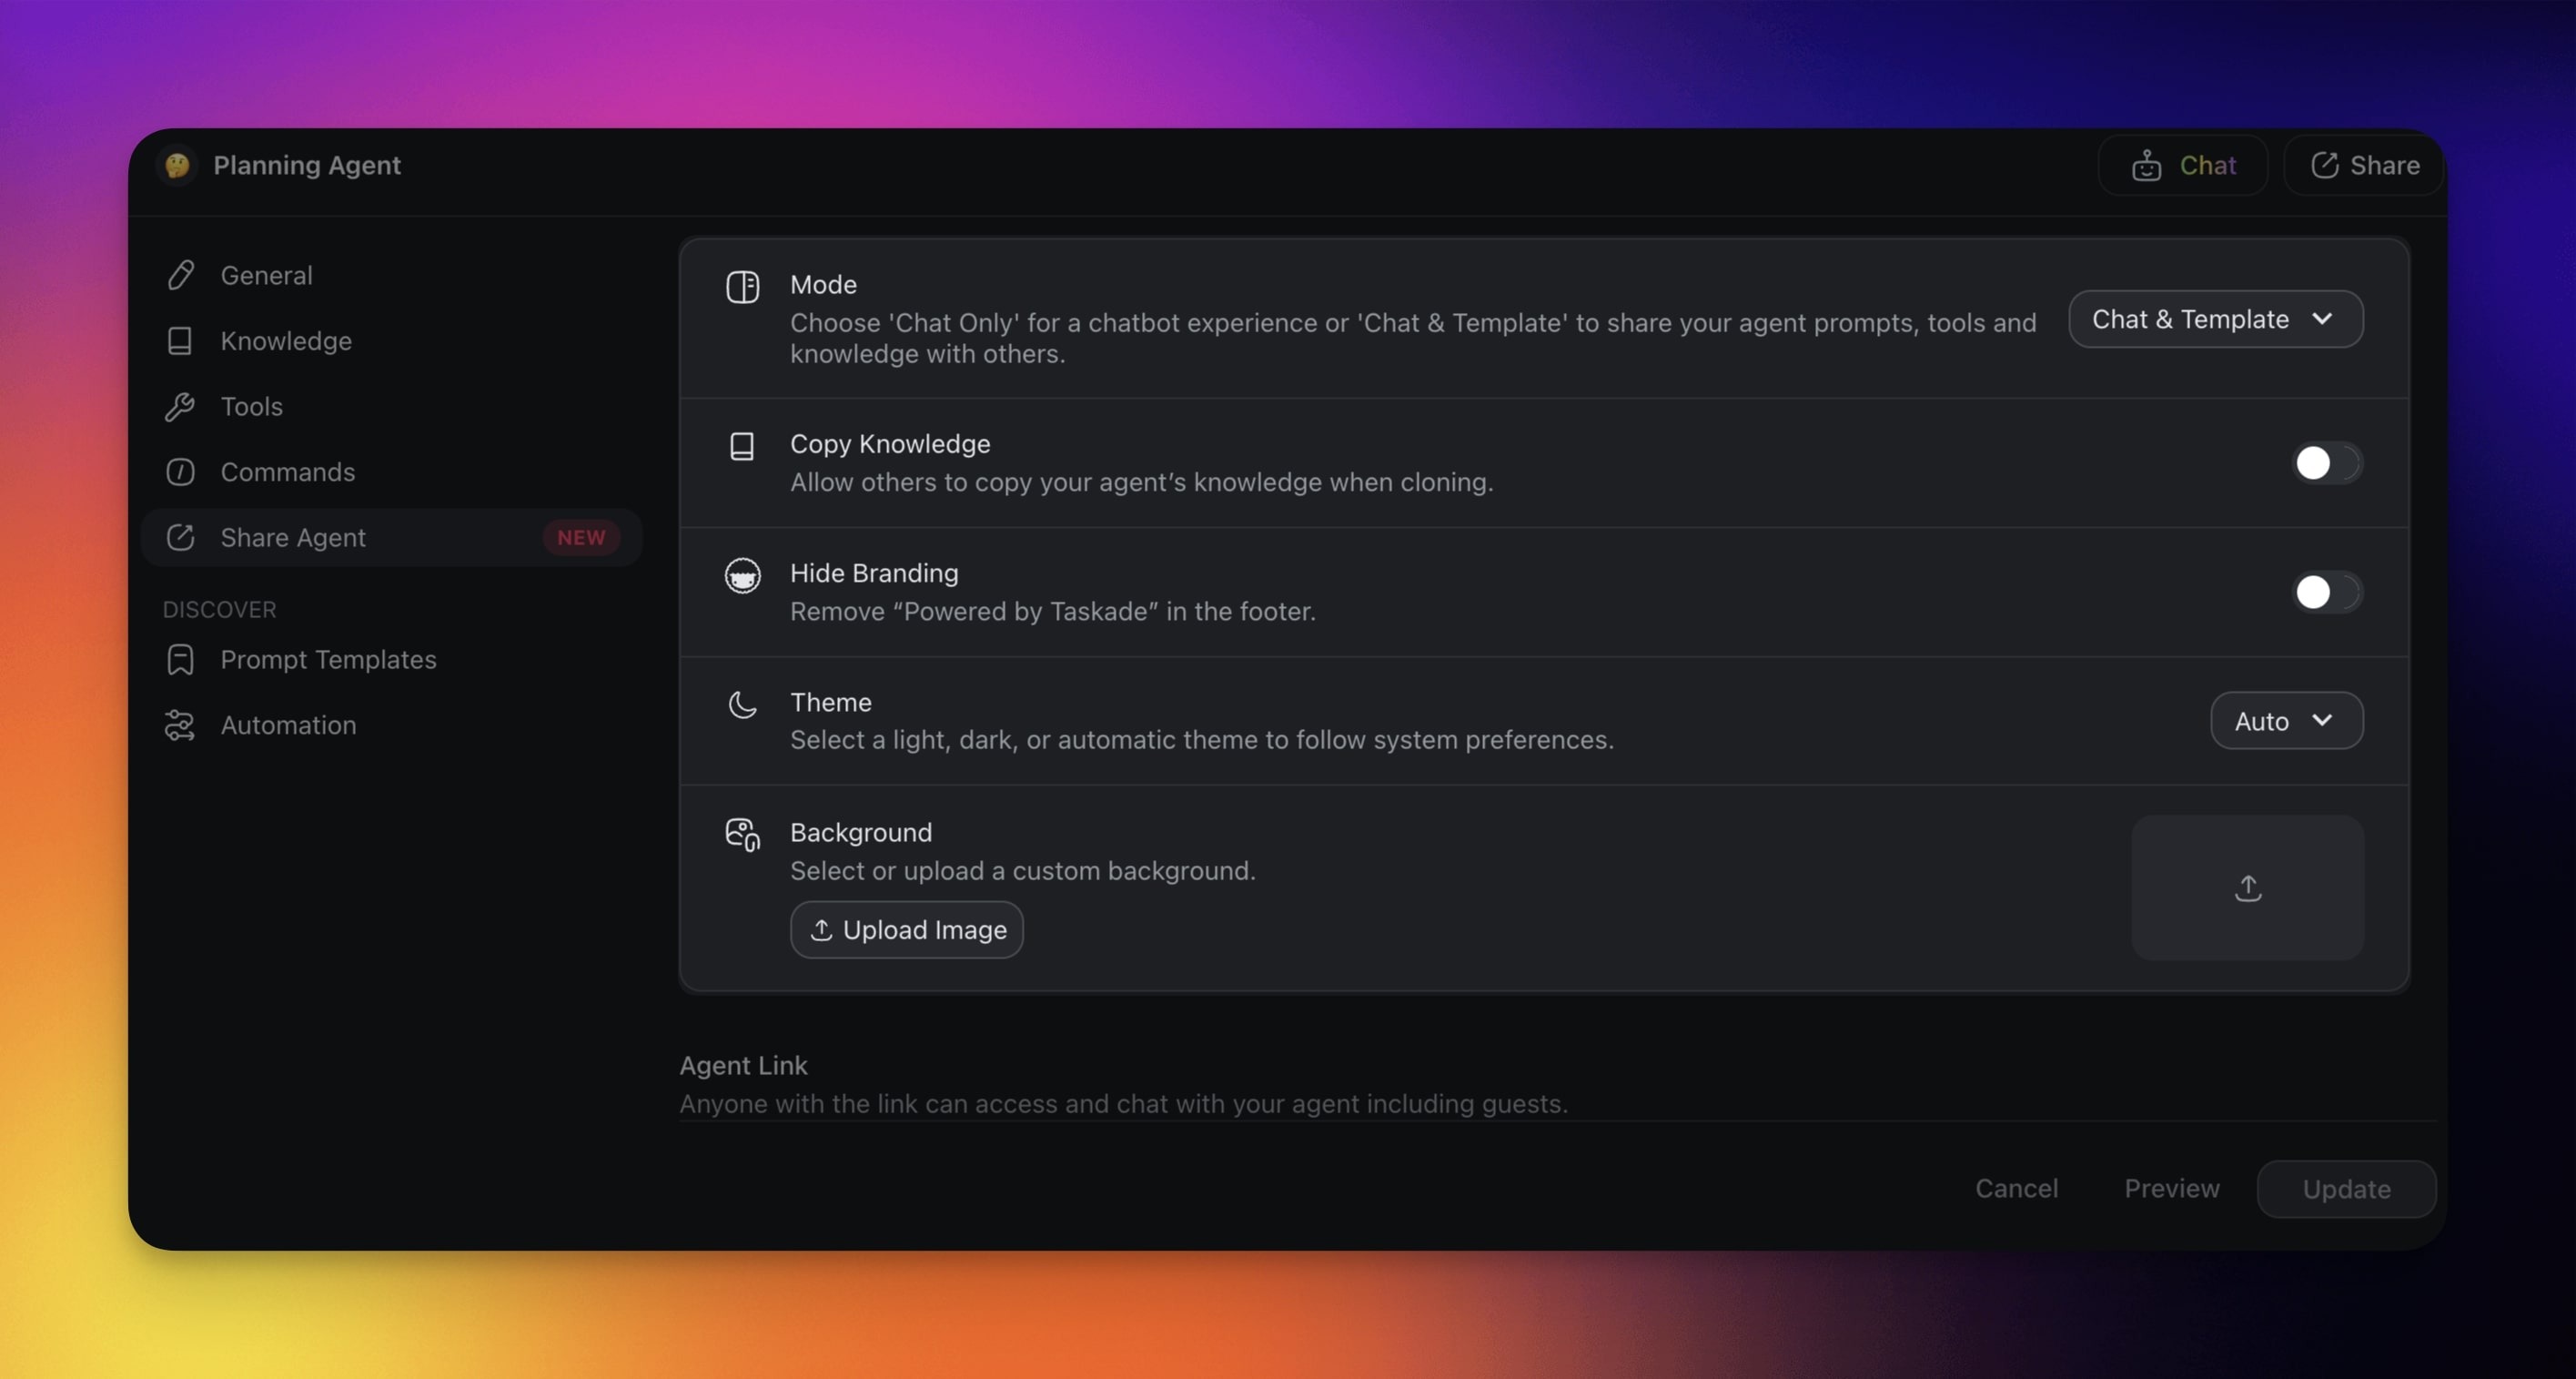
Finally, you can copy the agent link or embed code:
Click Copy link to share a direct link.
Click Copy code to embed the agent on your website.

Collaborative Agent Chat
You and your team can chat and collaborate with AI agents in the same space, at the same time. This feature brings tailored AI insights into your conversations.
- 🤝 Use a meeting agent to facilitate meetings
- 🔍 Employ a data agent to quickly retrieve data
- 📚 Tap a knowledge agent for data and knowledge
- 🧠 Engage a creativity agent to generate new ideas
- 📈 Deploy an analysis agent to support decision-making
1) Chat with a Single Agent
- Open the chat box (see the previous sections).
- Choose an agent from the drop-down at the top.
- (optional) Click the ⁺ 👤 button to invite people to the conversation.
- Type a prompt to start a conversation.
Note: When you start a chat, a tooltip at the bottom of the chat box will let you know if the chat is public or private, so you can see who has access.
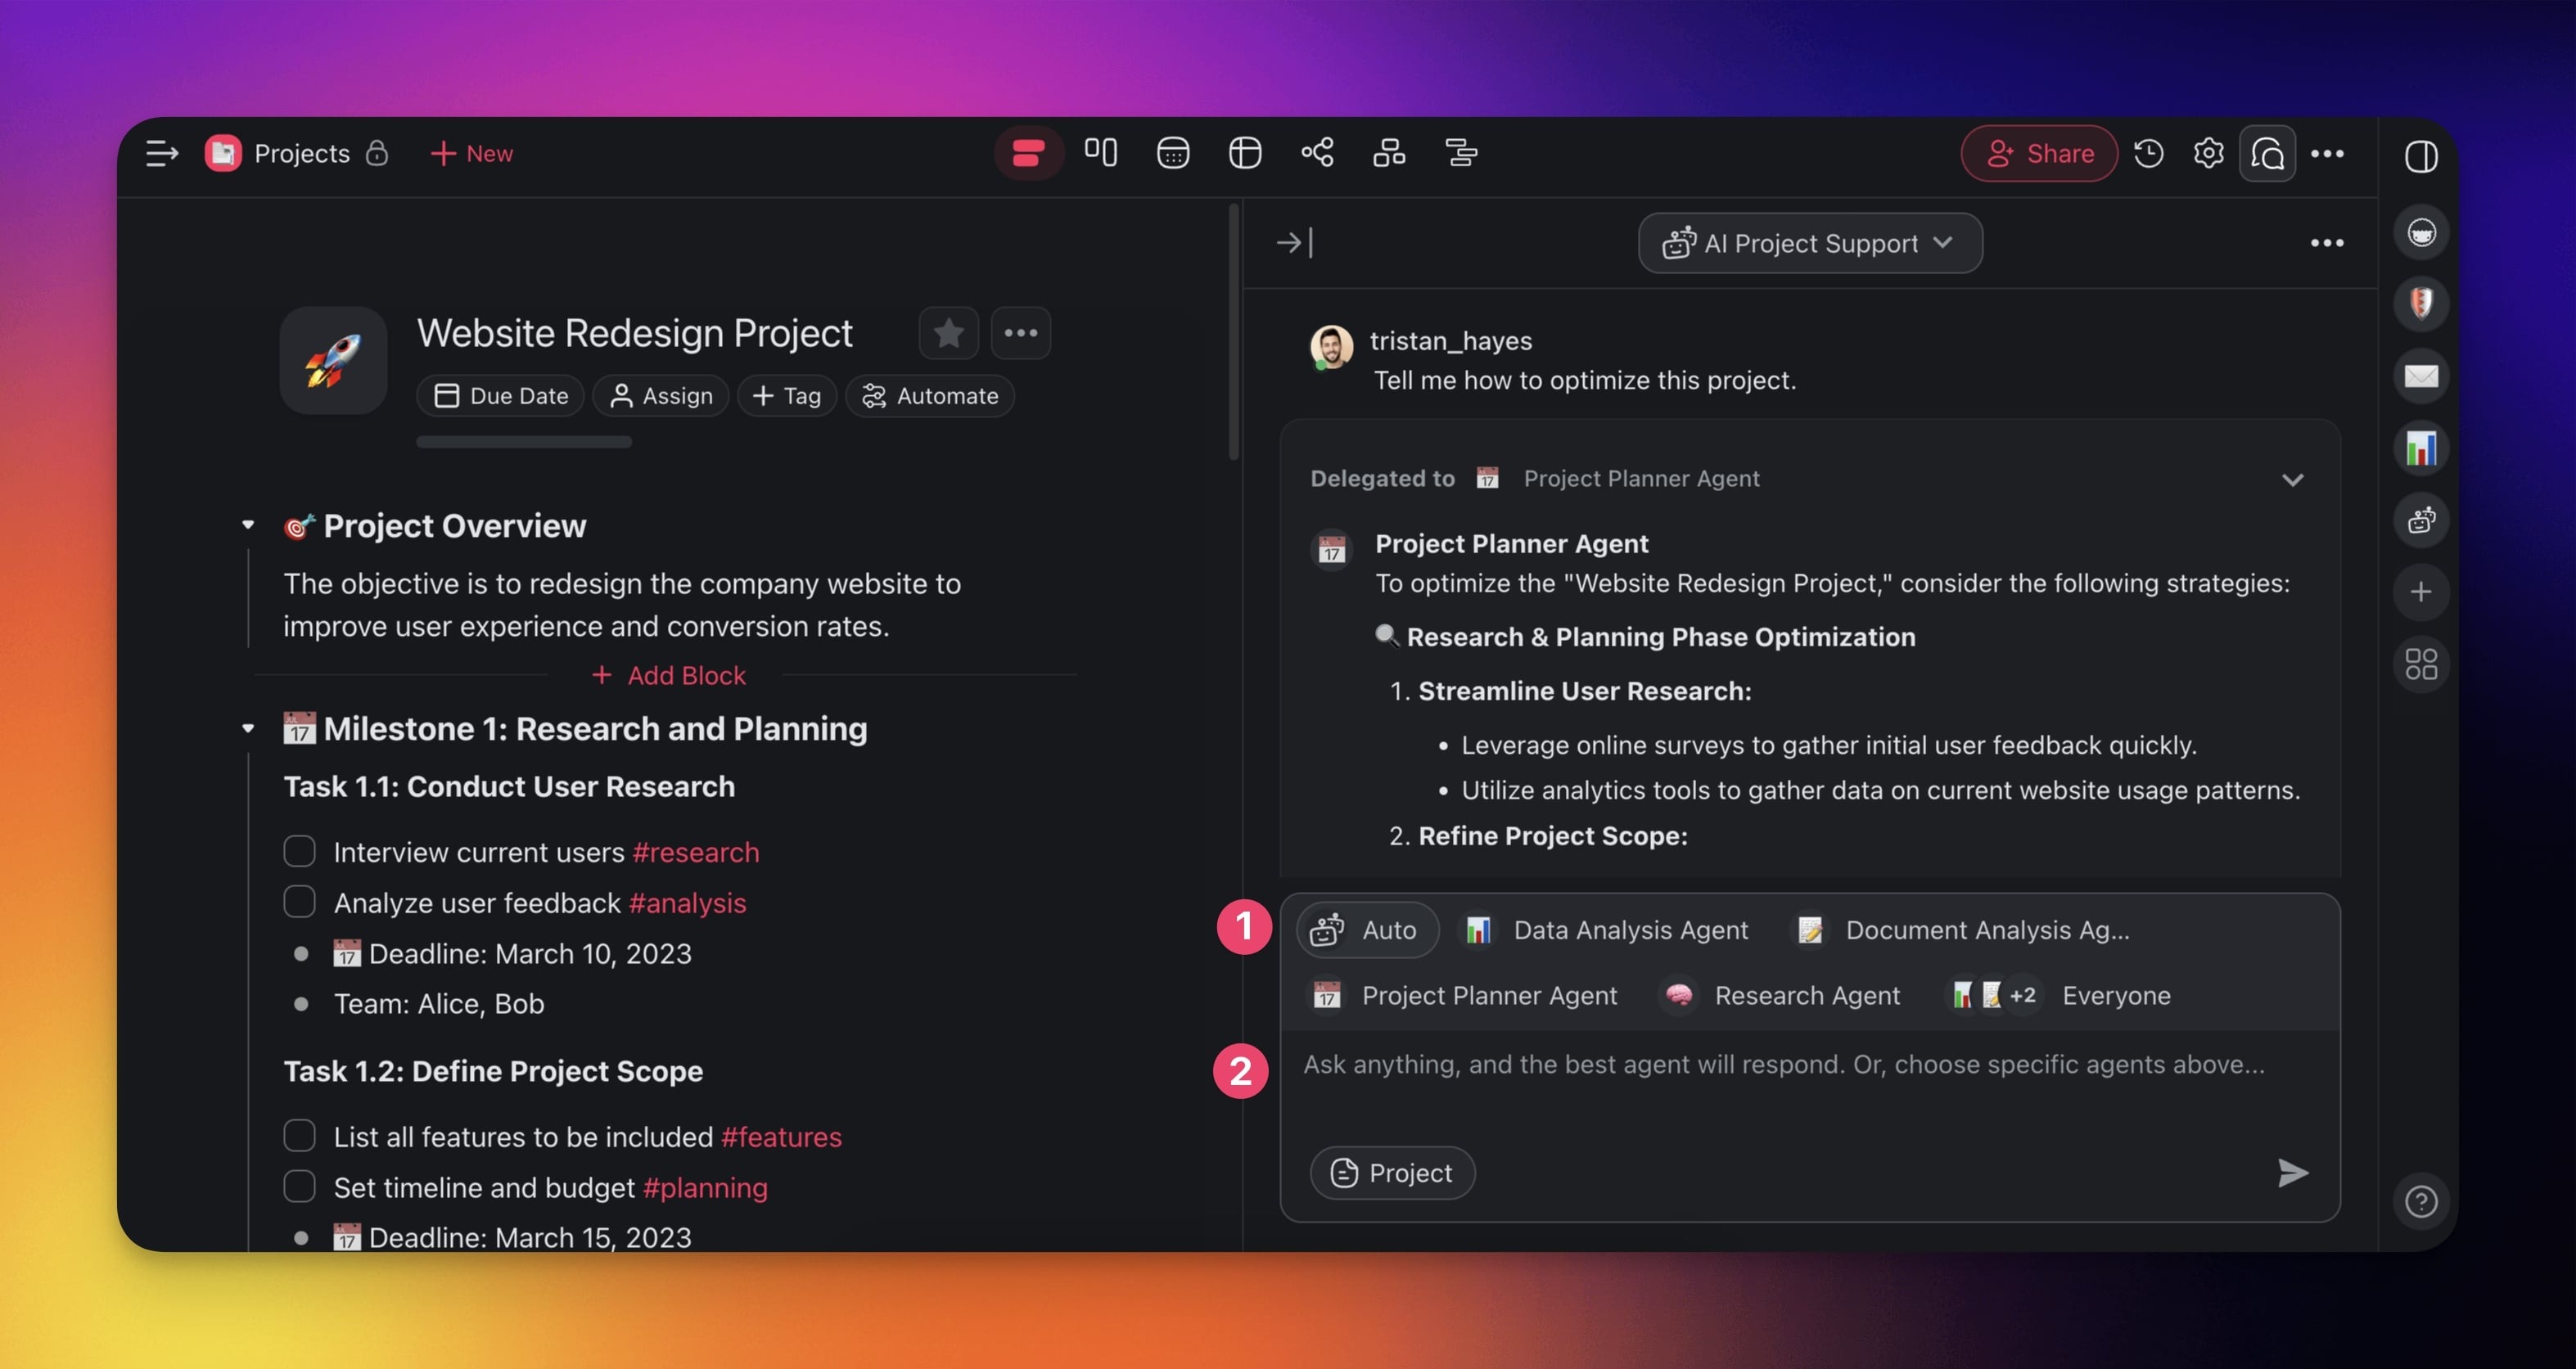
2) Chat with an AI Team
- Open the chat box (see the previous sections).
- Choose an AI Team from the drop-down at the top.
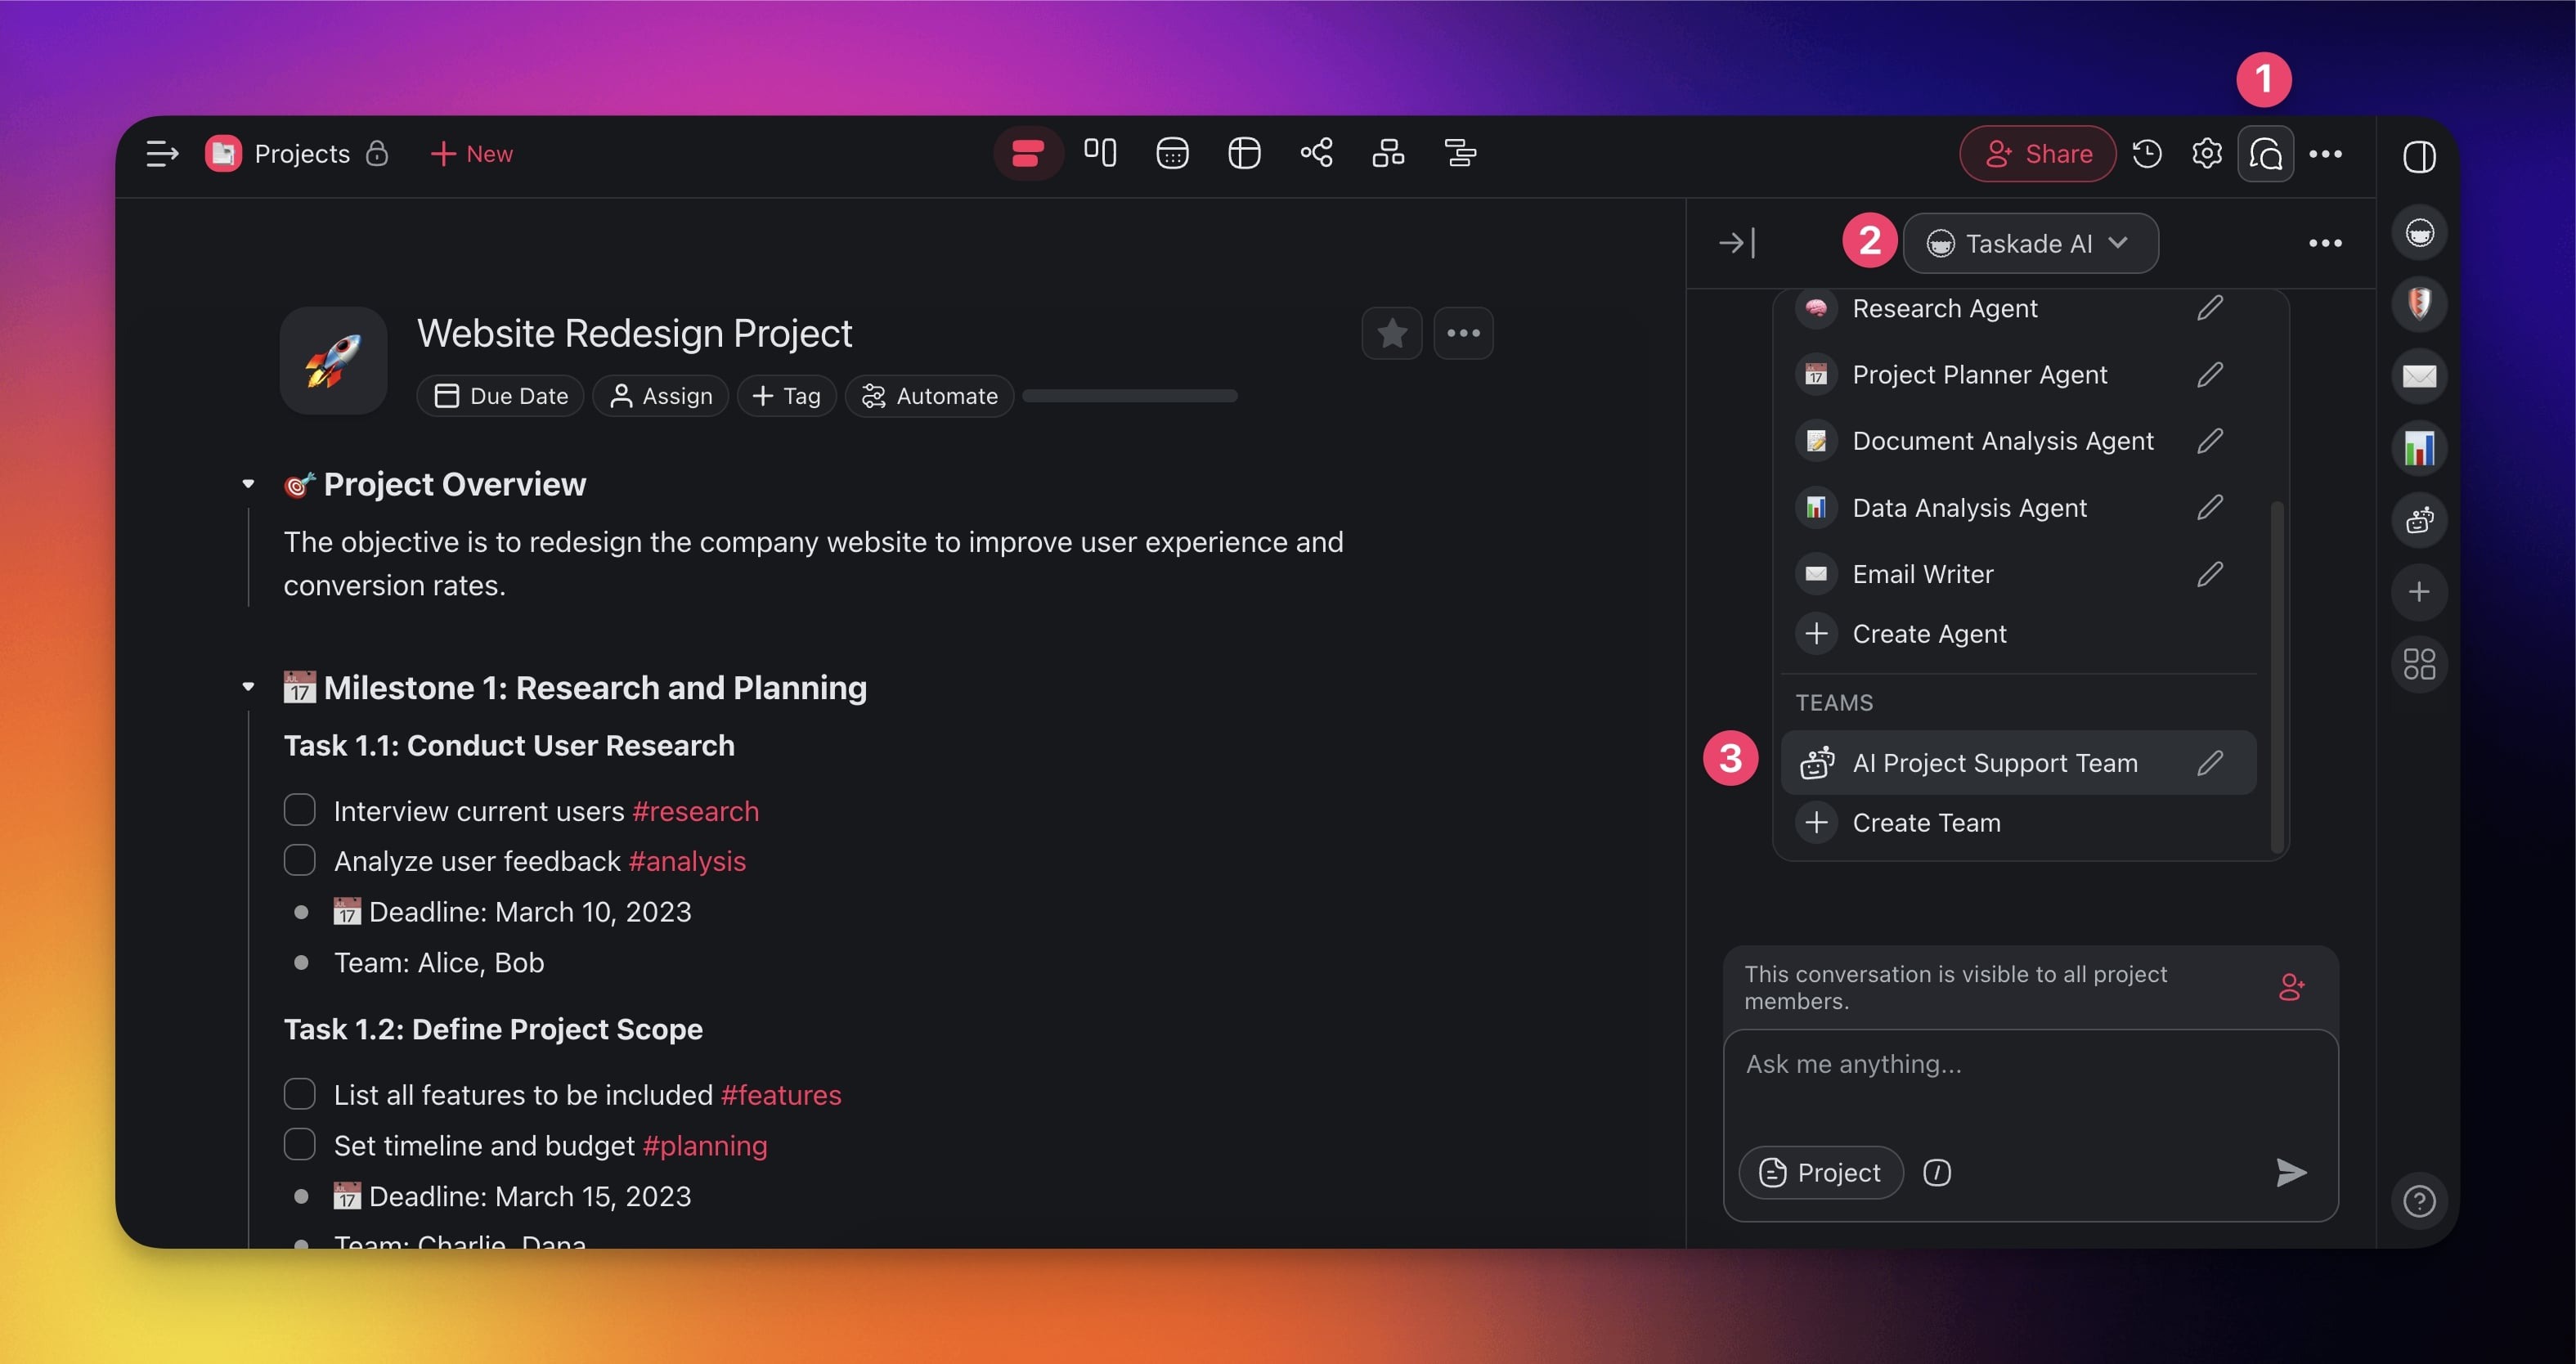
- (optional) Click the ⁺ 👤 button to invite people to the conversation.
- Choose an agent you want to interact with or set to Auto and let AI decide.
- Type a prompt to start a conversation.
Use Agent Responses
Use quick chat actions to make the most of conversations with your agents:
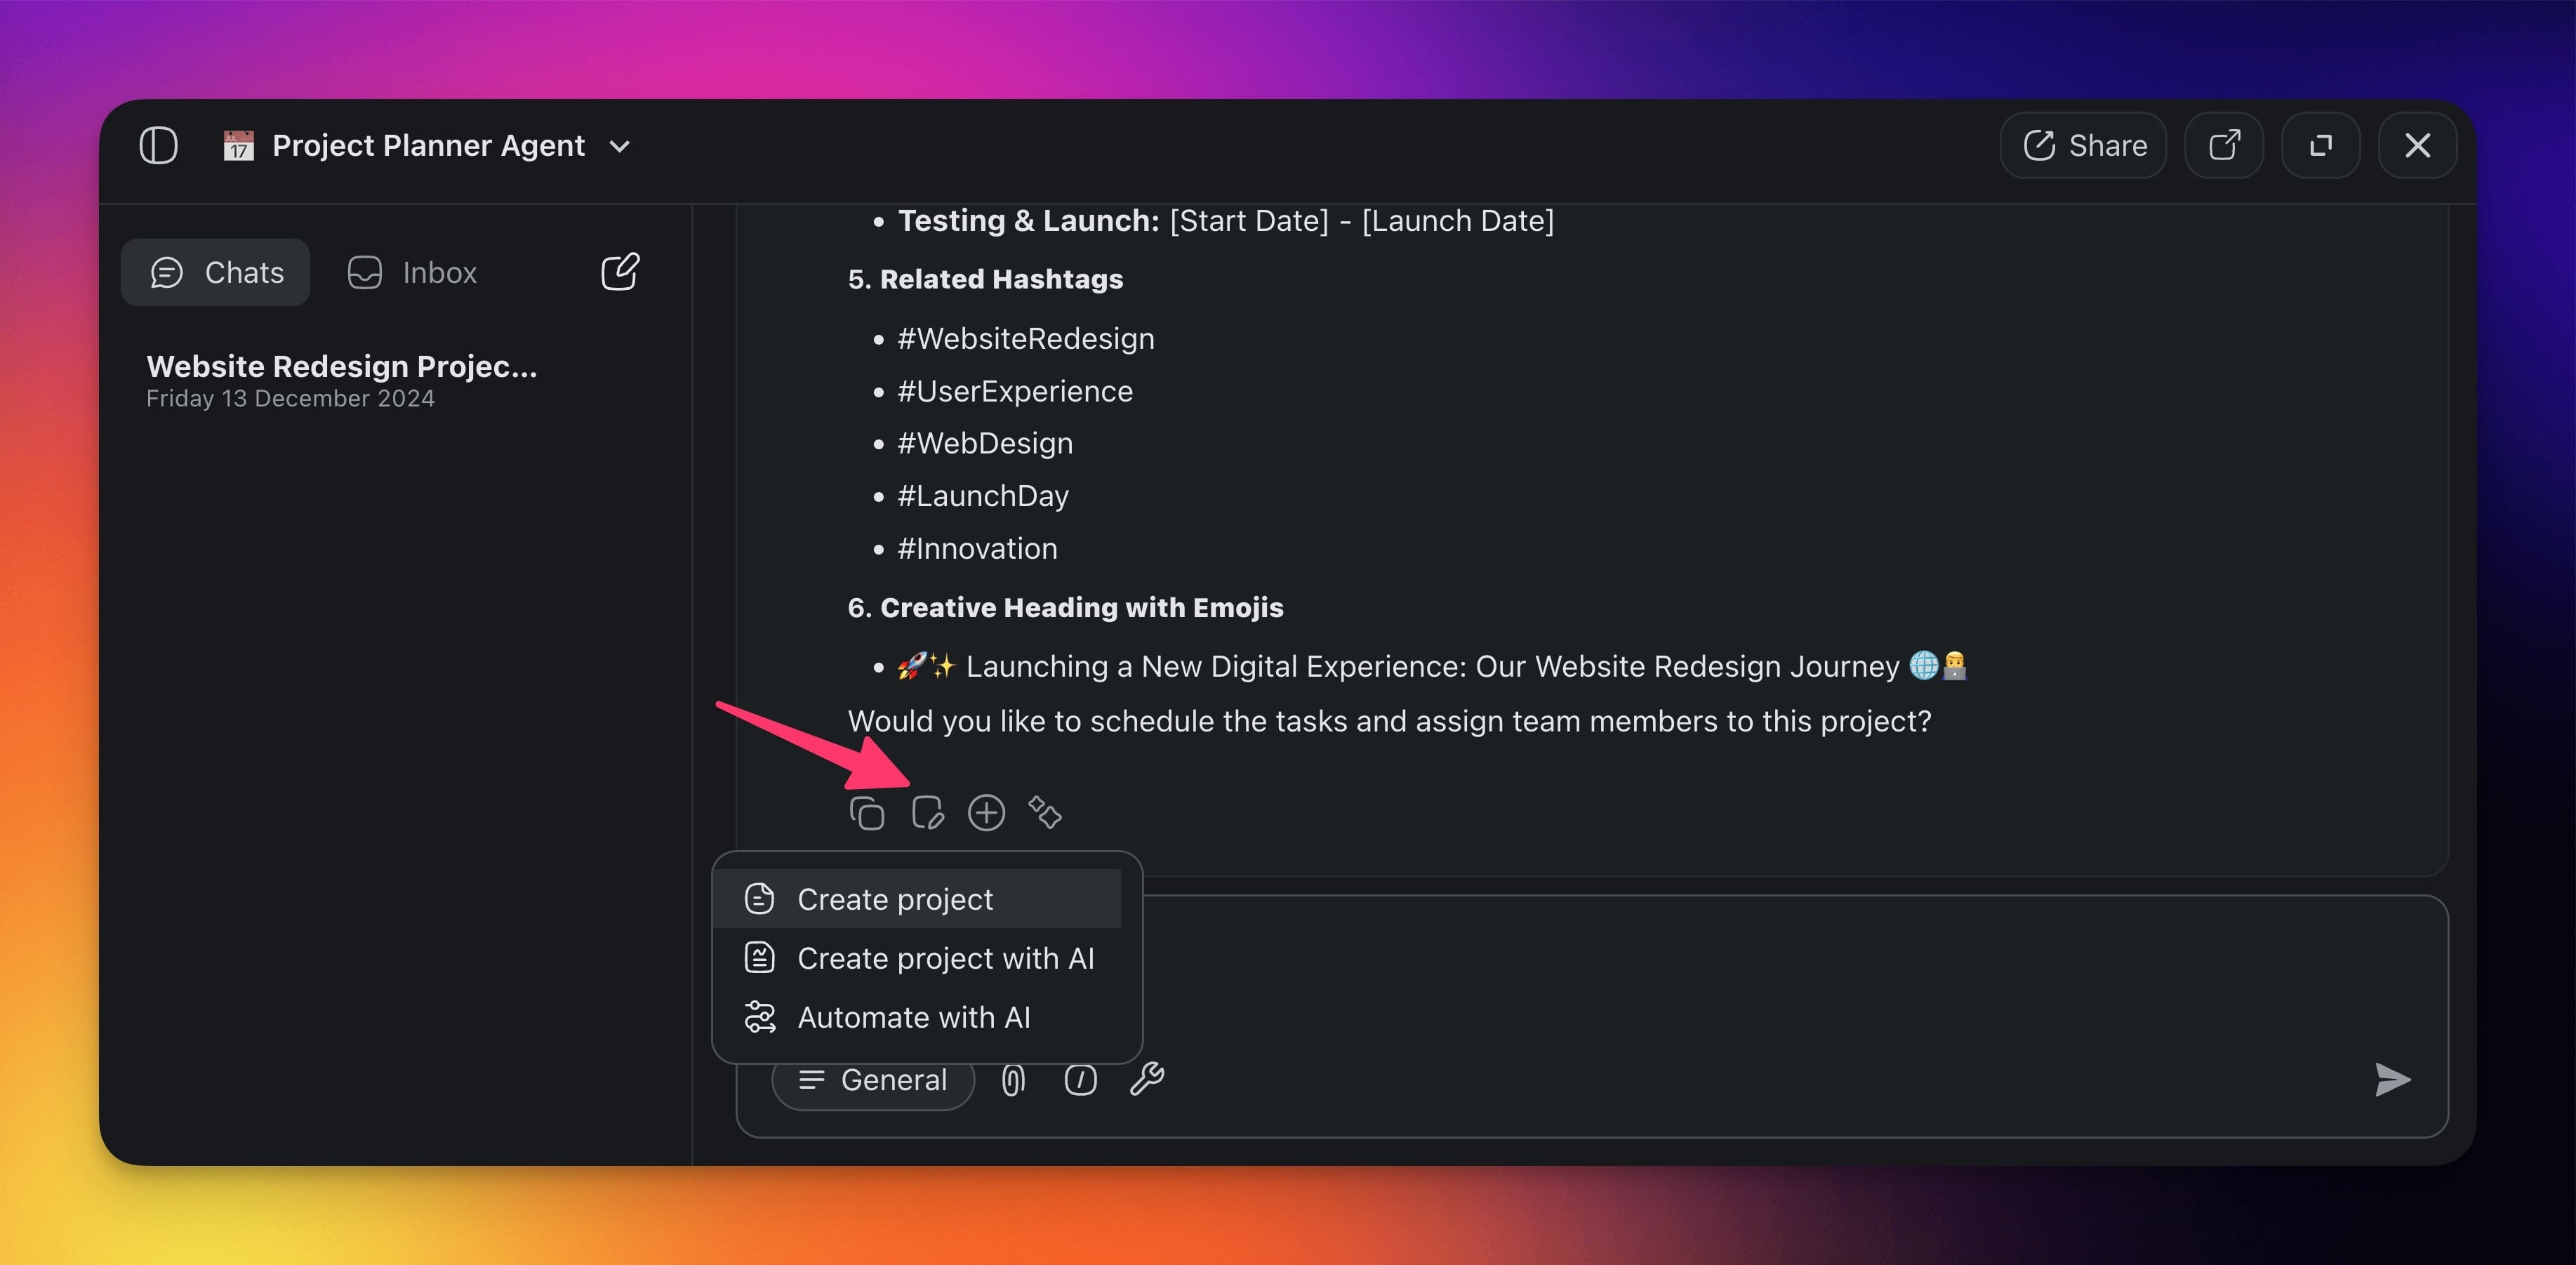
Click the ⨁ Plus button to add the output to:
➕ An existing project
📓 Agent knowledge
- Click the 📑 Copy button to save the output to the clipboard.
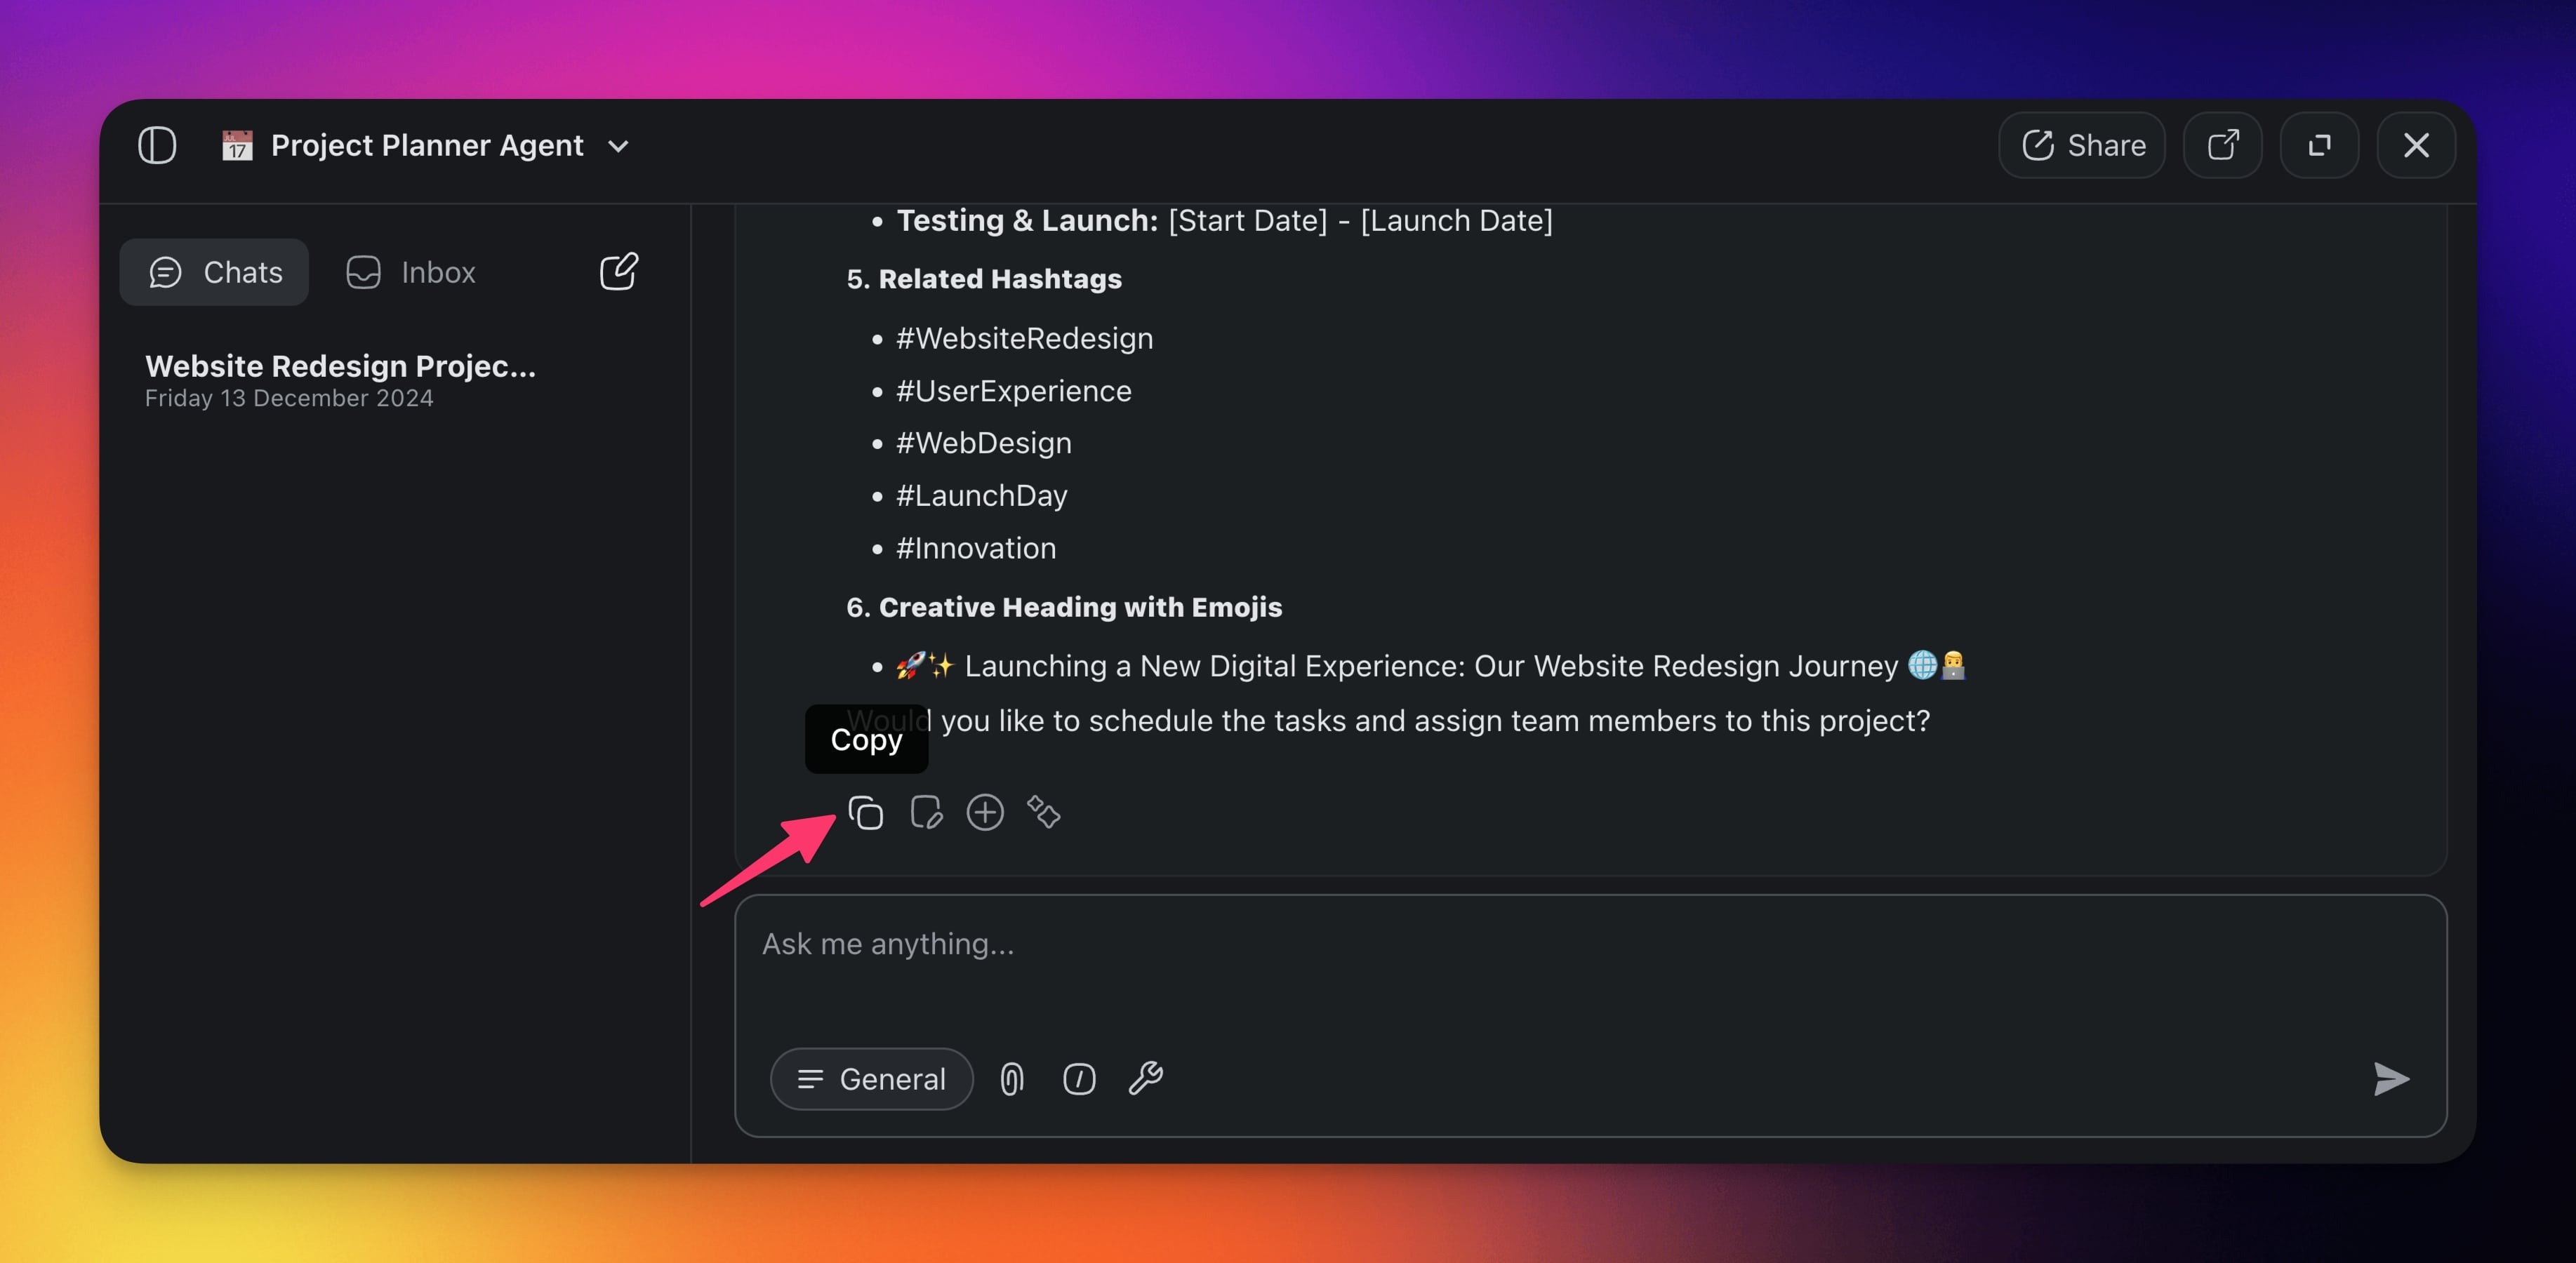
Click the 📝 Create new button use the output:
📄 In a new project
🌱 As a seed for AI Project Studio
In an 🔄 Automation Flow
Export Conversations
Want to archive or reuse conversations with your agents? Here's to you can do that:
- Click the three dots ··· next to a conversation thread.
- Choose Export from the drop-down list.
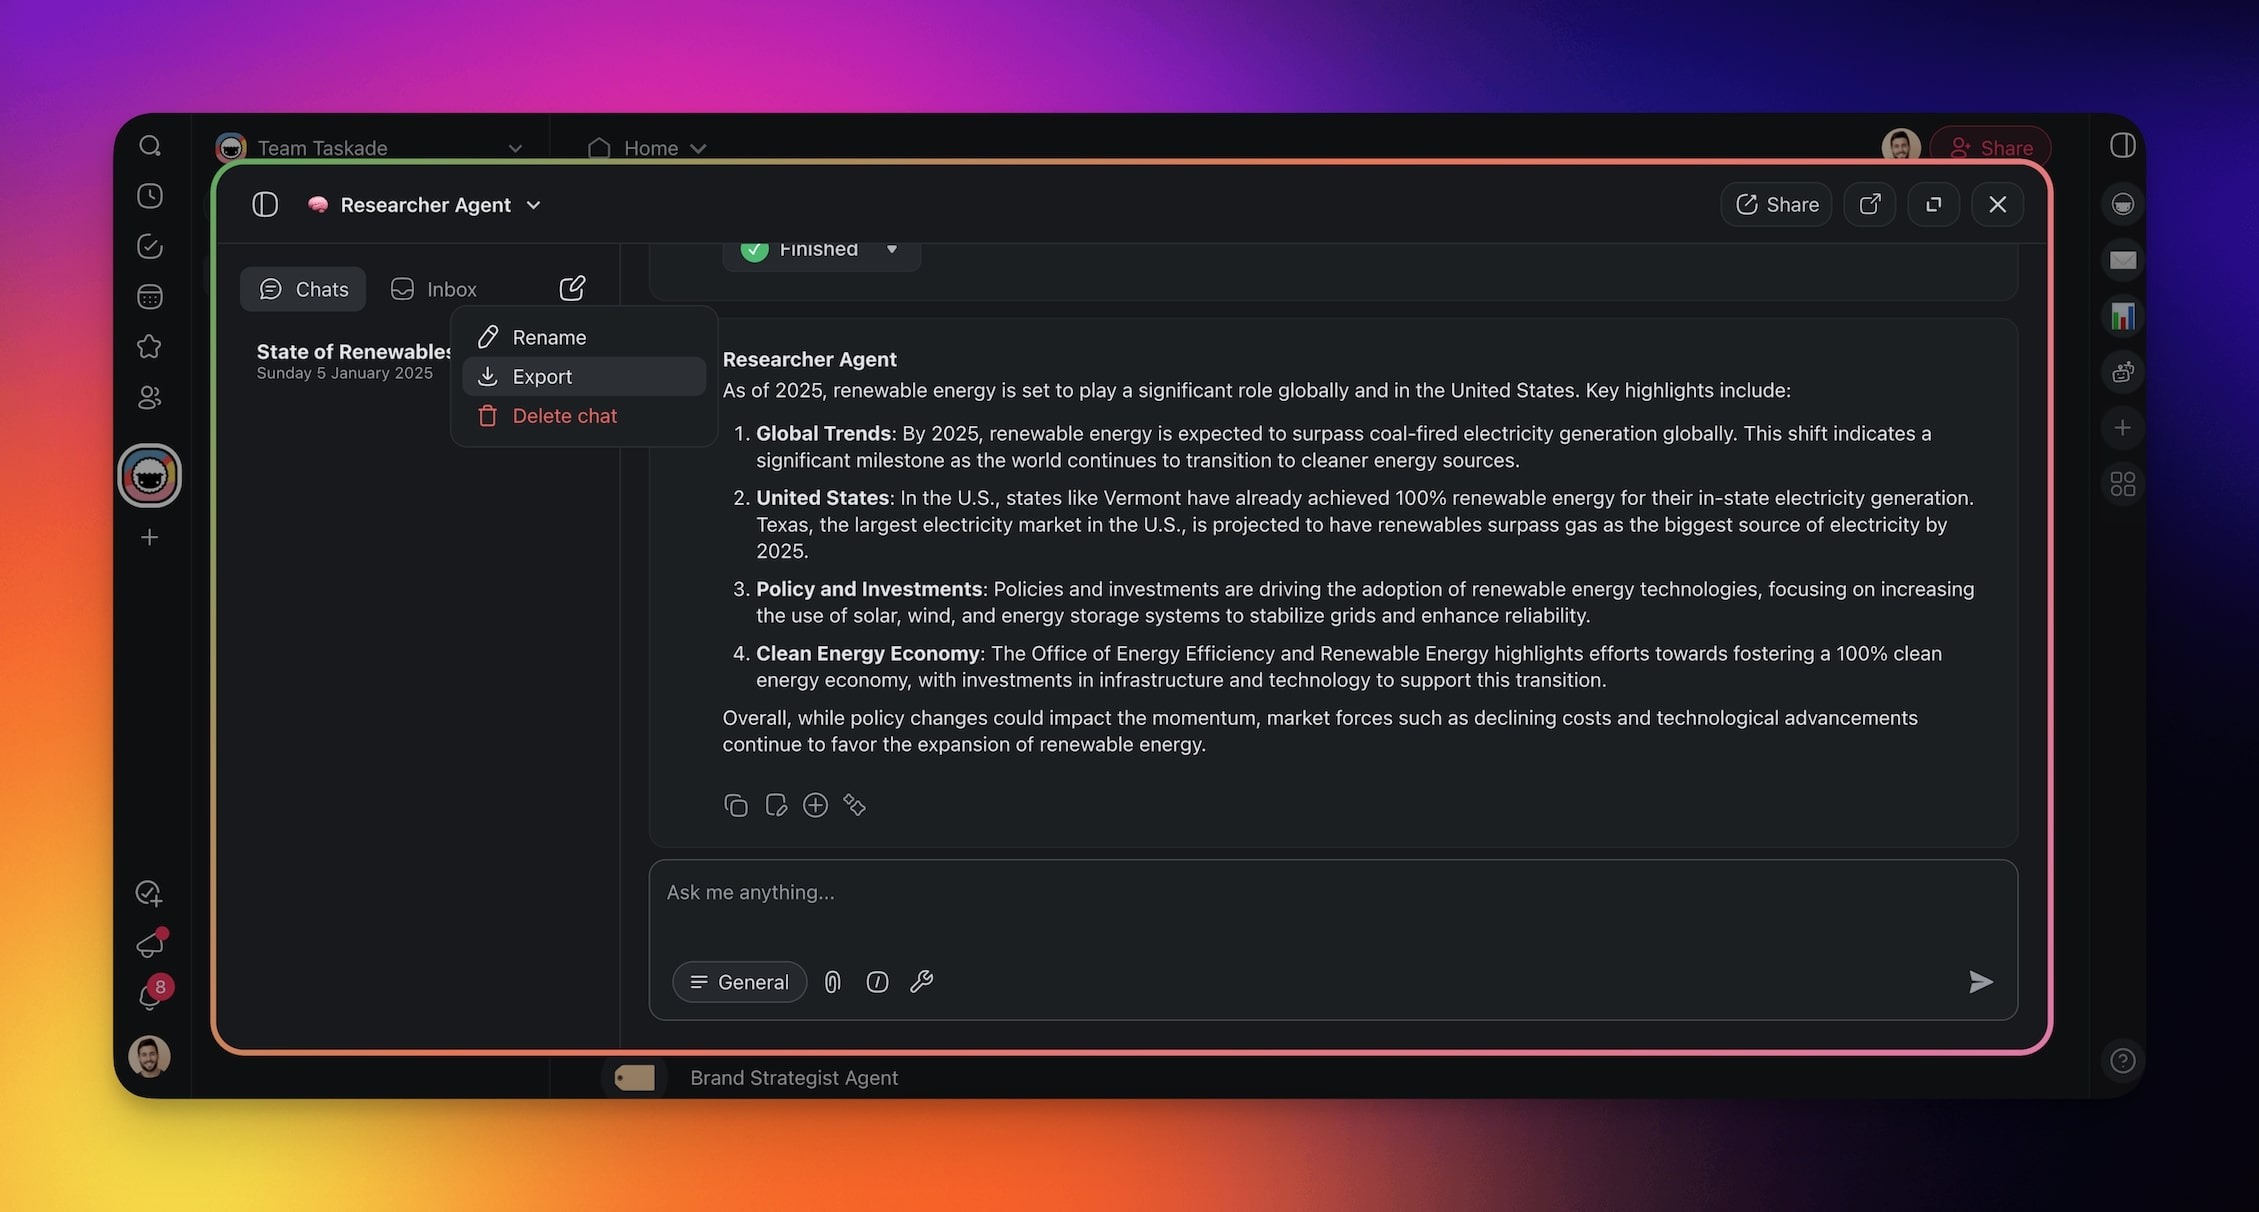
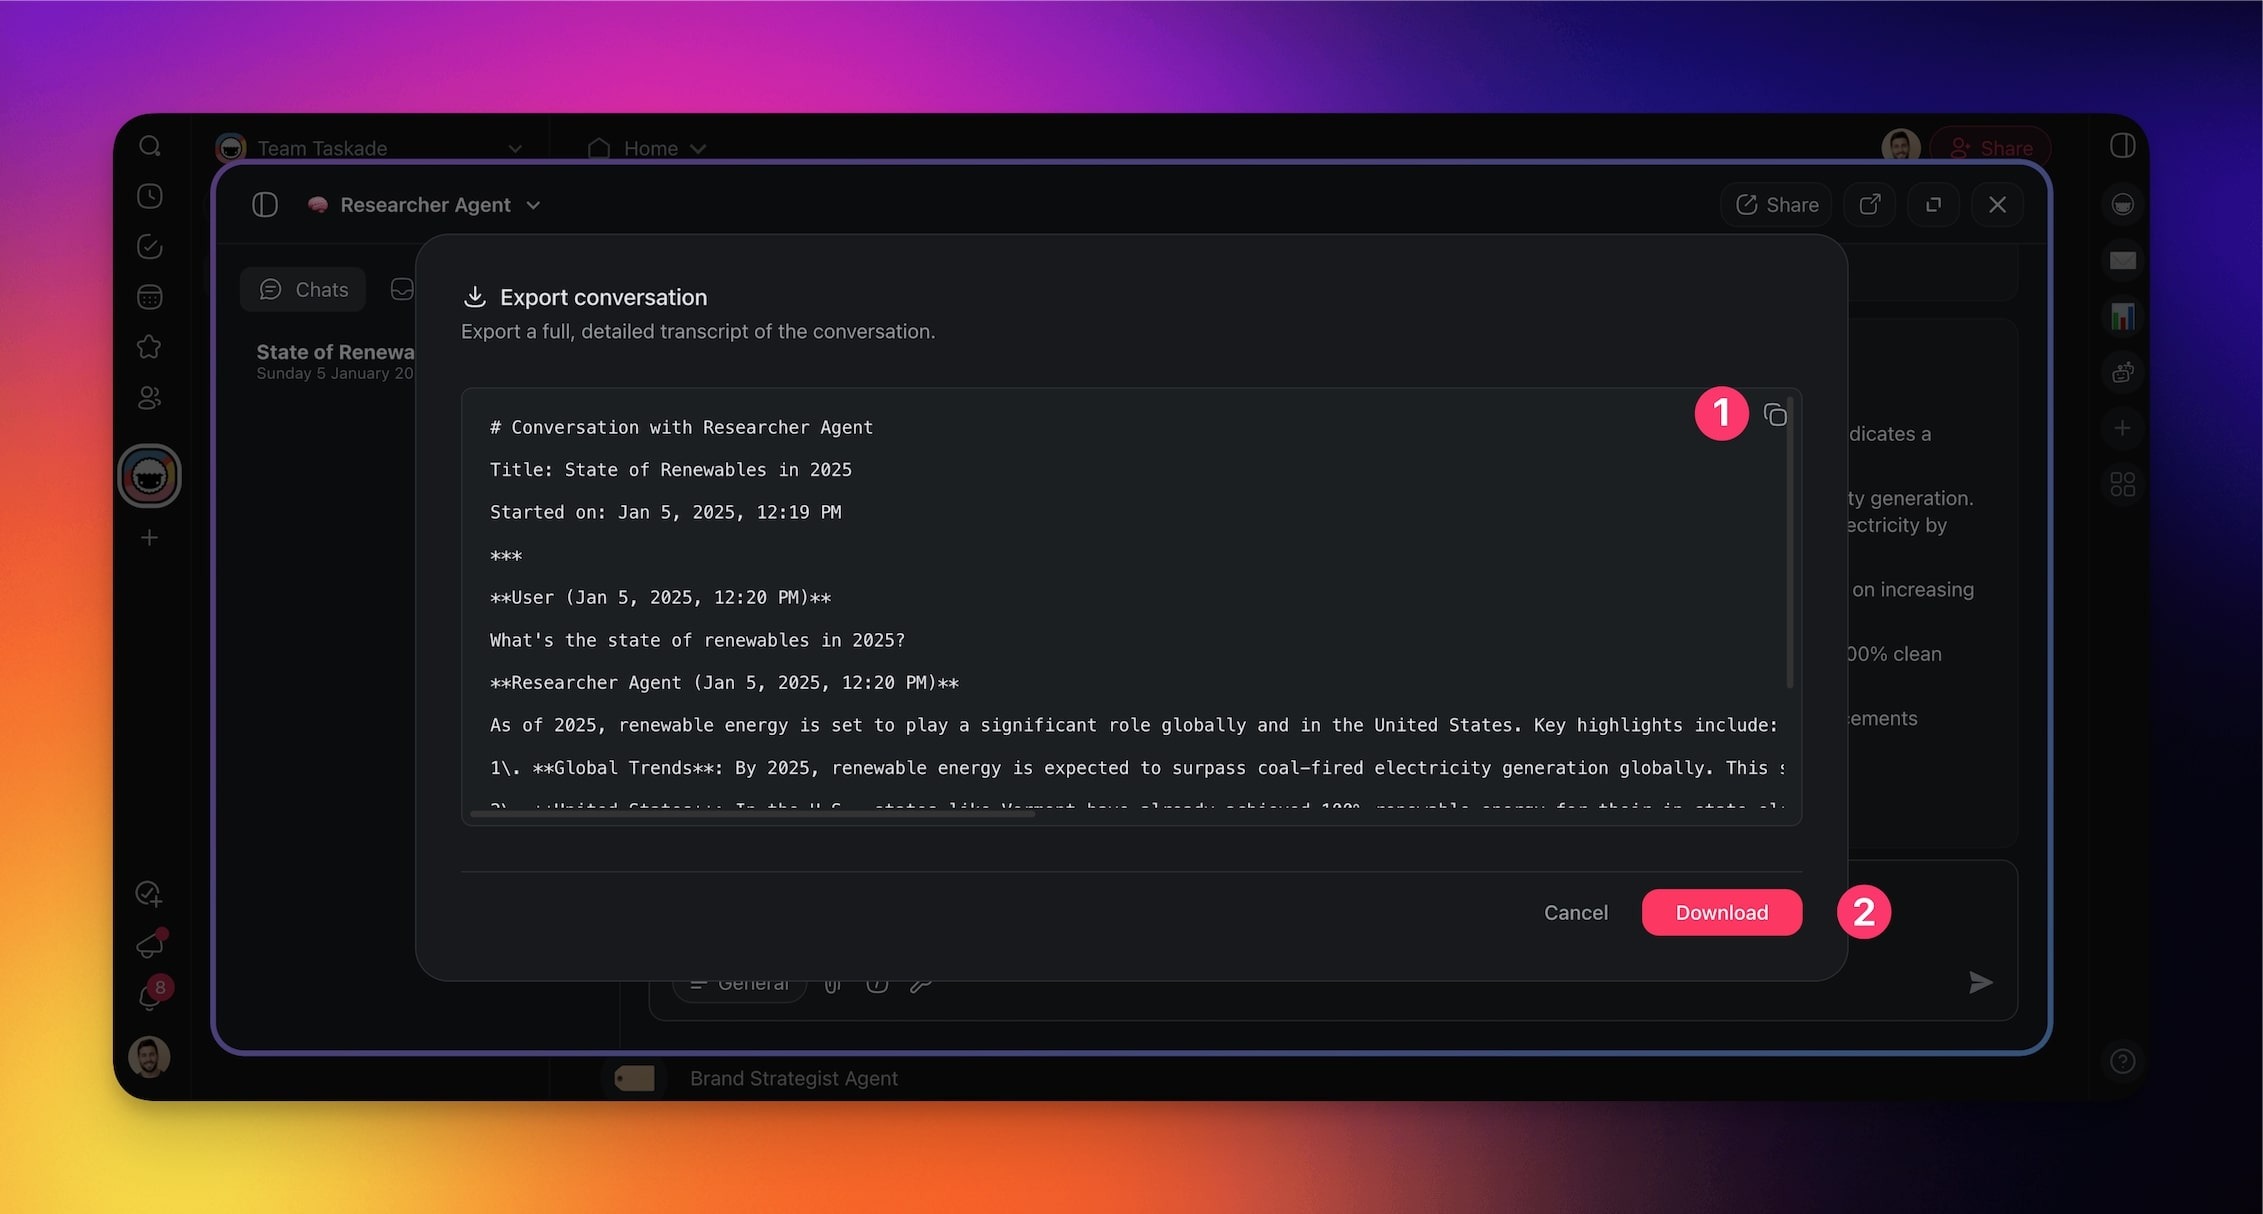
Choose one of the export methods:
- Copy the conversation to the clipboard.
- Download the conversation as a Markdown file.
Shared AI Agent Chats
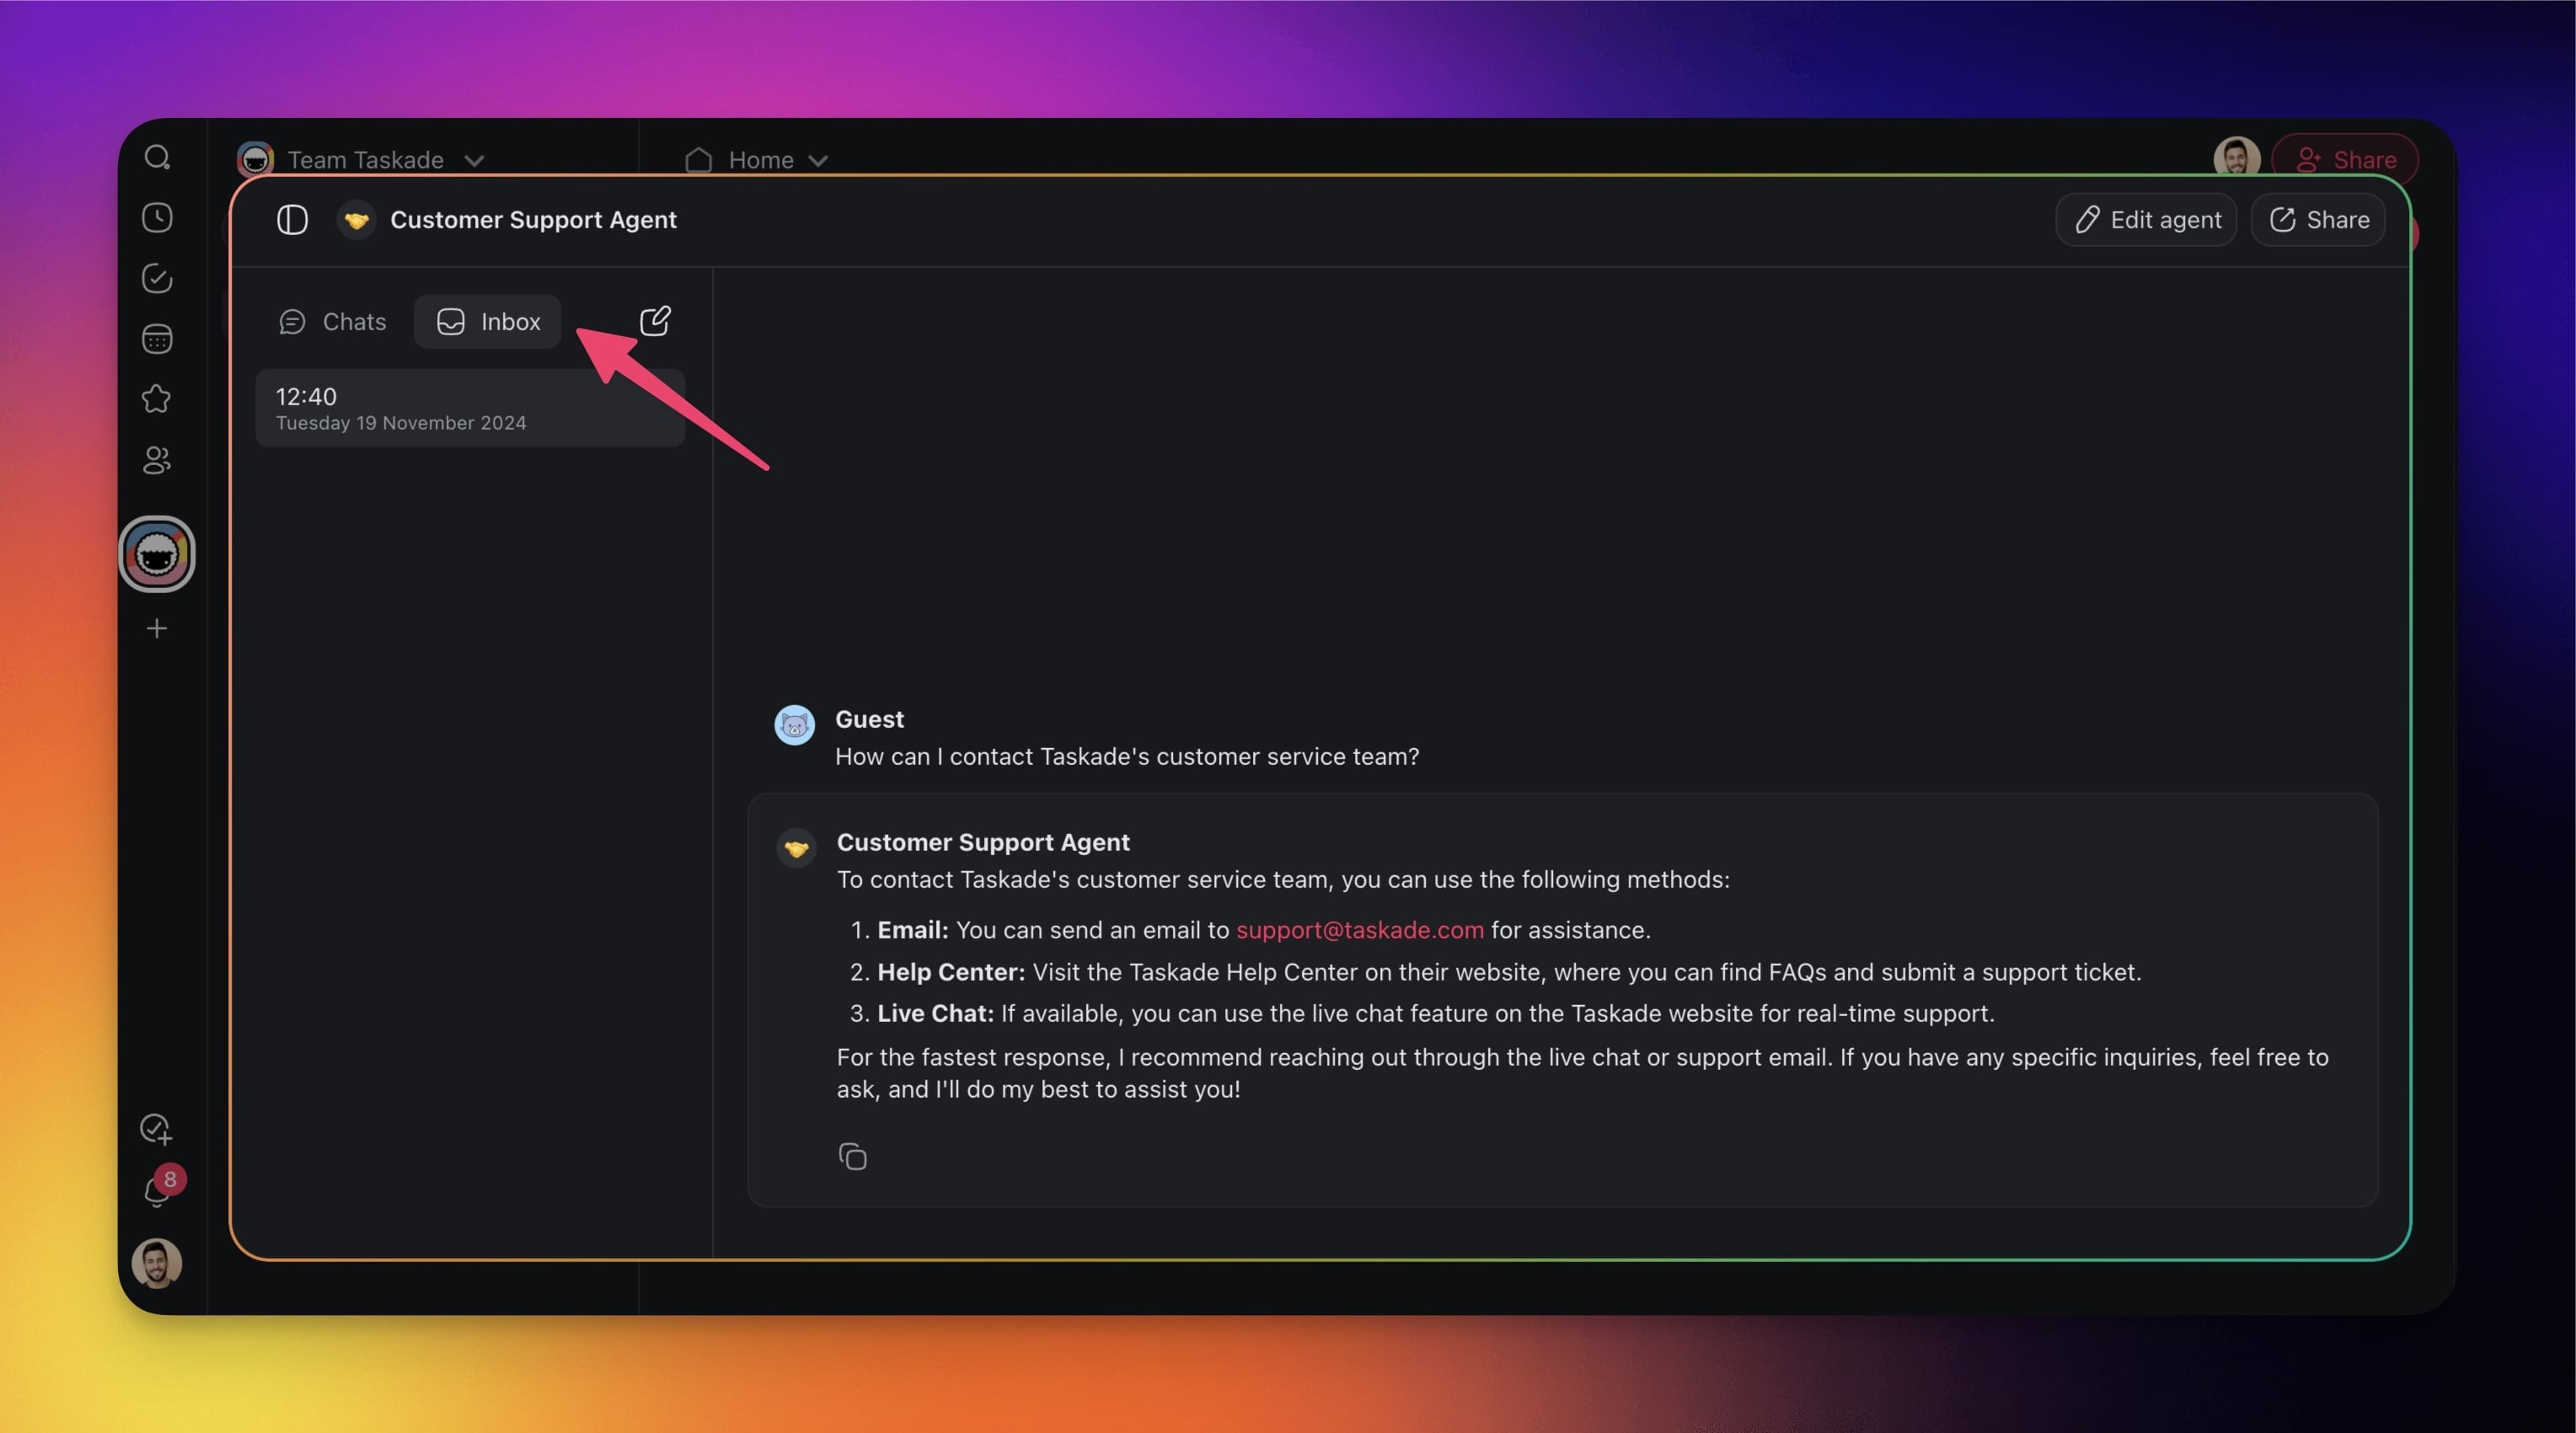
You can allow others to interact with your agents publicly. The public conversations will be visible inside the agent dashboard under the Inbox tab.
To enable public agent chats:
- Navigate to the 🤖 Agents tab.
- Hover the mouse cursor over an agent.
- Click the Share Agent button on the right.
- Enable the Public access toggle.
You can now customize the public agent:
Mode: Choose the level of interactions with the agent.
Copy Knowledge: Decide if you want to allow others to copy agent knowledge.
Hide Branding: Remove Taskade branding in the agent footer.
Theme: Select light, dark, or automatic theme.
Background: Select or upload a custom background.

Finally, you can copy the agent link or embed code:
Click Copy link to share a direct link.
Click Copy code to embed the agent on your website.
When somebody interacts with the public agent, the conversations will be aggregated inside the Inbox tab in the agent dashboard:
- Choose your agent in the Agents tab.
- Navigate to the Chat tab (top-right).
- Go to the Inbox tab in the left sidebar to see threaded conversations.
Use Threaded Conversations
You can engage in multiple conversations with the same agent concurrently.
- Focused conversations: Keep multiple chat threads with the same AI agent neatly organized, each tailored for specific topics or projects.
- Customized interaction: Each chat maintains its unique context, which makes it easier to manage complex tasks without confusion.
Here's how it works:
- Open the agent chat (only applies to methods 1 and 3).
- Click ➕ New chat to start a conversation.
Use the New chat button in the sidebar on the left to create new threads.
Repeat the step as many times as you need.
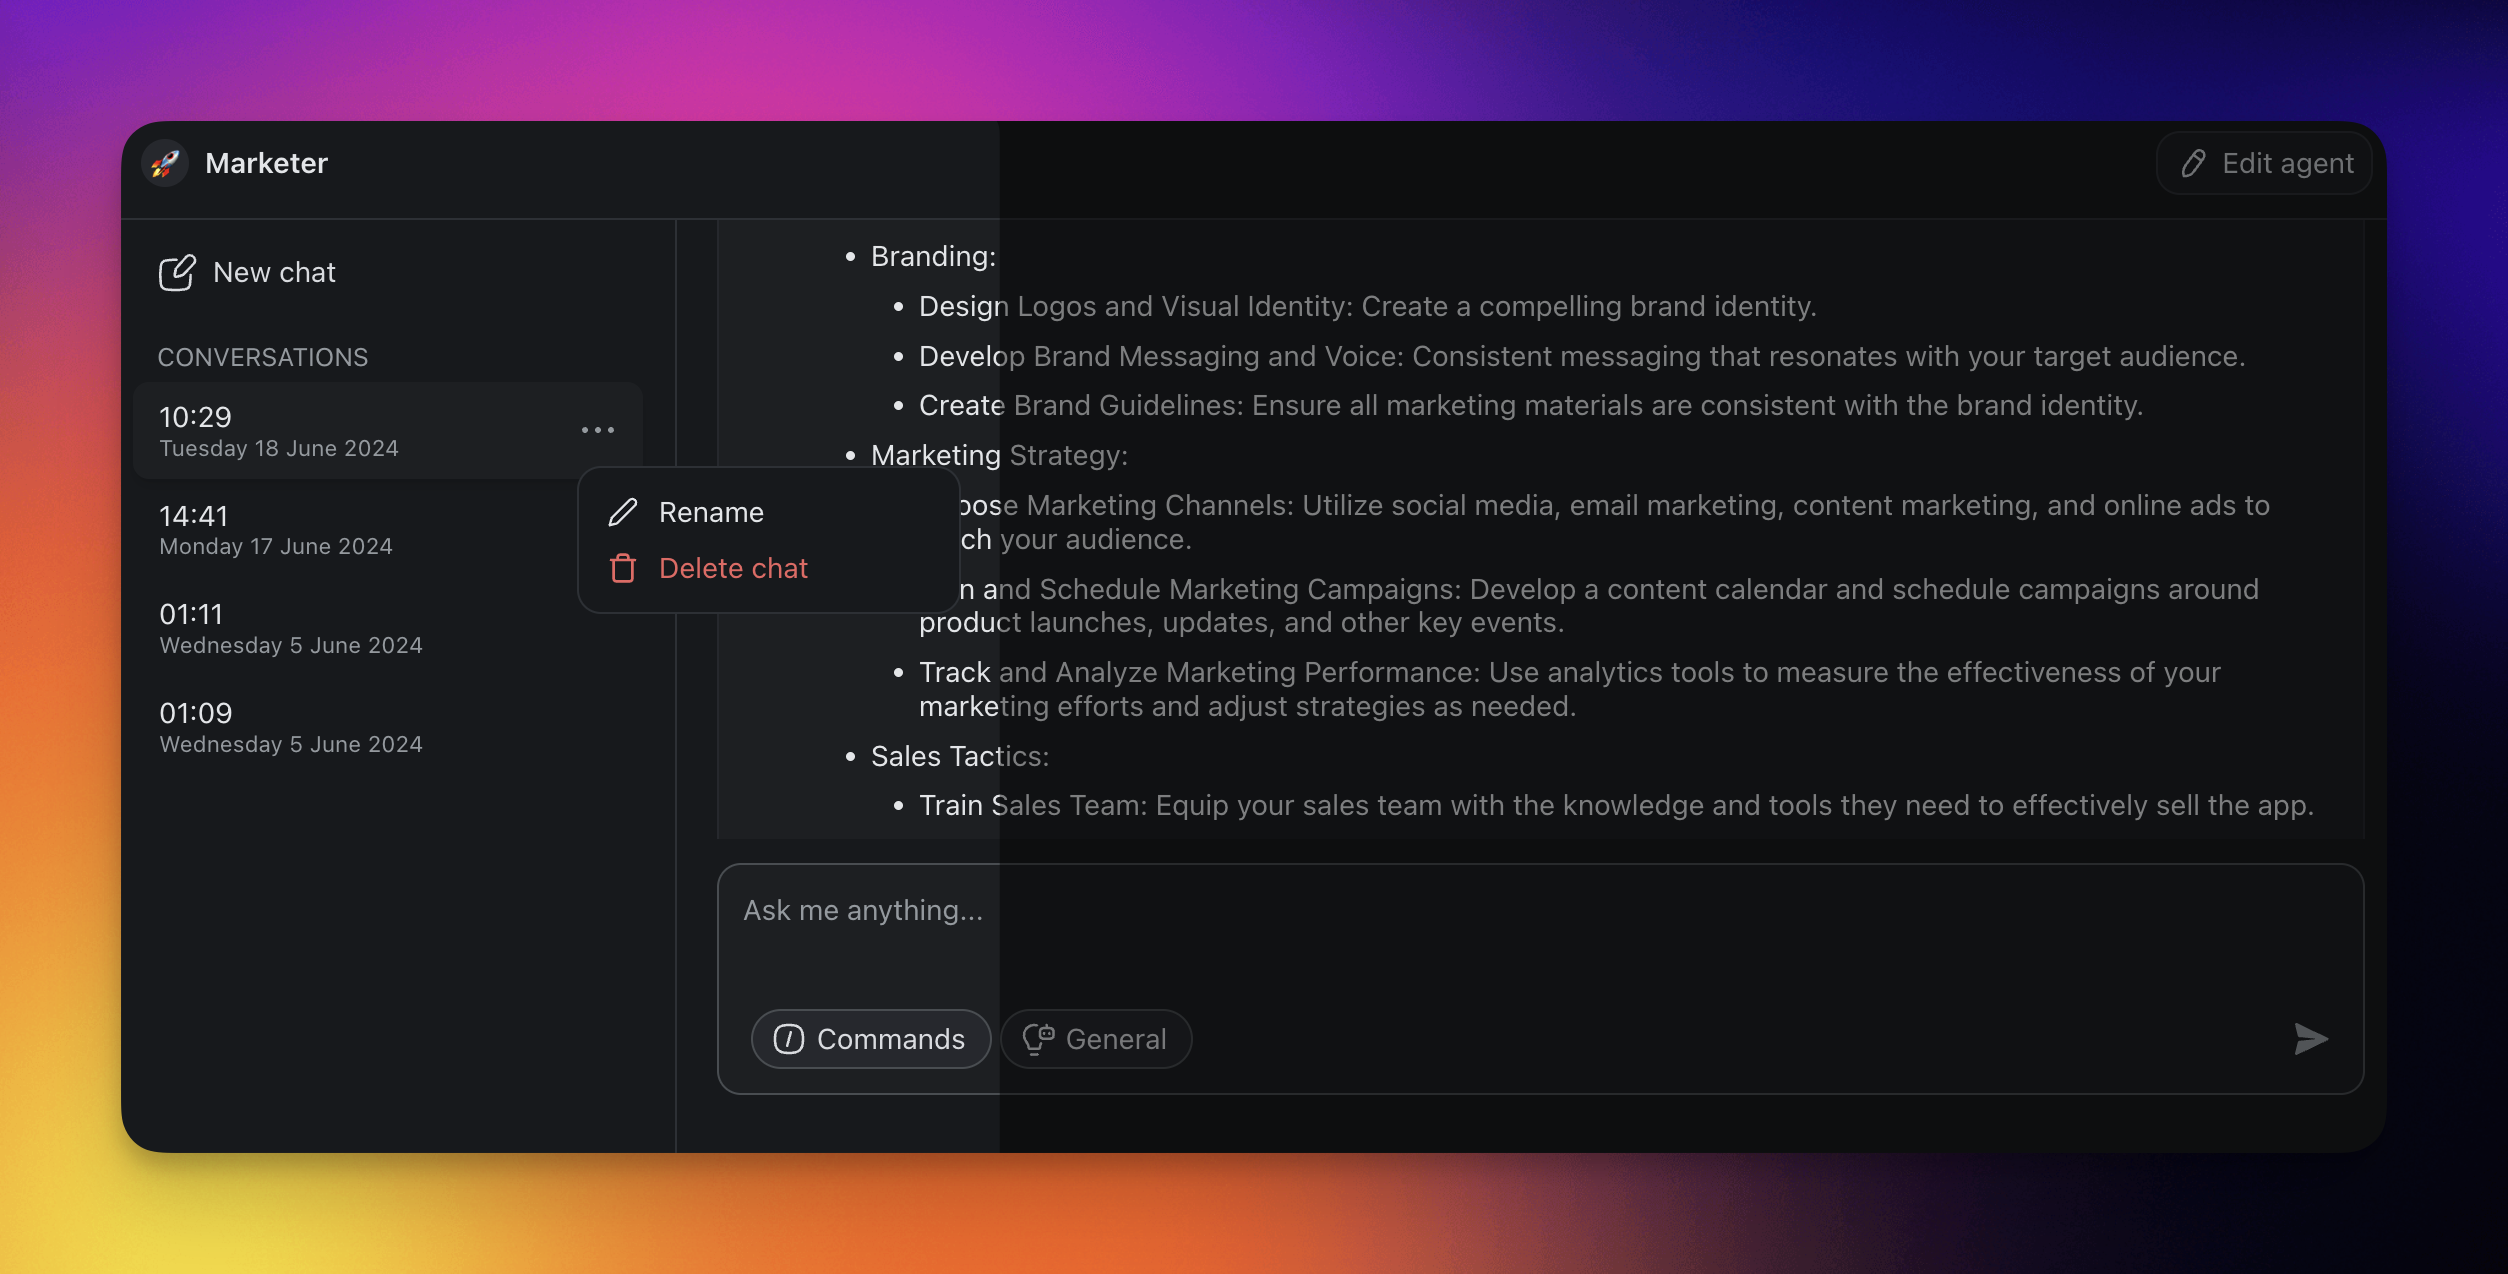
Click the time-stamped items in the sidebar to resume conversations.
Click the three dots ··· next to a thread to remove or rename it.
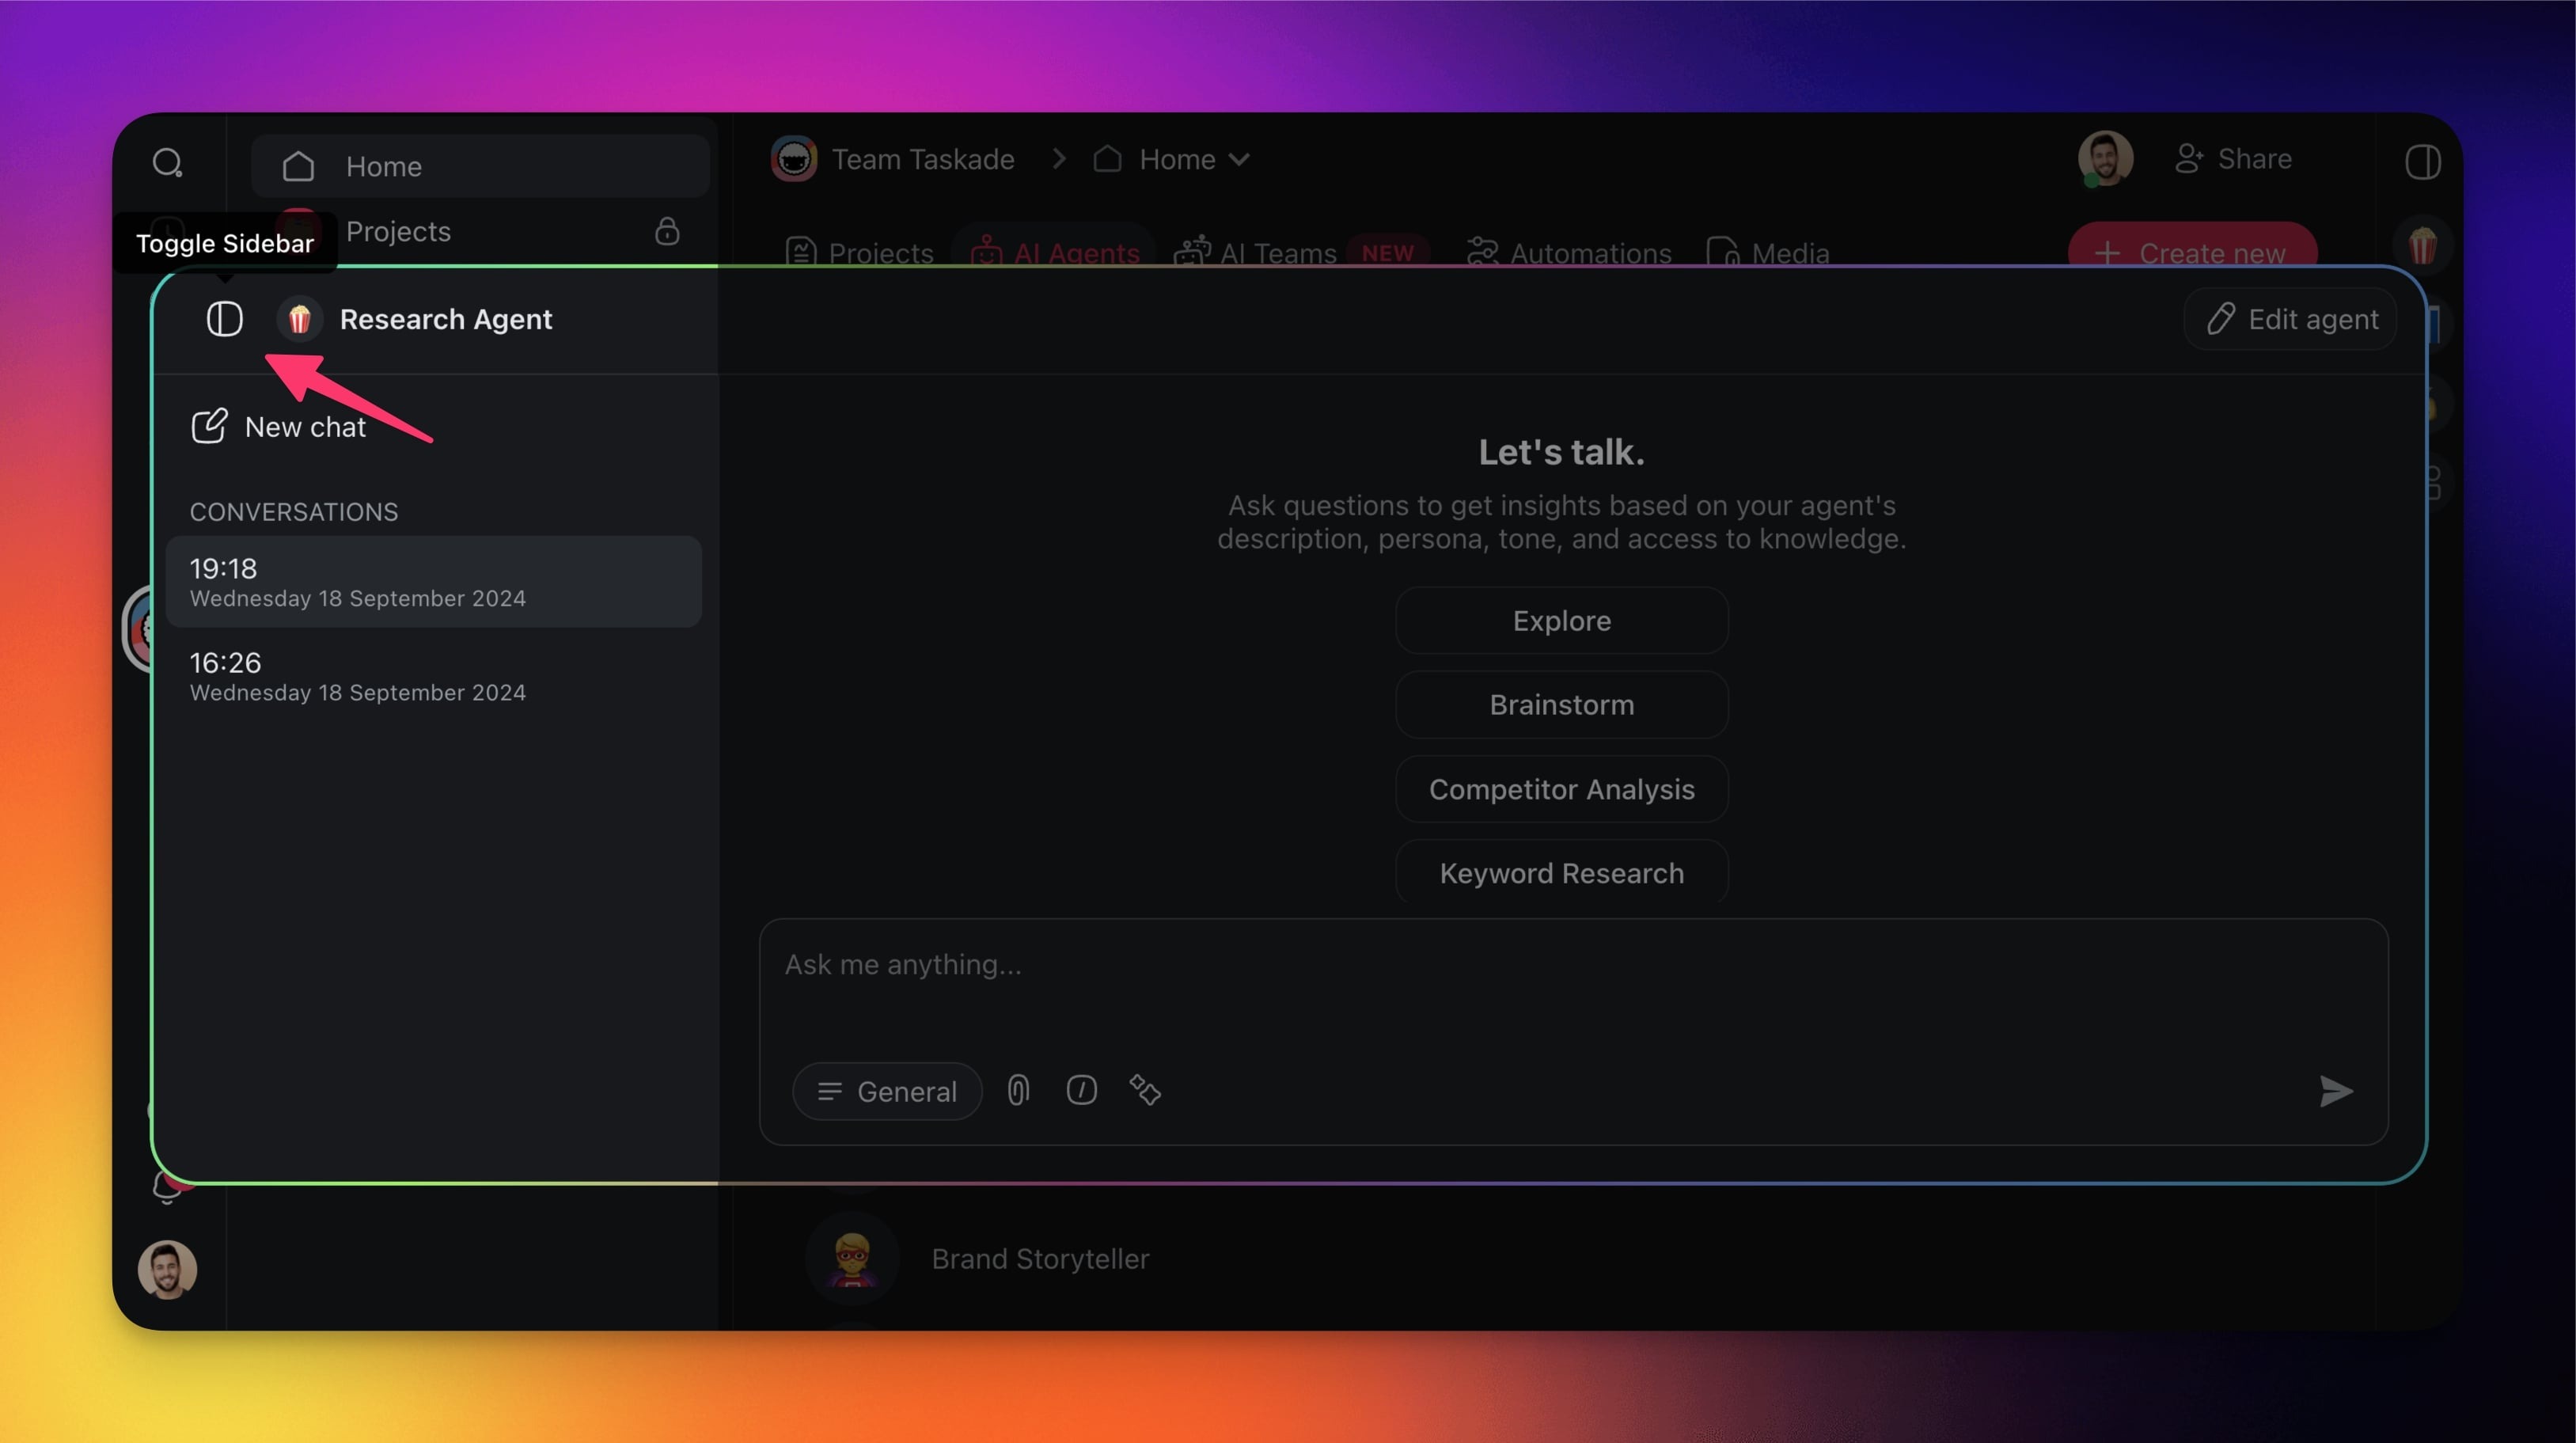
- Click the Toggle Sidebar button in the top-right corner to hide chat threads.
Enable Fullscreen Chat
Chat with your agents in full screen to keep conversations in focus:
Choose an agent from the Agent Sidebar.
Click

to open the Agent Modal.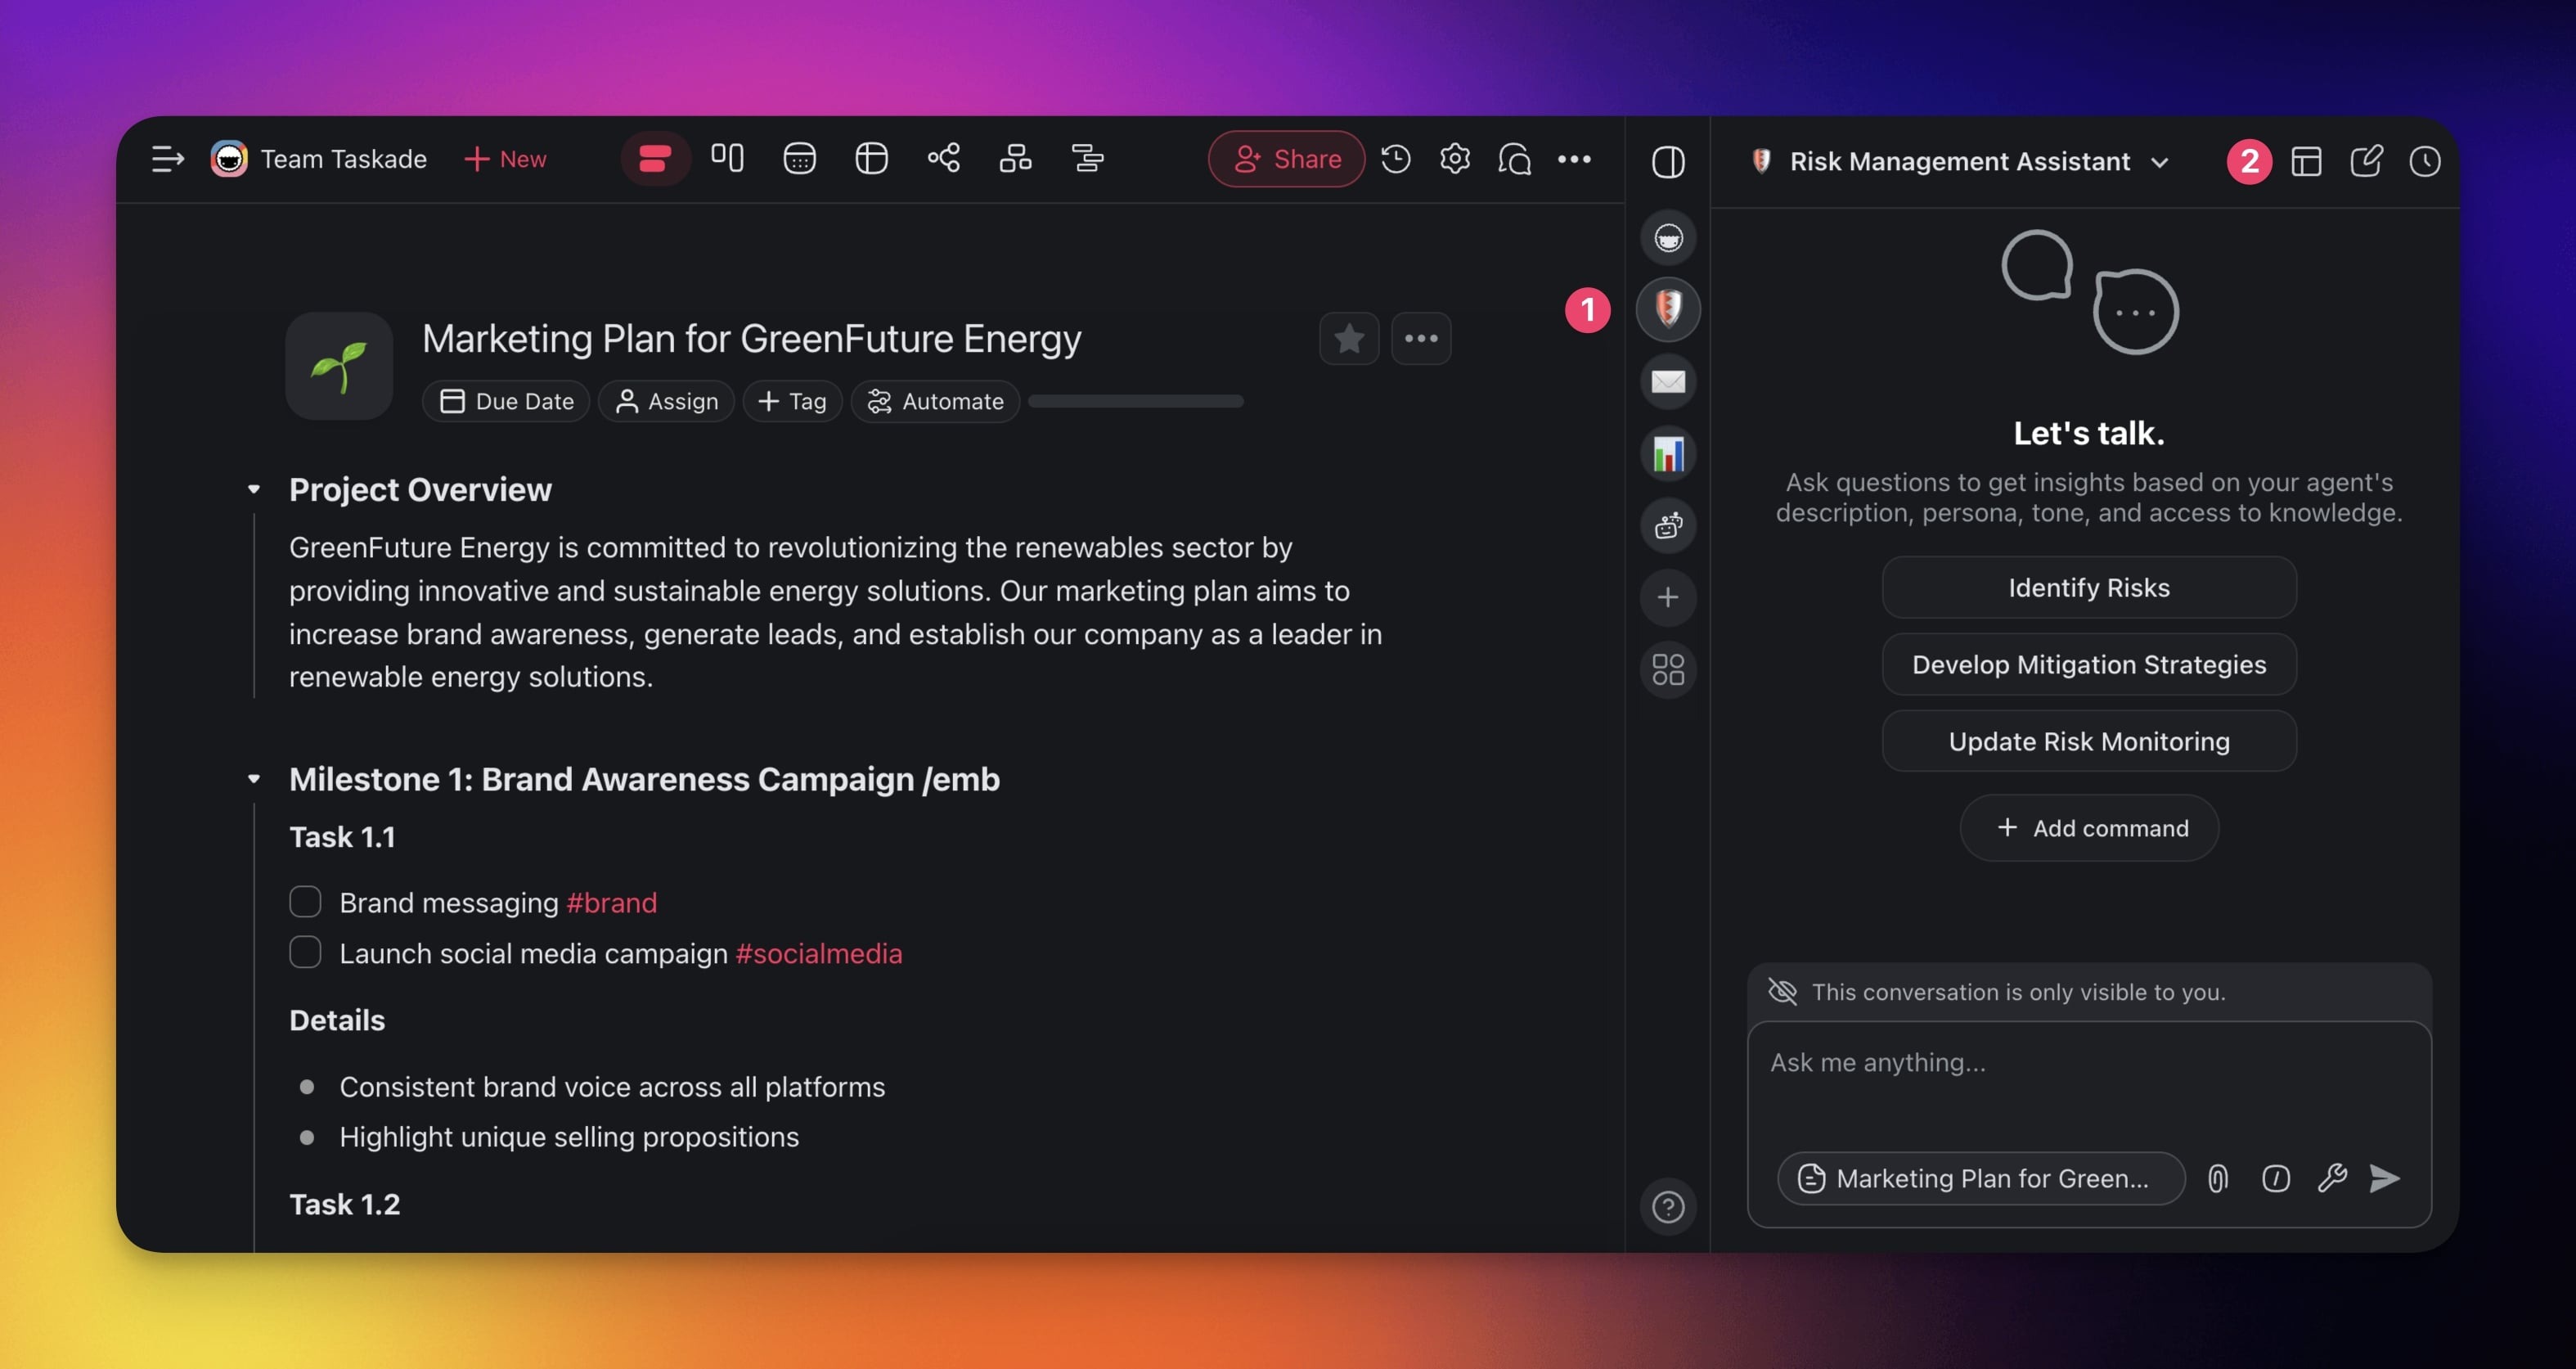
(1) Click

to open the chat in a new window.(2) Click

to enable fullscreen mode.
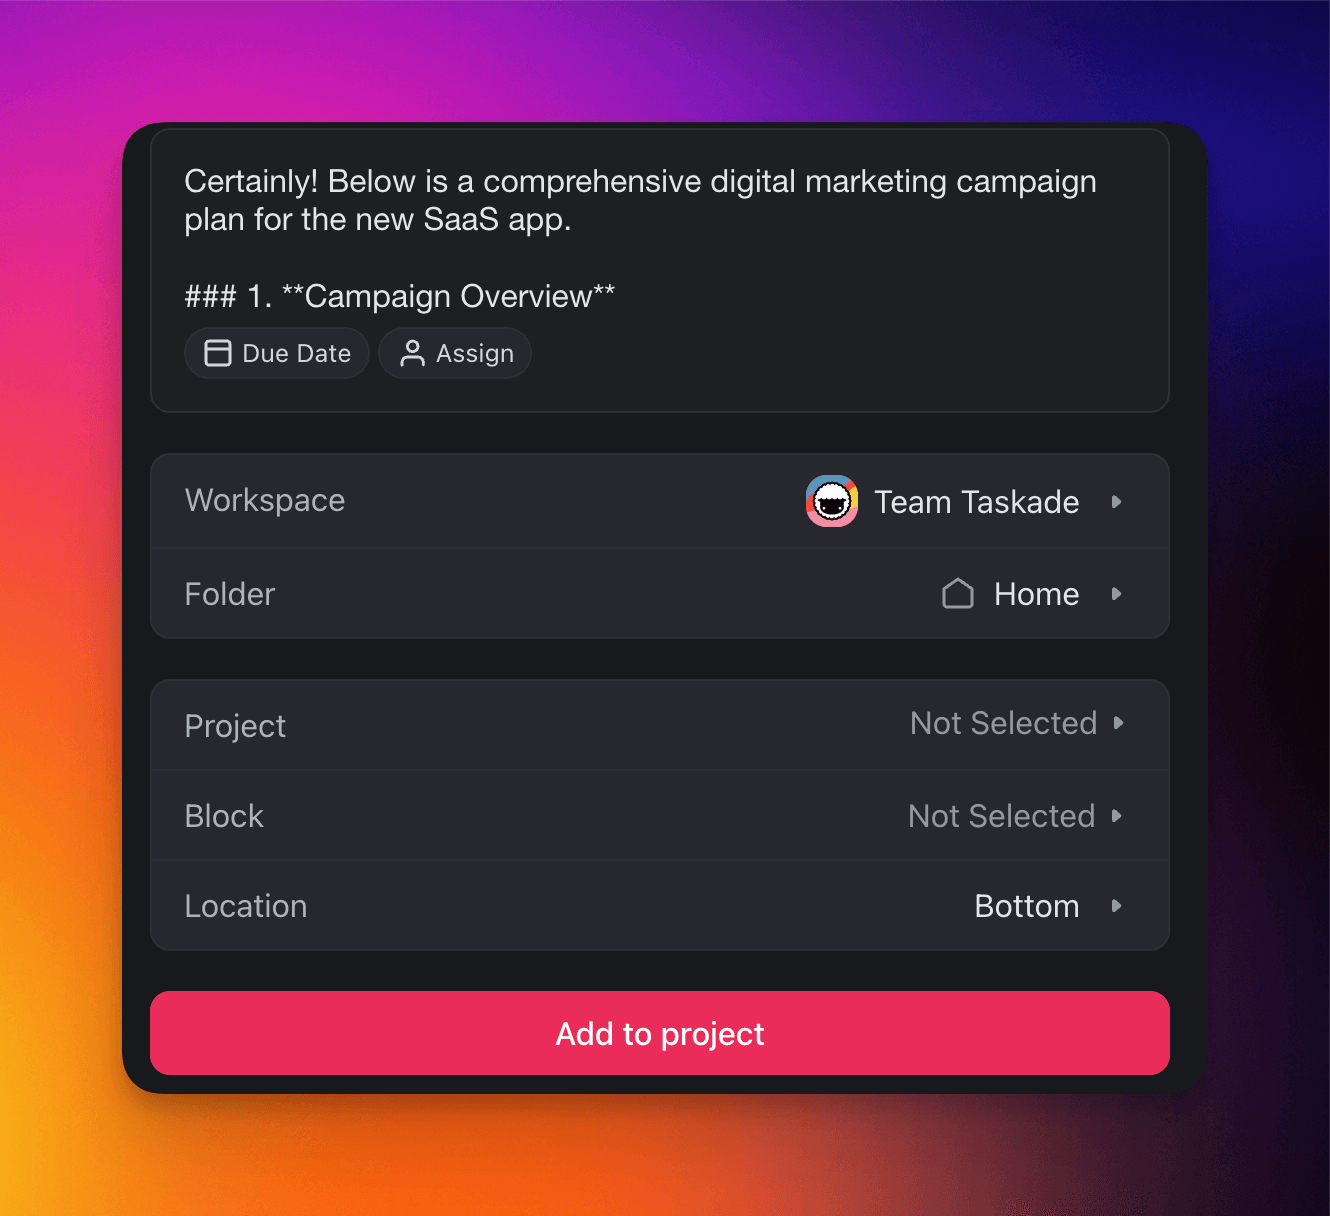
Quick Add
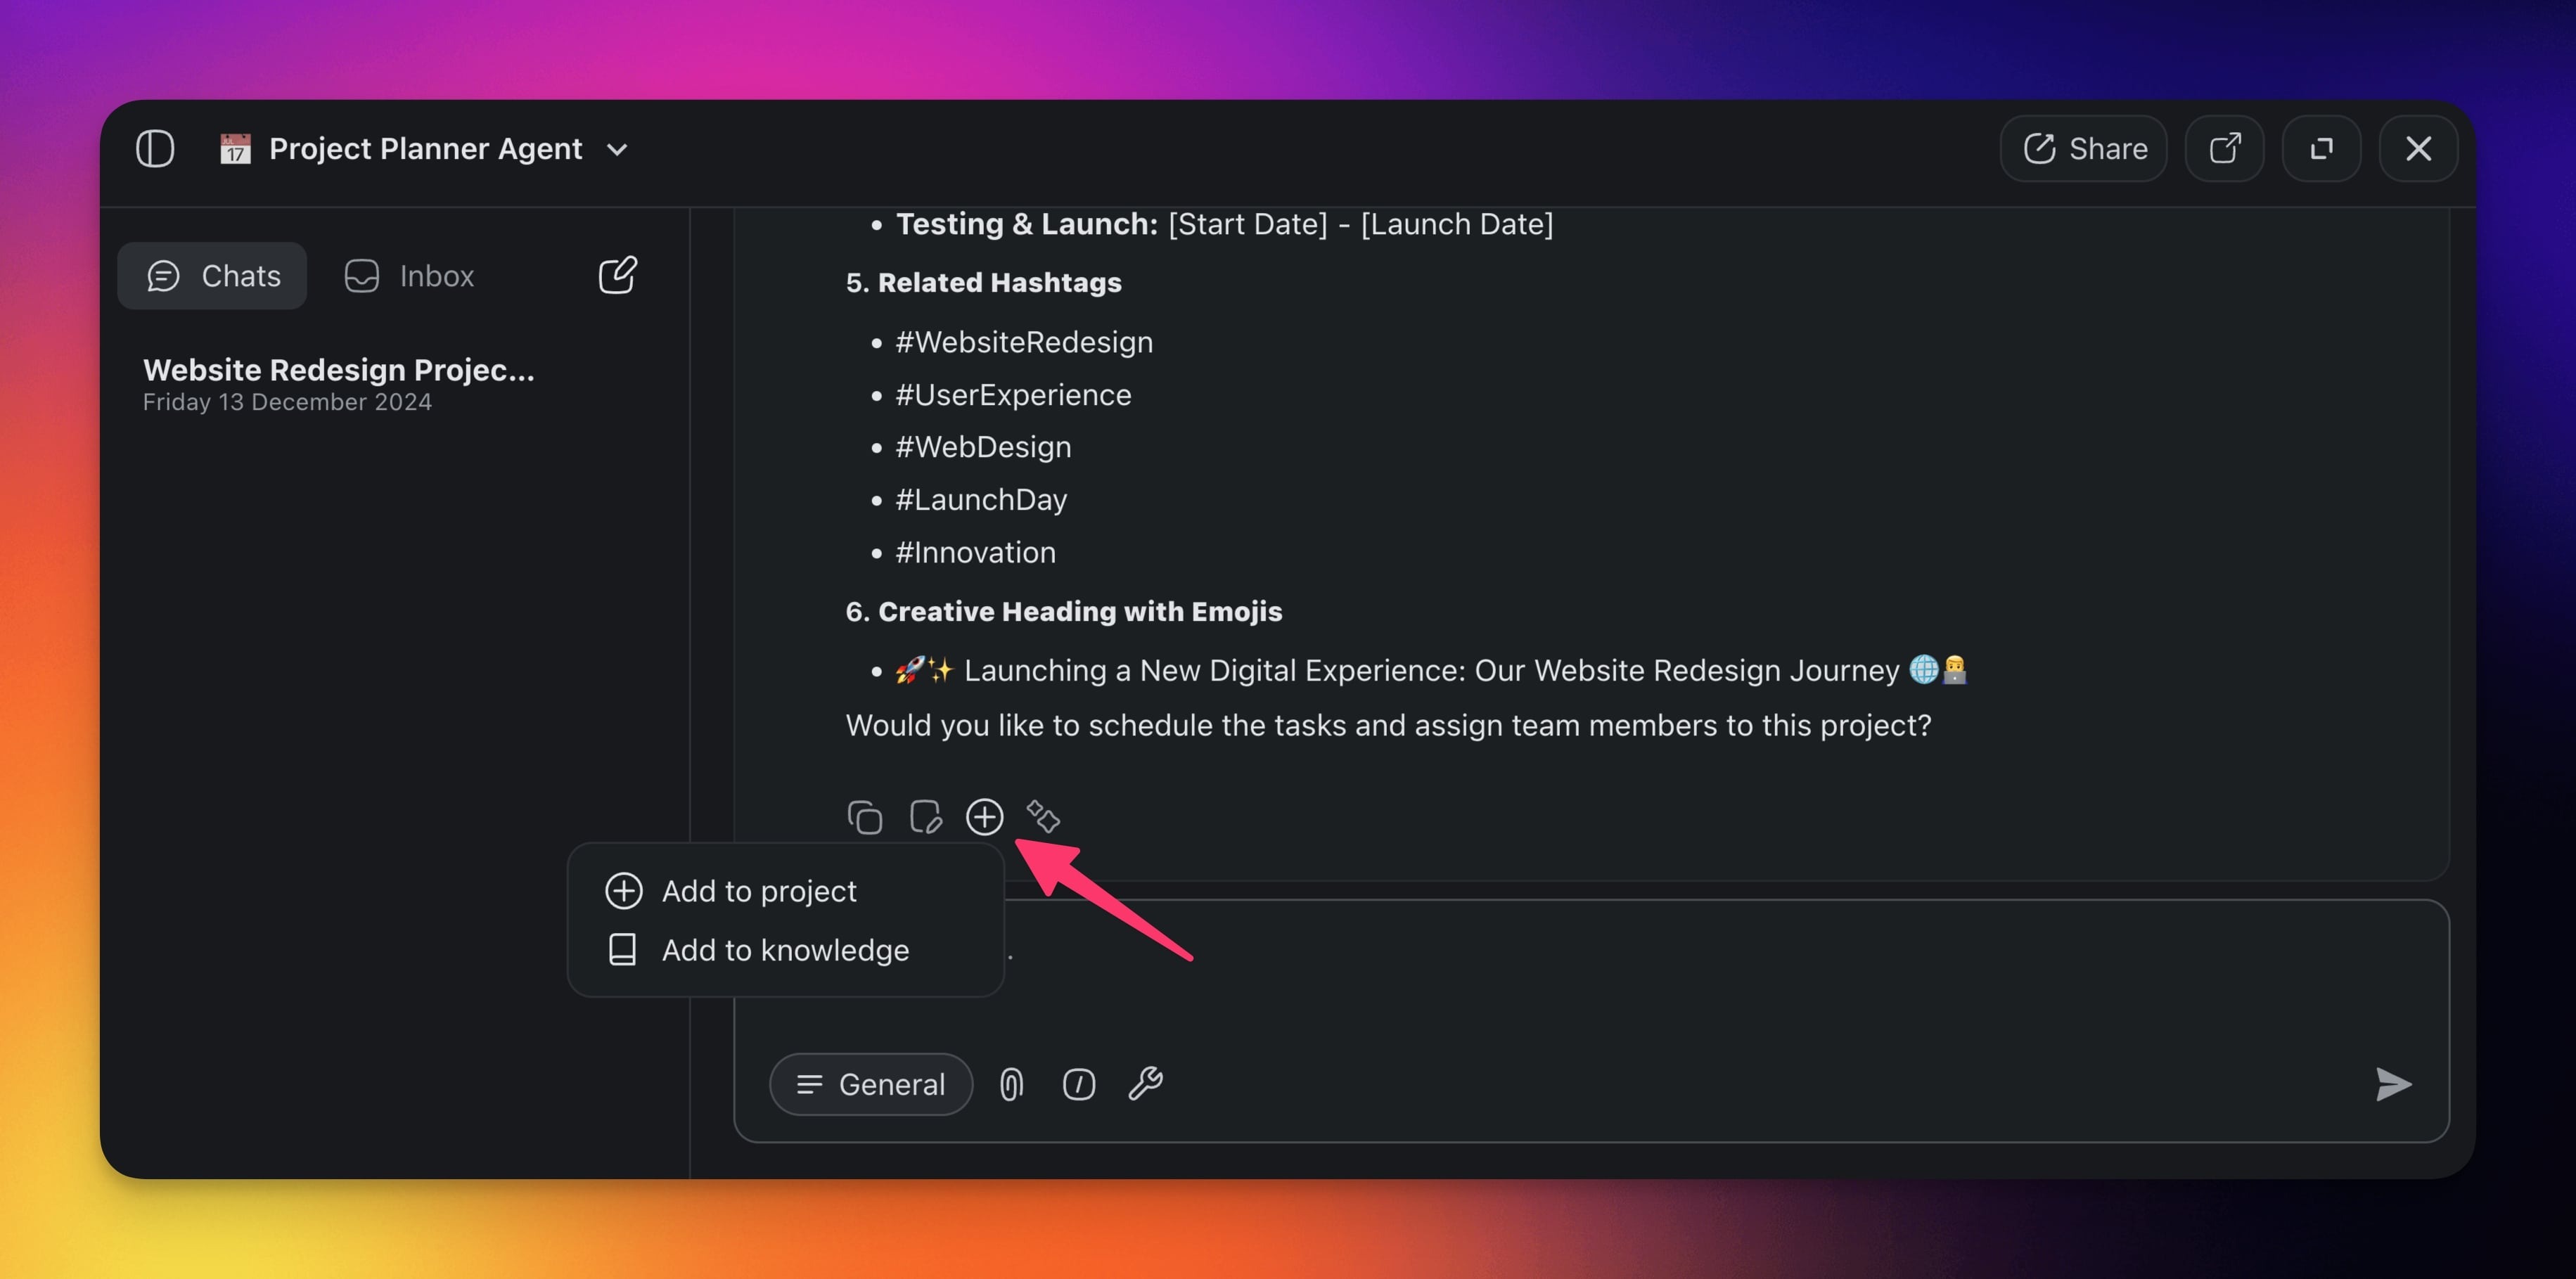
You can instantly add any agent message into a project with Quick Add.
- Start a new chat with your agent.
- Click the ➕ icon under the agent's message.
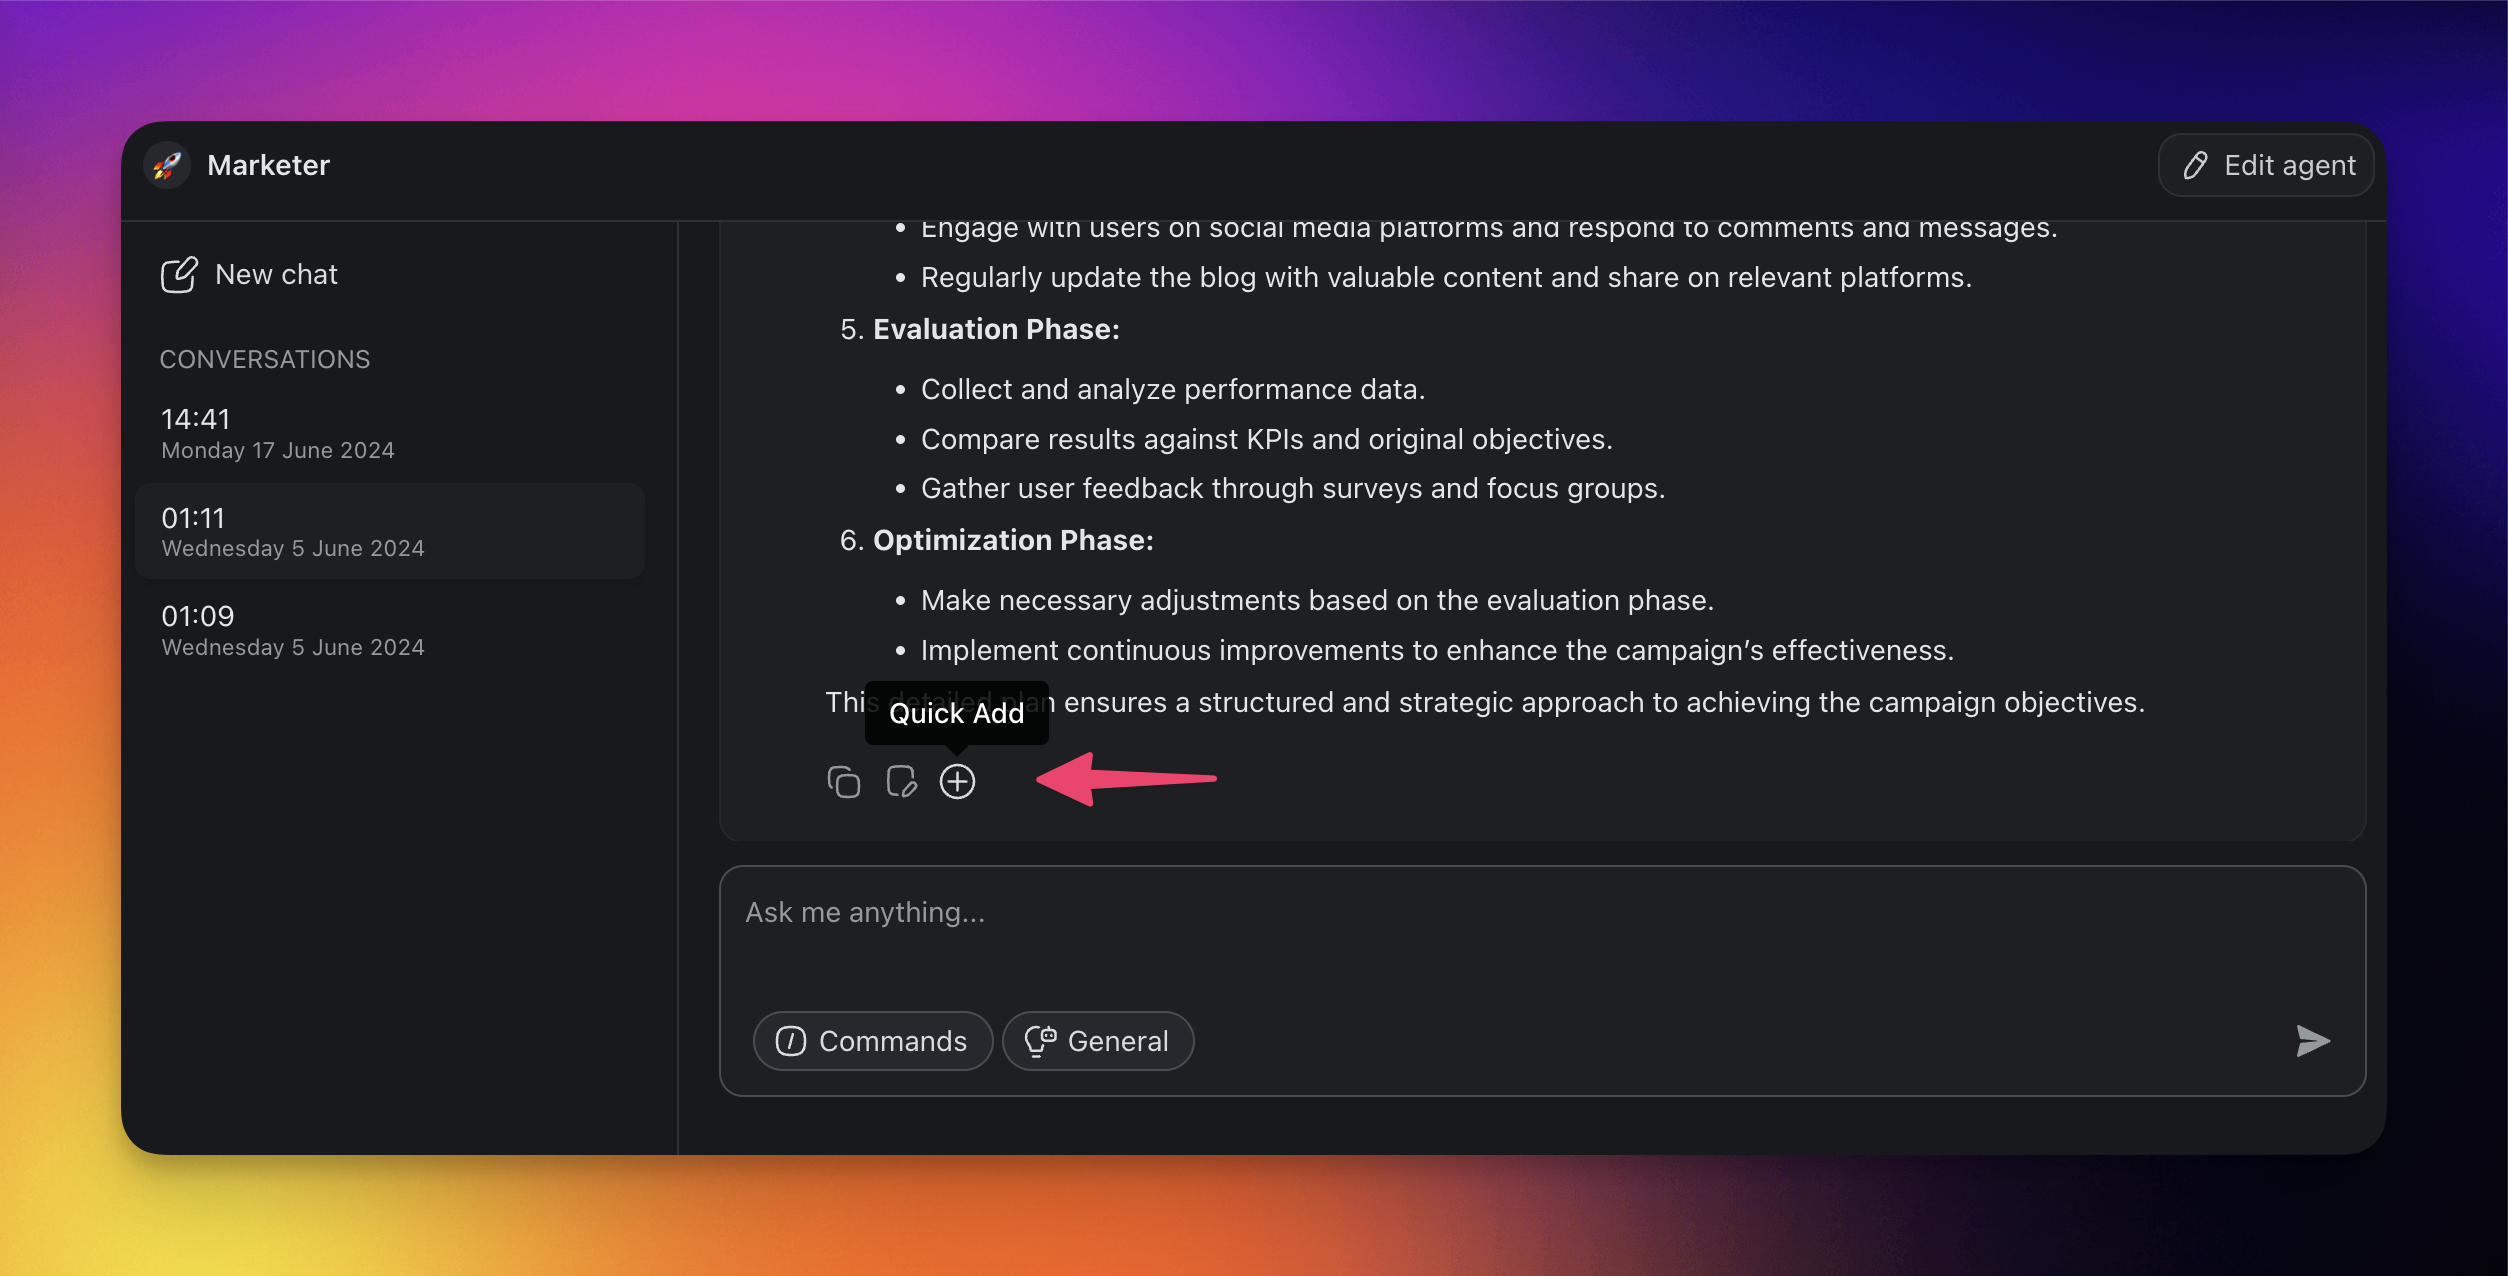
- Choose where you want to add the output.
- Click Add to project to confirm.
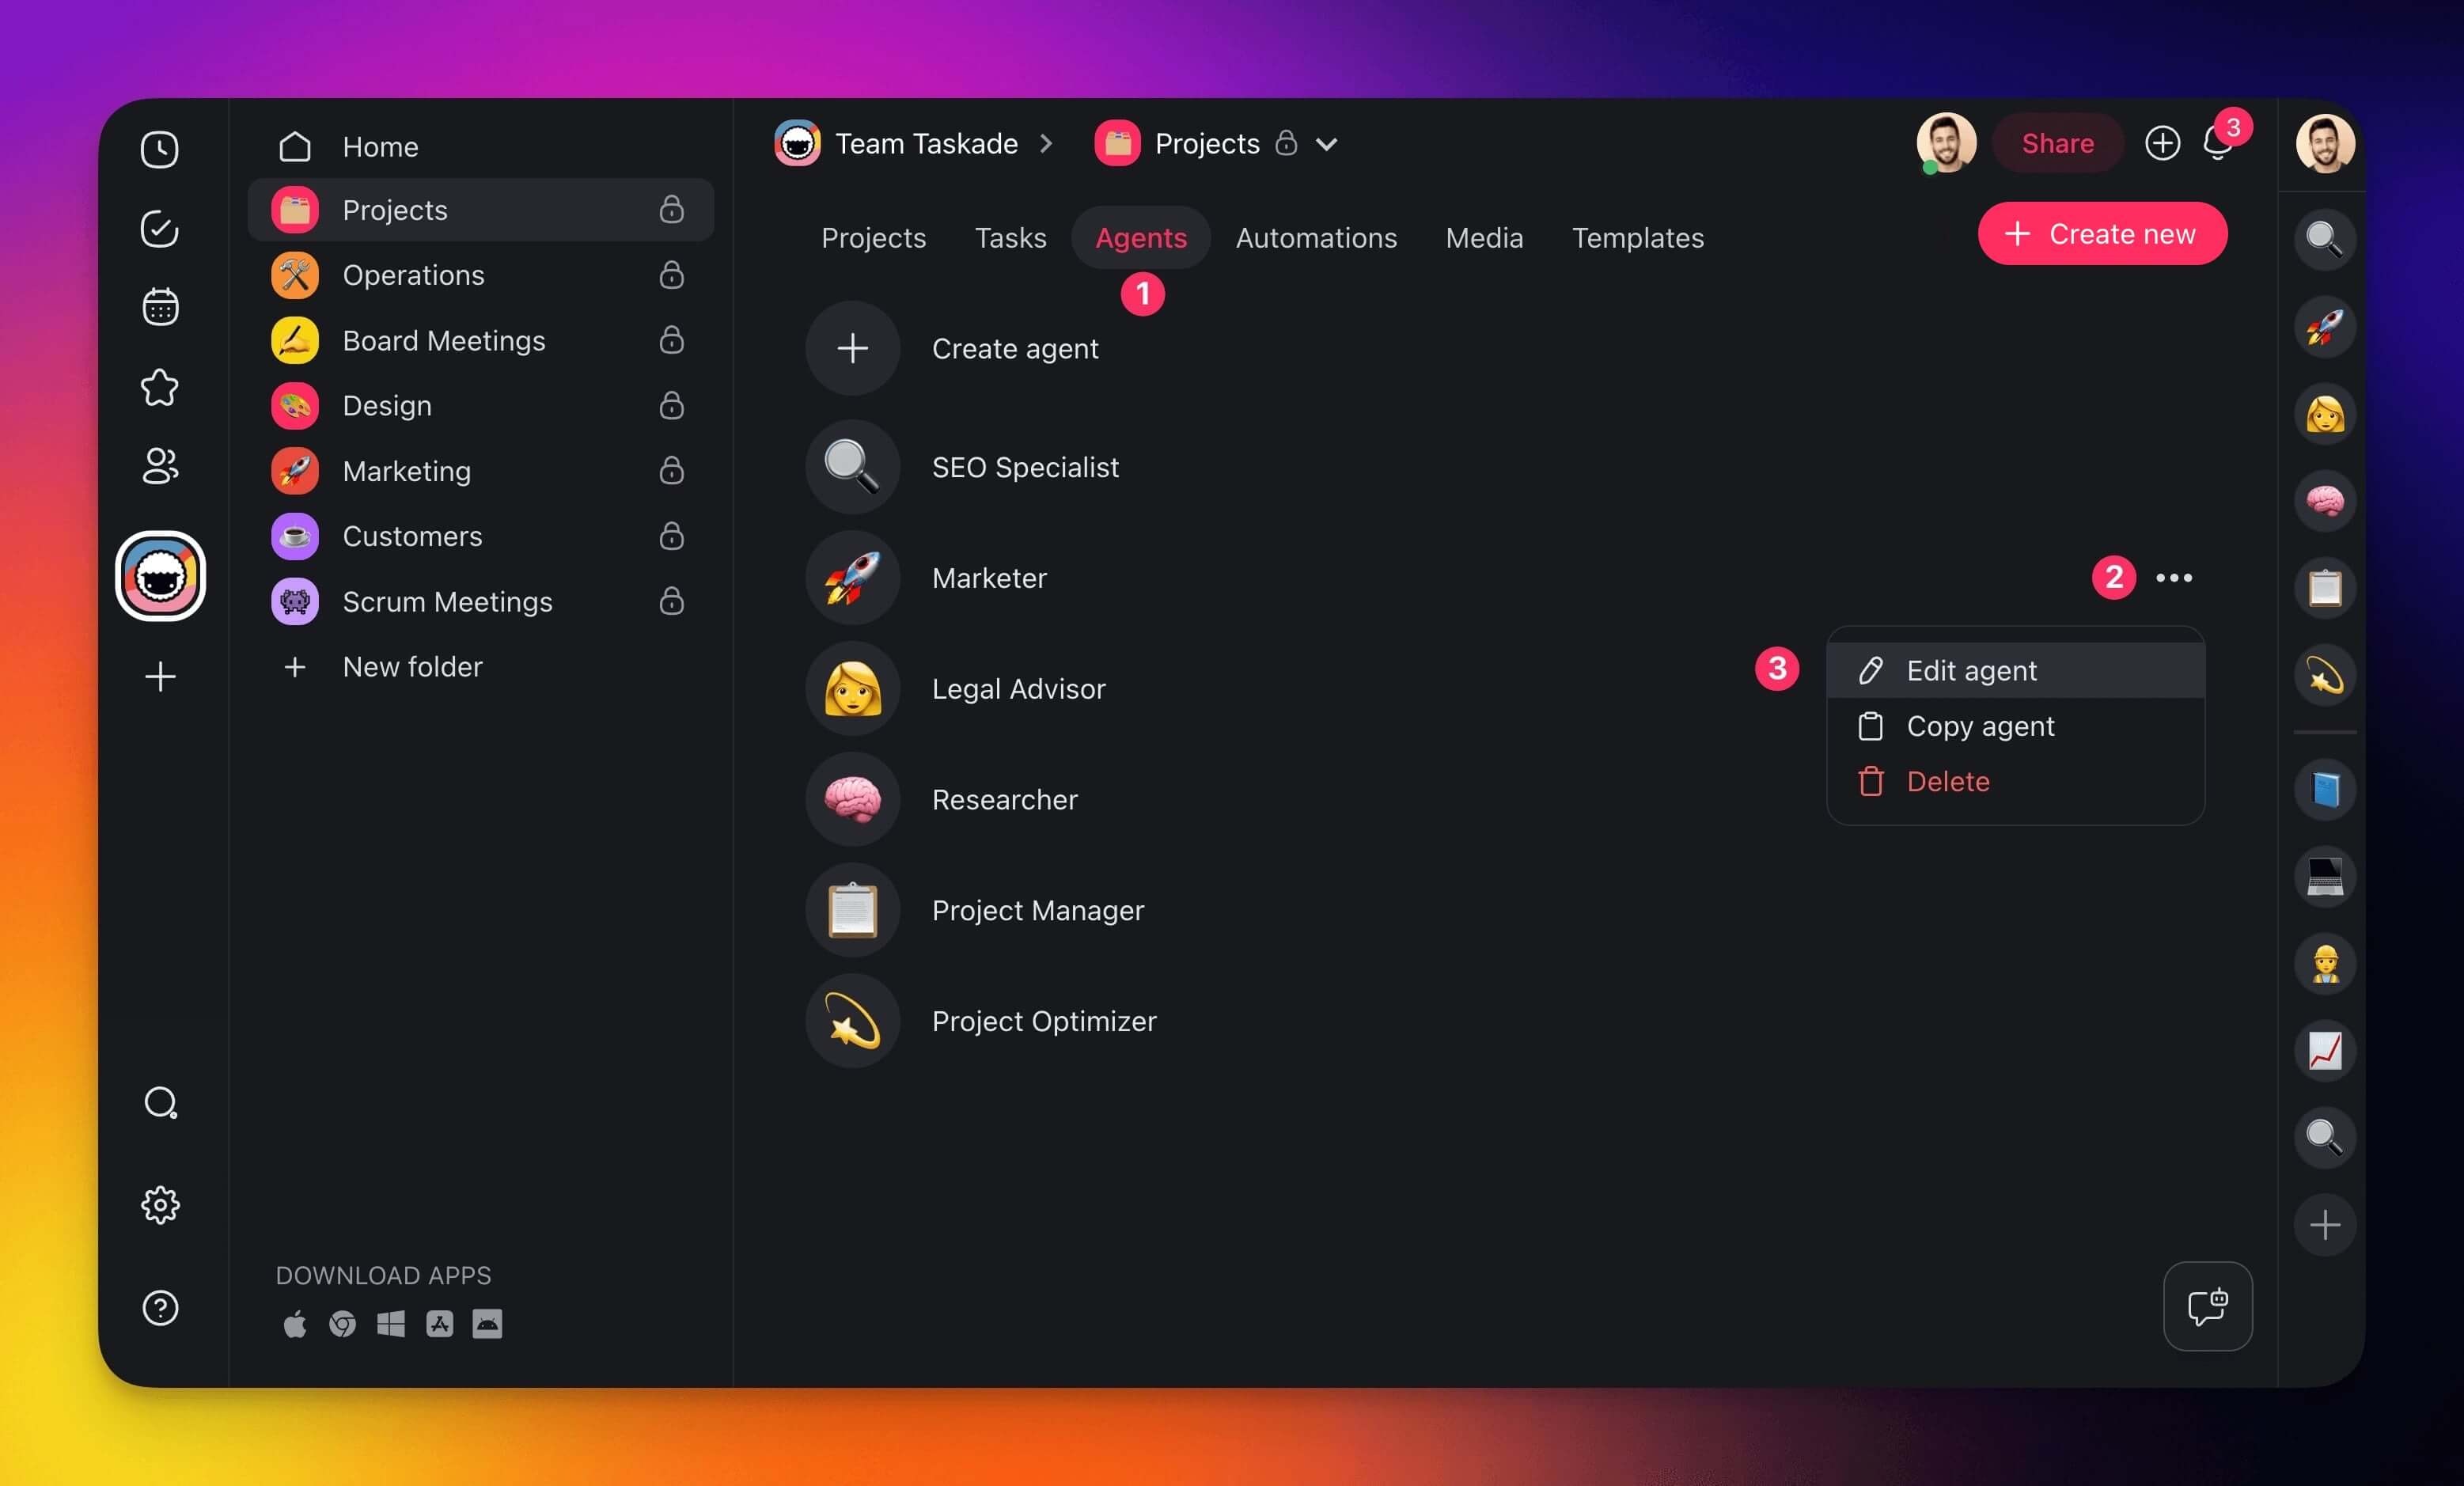
Organize the Agent Sidebar
The agent sidebar lists your agents within a workspace. Here's how to customize it:
- Navigate to your workspace or folder.
- Click the ⊞ Manage agents button.

Hover the cursor over any of your agents.
Click the star next to the agent's name to add it to the sidebar.
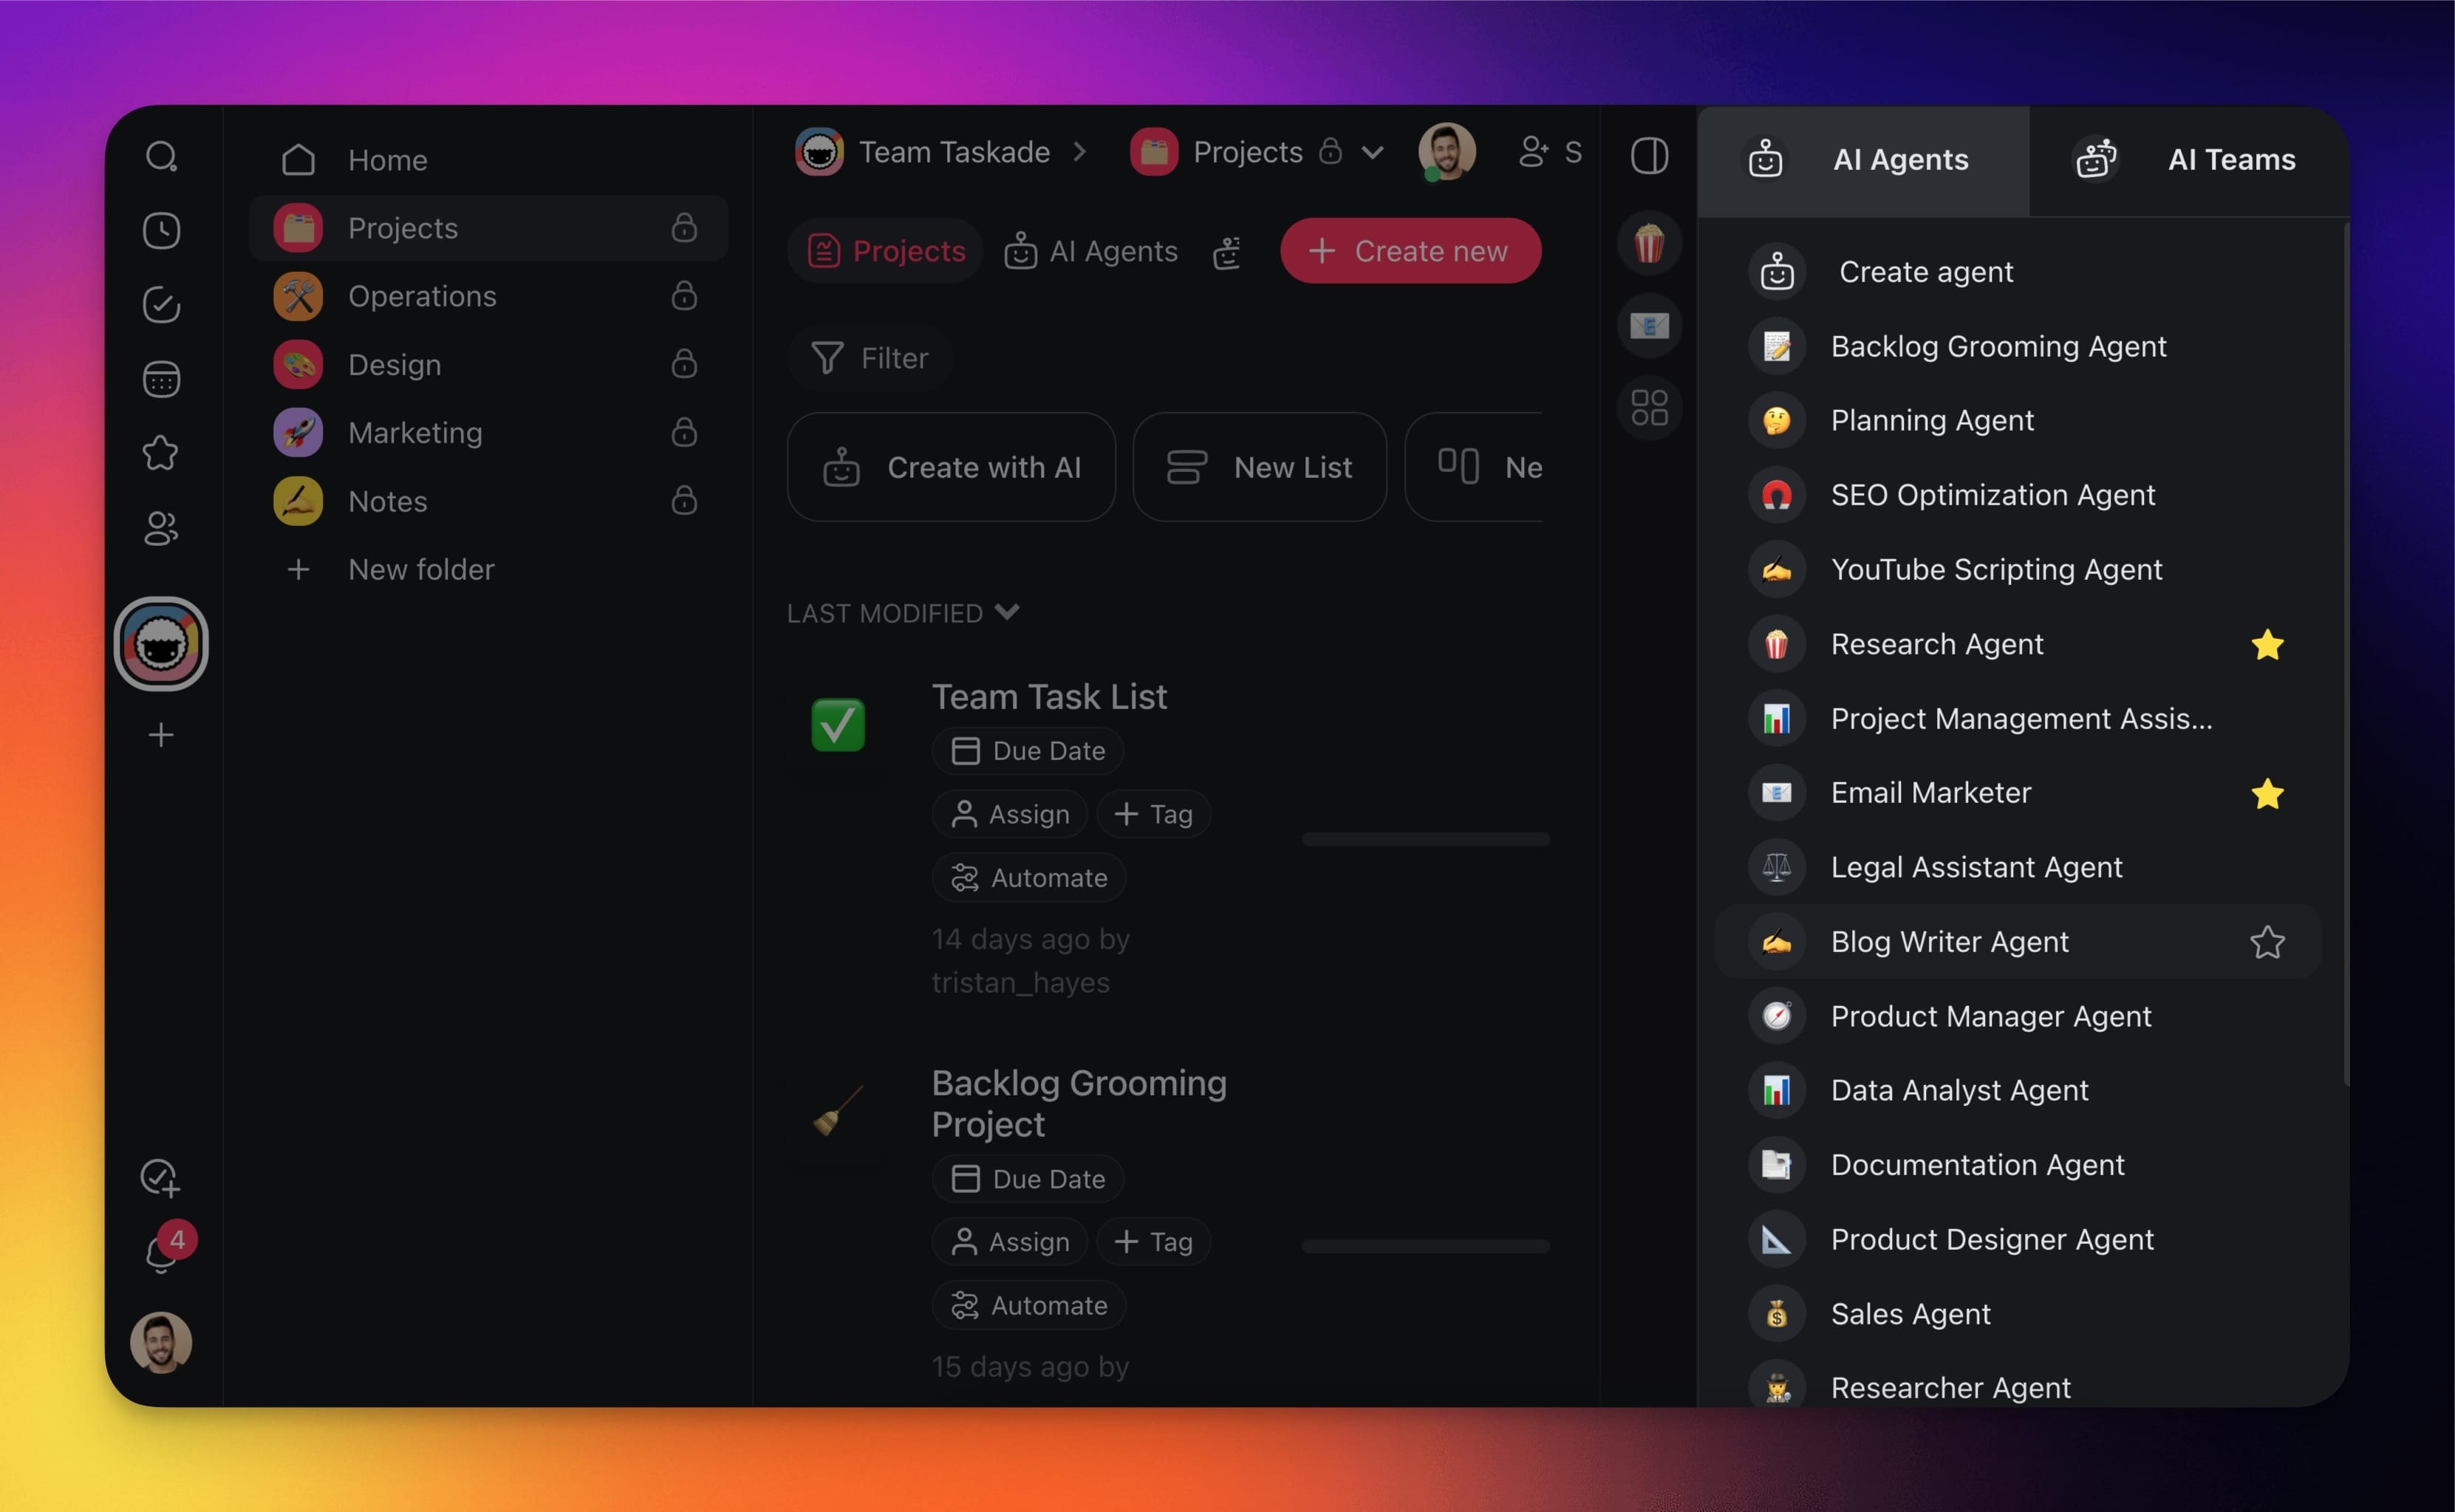
Click and hold an icon representing an agent to reorder it.
Release the mouse button to drop the agent in its new place.
Format Messages
You can use Markdown syntax to format and structure your prompts:
💡 Visit: Markdown Support to learn more.
| 🛠️ Feature | ⌨️ Syntax |
|---|---|
| Bold | bold |
| Italic | italic |
| Underline | Double underline test |
| Block quote | > block quote |
| Strikethrough | |
| Inline code | inline code |
| Code block | codeblock |
| Strikethrough | |
| Unordered list | - or * |
| Ordered list | 1., 2., 3., etc. |
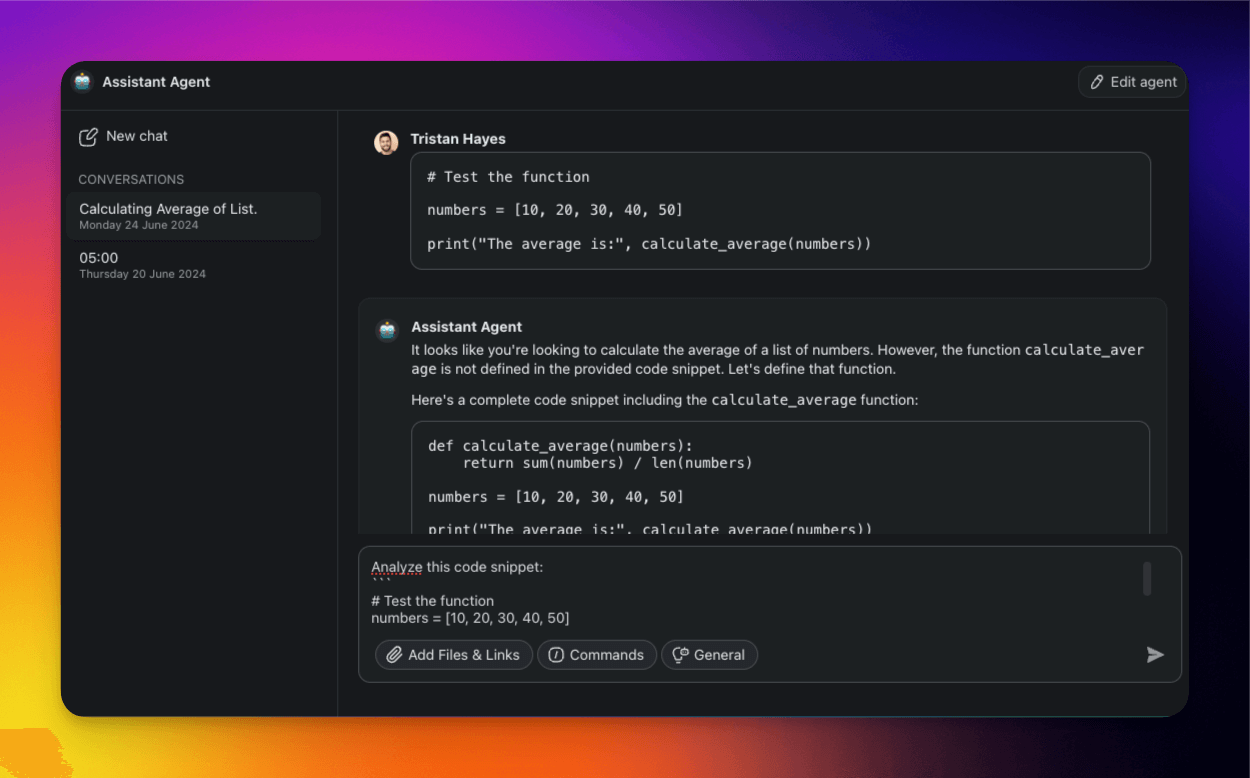
Code Block Support
Agents can generate code snippets in the agent chat. This feature is useful for quick prototyping, debugging, and even learning new programming concepts.
Start a conversation with your agent.
Ask the agent to generate code.
e.g. "generate a Python function to sort a list”
3. Hover the mouse cursor over the code block.
4. Click **Copy** to save the code block to the clipboard.
<iframe src="https://www.youtube.com/embed/IniIdZ-6i6A?rel=0" title="AI Agent Chat advanced features video" width="100%" height="400" allow="autoplay; fullscreen" allowfullscreen style="border: none"></iframe>
---
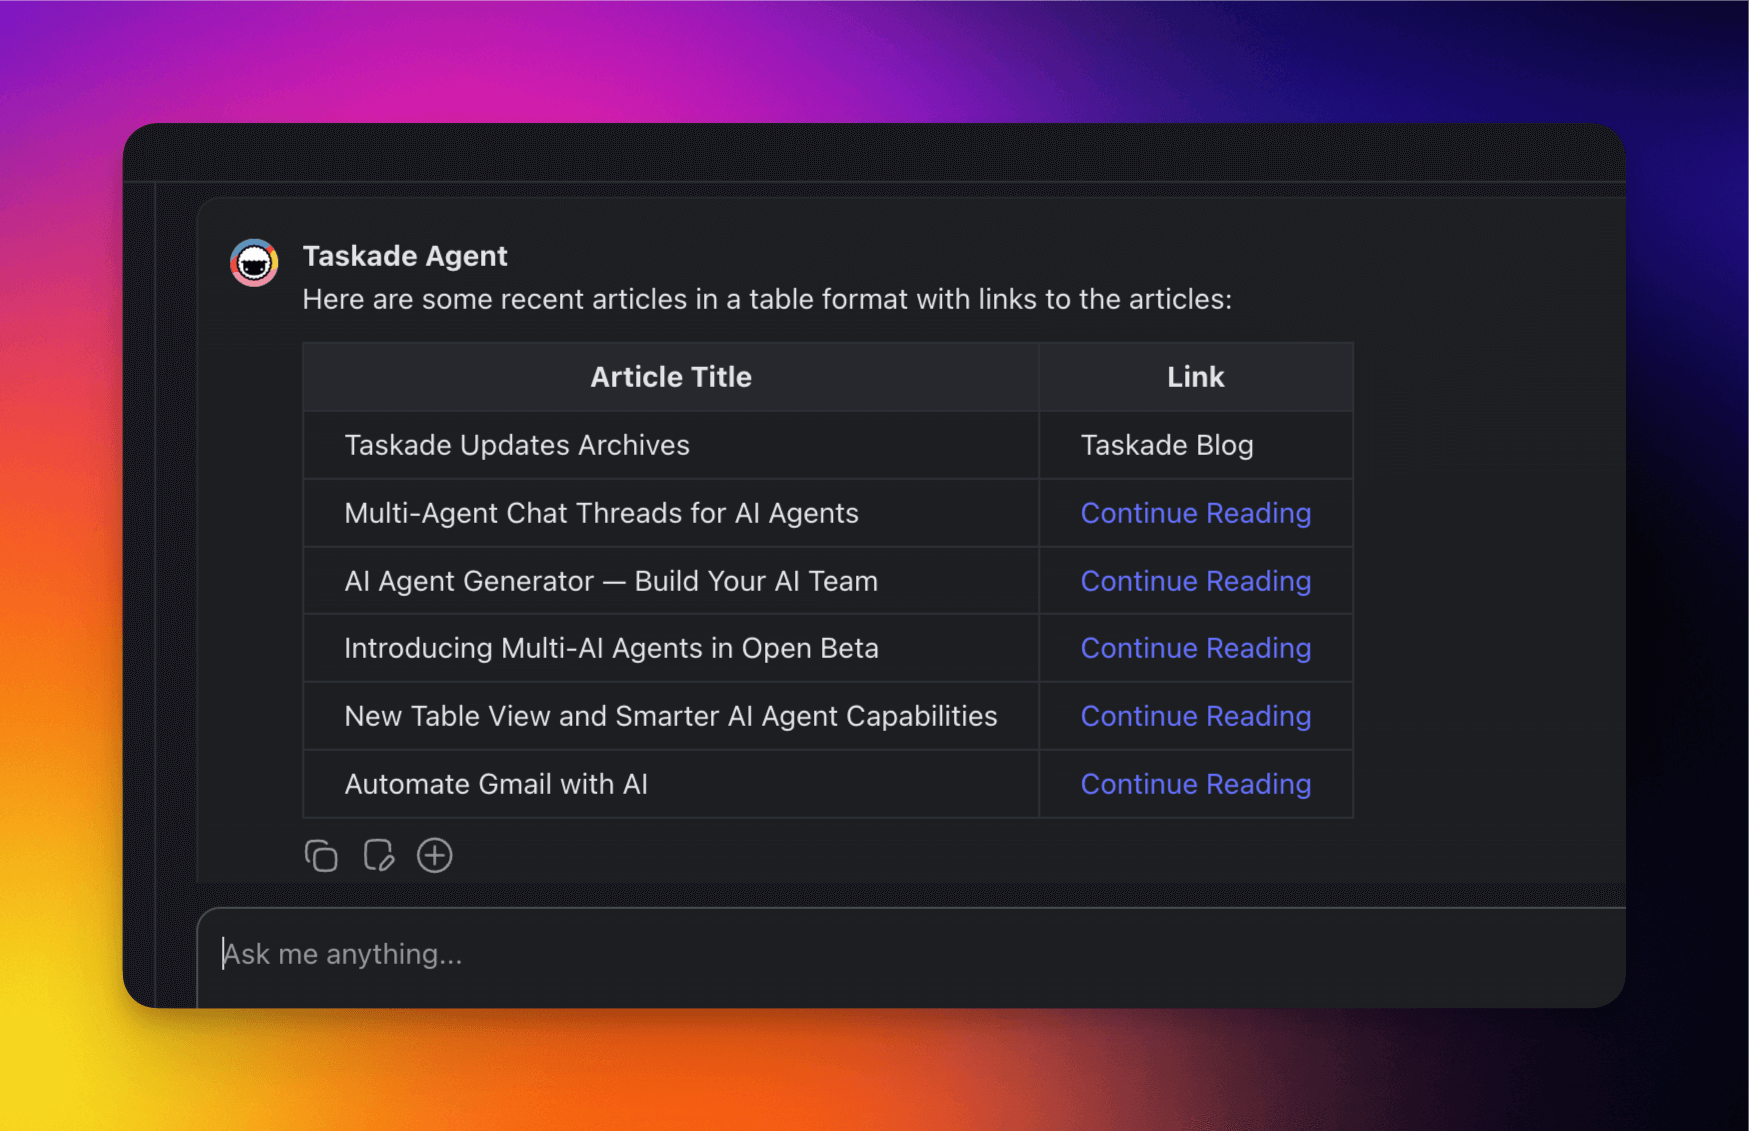
### Tables
Agents can render data in table format to make it easier to read and analyze. This is useful for organizing information in reports, comparisons, and schedules.
1. Start a conversation with your agent.
2. Ask the agent to generate in a table format.
- ```
e.g. “generate a table that summarizes global sales of EVs"
- Hover the mouse cursor over the table.
- Click Copy to save the table to the clipboard.
Use Agent Responses
Use quick chat actions to make the most of conversations with your agents:
Click the ⨁ Plus button to add the output to:
➕ An existing project
📓 Agent knowledge

- Click the 📑 Copy button to save the output to the clipboard.

Click the 📝 Create new button use the output:
📄 In a new project
🌱 As a seed for AI Project Studio
In an 🔄 Automation Flow

Agent Chat supports 15+ frontier models from OpenAI, Anthropic, Google, and leading open-source providers. Select your preferred model when configuring the agent or switch during a conversation. See AI Models for the full list and Model Credits for cost details.
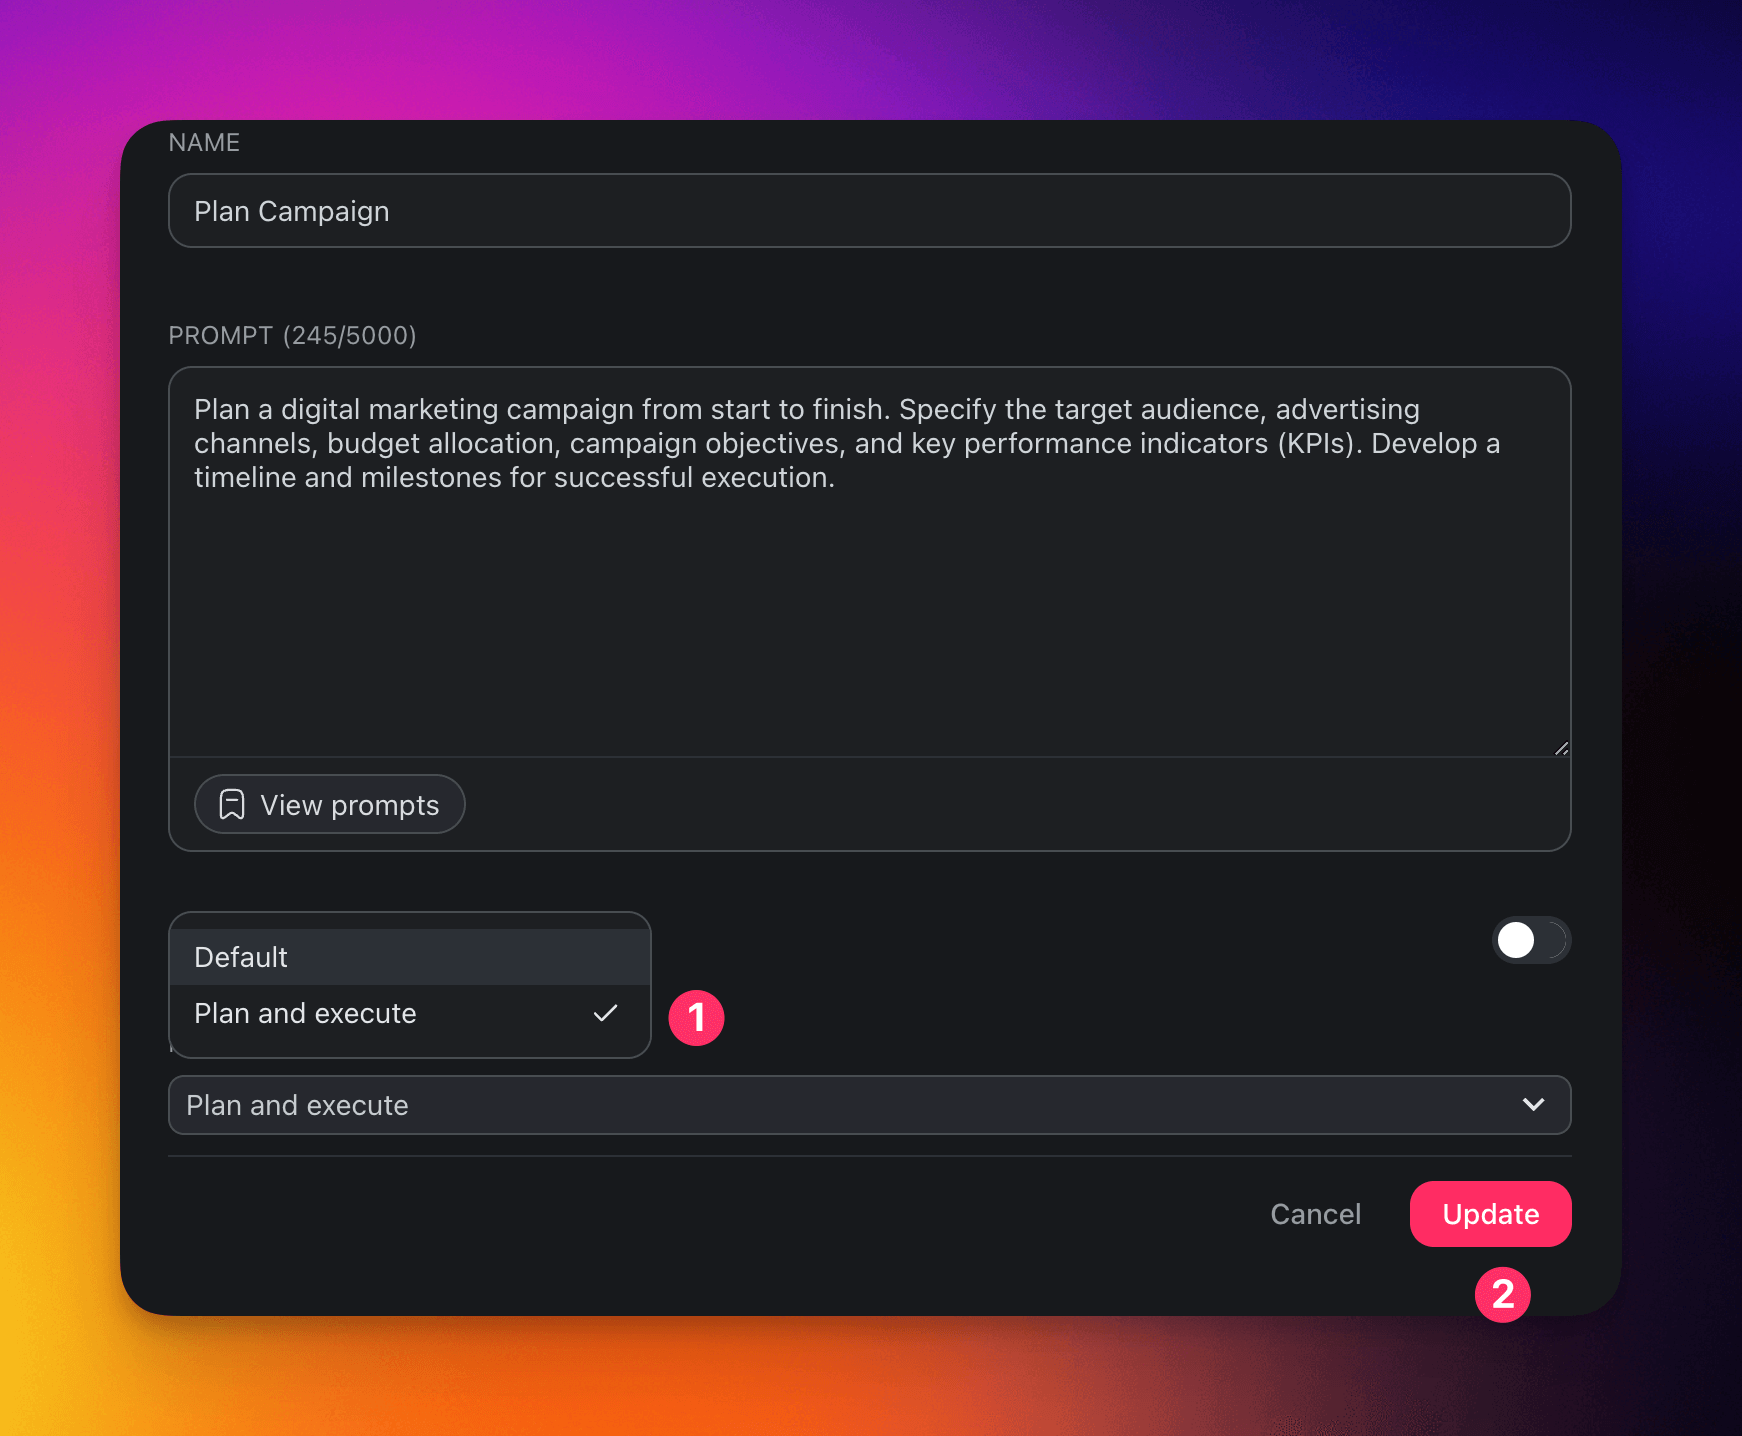
Command Modes
Command modes dictate how your custom AI agents approach tasks, whether by following specific instructions or by autonomously setting goals and iteratively working towards them. Currently, there are two primary modes:
| 🟢 Default | 🔵 Plan & Execute |
|---|---|
| The agent operates directly based on your prompt without setting any additional goals. It focuses on generating content or completing tasks following the instructions provided in a prompt. | The agent sets an overarching goal based on your opening prompt and then iteratively works towards achieving that goal. This mode is more autonomous and is designed to handle complex tasks. |

Change Command Modes
Follow these steps to change modes for your agent's commands:
- Open the Agents tab in your workspace.
- Click ··· next to an agent ➡ Edit agent.
- Choose the Commands tab on the left.
- Select an existing command or click ➕ New command.
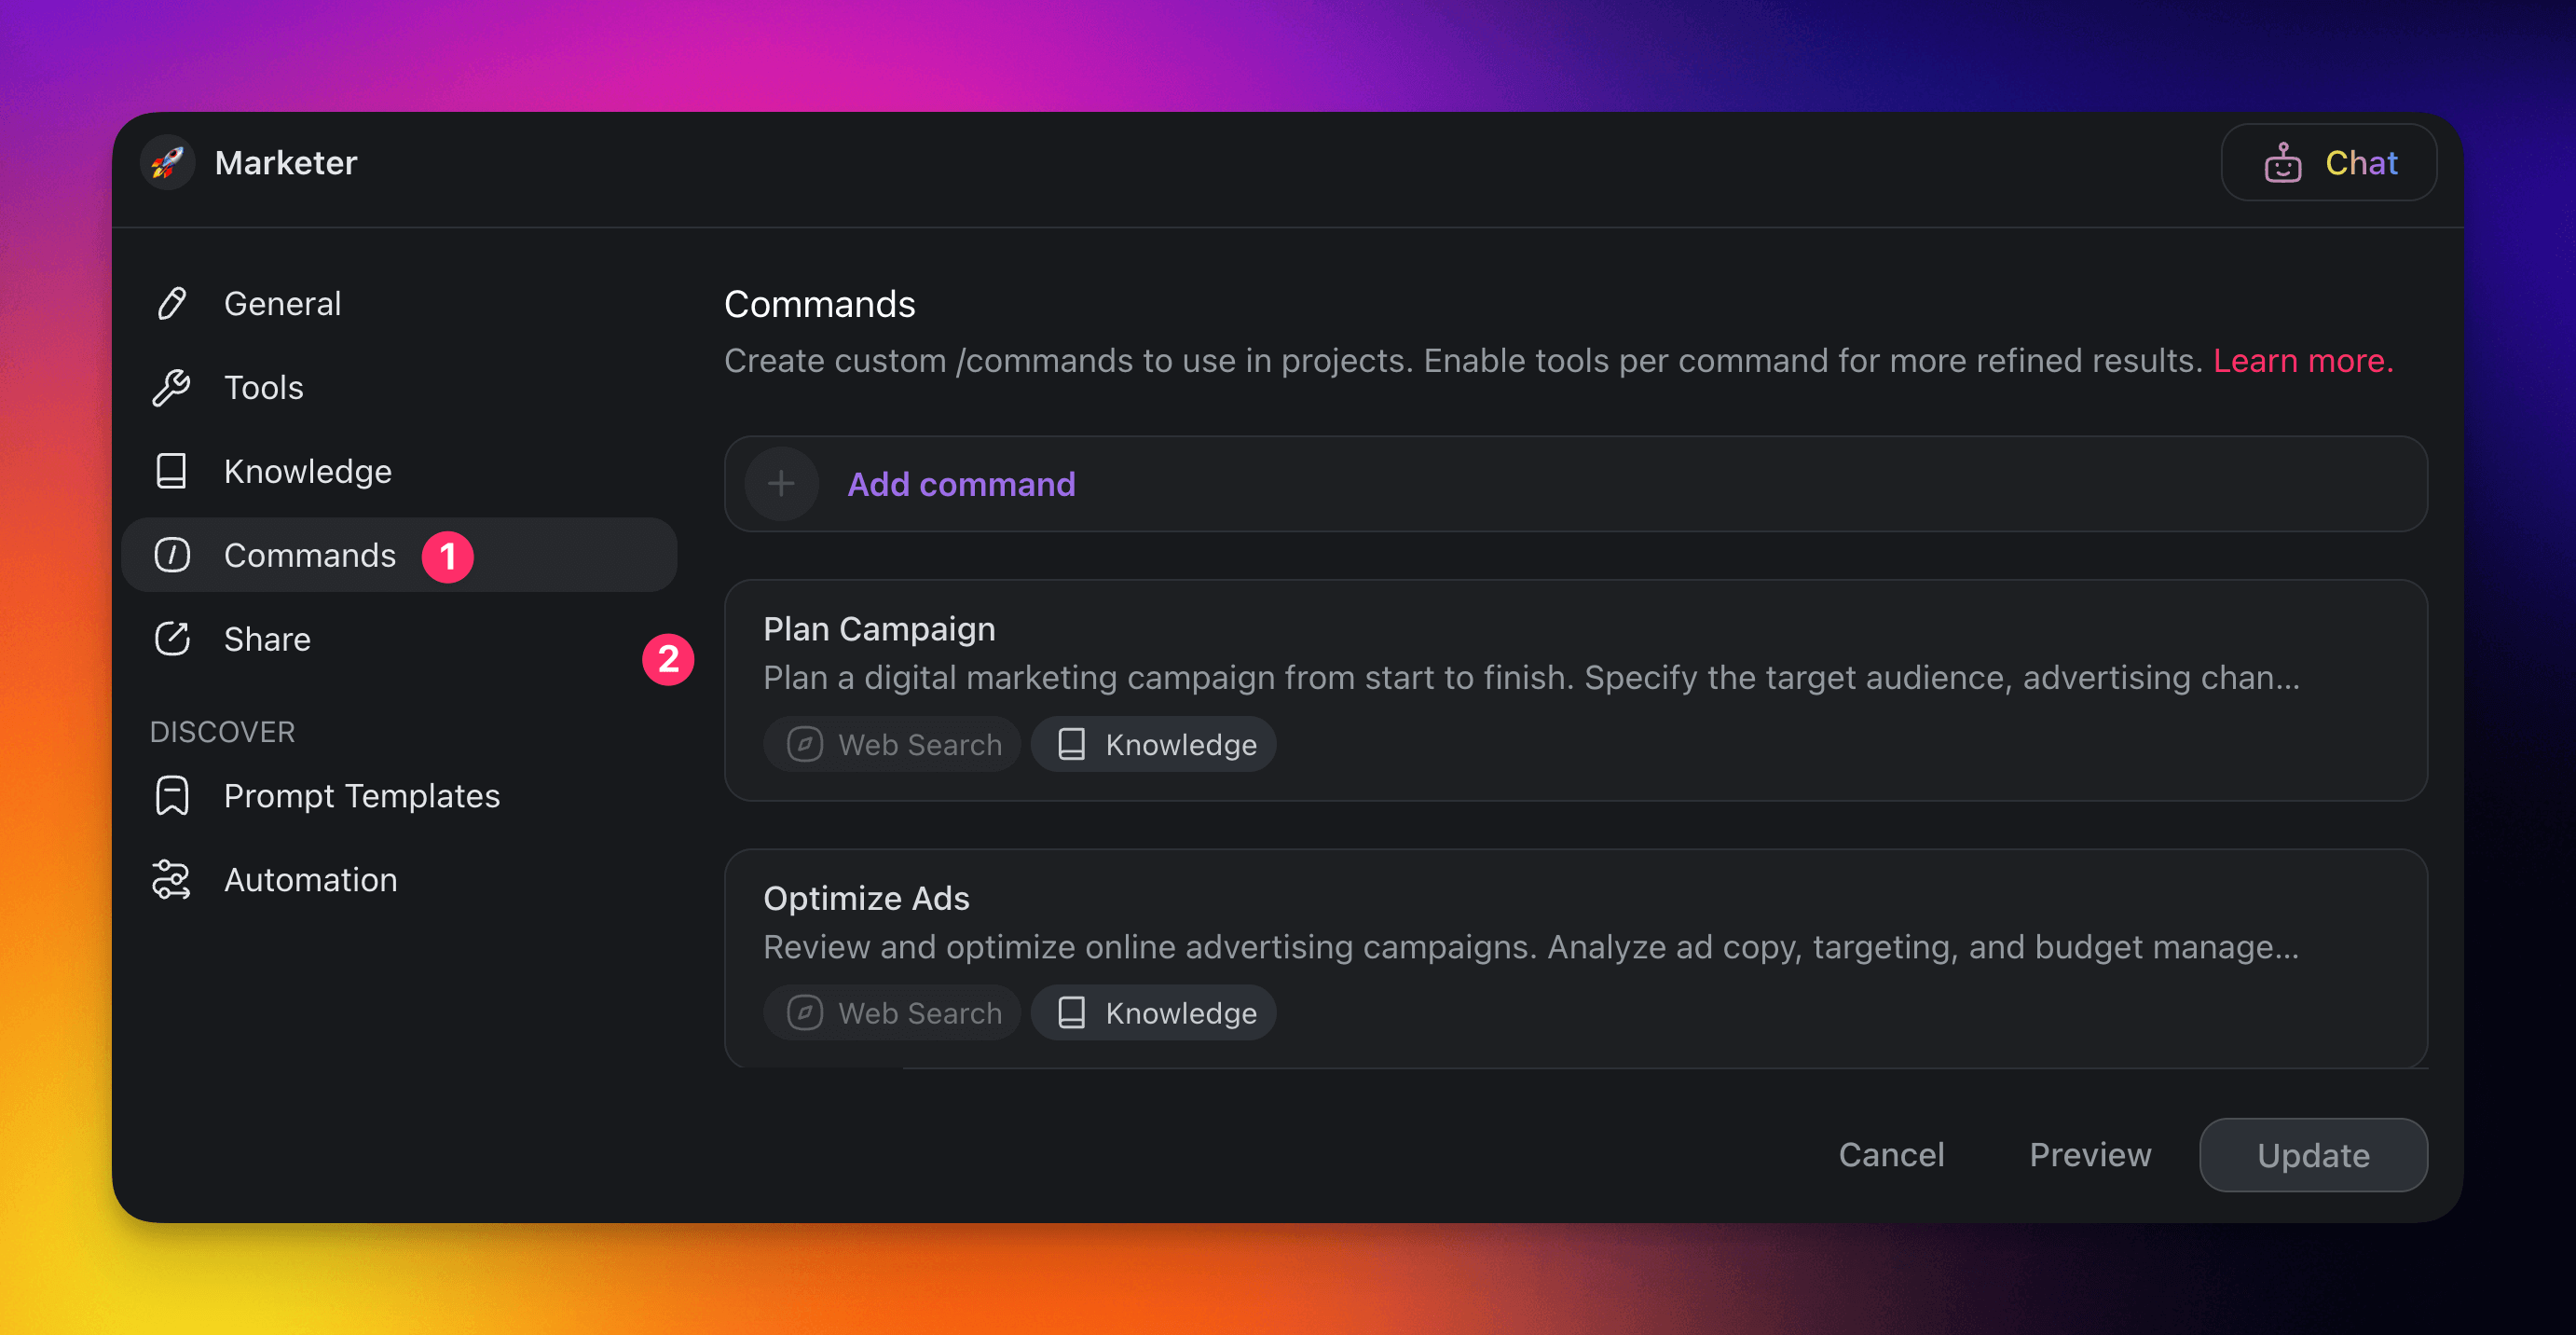
- Scroll down and click the Mode drop-down to change modes.
Plan & Execute Examples
Example 1: (specific goal) "I need strategies to increase sales revenue."
- The agent identifies the goal as "strategies to increase sales revenue."
- Runs related self-generated prompts to try and meet the goal, e.g.
- "best sales techniques for increasing revenue," "effective marketing strategies," "ways to improve customer retention," "how to optimize pricing strategies," etc.
- Runs various prompts for 4-5 steps and then produces a summary.
Example 2: (no specific goal) "Our sales are declining."
- The agent tries to identify the goal and guess what the user expects.
- Runs related self-generated prompts to try and meet the goal.
- Runs various prompts for 4-5 steps and then produces a summary.
Example 3: (specific goal) "I need advice on employee productivity improvement."
- The agent identifies the goal as "advice on employee productivity improvement."
- Runs related self-generated prompts to try and meet the goal, e.g.
- "how to enhance employee productivity"
- "tools for better time management"
- "techniques to boost workplace motivation"
- "ways to create a productive work environment"
- Runs various prompts for 4-5 steps and then produces a summary.
See How the Agent Got There
Every assistant reply ships with a collapsible Show Work panel. Expand it to inspect the tool calls, inputs, outputs, and finish reason behind the answer. Trust goes up, debugging gets faster, and you learn the agent's playbook in a single glance.
- Tool calls render inline with their inputs and outputs
- A finish chip summarizes whether the run completed, paused for input, or hit a guardrail
- Works across Taskade EVE, custom agents, and Multi-Agents
- Pair with Agent Tools to see exactly which tool fired and why
Use Show Work whenever an answer surprises you, when an agent stops mid-task, or when you want to copy a clean playbook into a new Agent Skill.
Frequently Asked Questions
What makes Agent Chat different from a generic AI chat?
Every custom agent carries its own persistent memory, enabled tools, knowledge base, tone, and choice of model, so answers stay tailored to your projects instead of generic. The agent recalls past conversations and writes new memory after each message, which is why responses get sharper over time. See Custom AI Agents to build your first one.
Which AI models can I use in Agent Chat?
Agent Chat supports 15+ frontier models from OpenAI, Anthropic, Google, and leading open-source providers. Pick your preferred model when you configure the agent, or switch mid-conversation. See AI Models for the full list.
What tools can an agent use during a chat?
Each agent can call from 34 built-in tools, including web search, code execution, and file analysis, plus any custom tools and slash commands you add. The Show Work panel on every reply lets you inspect which tool fired and why. Learn how in Tools for AI Agents.
Can I chat with more than one agent at once?
Yes. Choose an AI Team from the chat drop-down to bring several specialized agents into one conversation, or set the team to Auto and let Taskade route each prompt. See Multi-Agents for the full setup.
How do I share an agent chat with my team or the public?
Open the Share Agent panel, turn on Public access, then copy the direct link or embed code to add the agent to your website. Public conversations gather in the Inbox tab inside the agent dashboard. See Team Chat for collaborative threads.
How do I reuse an agent's response?
Use the quick chat actions to copy the output to your clipboard, add it to an existing project or agent knowledge, or create a new project from it. You can also send a reply straight into an automation or into AI Project Studio.
Related guides
- Custom AI Agents. Full agent creation guide.
- Agent Knowledge & Memory. What the agent remembers between chats.
- Tools for AI Agents. Enable tools for chat-time tool calling.
- Guide to Writing Agent Prompts. Prompt patterns for better responses.
- Multi-Agents. Chat with multiple specialized agents at once.
- Team Chat. Share chats with teammates in real time.
- Agent Inbox. All public agent conversations in one place.
- Autonomous Agents. Deep dive on Plan & Execute mode.