
Overview
Todoist is a task management app known for its clean interface and natural language input. Taskade has a dedicated Todoist import option. It reads your exported CSV files and turns them into structured projects. Your tasks, priorities, and labels come across with them.
TL;DR: Export each Todoist project as a CSV file, then pick the dedicated Todoist option in Taskade's Import dialog to keep your tasks, due dates, and priorities intact. View migrated tasks in Board view or Calendar view, and set up automations to act on them.
Export a Todoist Project
- Open Todoist and choose the Project you want to export from the sidebar menu.
- Click the three dots to the right of the project name.
- Select Export as a template ➡ Export as CSV file.
- Save the CSV file to your computer.
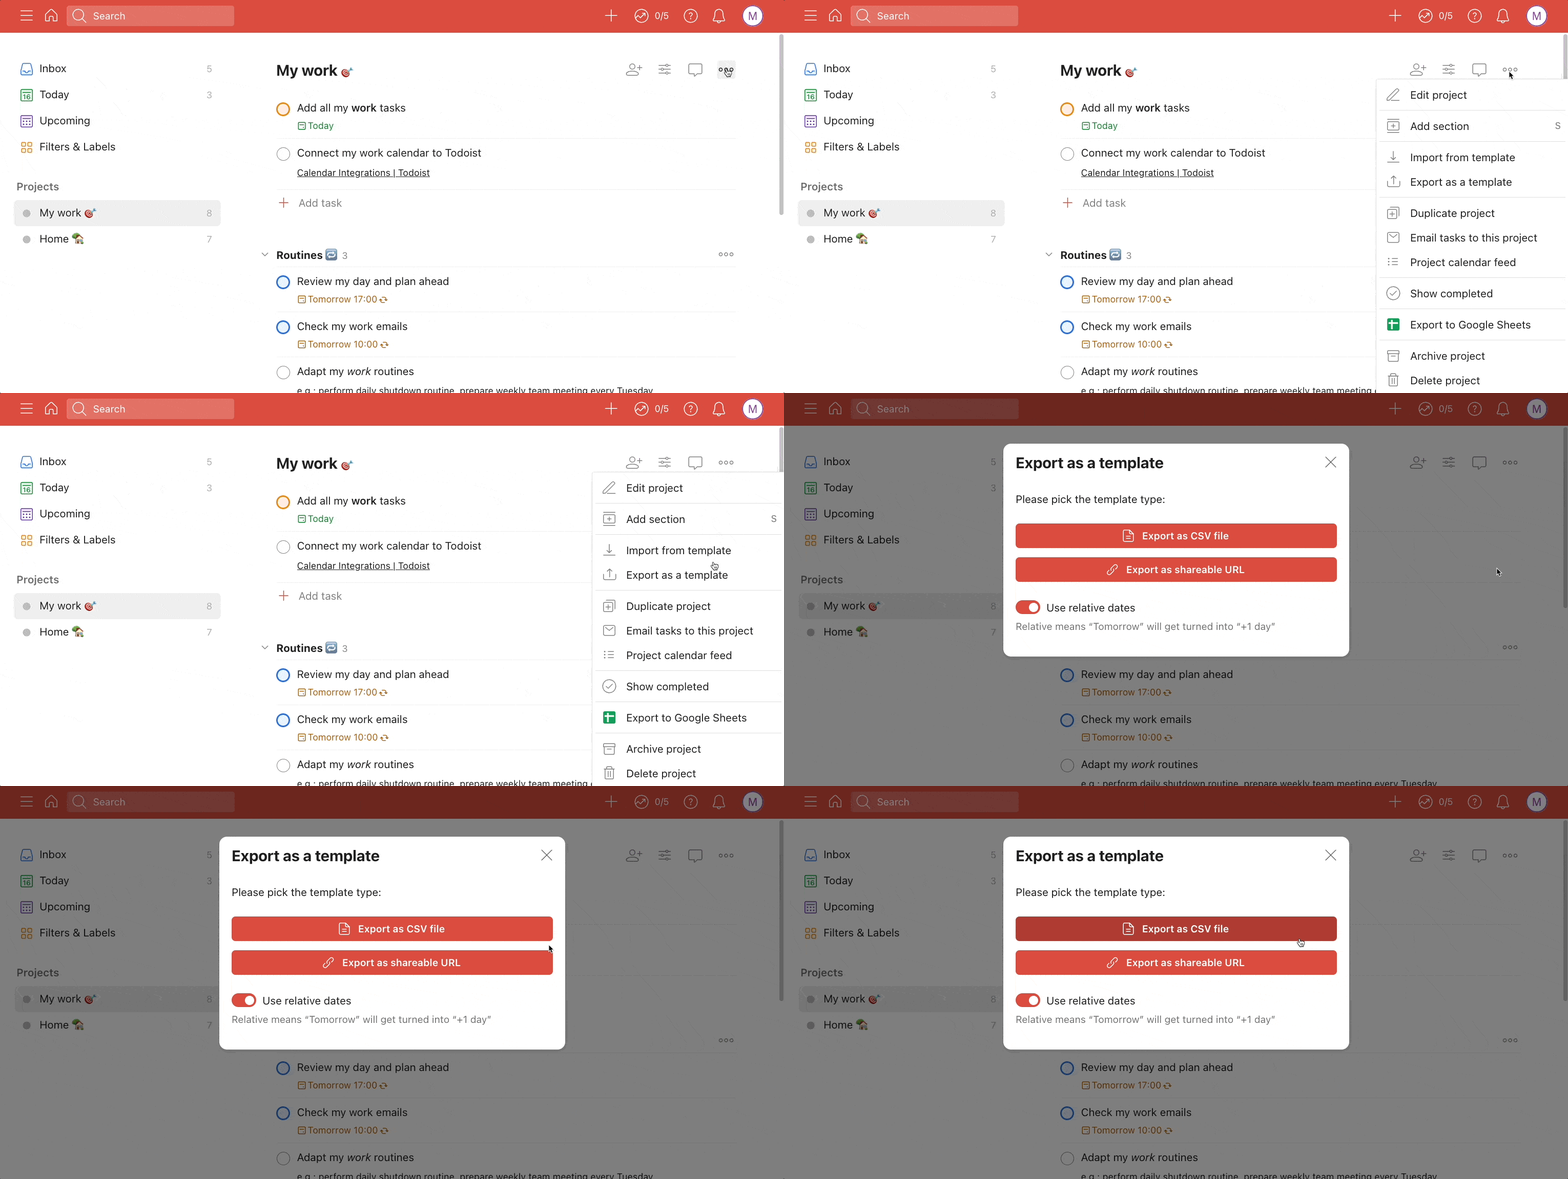
Repeat this for each project you want to migrate. Todoist exports one project per CSV file.
Import to Taskade
Go to your workspace or folder.
Click the arrow next to the ➕ New Project button.
Select Import and choose Todoist.
- (optional) You can also paste the contents of your .csv file.
Upload the exported .csv files and click Import.
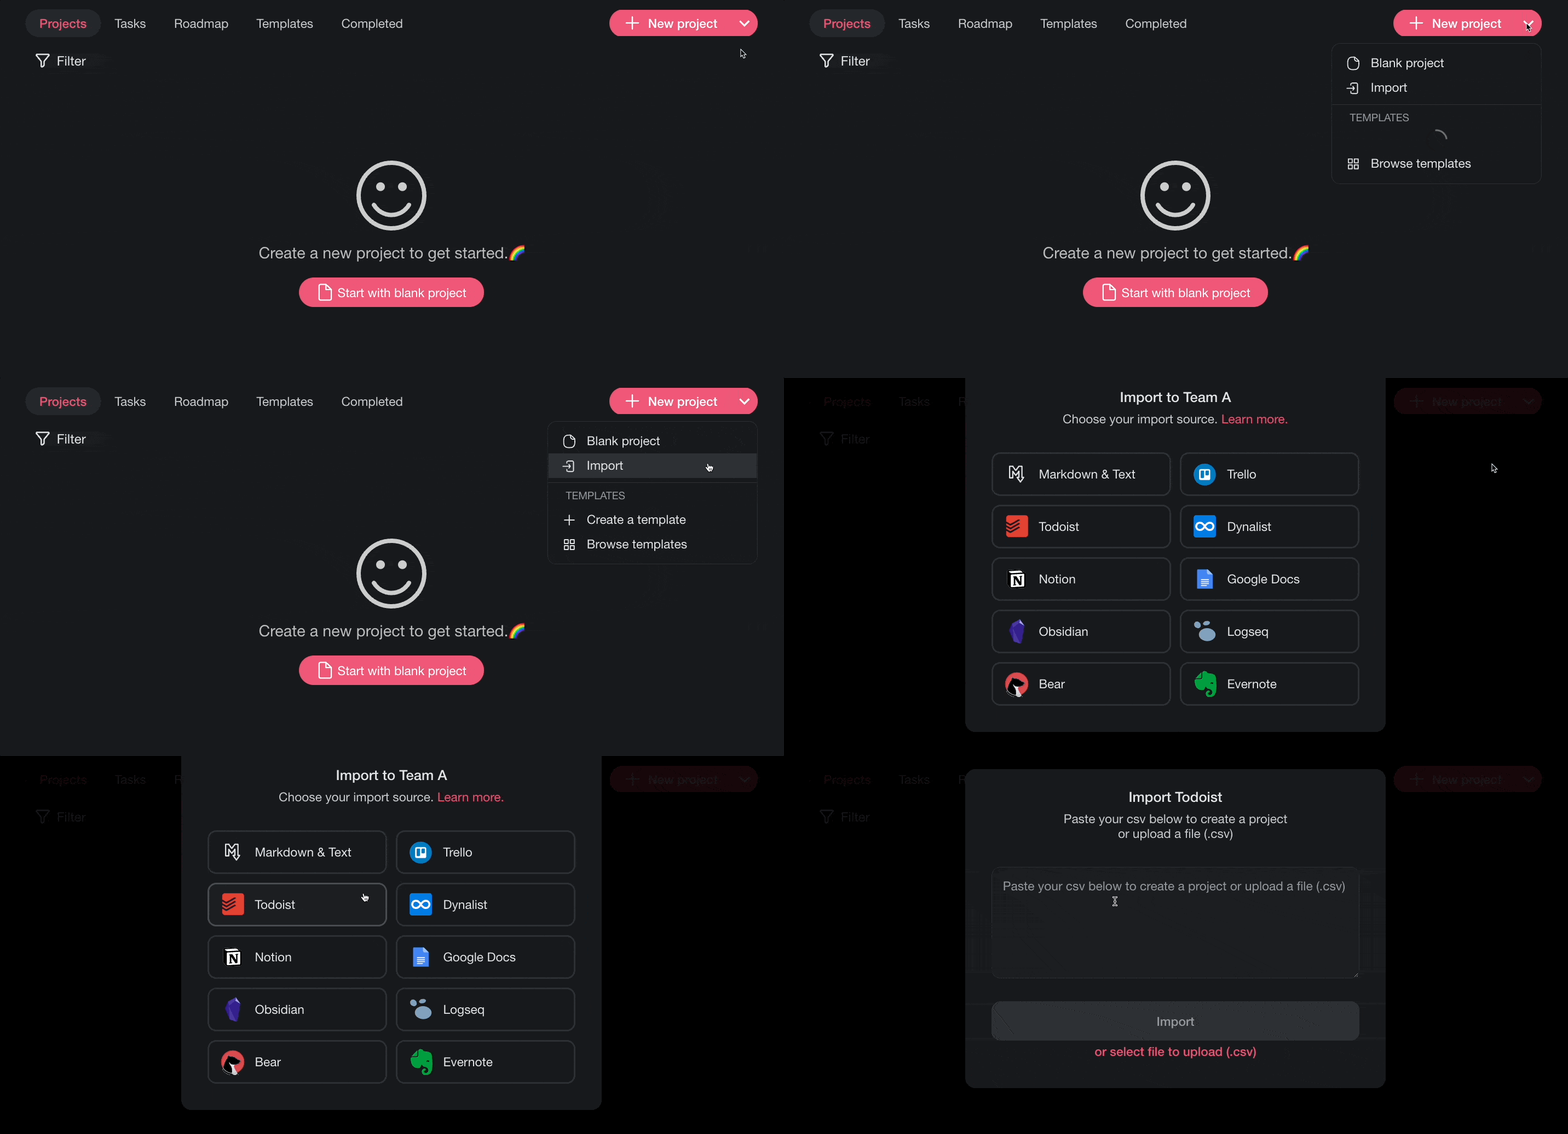
Taskade recognizes the Todoist CSV format and maps your tasks, due dates, and priority levels into a new project.
After Import
After your Todoist tasks land in Taskade, your priorities and due dates sit in a project you can run right away:
┌──────────────────────────────────────────────┐
│  ✅ Client Onboarding           List ▾     ⚙  │
├──────────────────────────────────────────────┤
│  ☐ Send welcome email       P1     Due Mon    │
│  ☐ Collect brand assets     P2     Due Wed    │
│  ☑ Kickoff call             P3     Done       │
│     ↳ Prep agenda                             │
└──────────────────────────────────────────────┘
From here you can expand your process:
- Visualize tasks: Switch to Board view for a kanban layout, Calendar view to see deadlines, or List view for a familiar task list.
- Add subtasks and notes: Expand imported tasks with nested subtasks, descriptions, and attachments.
- Set up automations: Use automations to move tasks, send notifications, or update statuses automatically.
- Use AI agents: Ask Taskade AI to prioritize your task list, generate subtasks, or create daily plans from your imported data.
Tips
- If Todoist does not show the CSV export option, check that your Todoist plan supports it.
- Use folders in Taskade to replicate your Todoist project hierarchy.
- After import, add due dates and assignees to tasks that need them.
- Need your tasks back as a spreadsheet later? Export to CSV from any of the project views.
Todoist → Taskade Mapping
| Todoist | Taskade |
|---|---|
| Project | Project |
| Task | Task |
| Priority | Custom field / Tag |
| Due Date | Due date |
| Label | Tag |
See AI Personas & CSV-to-Project for the background on CSV-to-project imports.
How the Import Works
Bring It Into Taskade Genesis
Your imported task list is now part of your Workspace DNA. Open the project's ··· menu and choose Add to Agent Knowledge so a custom agent answers questions from it. Start an automation from the project to act on completed tasks and due dates. Then open Taskade Genesis and describe the app you want on top of that data, such as a client portal, a CRM, or a habit tracker. For a web page or a video you want to keep alongside it, save the link in the Media Files tab (see Import a Website URL).