
Overview
Turn any spreadsheet into a working project. Upload a CSV exported from Asana, Trello, Monday, ClickUp, or your own sheet. Taskade rebuilds the rows into tasks you can assign, filter, and automate. It is the fastest way to bring a client list, inventory, or booking tracker into your workspace.
TL;DR: Upload a CSV in the Import CSV tab. Taskade reads the first row as your column names and previews the rows. You set each column to Text, Select, or Number. Taskade then opens a project in Table view. The same file also works as agent knowledge or as a seed for an AI project.
How CSV Columns Become Fields
| CSV Concept | Taskade Equivalent |
|---|---|
| First row | Custom field names |
| Row | Task |
| Cell value | Field value |
| The column you mark Primary | The task text |
| Every other column | A field set to Text, Select, or Number |
For background on CSV-to-project imports (shipped v4.91, July 2023), see AI Personas & CSV-to-Project.
Know the Limits Before You Upload
The Import CSV tab reads your file in the browser, so it has two limits:
- 5,000 rows per file. Taskade counts data rows, not the header row or blank lines. If the file has more, Taskade refuses it with a message that names the limit. Split it and import the parts.
- 5 MB per file. This CSV limit is the same on every plan, including Free.
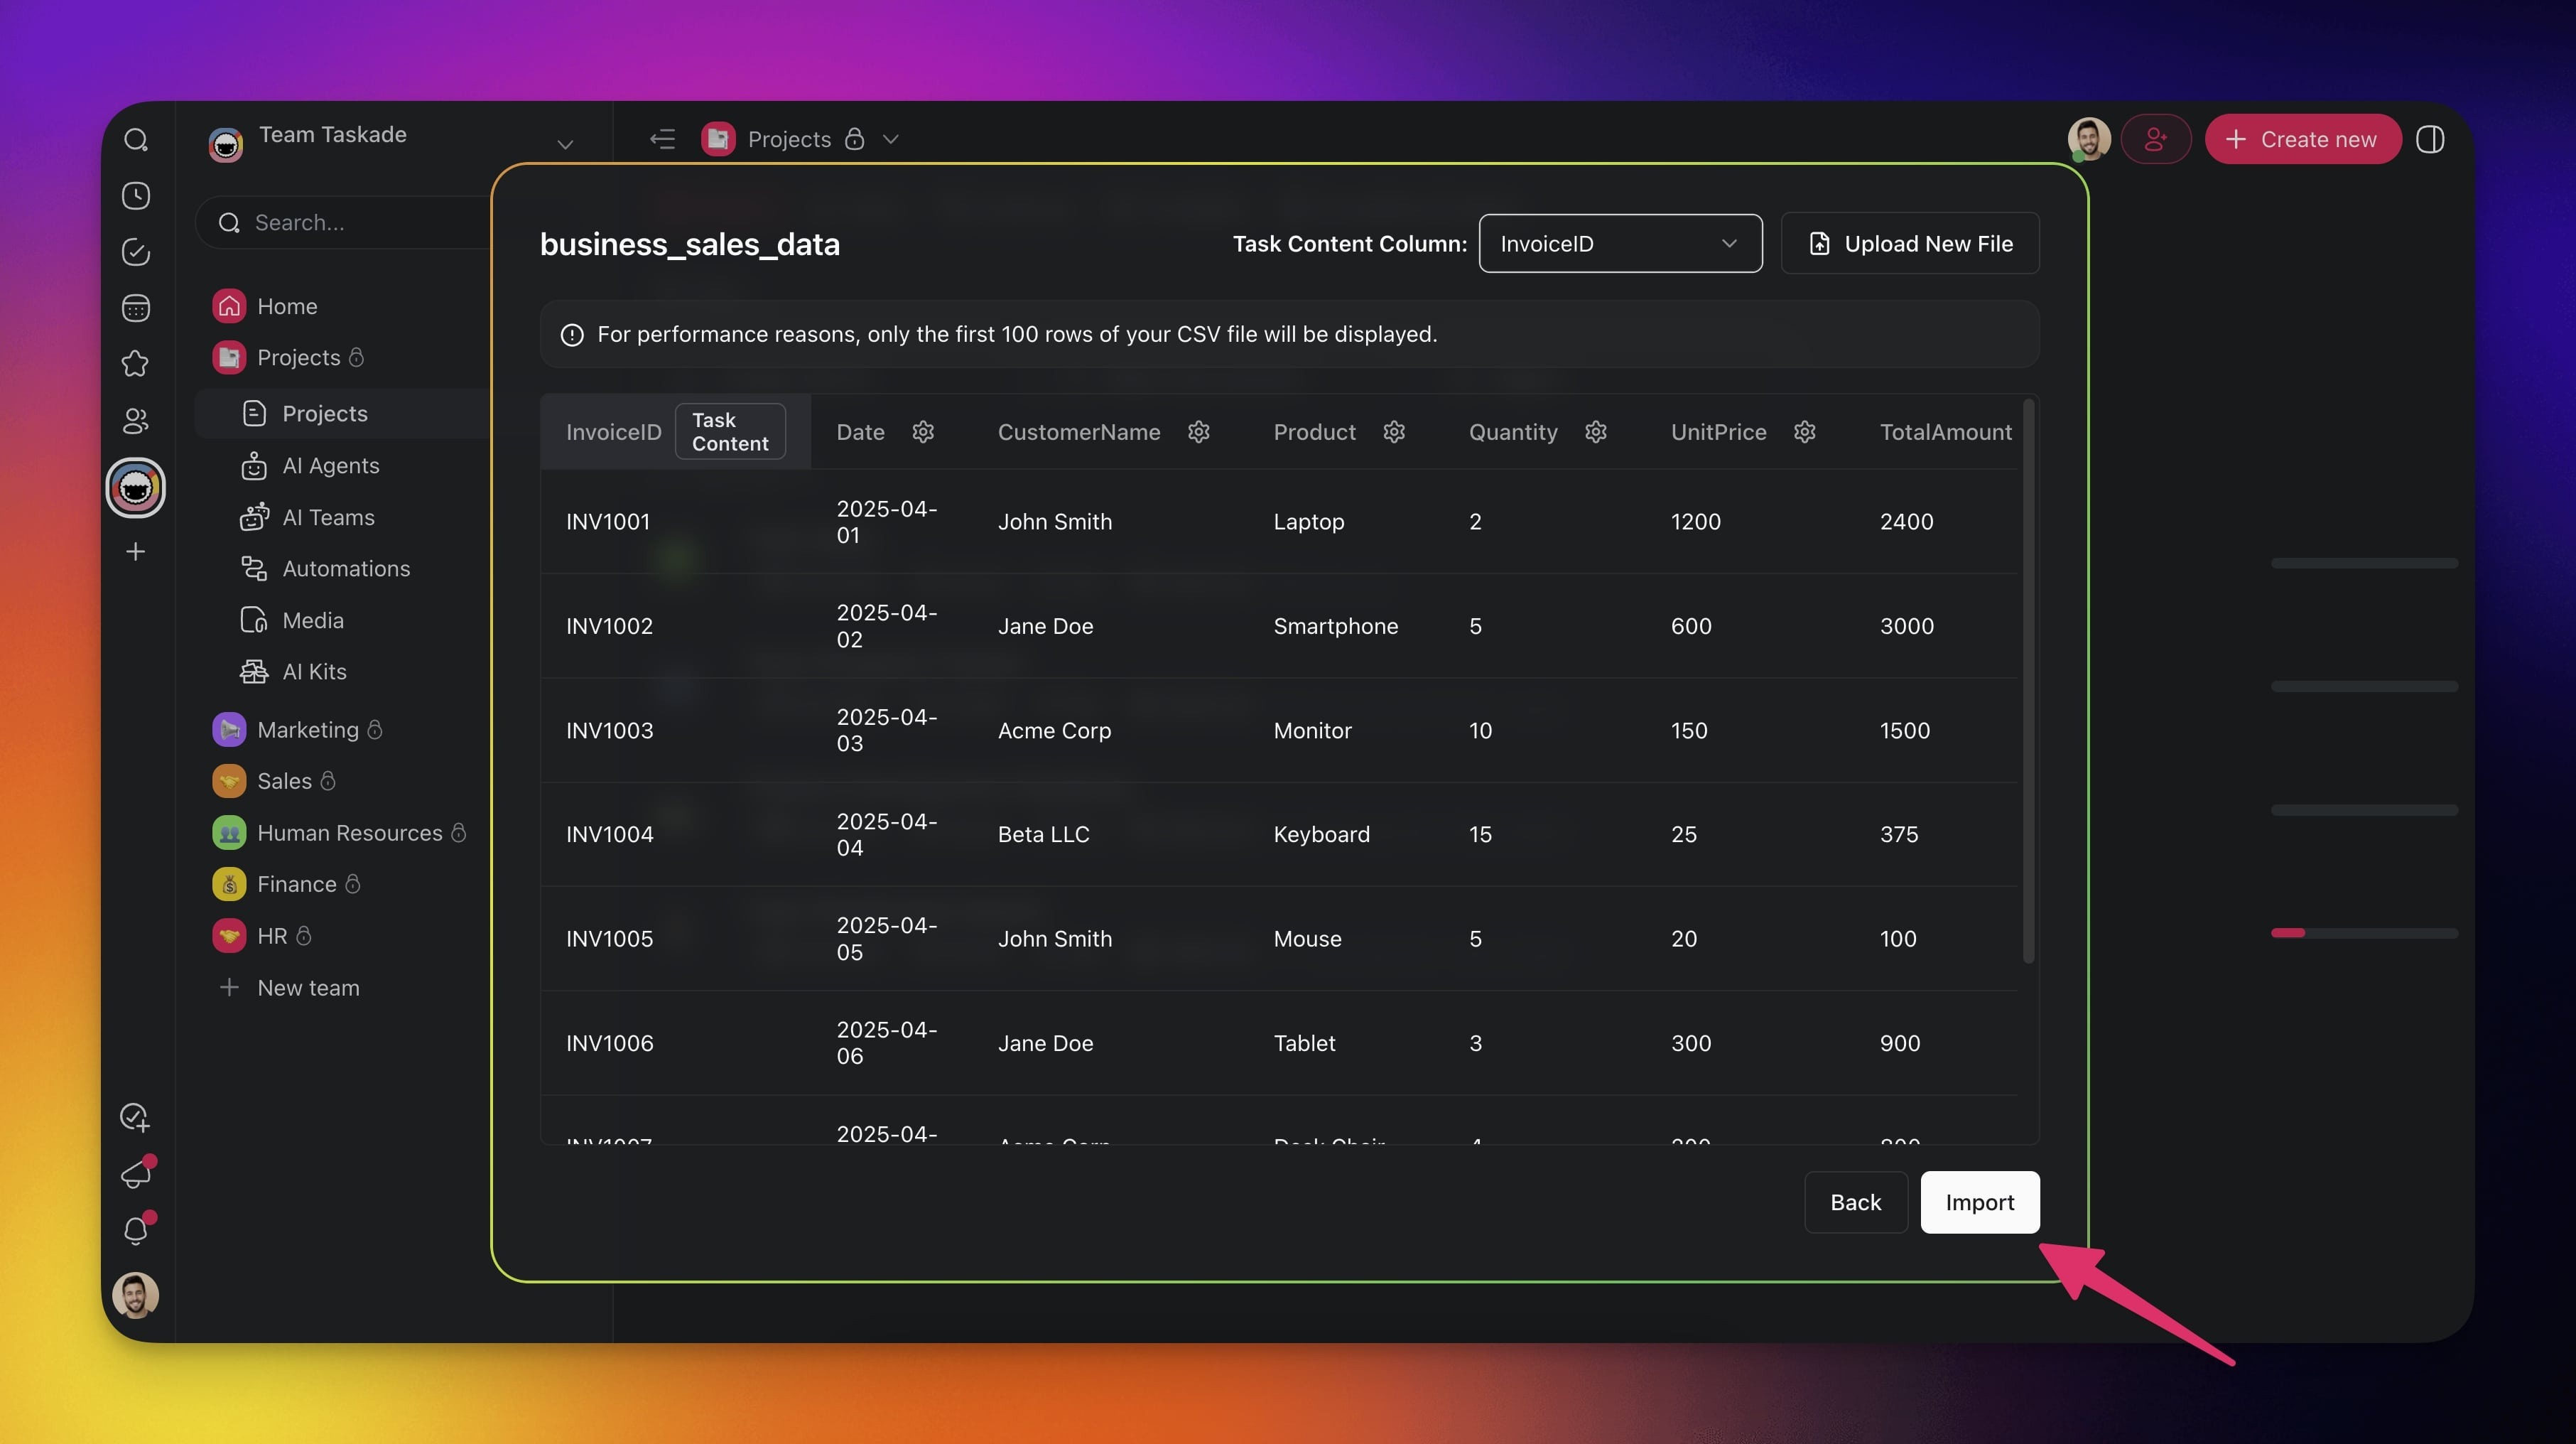
The preview shows the first 100 rows. Taskade still imports every row in the file, up to the 5,000-row limit.
Import CSV
Note: Visit Convert to Taskade & Summarize with AI to learn more.
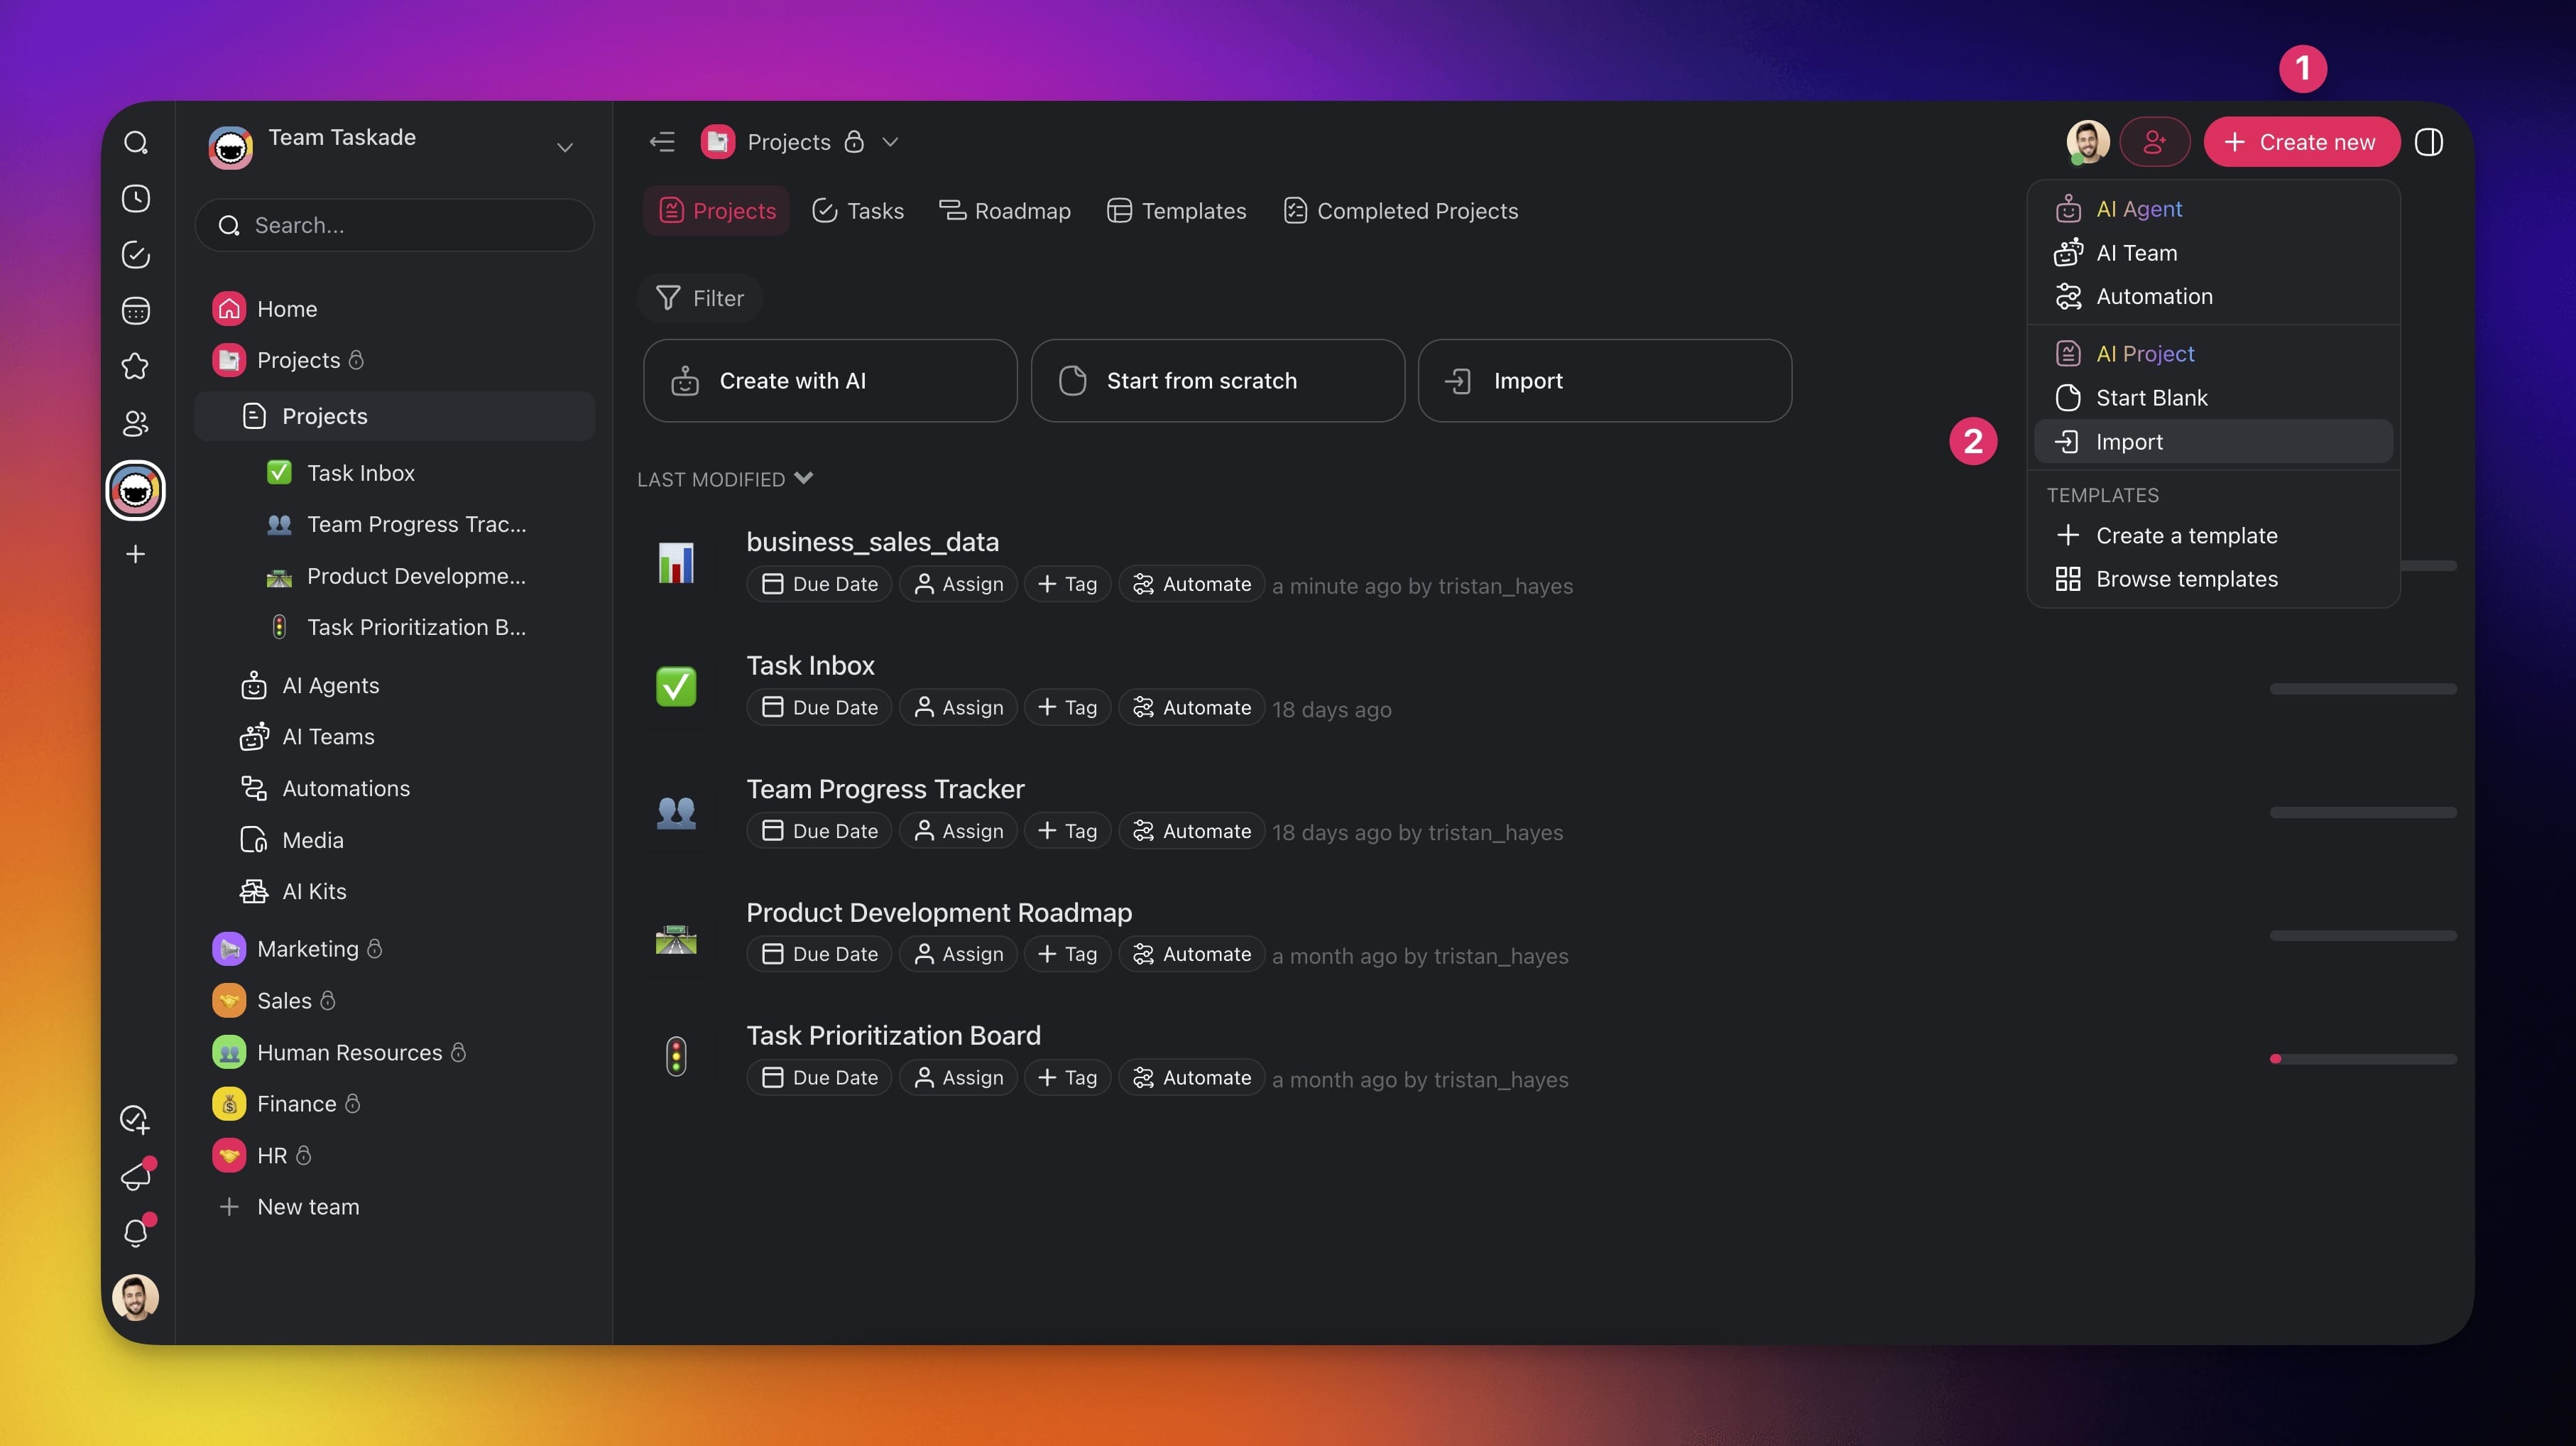
- Click the ➕ Create new button in your workspace/folder.
- Choose Import from the drop-down menu.
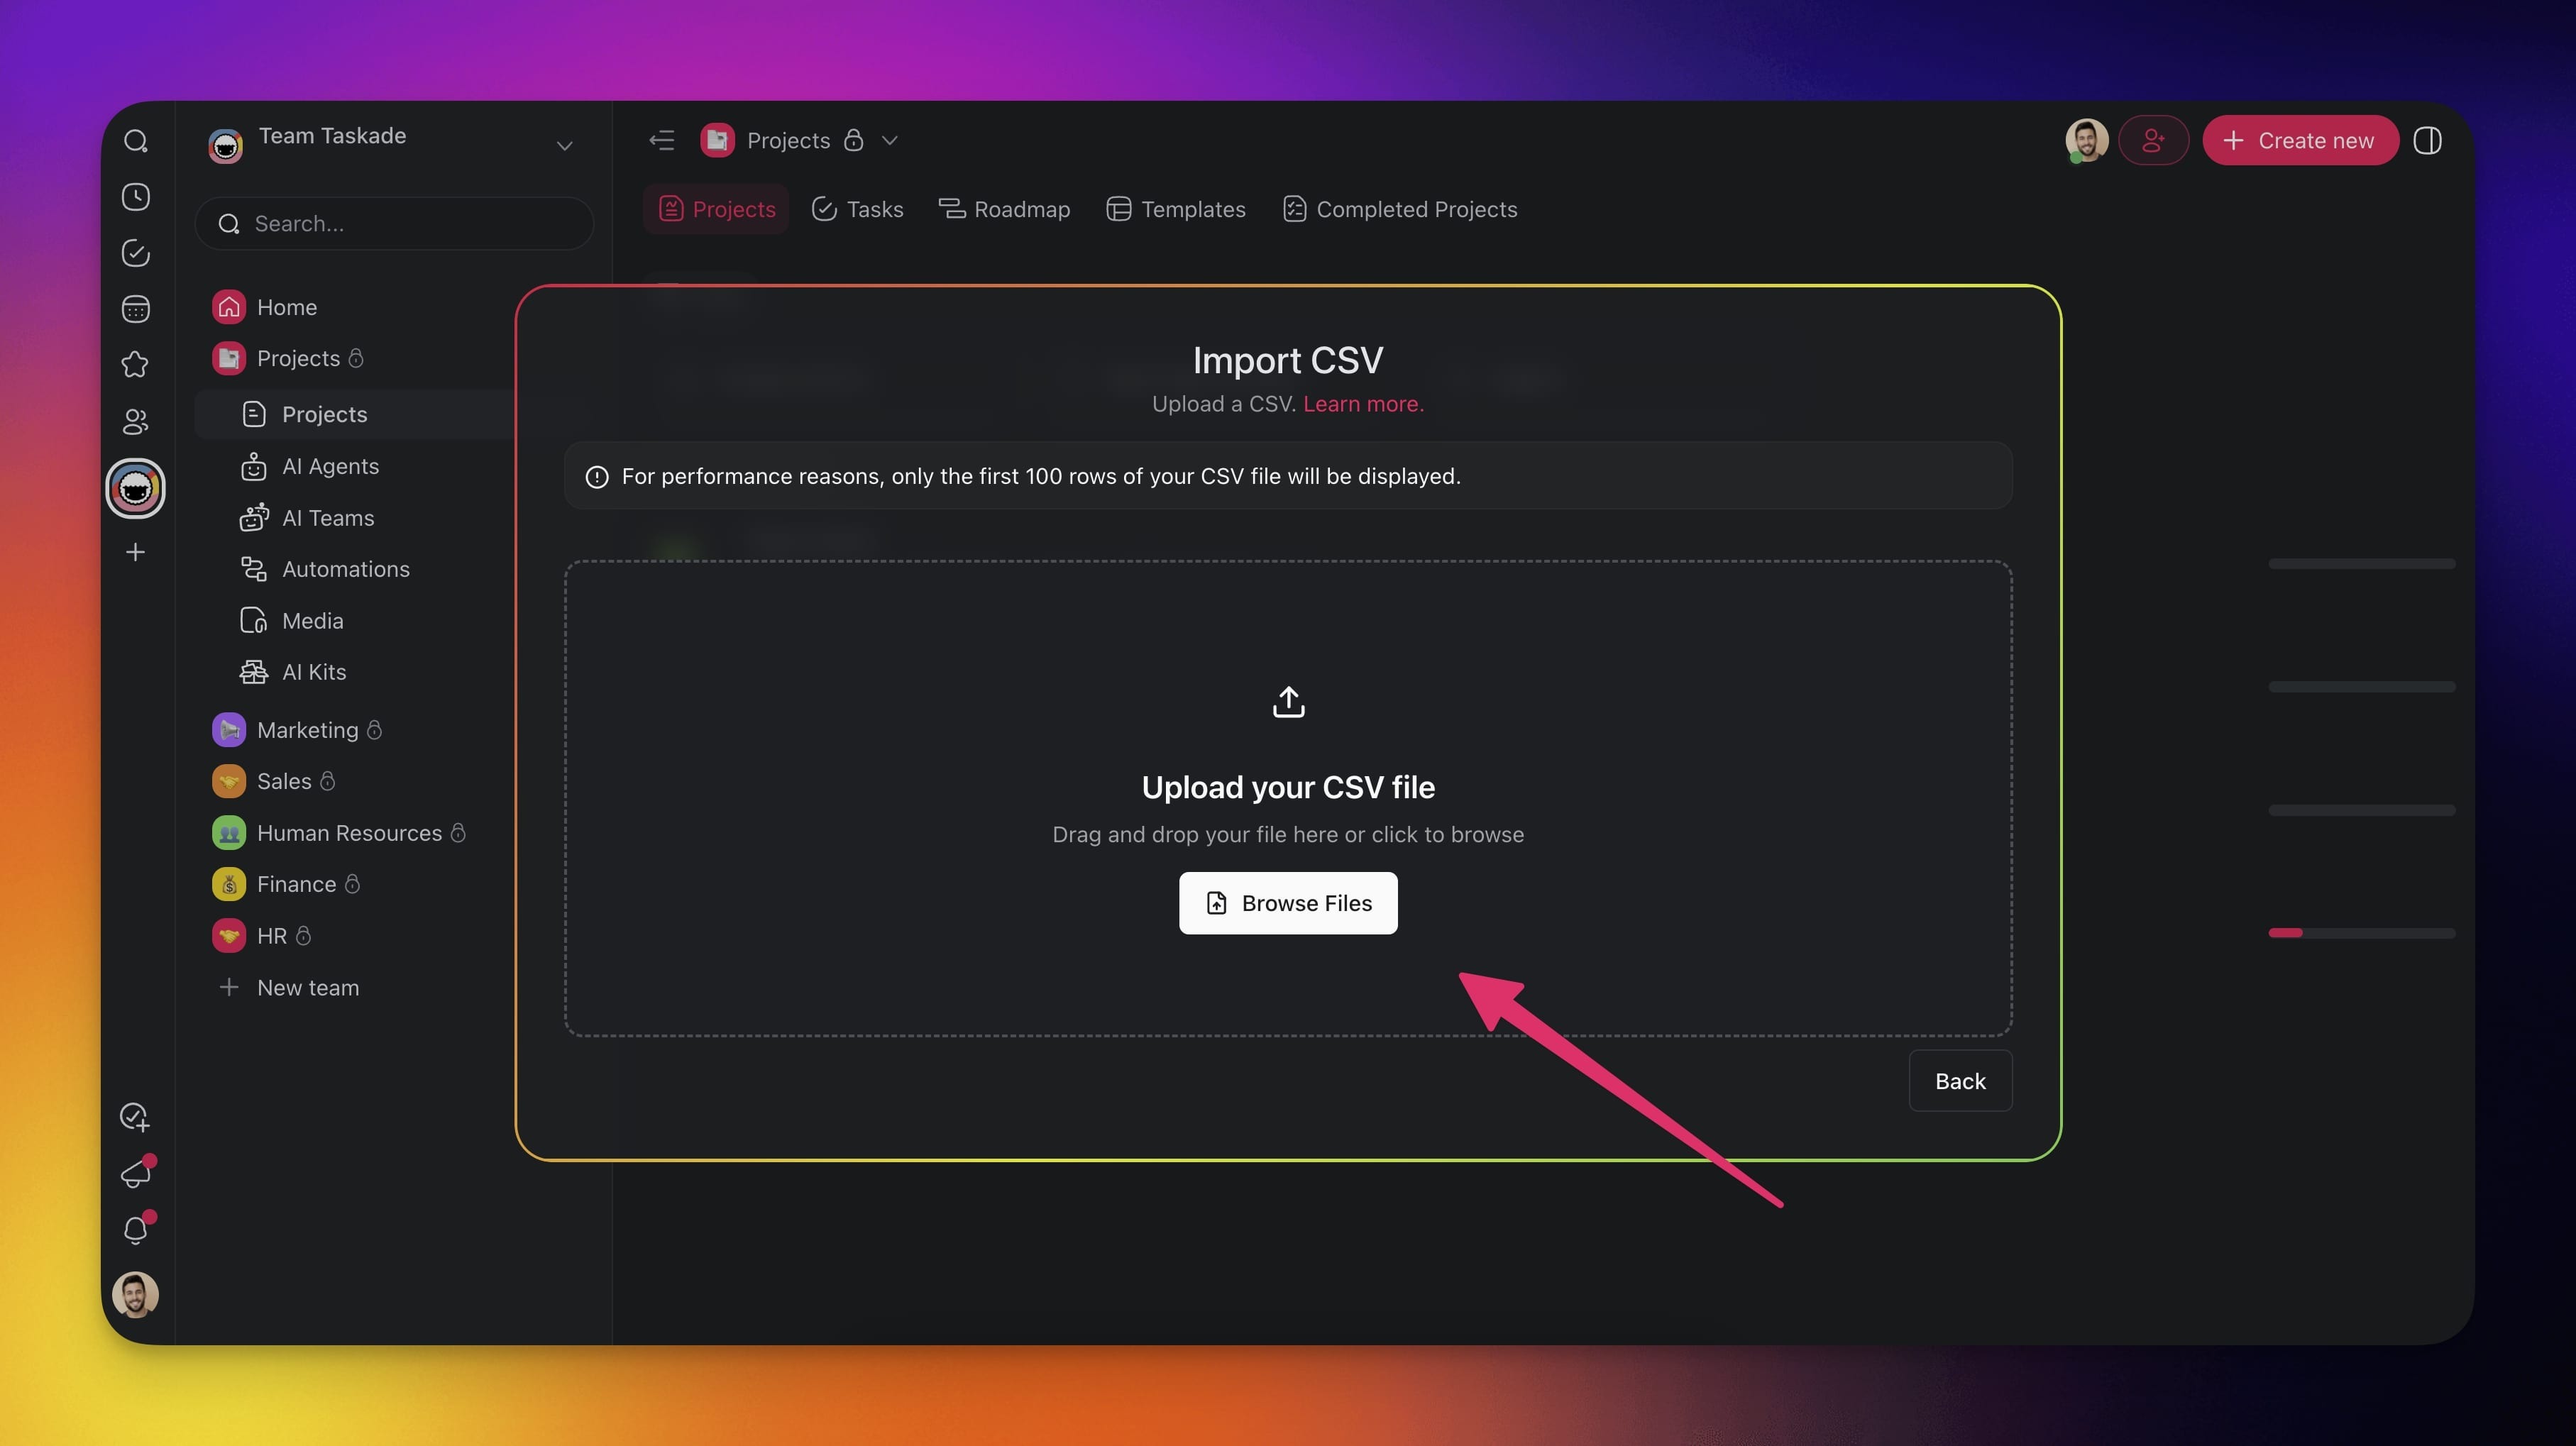
- Switch to the Import CSV tab.
- Drag your CSV file into the box or click Browse Files to upload.
- Click Import to finish the process.
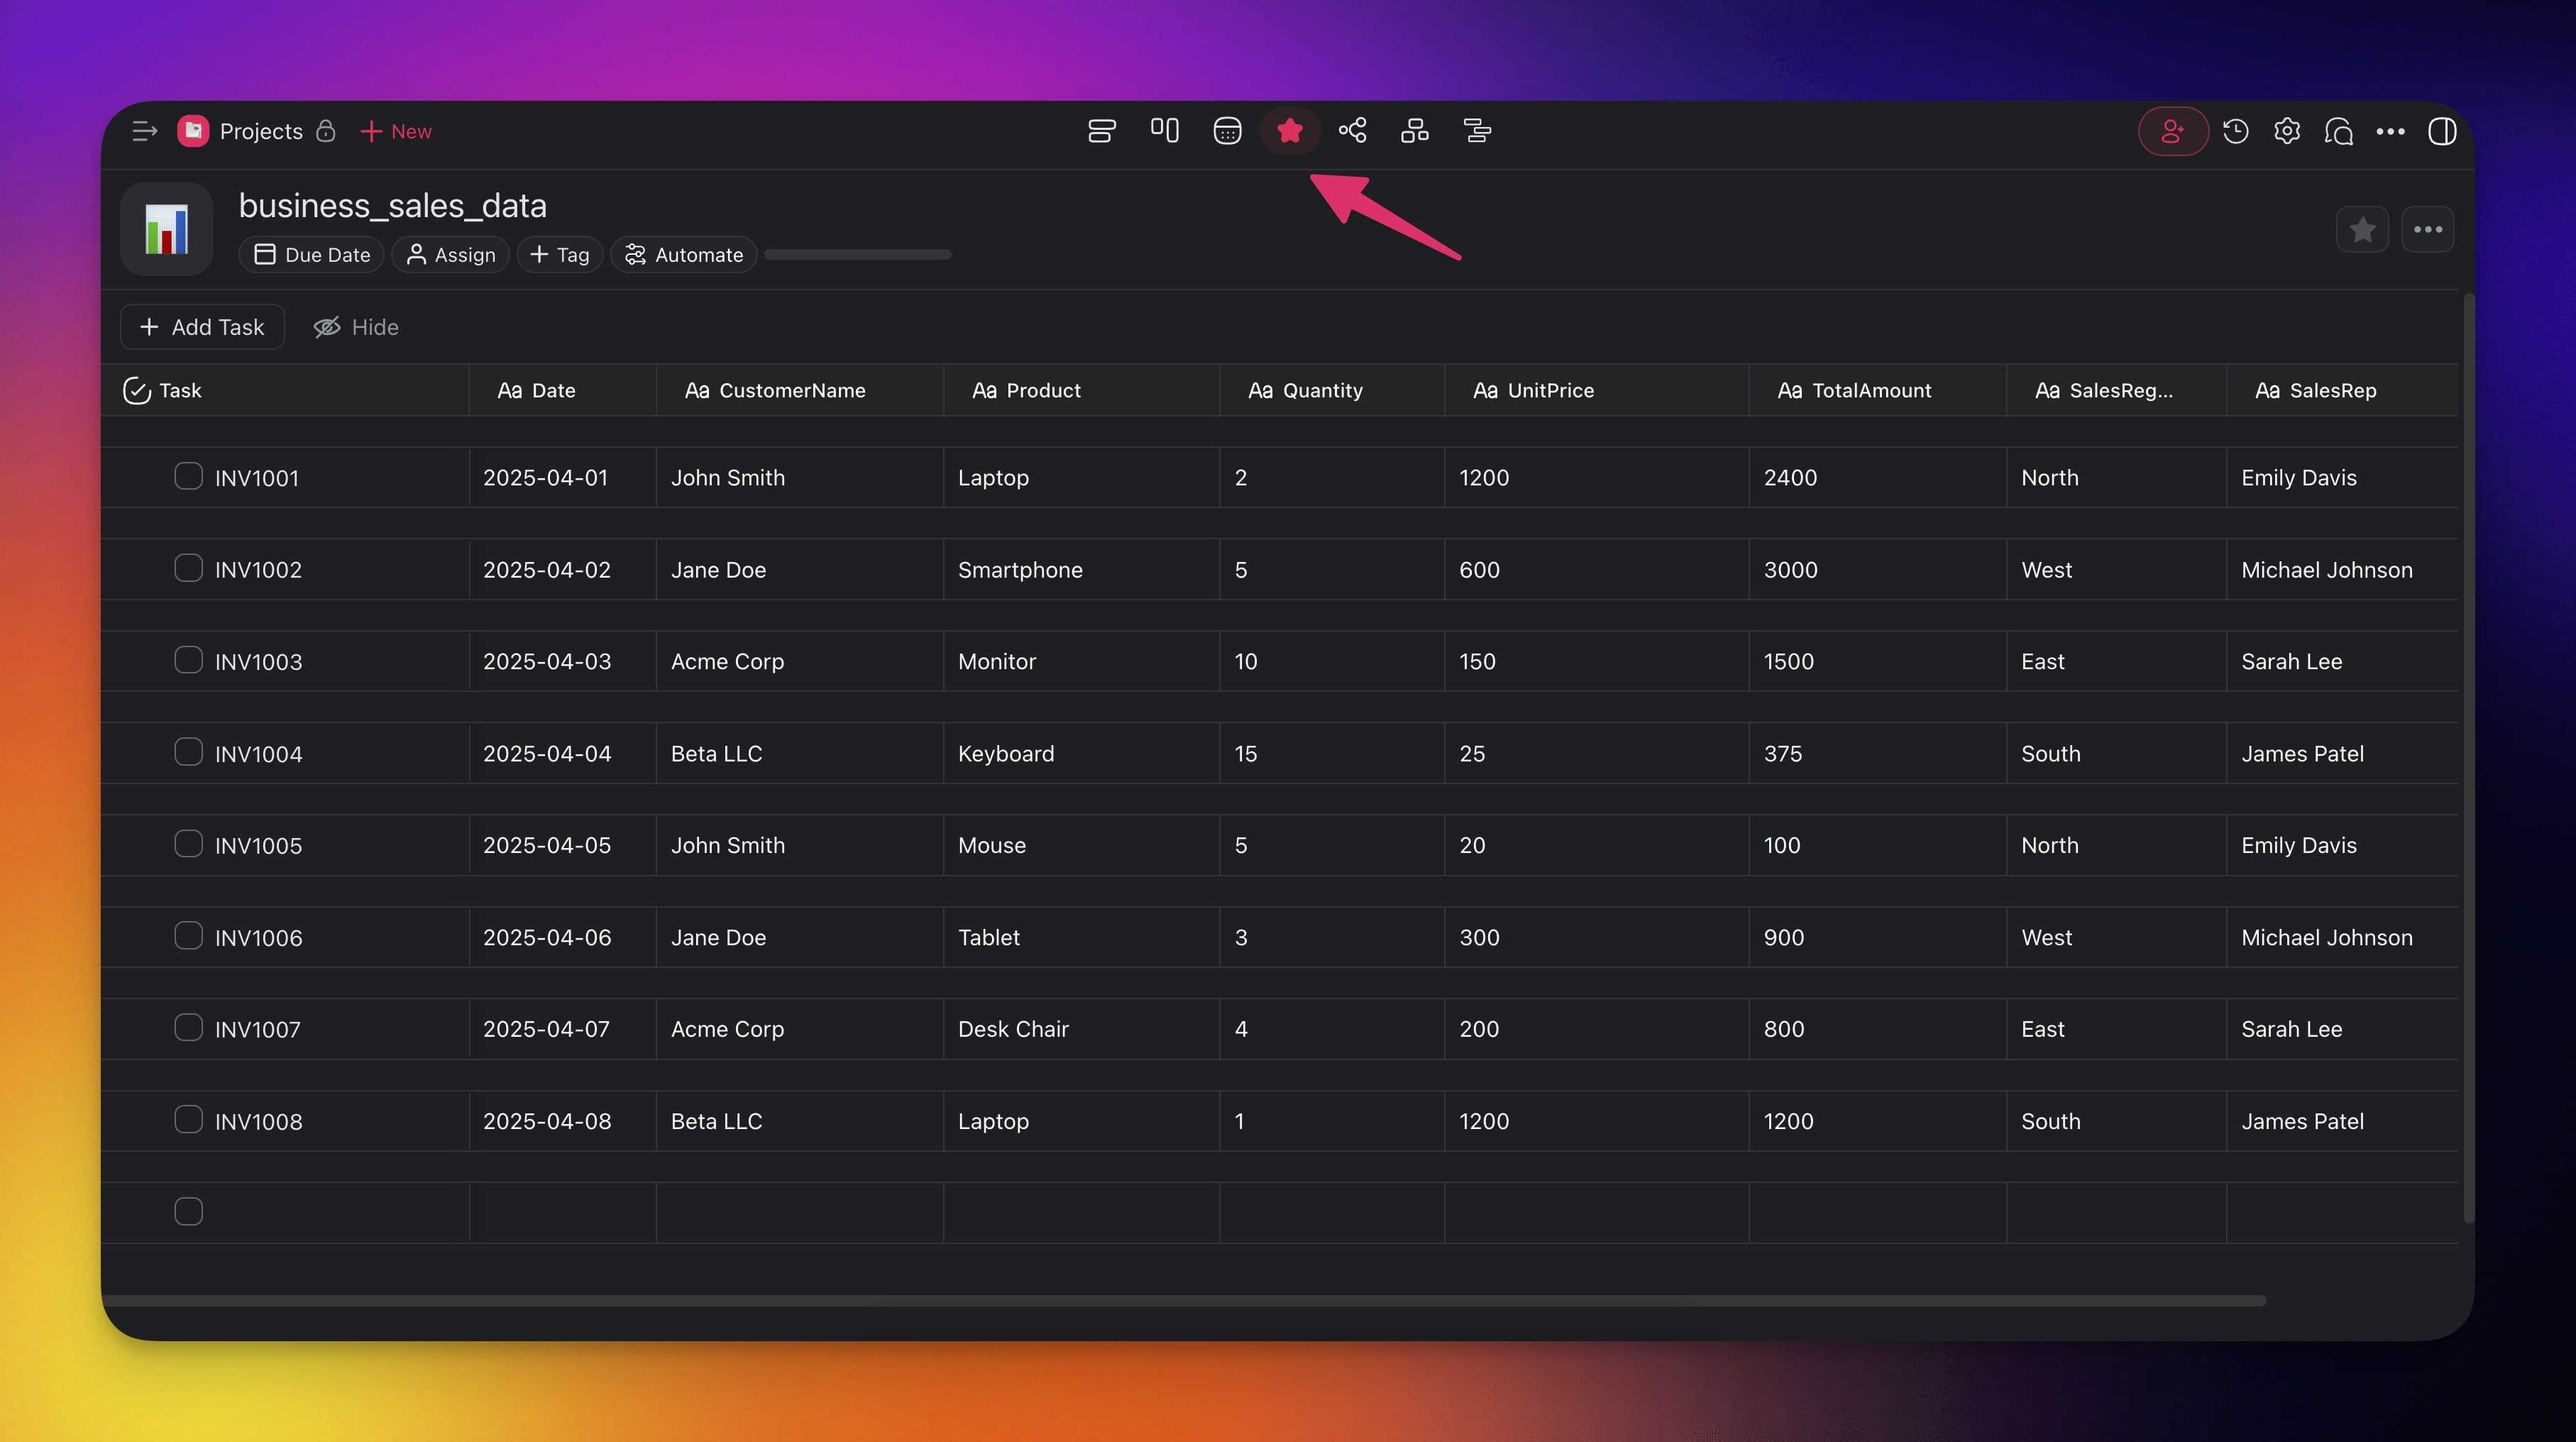
- Taskade opens a new project in the Table view.
Add CSV as AI Agent Knowledge
Note: Visit Agent Knowledge & Data to learn more.
- Go to your workspace or folder.
- Open the AI Agents tab.
- Select the agent you want to fine-tune with your file.
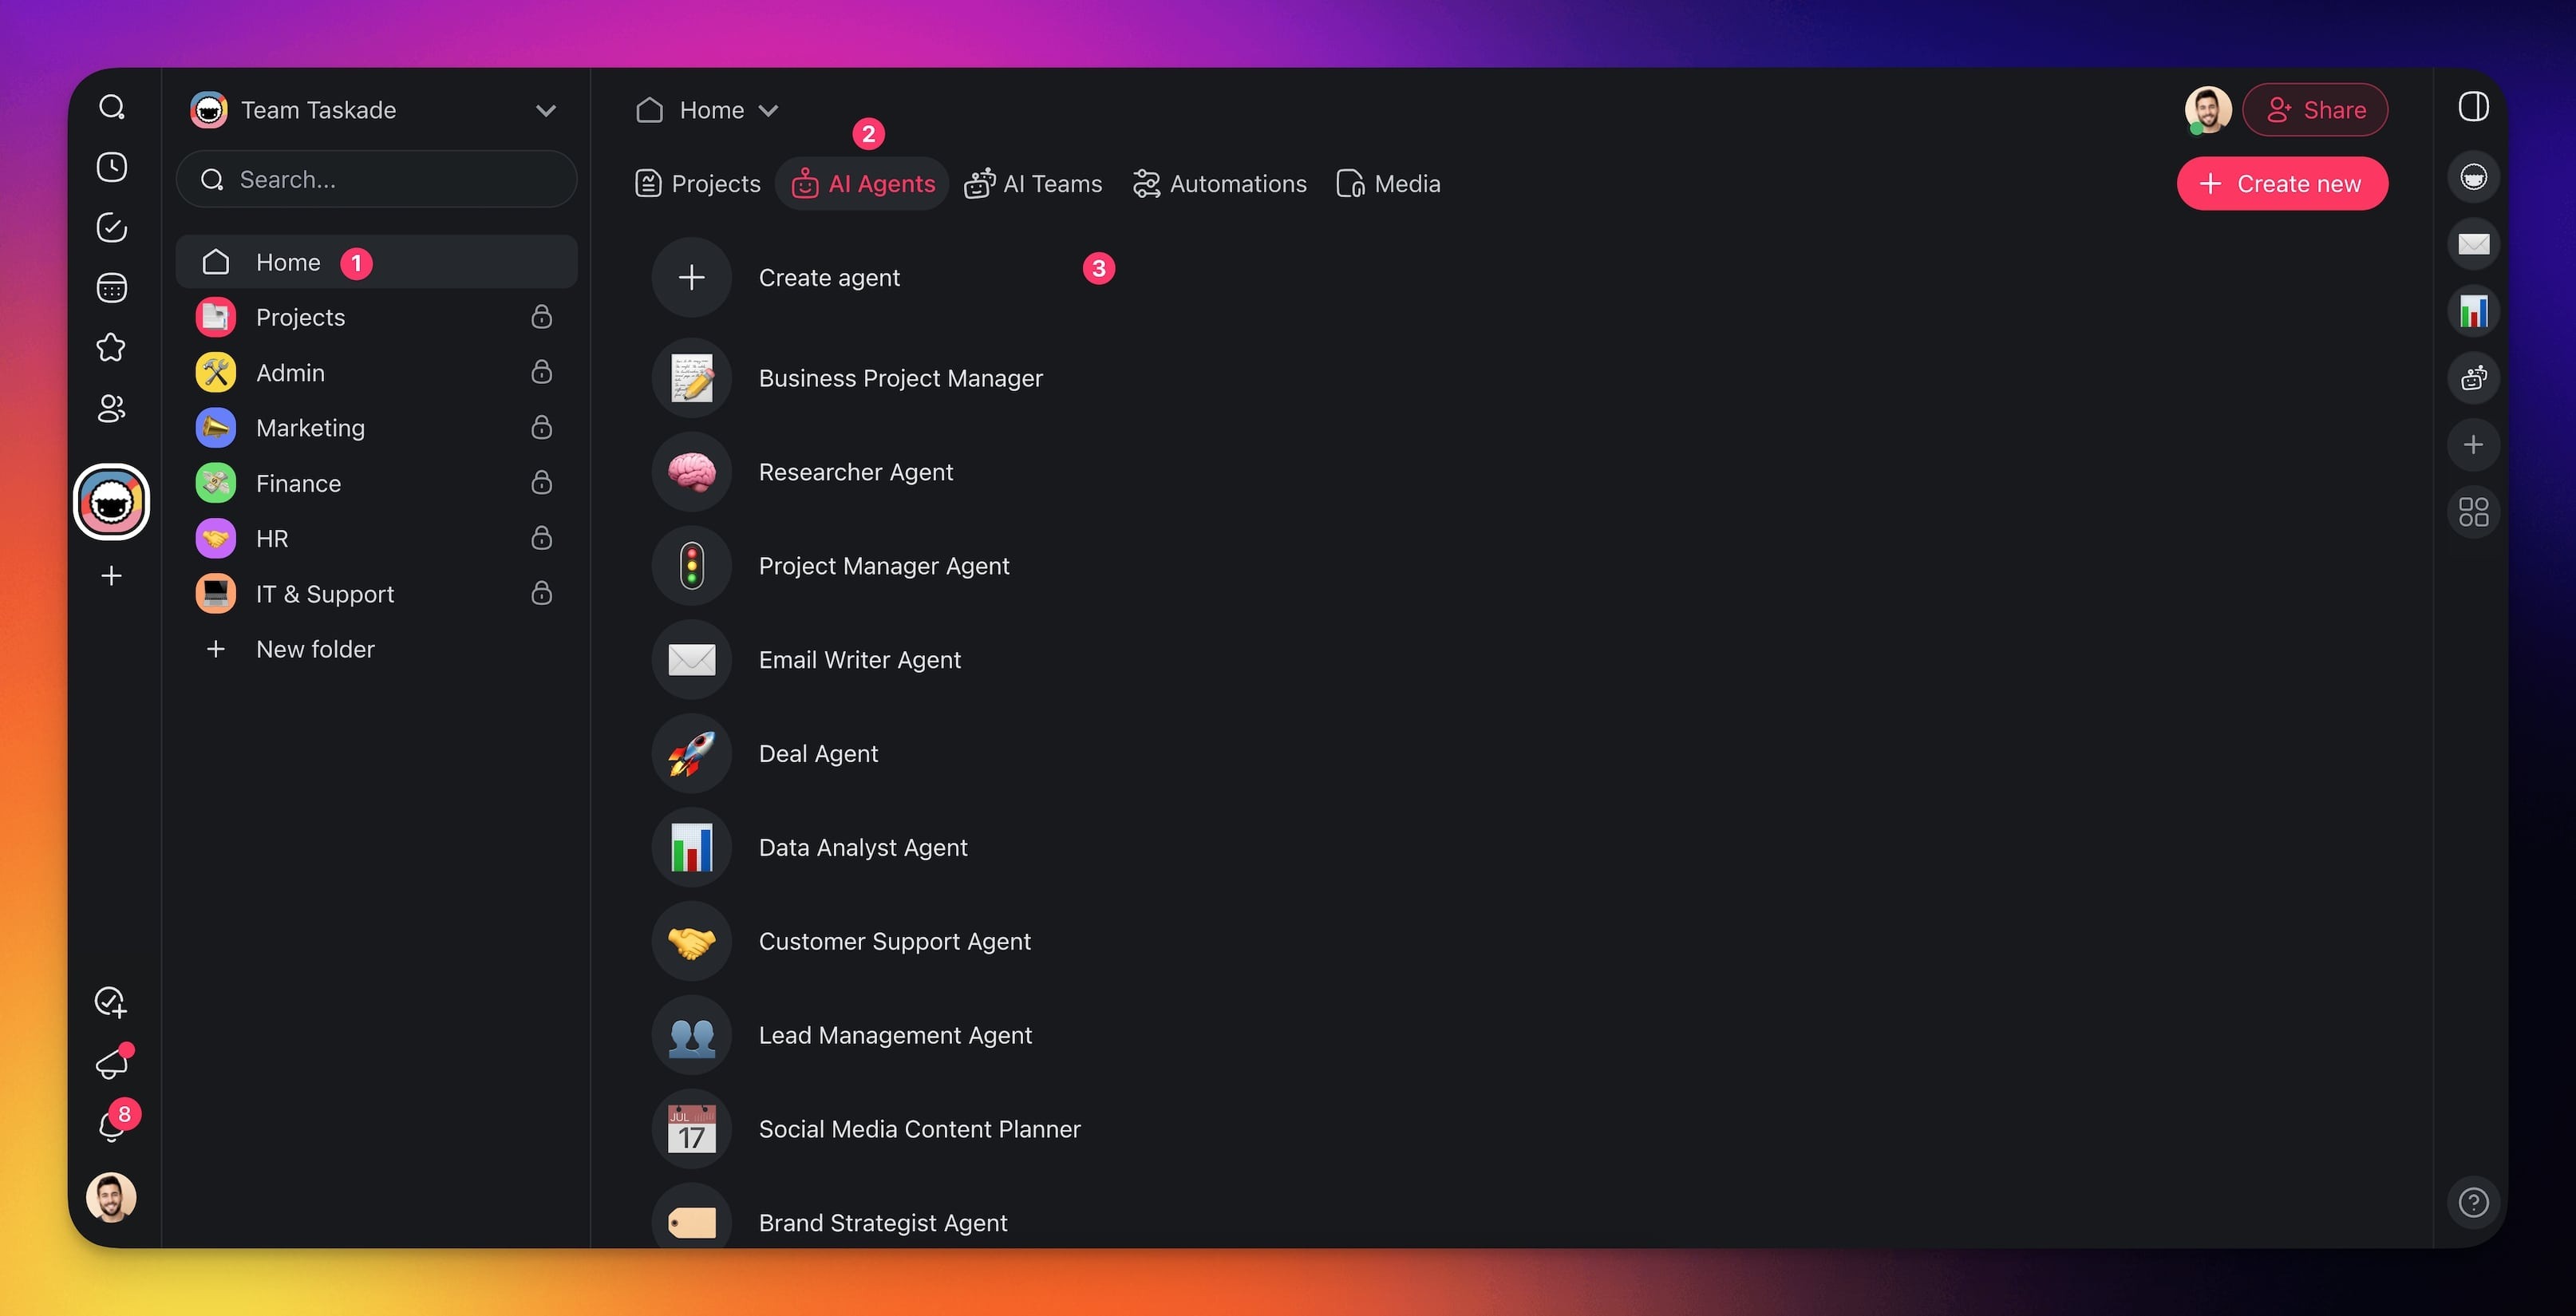
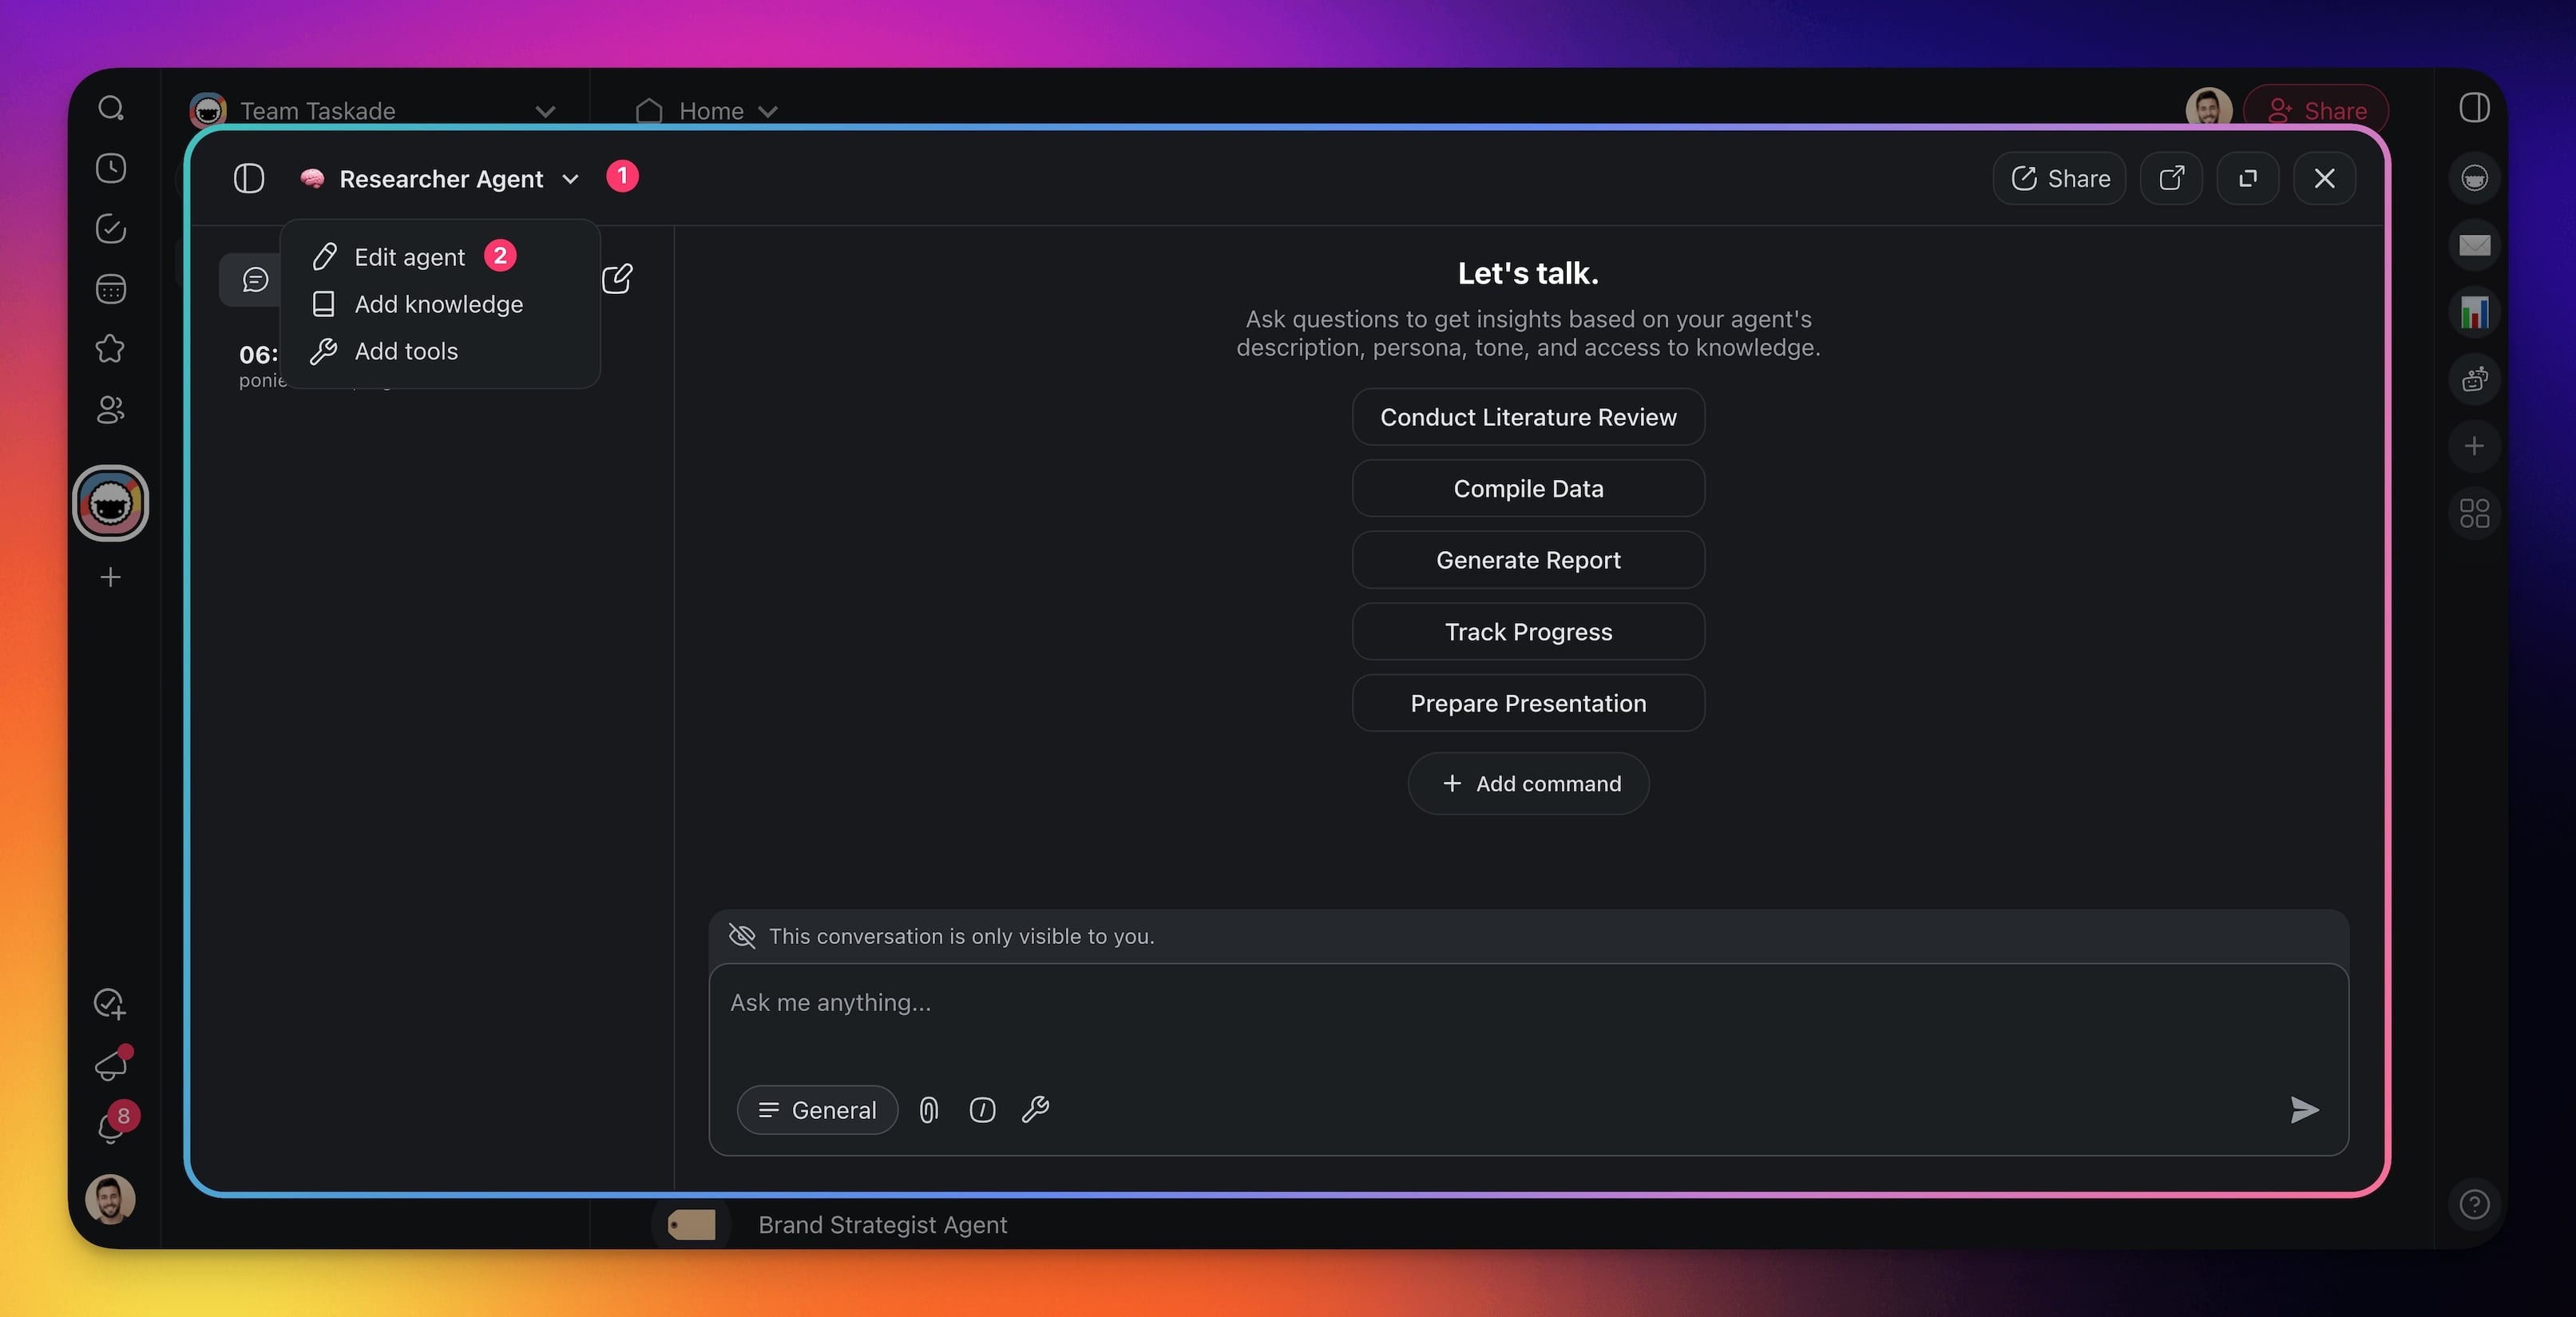
- Click the arrow next to the name of the agent.
- Click Edit agent.
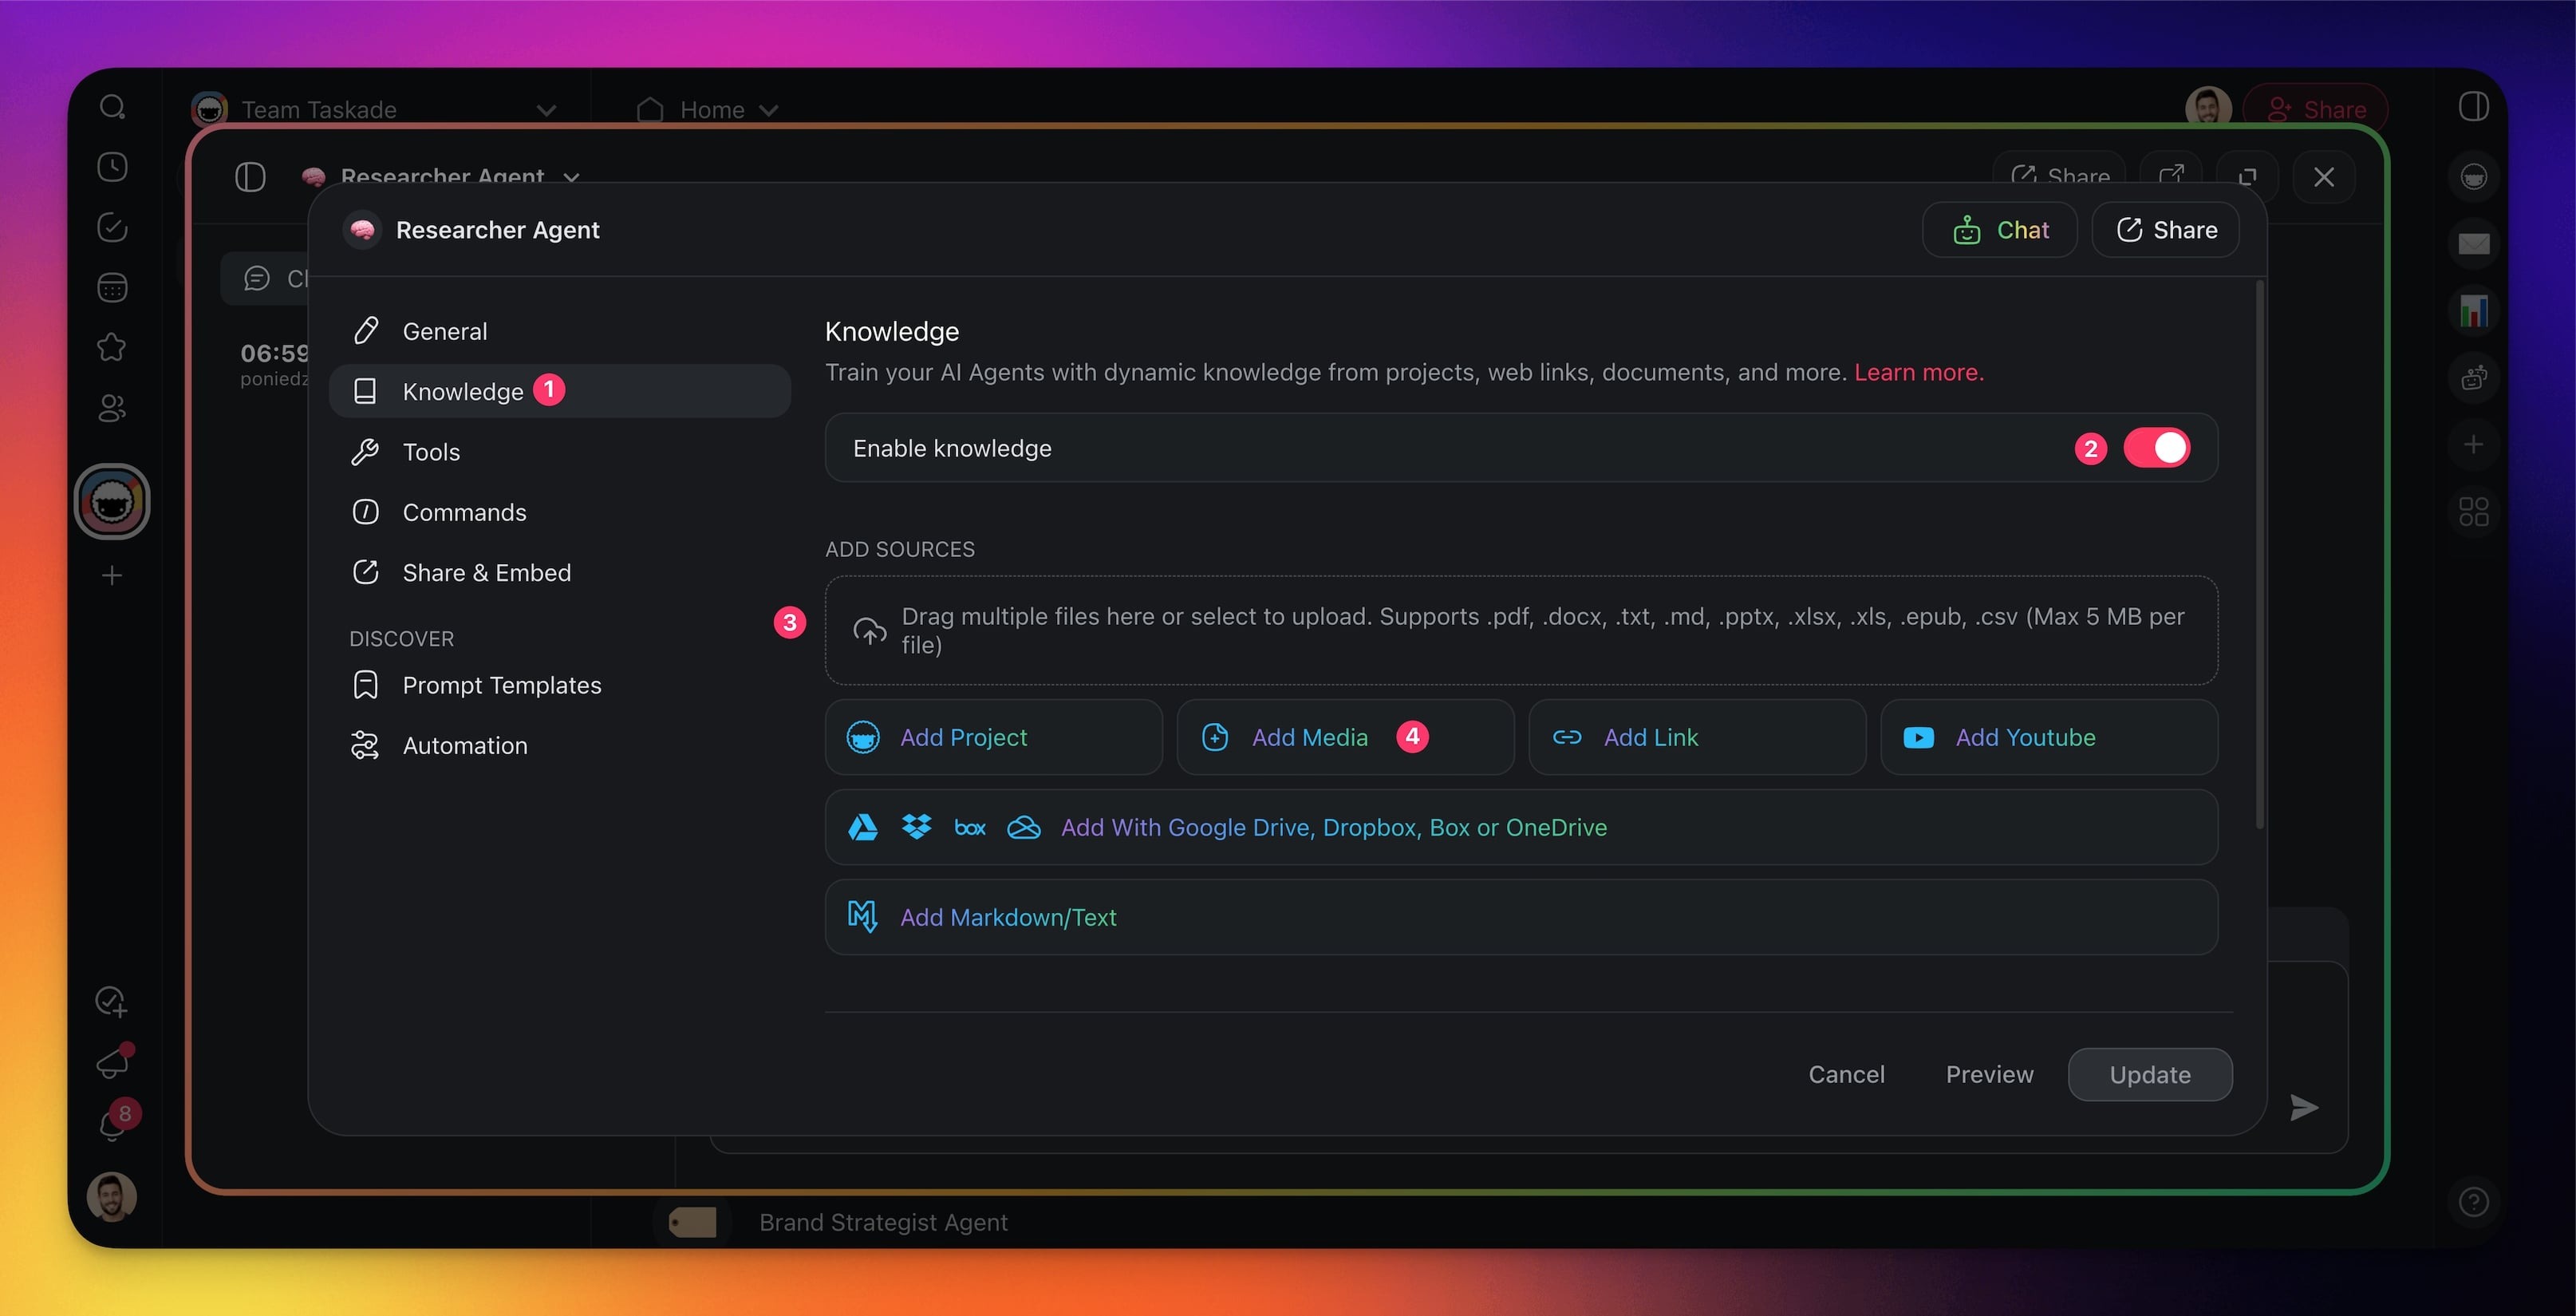
Select the Knowledge tab from the menu on the left.
Use the toggle to enable agent knowledge.
- Drag your files into the box or click to upload.
- Click Add Media to add attachments from your folders/workspace.
Use CSV as Project Context
Note: Visit AI Project Studio to learn more.
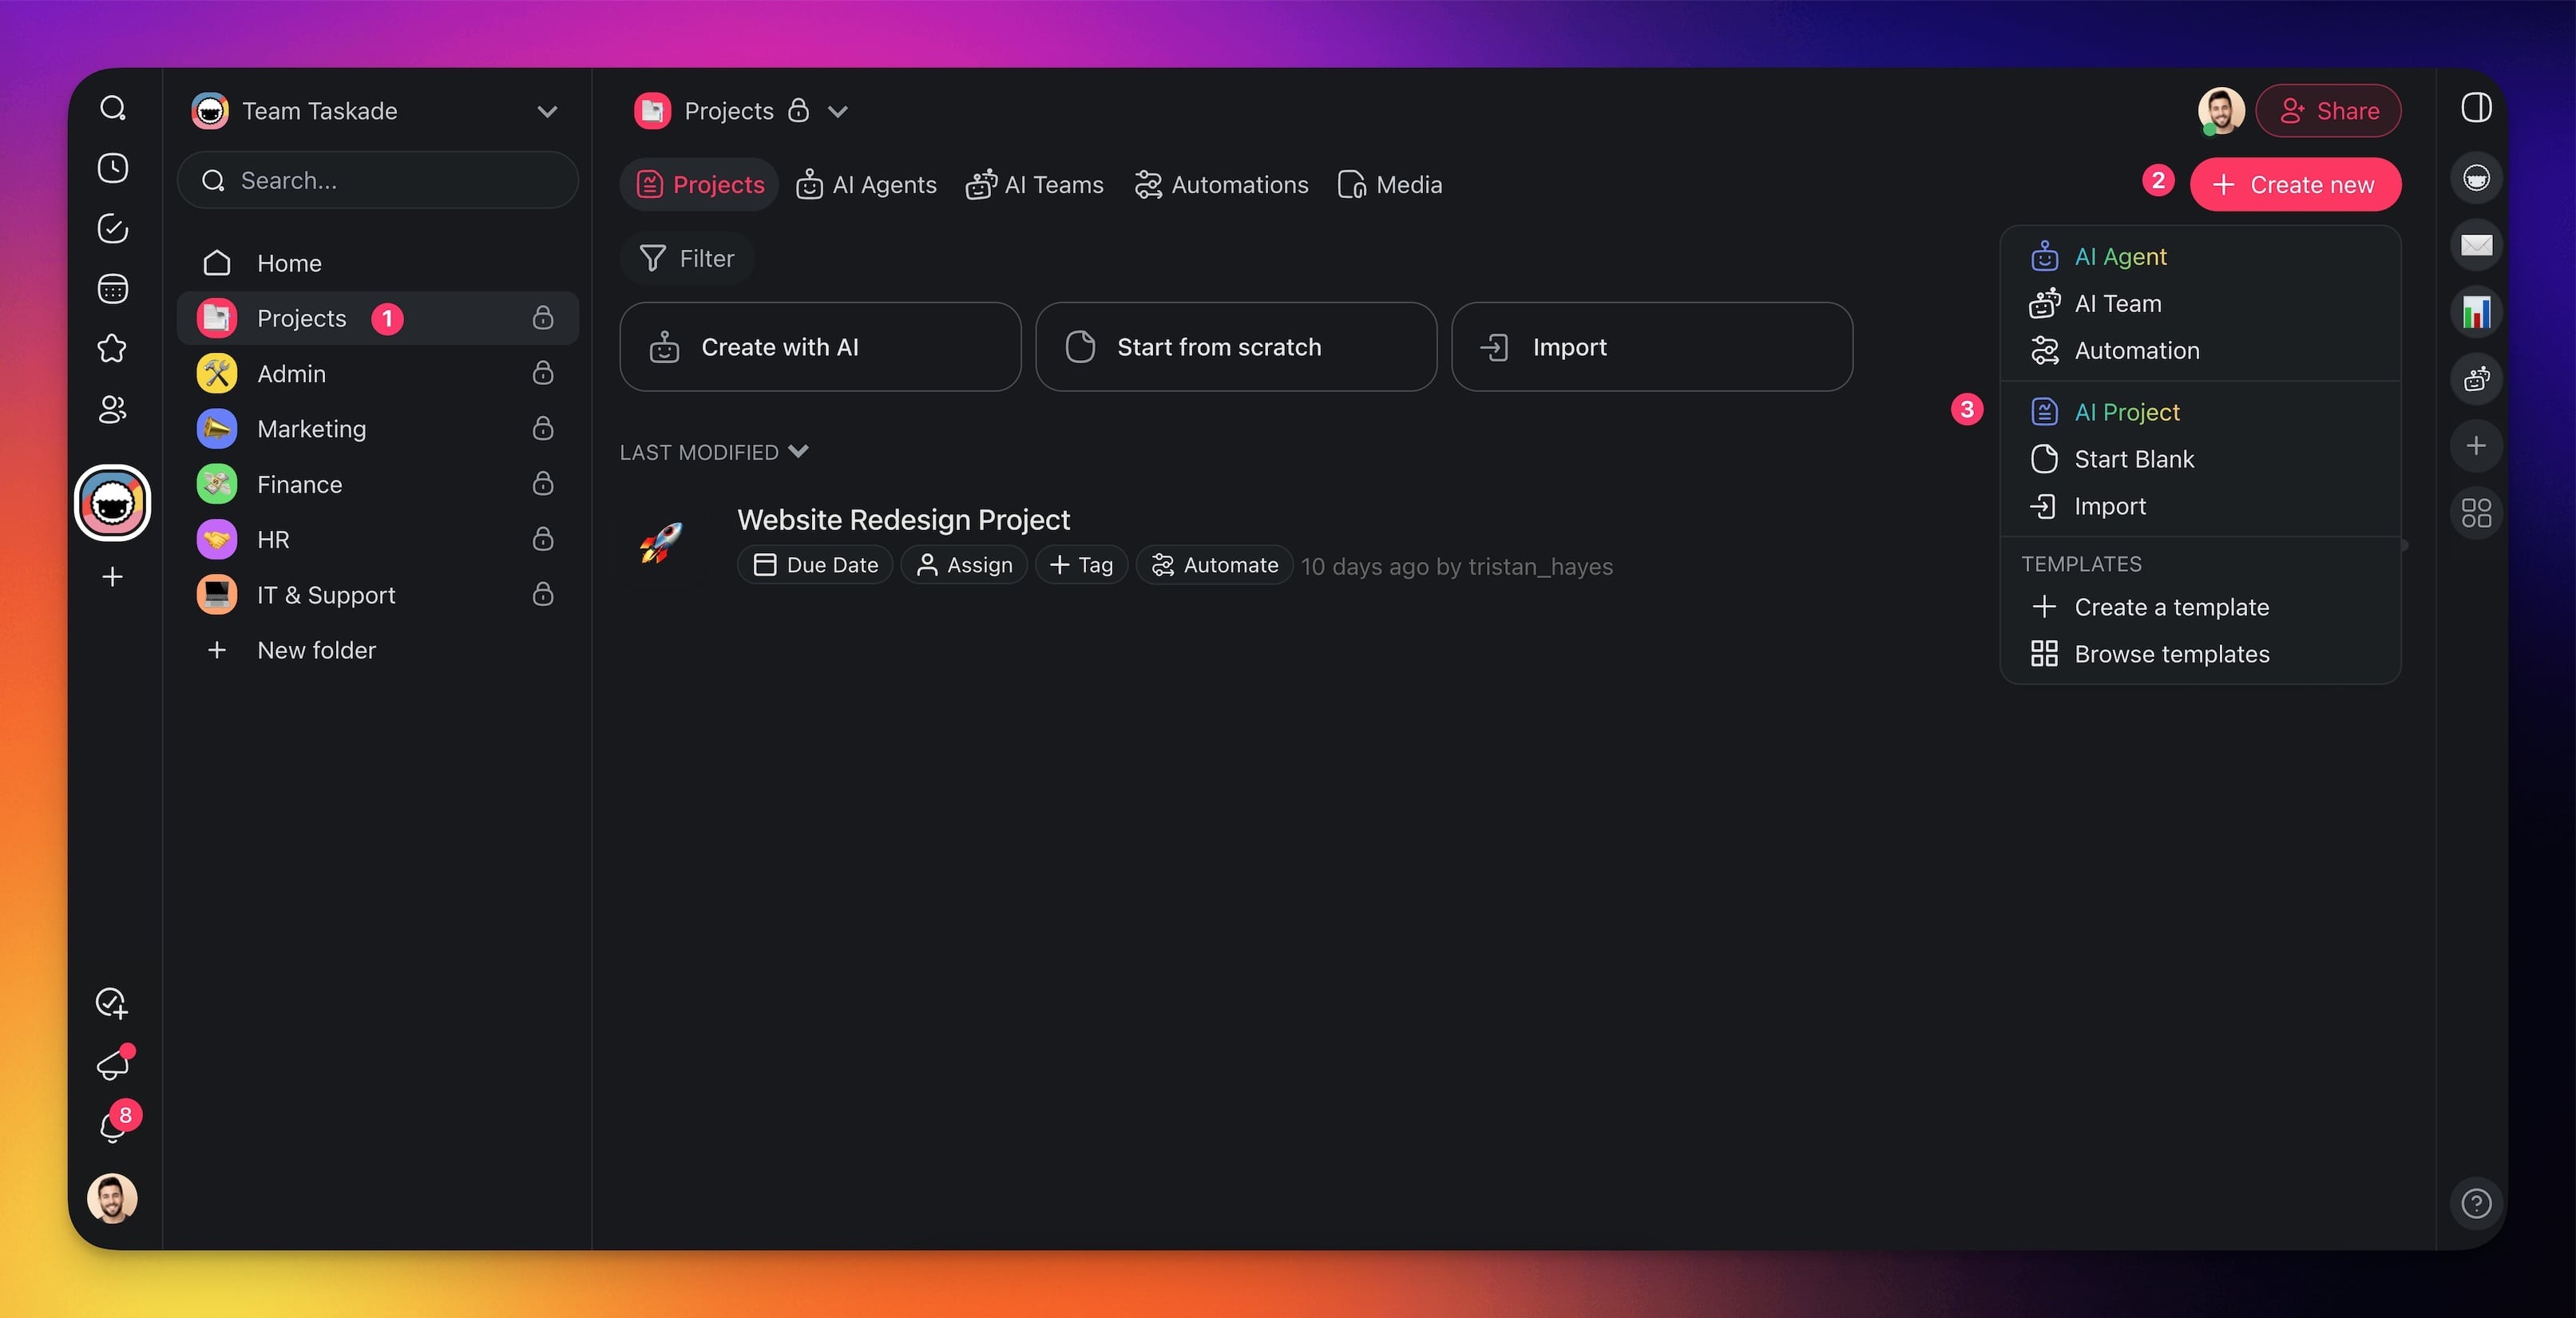
- Go to your workspace/ folder.
- Click ➕ Create new (top-right corner).
- Choose AI Project from the drop-down list.
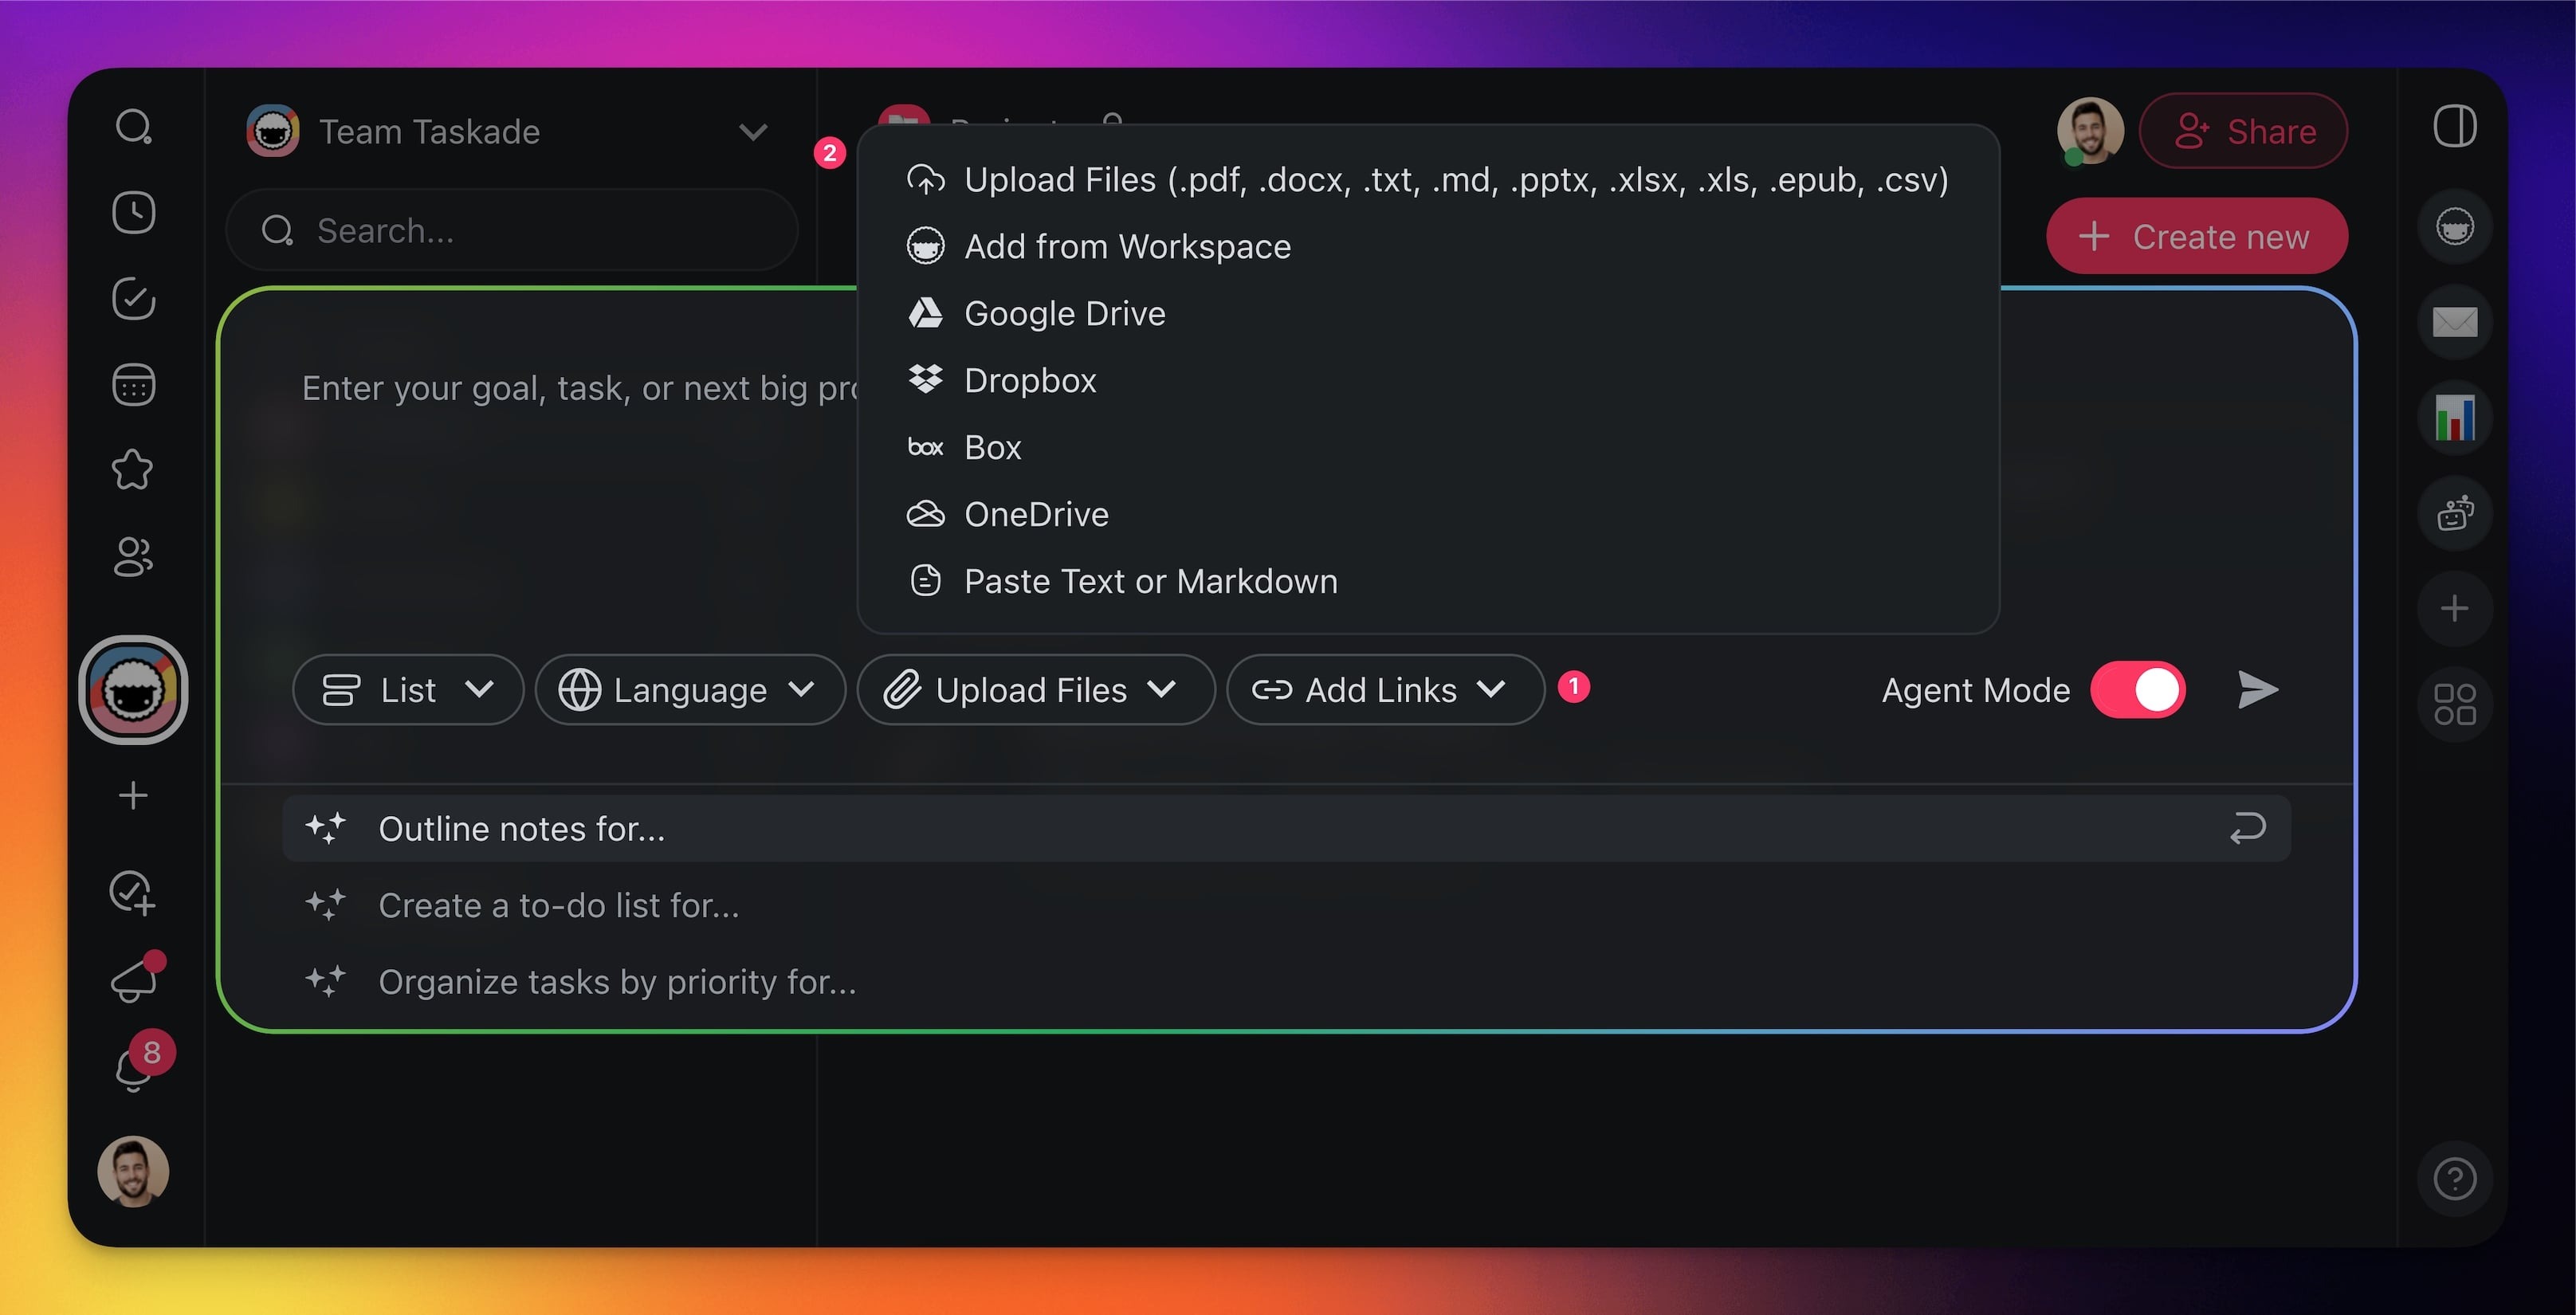
- Describe the project you want to generate, or use one of the templates.
- Click 📎 Upload Files and upload your .csv files.
- Click ➤ or press ⌨️ Enter to generate the project.
Tips
- The methods on this page also work for CSV files exported from Asana, Trello, Monday, and ClickUp.
- For best results, give your CSV file a clear header row with column names.
- If your file holds more than 5,000 rows, split it into parts and import each part.
- If you want a narrative summary instead of rows, use Summarize with AI.
- To go the other way, export any Taskade project back to CSV from any project view, on every plan. See Export & Print Projects.