
What Is SAML?
SAML lets your team sign in to Taskade with the same Microsoft Entra (Azure AD) credentials they already use across the Microsoft stack. There is no second password, and no extra account to deprovision. This guide walks through the full Azure and Taskade configuration in roughly 15 minutes.
TL;DR: Create a custom Enterprise Application in Azure AD, configure SAML with Identifier
https://www.taskade.com/saml/sso/metadataand Reply URLhttps://www.taskade.com/saml/sso/login/callback. Generate a signing certificate, then paste Azure's Login URL, Identifier, and Base64 certificate into Taskade's Settings → Organization → SAML SSO. Available on Business, Max, and Enterprise plans, and pairs with SCIM provisioning for automated user accounts.
💡 Note: If your team already uses Taskade, your identity provider takes ownership of those accounts. Tell your team before you enable SAML.
Configure with Azure AD
Requirements
- Important: Ask your IT department to configure this.
- The main account must be set up with a company email address.
- Personal email accounts are not allowed.
- Your email must be verified.
- This feature is available on Business, Max, and Enterprise plans.
💡 Already on Business? SAML single sign-on is included on Business, Max, and Enterprise, so you can finish this setup as soon as your Azure application is ready. Turn it on from Settings → Organization → SAML SSO. Business also puts your published Taskade Genesis apps on Custom Domains. Their built-in GenesisAuth sign-in works on every plan. See the Plan Matrix to compare tiers.
1) Create an Organization
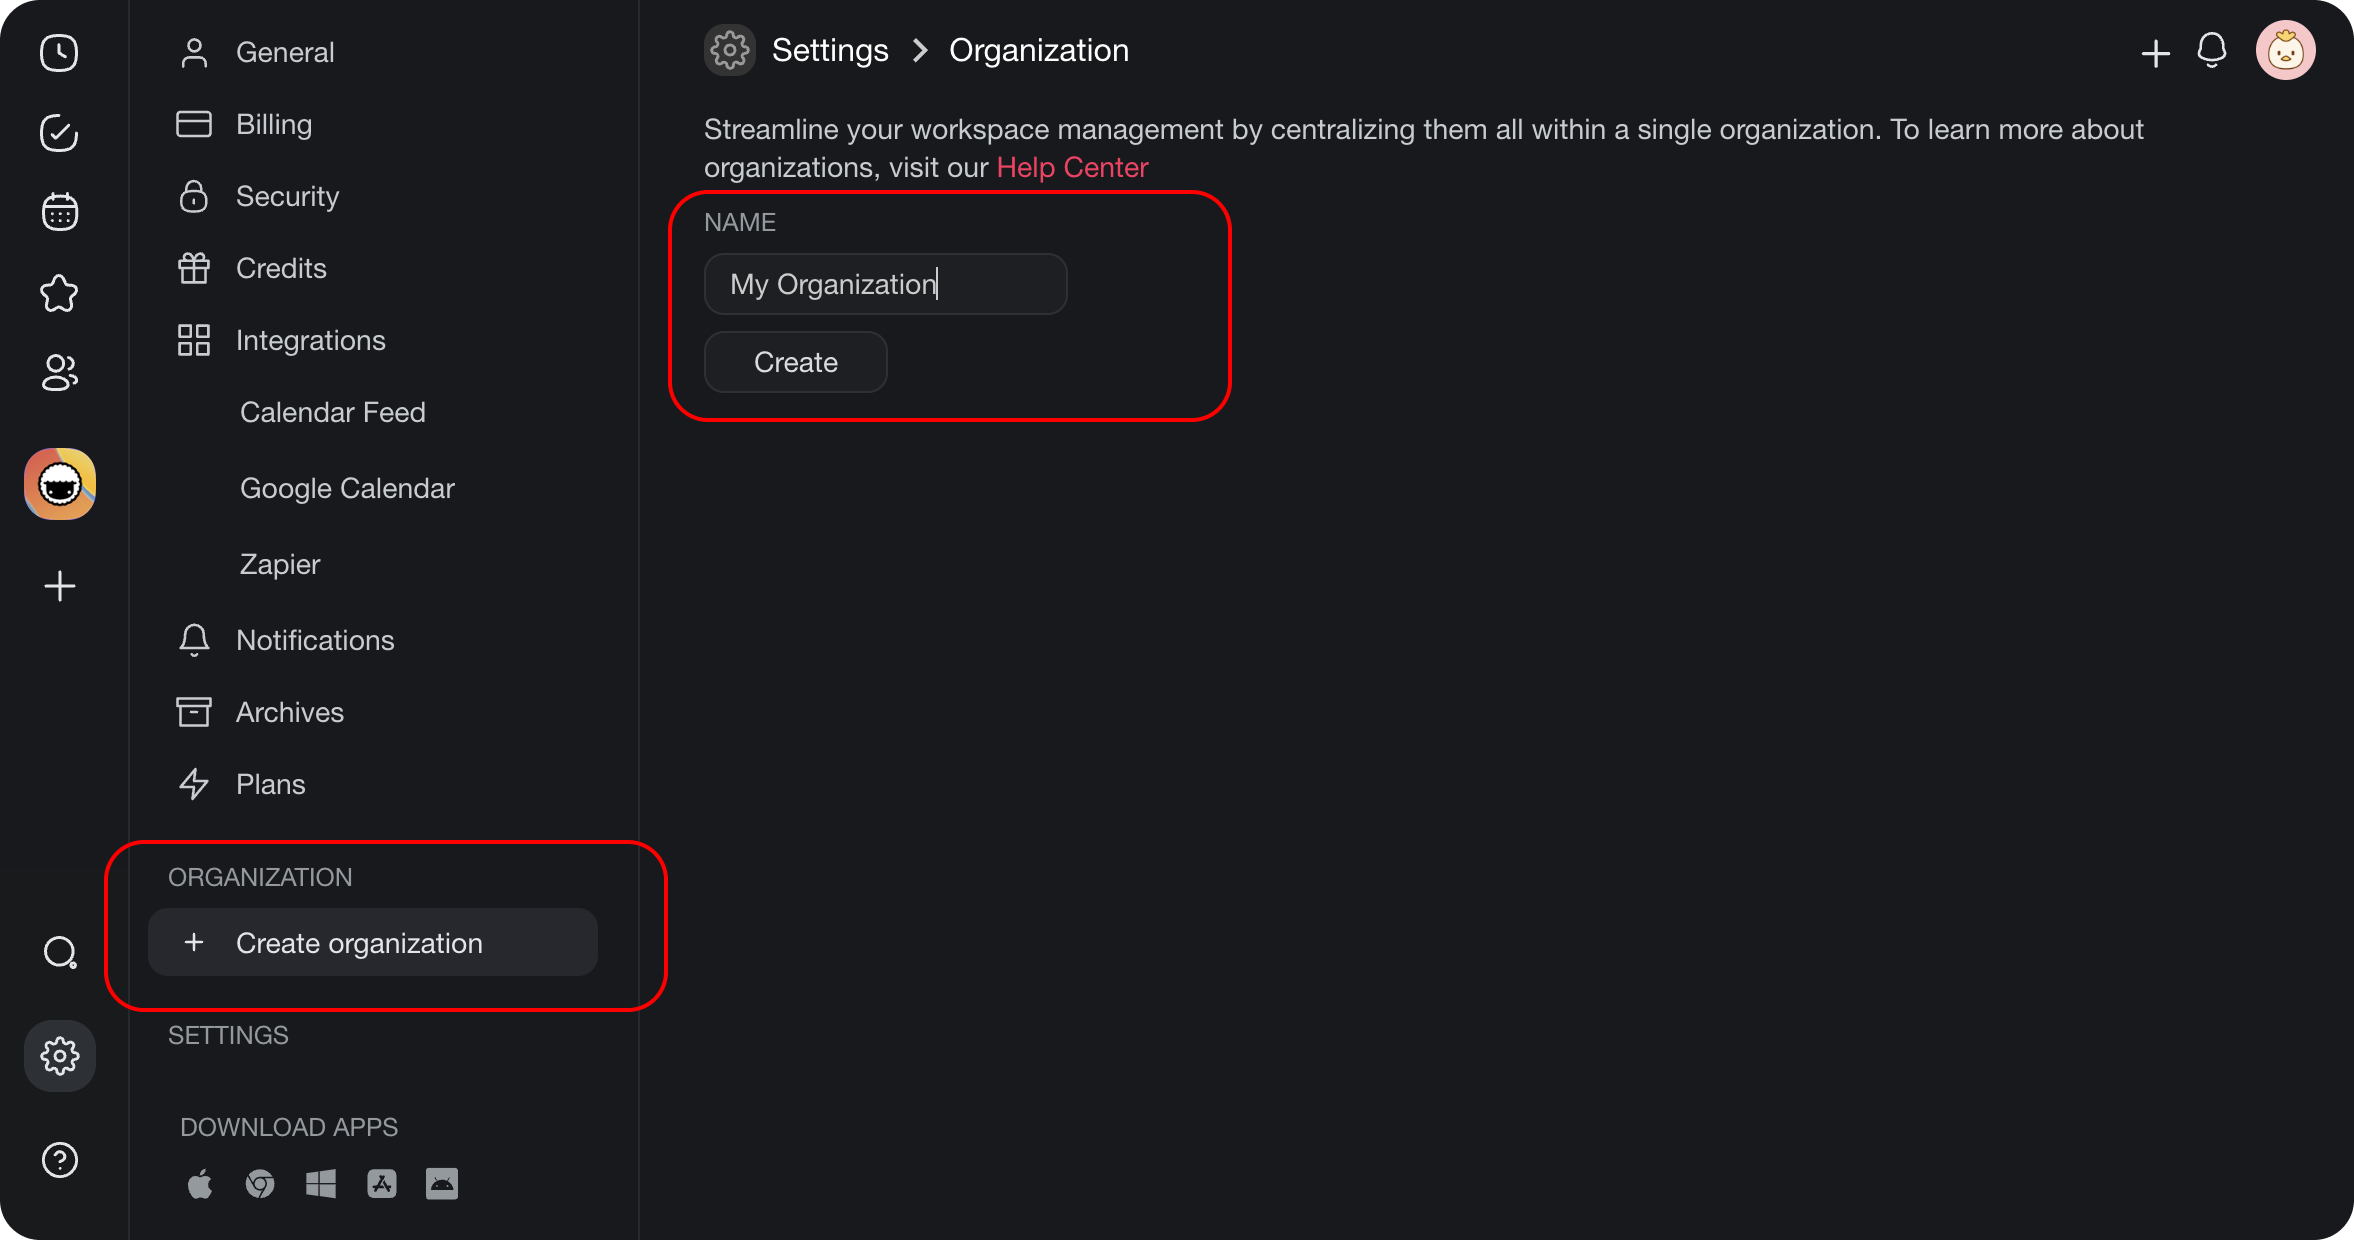
To manage multiple workspaces and enable group provisioning, create an organization on the Settings page of your Taskade account.
- Click the gear ⚙ button in the left sidebar.
- Under Organization, click ➕ Create organization.
- Enter the name of your organization and click Create.
2) Configure Azure
Next, open your Azure Portal and follow these steps:
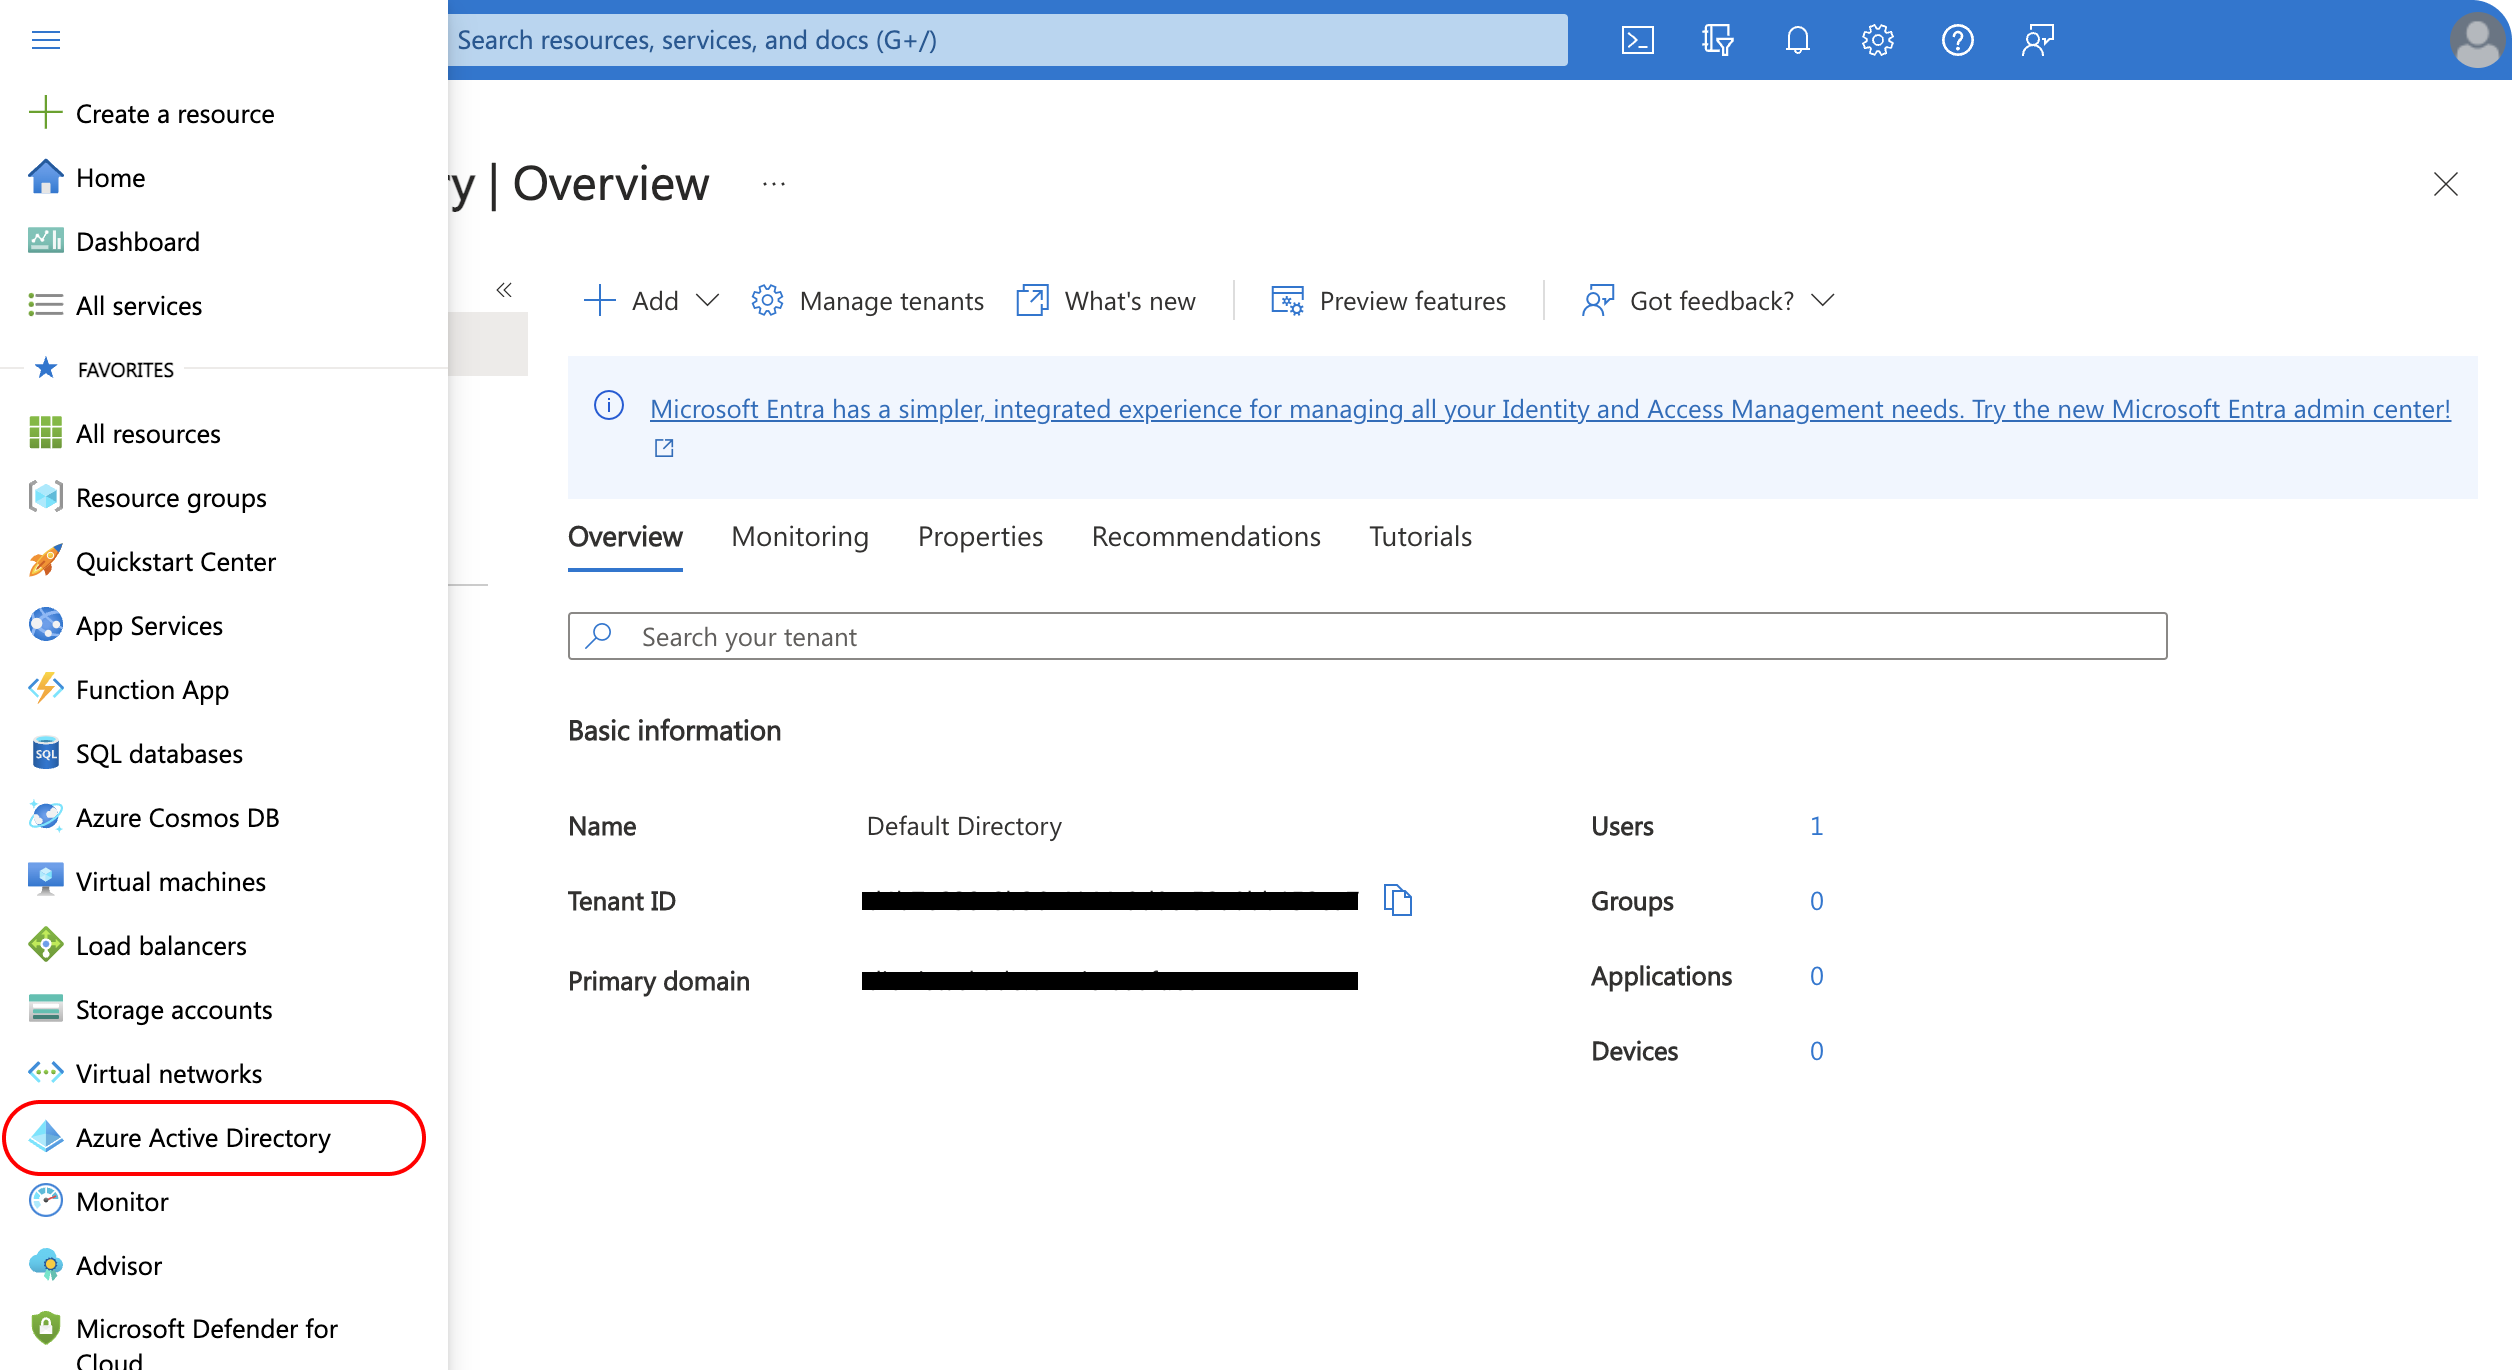
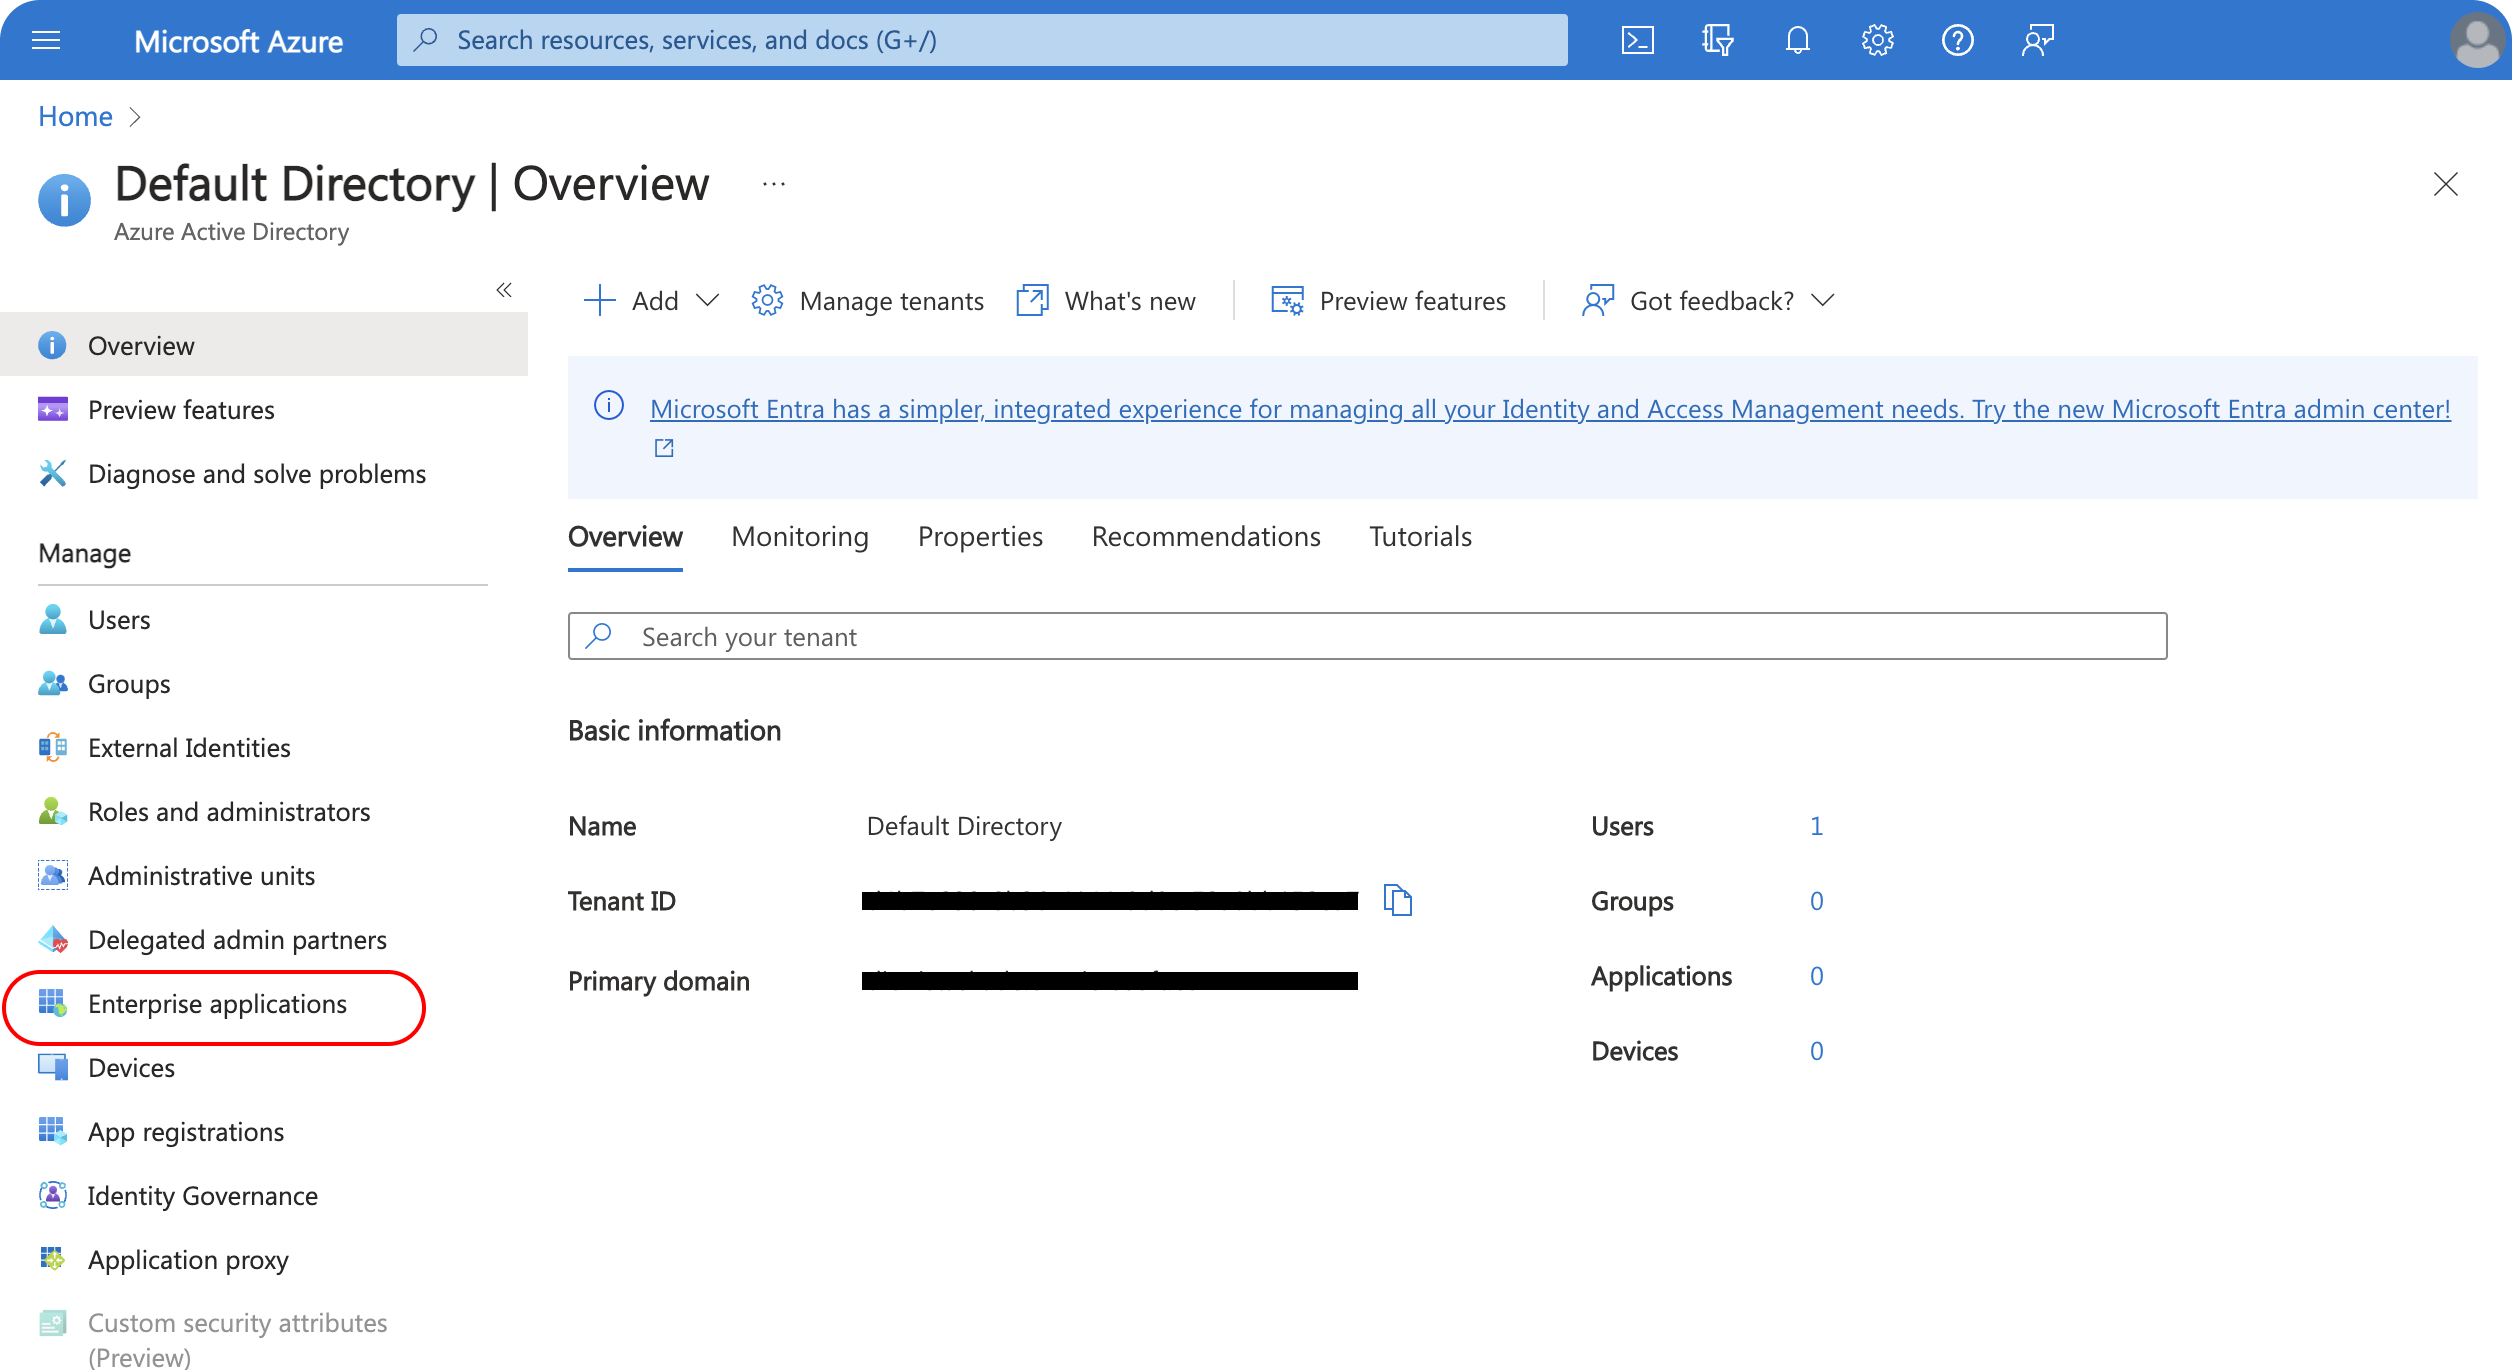
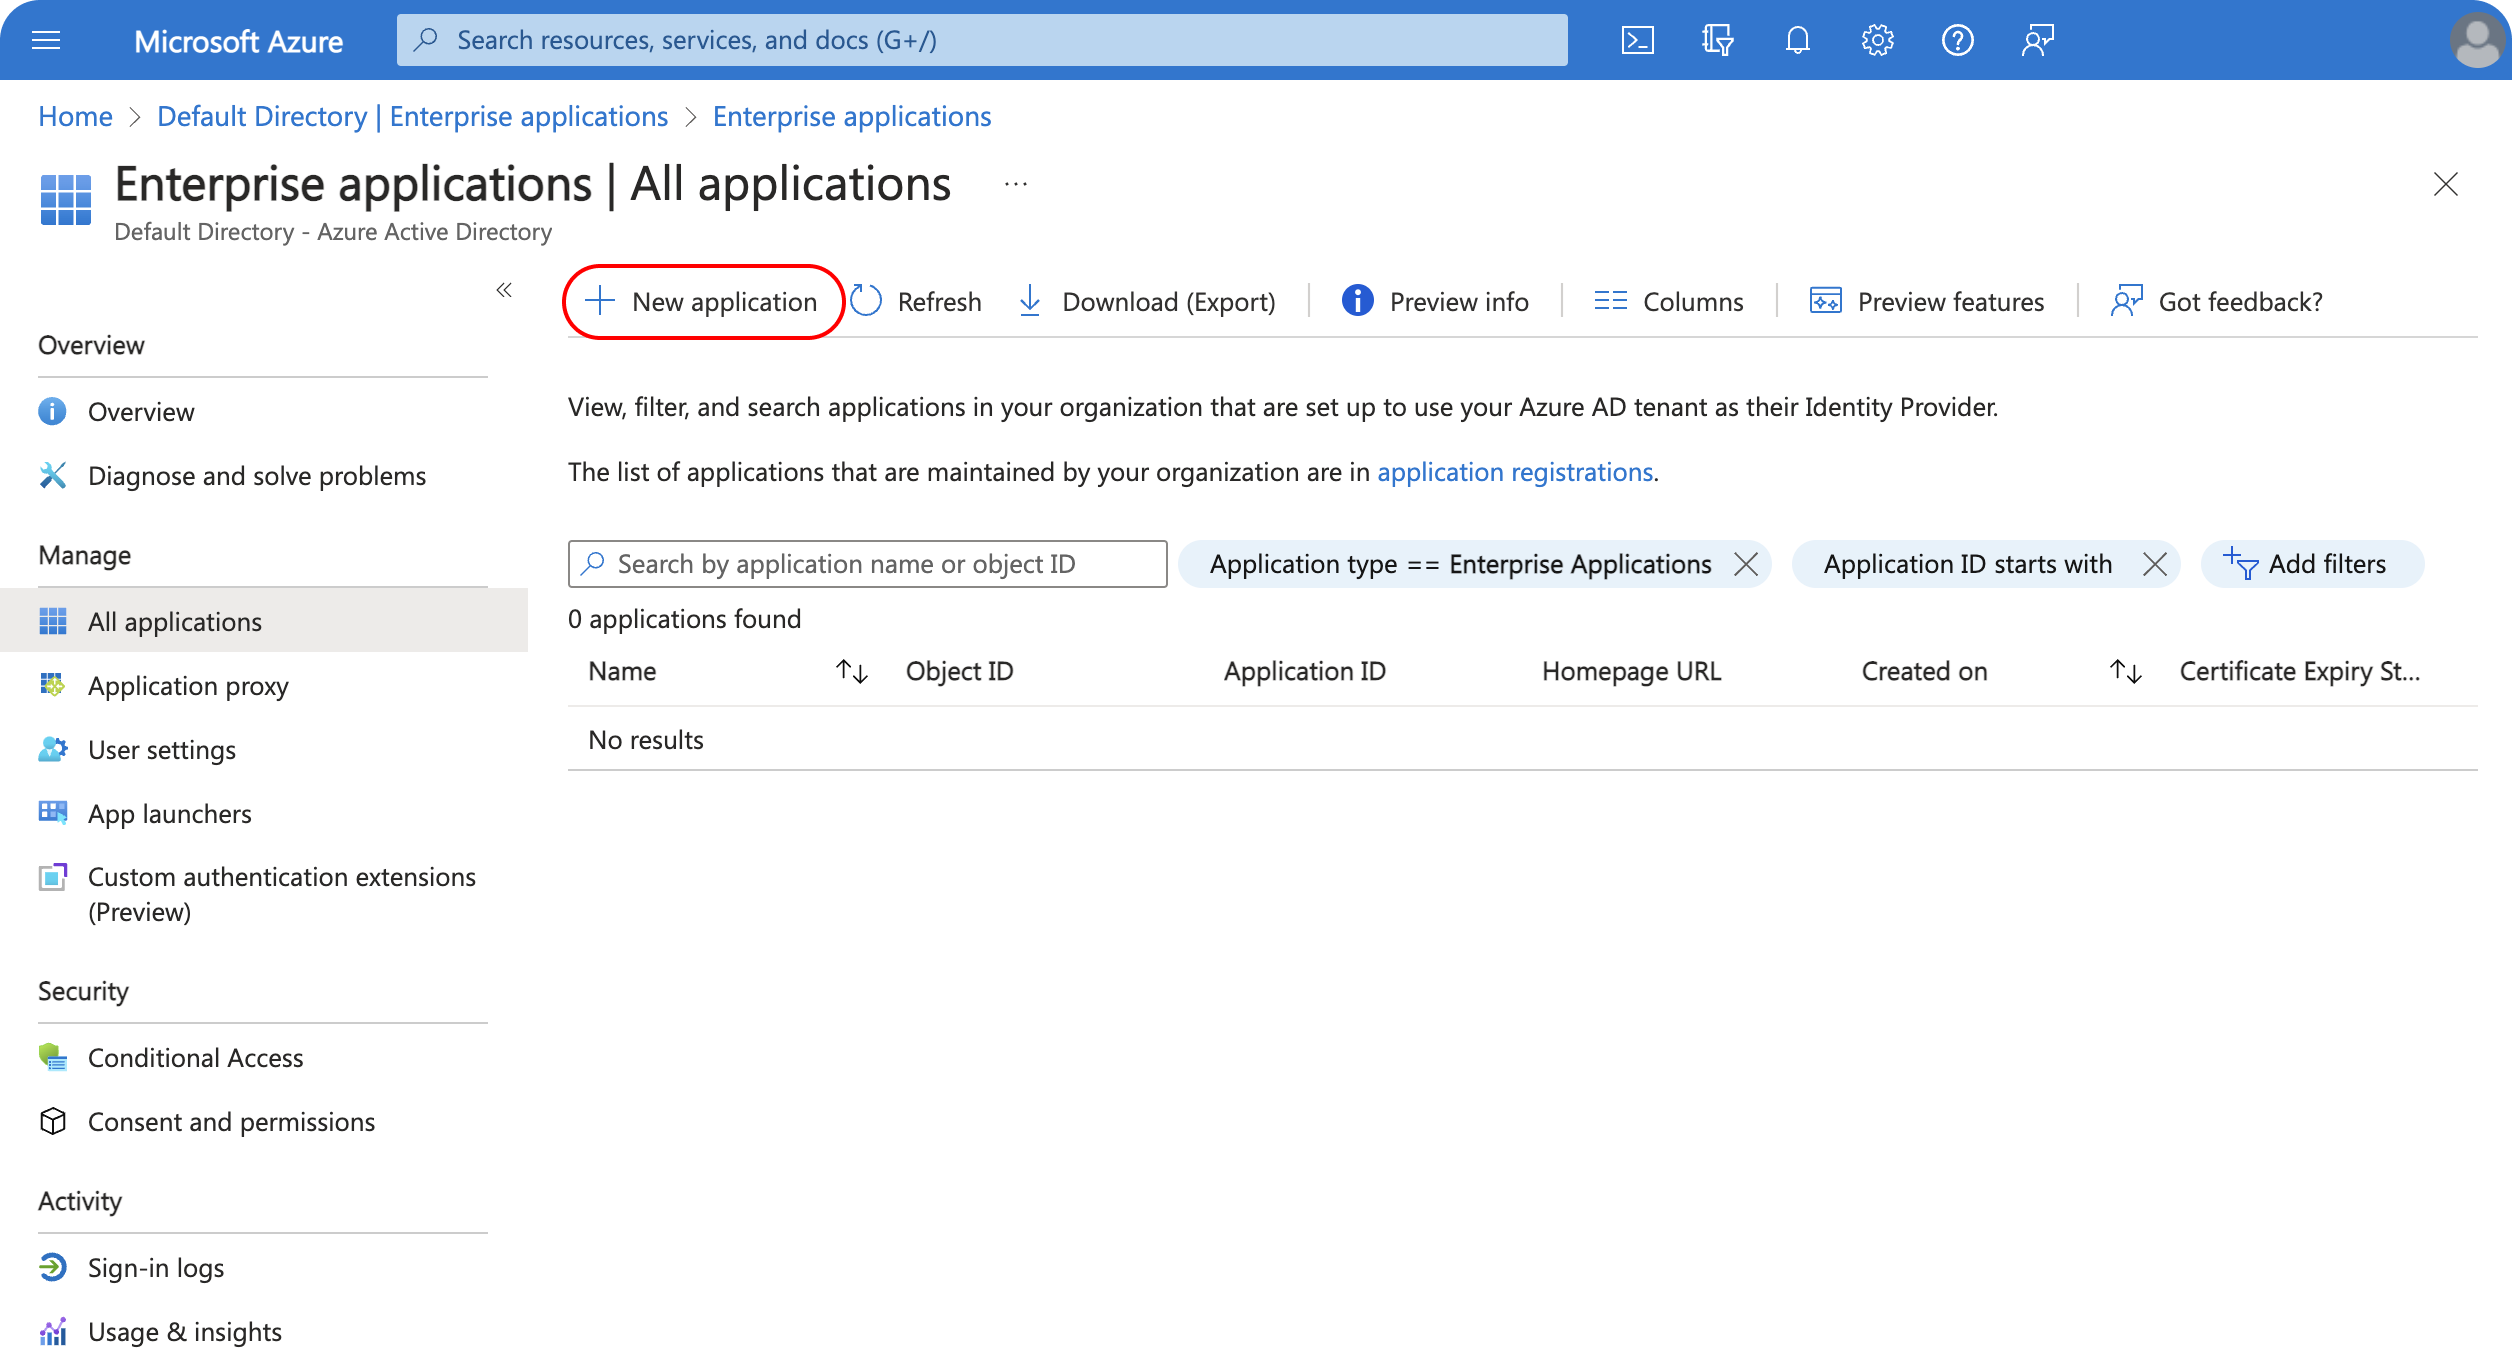
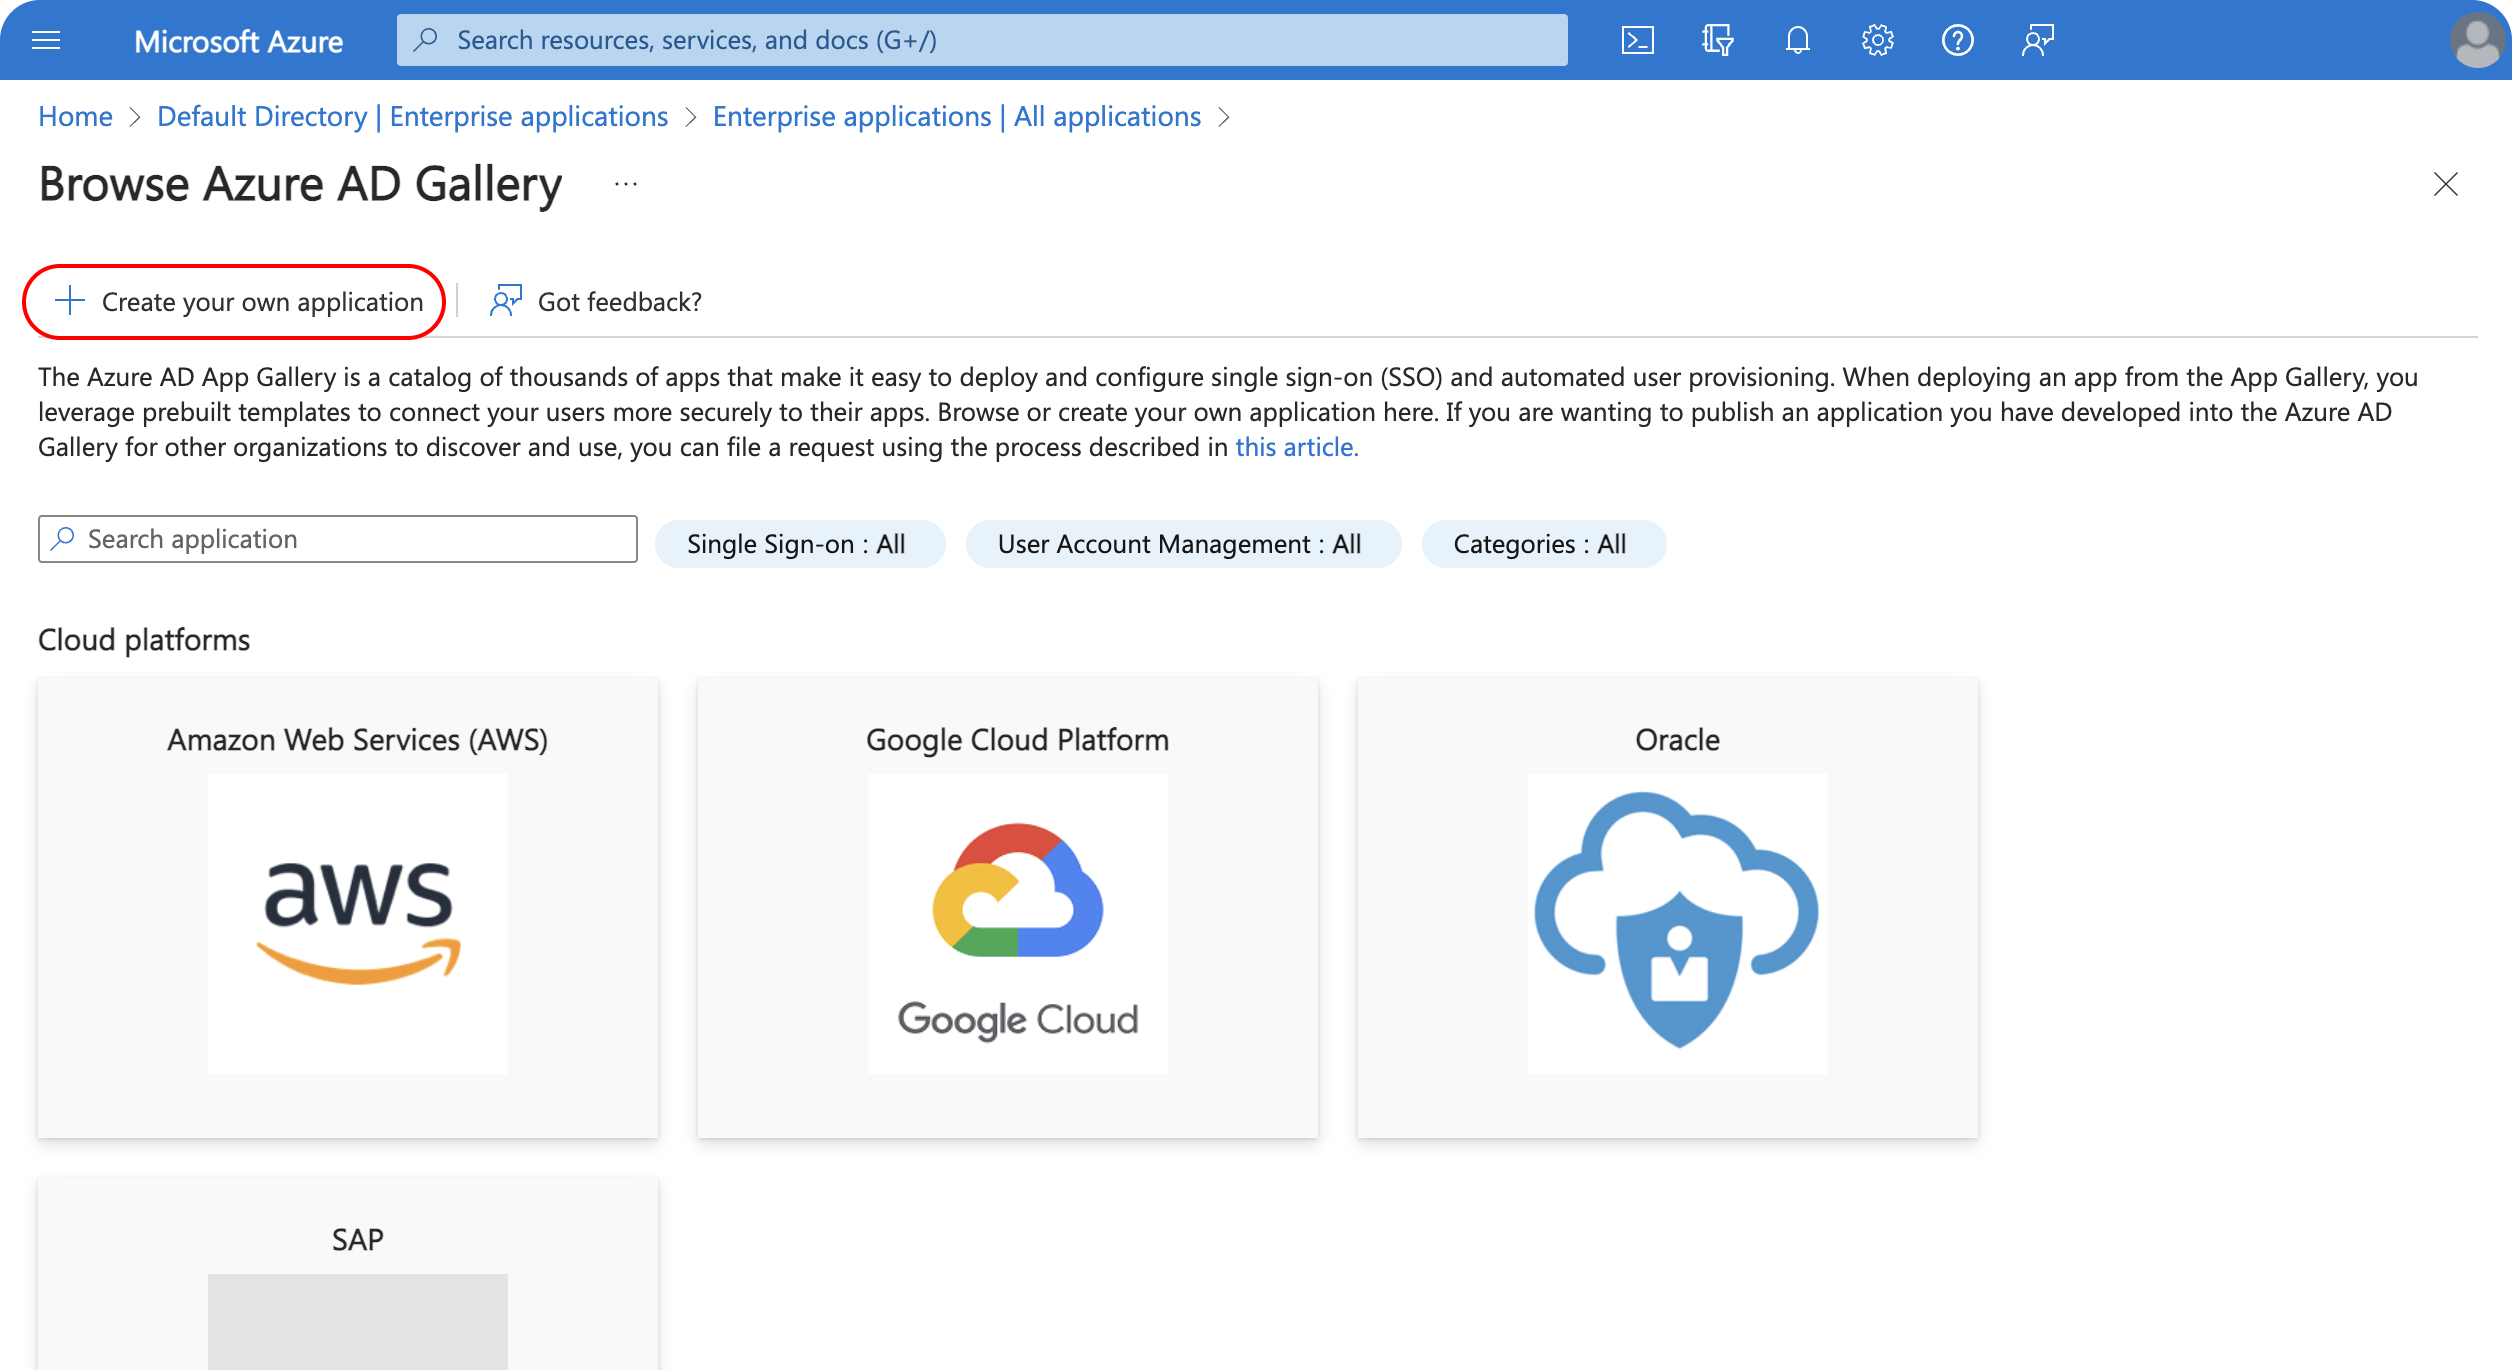
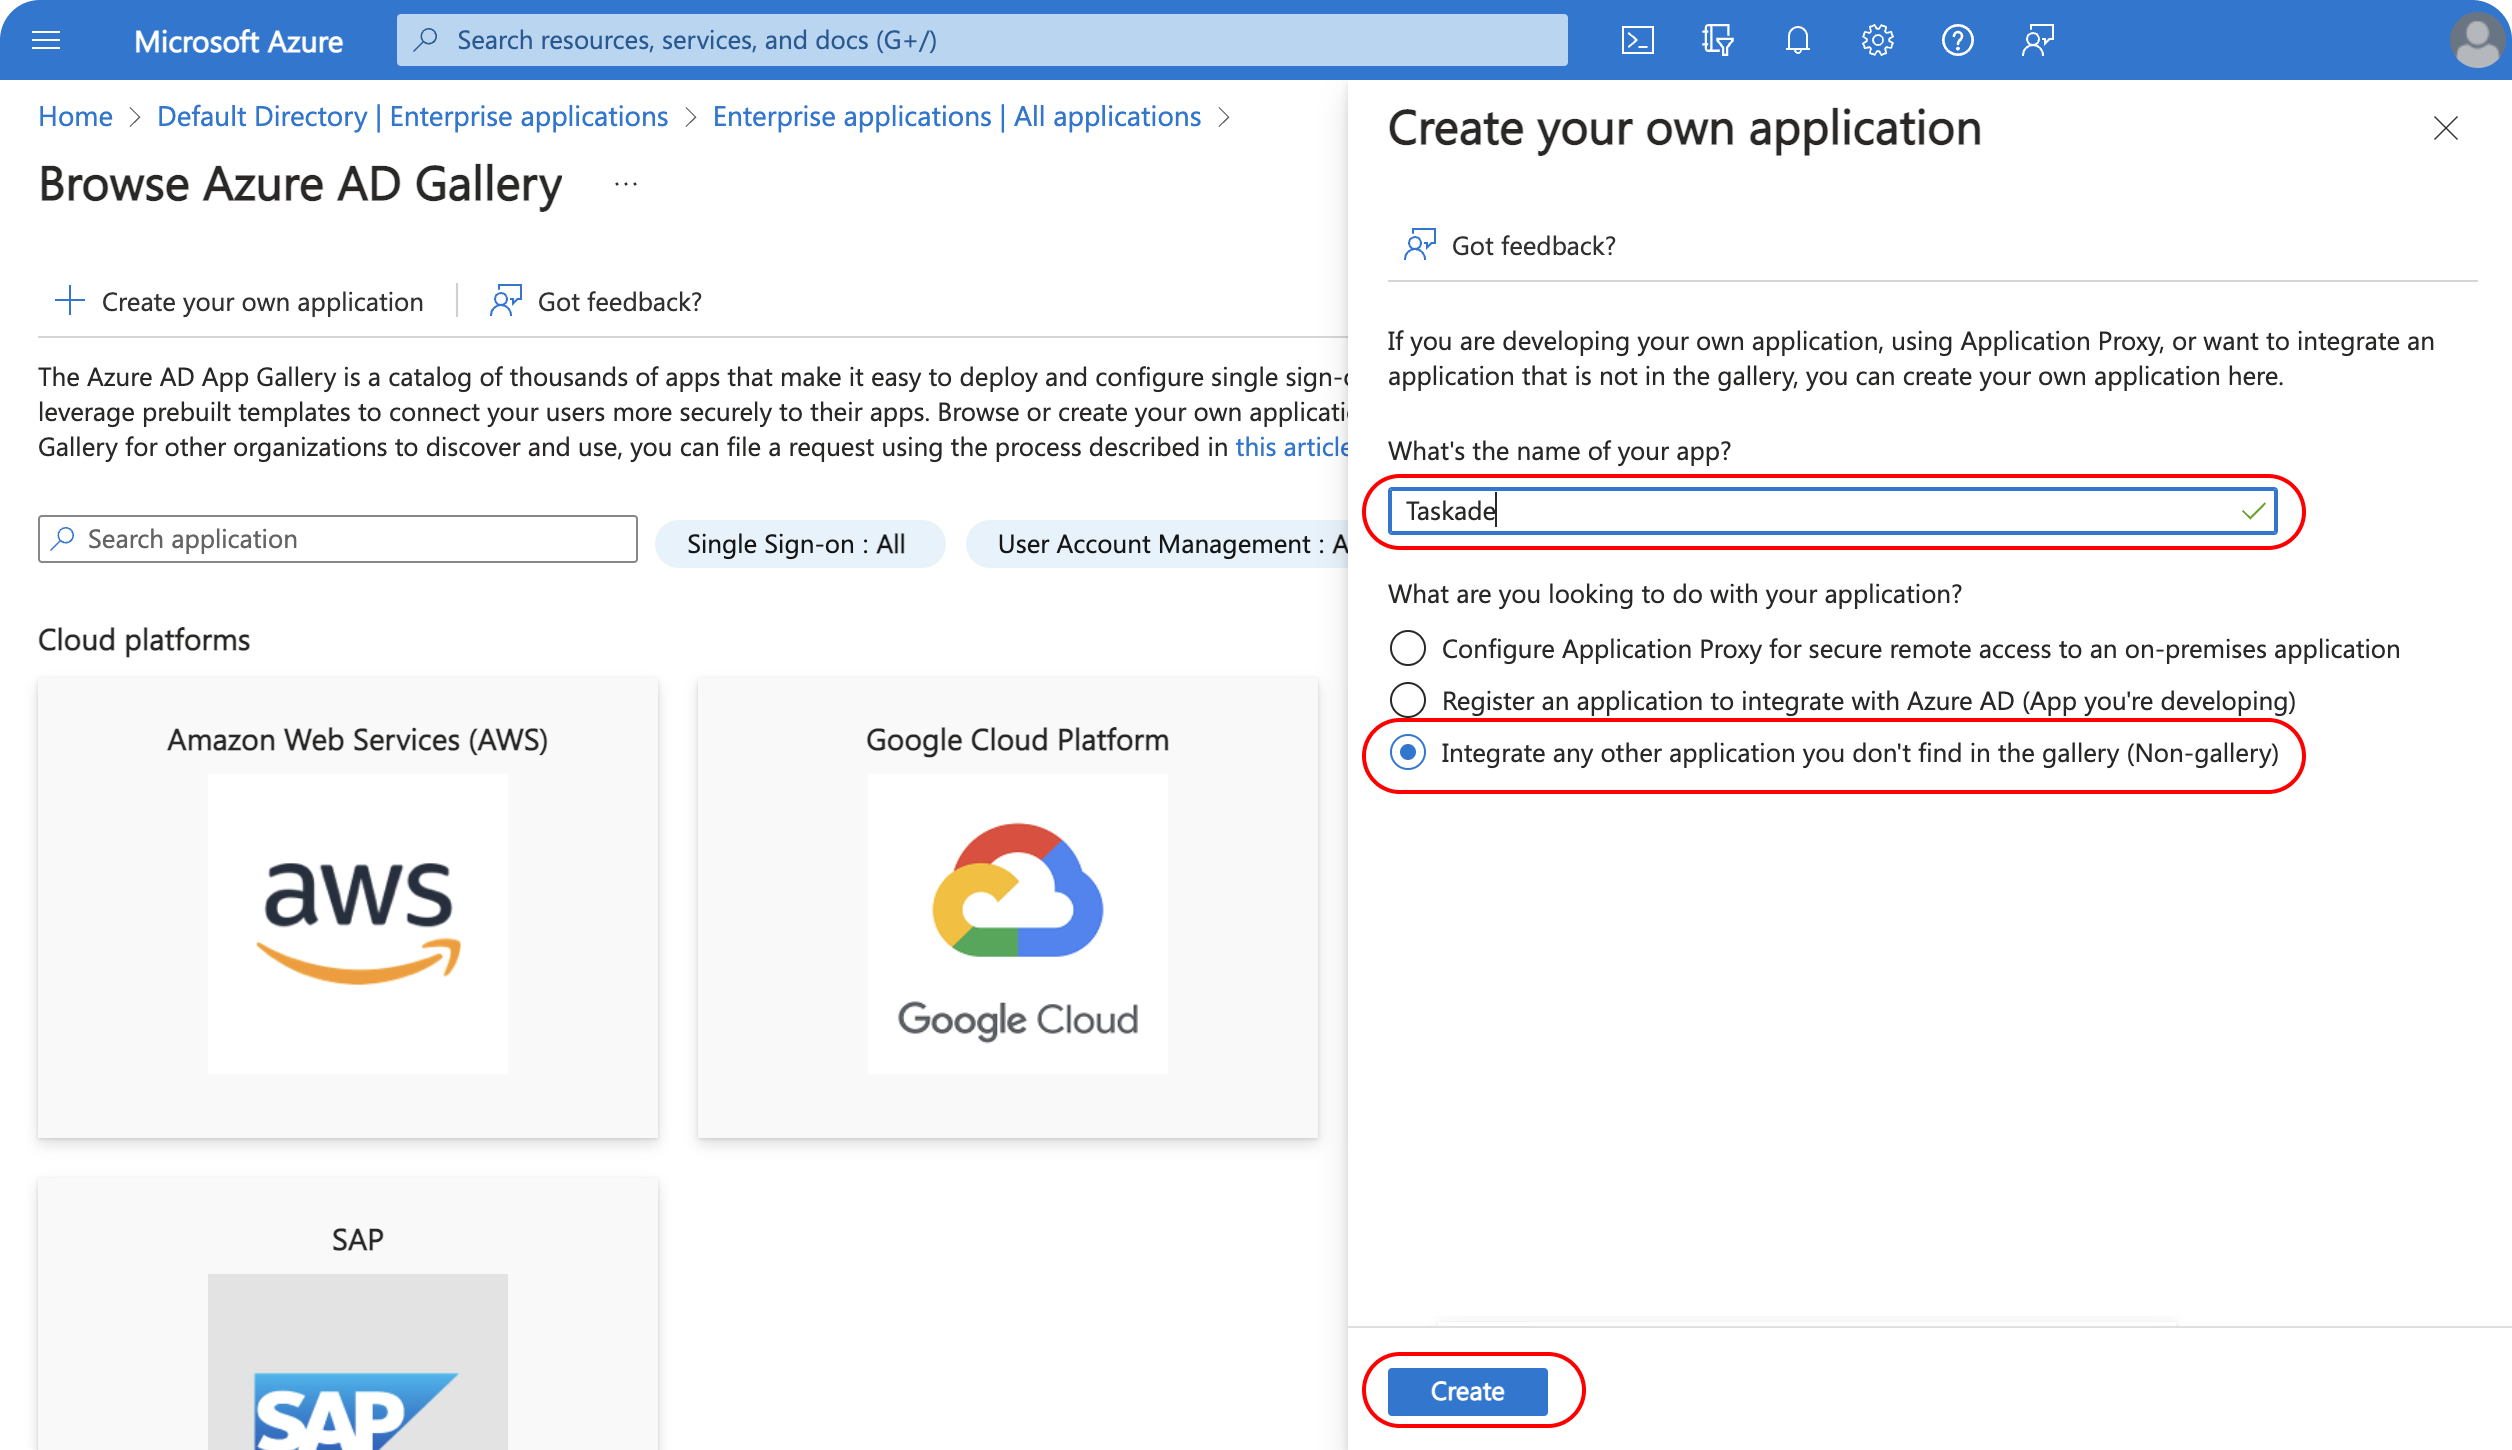
Taskade is not available in the Azure AD gallery yet. In the Create your own application menu, select Integrate any other application you don't find in the gallery. Then click Create at the bottom of the panel.
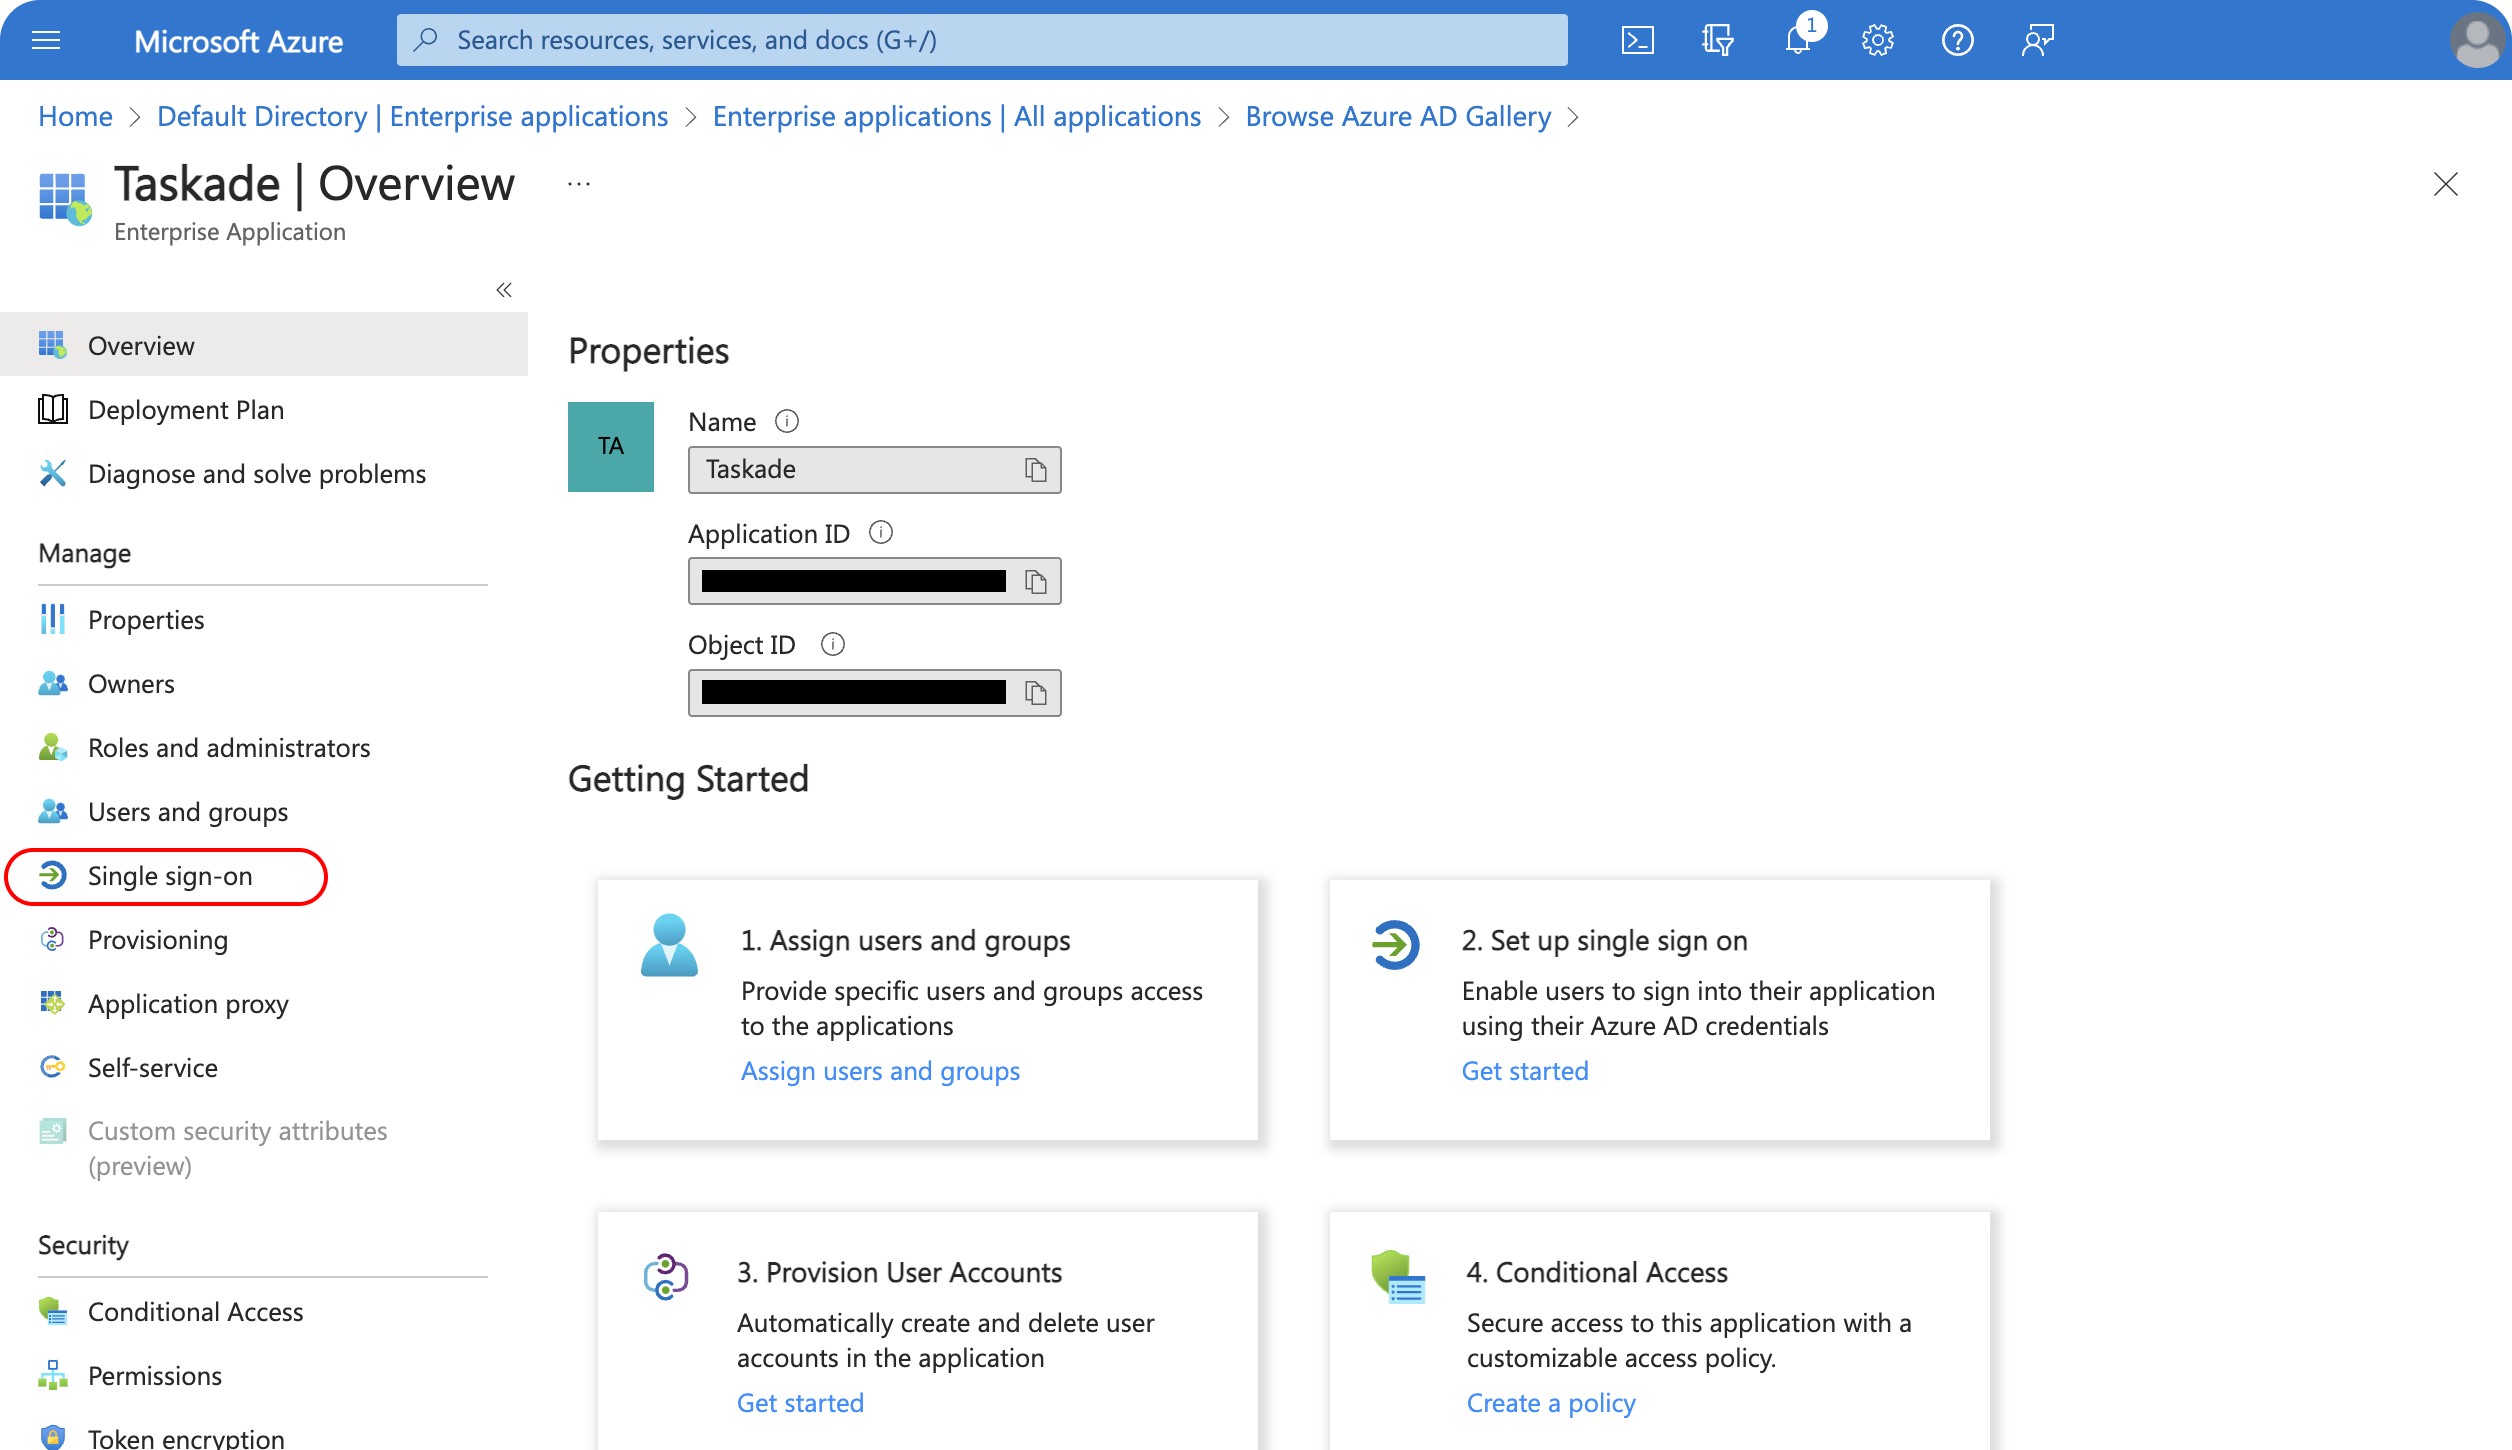
The next step is configuring the Single sign-on for the newly added application.
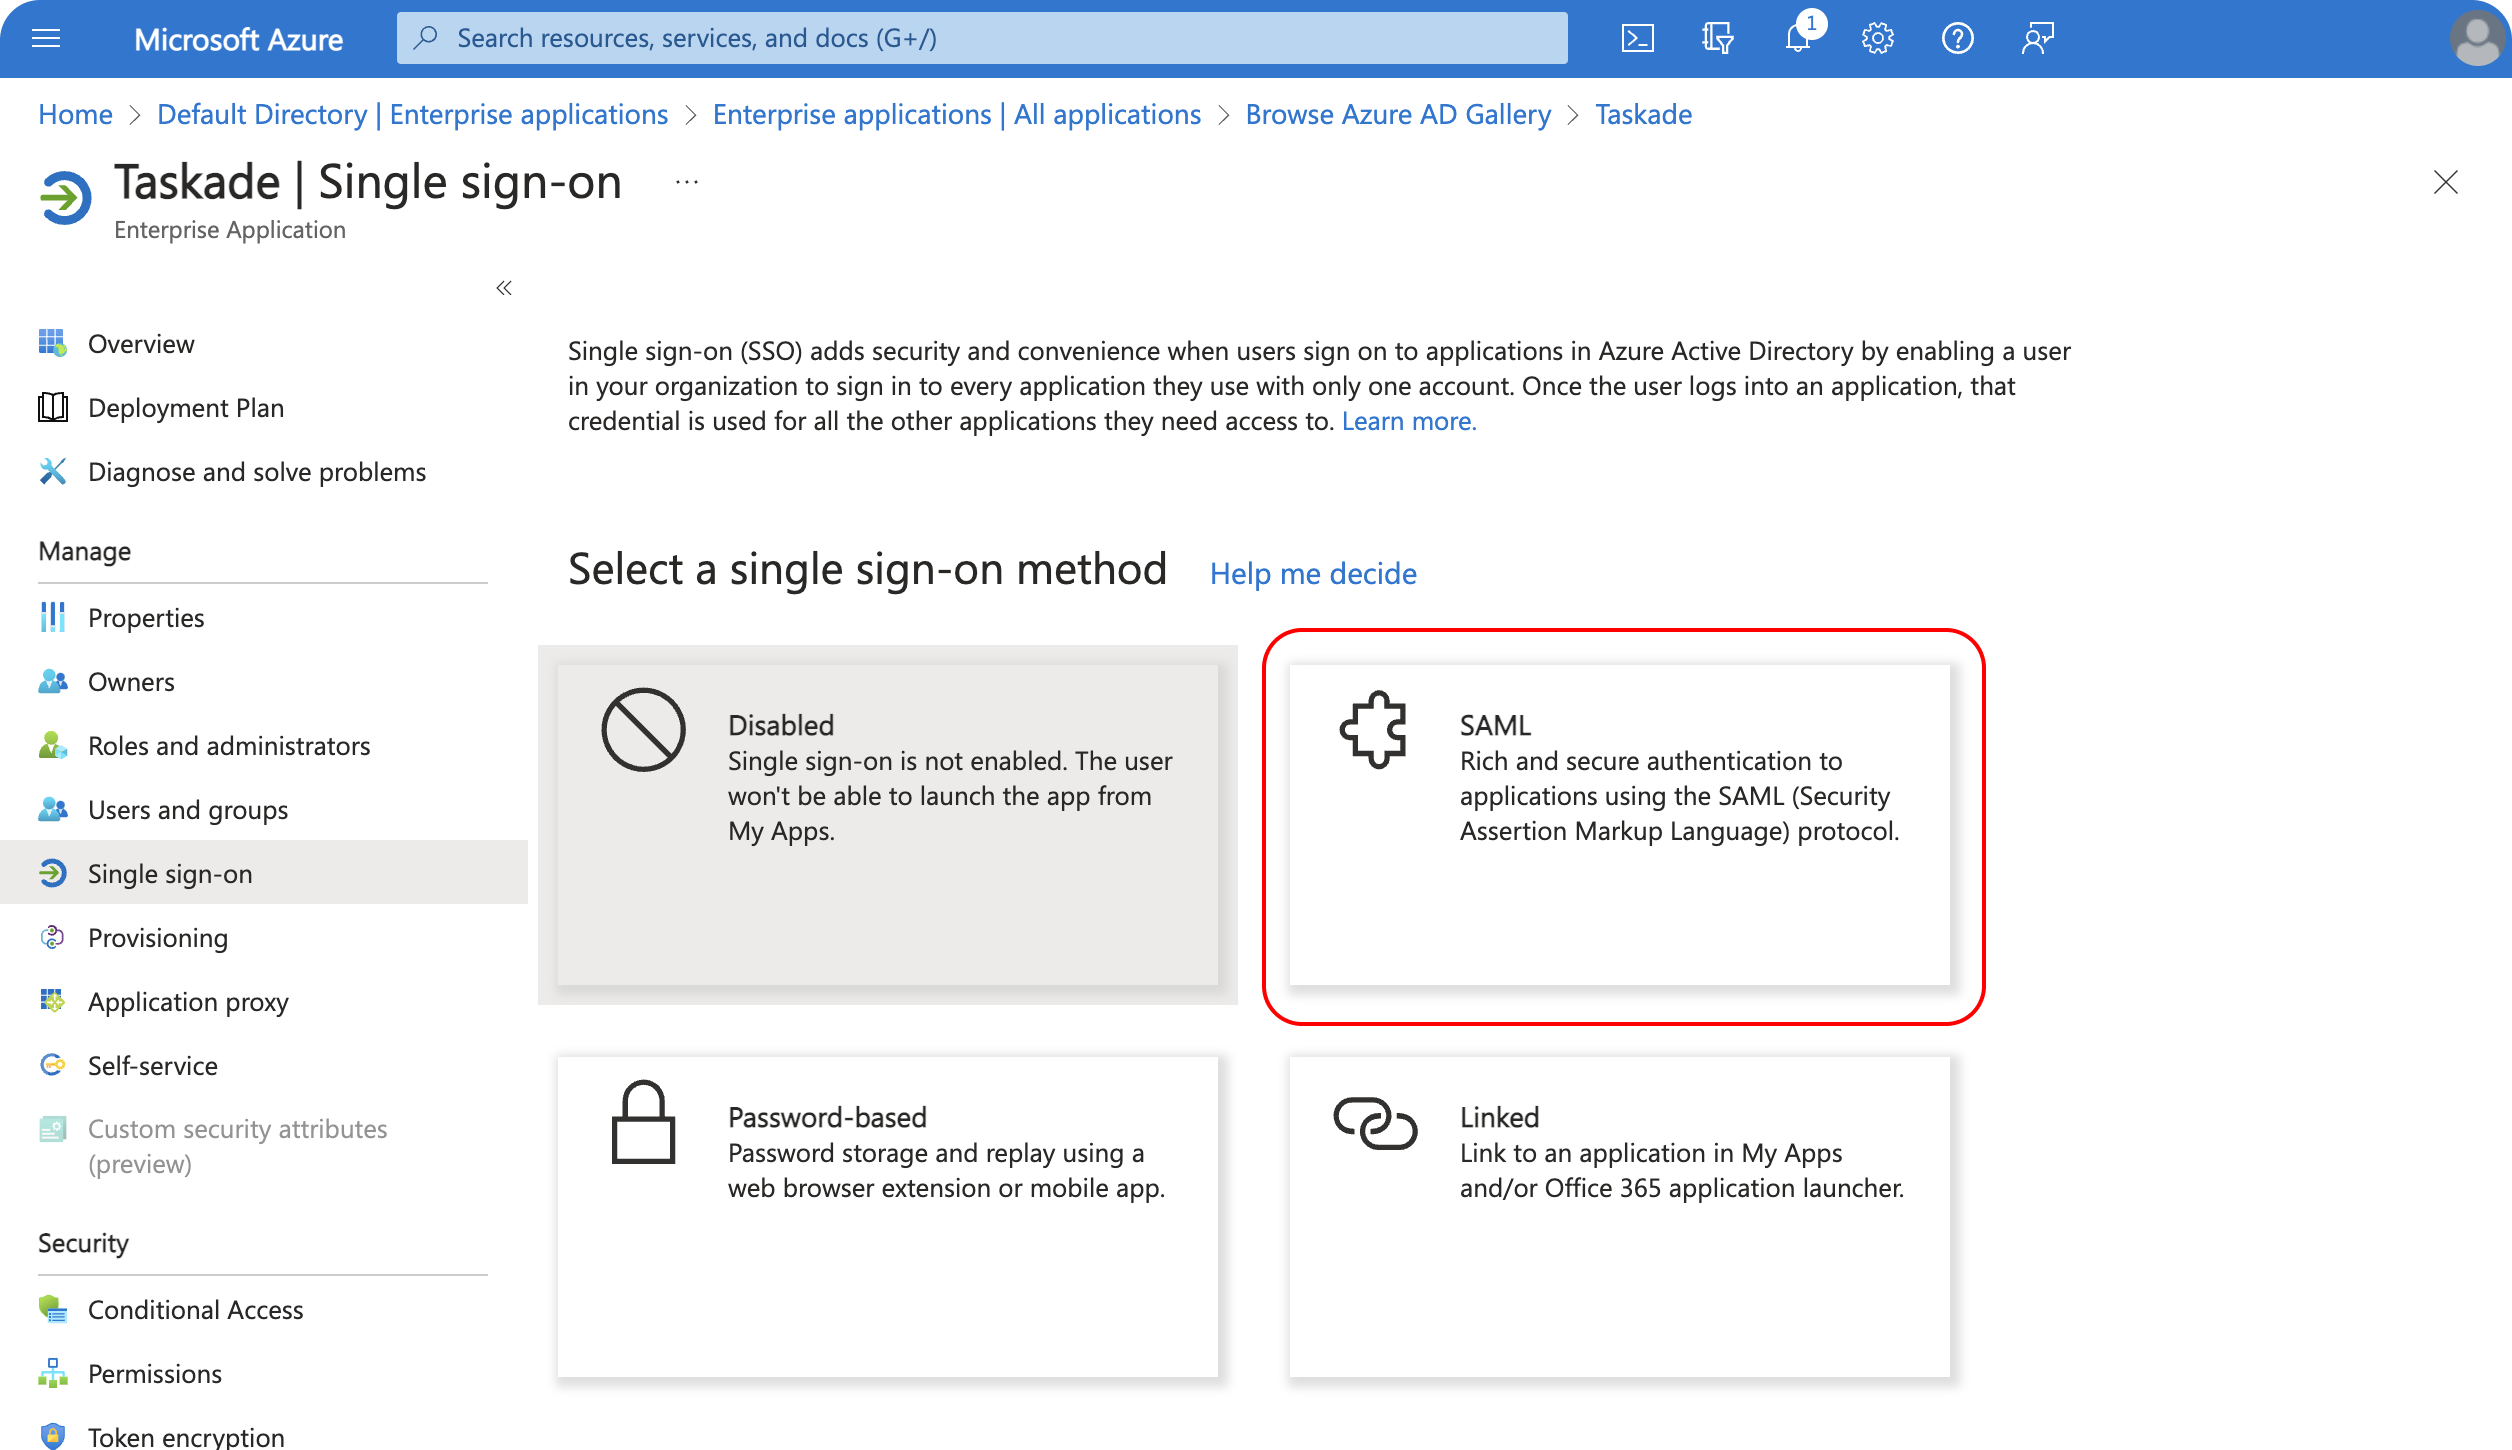
Make sure to select SAML as the authentication method.
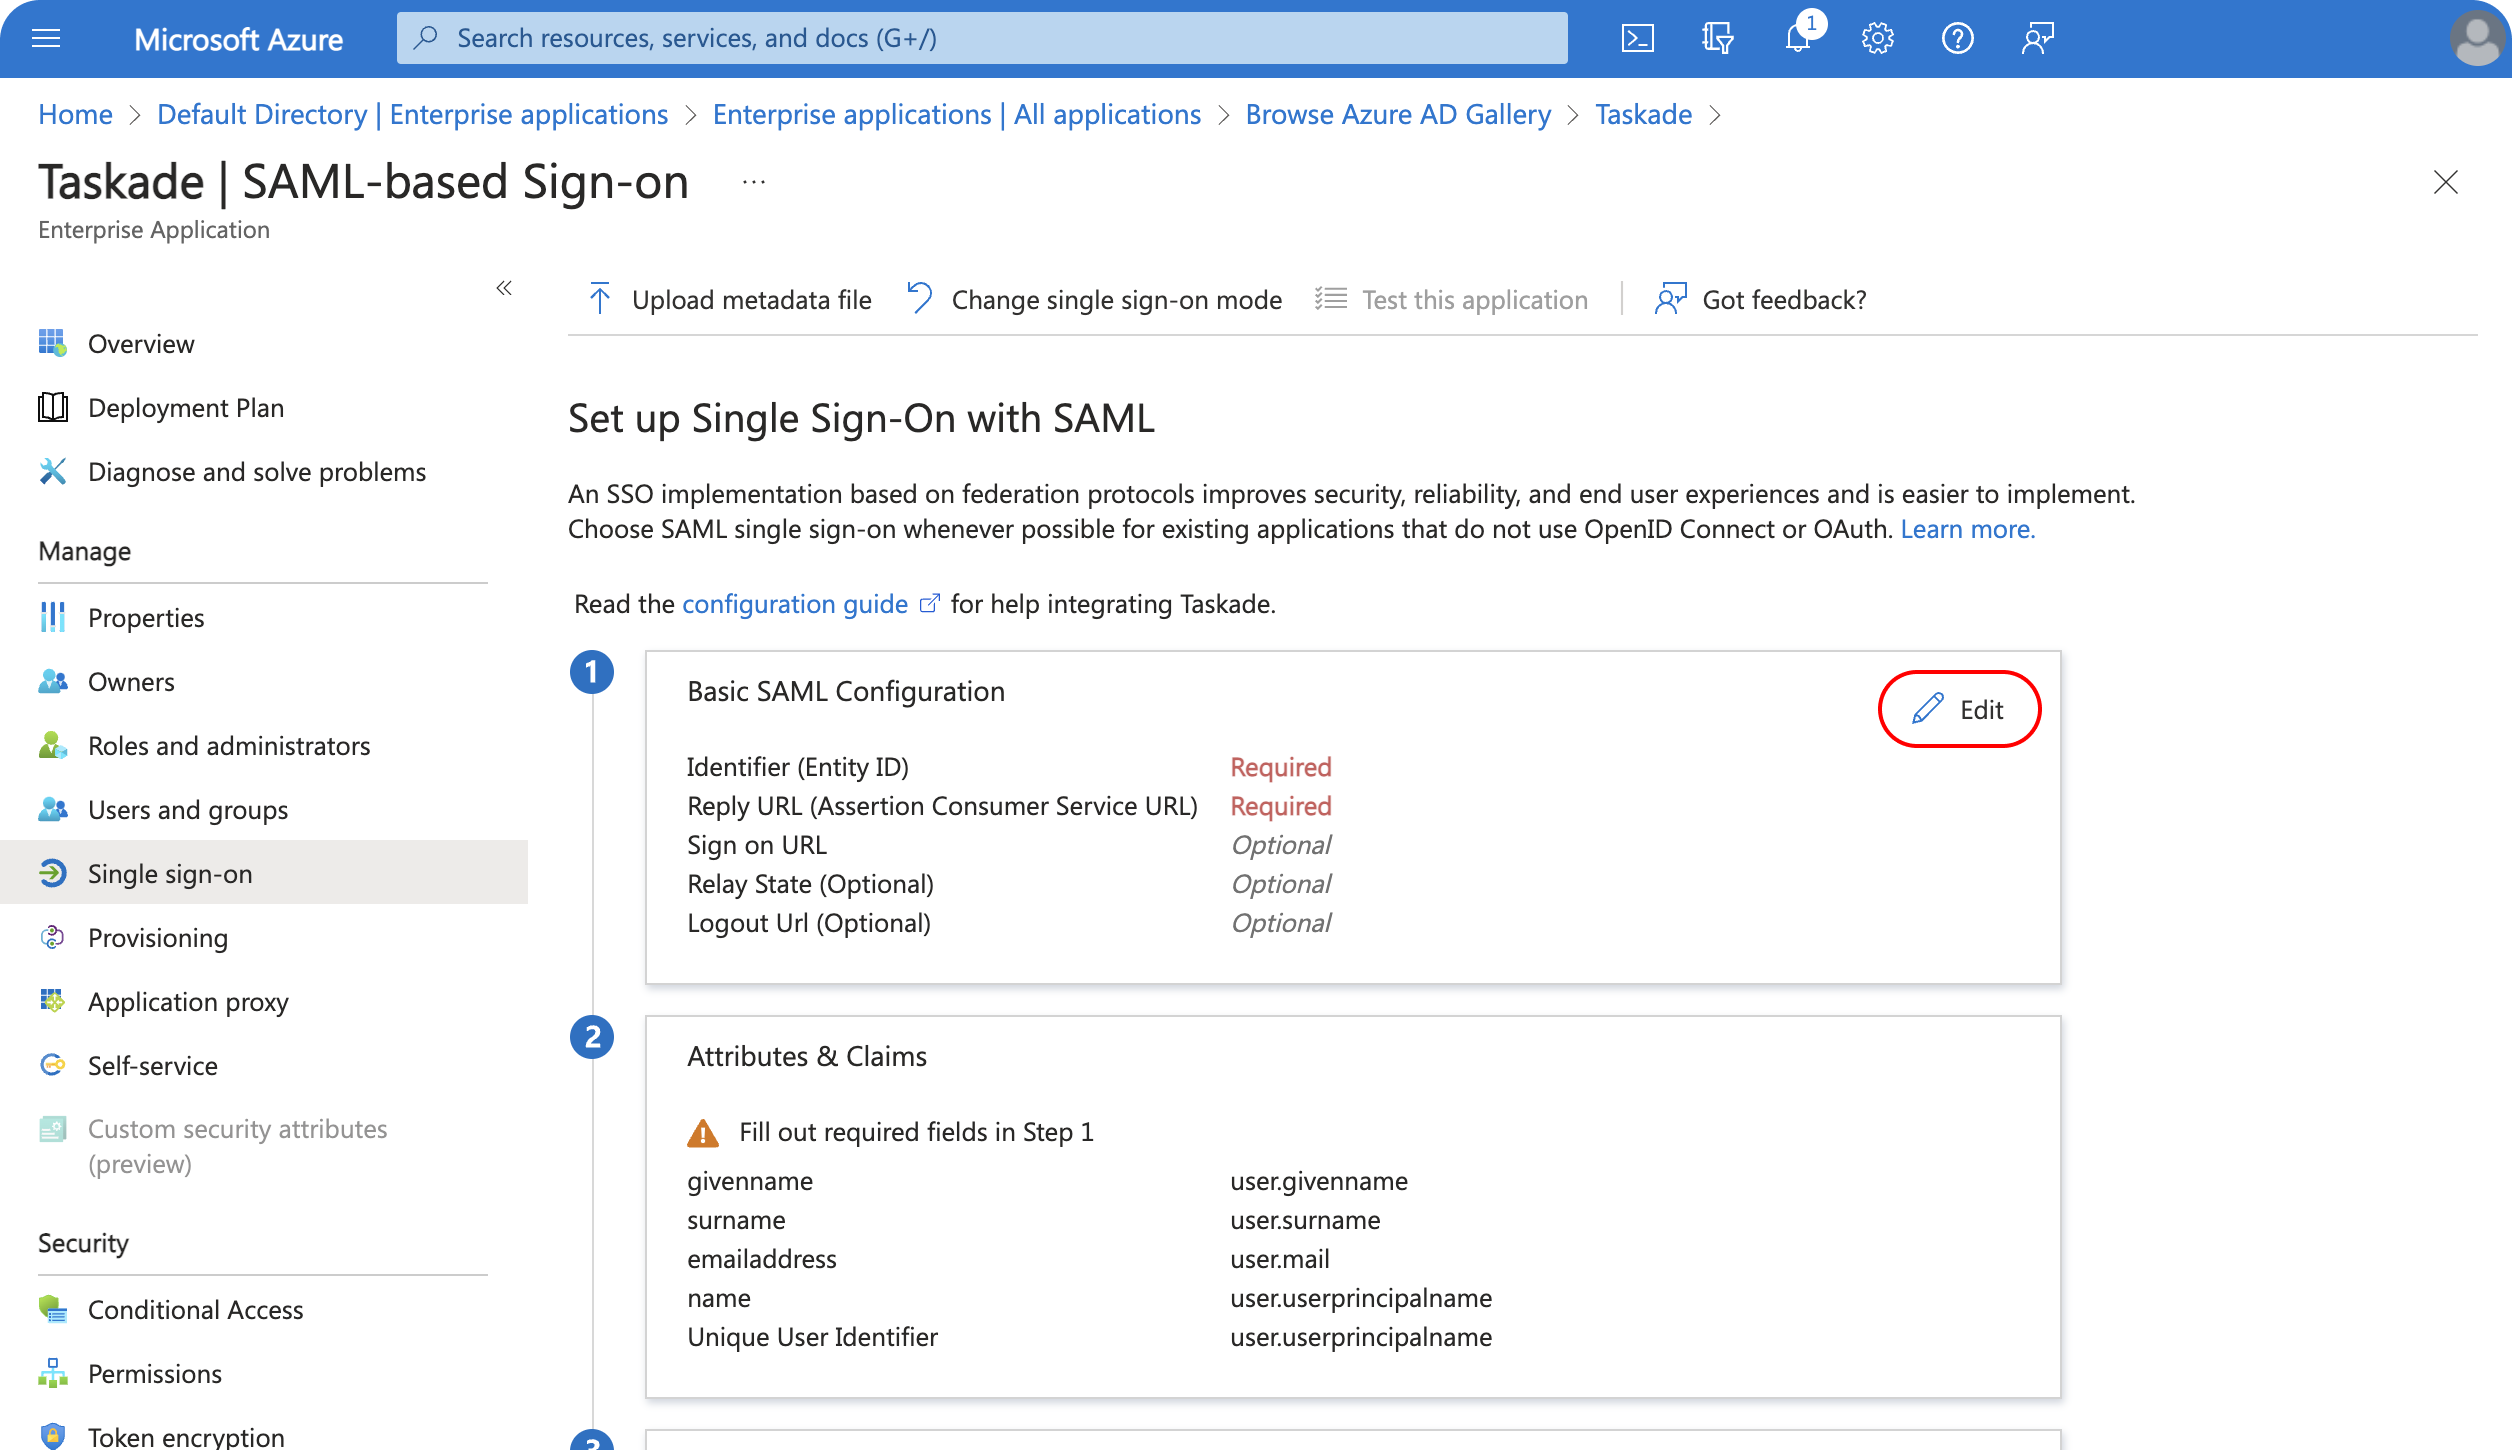
3) Set Up SAML Certificate
In the Basic SAML Configuration panel, use the following values:
| Identifier (Entity ID) | https://www.taskade.com/saml/sso/metadata |
|---|---|
| Reply URL (Assertion Consumer Service URL) | https://www.taskade.com/saml/sso/login/callback |
| Sign-on URL (Optional) | https://www.taskade.com/saml/sso |
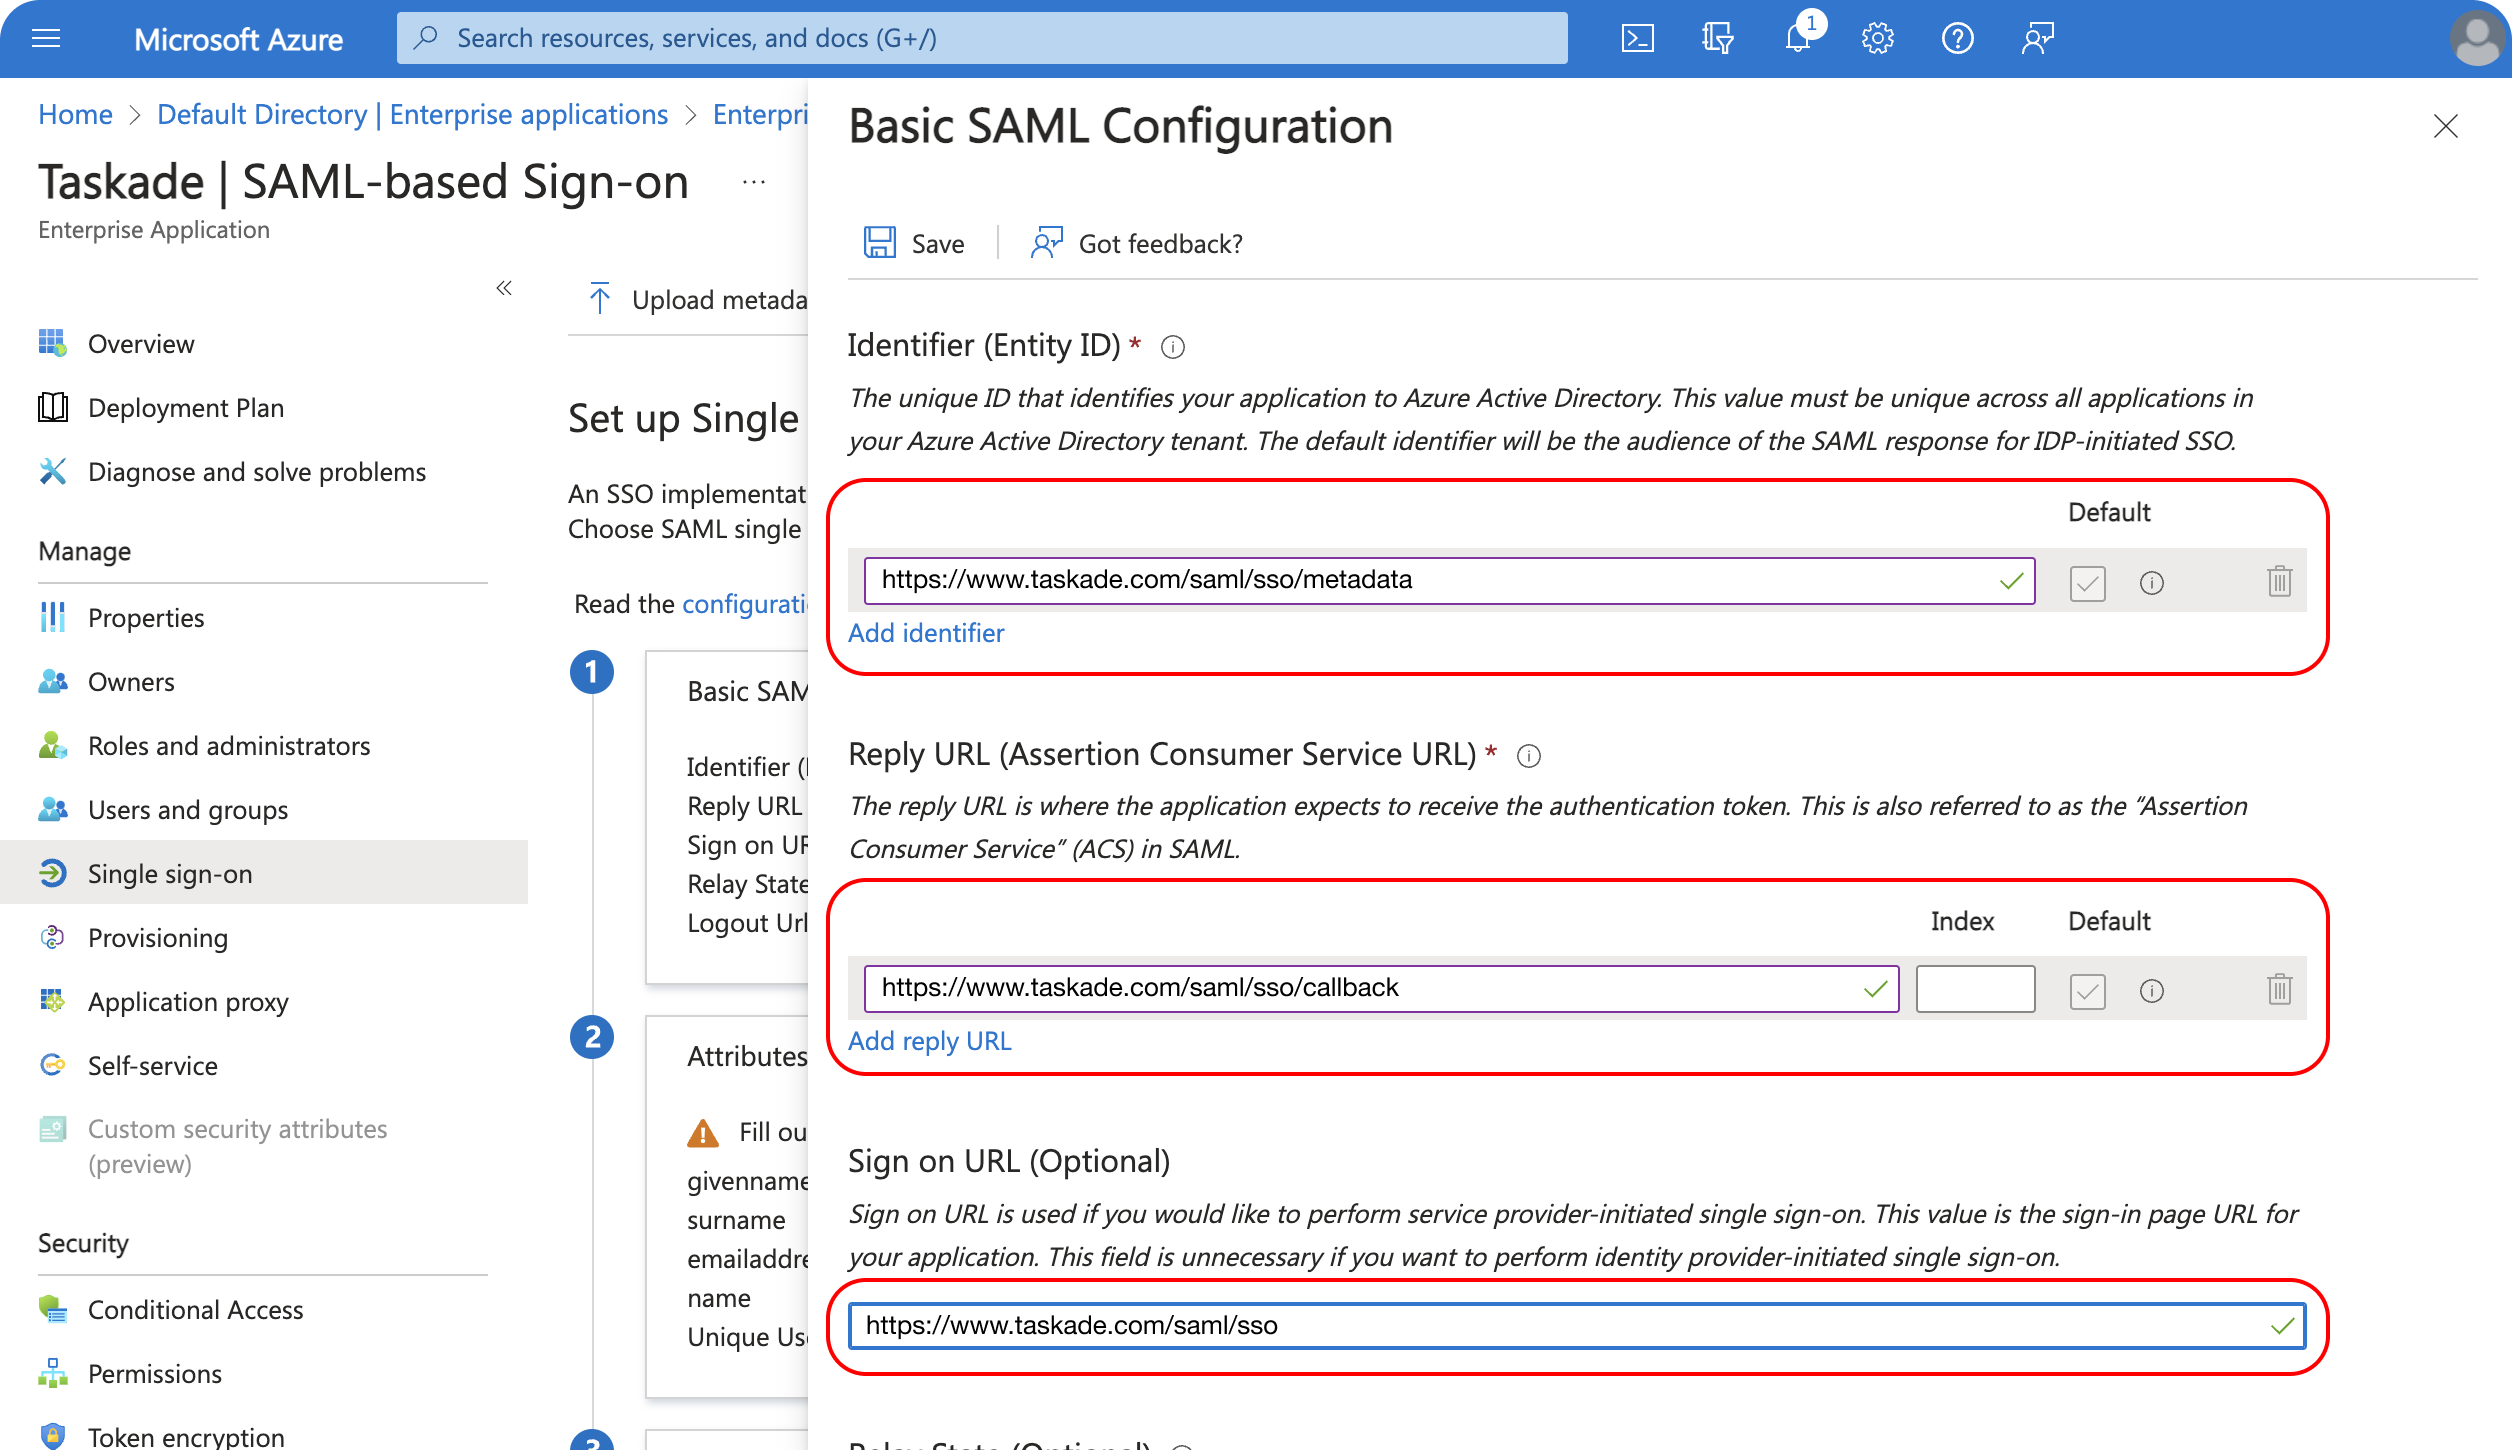
Click Save at the top left corner of the Basic SAML Configuration panel. Next, scroll down to SAML Certificates and click Edit.
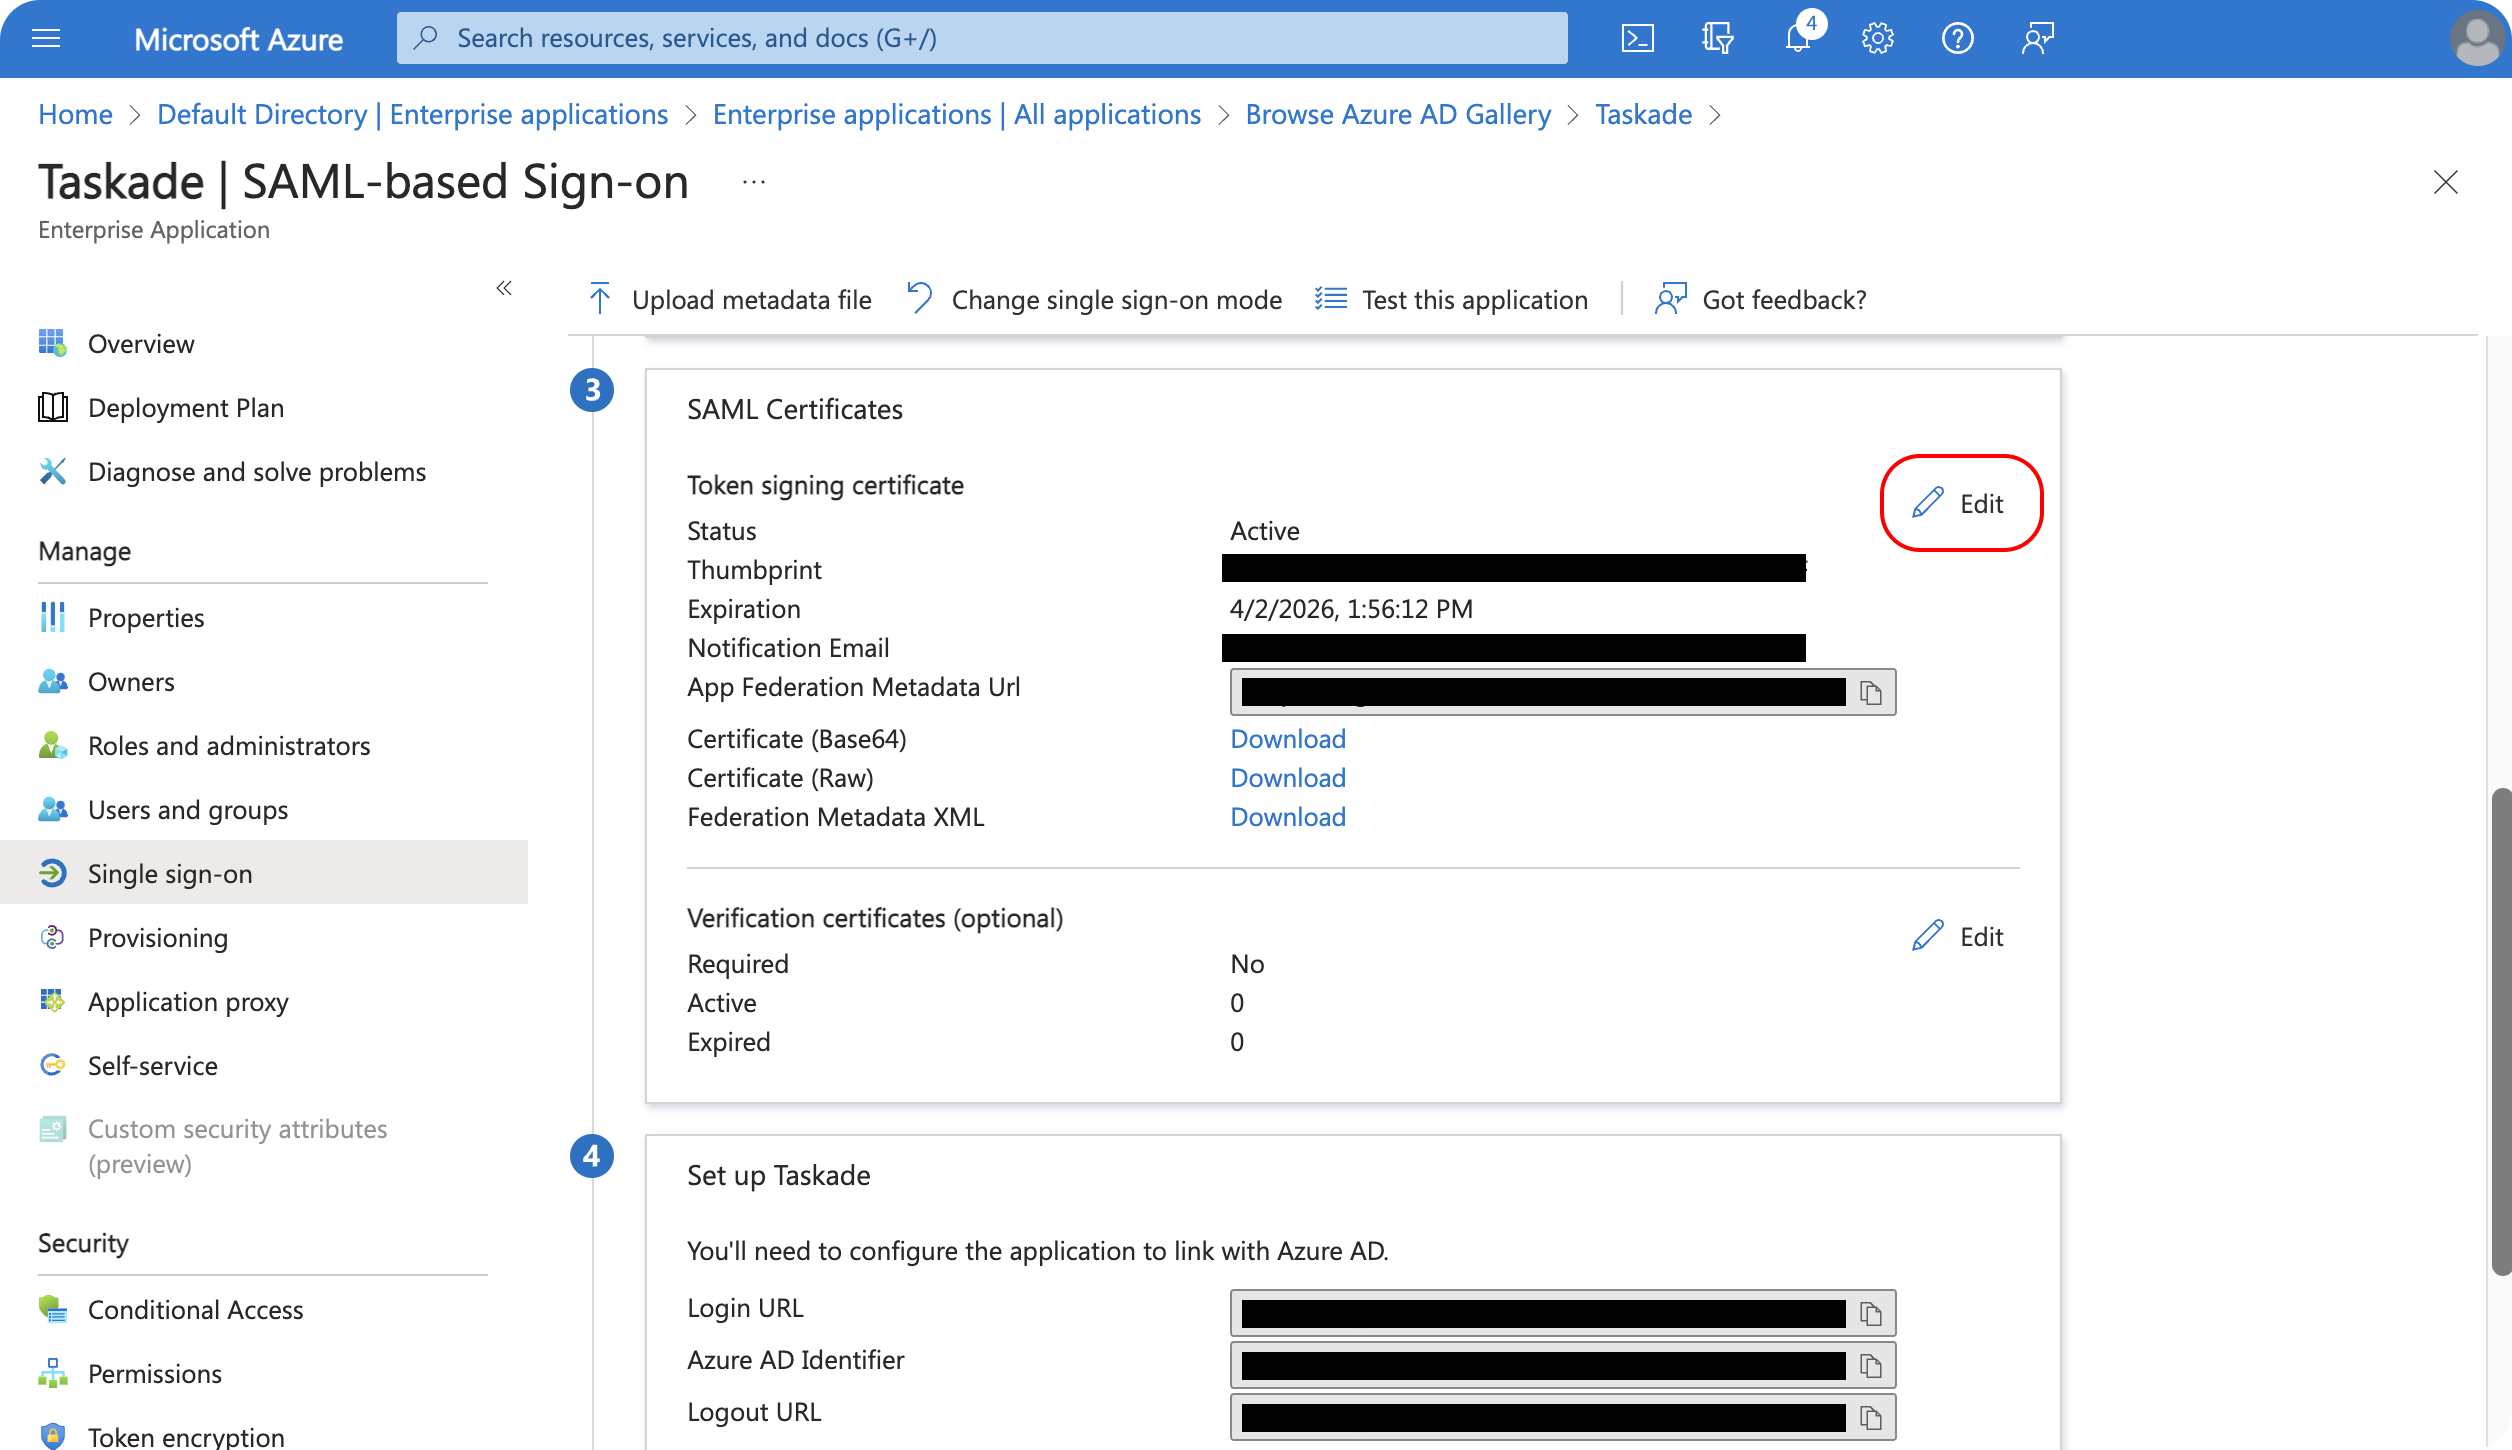
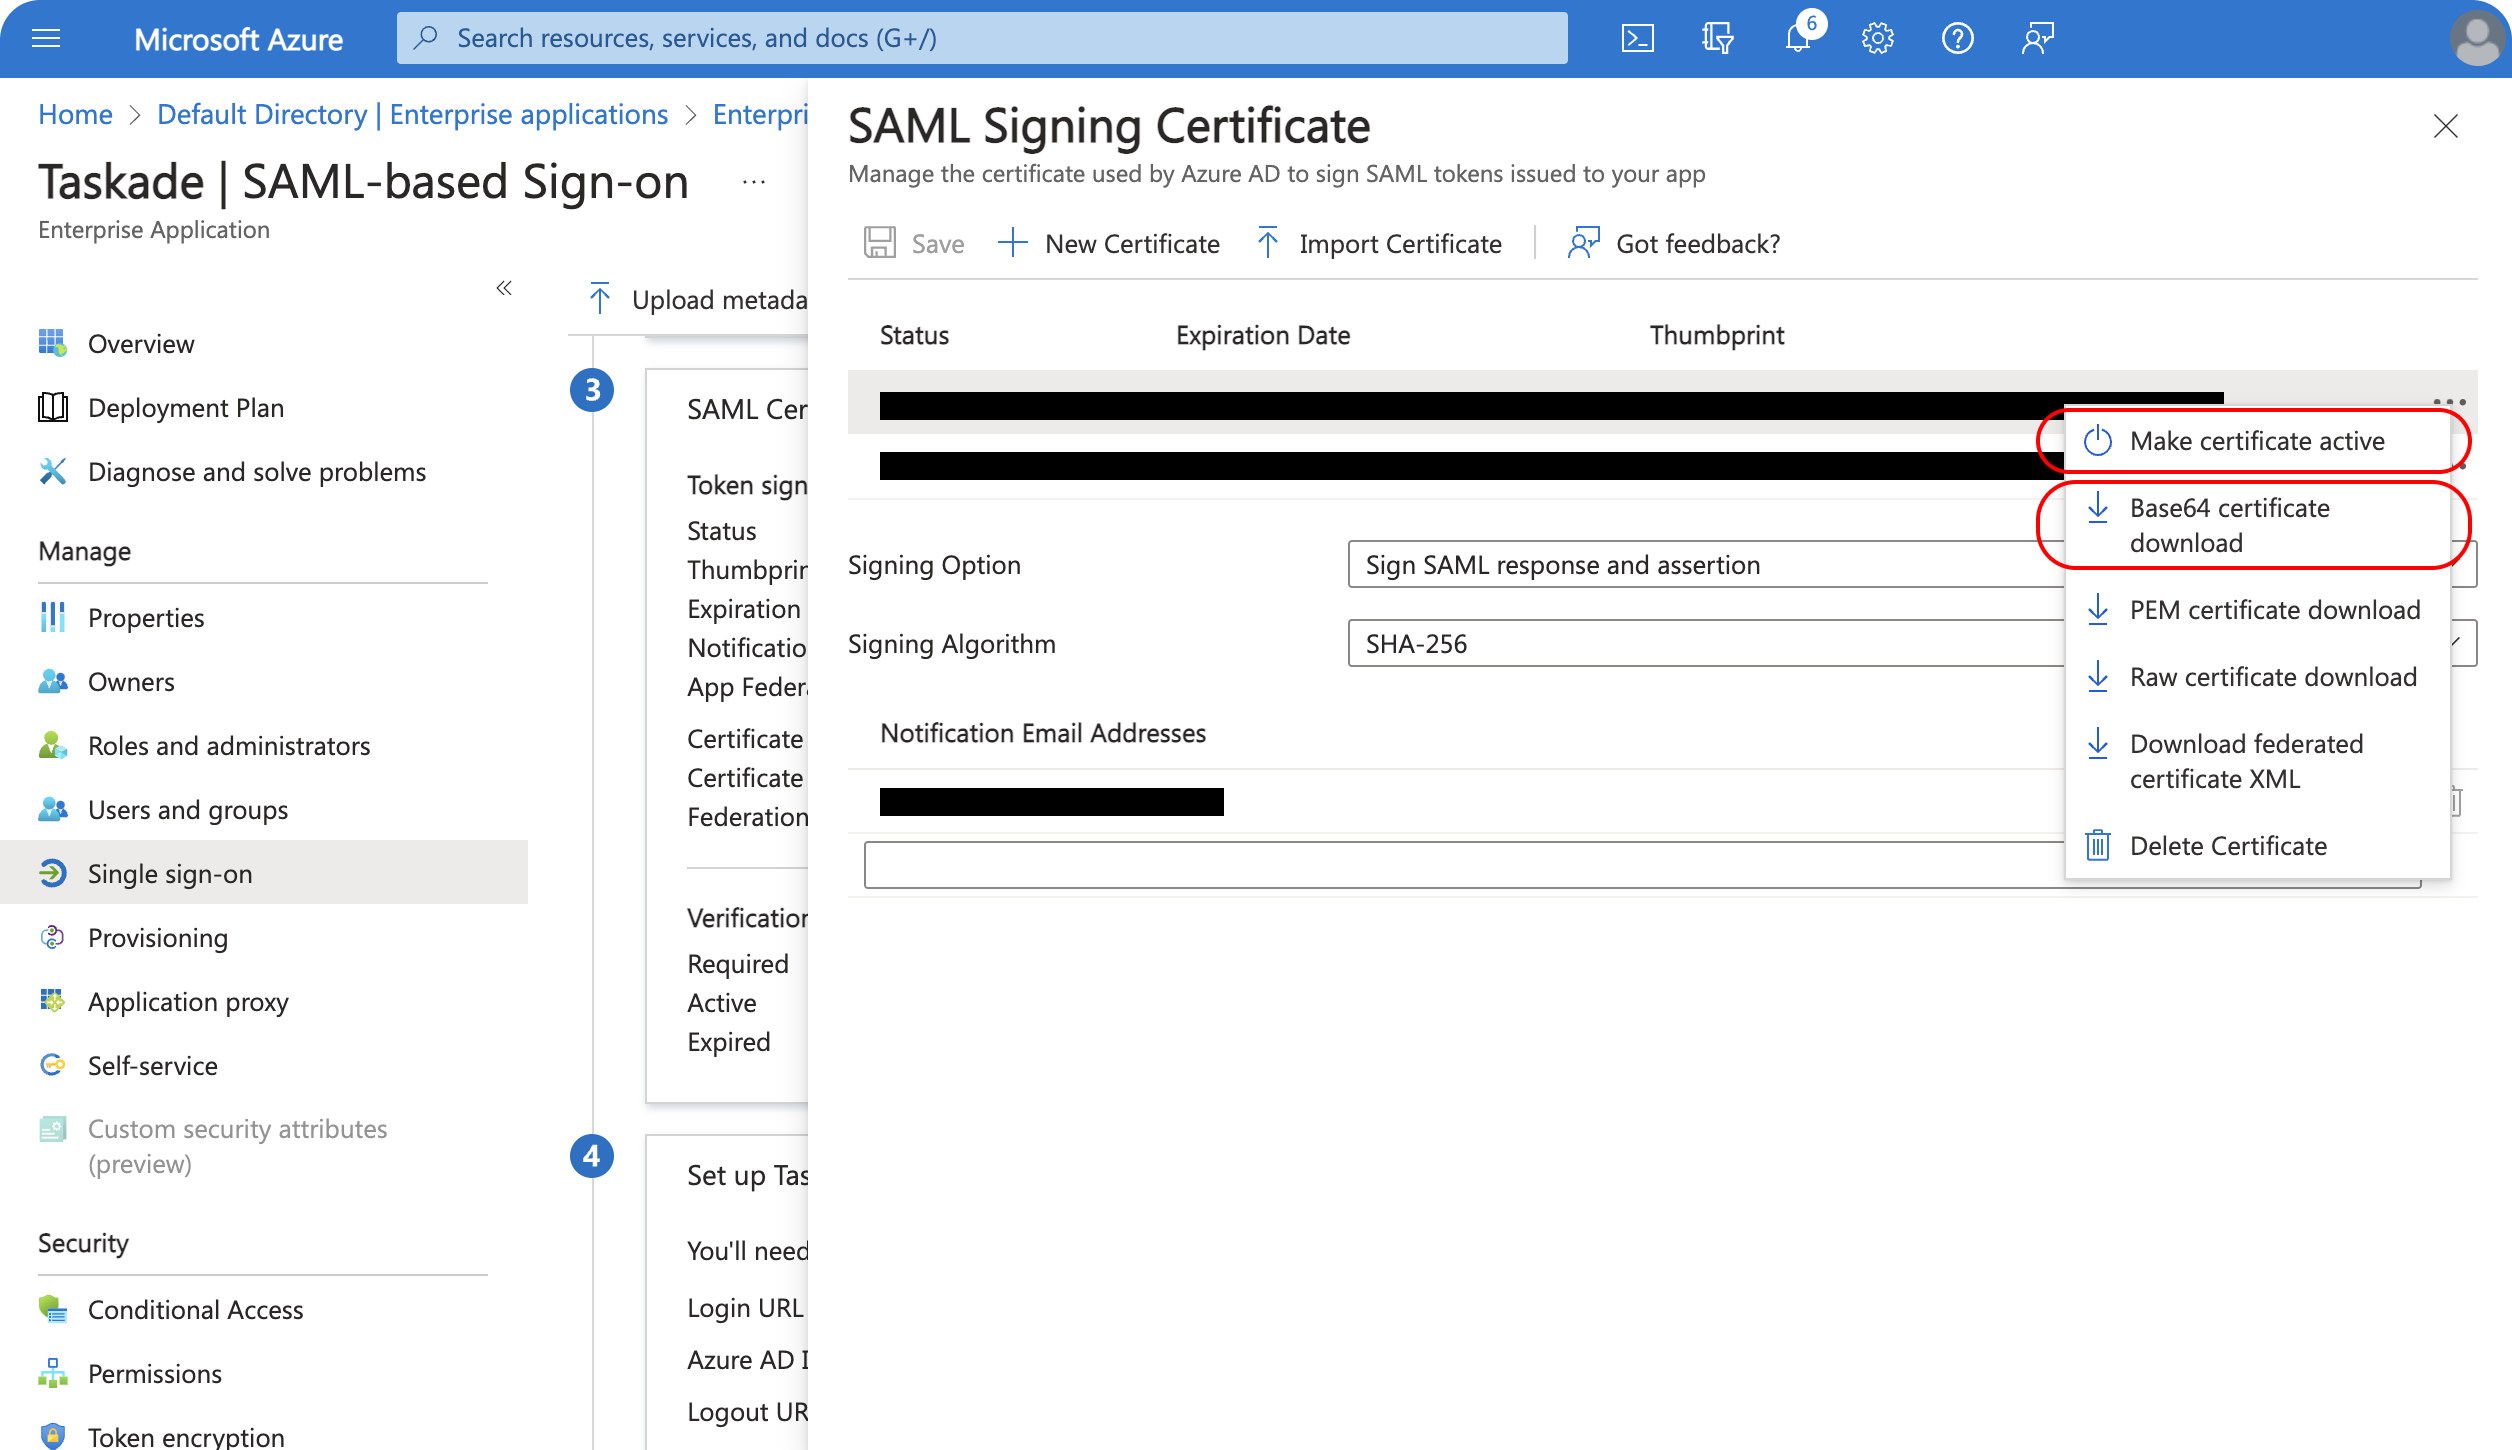
Create a new certificate and pick the Sign SAML response and assertion option for the Signing Option. Click Save to create the certificate.
Now activate the new certificate.
Click the three dots (···) on the right and select Make certificate active. Then download the Base64 certification. You need the certificate in the next step.
Close the SAML Signing Certificate panel and scroll to Set up Taskade (step 4) of the Single Sign-On configuration page.
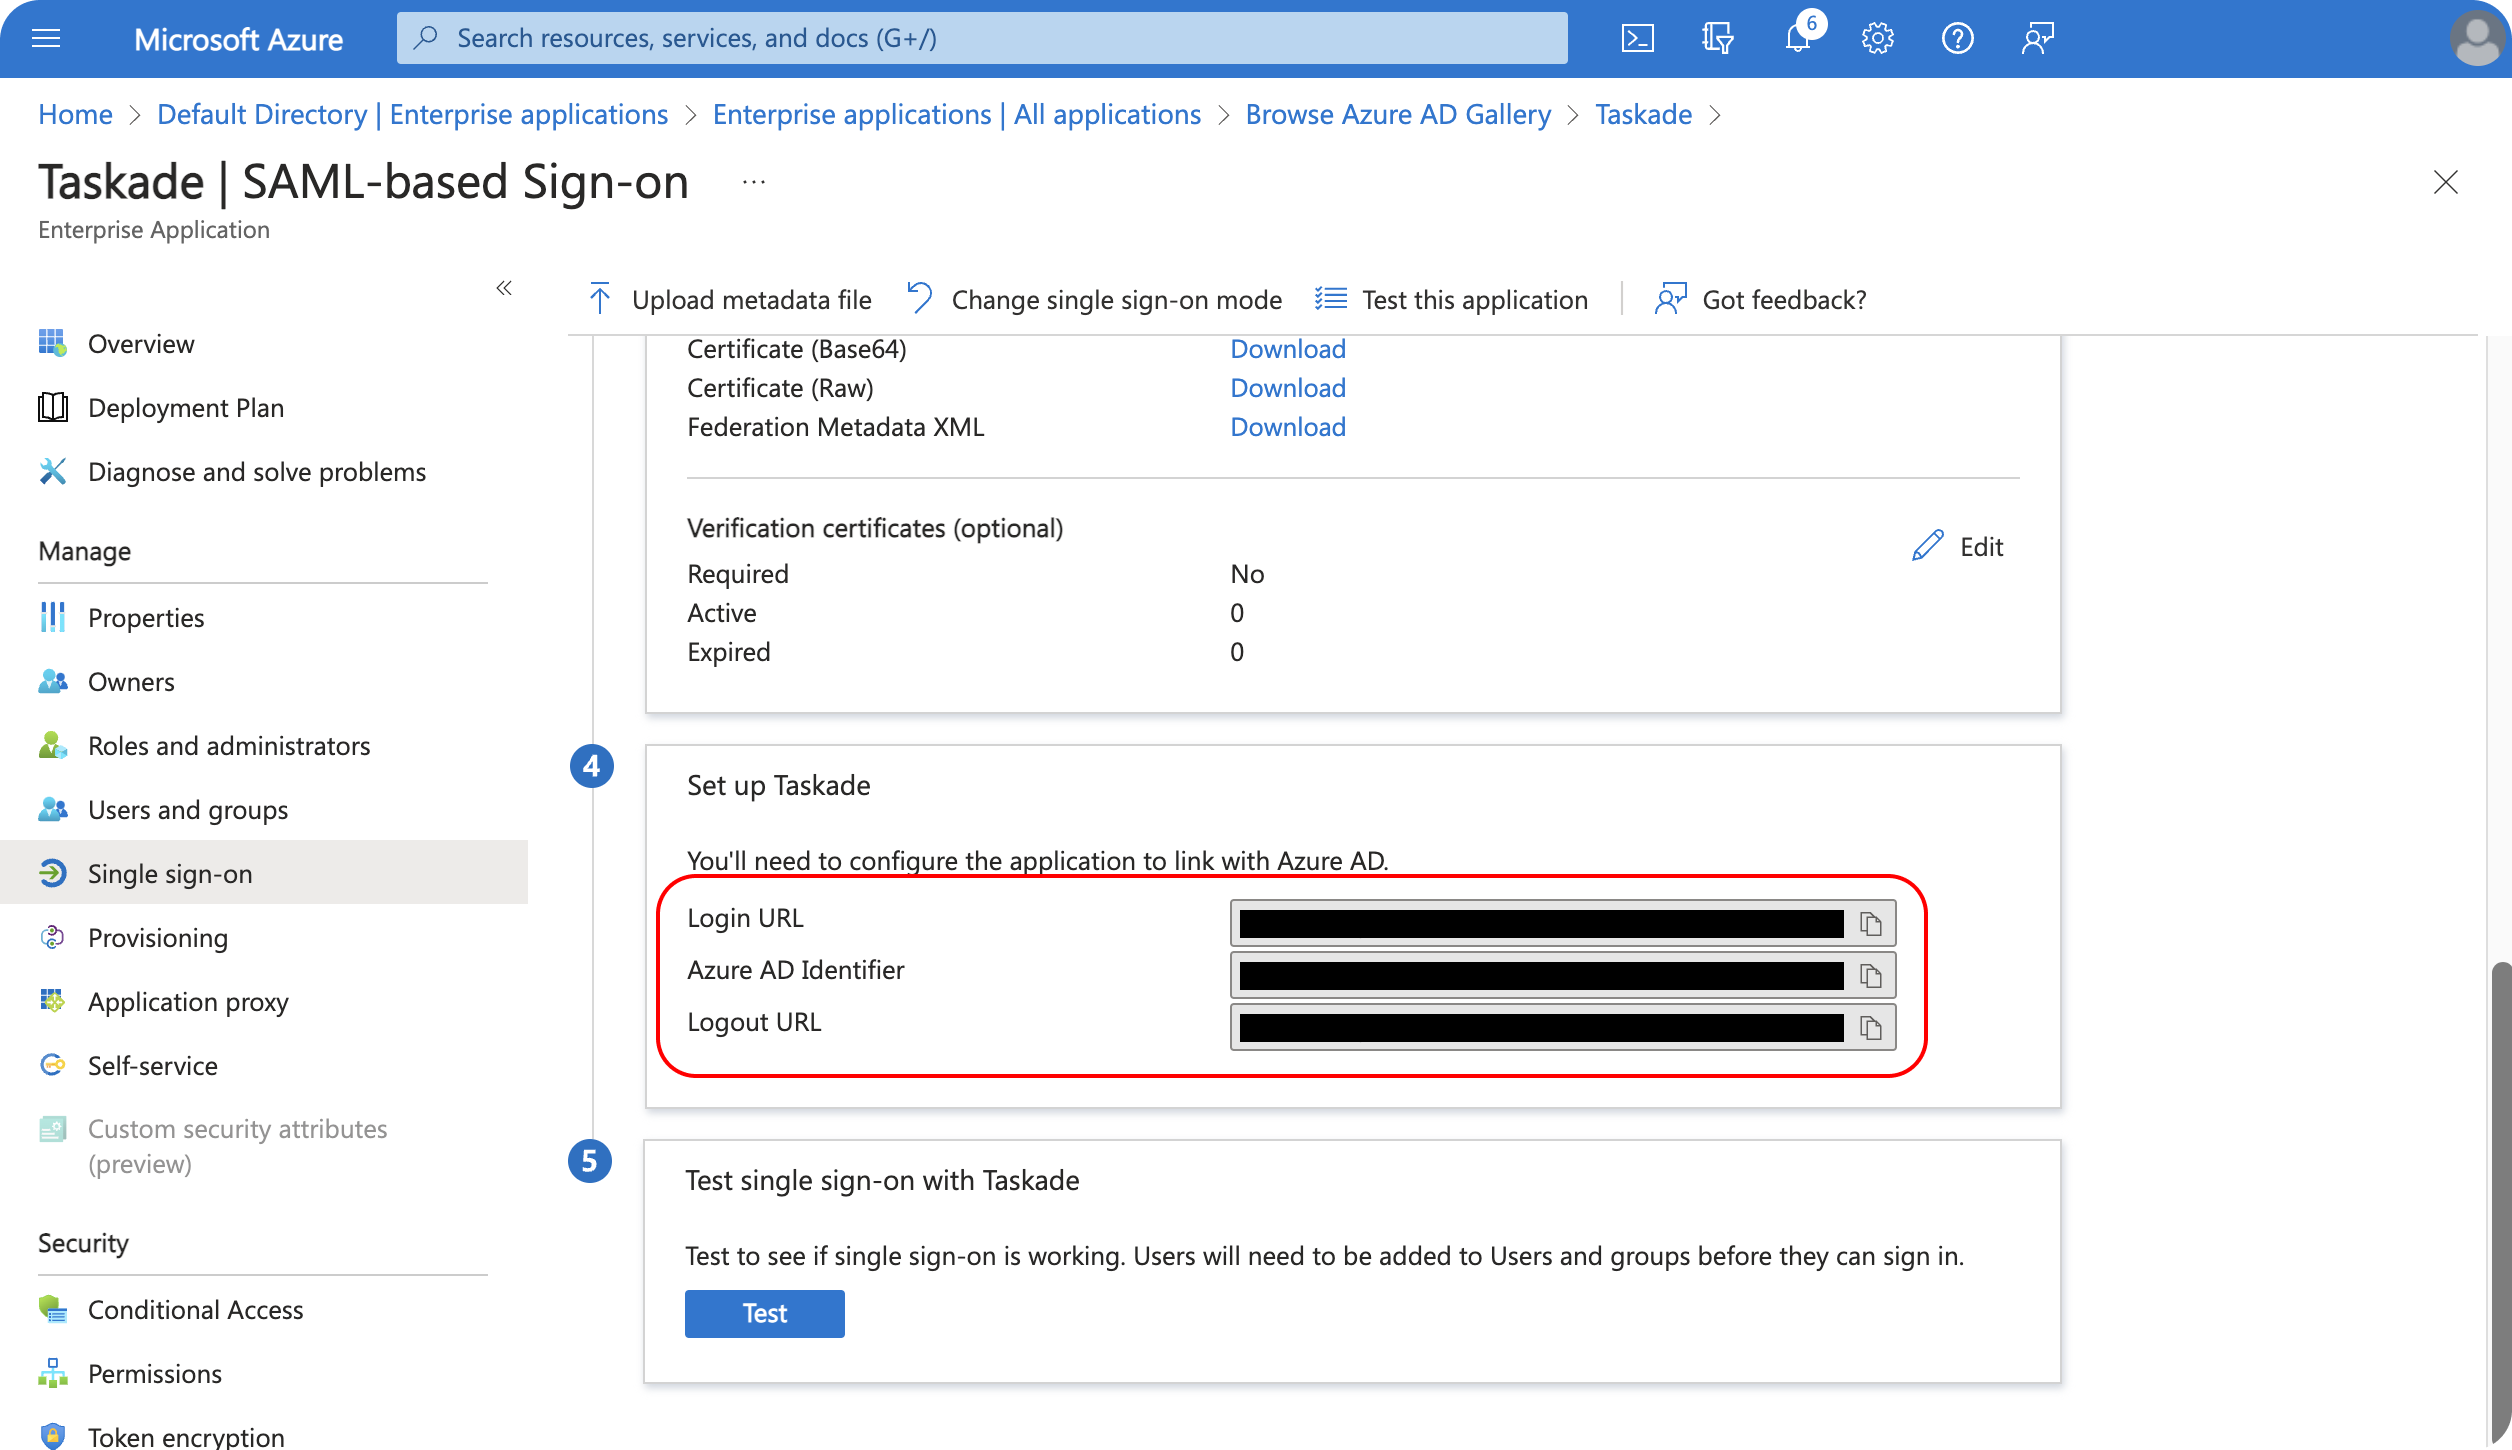
You copy these values into Taskade next. Keep this window open and go back to your organization.
4) Finish Setup in Taskade
In the SAML SSO page, paste the SSO URL, IDP Issuer, and the Base64 Certificate from the previous step. You can open the certificate file with any text editor.
Type your company website in the DOMAIN field (1)
Your team needs the company domain to log in as name@company.com.
For the other fields, use the details in this table.
| Taskade | Azure AD | |
|---|---|---|
| 2 | Login URL | SSO URL |
| 3 | Azure AD Identifier | IDP Issuer |
| 4 | Base64 Certificate (copy using a text editor) | IDP Public Signing Cert |
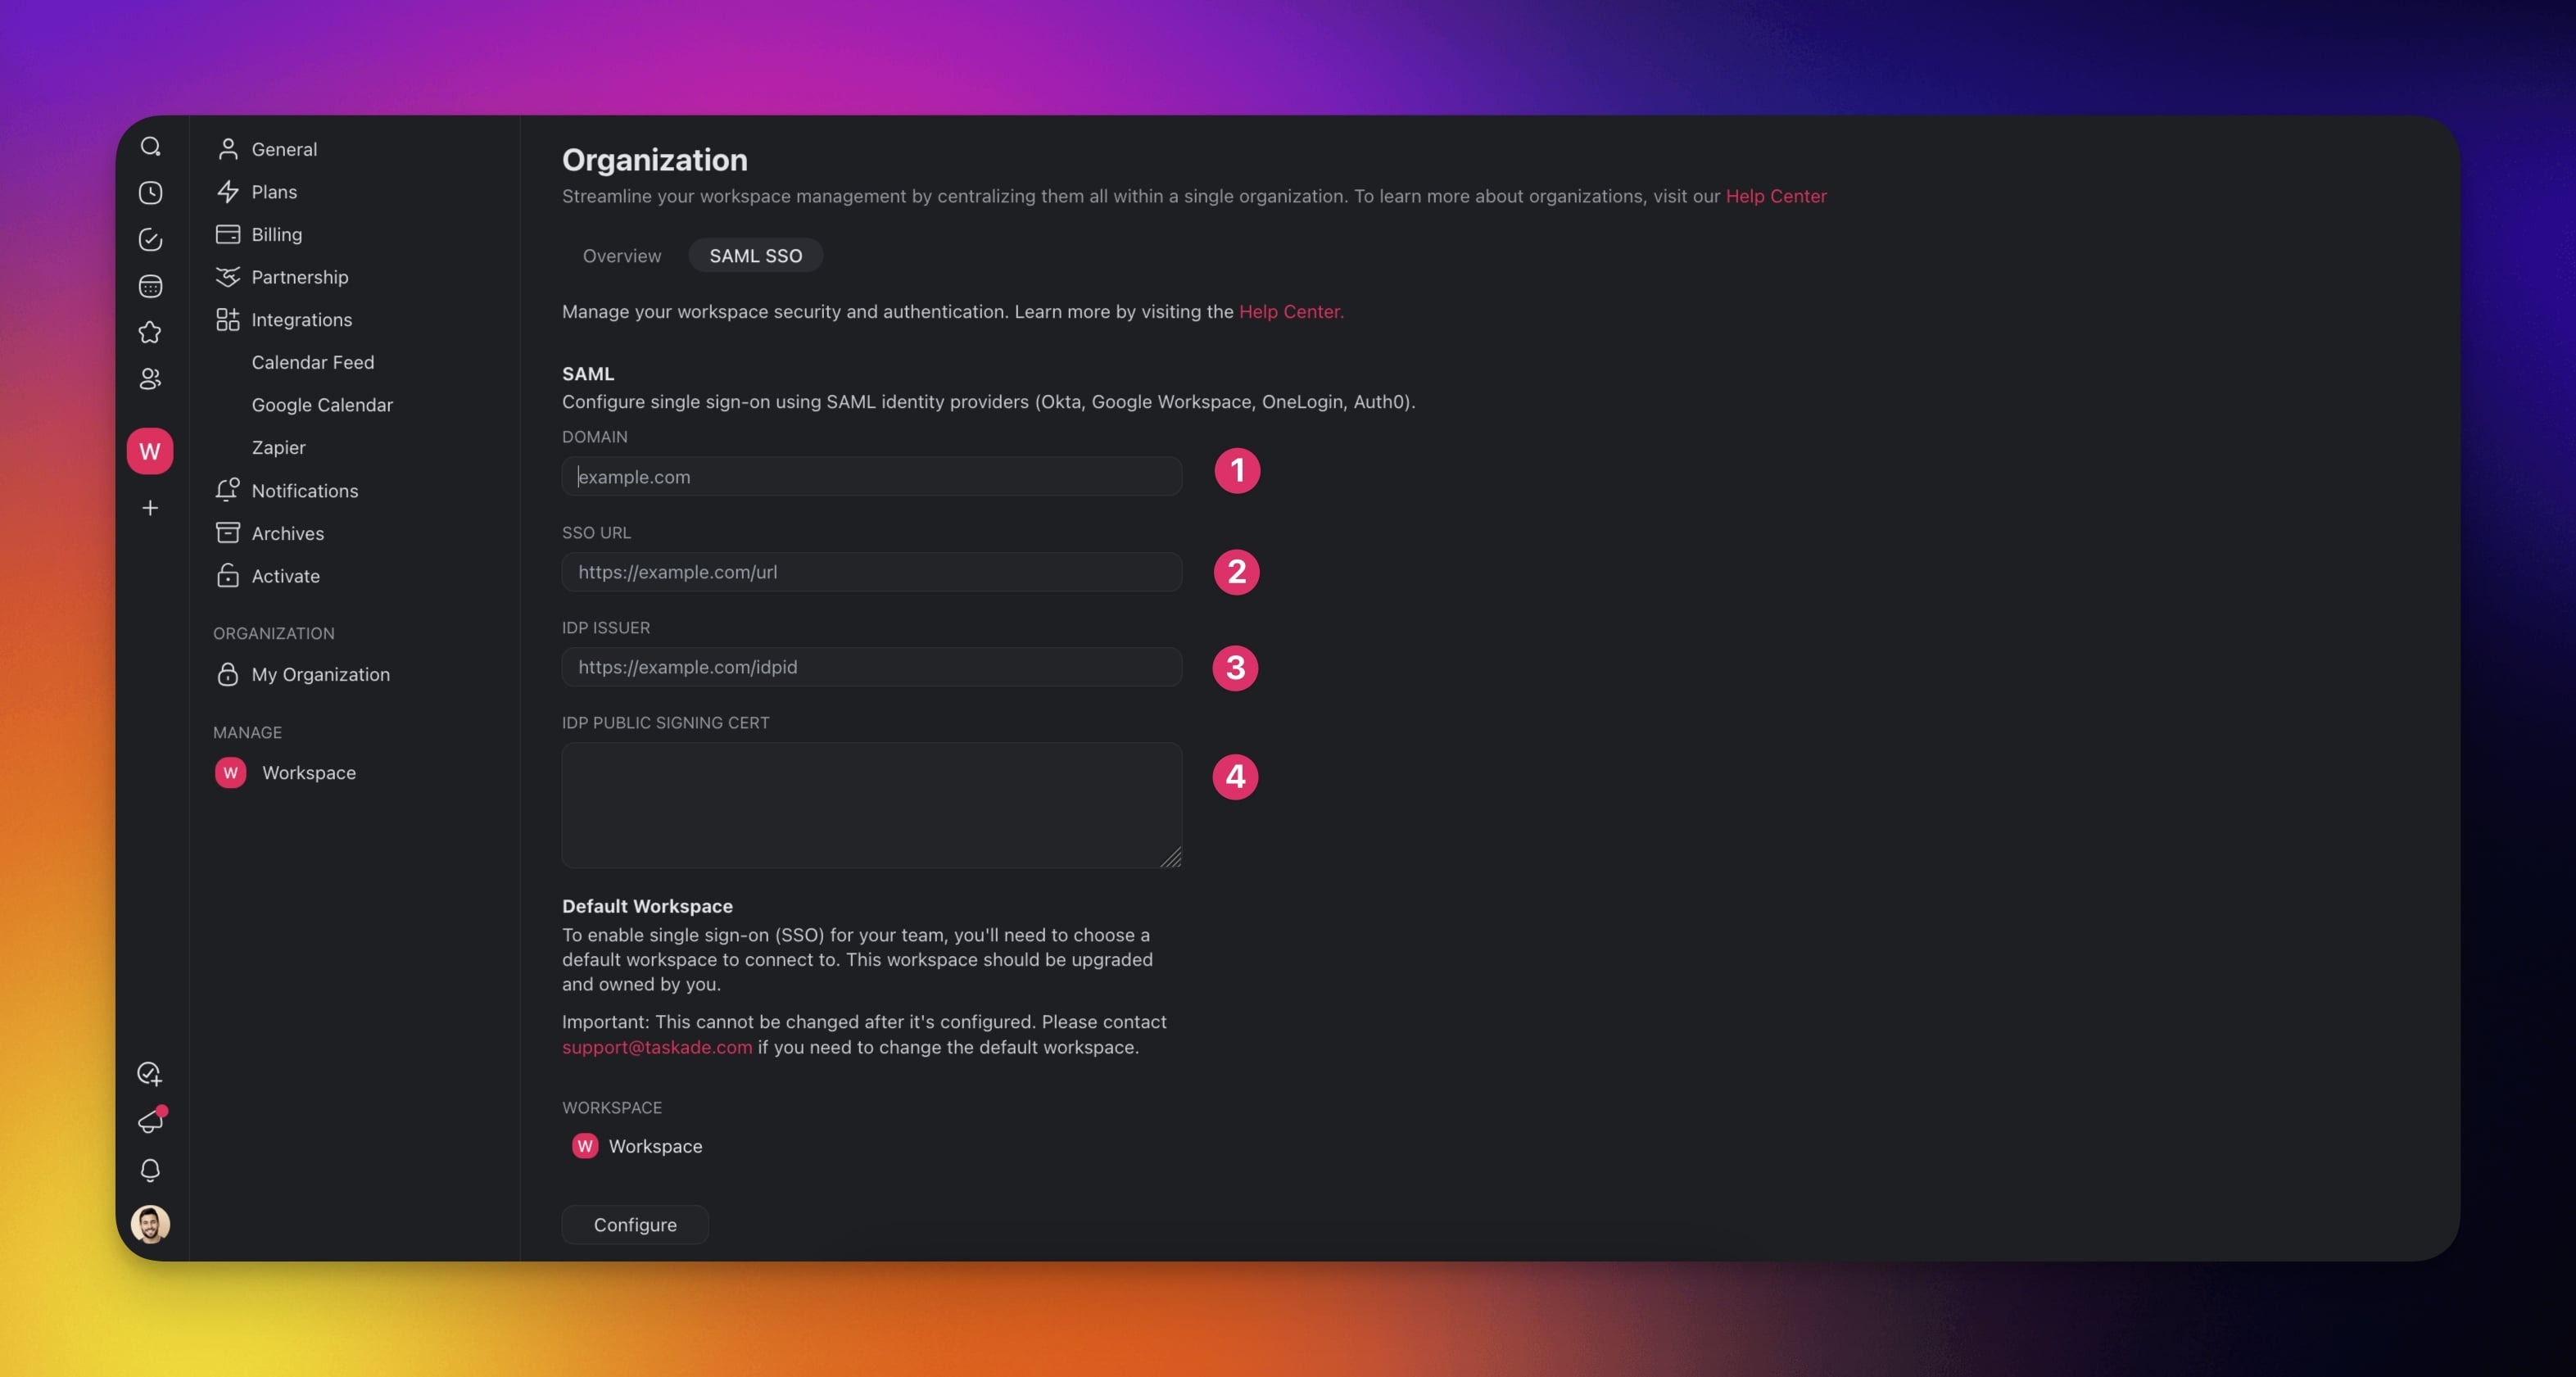
❗️ Important: Select 1 default workspace. When your team signs in through SSO, they reach the default workspace's home folder. Treat the home folder as a lobby for your team. Every other folder in your workspace needs a manual invite or a change to team access.
When you are done, scroll down and click Save. If you hit an error at any point, email us at support@taskade.com.
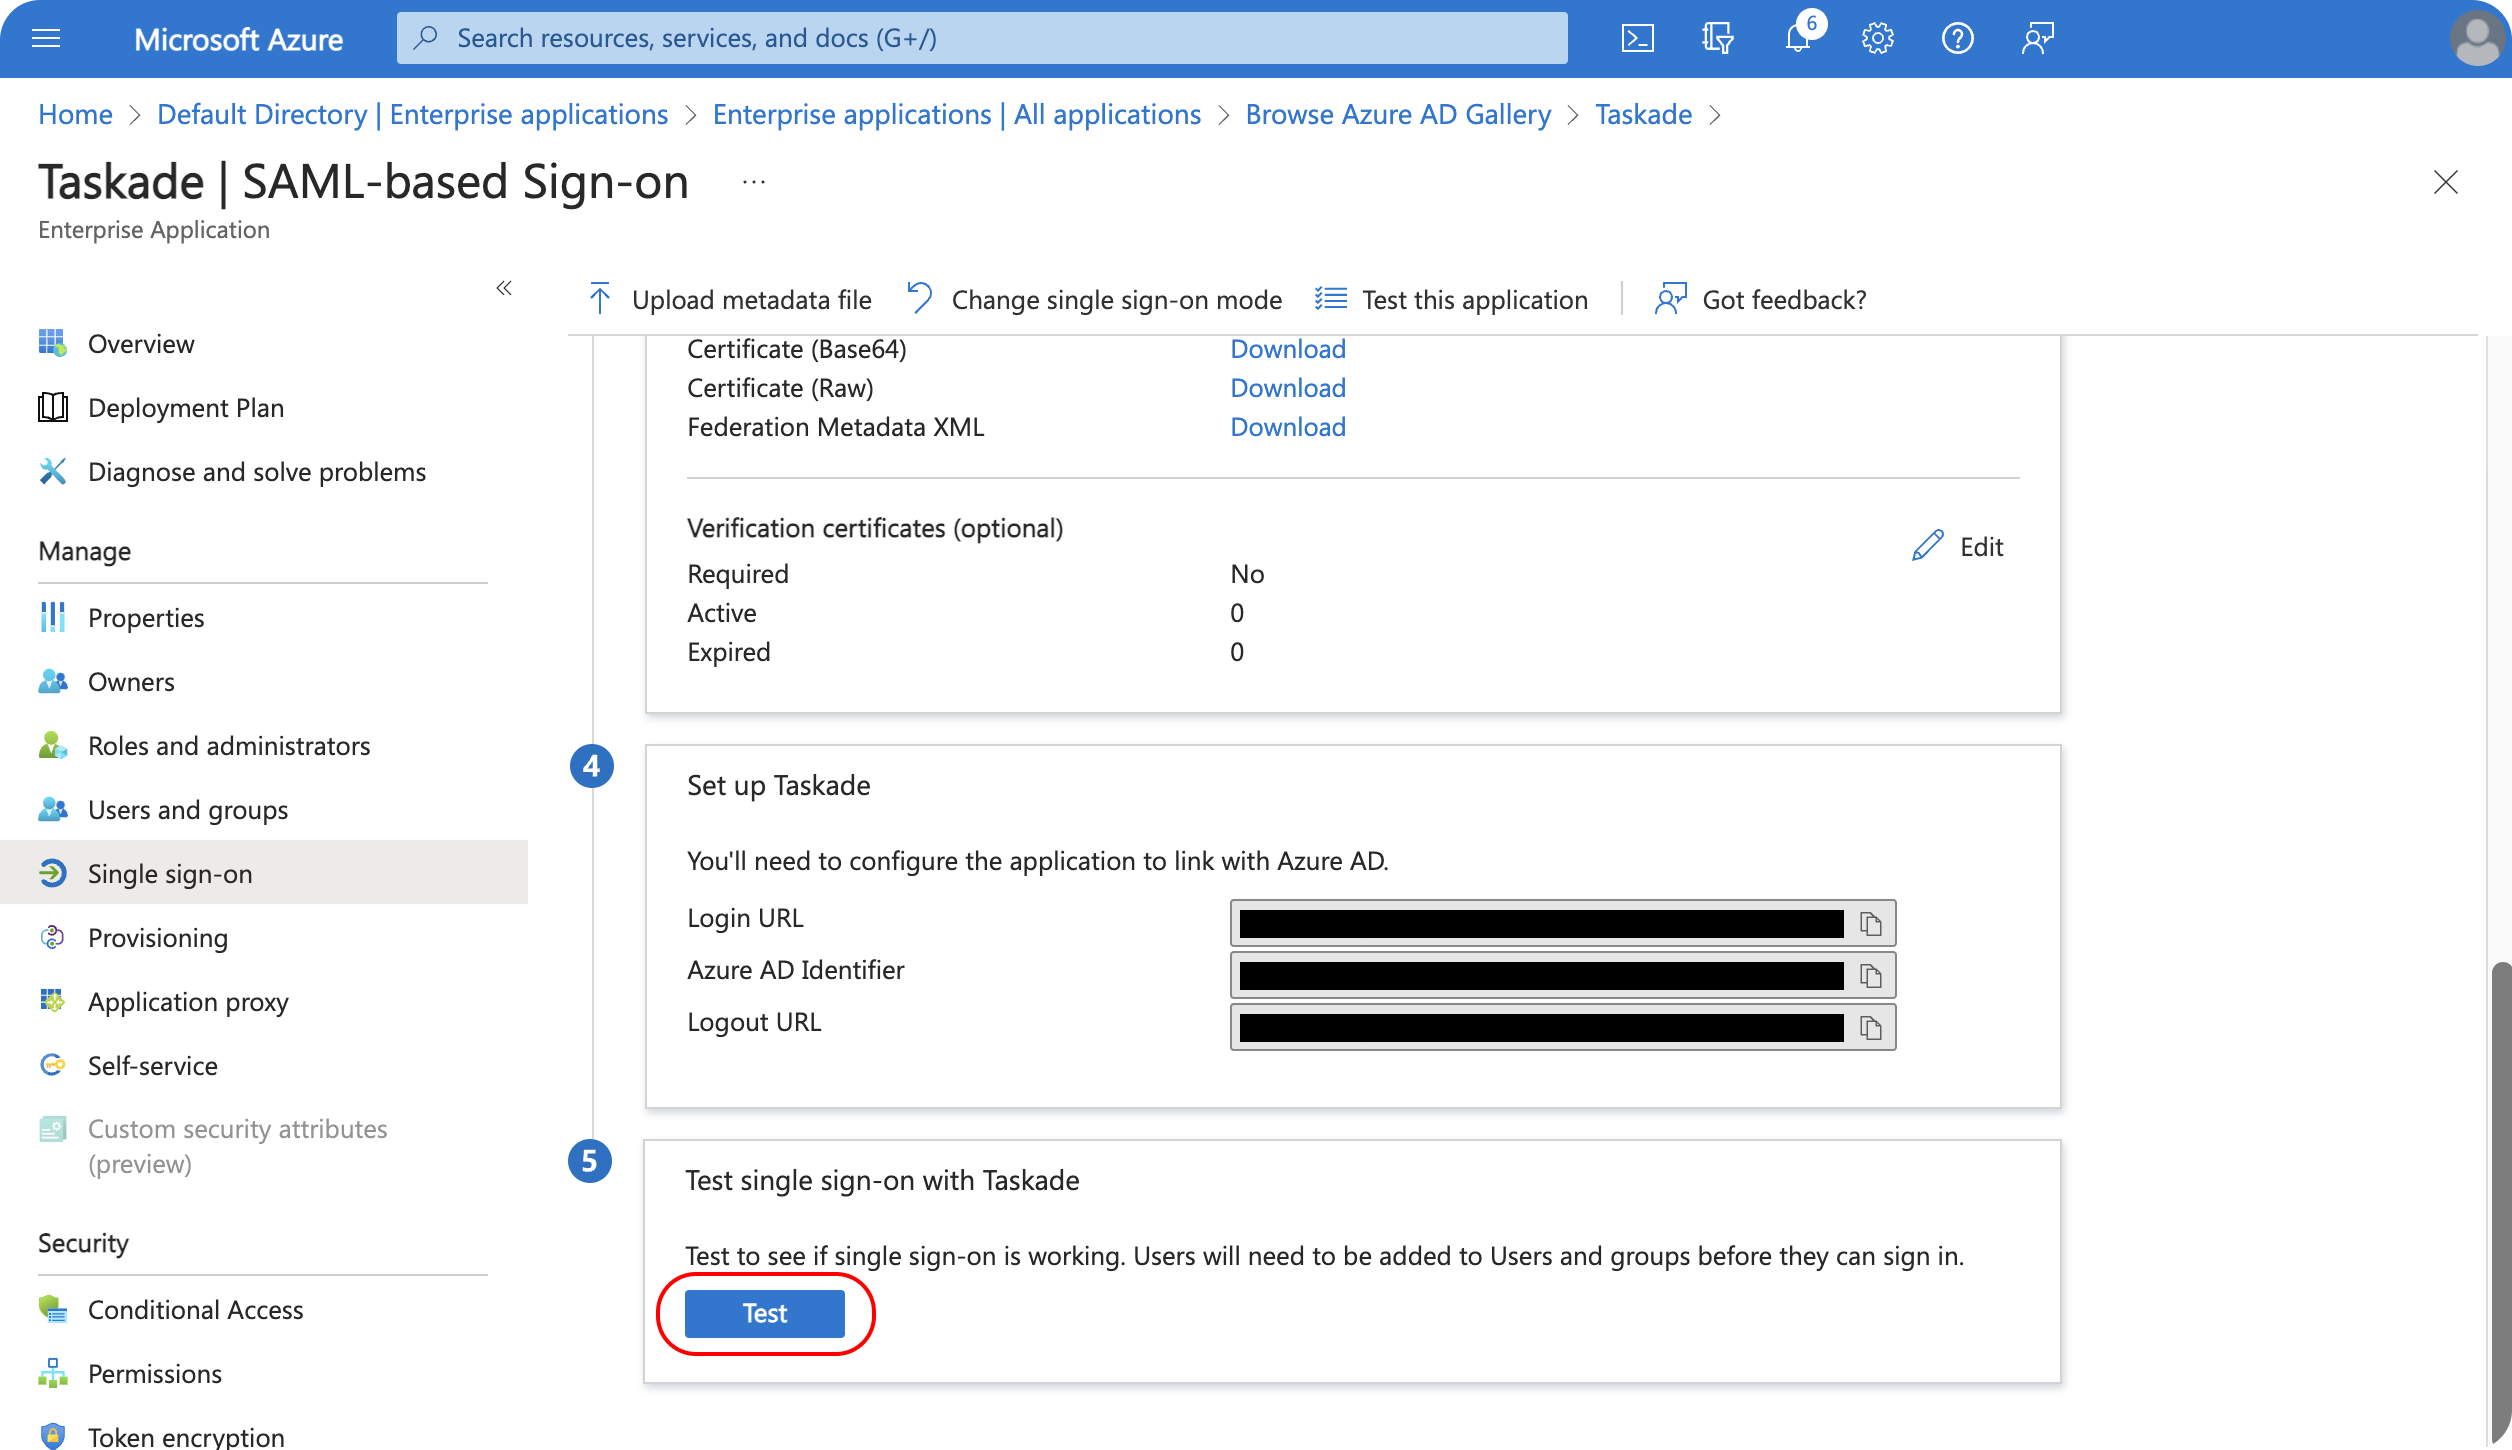
The last step tests your Single Sign-On setup. Open your Azure Portal and click Test under Test single sign-on with Taskade. Then click Test sign in as the current user.
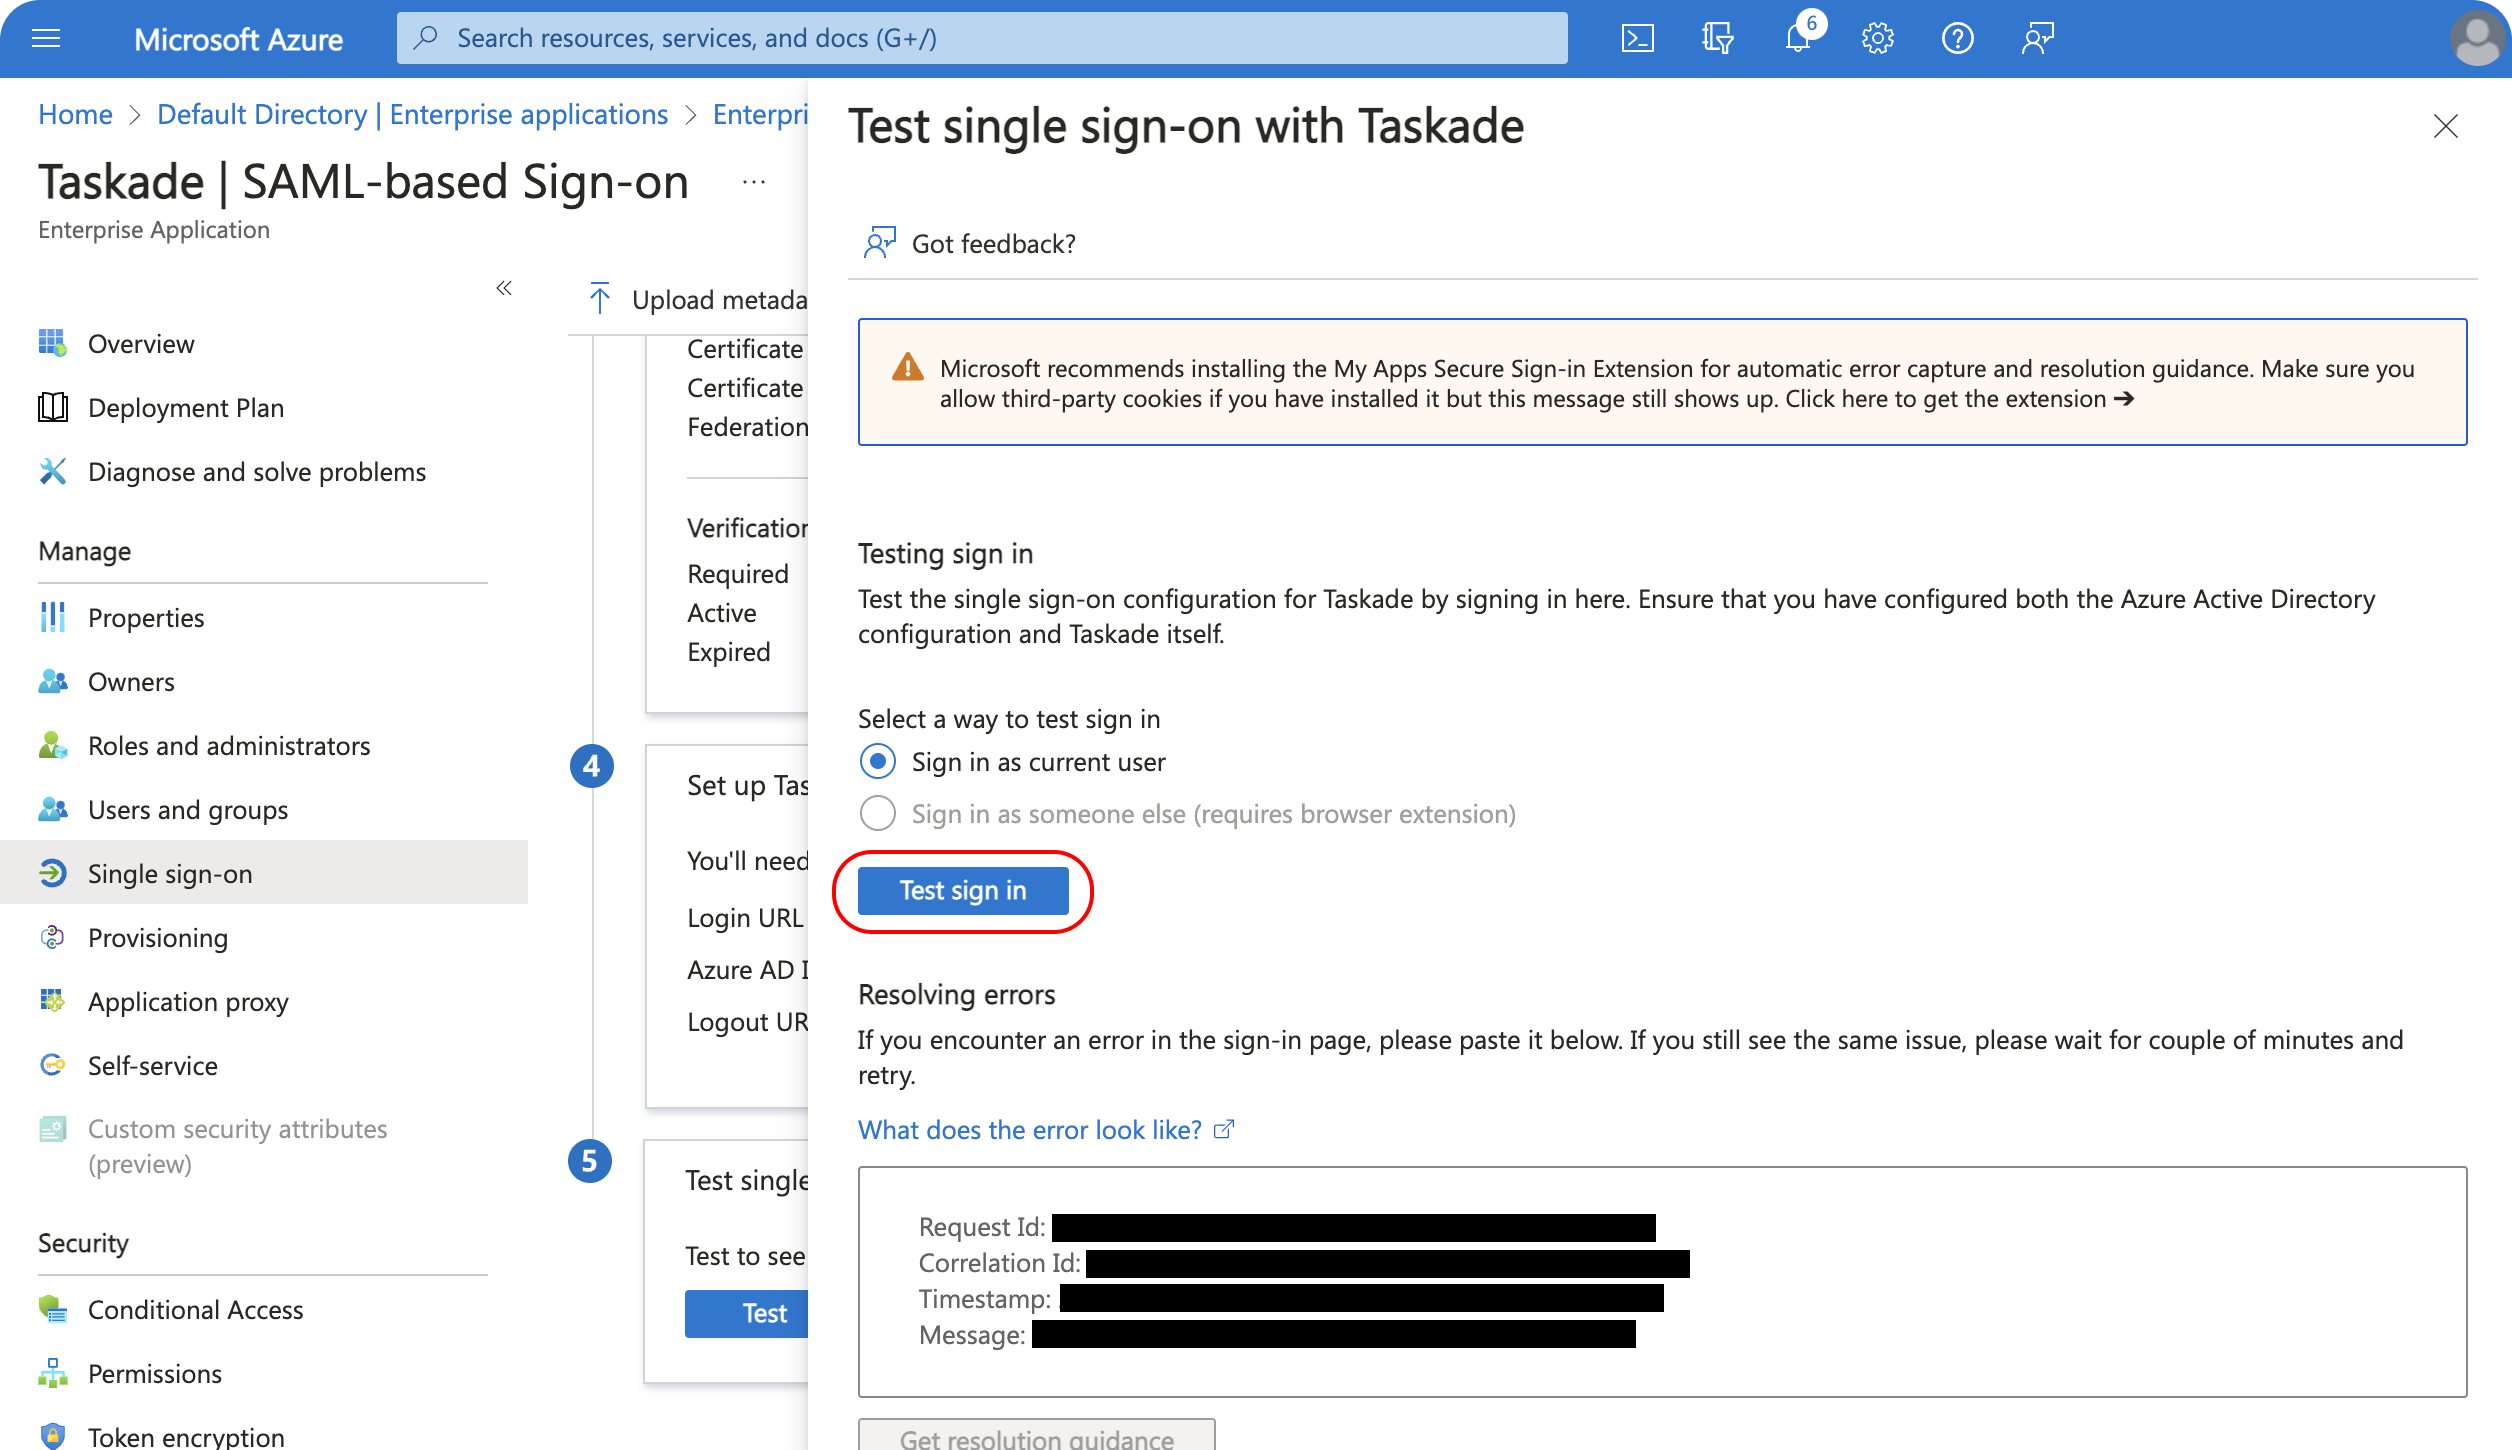
Taskade sends you to https://www.taskade.com/saml/sso, where you log in with your Azure credentials. If the test passes, anyone in your Active Directory who is assigned to the application can sign up or sign in to Taskade.
If you want more help with this configuration, email us at support@taskade.com. We are happy to set it up with you.
Related guides
- SAML via Okta. SSO setup with Okta as identity provider
- SAML via Google Workspace. SSO setup with Google Workspace
- SCIM via Azure AD. Automated user provisioning via Azure
- Two-Factor Authentication. Add a second sign-in step on top of SSO
- Workspace Privacy. Control who sees what after sign-in