
What Is SCIM?
SCIM (System for Cross-domain Identity Management) automates user provisioning and deprovisioning between Taskade and Okta. New hires assigned to the Taskade Okta app are created automatically in your Taskade Organization; deactivated Okta users are revoked instantly. No manual invites, no orphaned seats, no audit gaps.
TL;DR: Configure SAML via Okta first. Then in Taskade create an Organization, copy the SCIM token, and paste it into Okta's Provisioning → Integration tab with base URL
https://www.taskade.com/scim/v2and Bearer auth. Push Okta groups to map them to Taskade workspaces. Available on legacy Enterprise plans. Contact us for V8 Enterprise SCIM access.
Configure SCIM in Taskade
SCIM provisioning is currently available for legacy Enterprise plans only. V8 plans do not yet include SCIM support. Contact us for Enterprise SCIM access. We work exclusively with Okta as our identity provider (with support for other IDPs in the near future).
Note: To get started, you first need to configure SAML.
The first step is to make sure you upgraded your workspace.
- Visit https://taskade.com/settings/plans.
- Select the workspace(s) you want to upgrade, and click Upgrade.

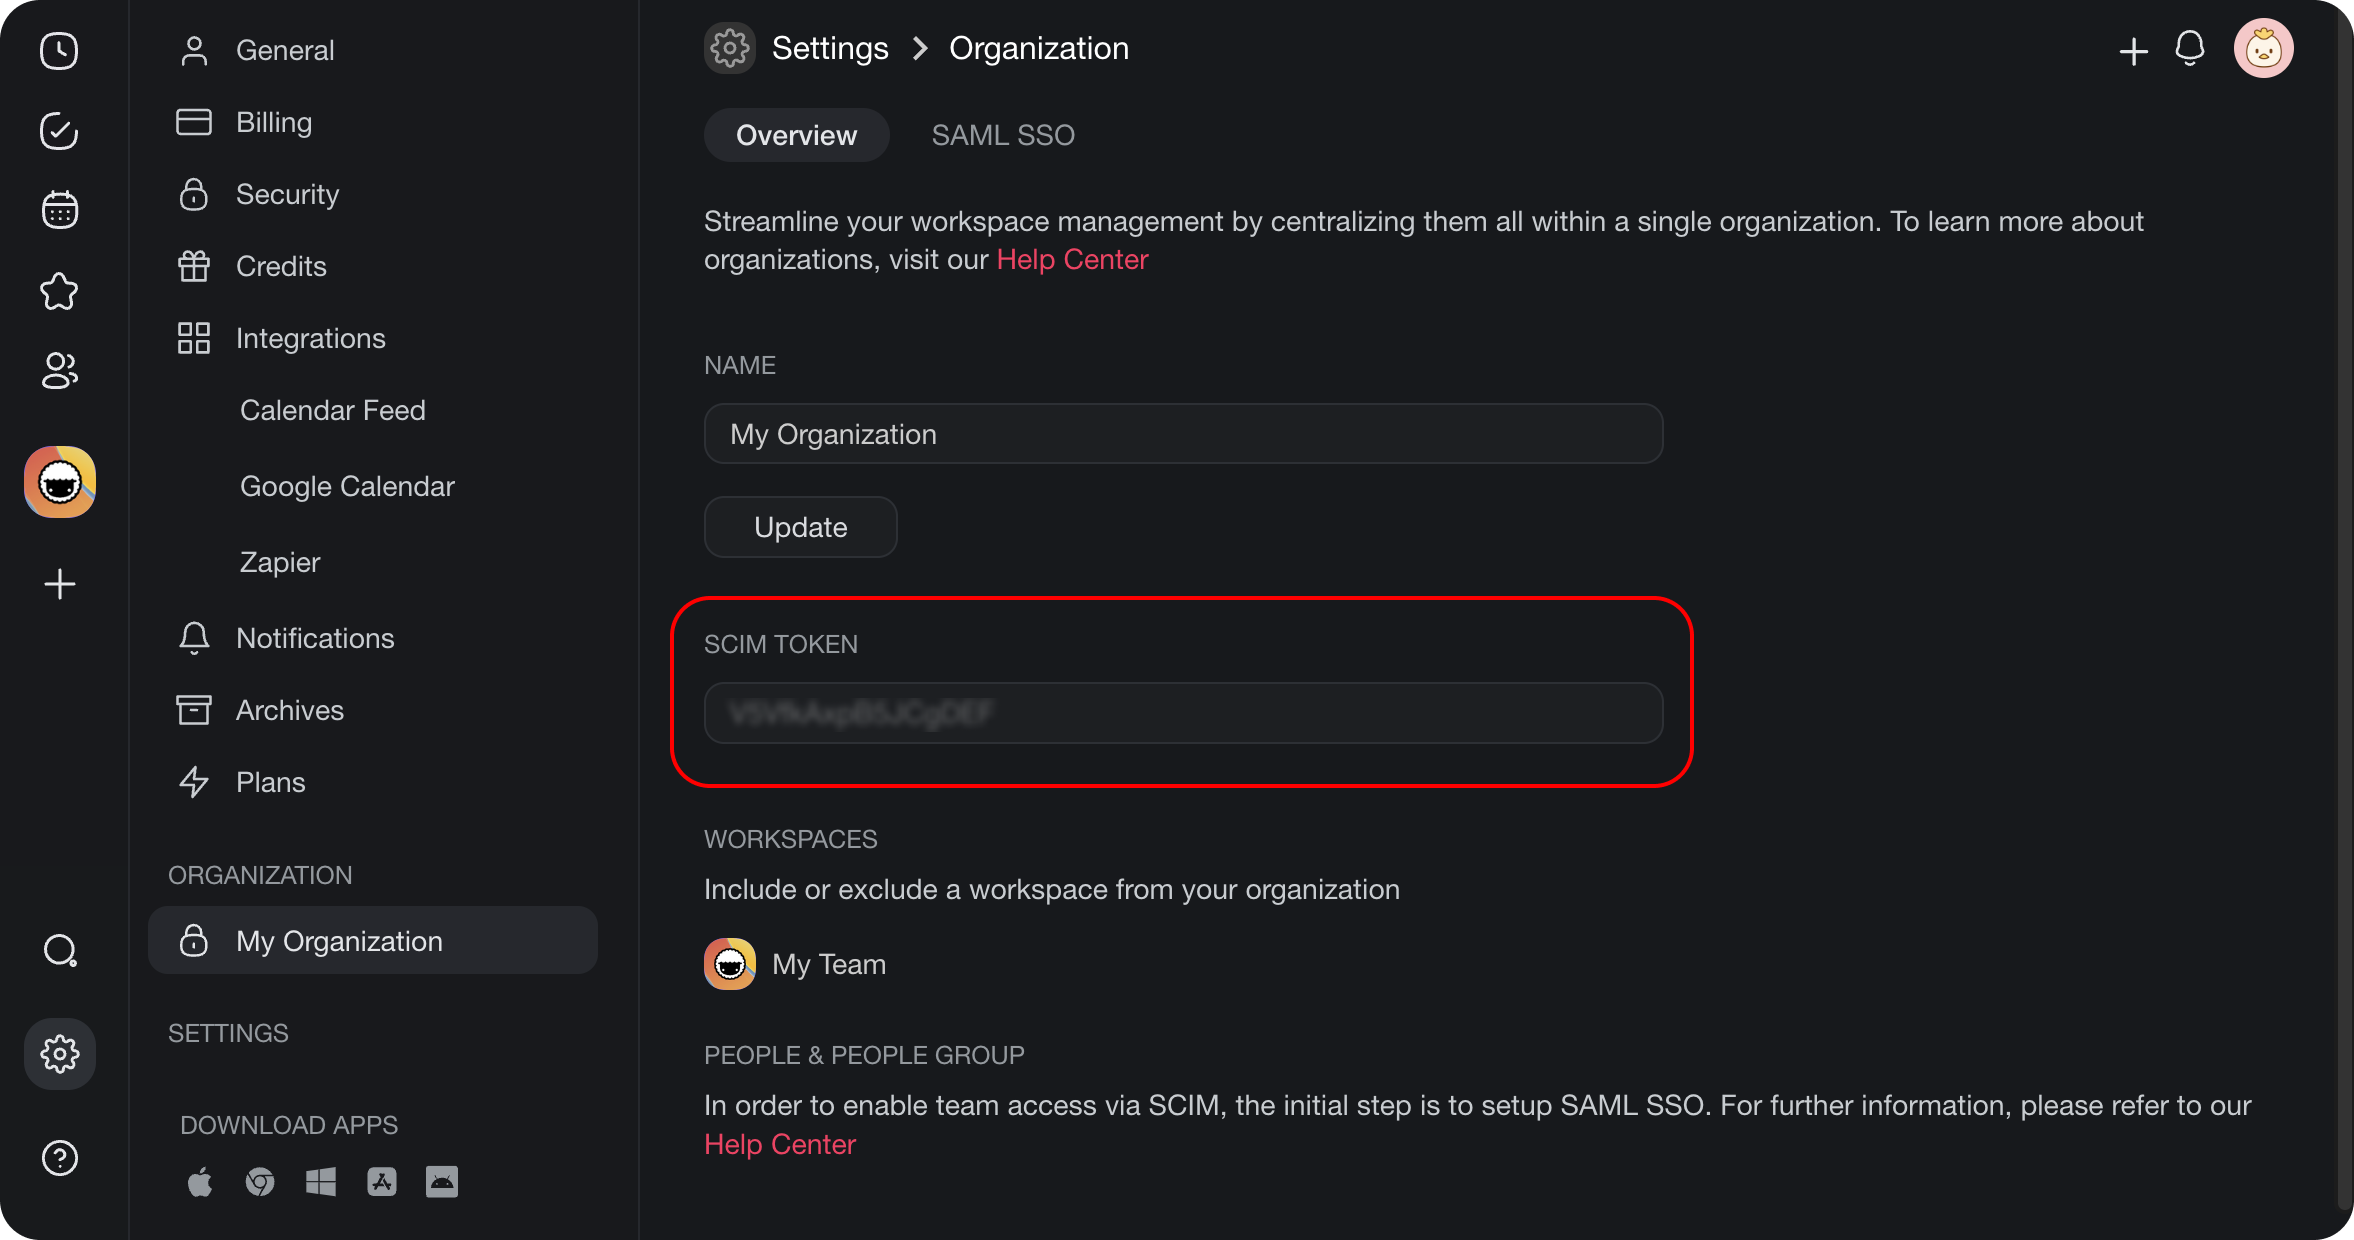
- The next step is to create an organization. An organization allows you to group together multiple workspaces, which in turn makes it possible to provision groups.

- Once you've named your organization, click the Create button under the NAME field to get the SCIM token. We'll use the SCIM token in a later step.
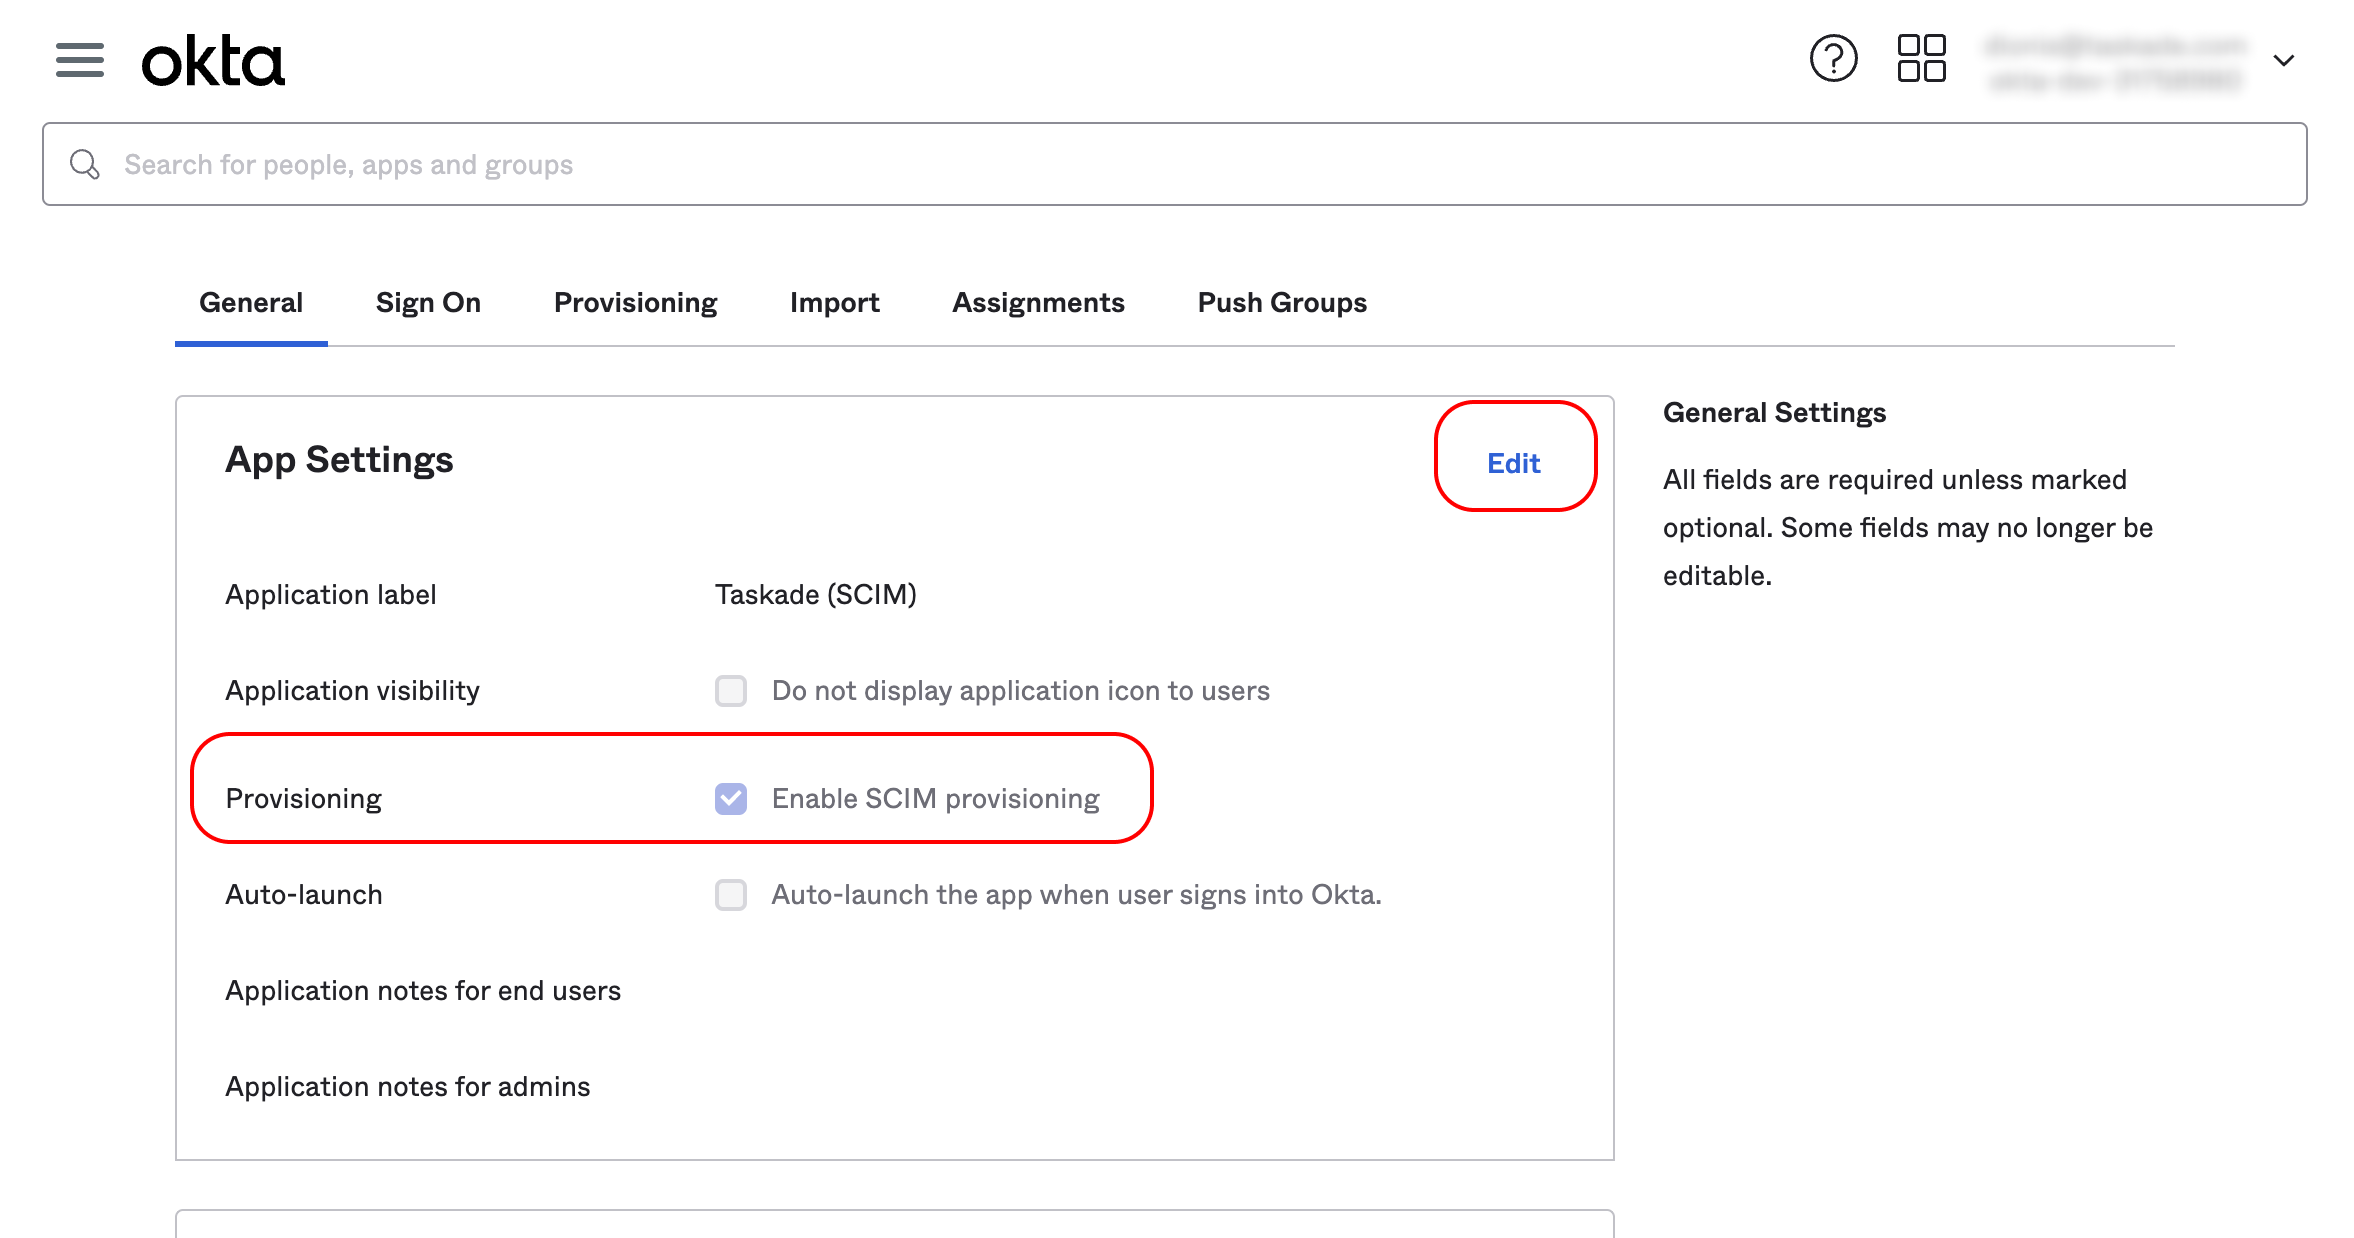
- With the organization created and the SCIM token copied, we can head to Okta. Go to Taskade's General tab, click Edit, and check Enable SCIM provisioning.
- Navigate to the Provisioning tab and click Edit.

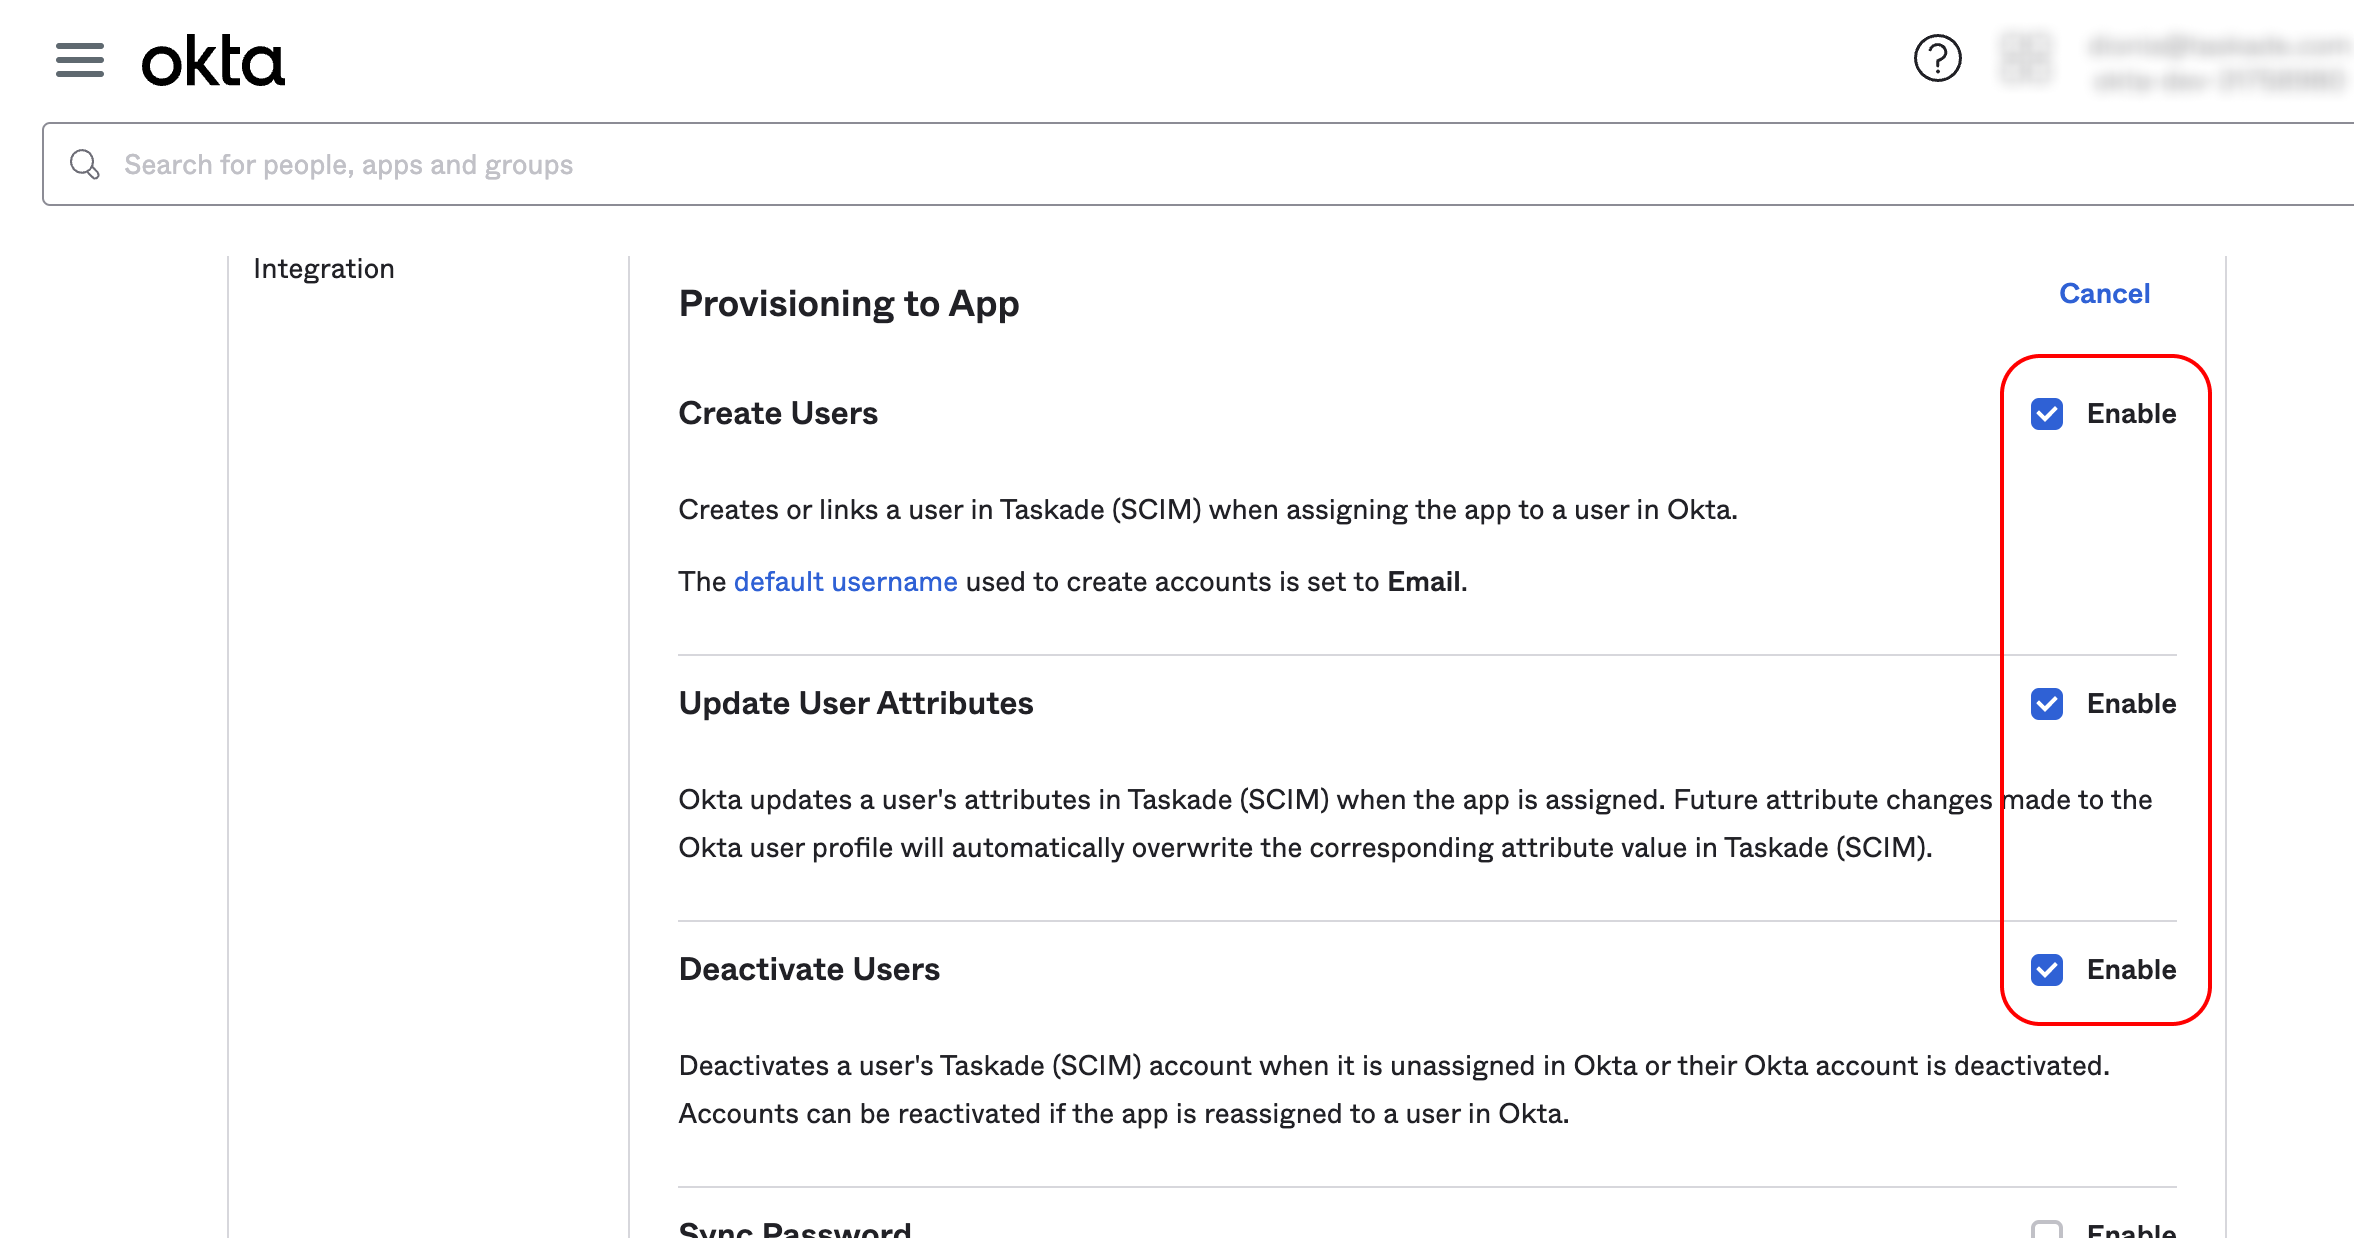
- Enable provisioning to Create Users, Update User Attributes, and Deactivate Users.
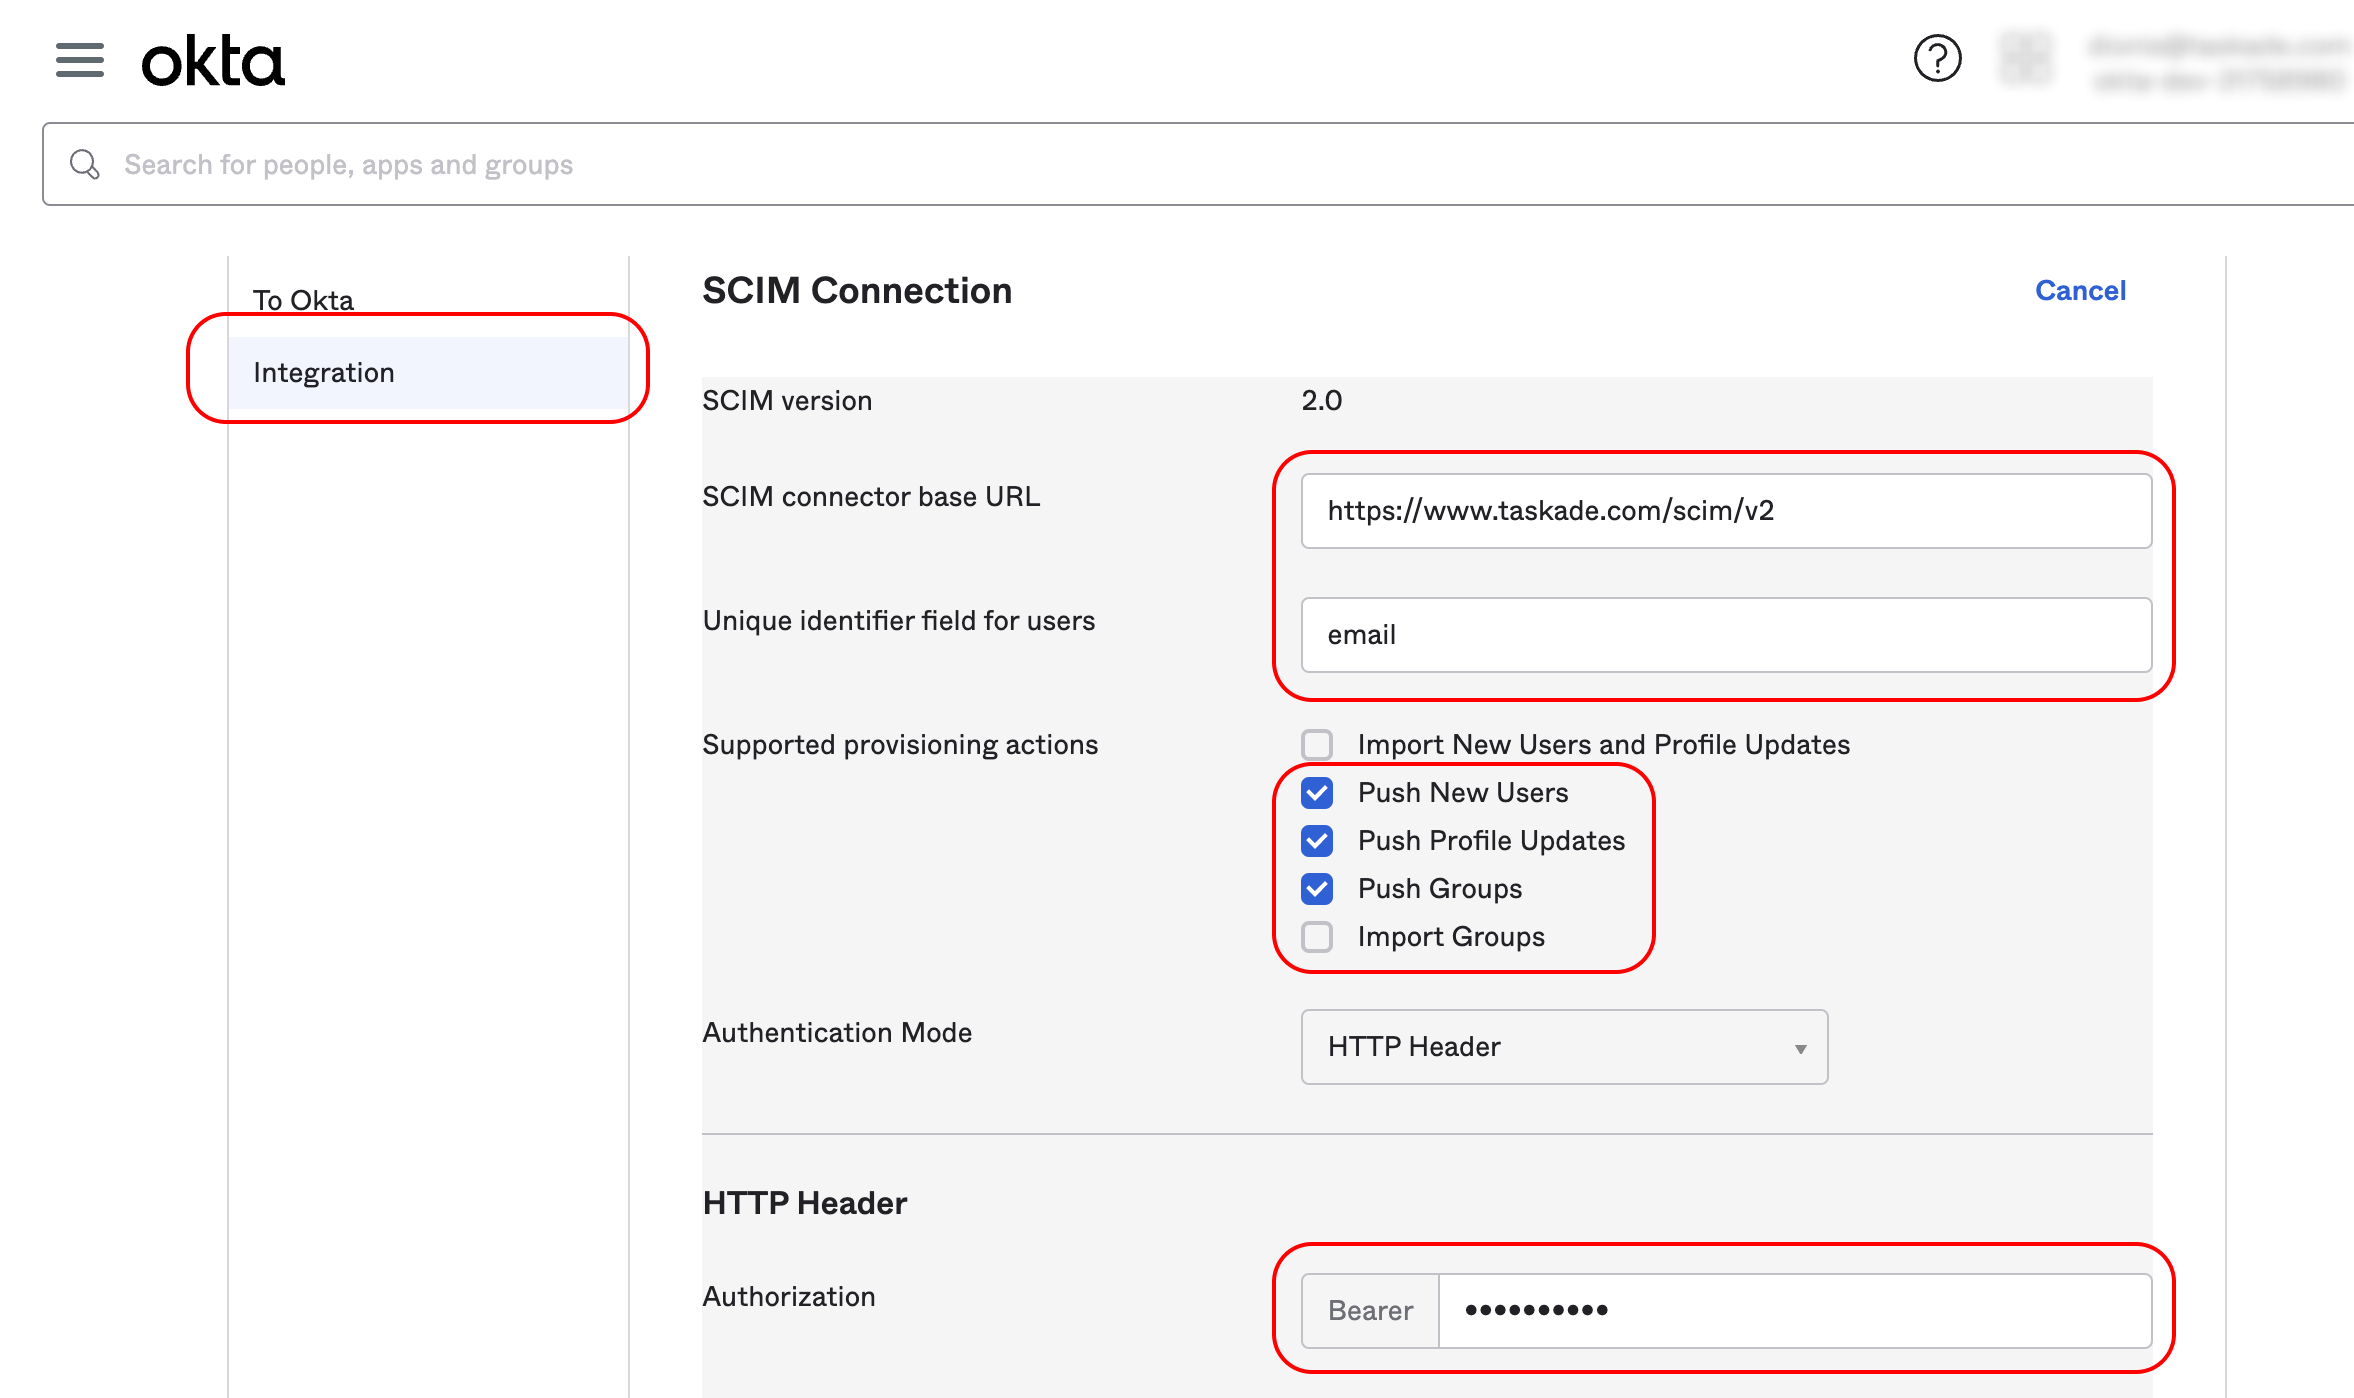
- Go to the Integration tab in the left sidebar and use the following settings:
| SCIM connector base URL | https://www.taskade.com/scim/v2 |
|---|---|
| Unique identifier field for users | |
| Supported provisioning actions | Enable Push New Users, Push Profile Updates, and Push Groups |
| Authentication Mode | HTTP Header |
| Authorization Bearer | Paste your SCIM token |
This is a preview of what the settings page should look like. Once you're done:
- Click Save at the bottom of the page.
- (optional) Select Test Connector Configuration to check for errors.
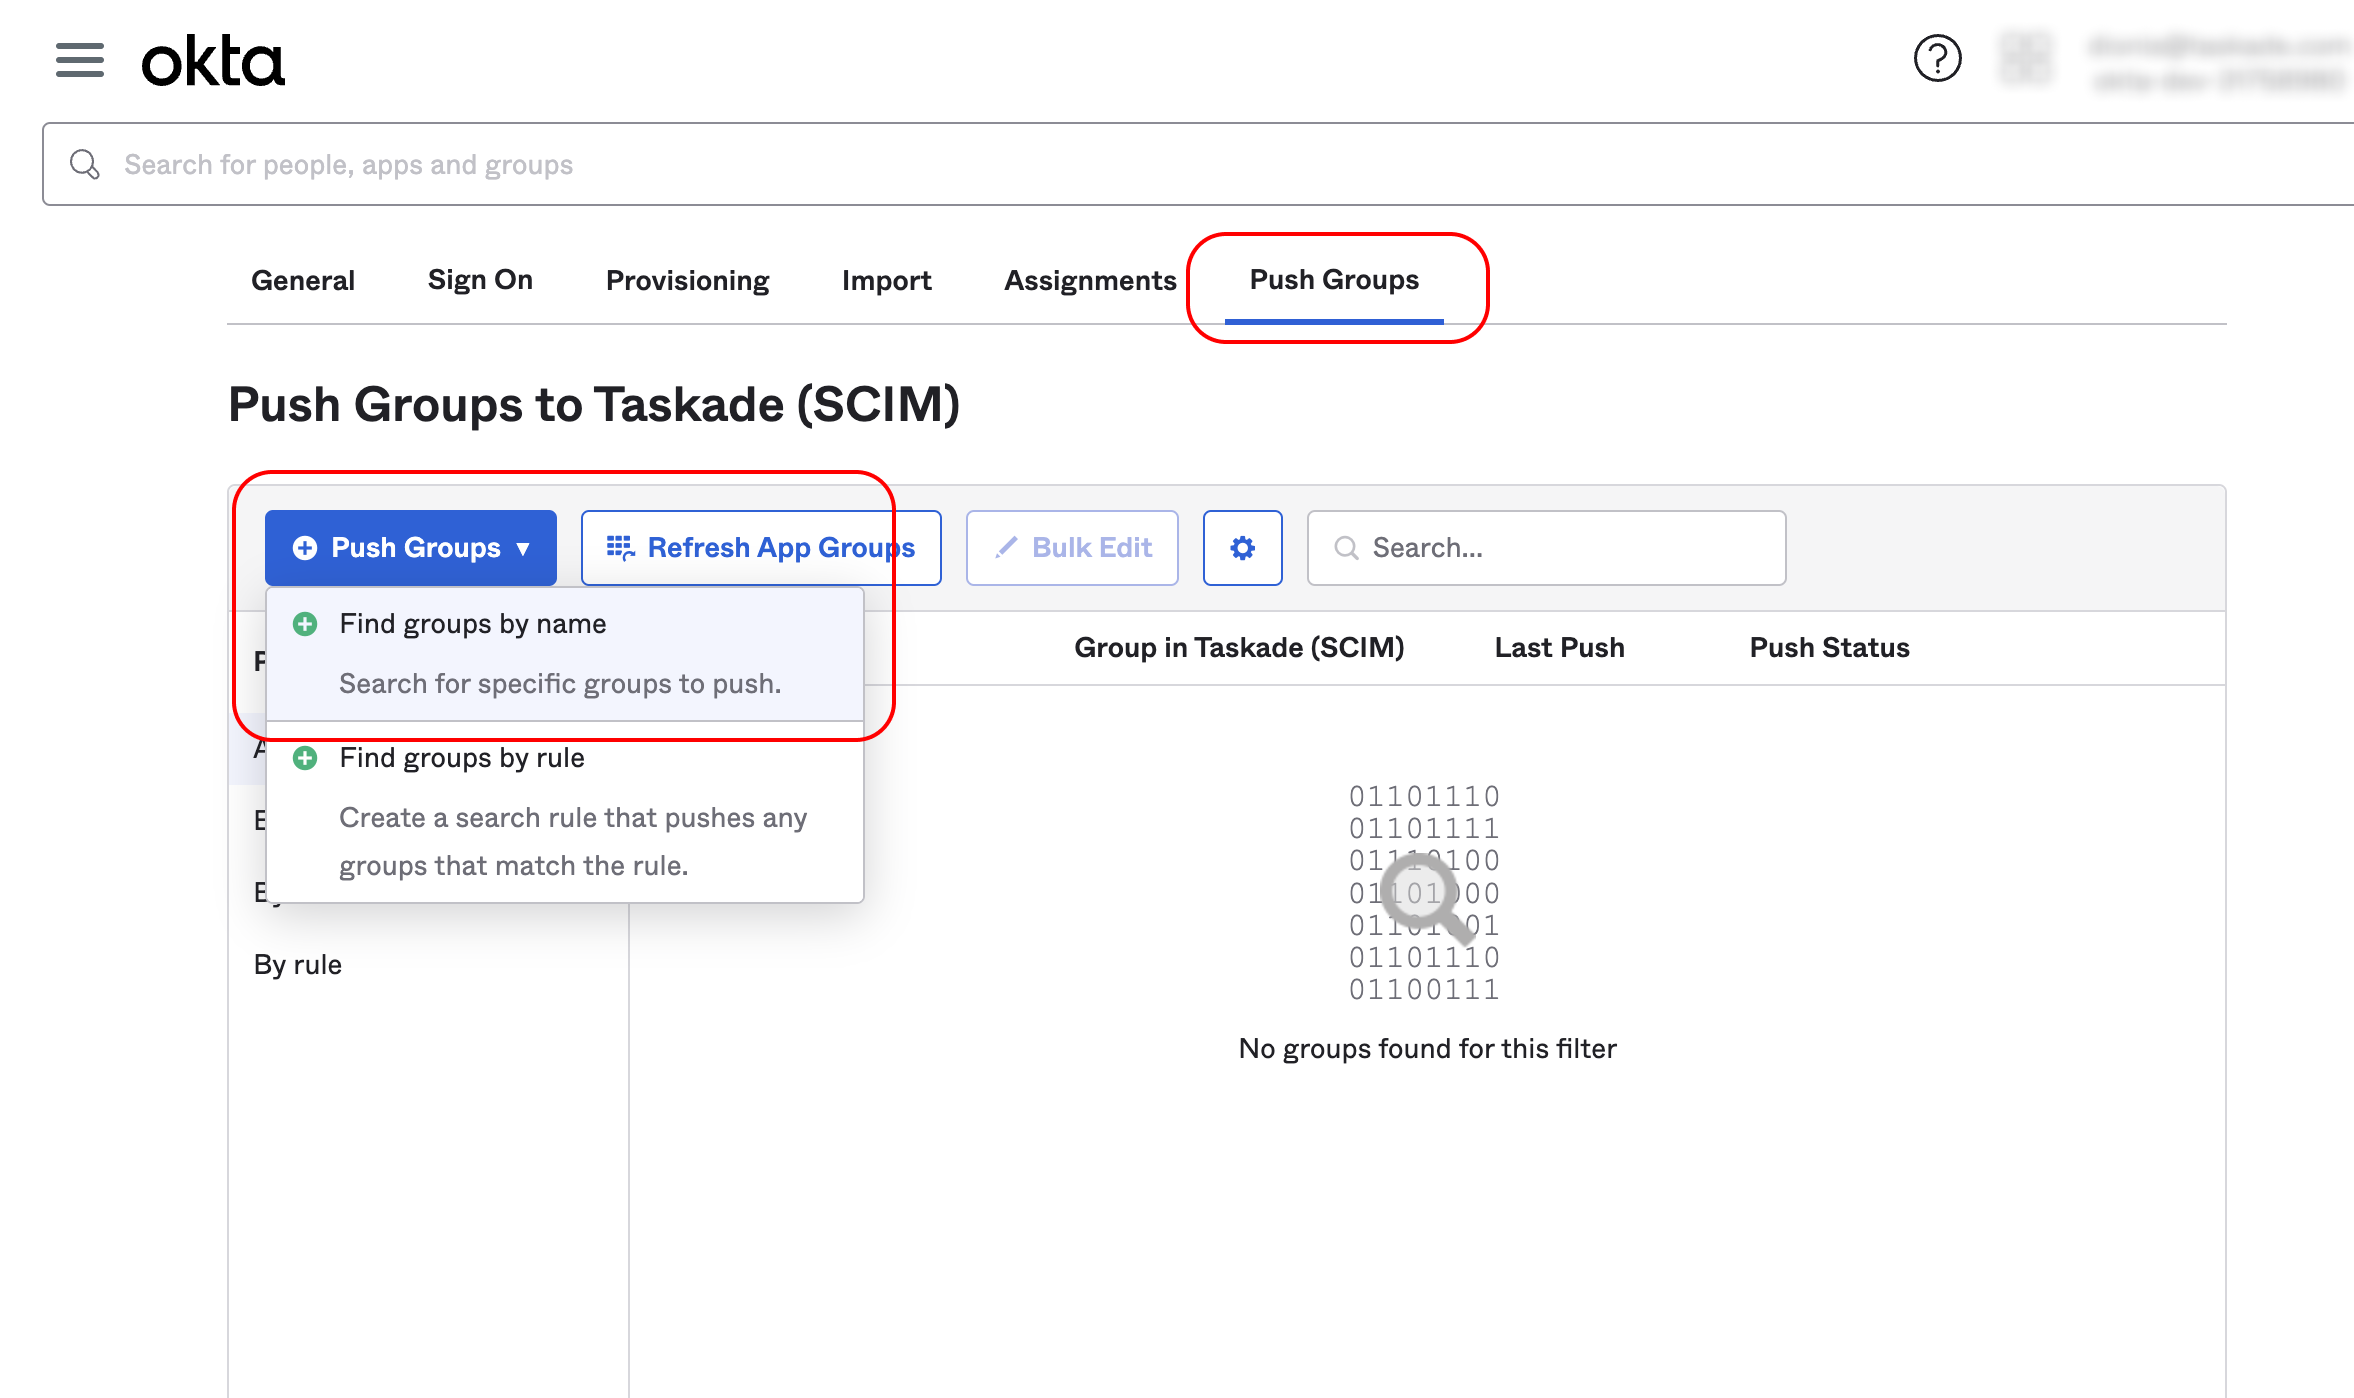
Now it's time to add a push group to your application:
- Navigate to the ➕ Push Groups tab.
- Click Push Groups.
- Choose Find groups by name from the drop-down list.
Once you decide on which group to push, enable Push groups memberships immediately and set the match result and push action to Create Group.
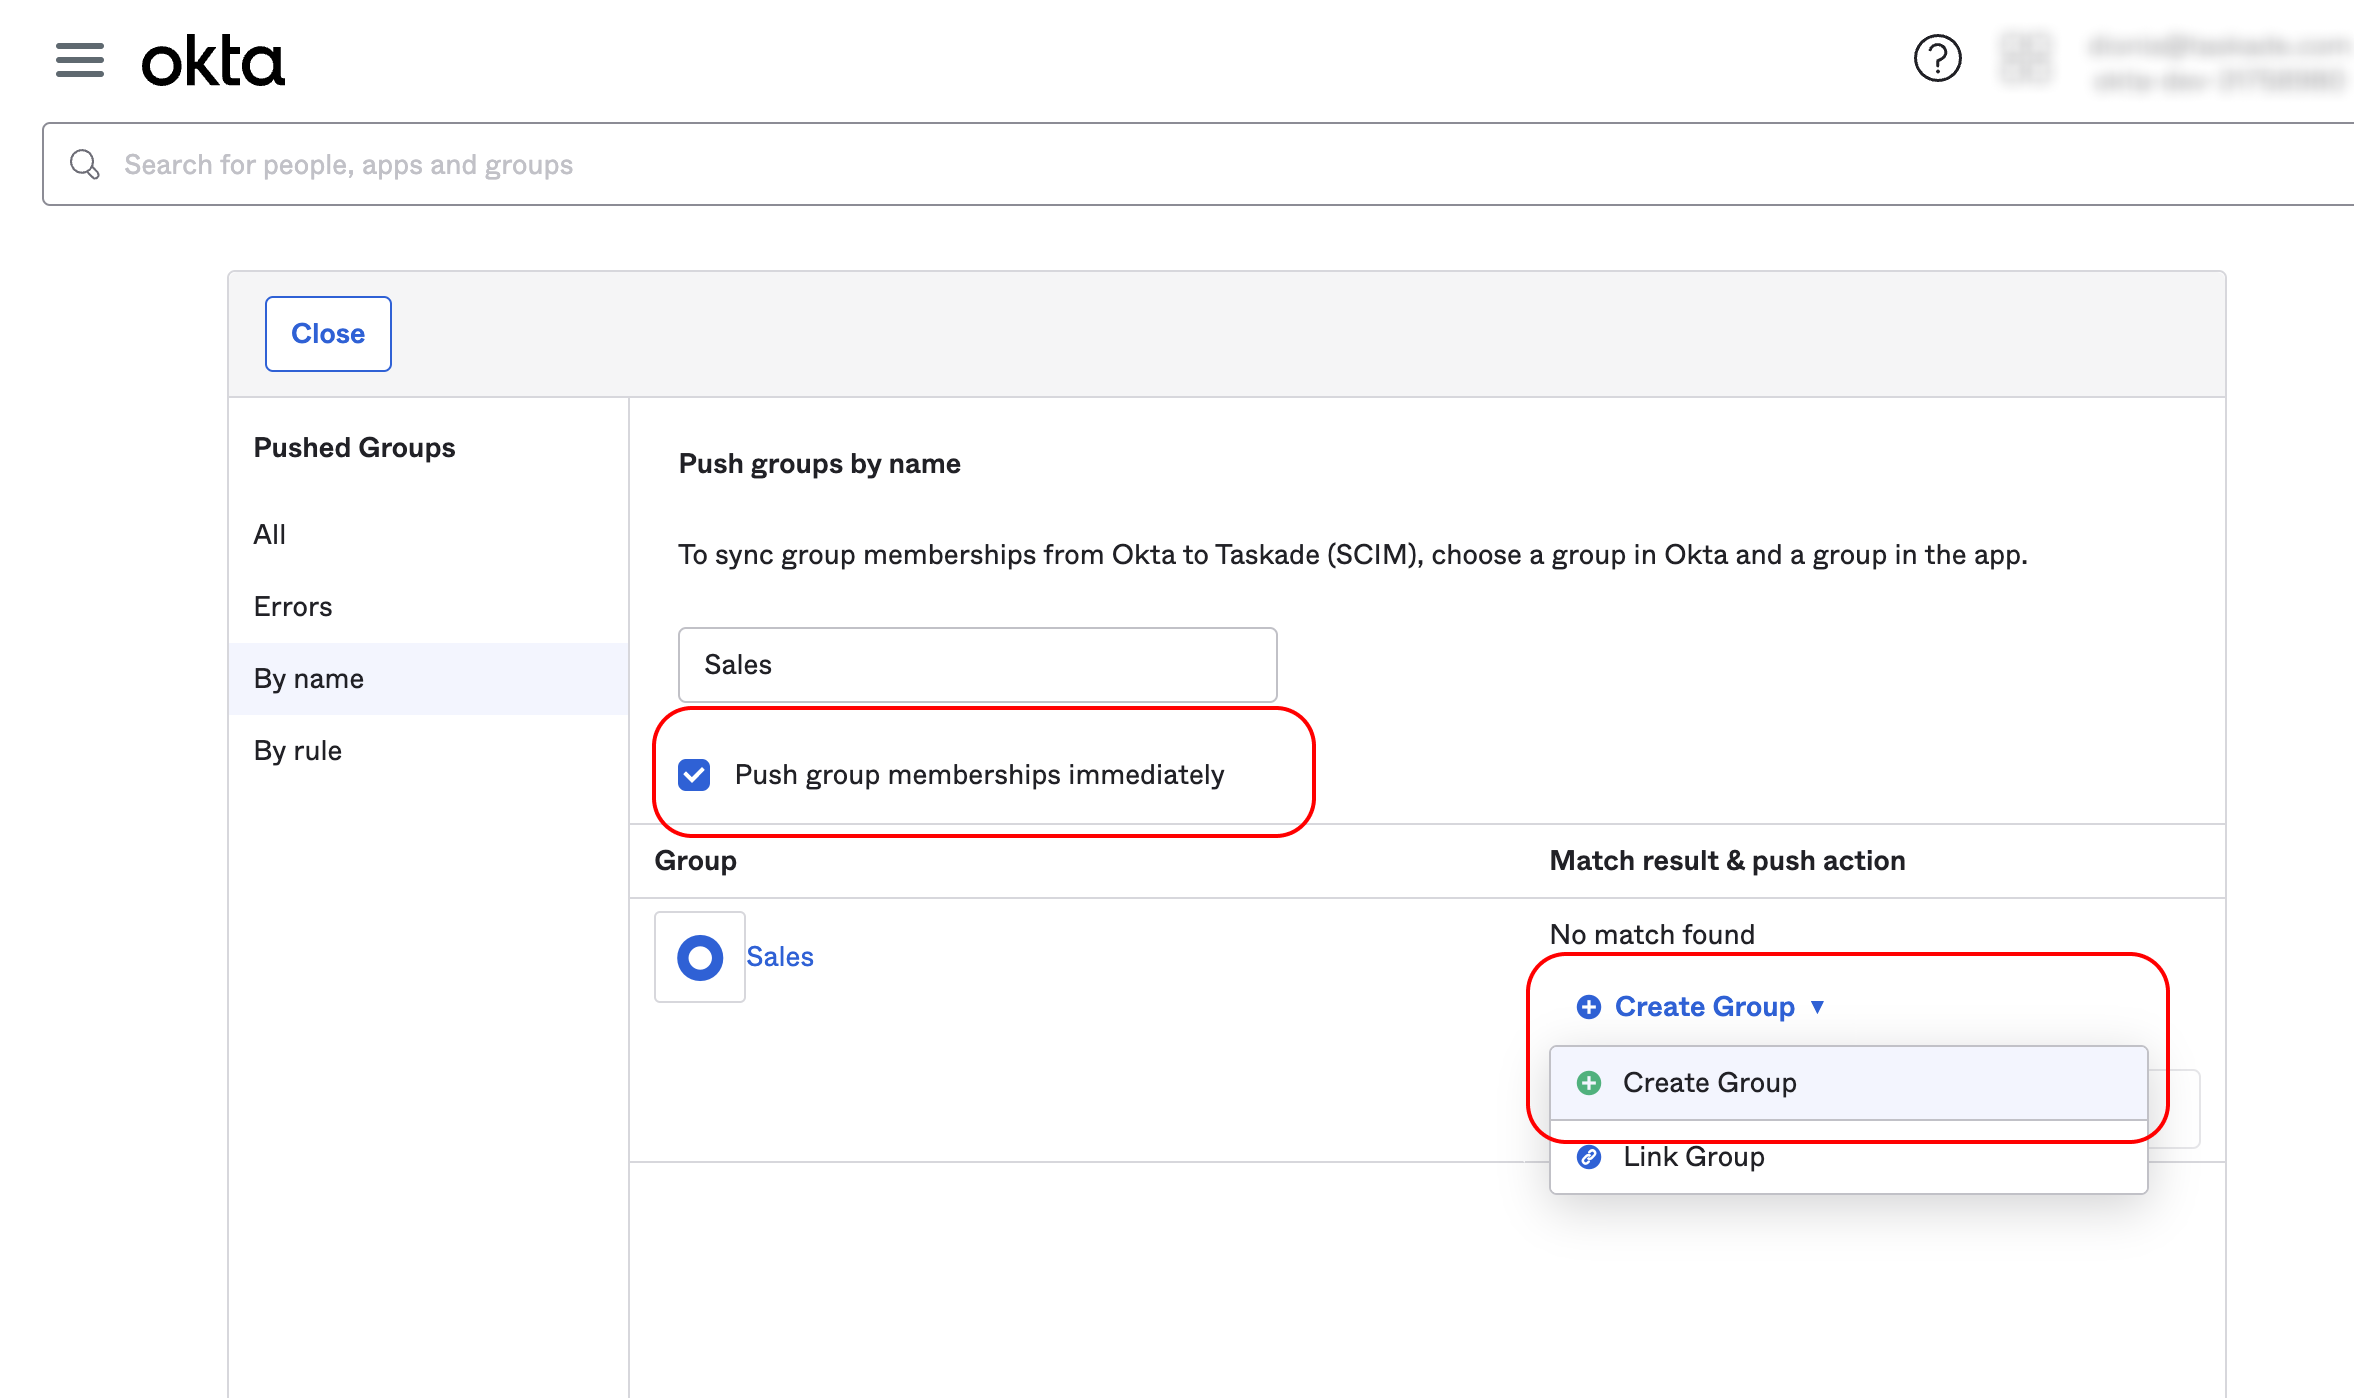
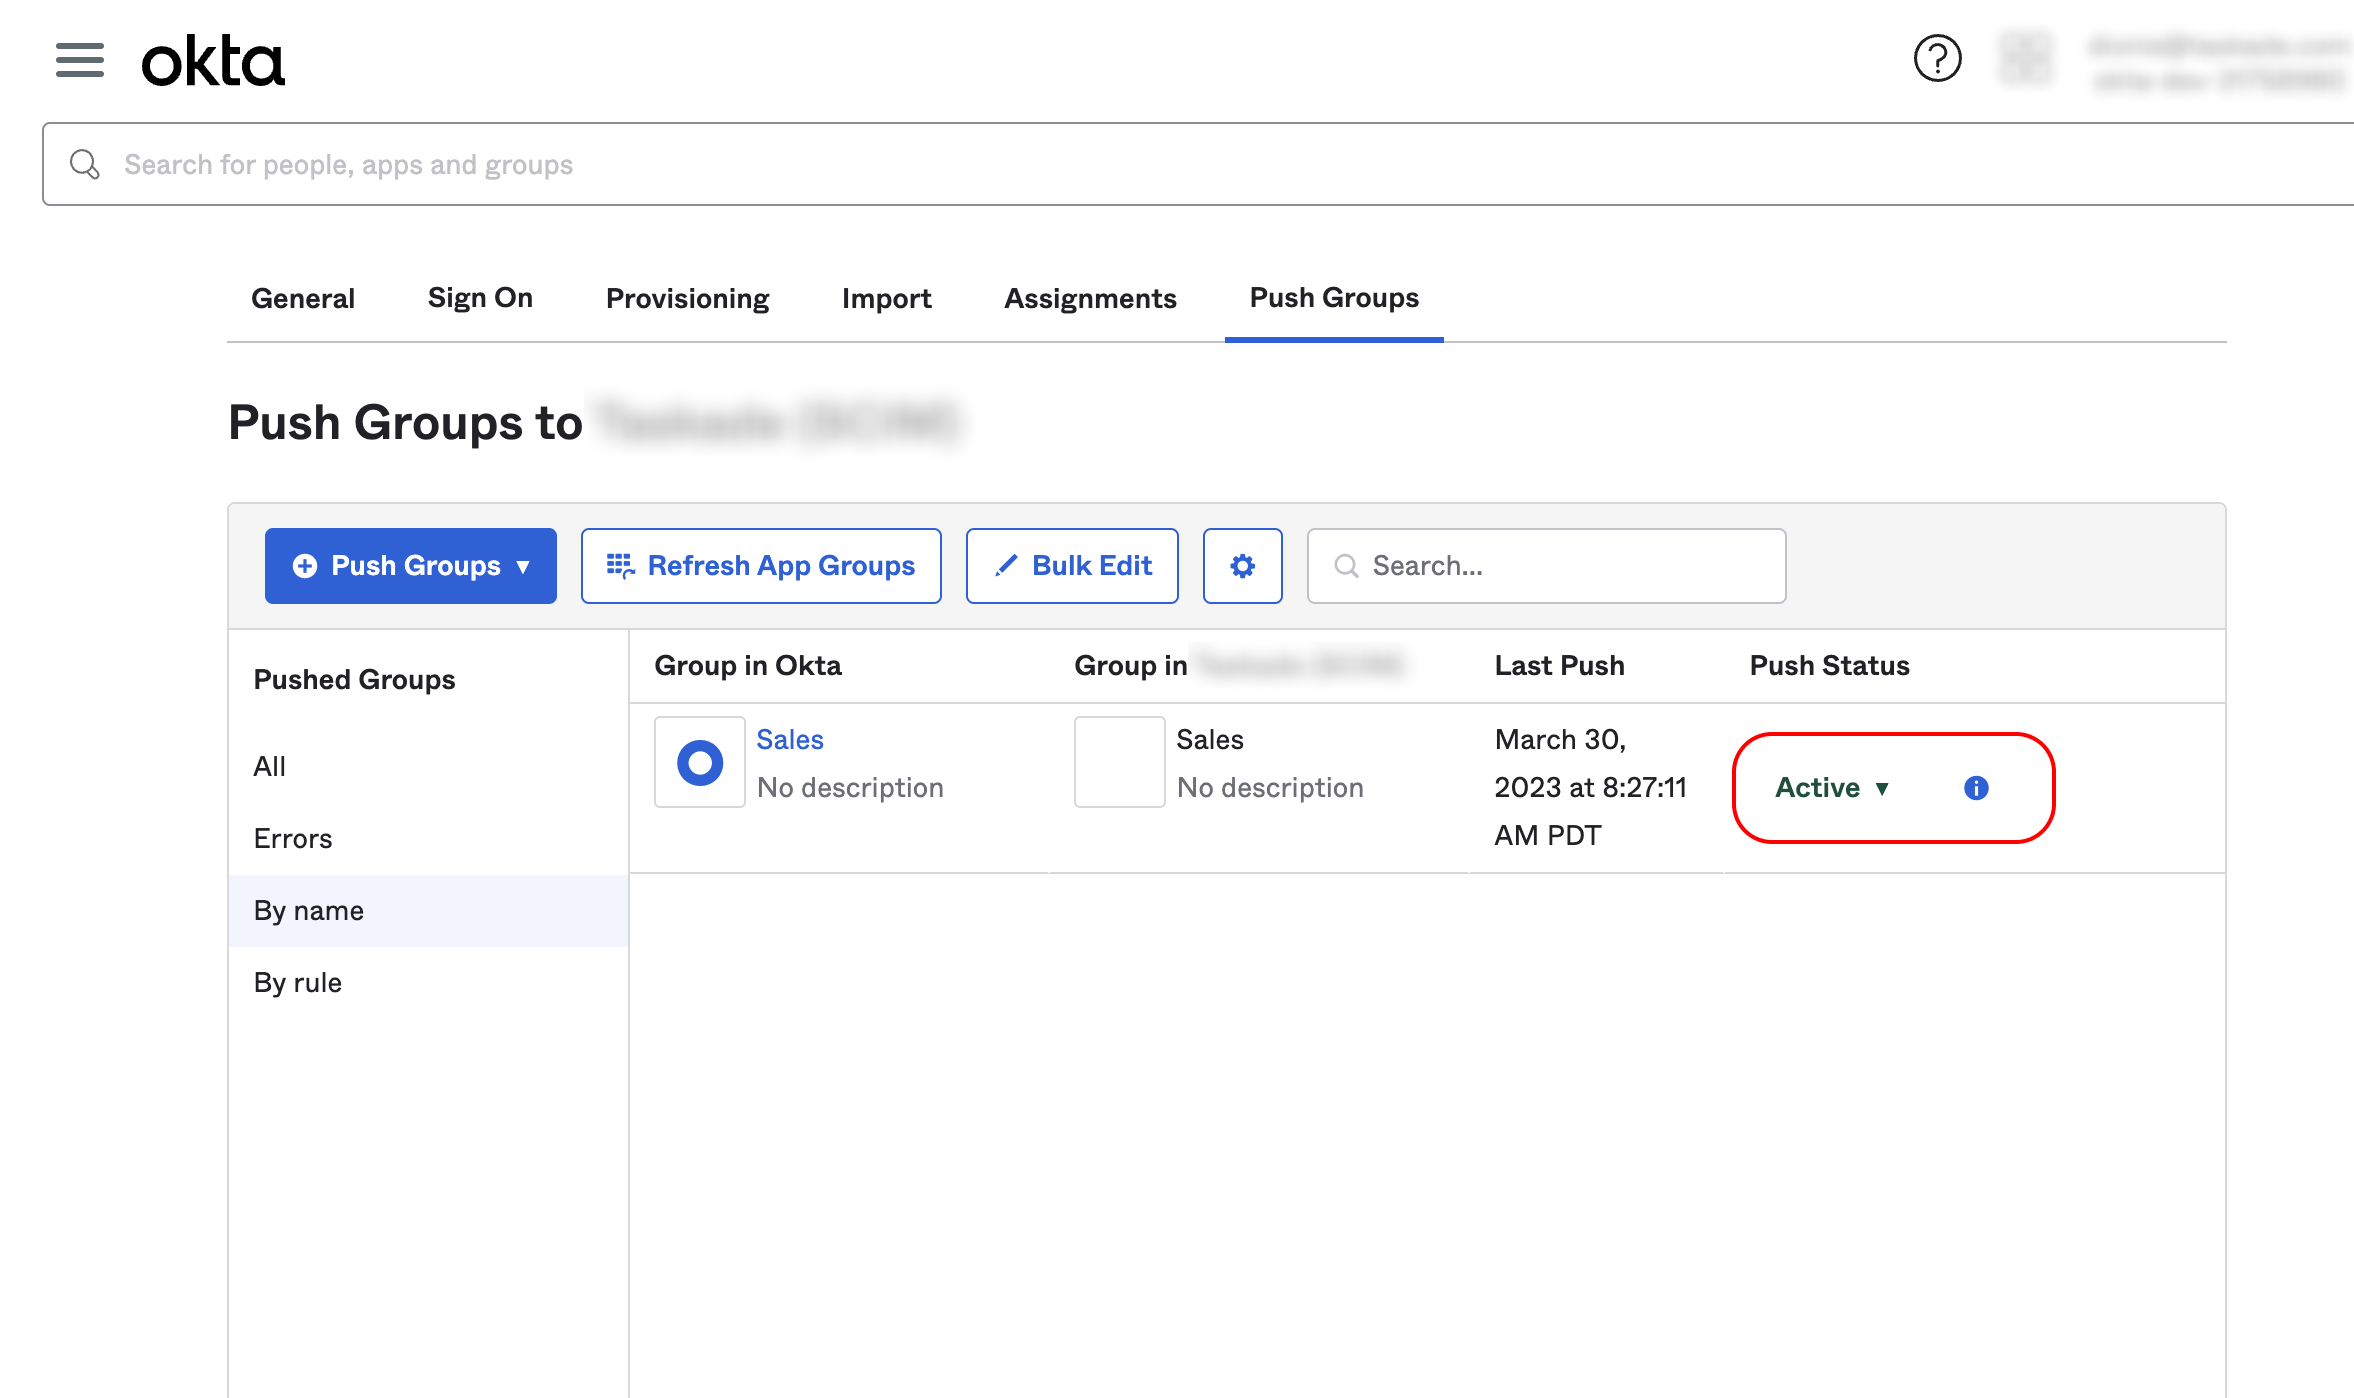
When you're done, scroll down and click on Save or Save & Add Another if you have other groups to add. If successful, the new group's push status will be set to Active.
💡Note: Make sure you assign the application to the groups you've created.
And that's it!
Now that we have everything configured, let's return to your Taskade dashboard. The groups will populate at the bottom of the organization screen. Make sure to select all the workspaces that you wish to manage in your organization.
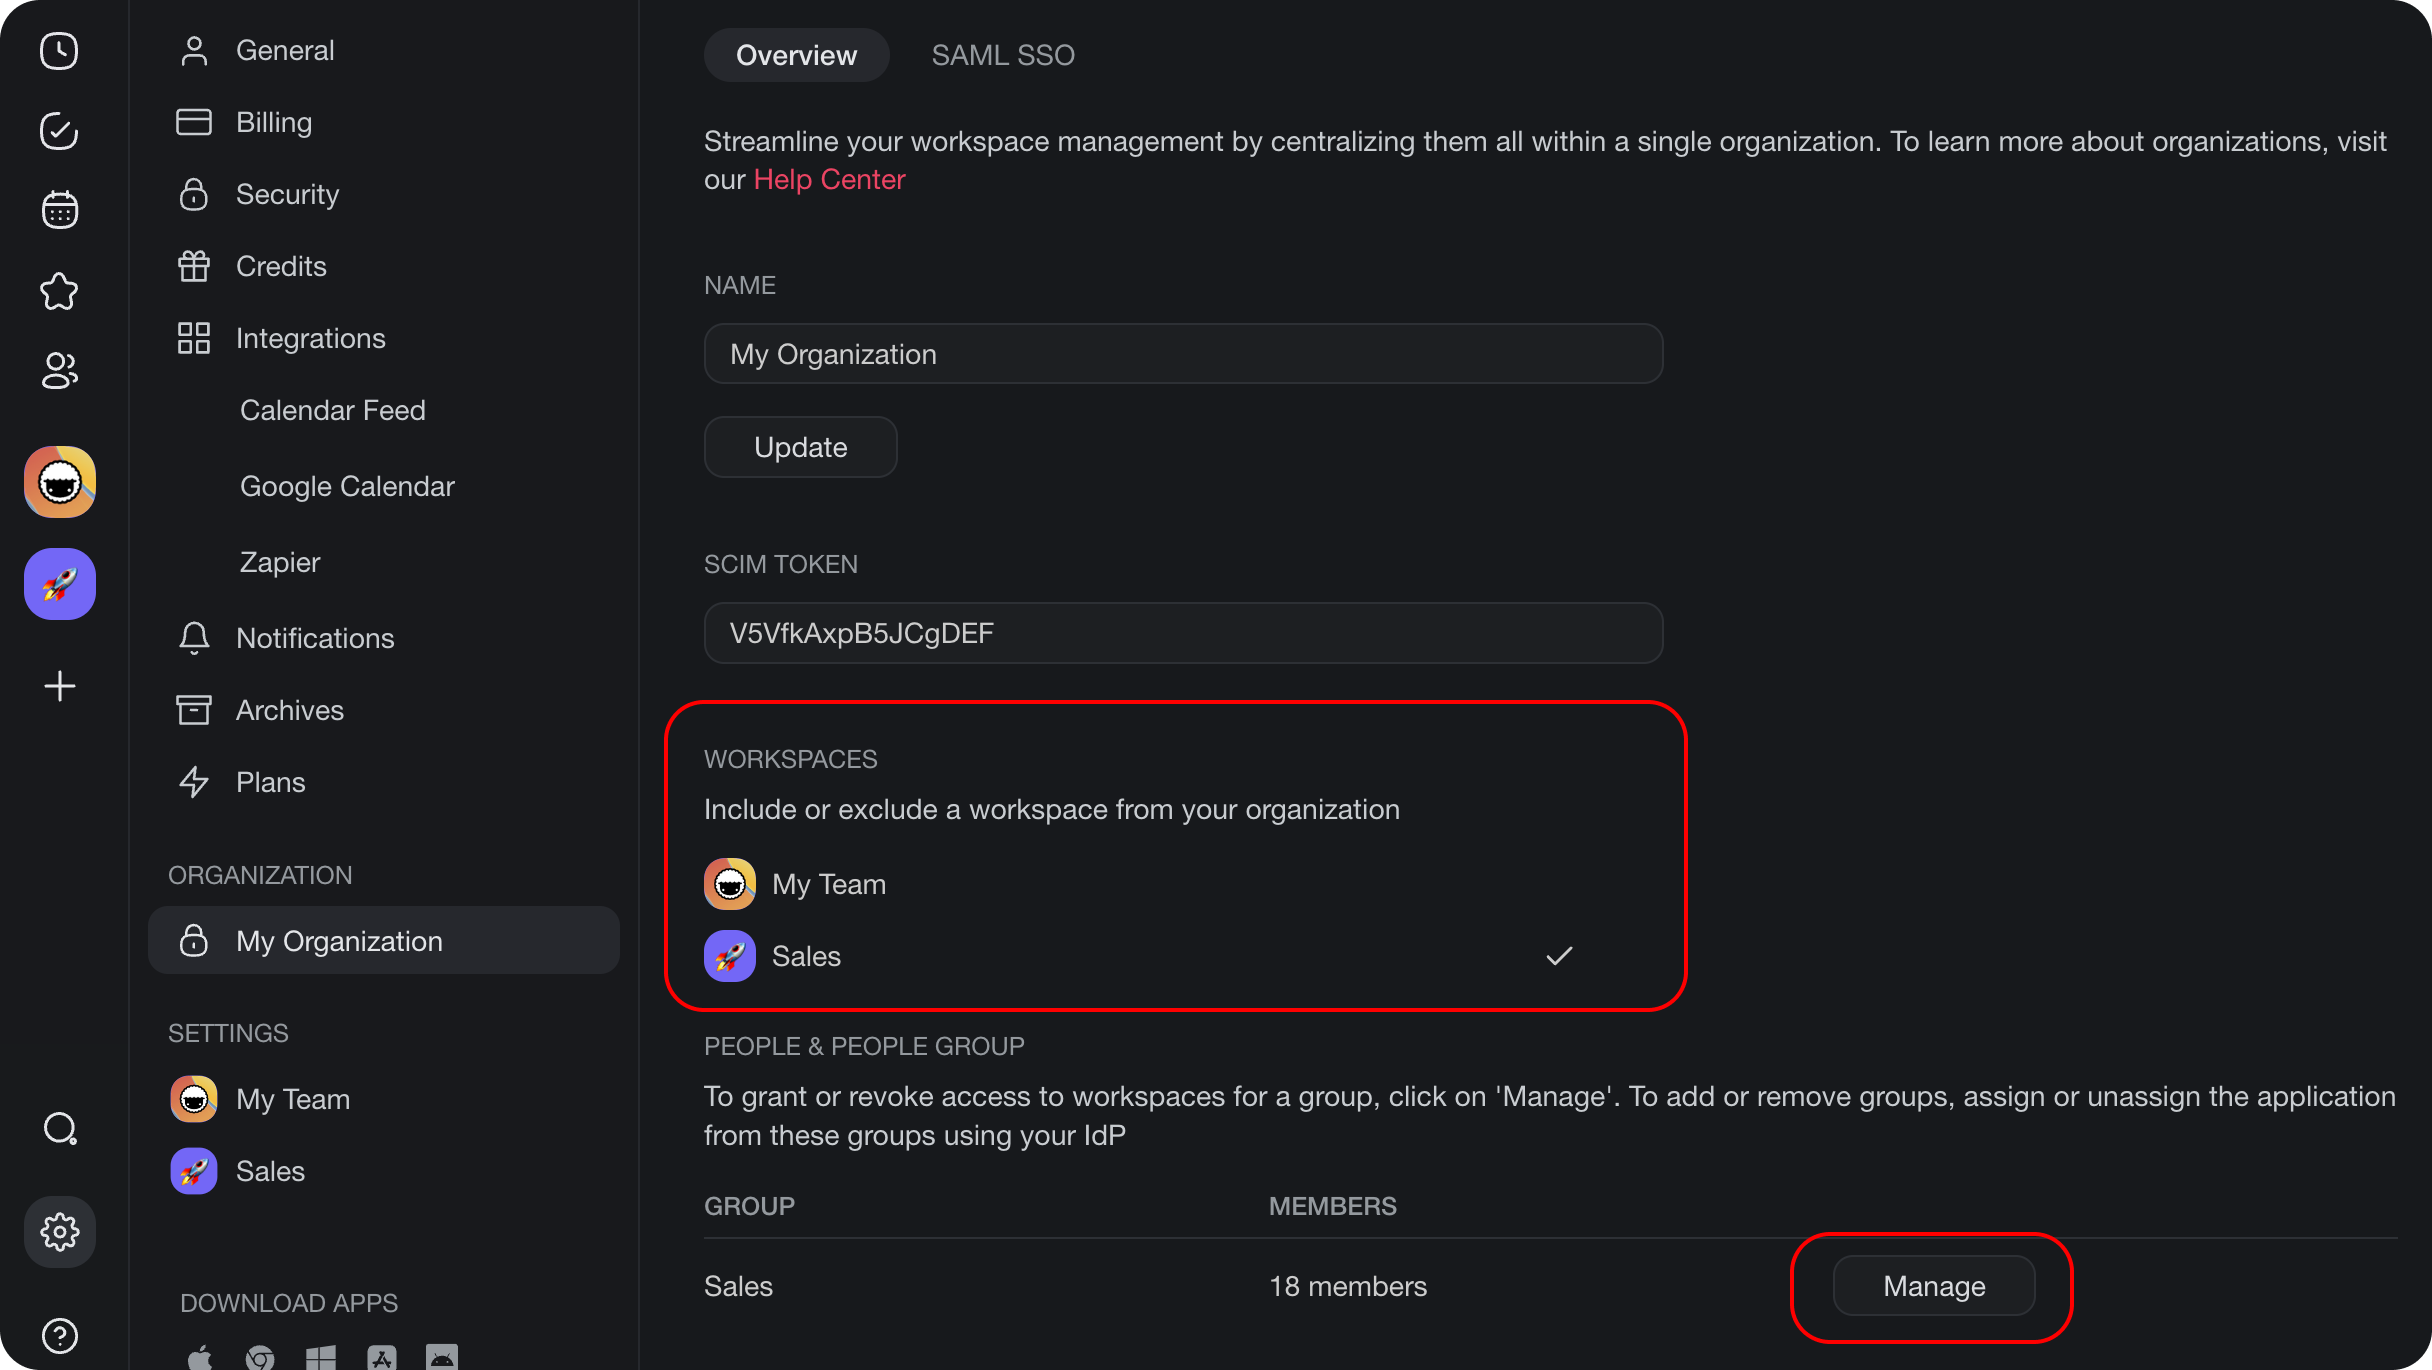
As an example, let's provision the Sales group and grant access to the Sales workspace:
- Click Manage to open the group management modal.
- You can grant the group Edit, Check or View only access.
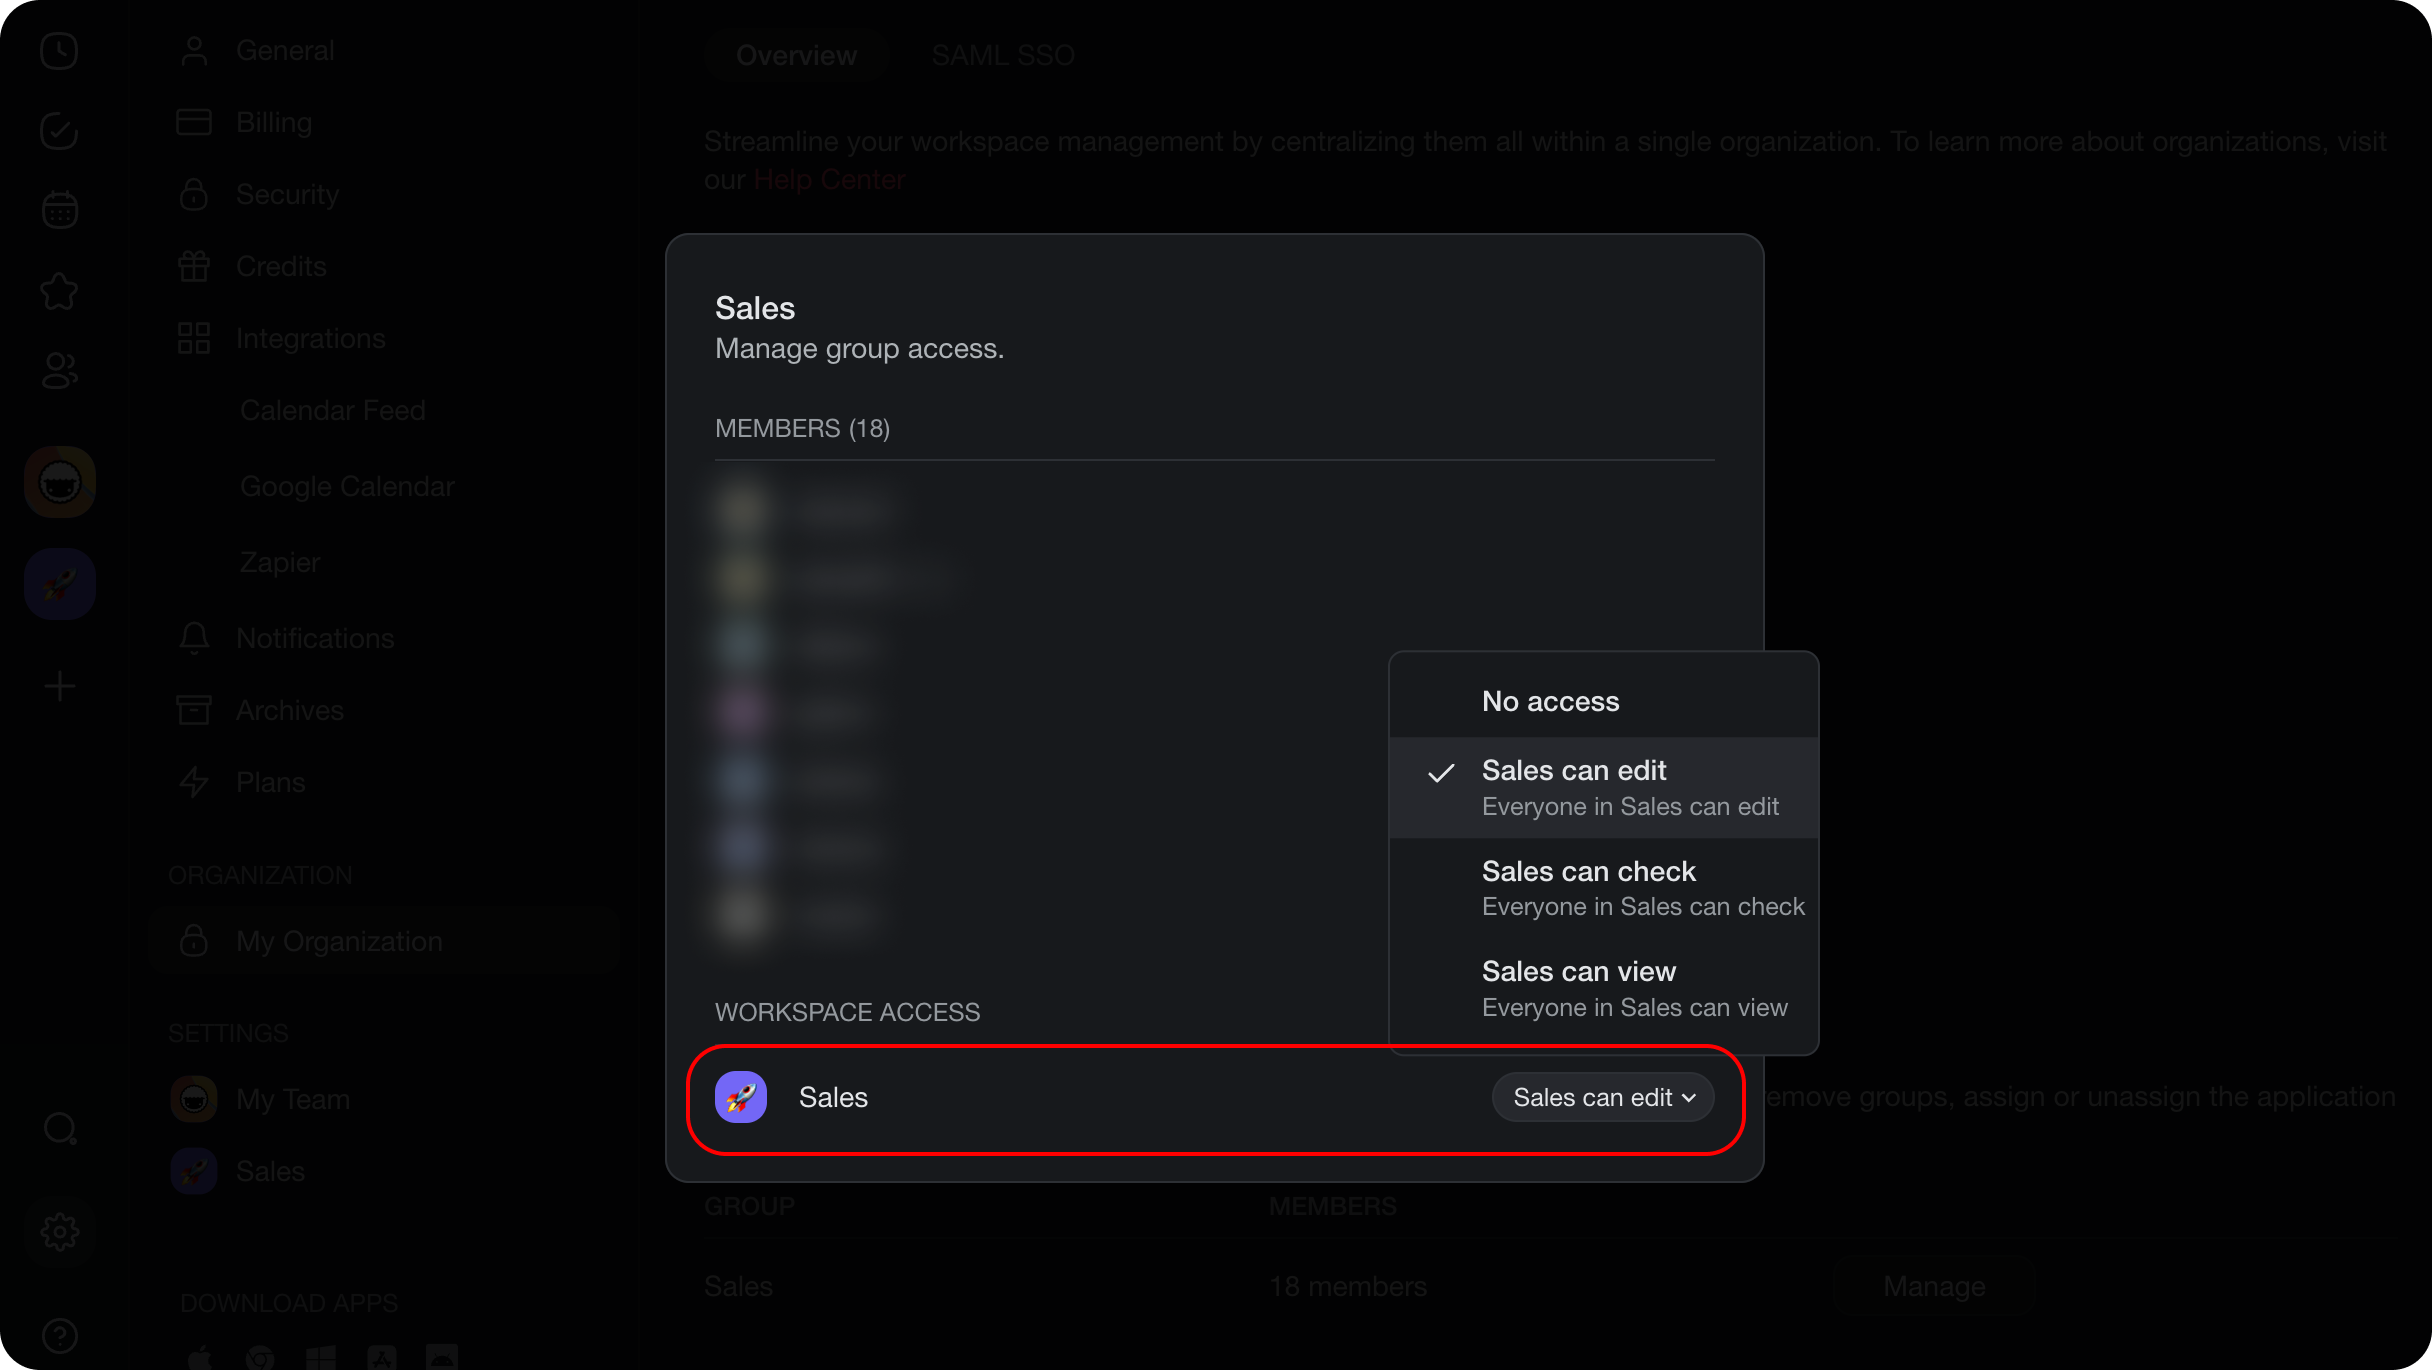
Group members will now be able to SSO to Taskade and automatically get access to the Sales workspace. For new group members, the first click will let them join the workspace, from that point onward they'll convert to members.
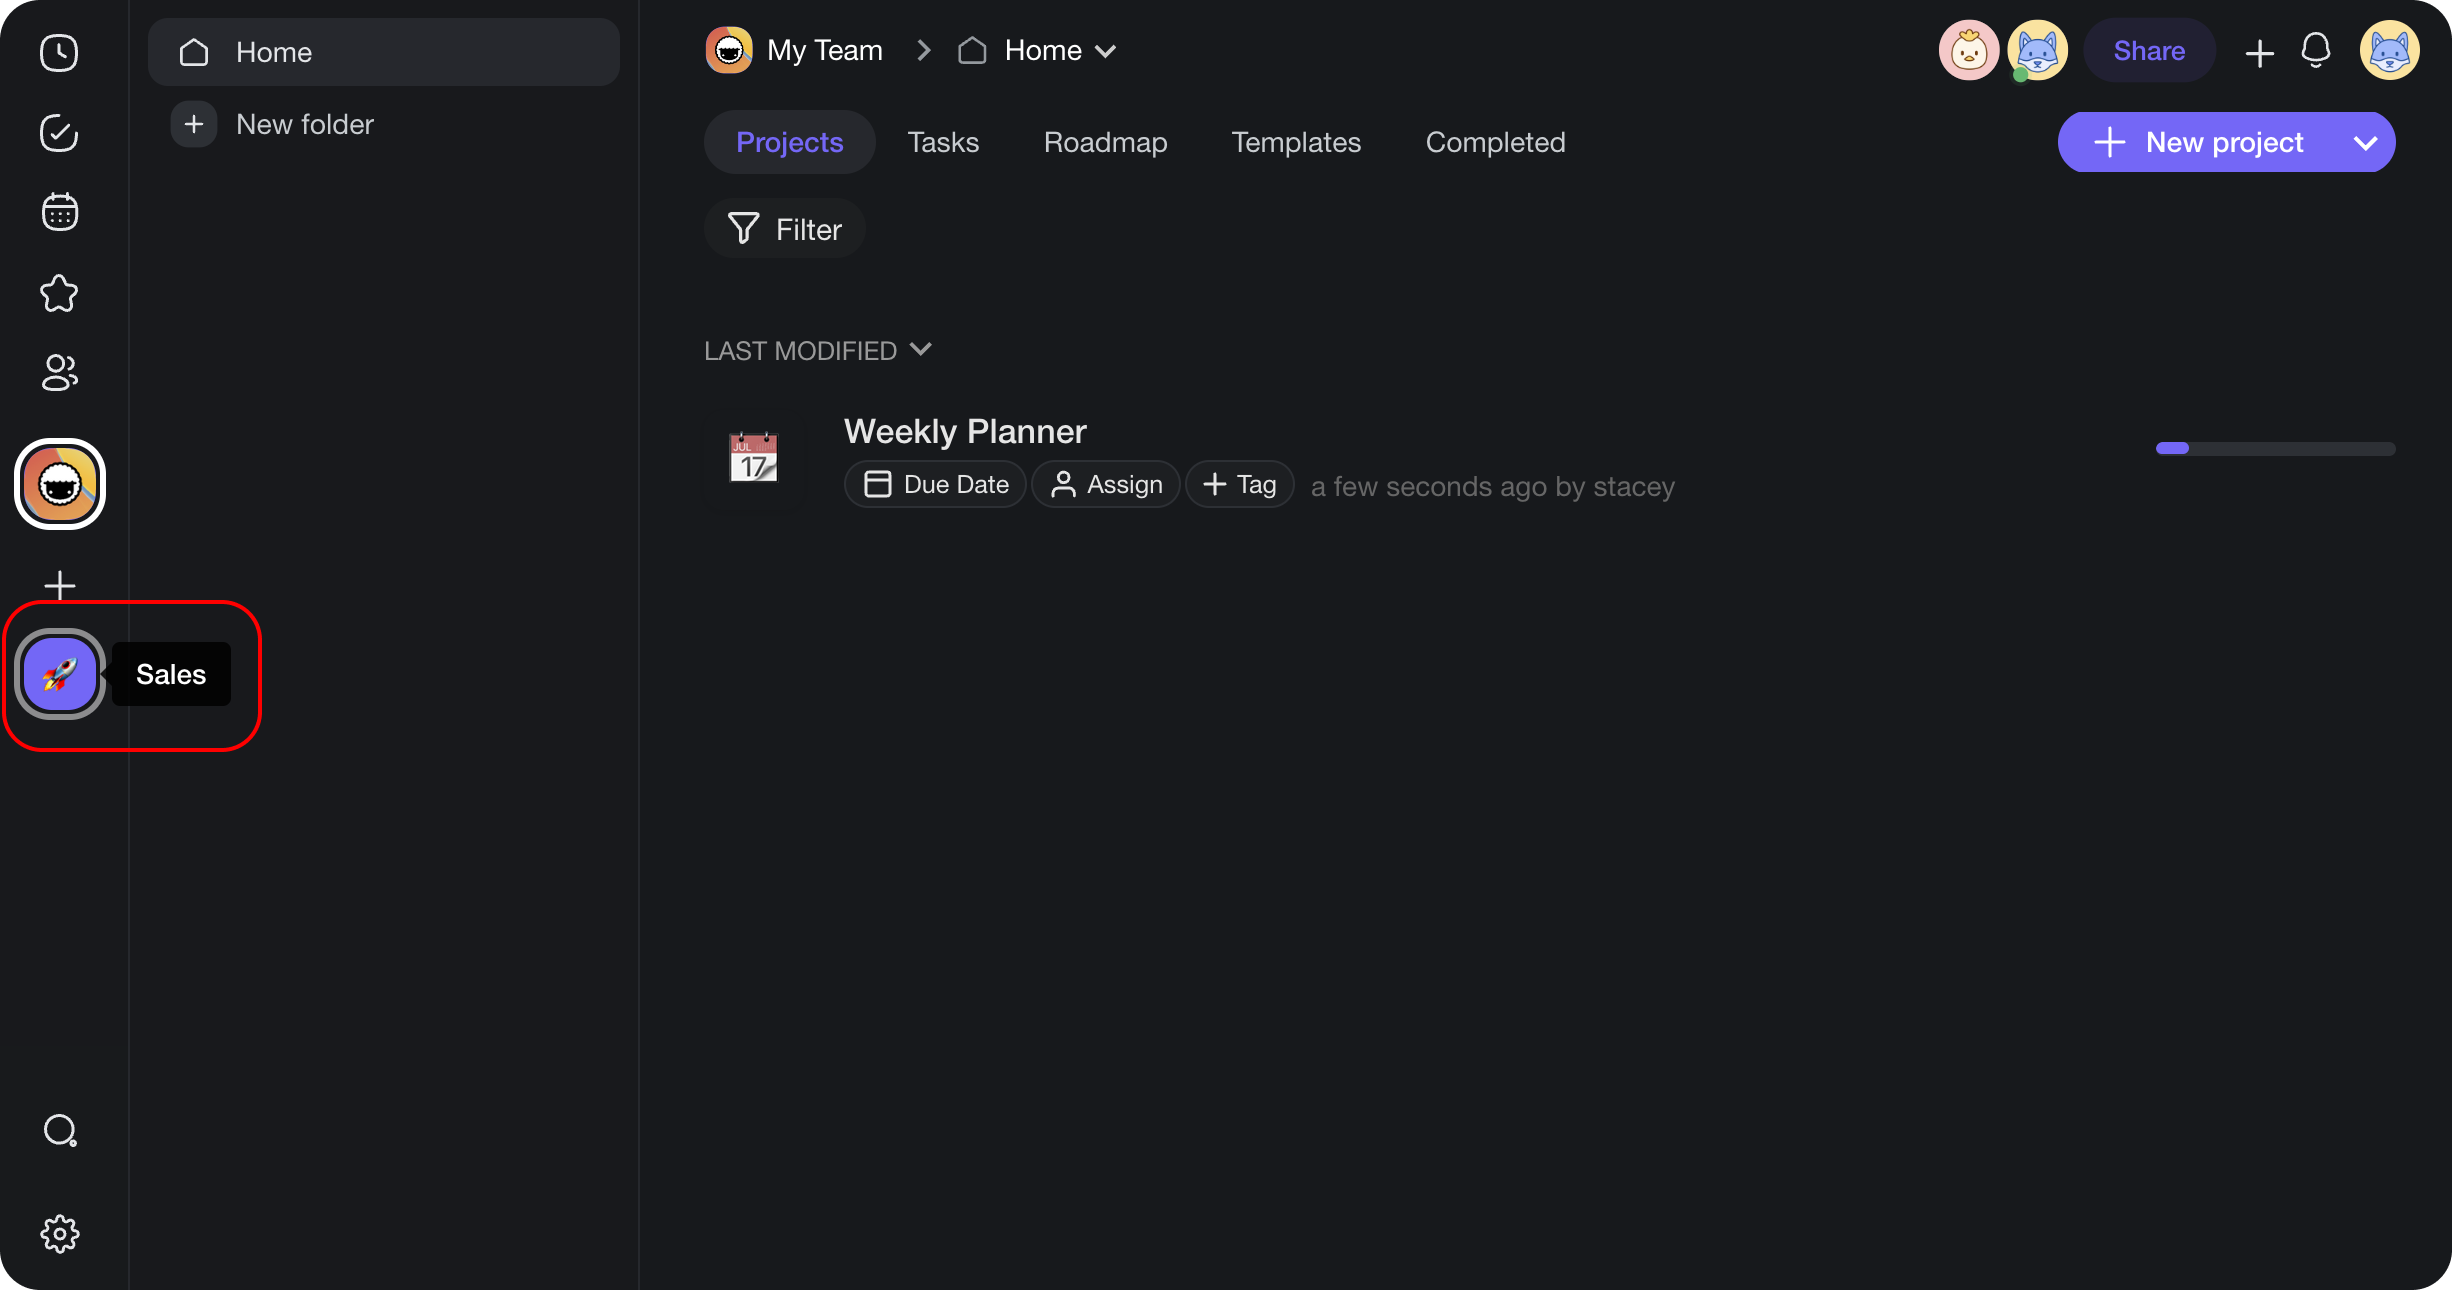
Organization owners can also provision folders. Here's how it works:
- Create a new folder in your workspace.
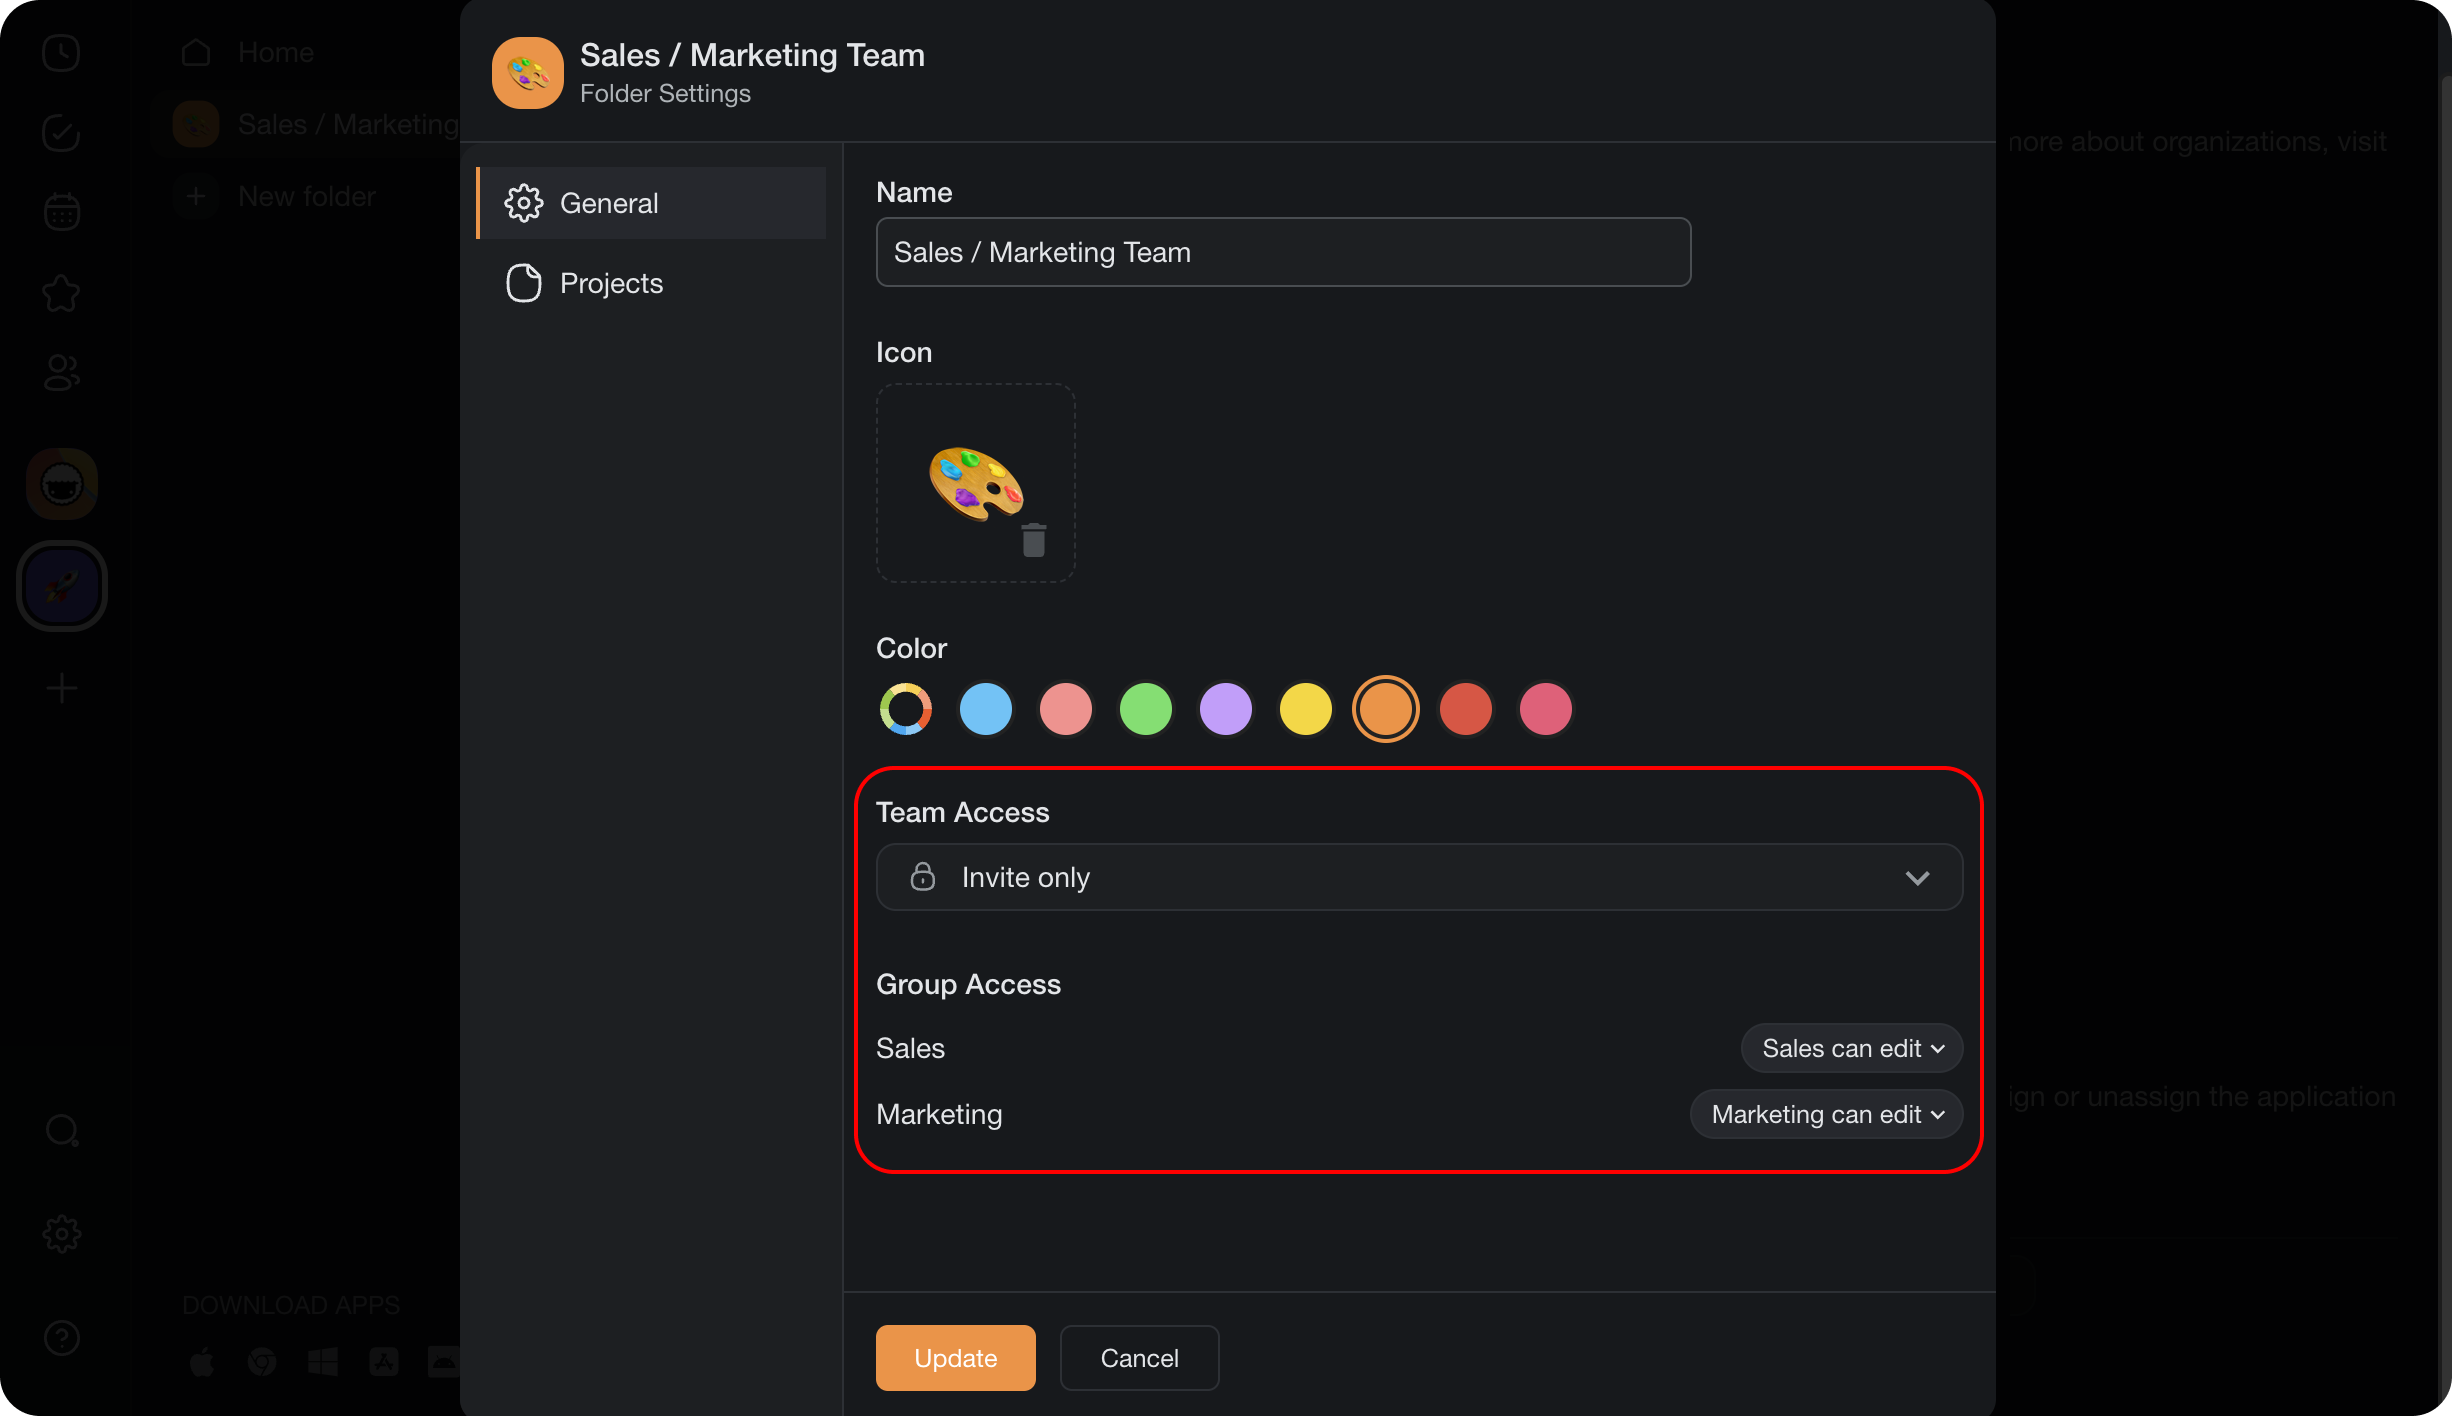
- Open the folder Edit modal.
- (optional) You can also manage groups from the folder Share modal.
💡 Note: To provision groups inside folders, the folder team access must be set to Invite only. You can mix and match groups as you see fit.
If you need help with configuring SCIM, please email [email protected].
Related guides
- SAML via Okta — Configure SSO before SCIM
- SCIM via Azure AD — Same automation flow with Azure as IdP
- Transfer Ownership — Hand off the workspace
- Workspace Privacy — Folder and workspace access controls