
What Is SAML?
SAML is the security standard that lets your team sign in to Taskade with the credentials they already use in Google Workspace — no separate Taskade password required. Identity, deprovisioning, and audit trails stay inside your Google admin console. This guide walks through the full Google Workspace + Taskade configuration in roughly 10 minutes.
TL;DR: In Google Workspace, create a custom SAML app pointed at
https://www.taskade.com/saml/sso/login/callback(Entity IDhttps://www.taskade.com/saml/sso/metadata). Copy the SSO URL, IdP Issuer, and signing certificate. Paste them into Taskade's Settings → Organization → SAML SSO along with your verified company domain. Available on Business and Enterprise plans.
💡 Note: If your team is already using Taskade, your identity provider will take ownership of those accounts. Please inform your team before enabling SAML.
Configure with Google Workspace
Requirements
The main account must be set up with a company email address.
Personal email accounts are not allowed.
Your email must be verified.
This feature is only available on the Business and Enterprise plans.
Google Workspace Setup
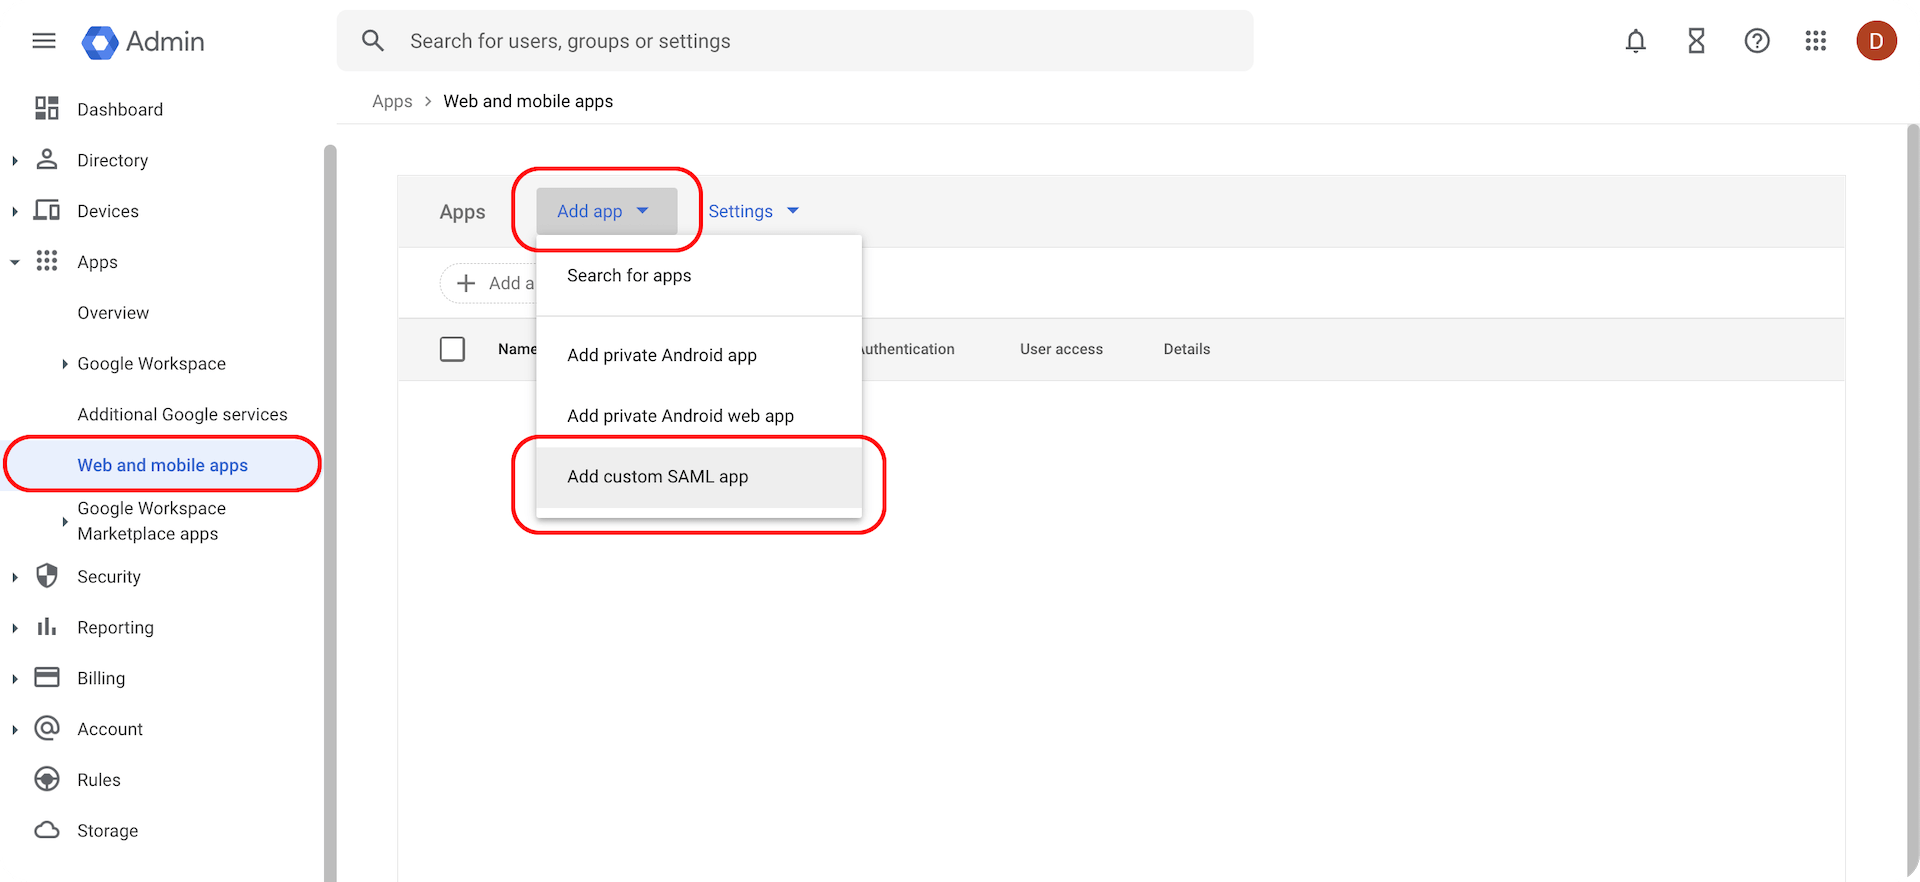
Go to the Google Workspace admin dashboard. In the sidebar, select "Web and mobile apps" under Apps. Click "Add app", then "Add custom SAML app".
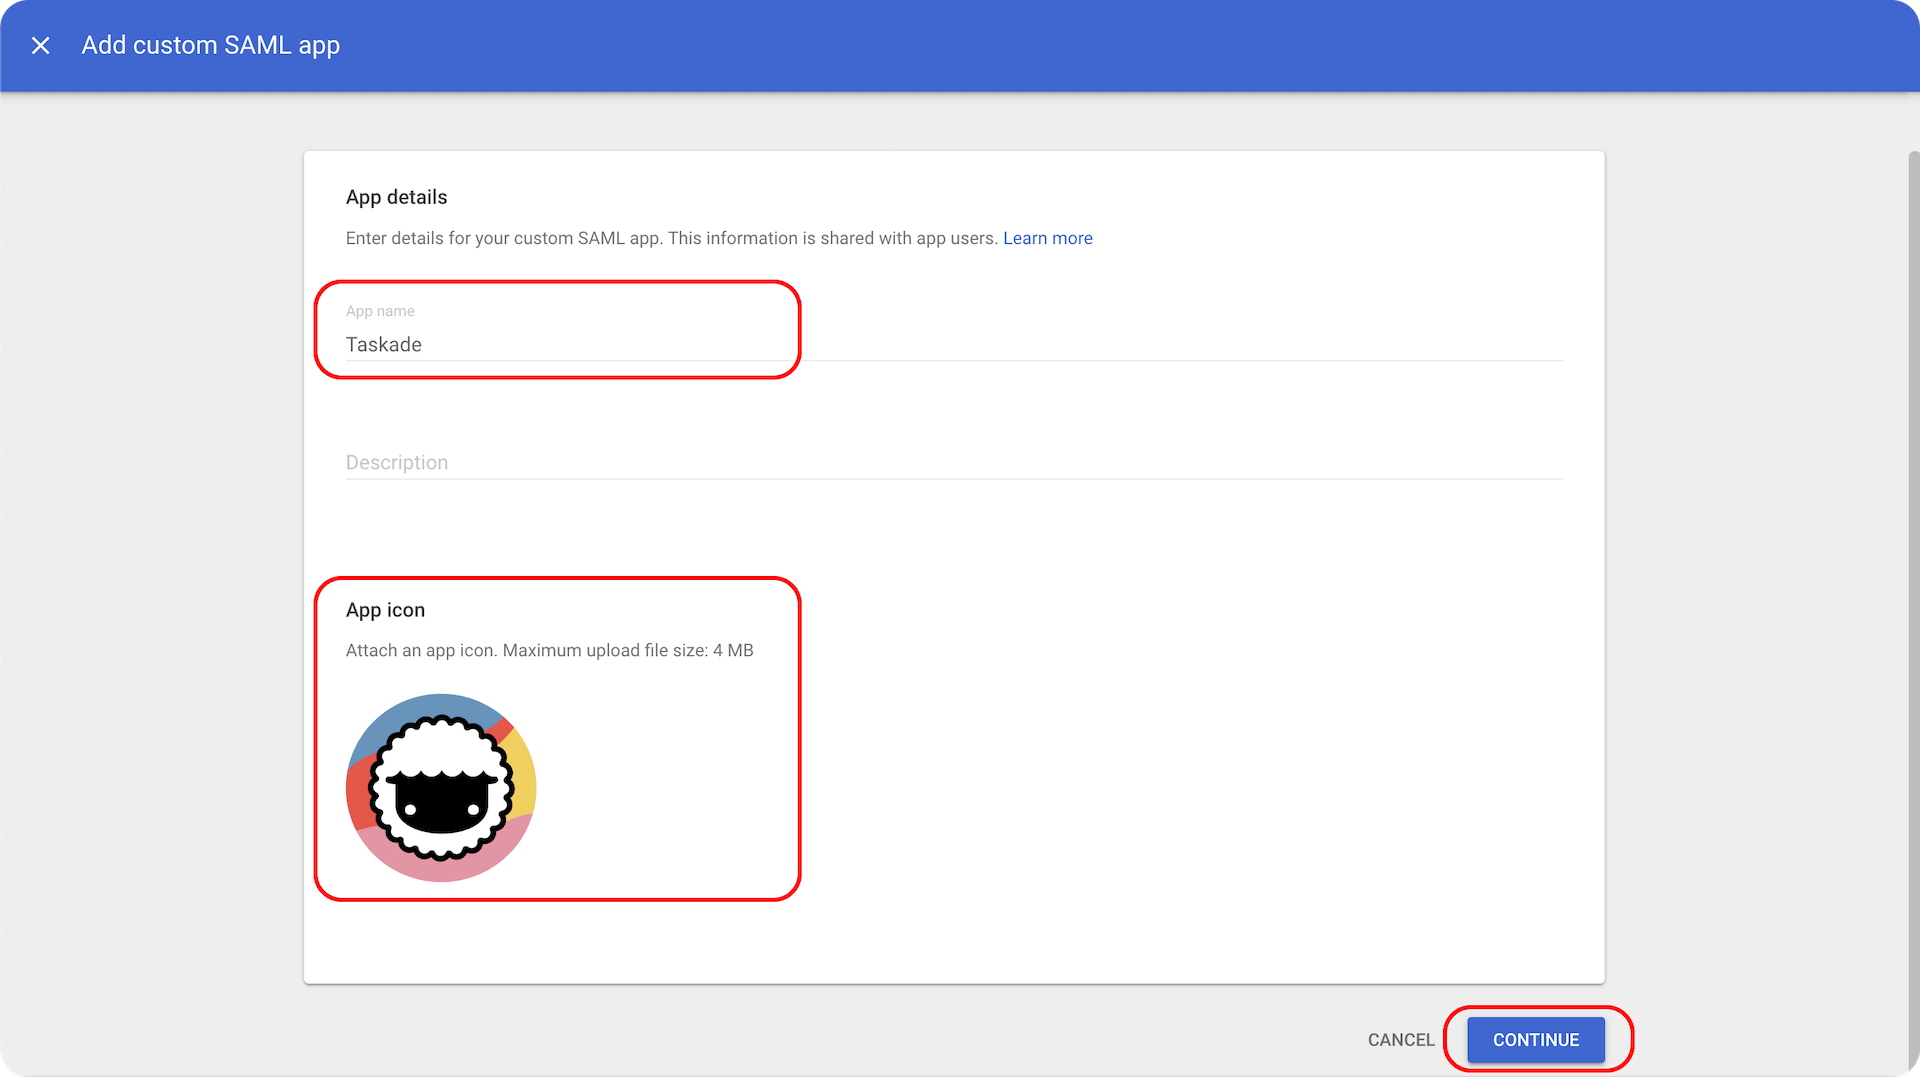
Enter "Taskade" under App name and upload a logo (optional).
Click "Next" to continue.
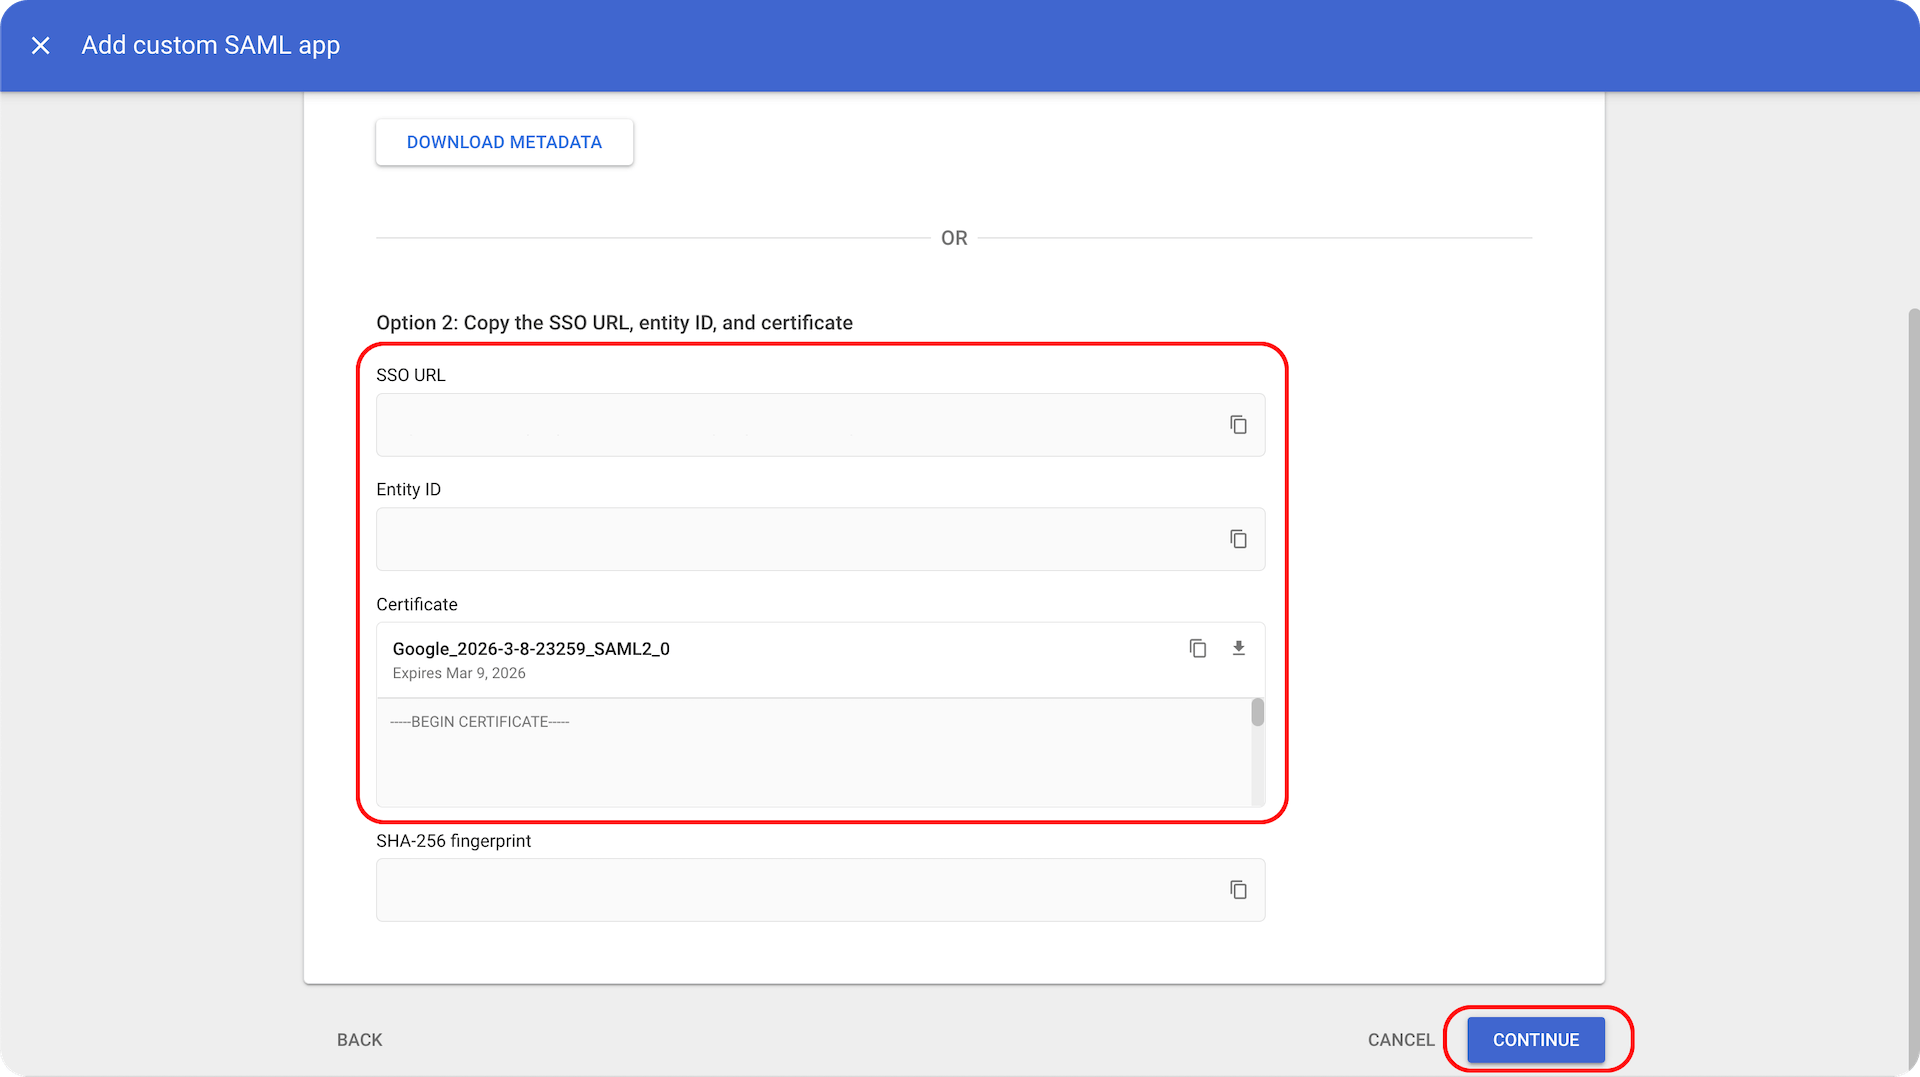
Save the SSO URL, Entity ID, and Certificate to a file somewhere. You'll need this information for Taskade setup. Click "Continue".
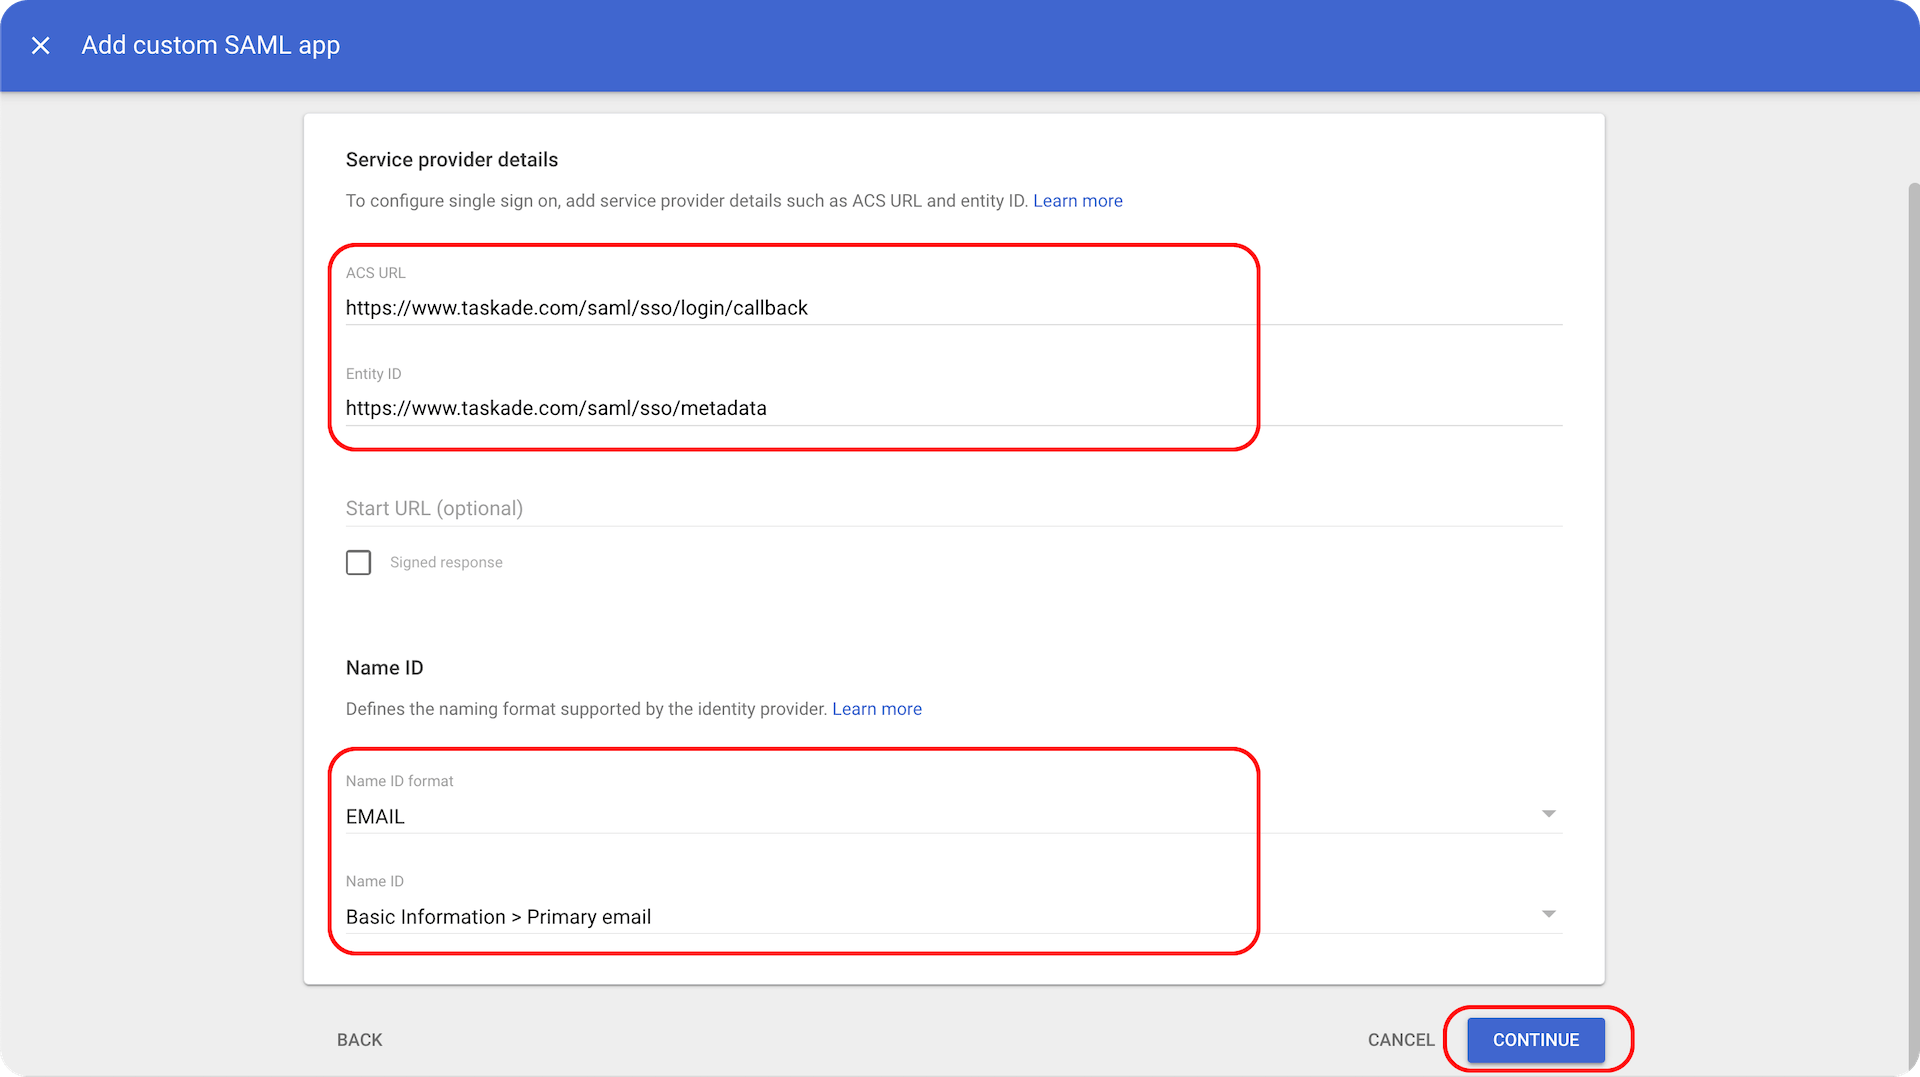
On the next screen, enter the following information:
- ACS URL: https://www.taskade.com/saml/sso/login/callback
- Entity ID: https://www.taskade.com/saml/sso/metadata
- Name ID Format: Email
- Name ID: "Basic Information Primary email"
Click "Continue".
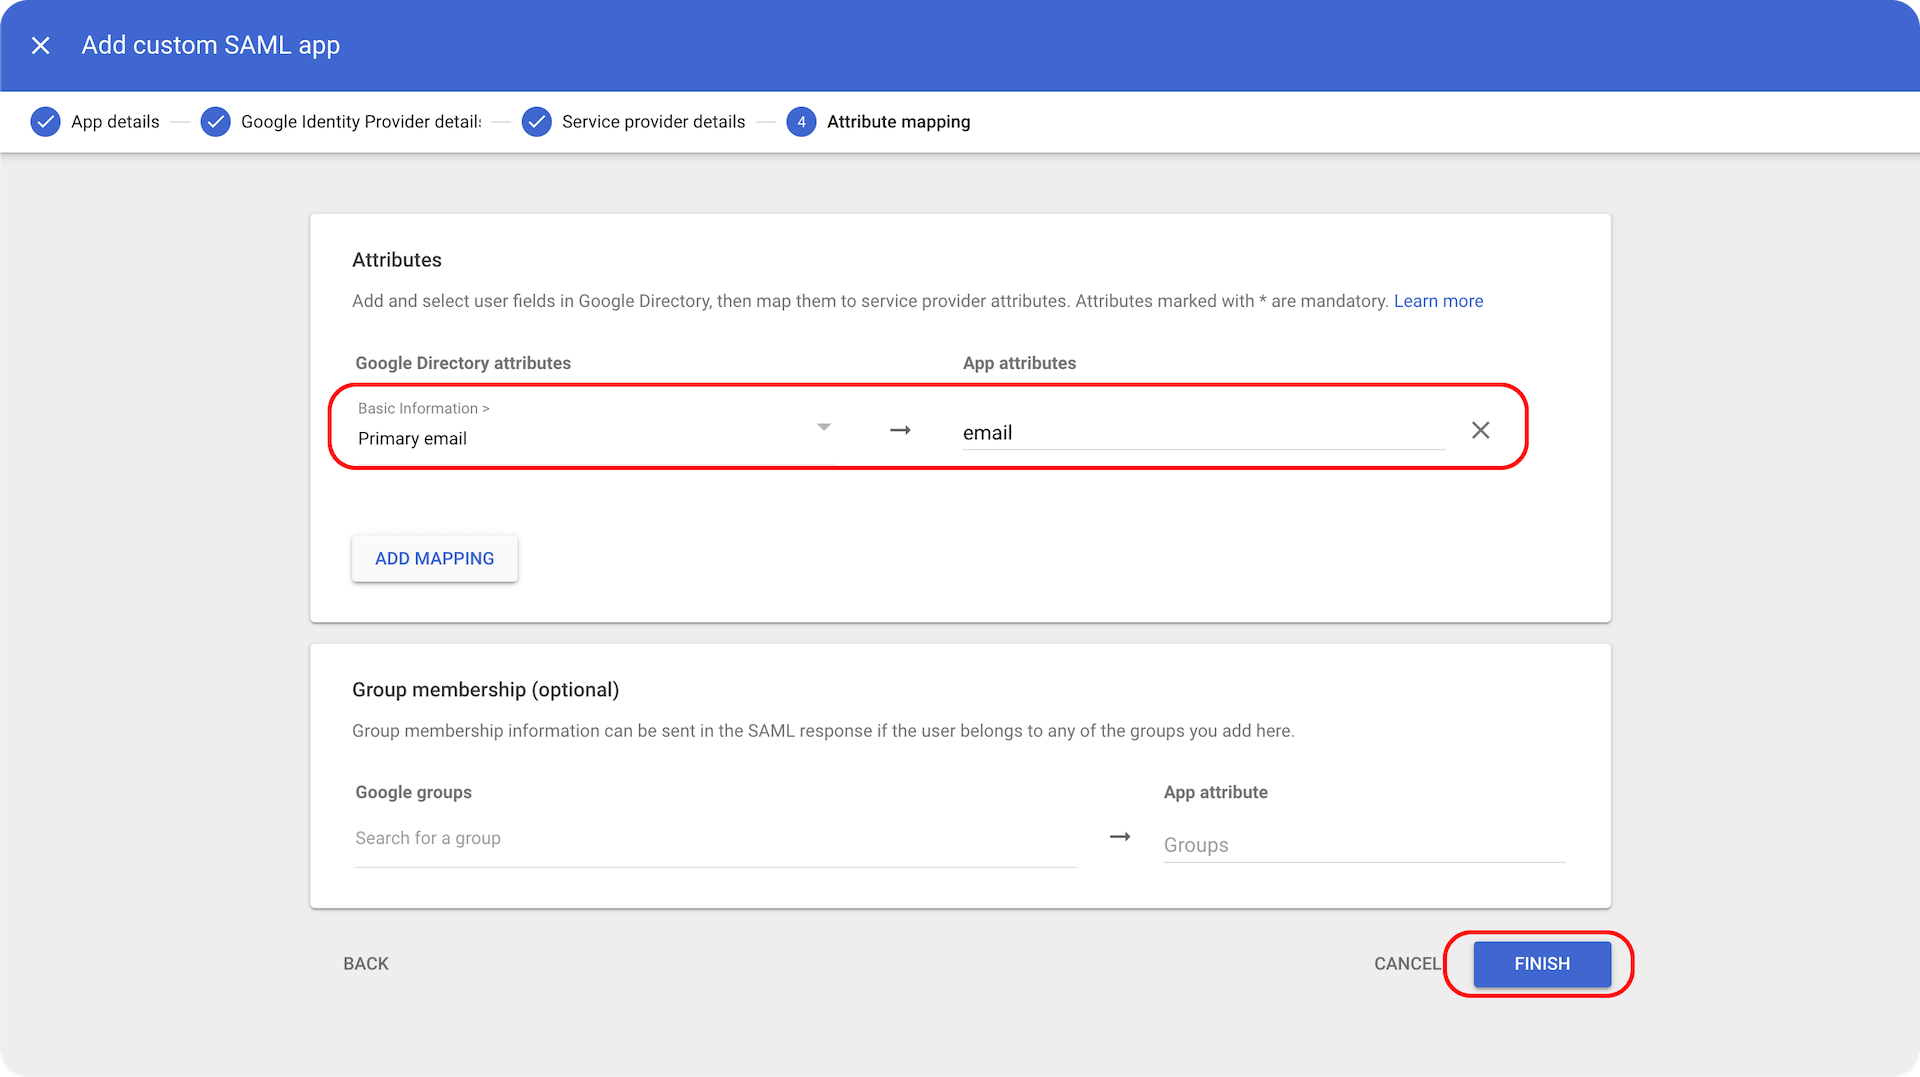
Under "Google Directory attributes", select "Primary email" and "email" for "App attributes".
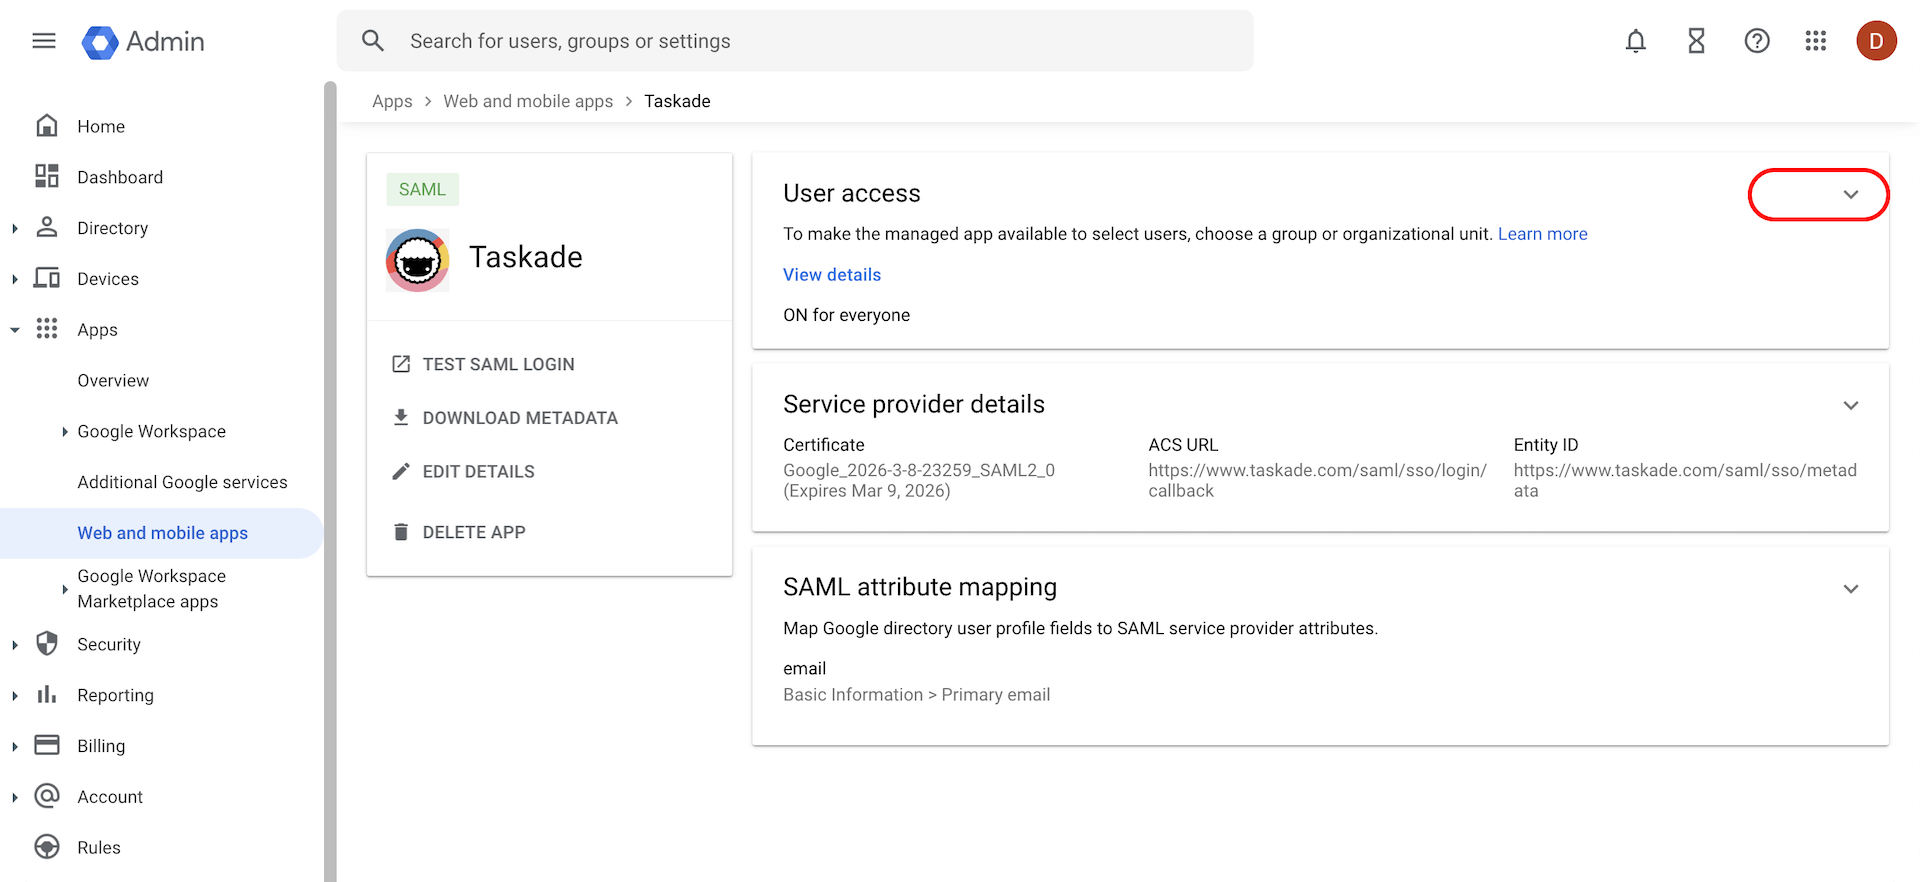
Click the arrow in the "User access" section to open a drop-down menu.
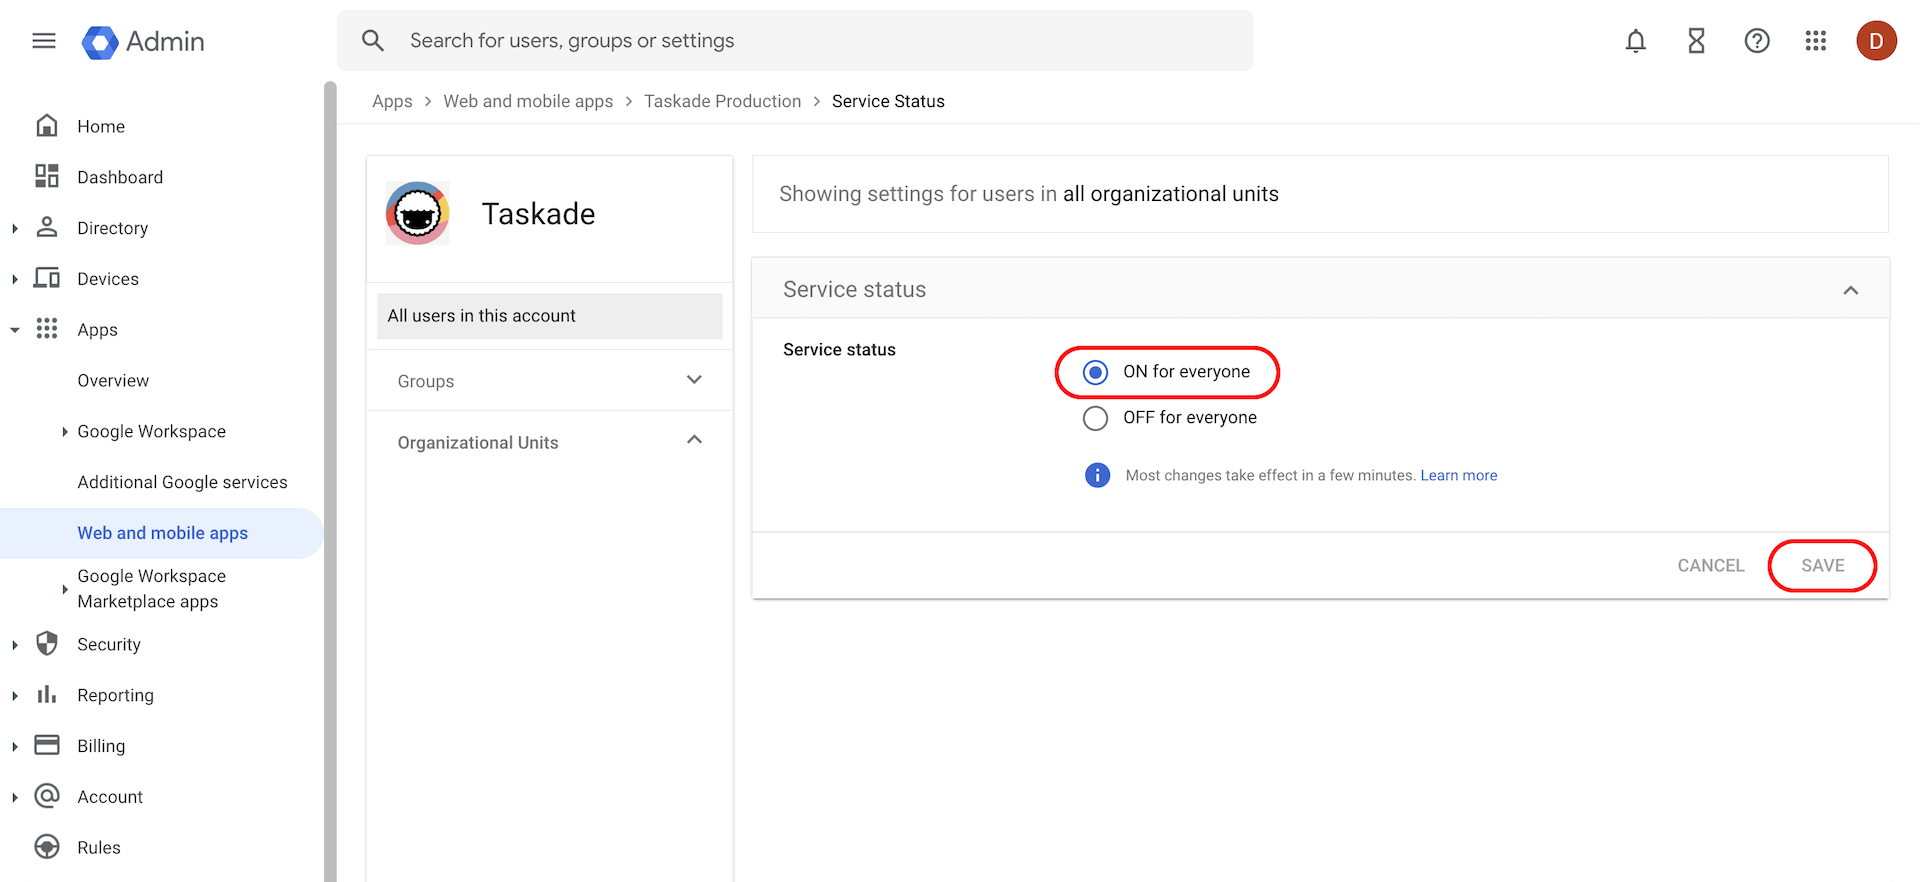
Choose "ON for everyone" in your Google Workspace Dashboard to enable SSO for all users. Click "Save" to confirm the changes.
That concludes Google Workspace setup. Let's finish the process in Taskade.
Taskade Setup
💡 Note: Read the requirements before completing the steps below.
- Visit https://taskade.com/settings and navigate to the Organization tab.
- On the security screen, paste the Google Workspace we saved earlier:
- Domain: Enter your domain, e.g., company.com without "https://" or "www."
- SSO URL: Paste the "SSO URL" from earlier.
- IDP ISSUER: Paste the "Entity ID" from earlier.
- IDP PUBLIC SIGNING CERT: Paste the "Certificate" from earlier.
Anyone with an email address in your domain can now go to https://taskade.com/login and choose Sign In with Single Sign-On to sign in with their Google Workspace credentials.
Related guides
- SAML via Okta — SSO setup with Okta as identity provider
- SAML via Azure AD — SSO setup with Microsoft Entra / Azure AD
- SCIM via Okta — Automated user provisioning
- MFA Setup — Layer multi-factor on top of SSO
- Workspace Privacy — Control who sees what after sign-in