
What Is SCIM?
SCIM (System for Cross-domain Identity Management) automates user provisioning and deprovisioning between Taskade and your identity provider. New hires land in the right Taskade workspace automatically; departures are revoked the moment HR offboards them. No manual invites, no orphaned accounts, no audit gaps.
TL;DR: Configure SAML via Azure AD first. Then in Taskade create an Organization, copy the SCIM token, and paste it into Azure's Enterprise App Provisioning tab with tenant URL
https://taskade.com/scim/v2. Assign Azure groups to provision them as Taskade workspace members. Available on legacy Enterprise plans. Contact us for V8 Enterprise SCIM access.
Configure SCIM in Taskade
SCIM provisioning is currently available for legacy Enterprise plans only. V8 plans do not yet include SCIM support. Contact us for Enterprise SCIM access.
Note: To get started, configure SAML. Visit SAML via Azure AD to learn how.
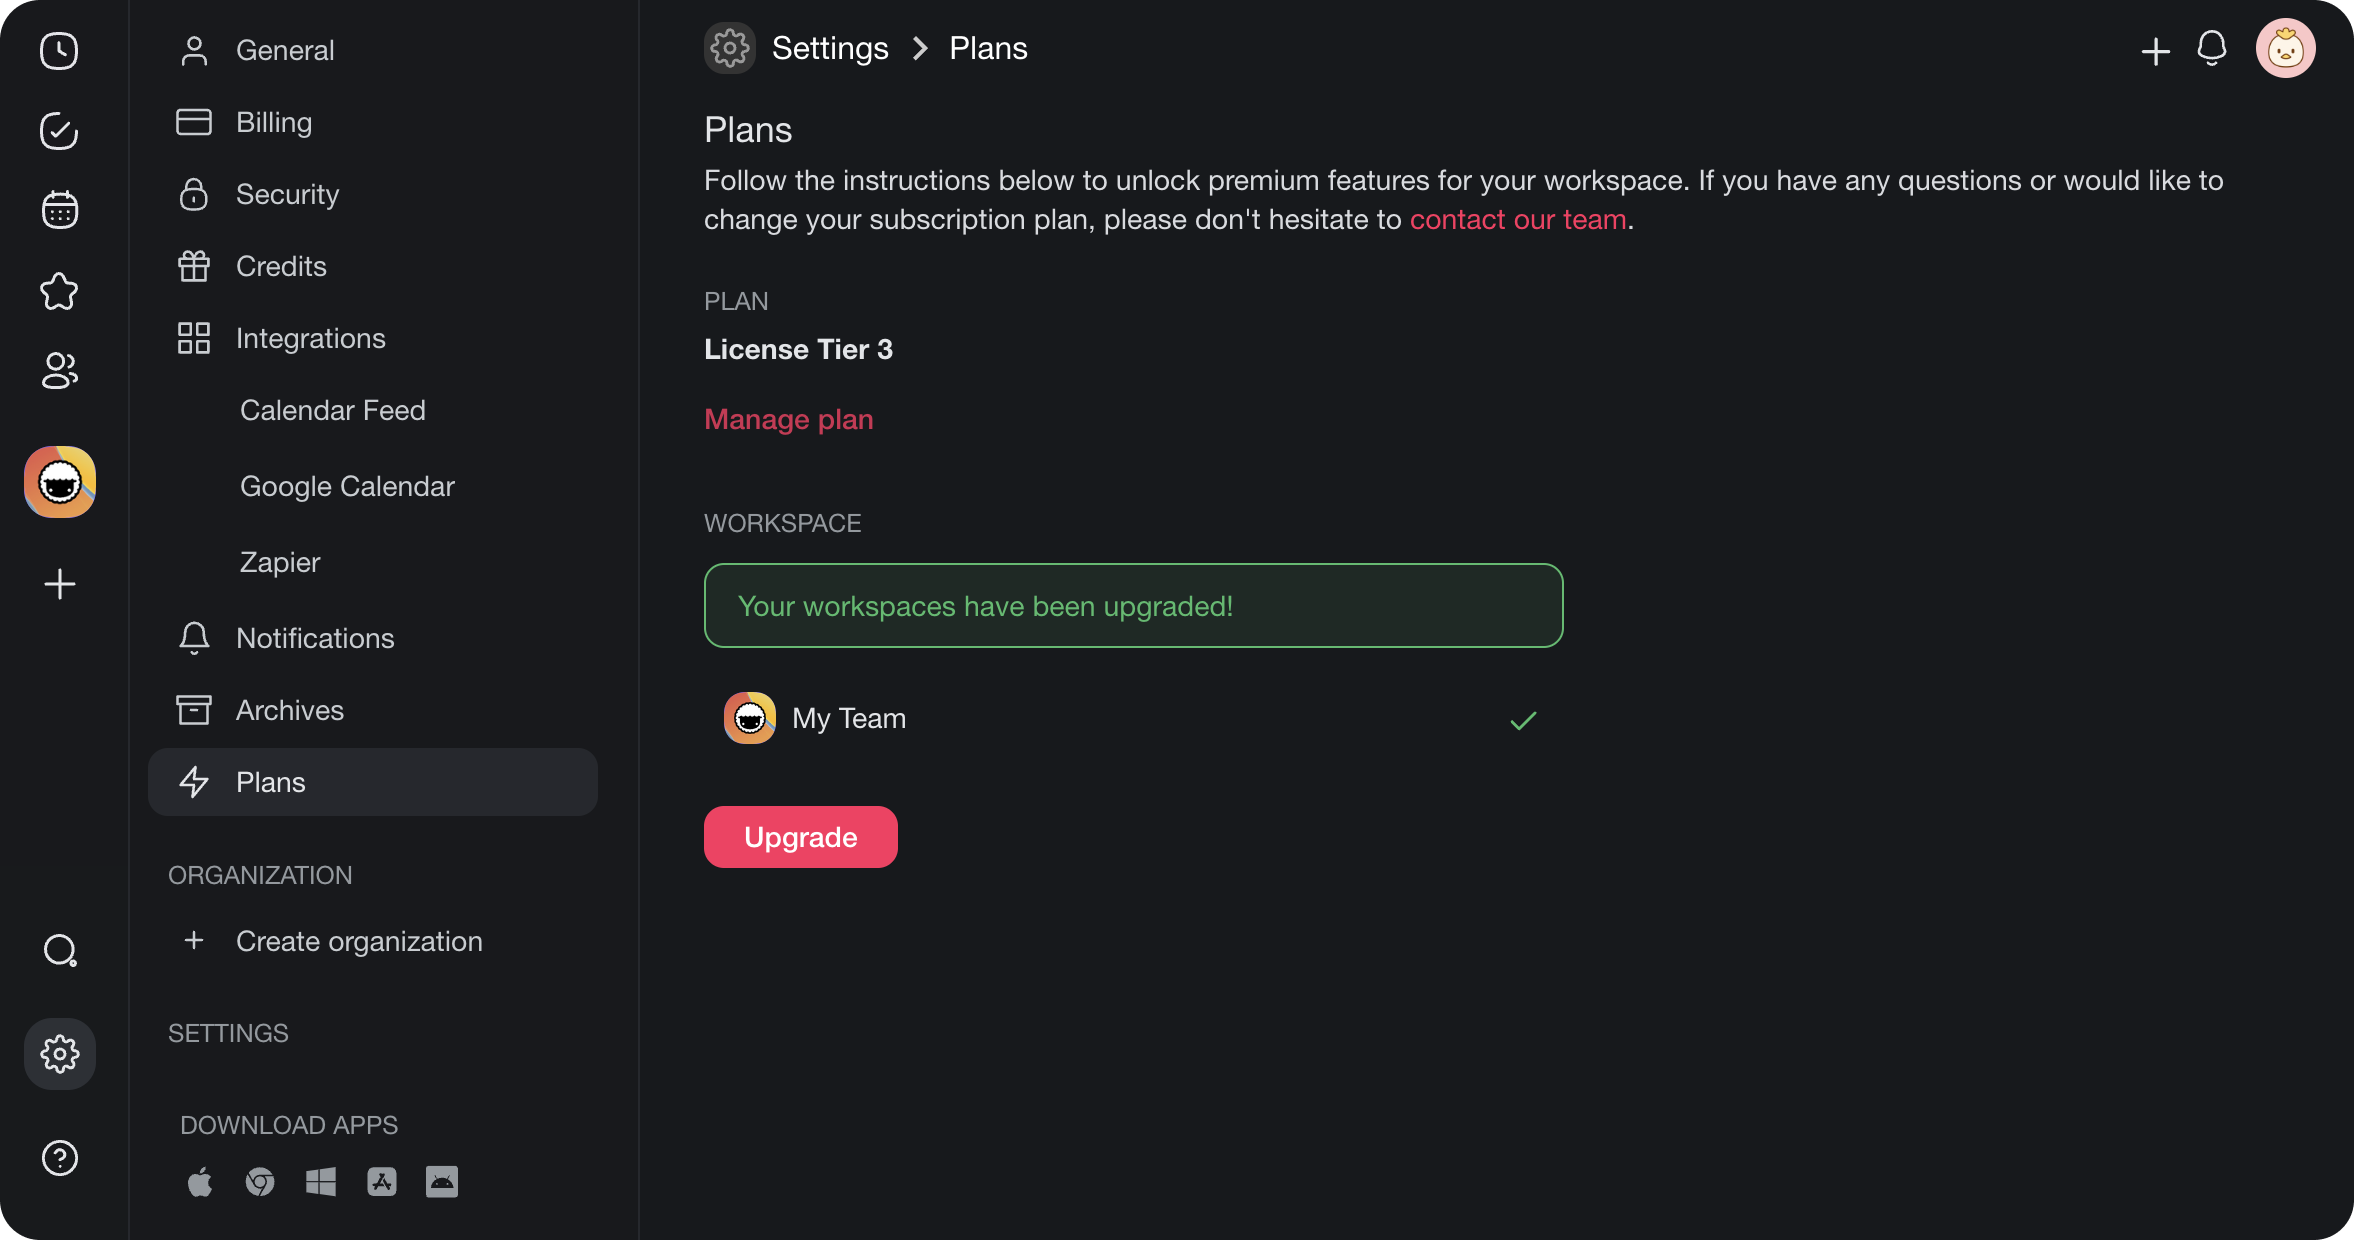
The first step is to make sure you upgraded your workspace.
- Visit https://taskade.com/settings/plans.
- Select the workspace(s) you want to upgrade, and click Upgrade.
- The next step is to create an organization. An organization allows you to group together multiple workspaces, making the provision of groups possible.
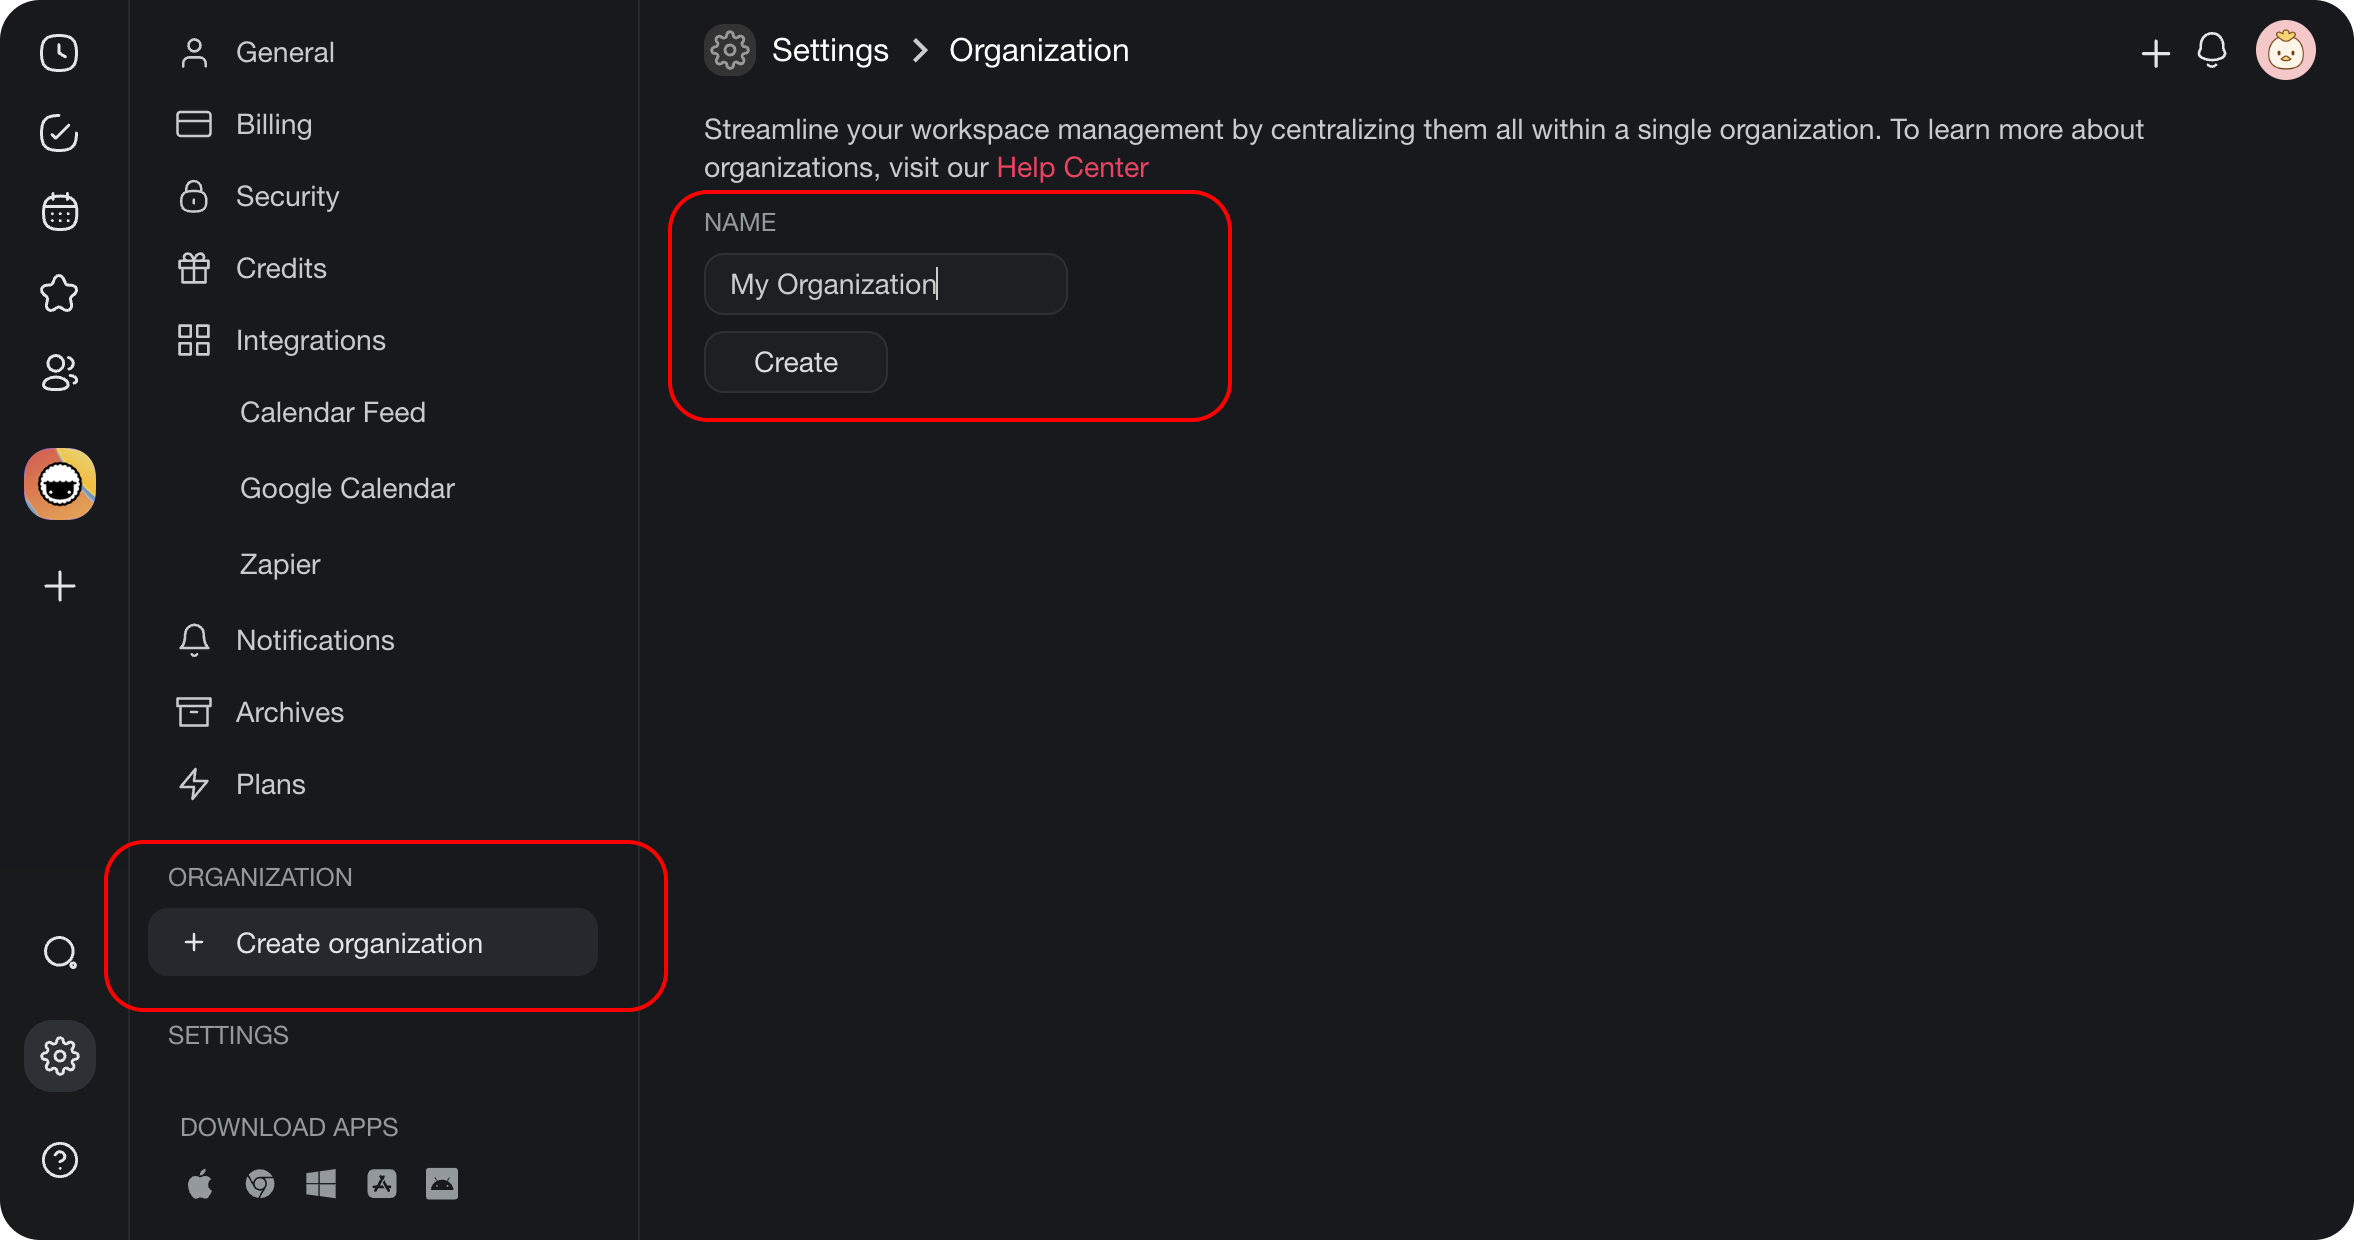
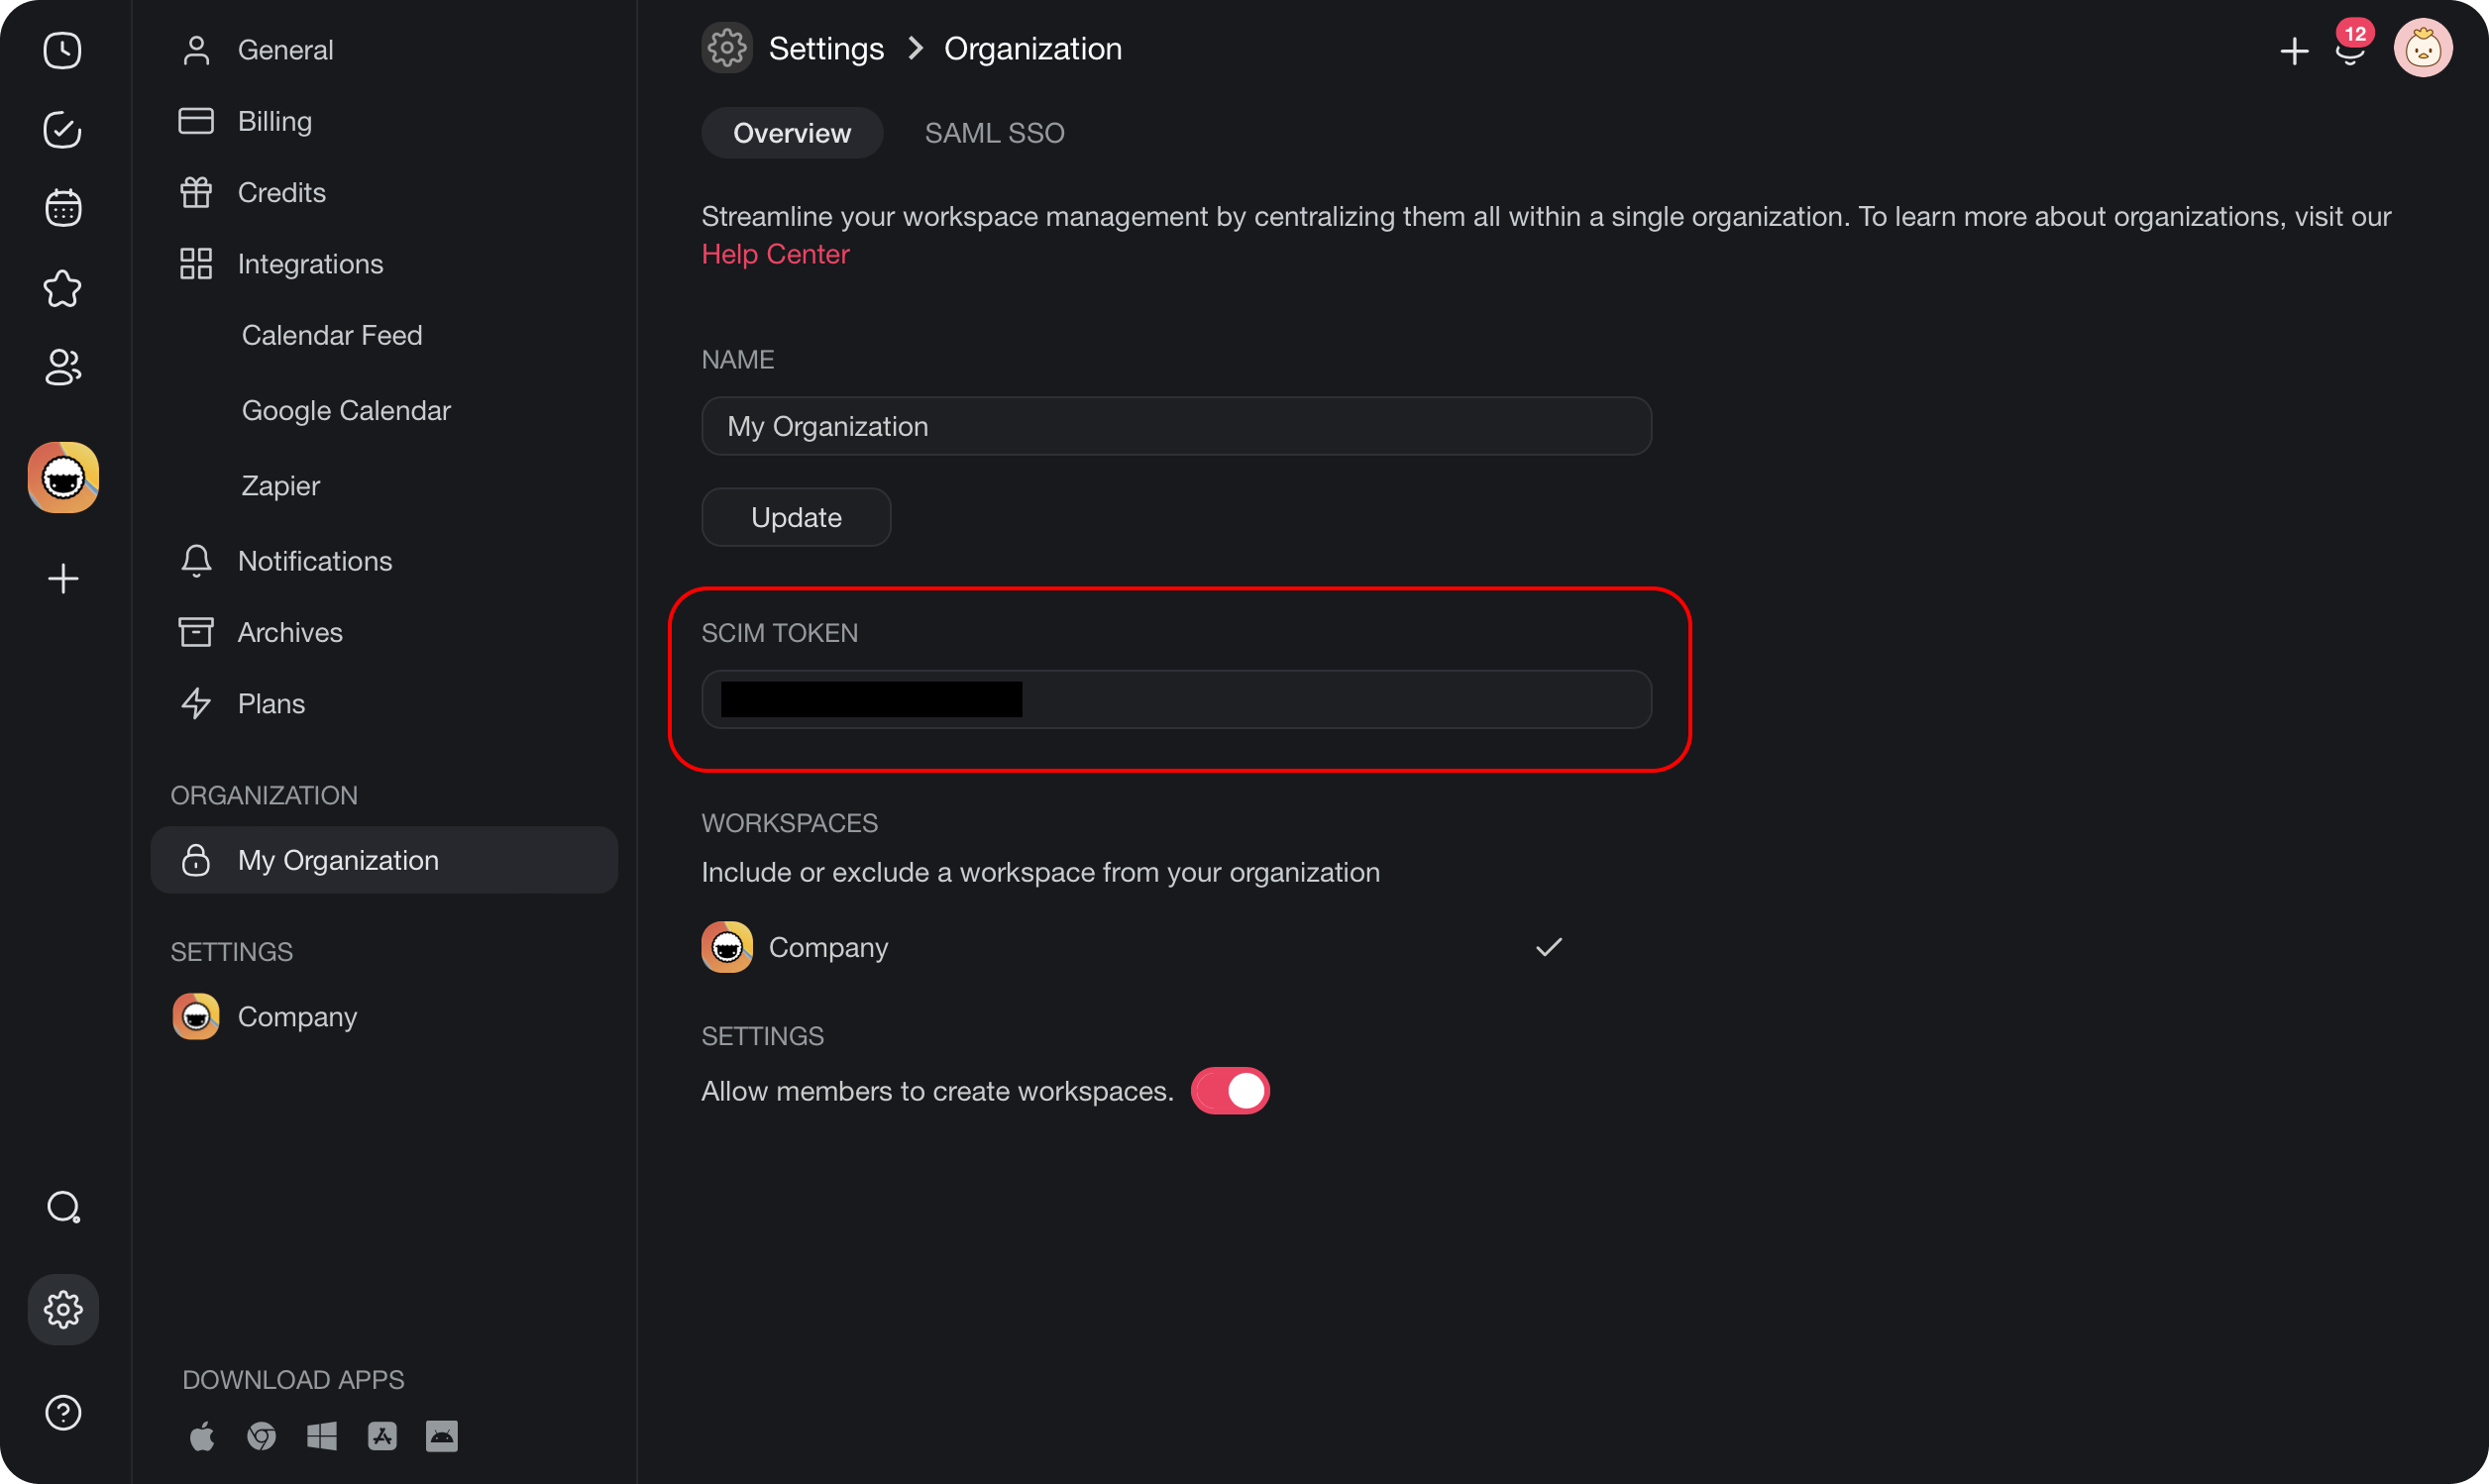
- Once you've created your organization, copy the SCIM token. It will be required during the Azure setup process.
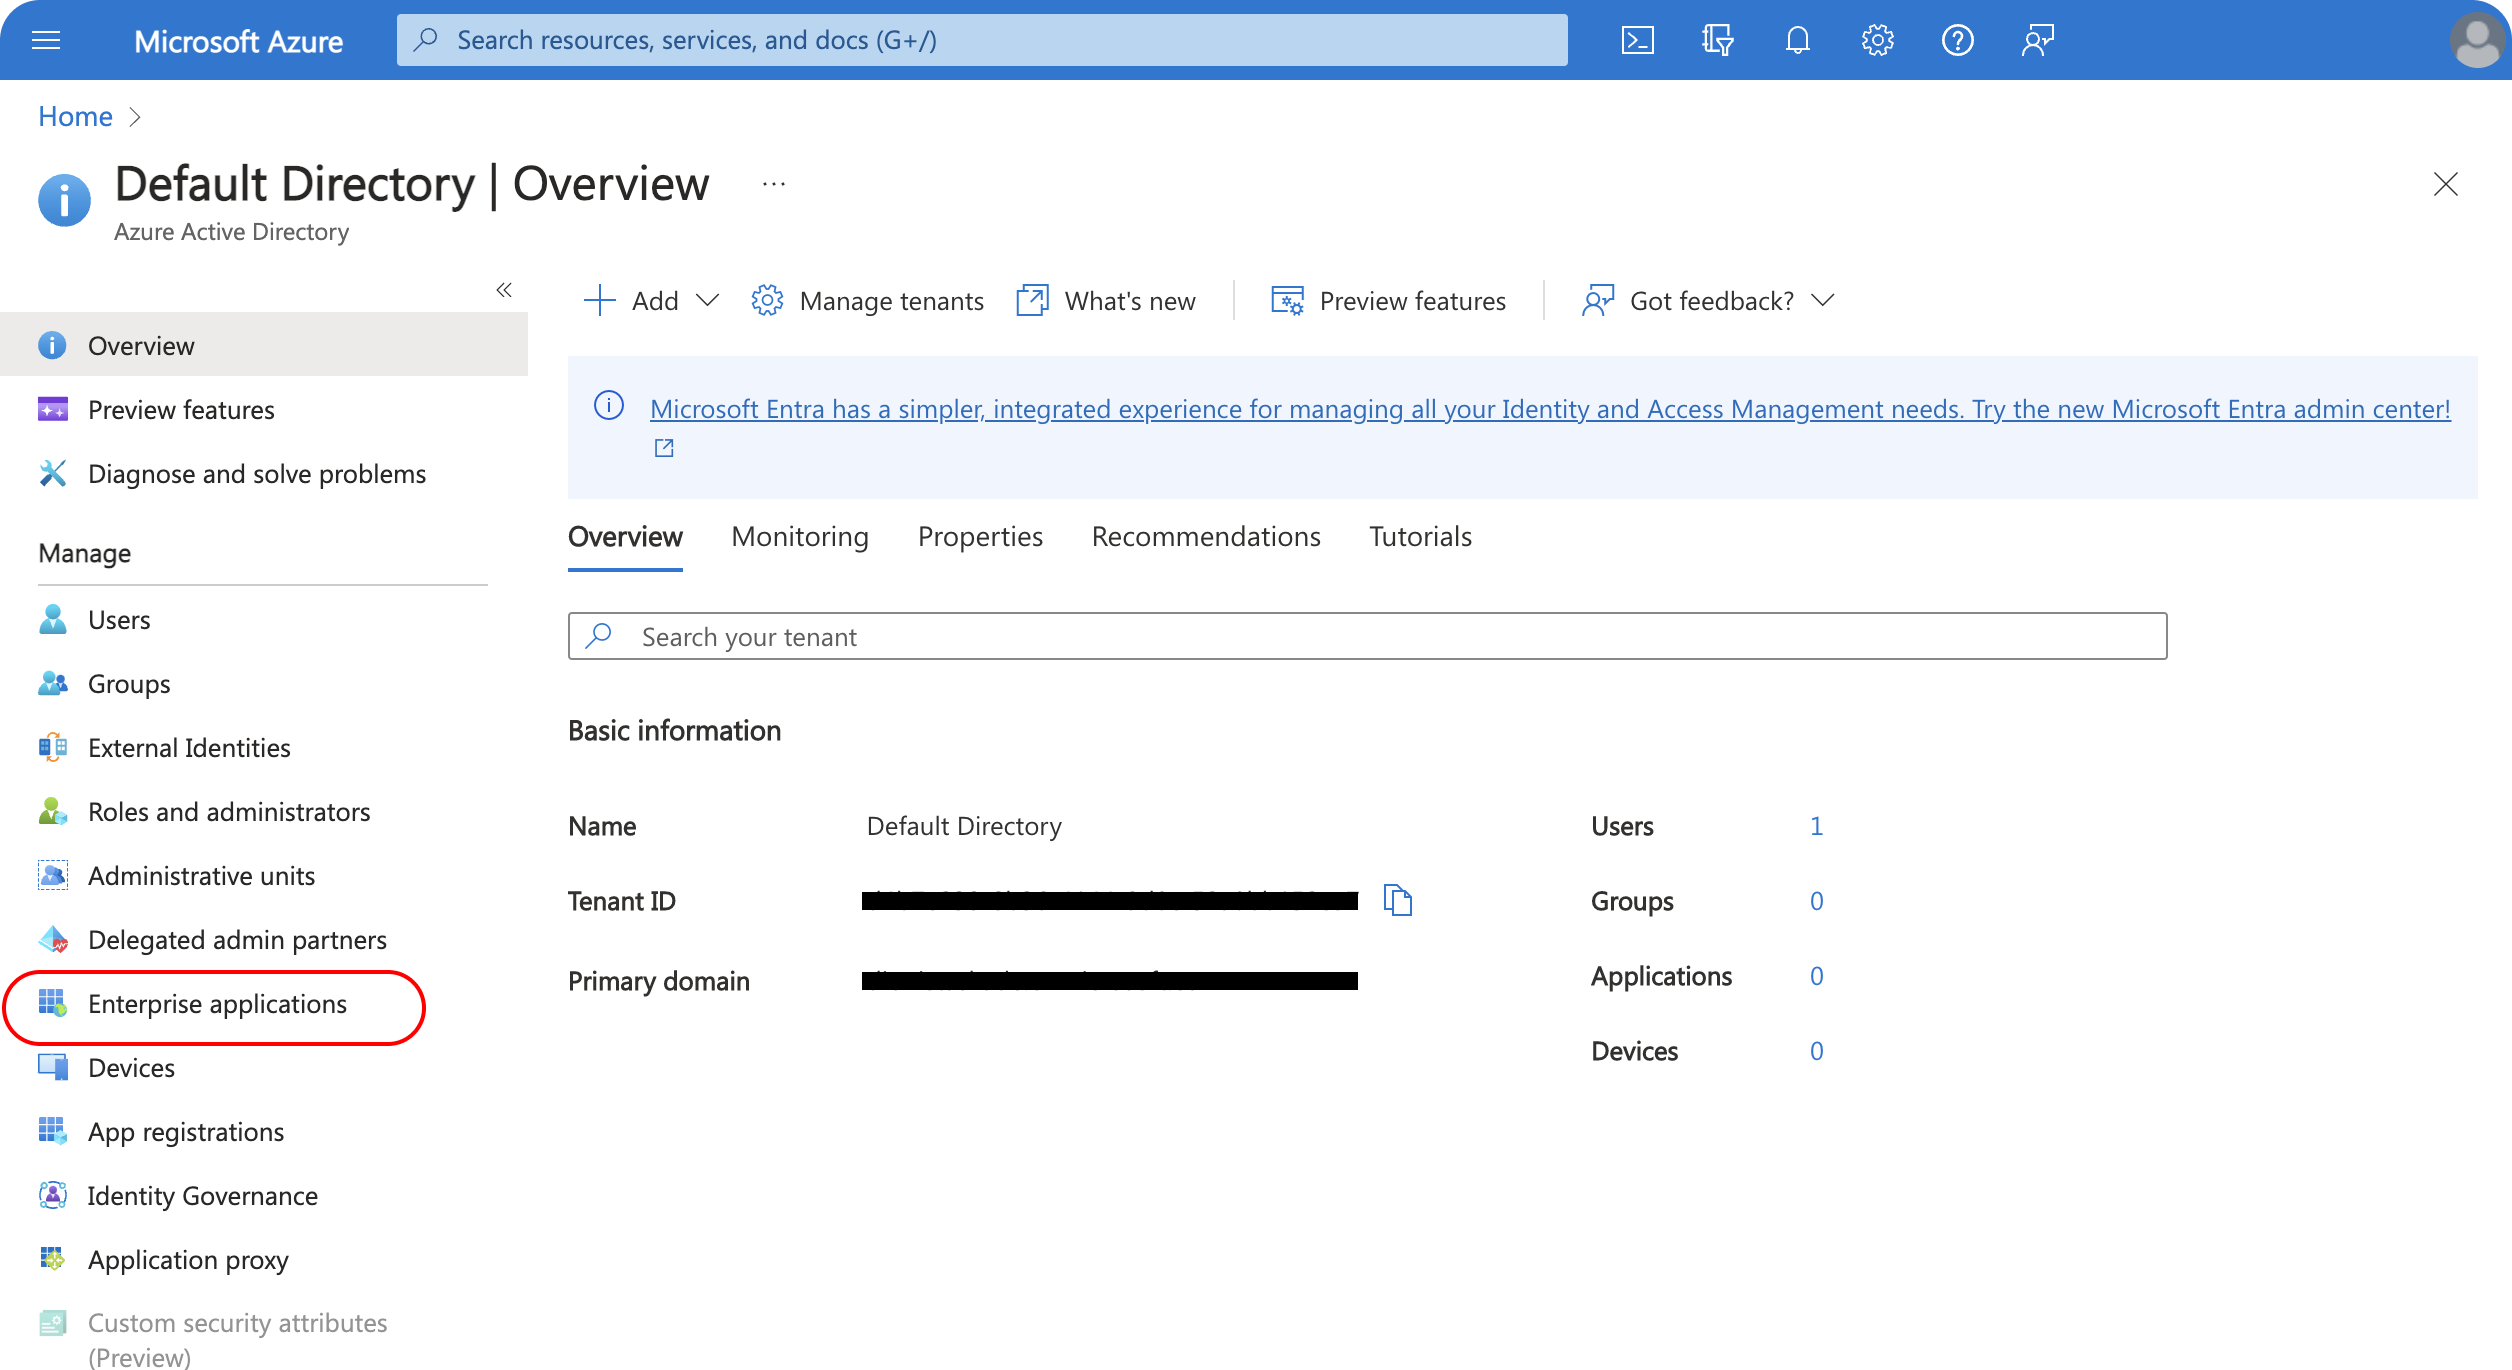
- Next, navigate to the Azure portal, and locate the Azure Active Directory in the side navigation panel.
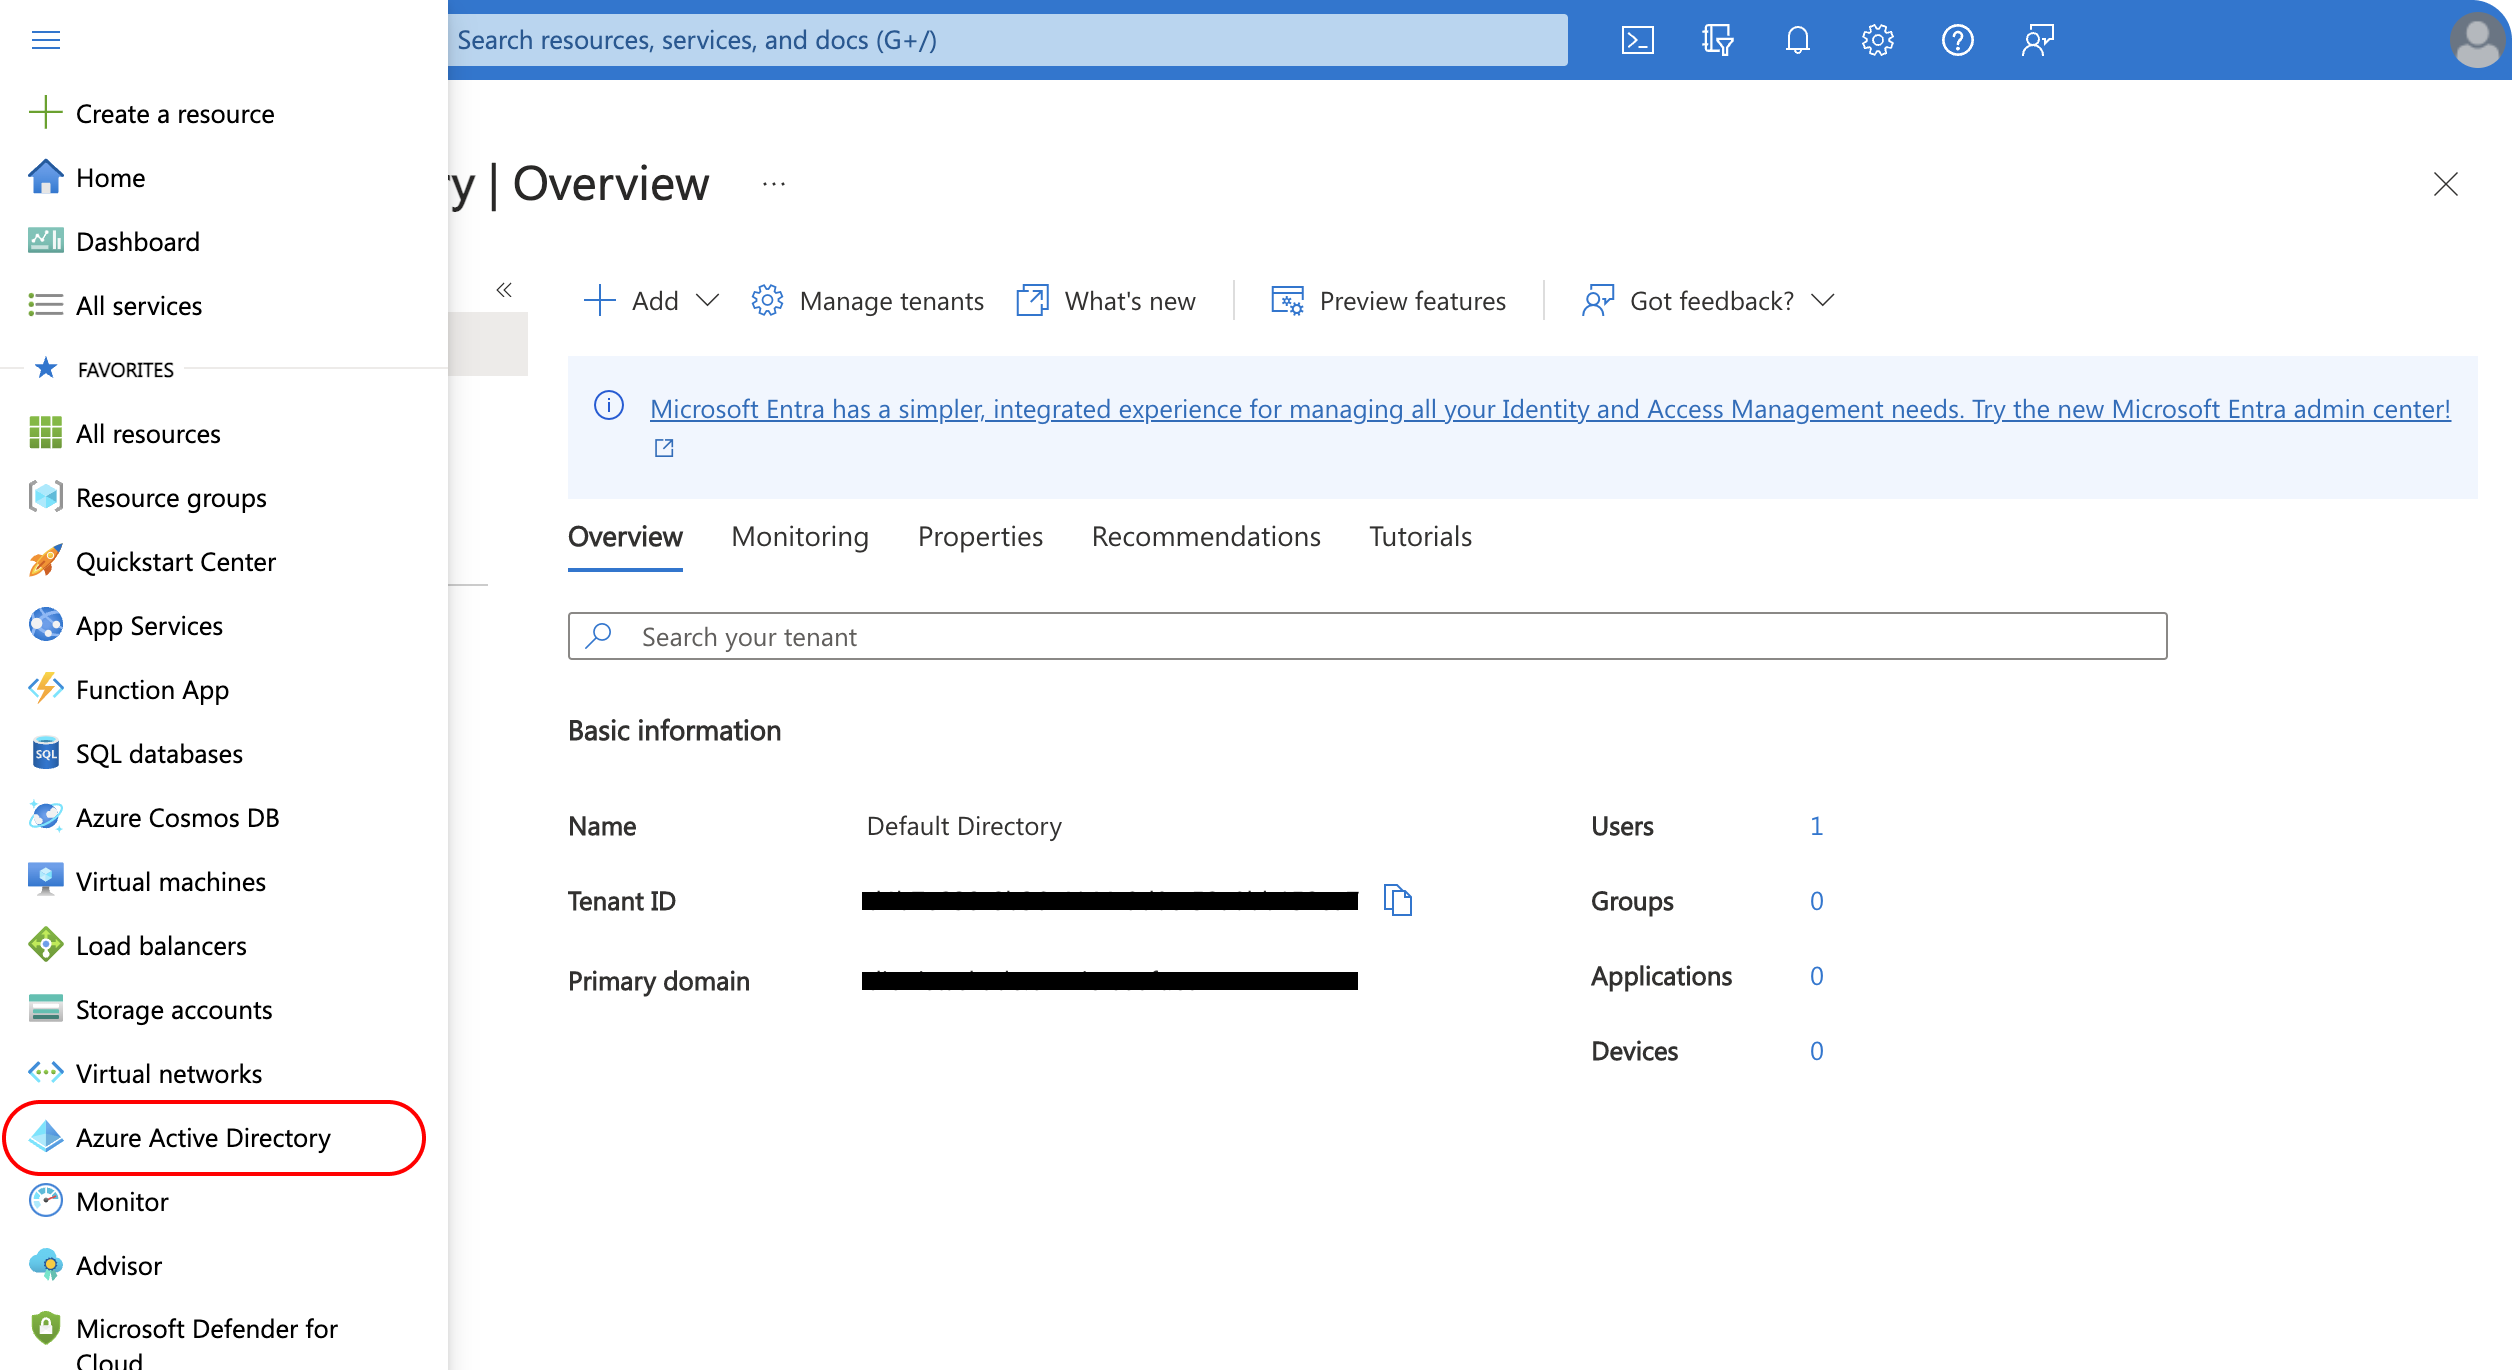
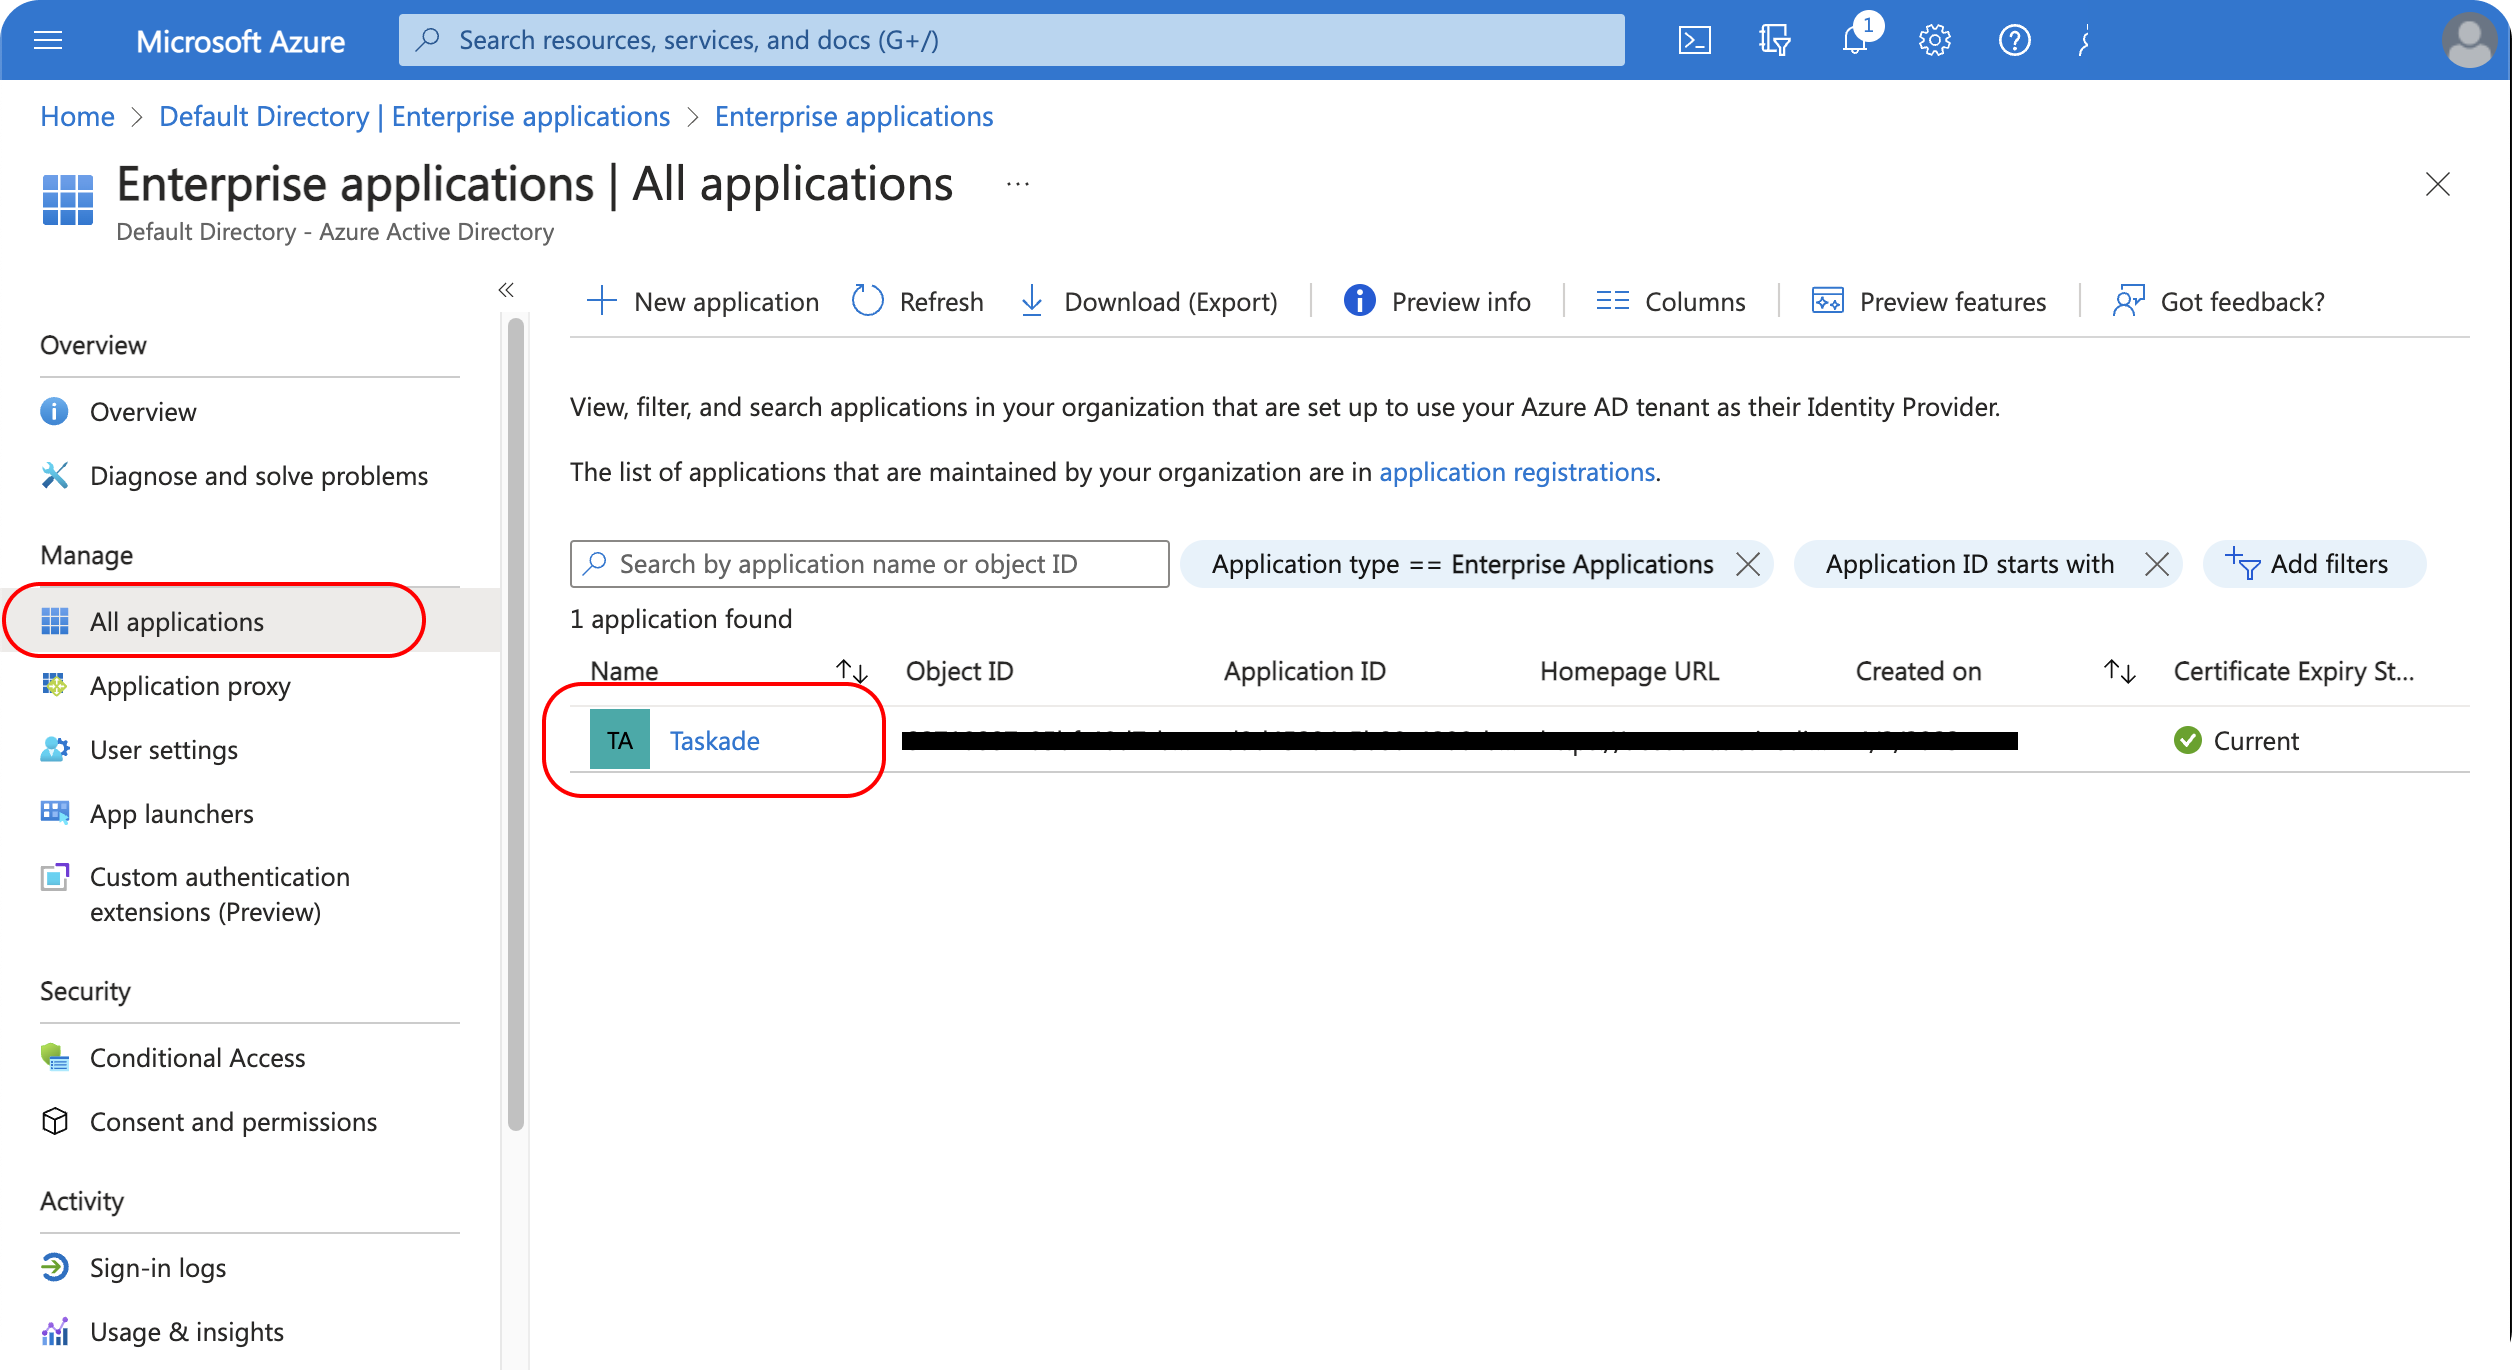
Select Enterprise Applications and find Taskade among the list of applications.
- Under the Manage section, click Provisioning.
- Choose Automatic for the provisioning mode and type "https://taskade.com/scim/v2" for the admin credentials tenant URL.
- Paste the SCIM token from your org's overview page into the Secret Token field.
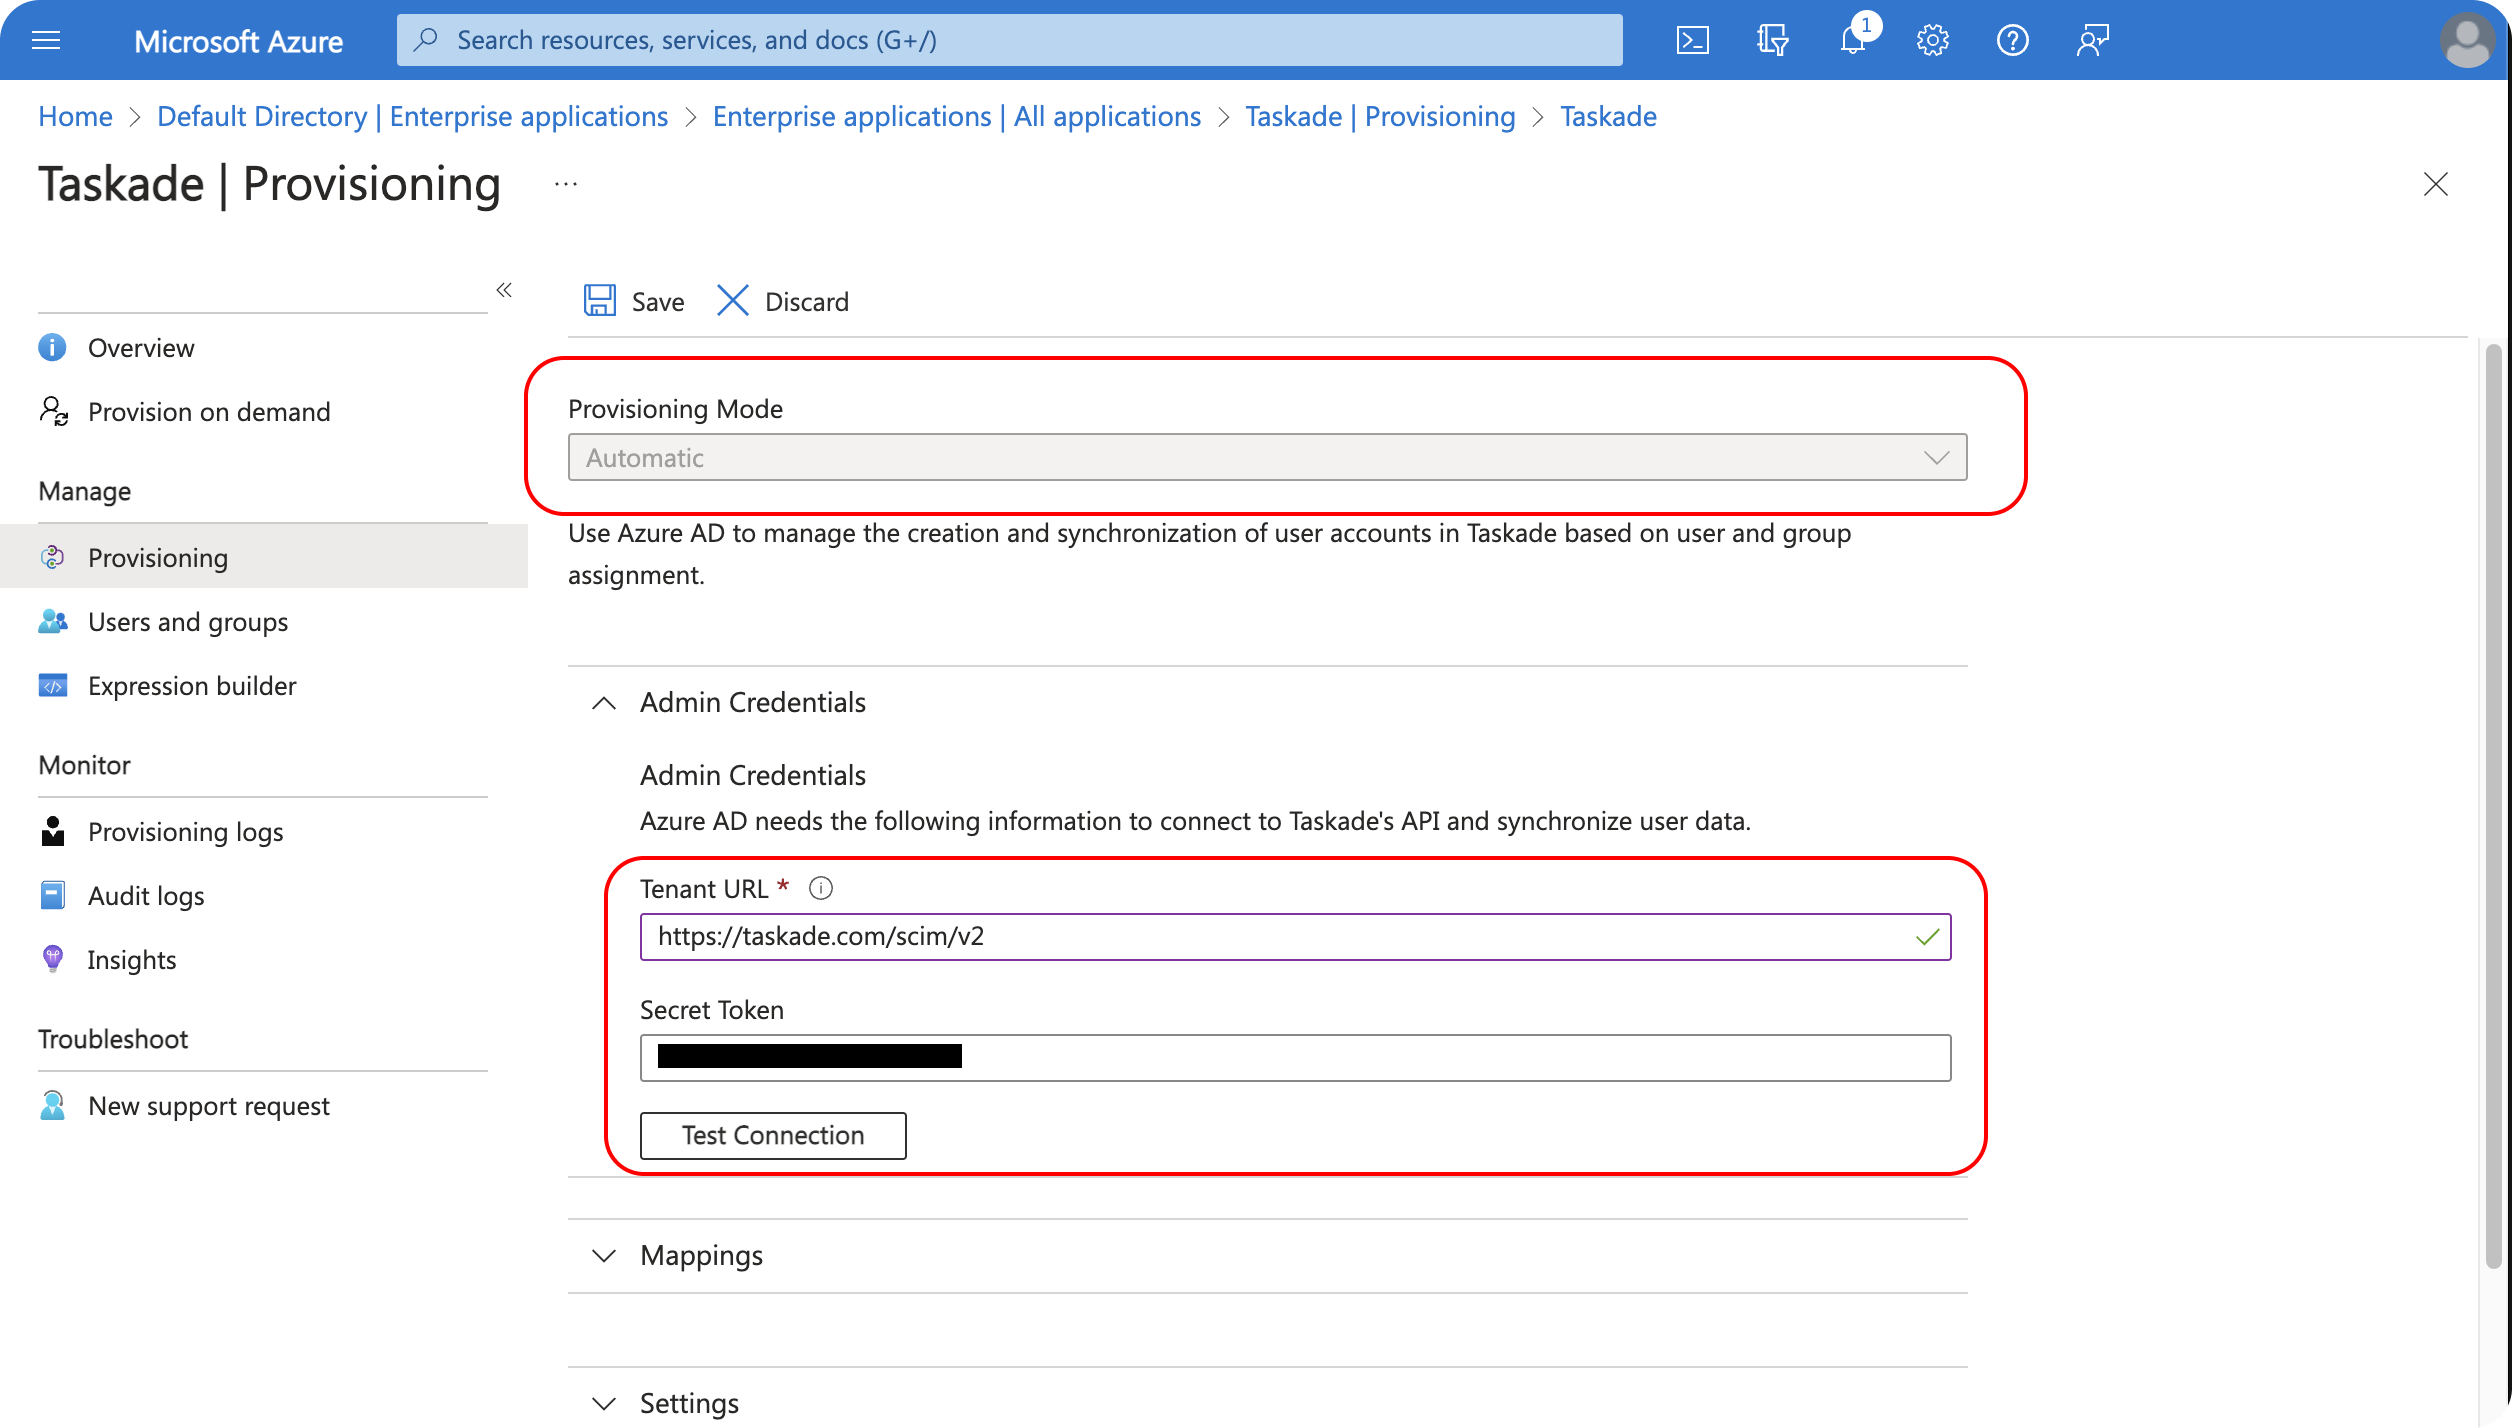
- Select Test Connection to verify that the configuration has been set up correctly.
- If the connection is successful, click Save.
The following steps will guide you through provisioning groups.
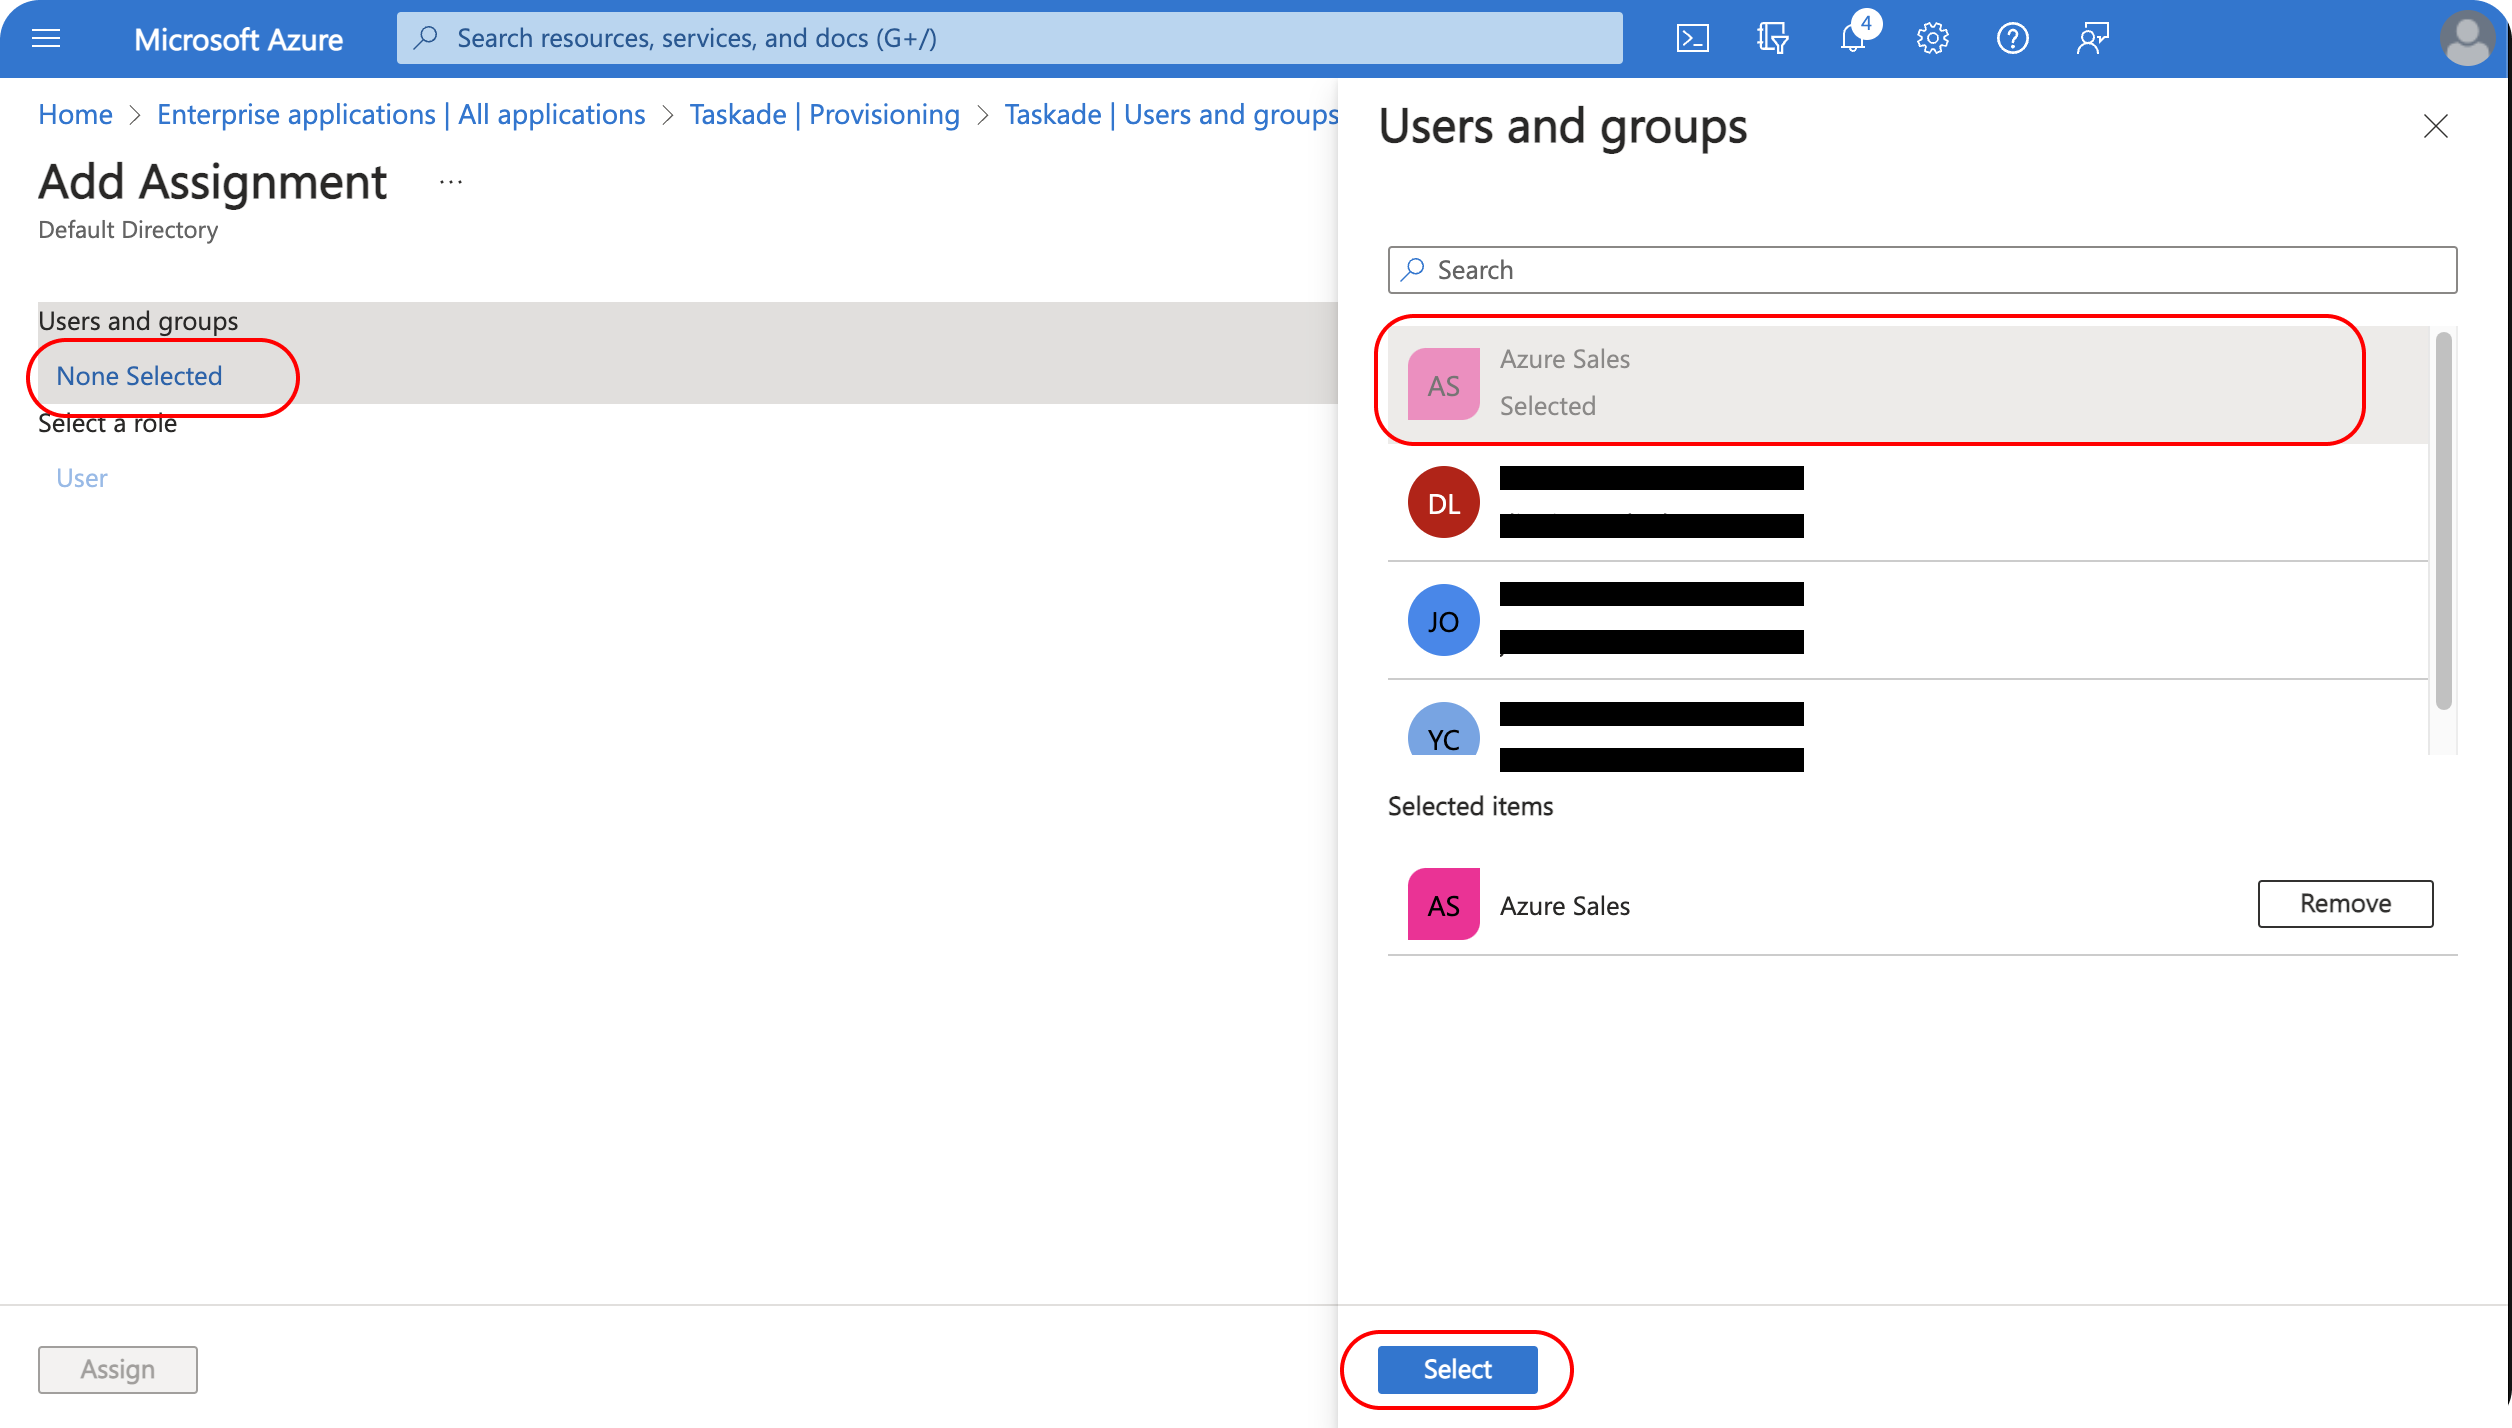
- Navigate to the Manage section and select Users and Groups.
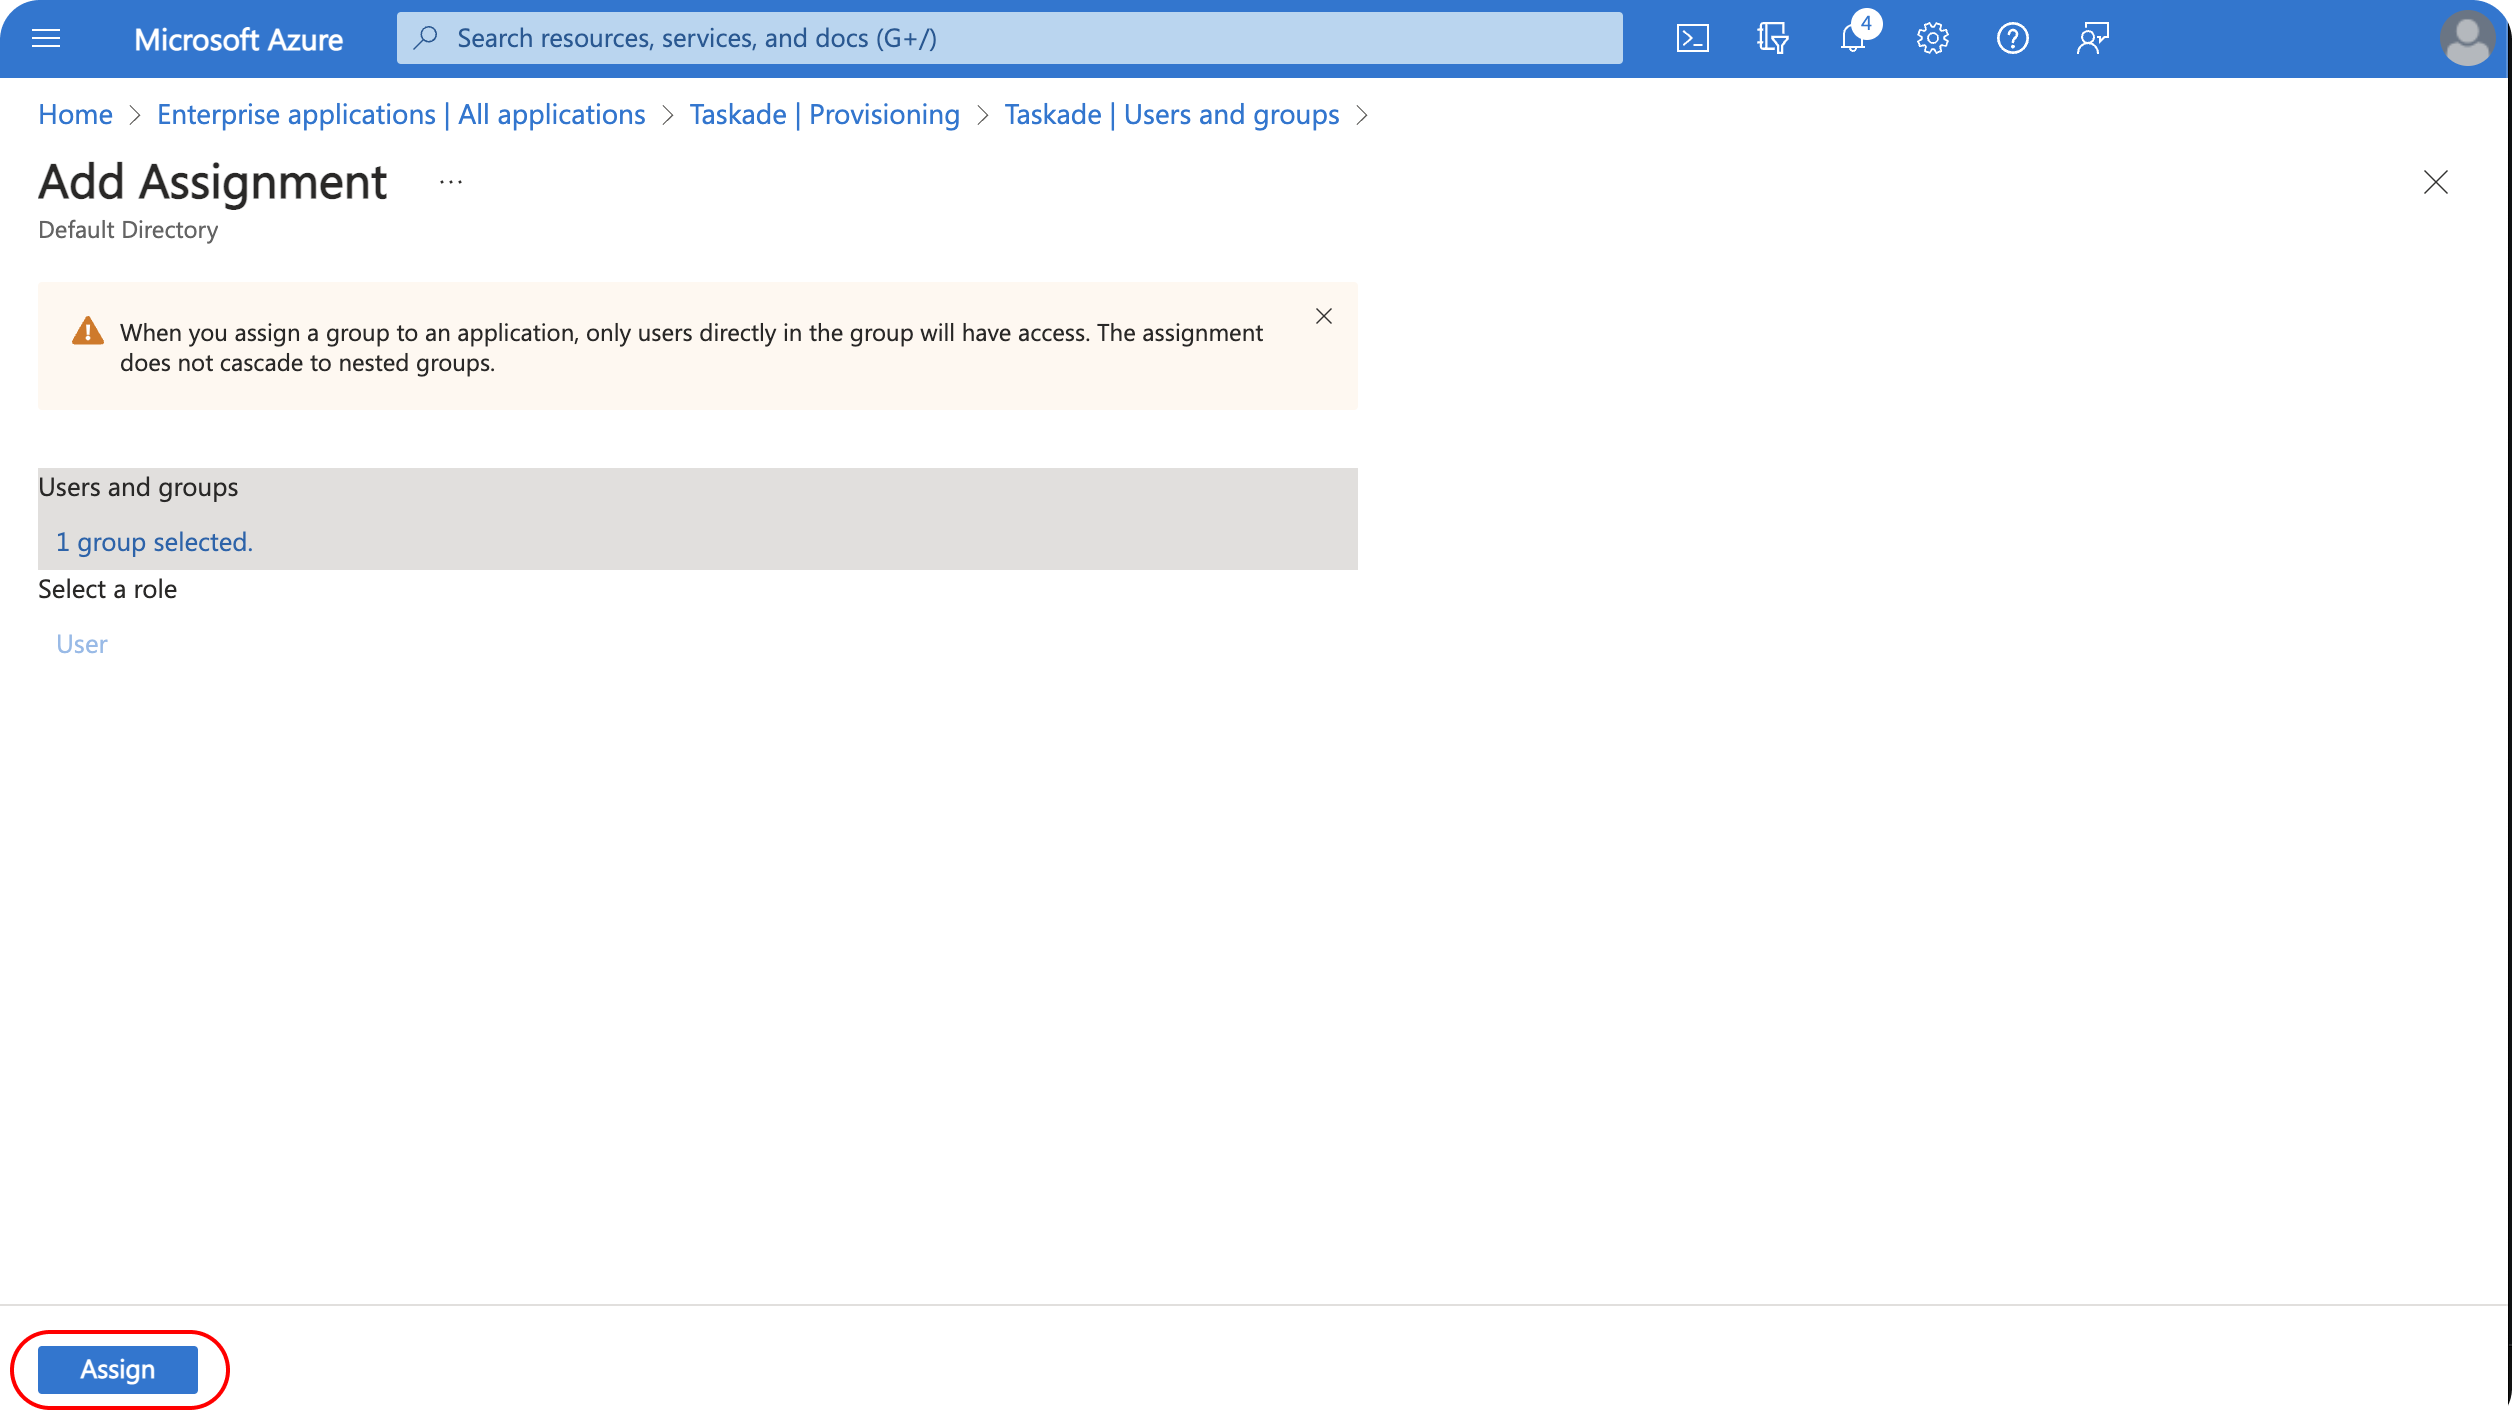
- Click on Add user/group.
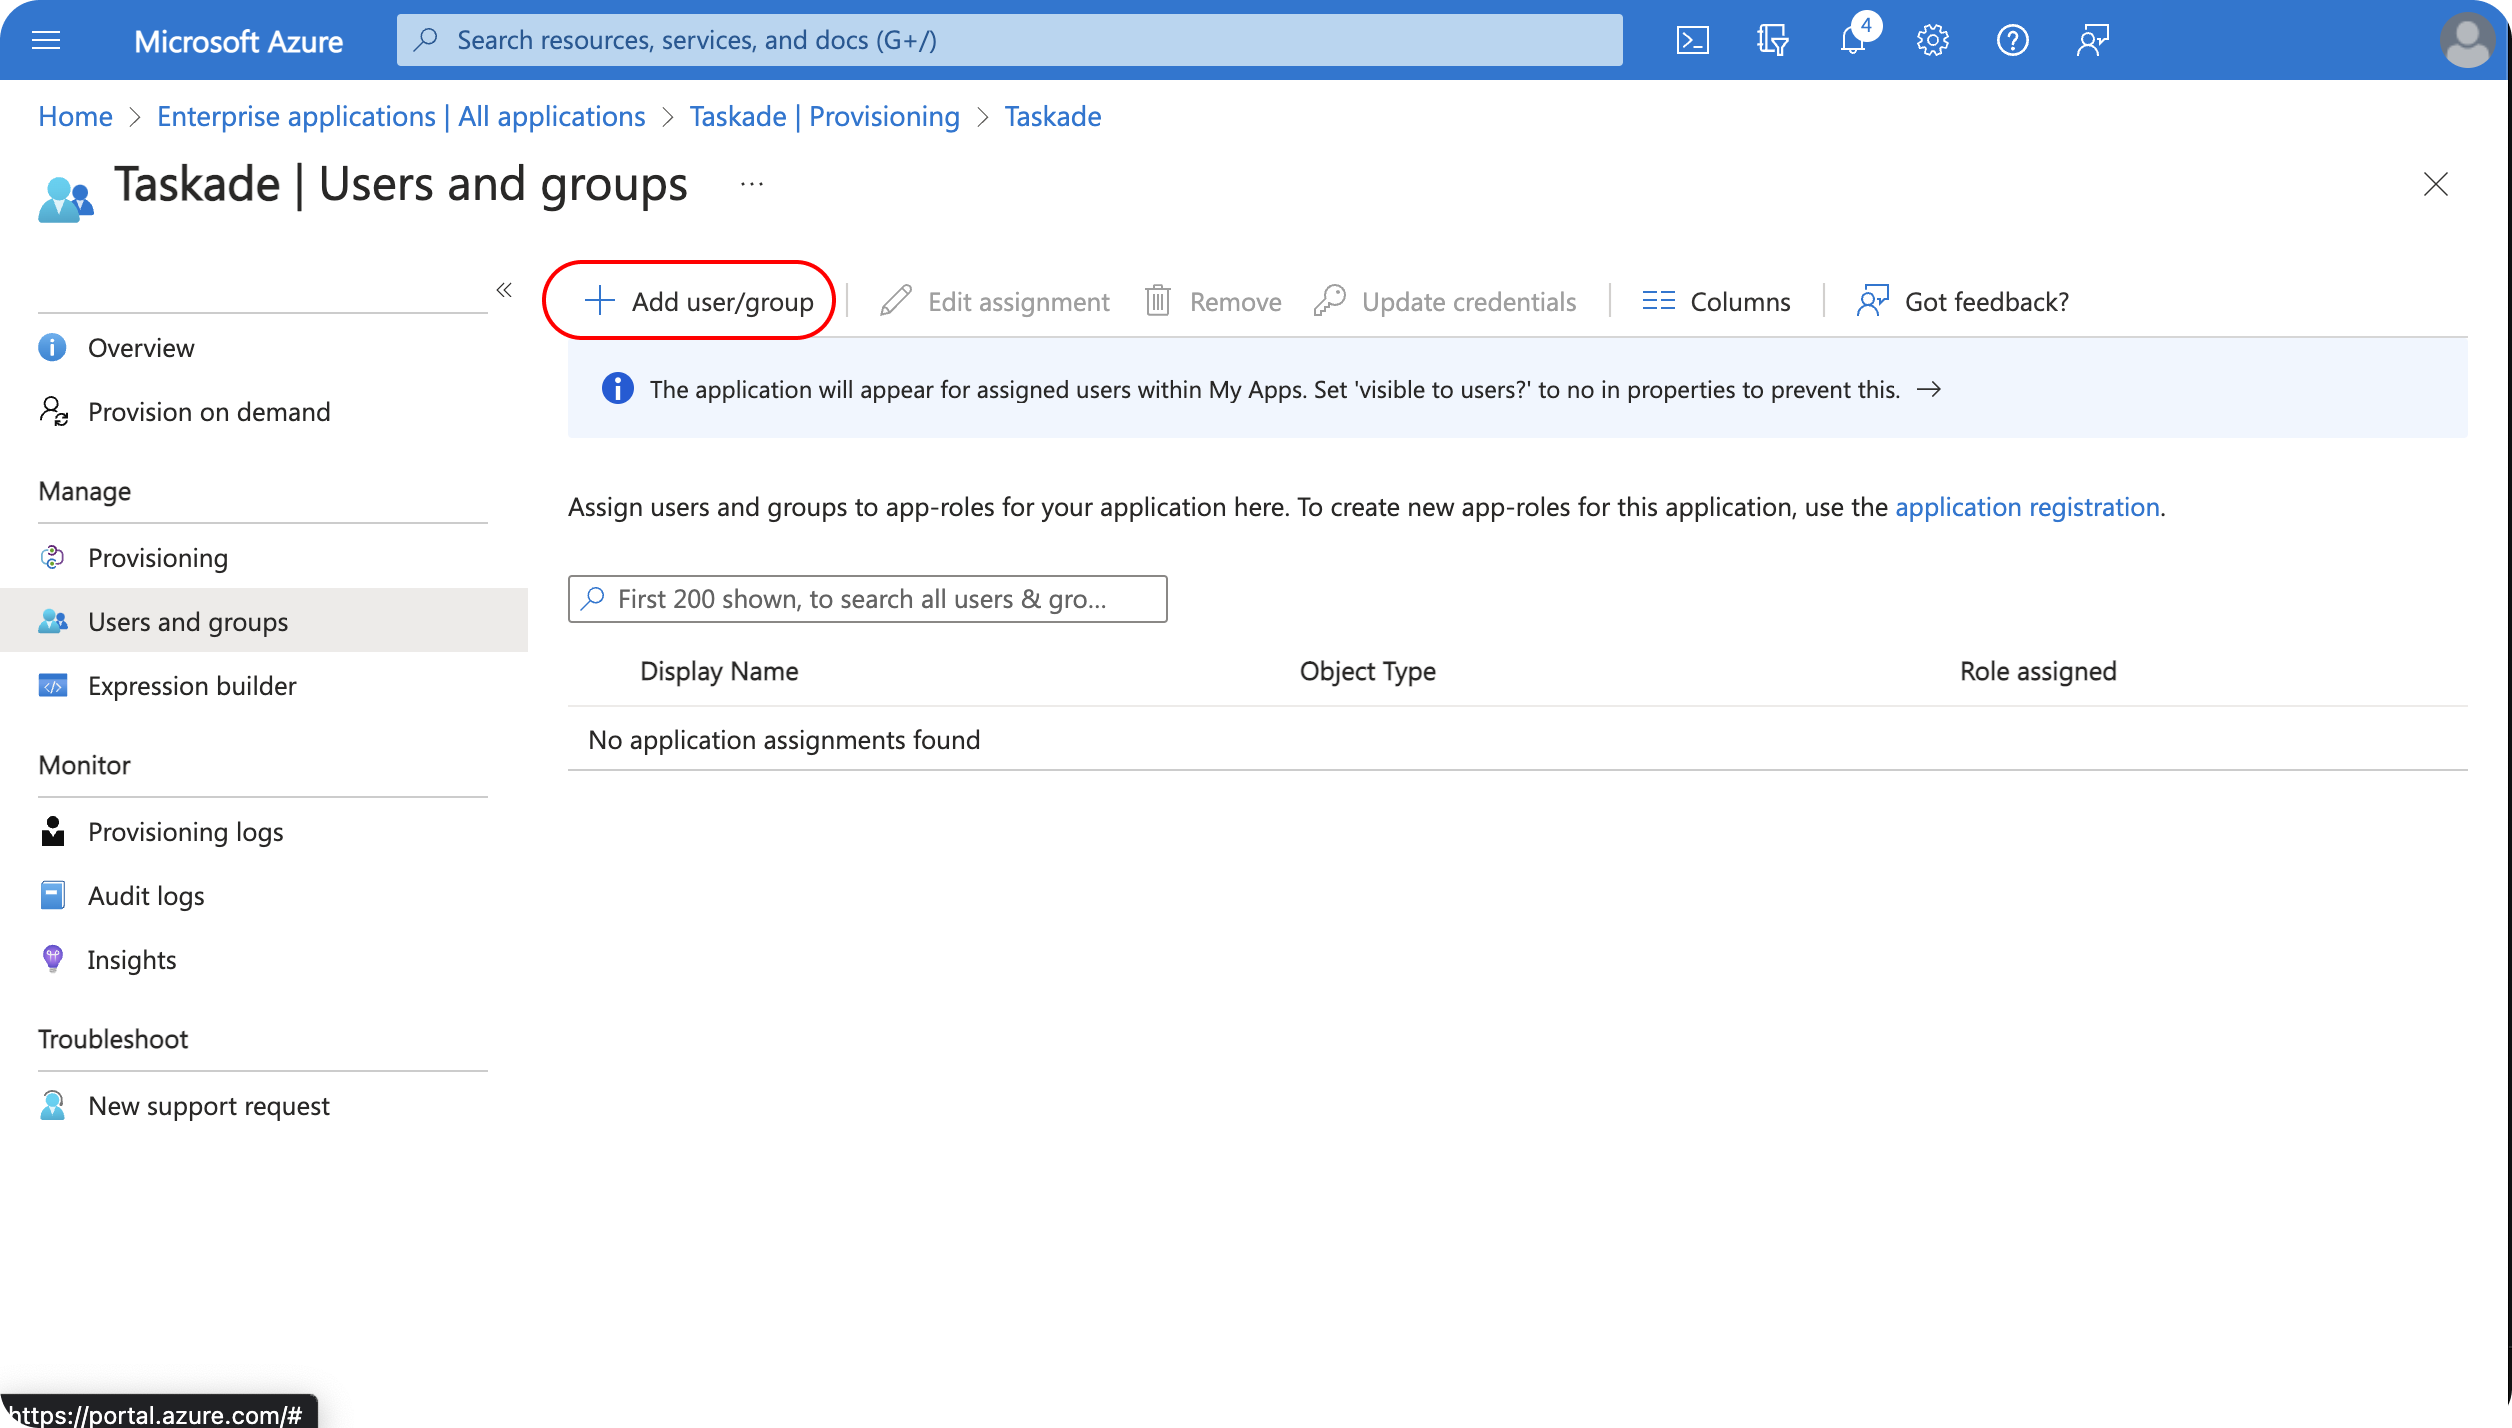
Add a group you'd like to sync with your Taskade organization, then click Assign.
Select Provision on demand and choose the group you recently assigned.
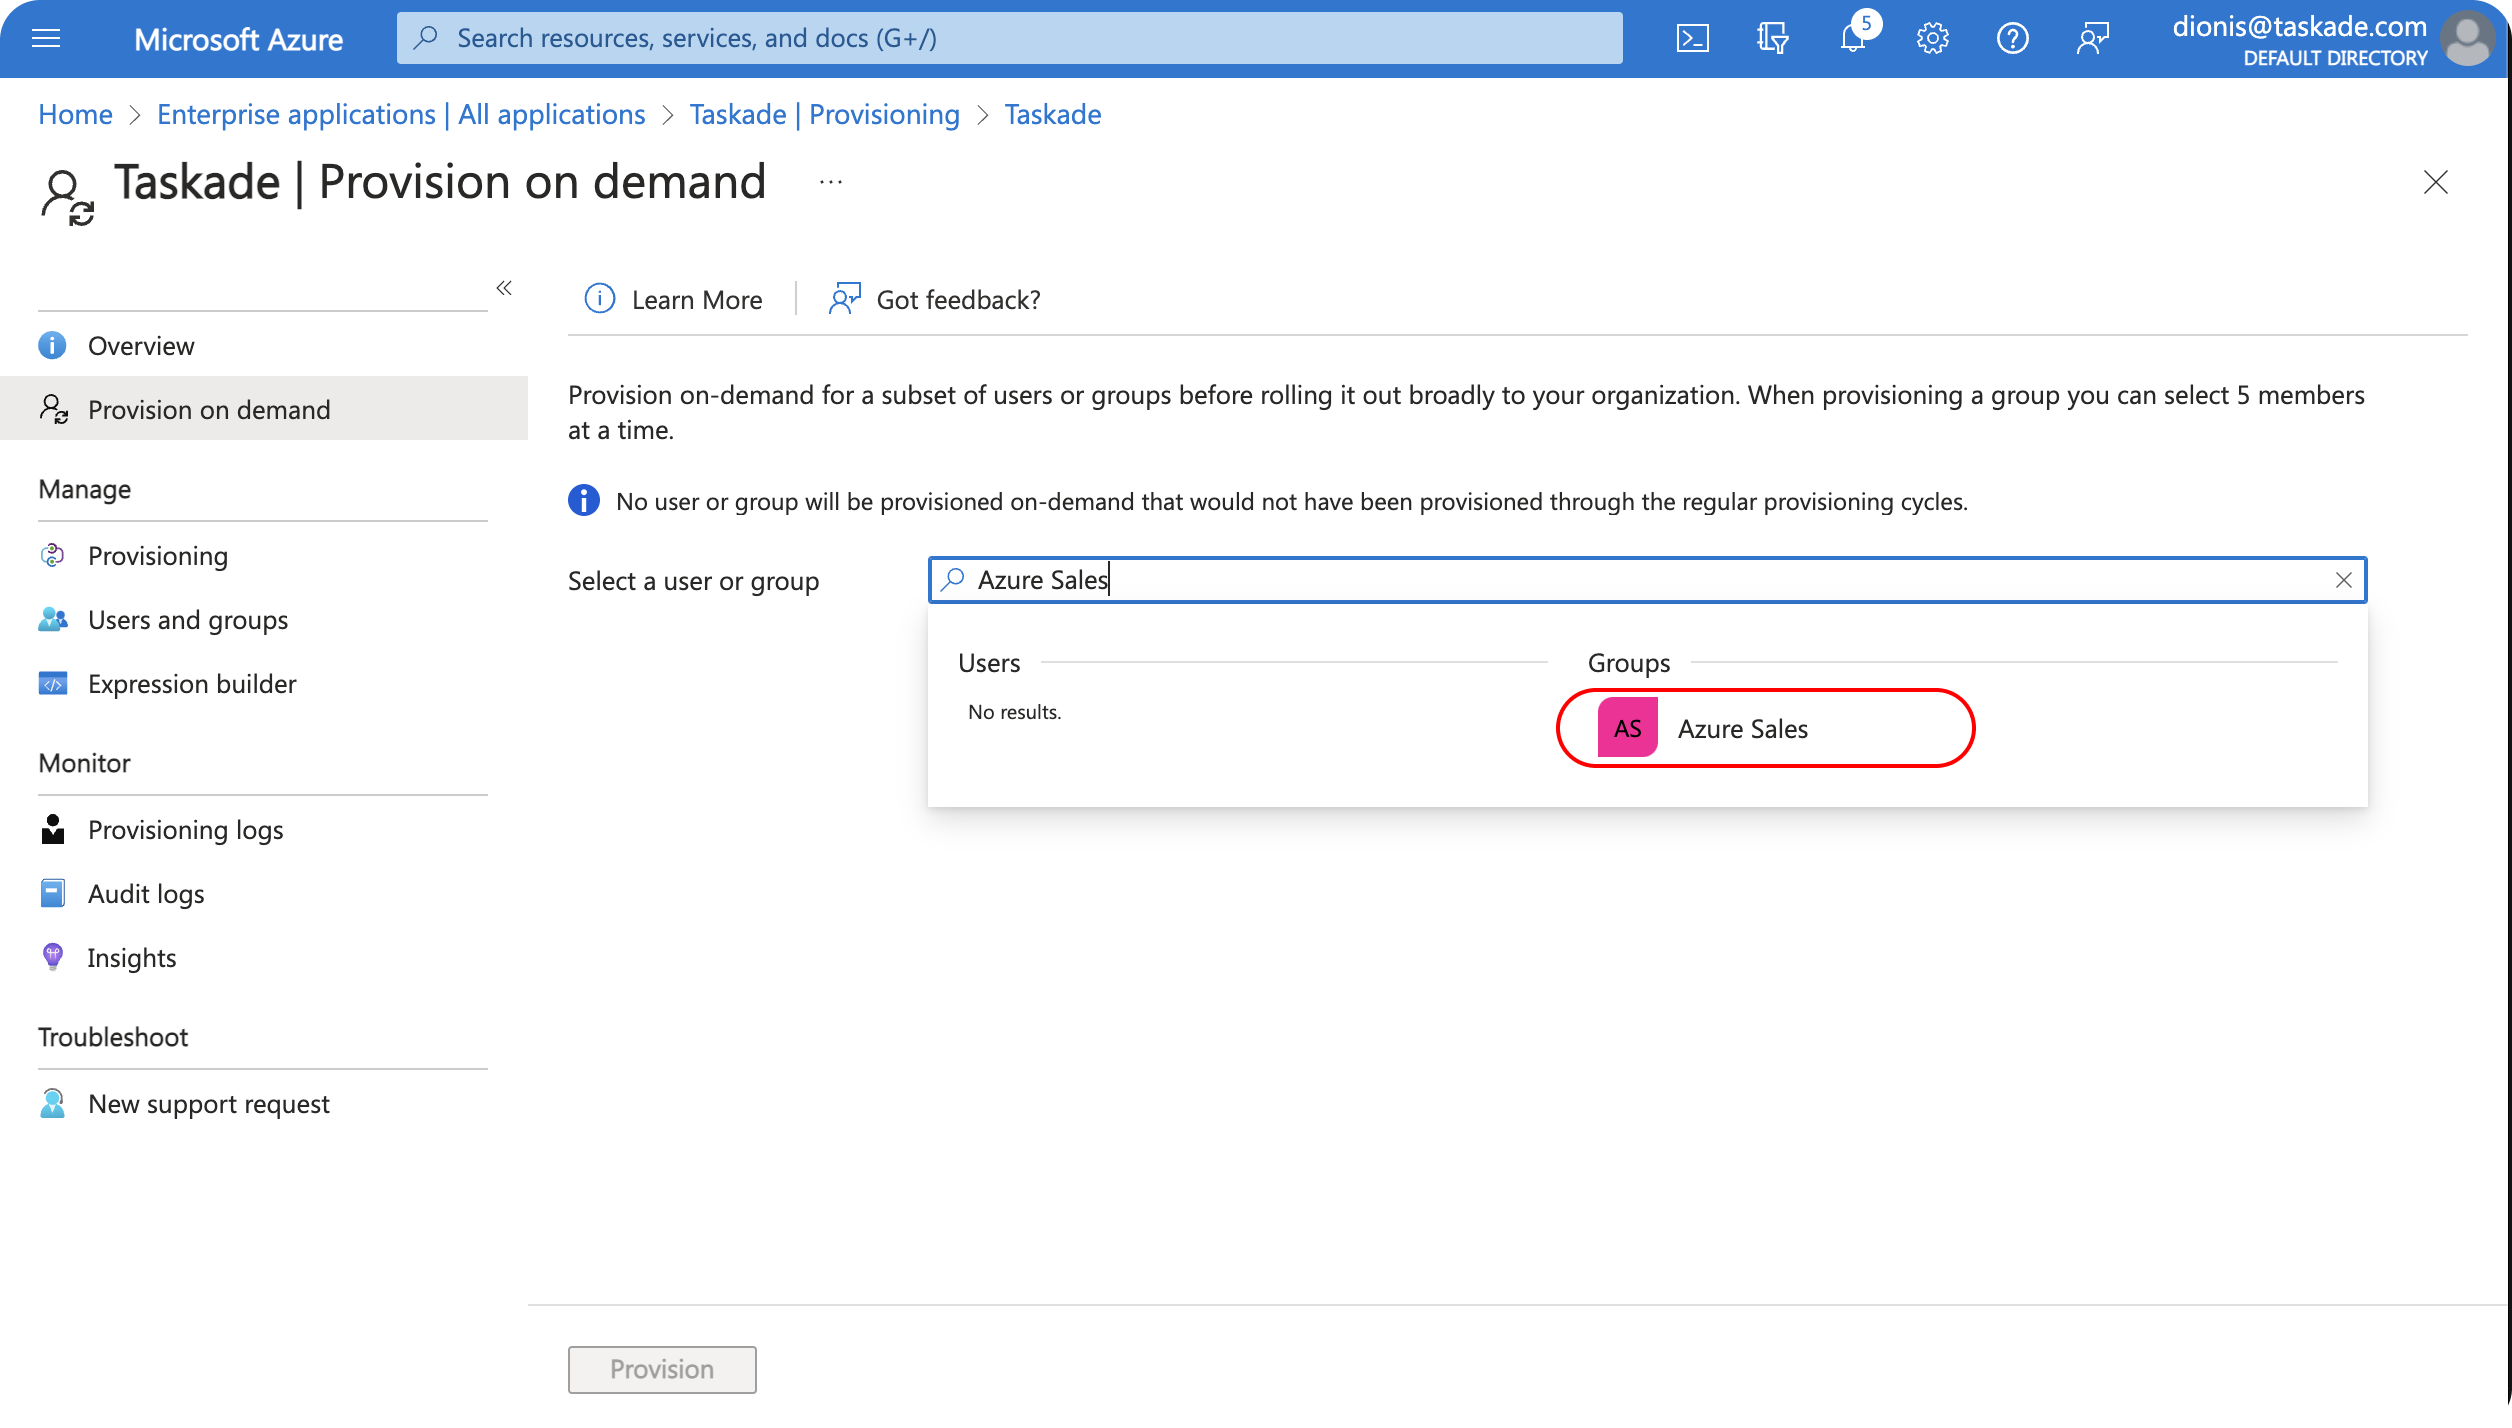
Choose all the group members, then click Provision.

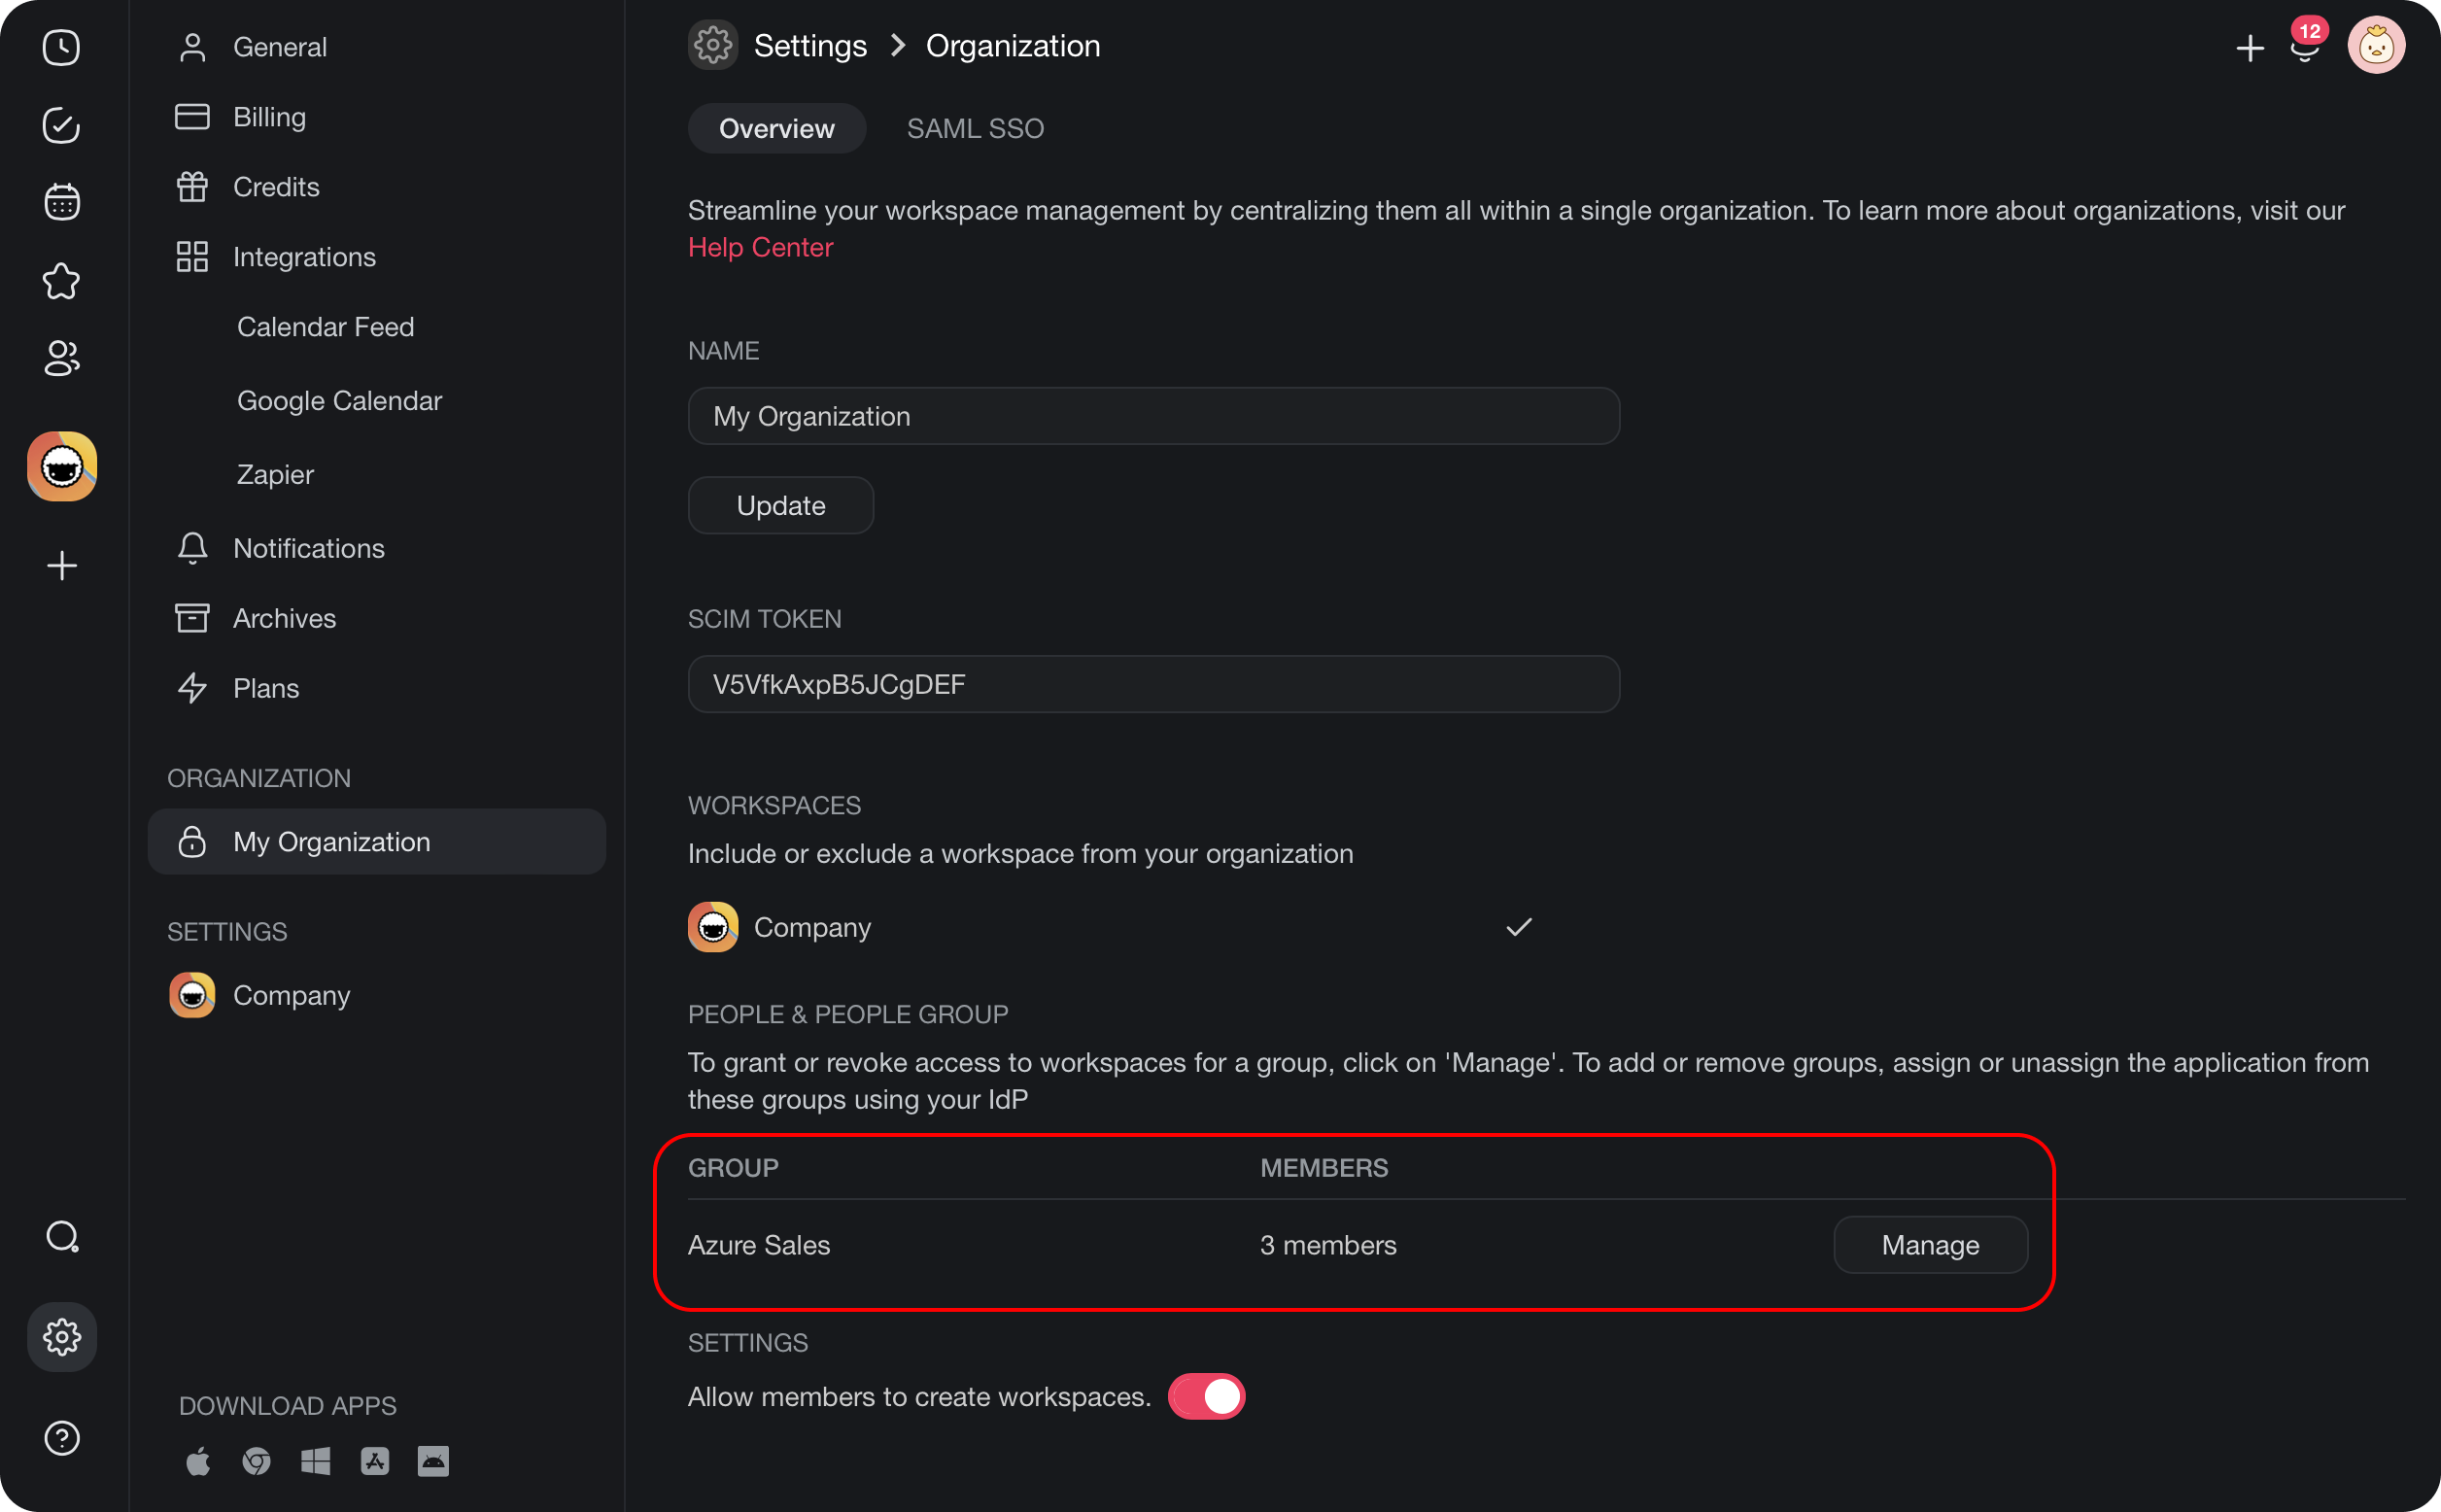
When you open Taskade, the group you provisioned will appear in the Organization tab.
Provision Folders
You can provision groups for both folders and workspaces. To begin with folders, navigate to any folder within a workspace that's part of your organization. Click on the folder name in the header, and choose Edit from the drop-down menu.
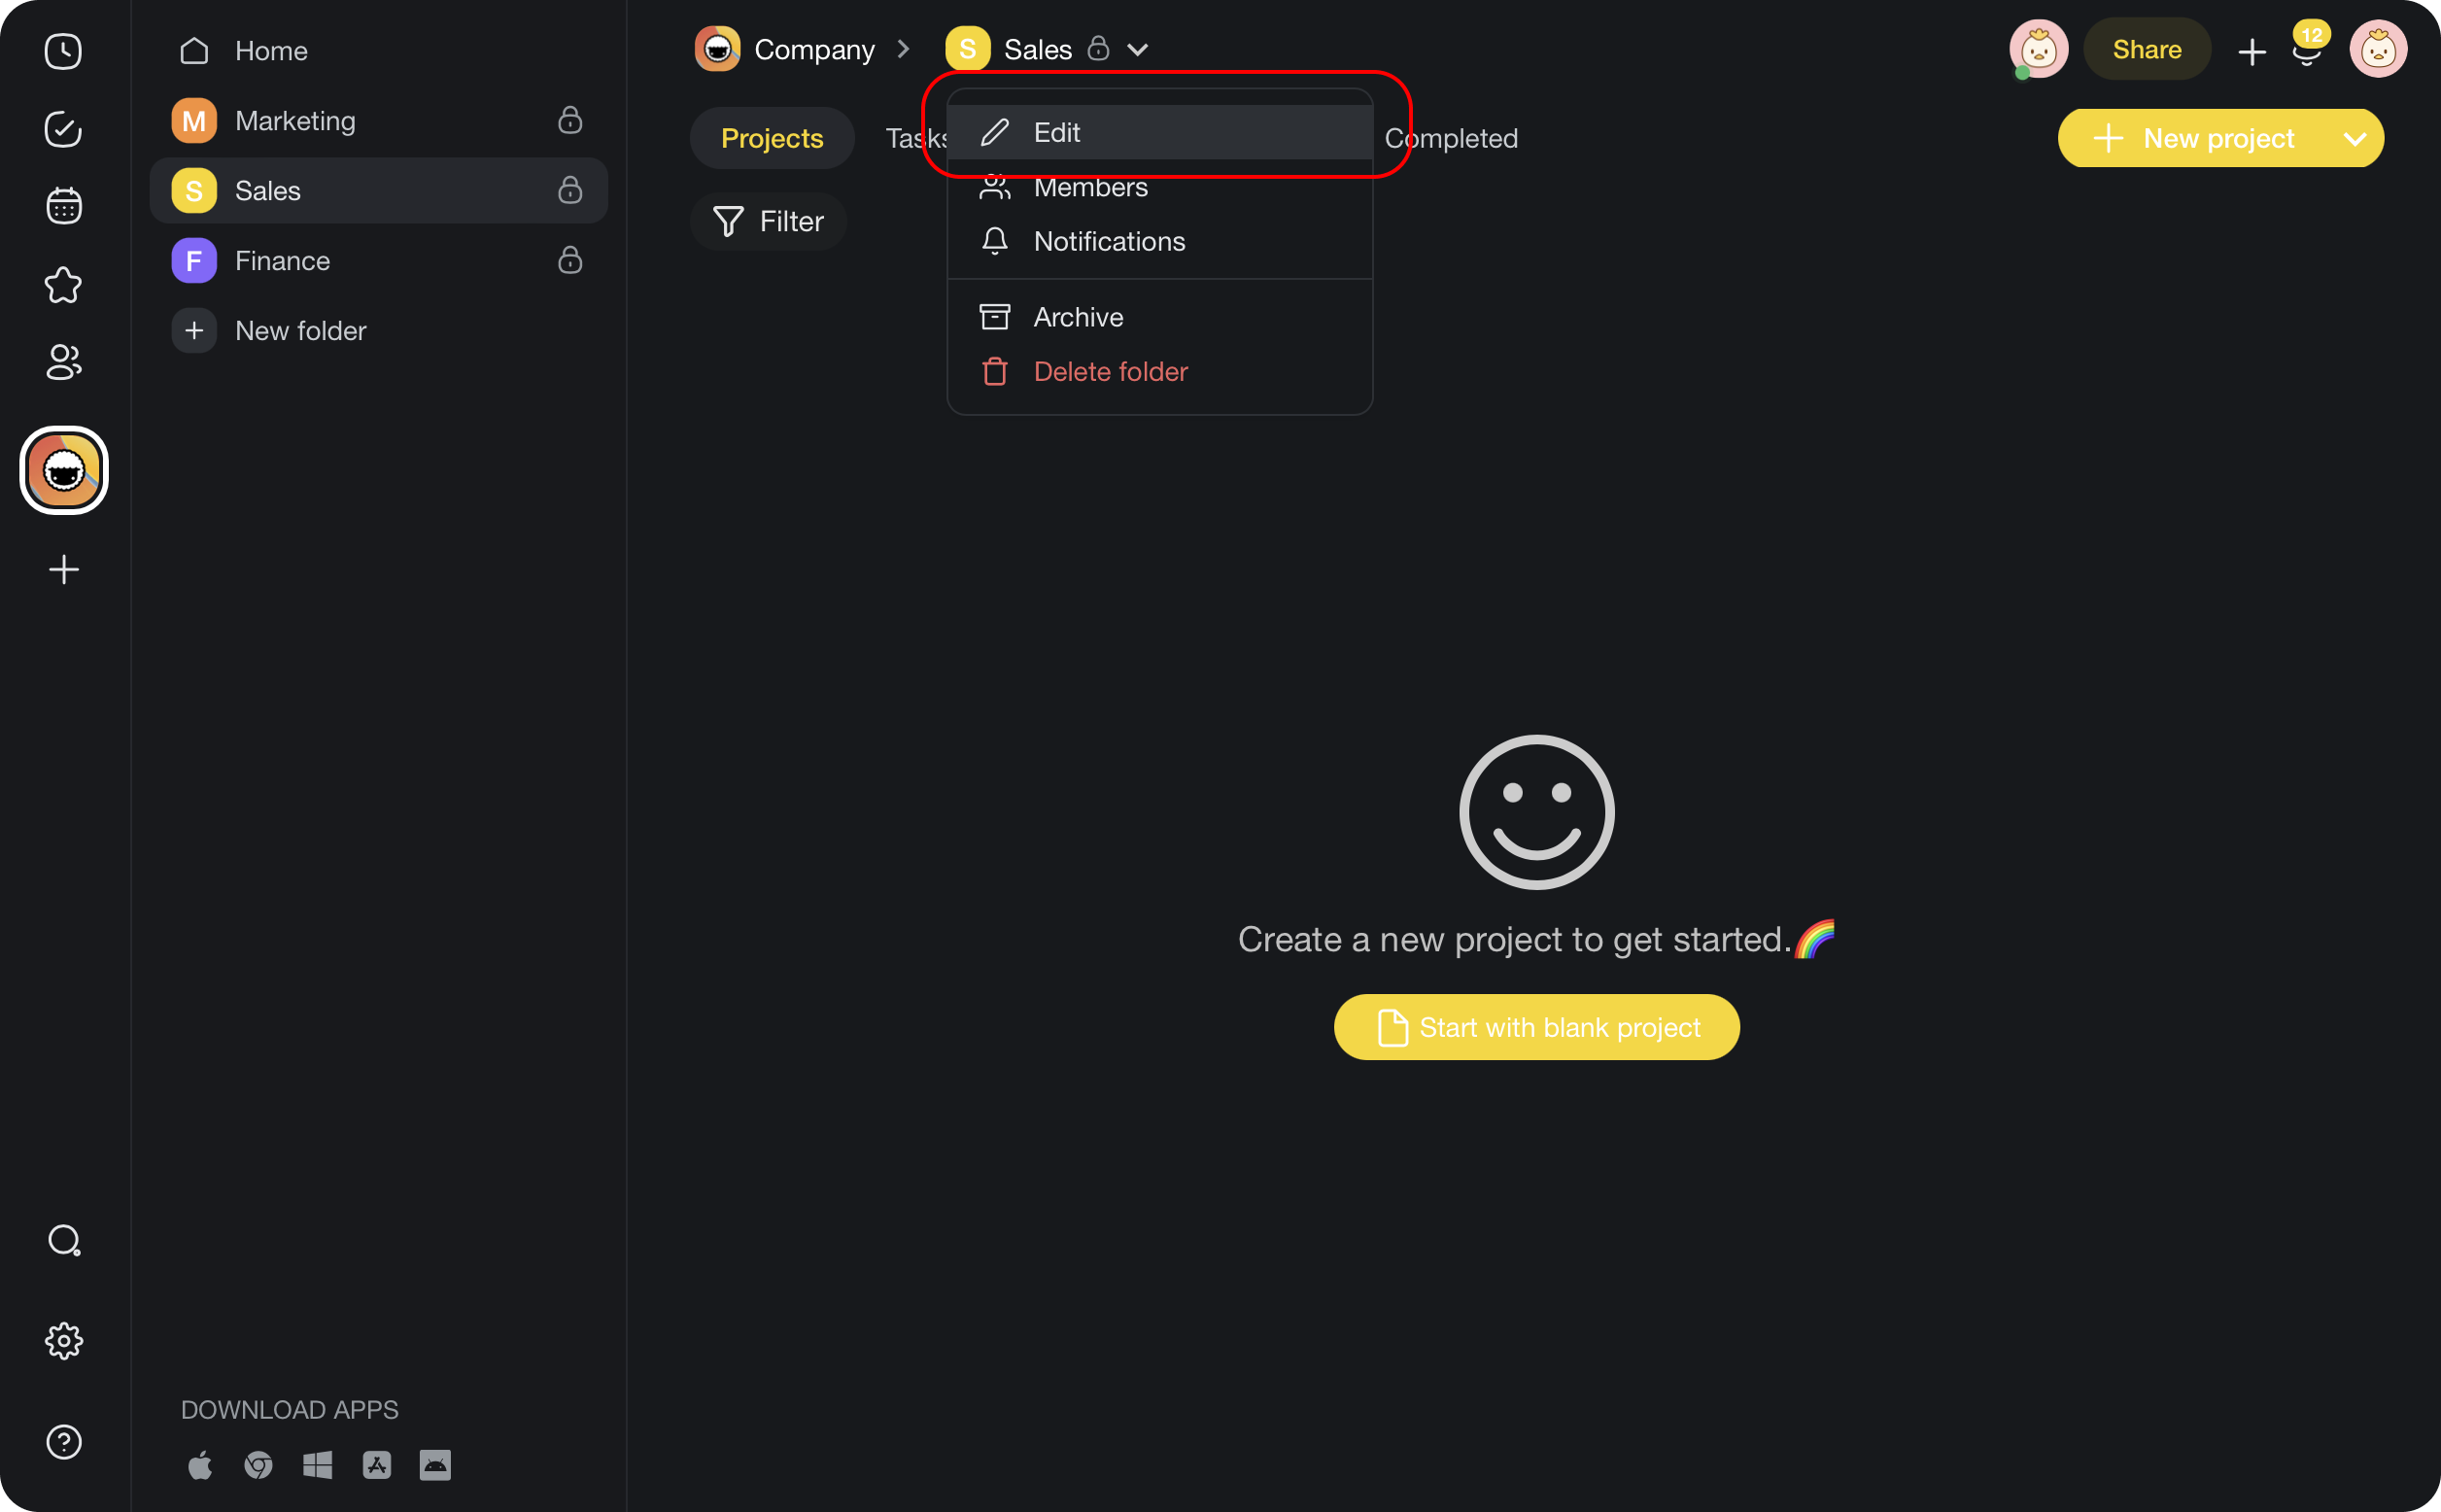
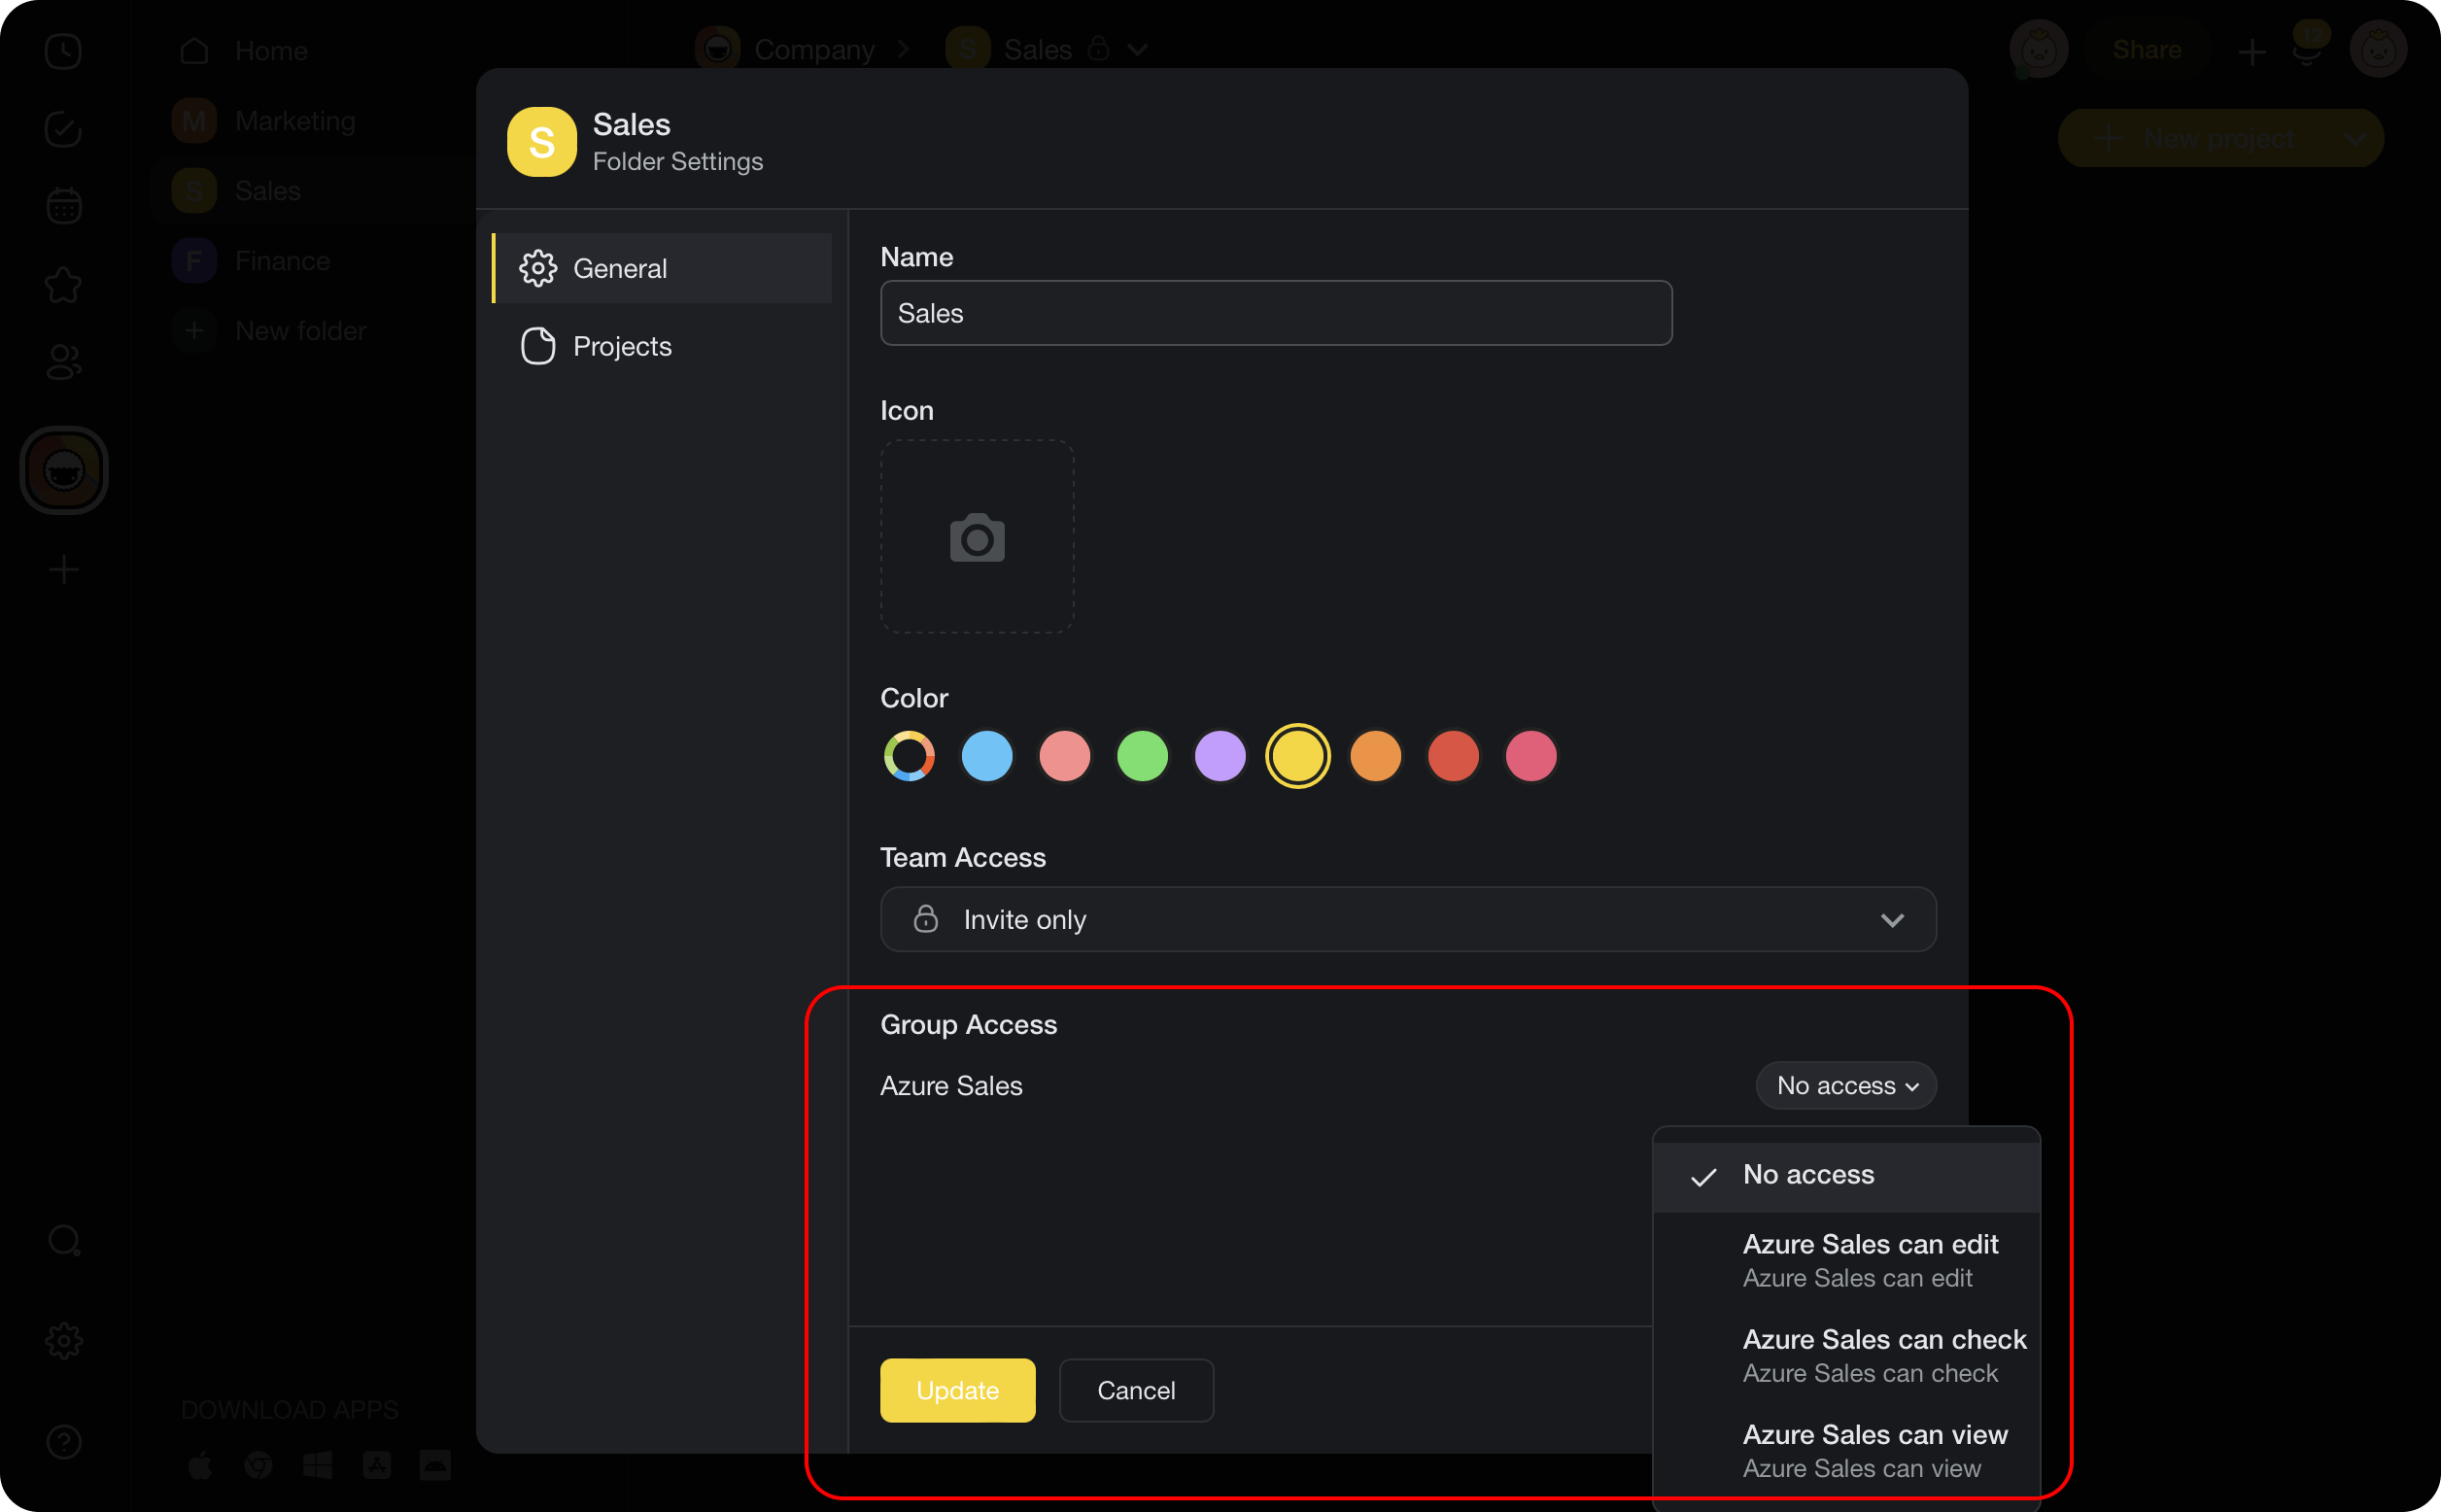
You can provision the Azure group within the Edit Folder menu. Determine the desired group access level — Editor, Commenter, Participant, or Viewer. See User Roles & Permissions for the full 7-tier breakdown.
Note: After updating the group access, group members will gain access to the specified folder. It's important to note that once a specific group member joins a folder, you must remove them manually.
Provision Workspaces
- To provision workspaces, return to your organization page.
- Ensure that your organization has multiple workspaces under management.
- Next, within the Groups section, manage one of the desired groups.
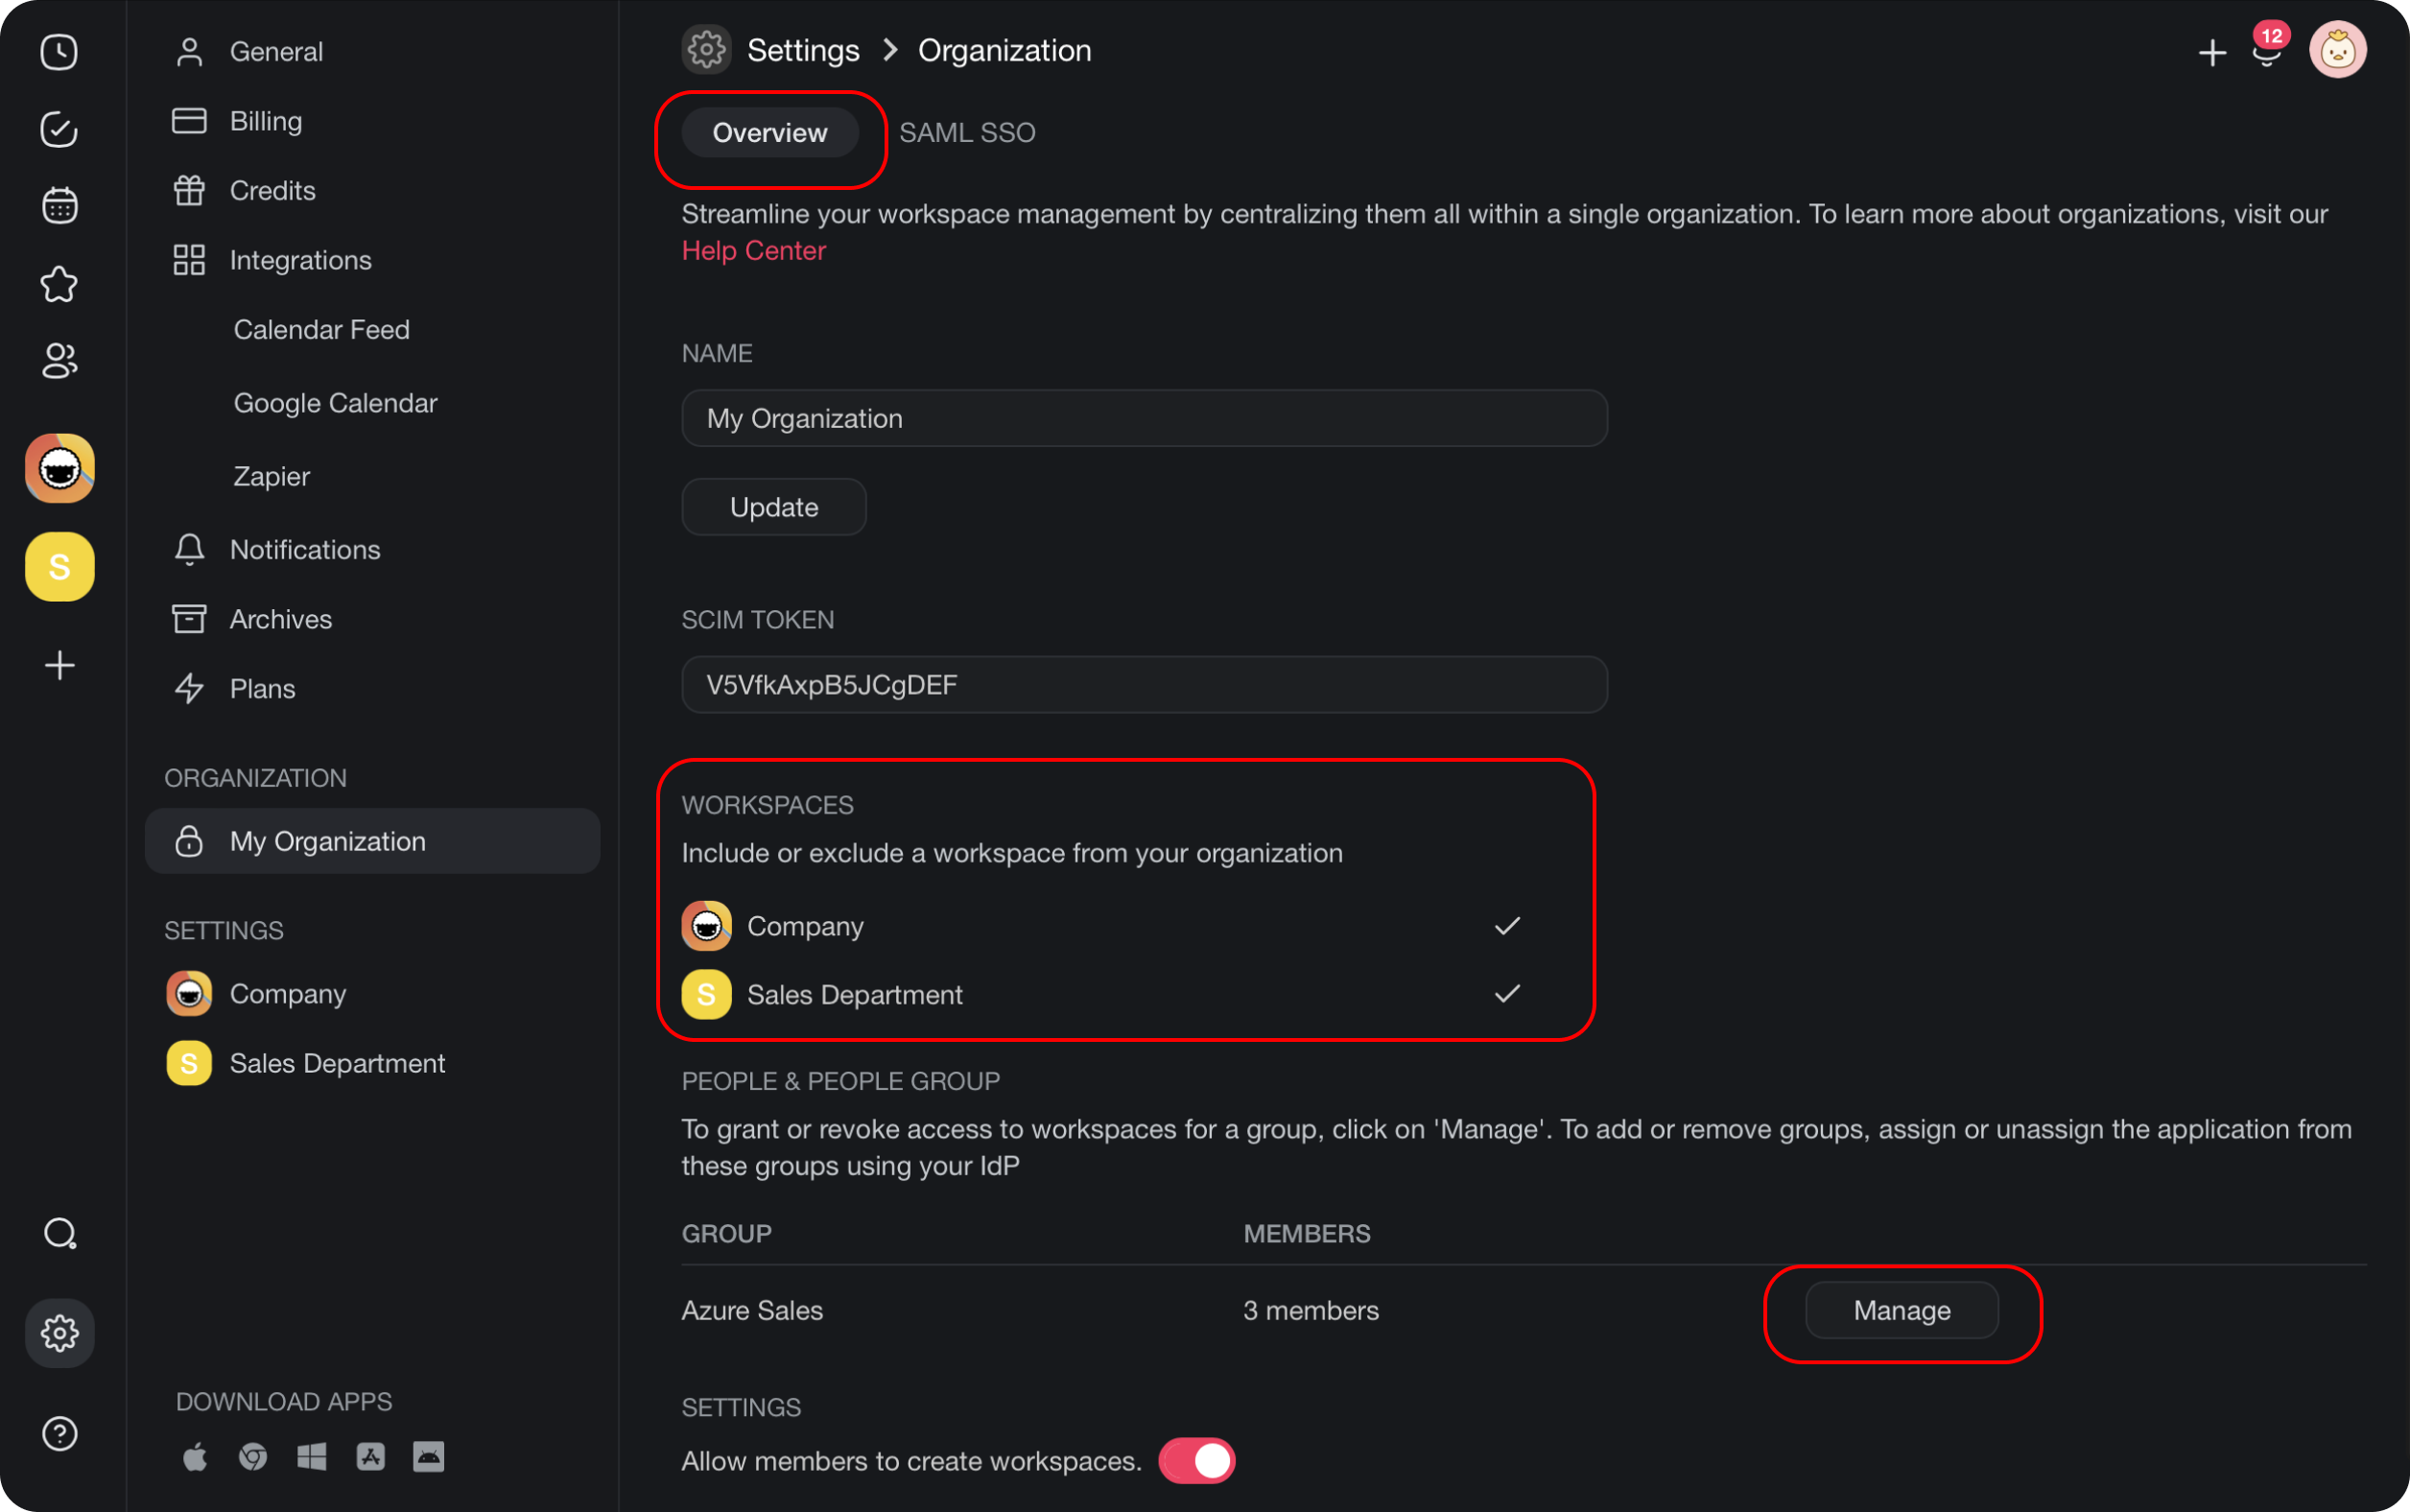
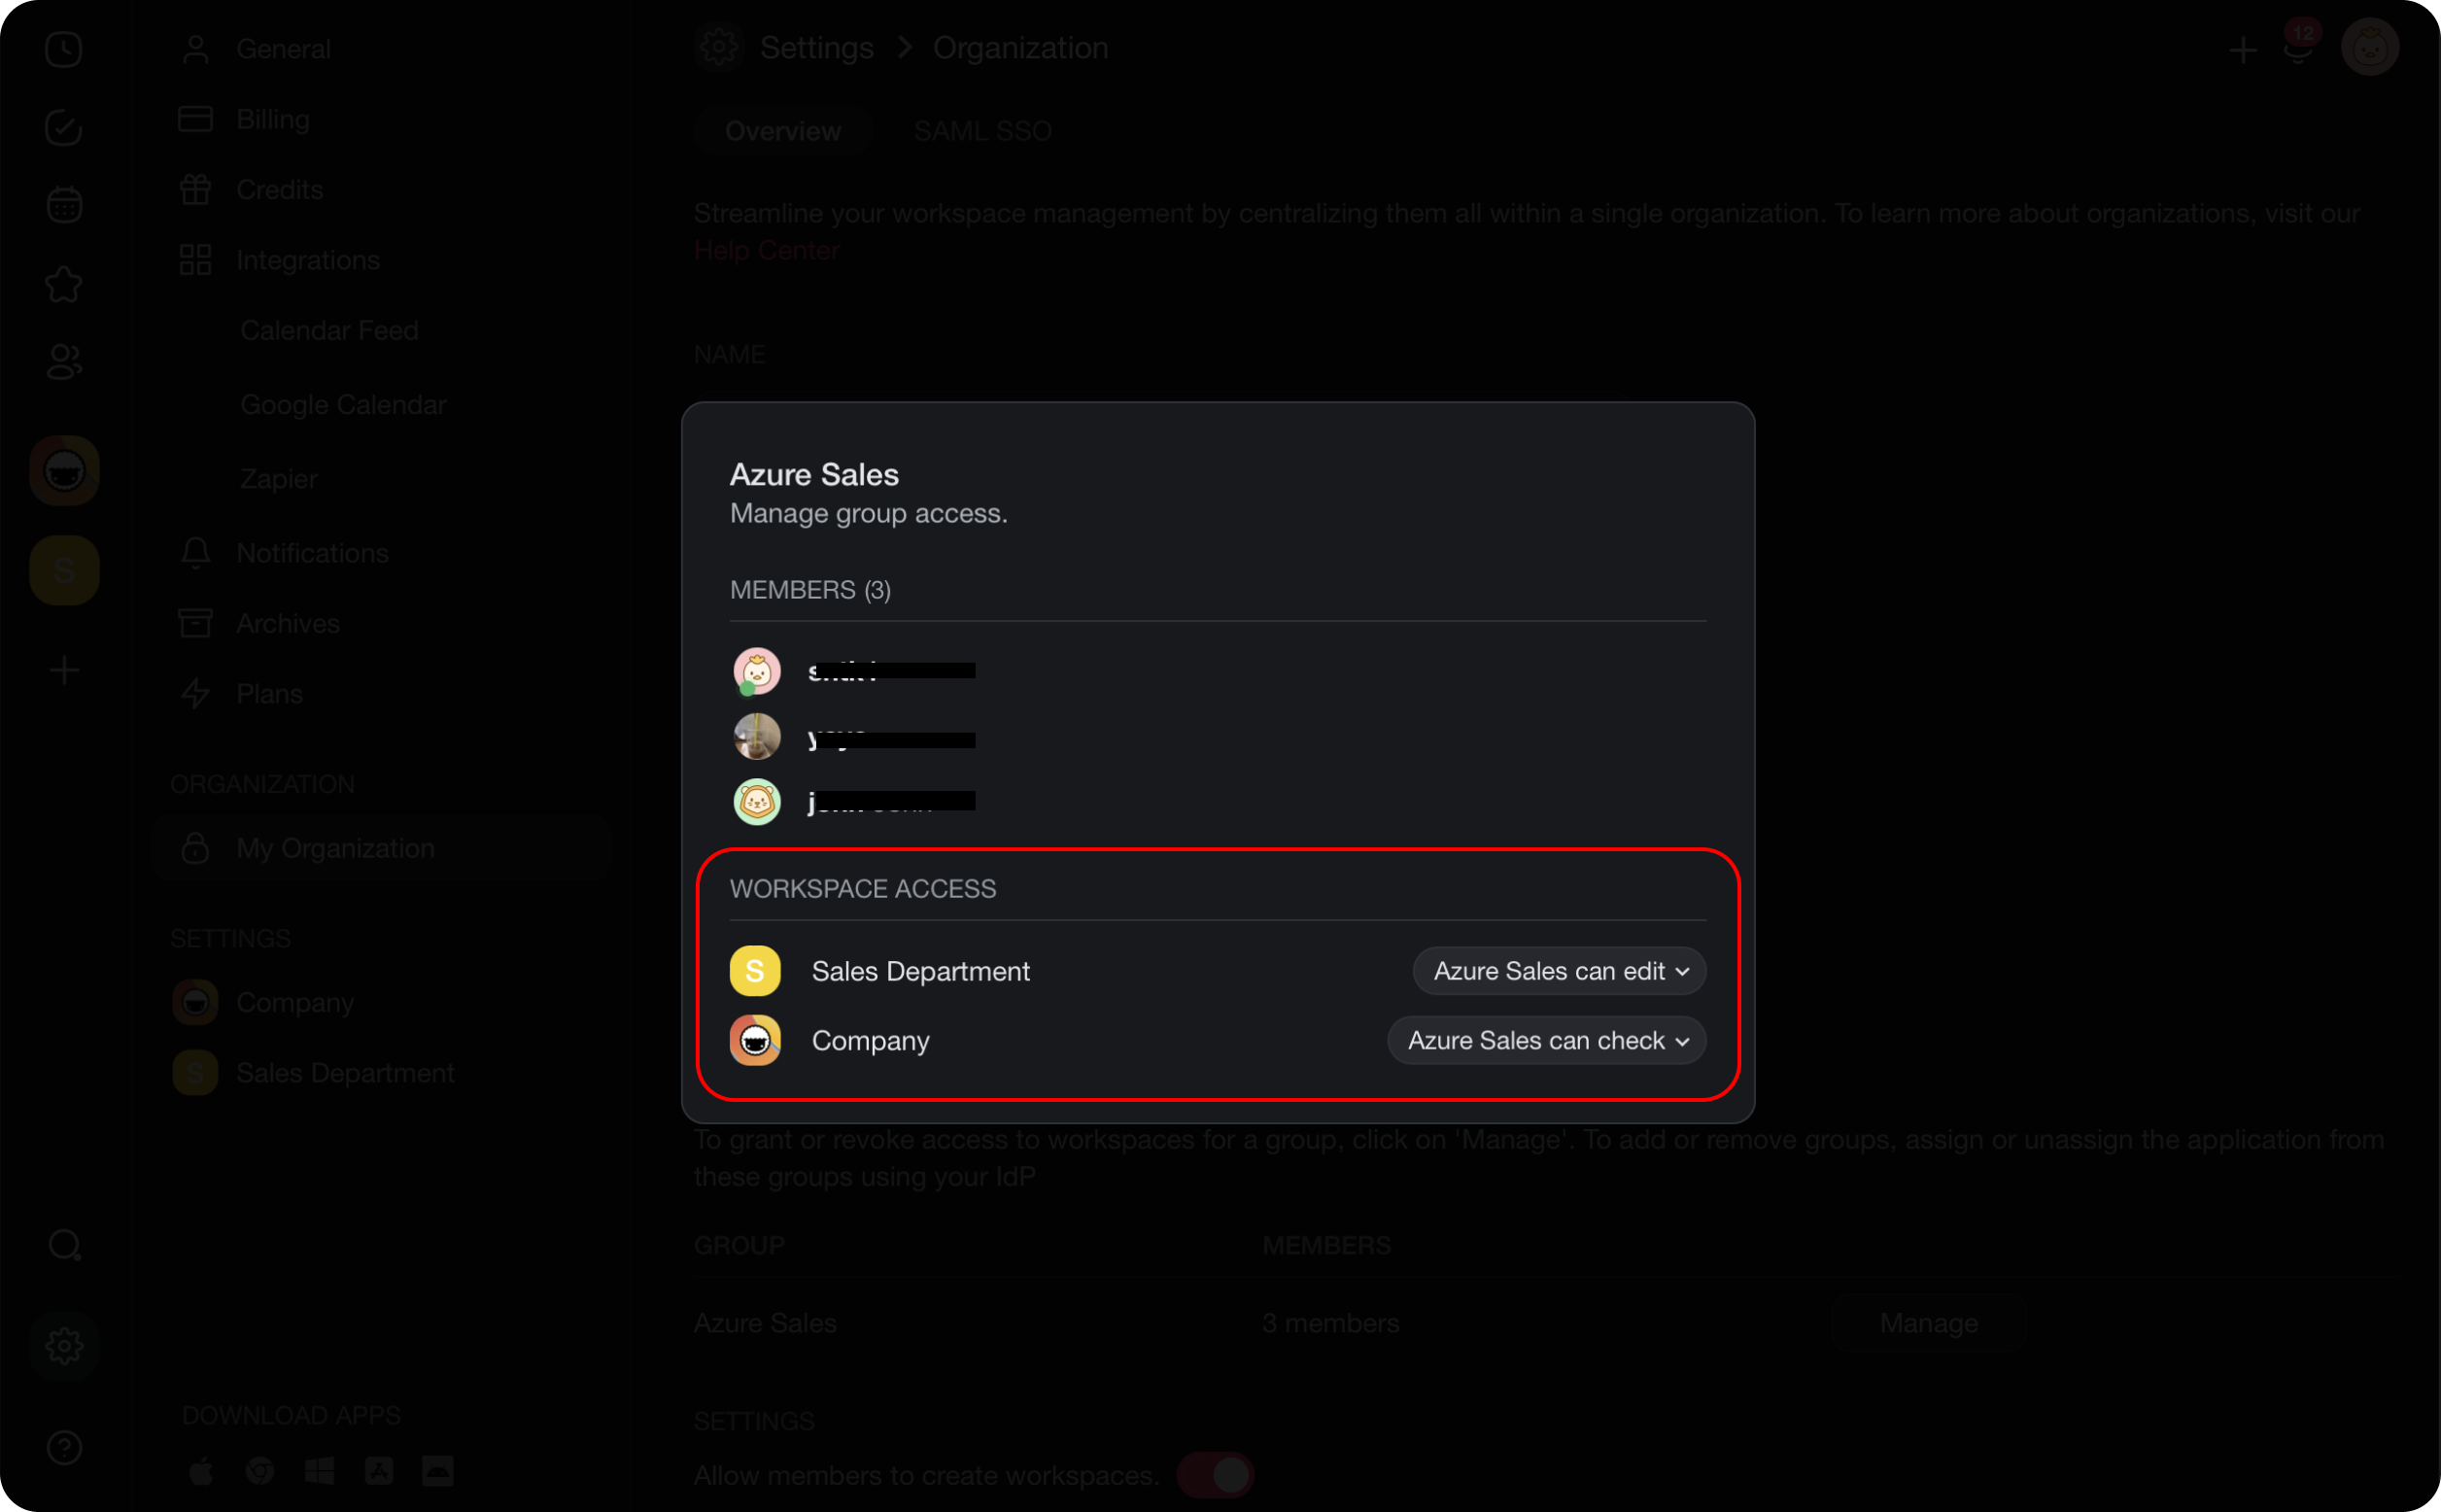
- Adjust the group access level for each workspace.
💡 Note: Any group with workspace access will have access to the home folder. Access to other folders can be managed individually within the workspace.
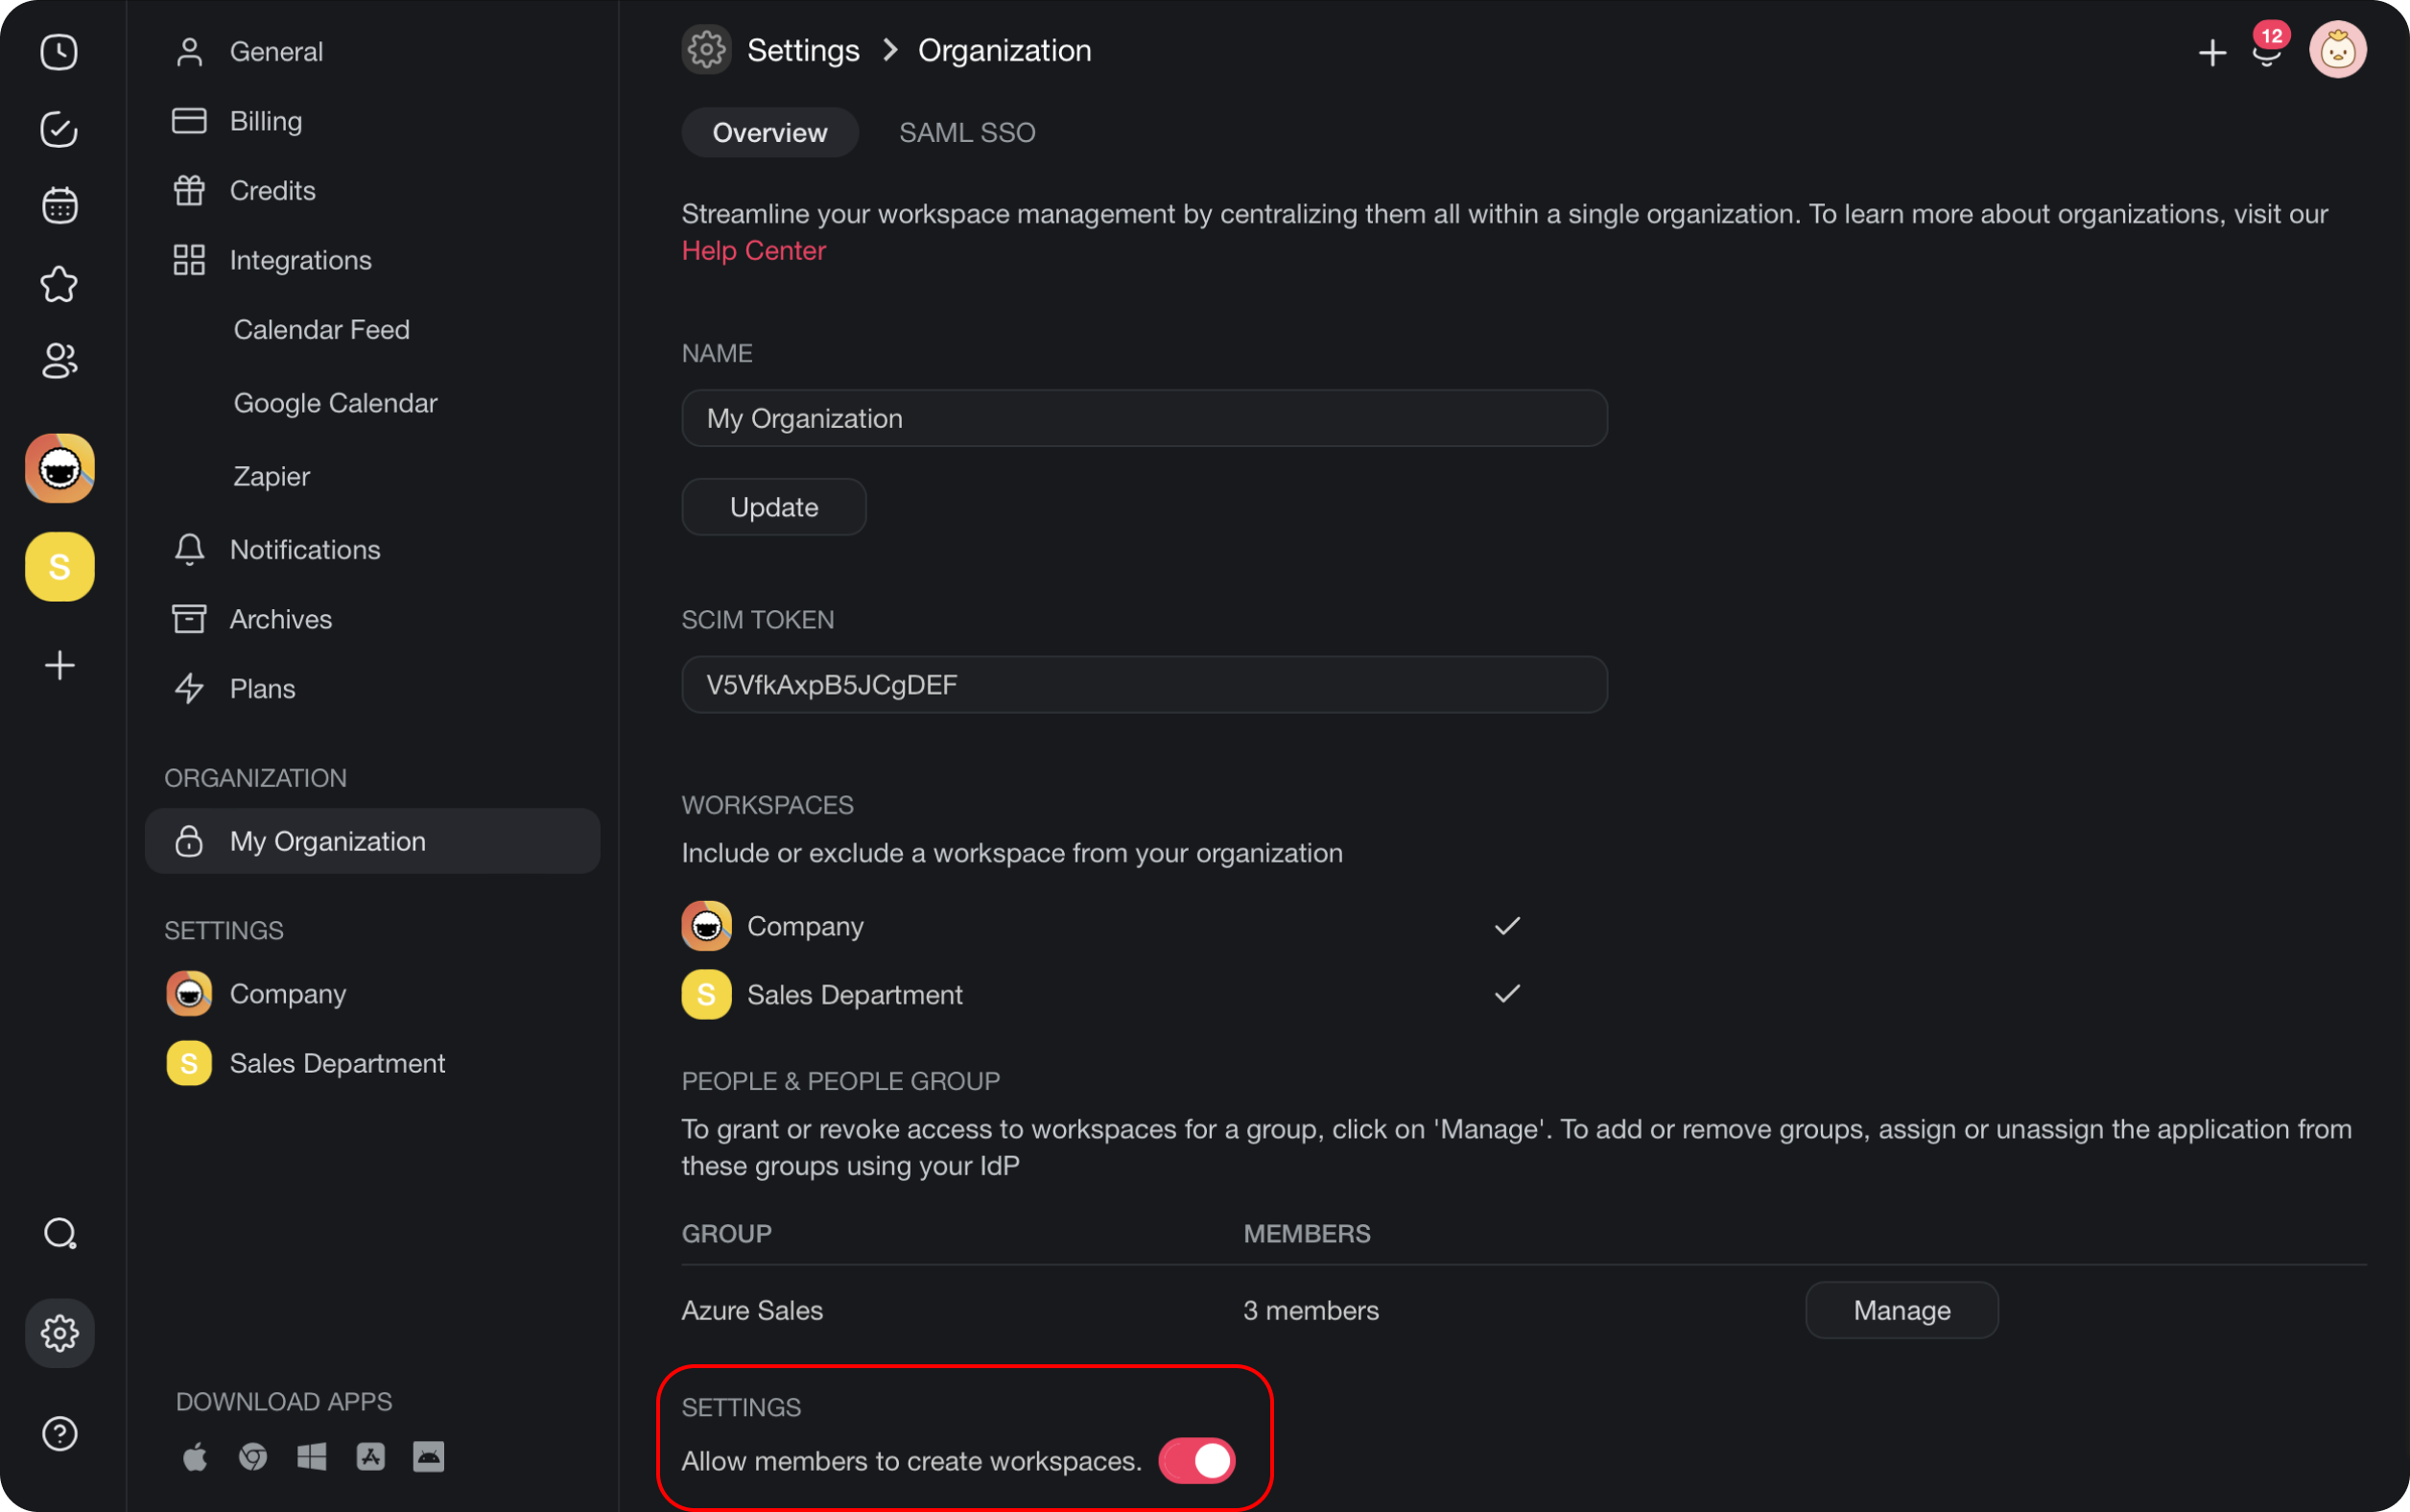
To prevent organization members from creating their own workspaces, disable the Allow members to create workspaces option in the organization settings.
If you need help with configuring SCIM, please email [email protected].
Related guides
- SAML via Azure AD — Configure SSO before SCIM
- SCIM via Okta — Same automation flow with Okta as IdP
- Transfer Ownership — Hand off the workspace
- Workspace Privacy — Folder and workspace access controls