
What Is Agent Automation?
Agent automation allows you to quickly build automation flows with your custom AI agents in the center to perform sequences of tasks without intervention. Instead of agents waiting for you to prompt them, automations call agents on triggers like emails, schedules, webhooks, and project events.
TL;DR: Put a custom AI agent inside an automation so it runs on triggers instead of waiting for prompts. The agent reads each input, makes a judgment call, and acts across 100+ integrations. Use the Automation interface for rule-based work and agent automations for tasks that need understanding.
The full Workspace DNA loop: Memory triggers Intelligence, Intelligence uses tools and updates Execution, Execution writes back to Memory. Every run feeds the next.
💡 Note: This feature is part of our Automation Interface.
Build Agent Automations
You can set up your first agent automation in a few steps:
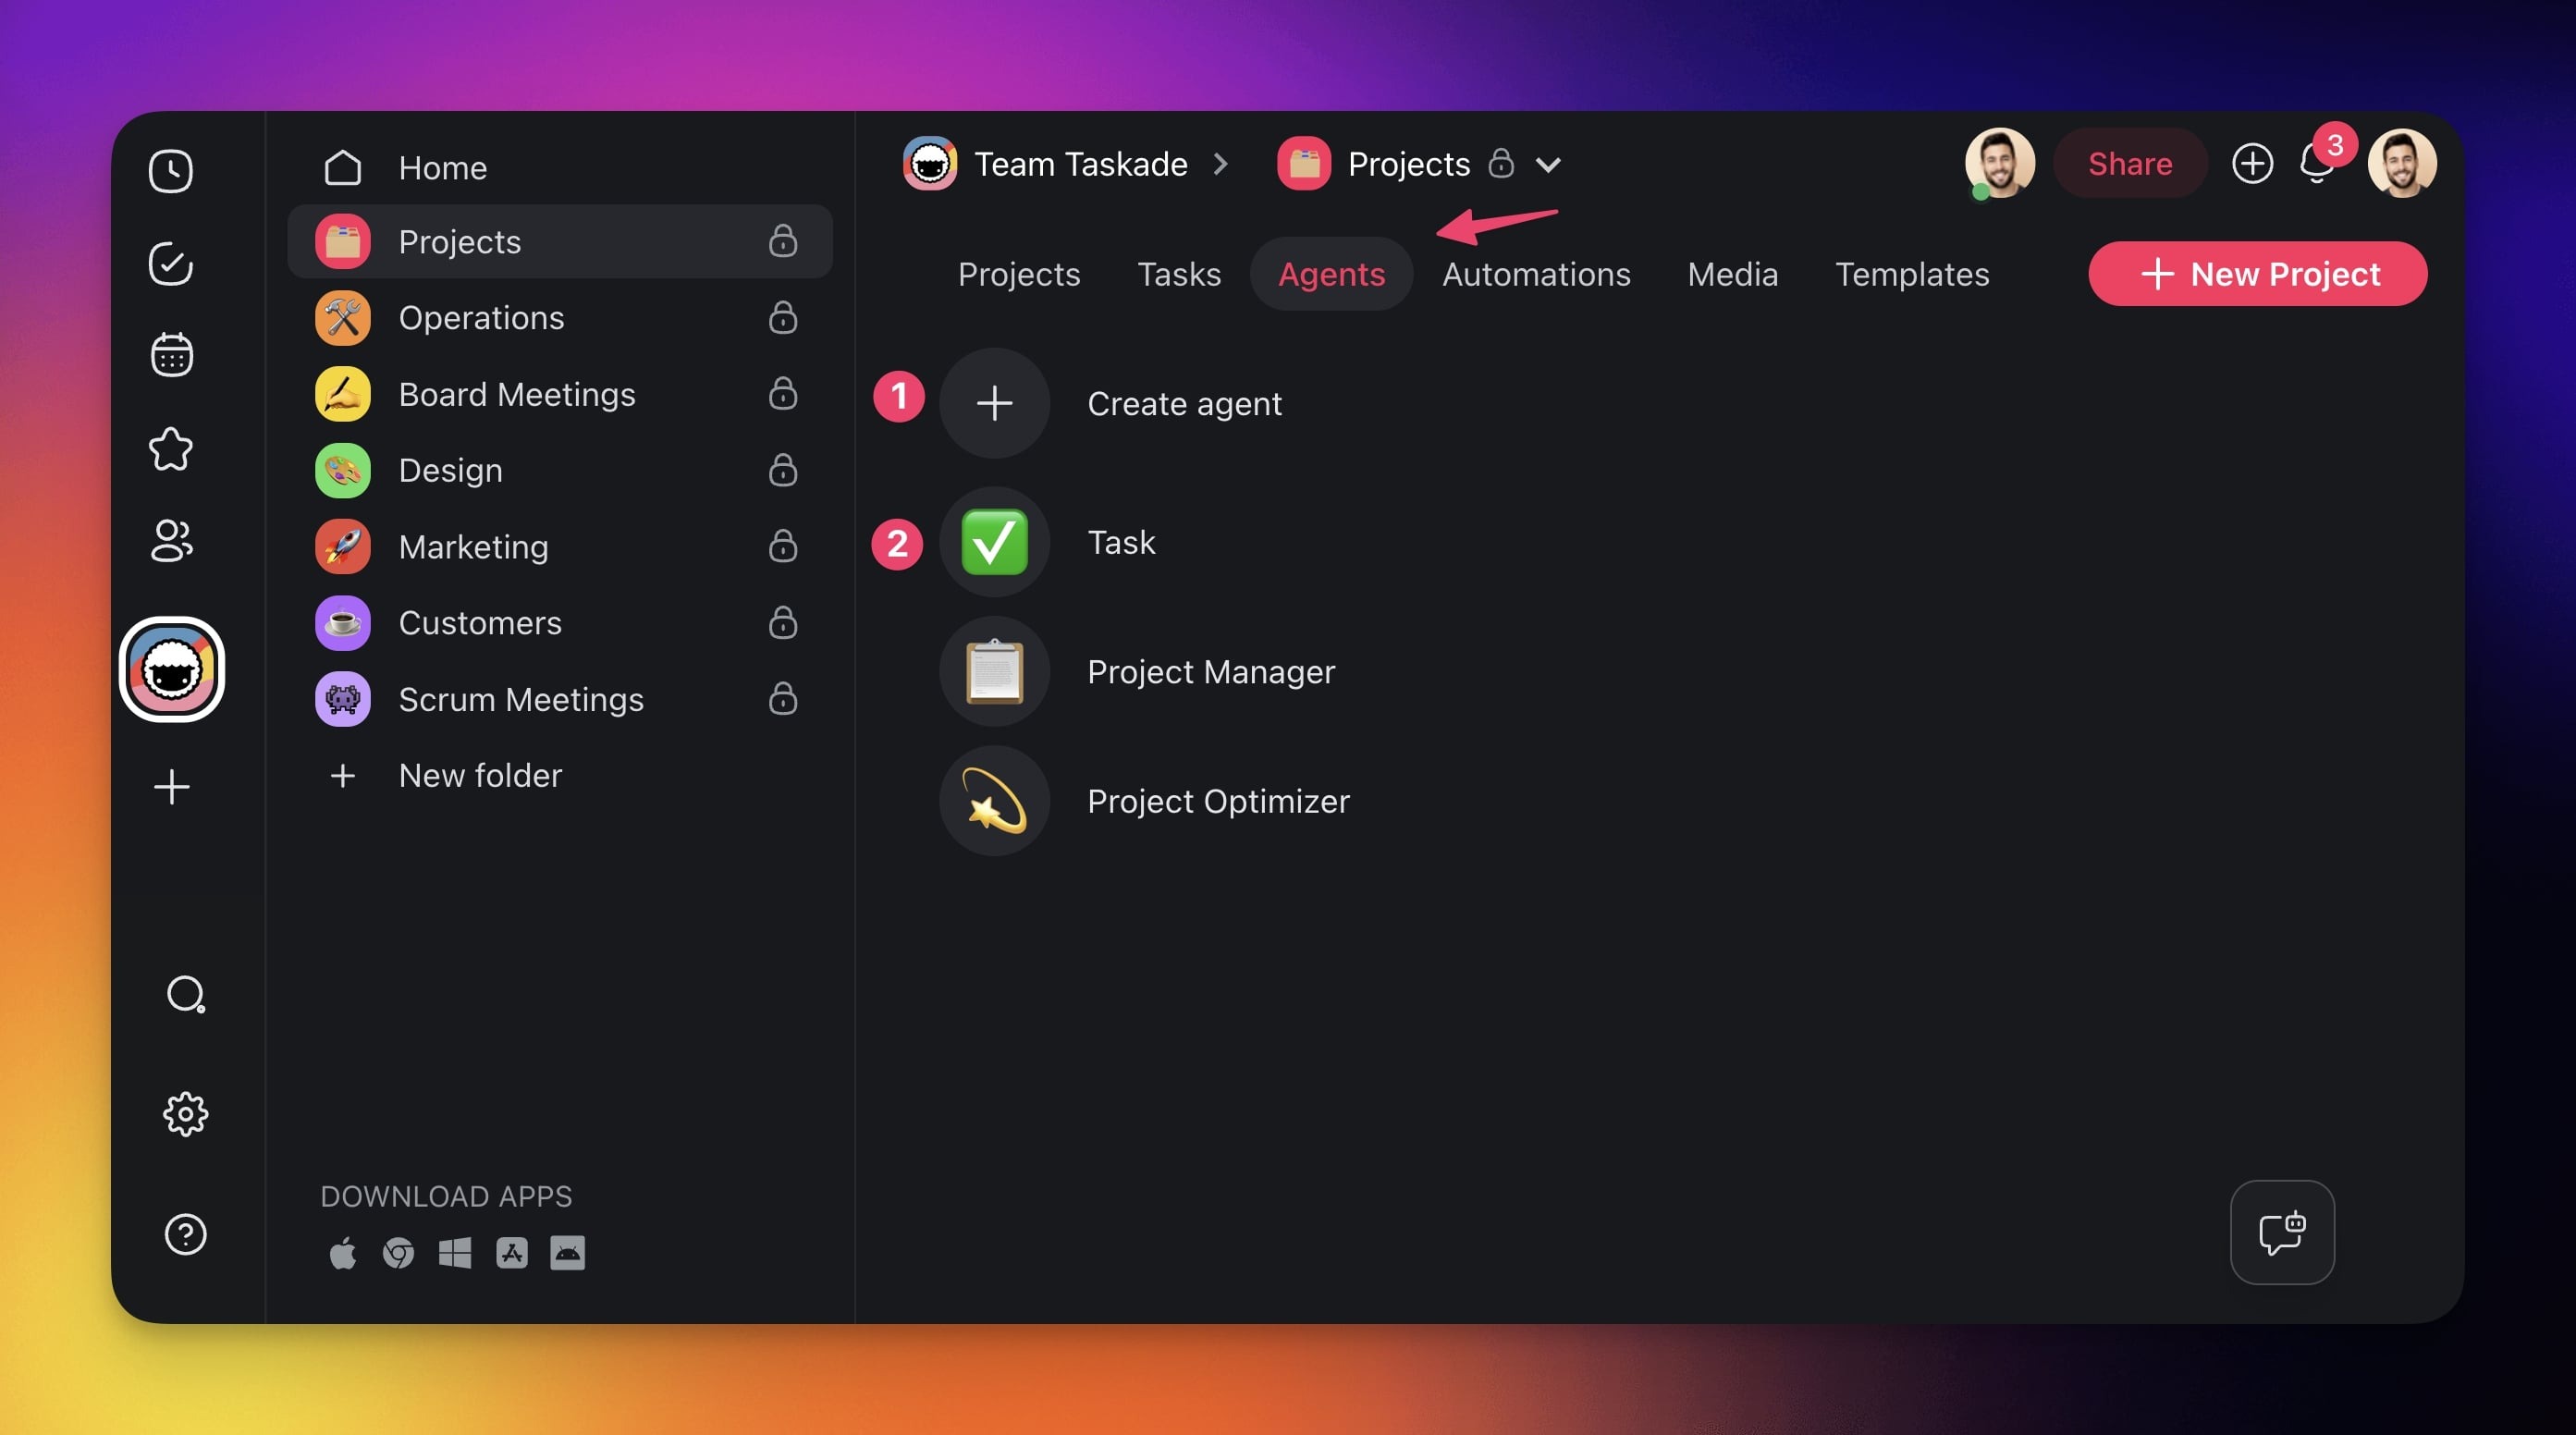
- Go to the Agents tab at the top of your workspace/folder.
- (1) Select an existing agent or (2) create a new one.
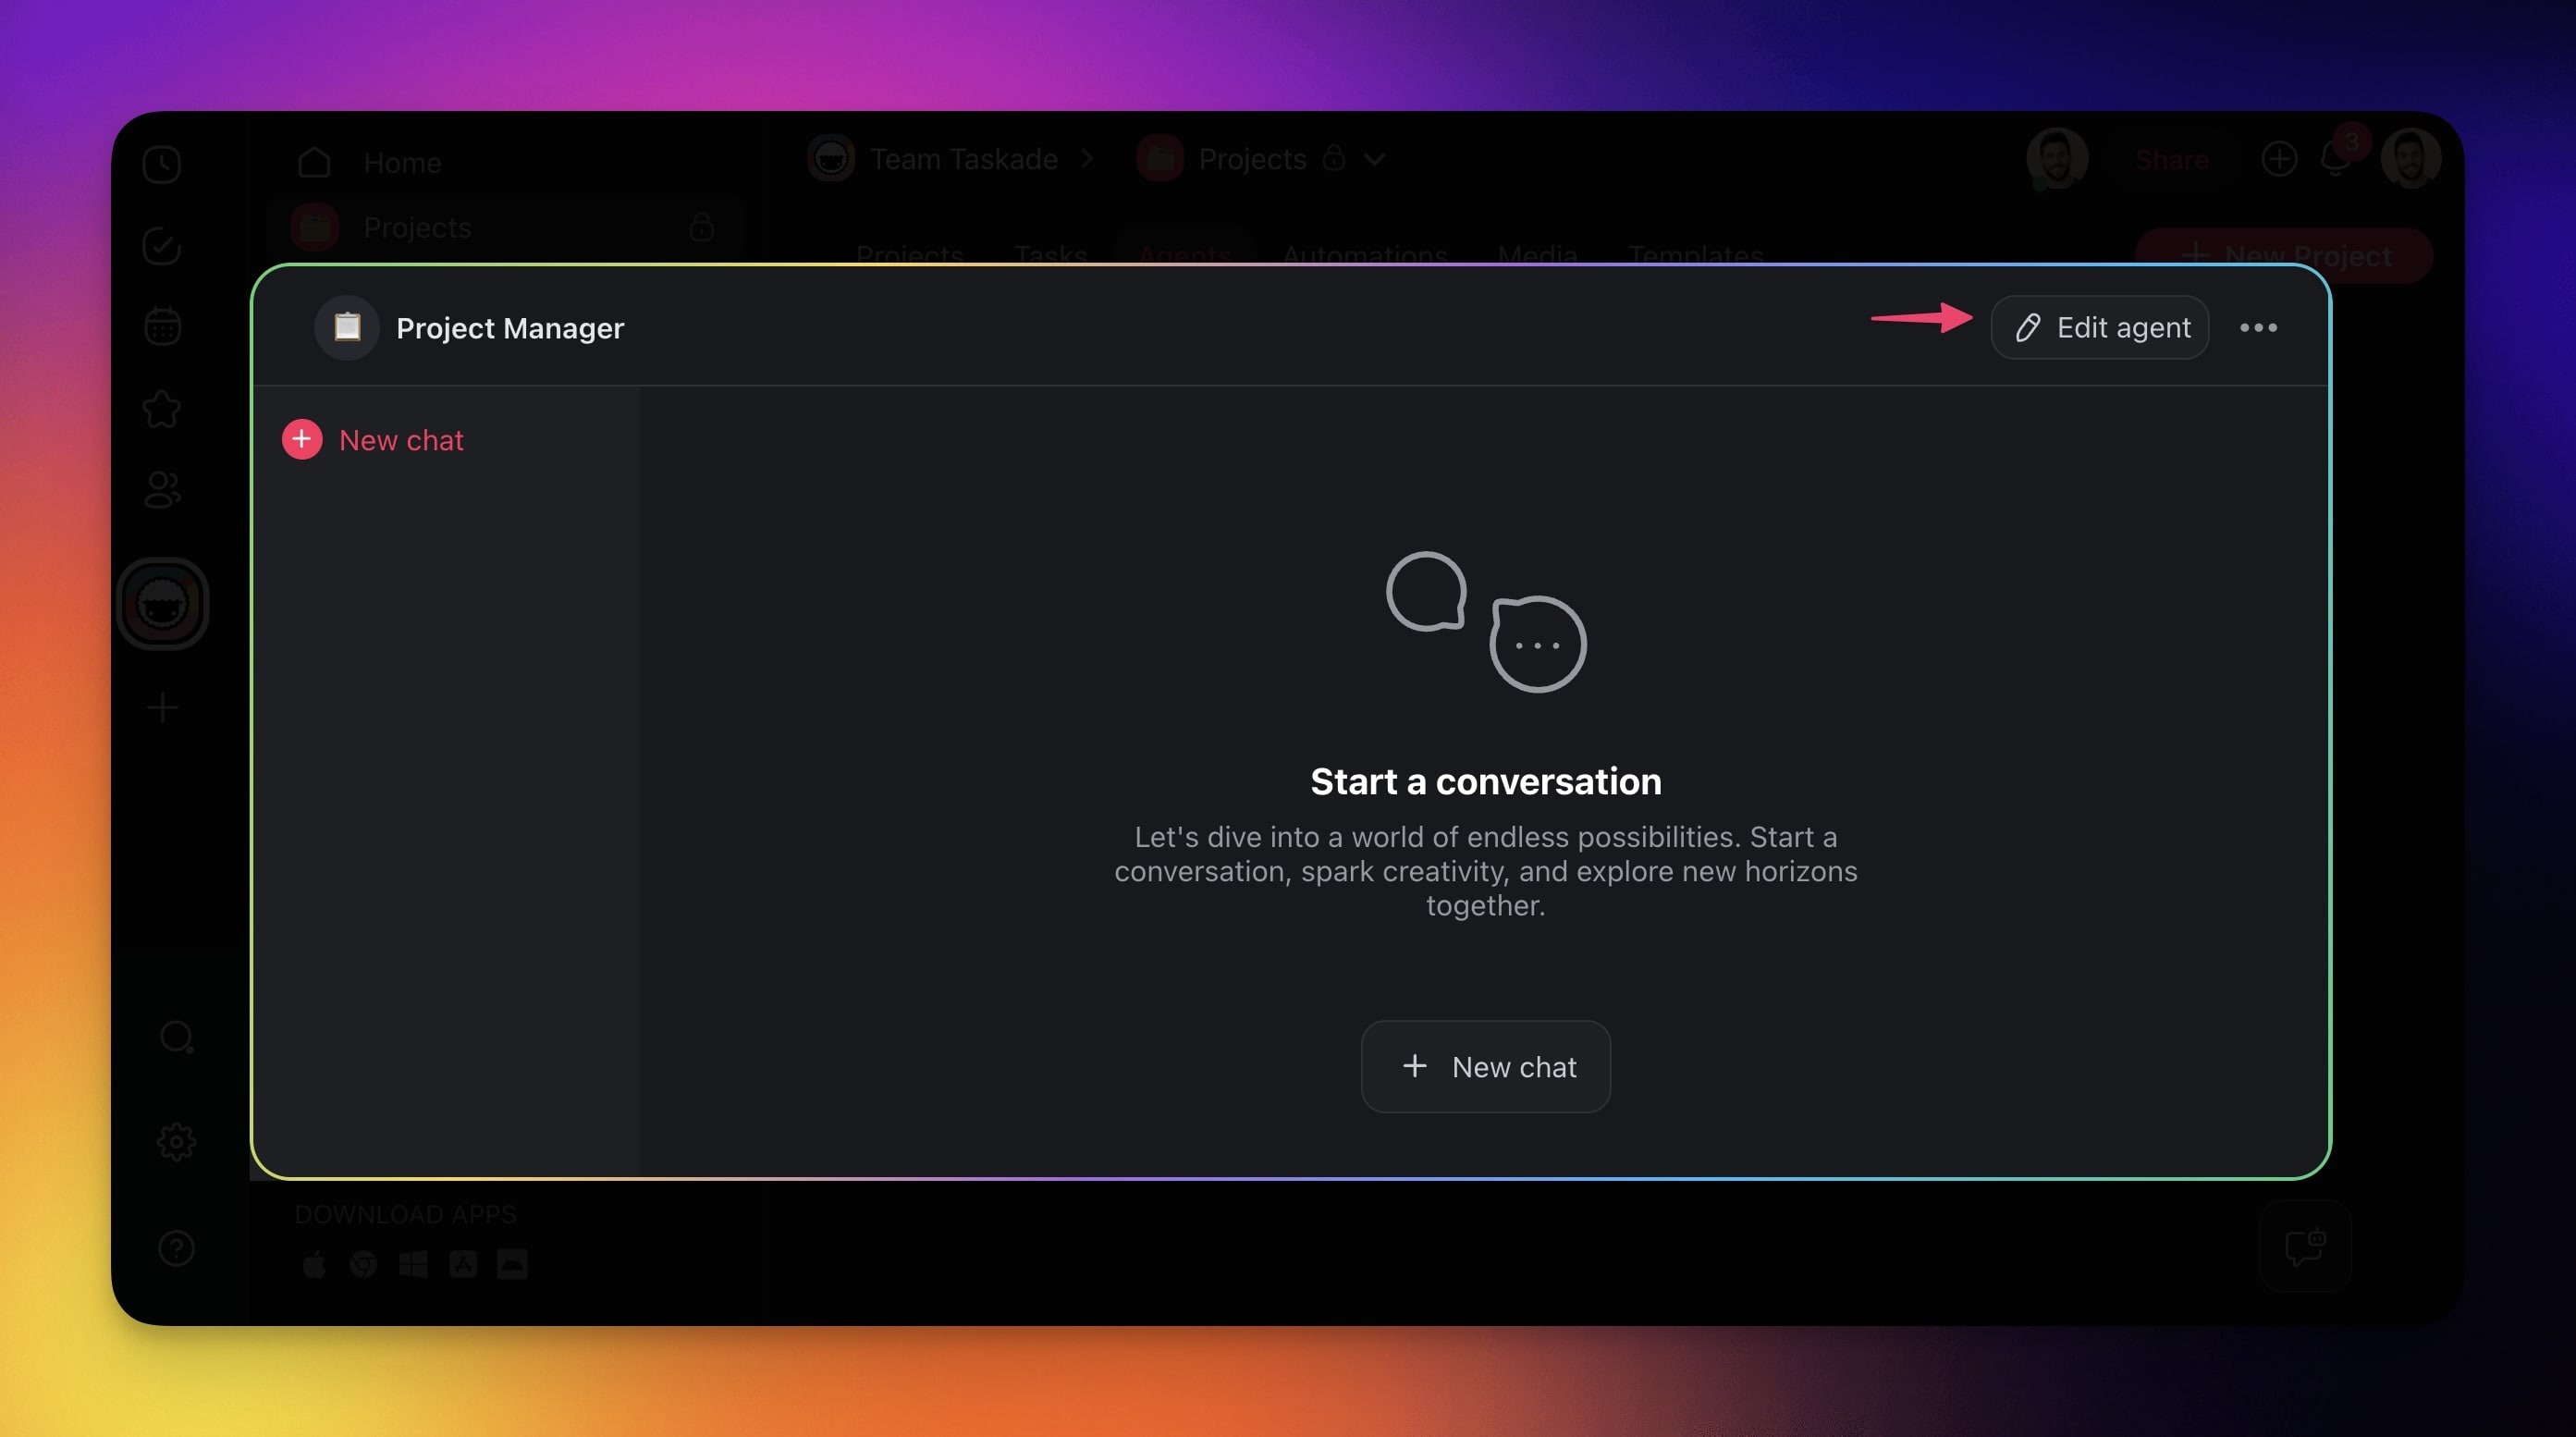
- Click ✏️ Edit agent in the top-right corner.
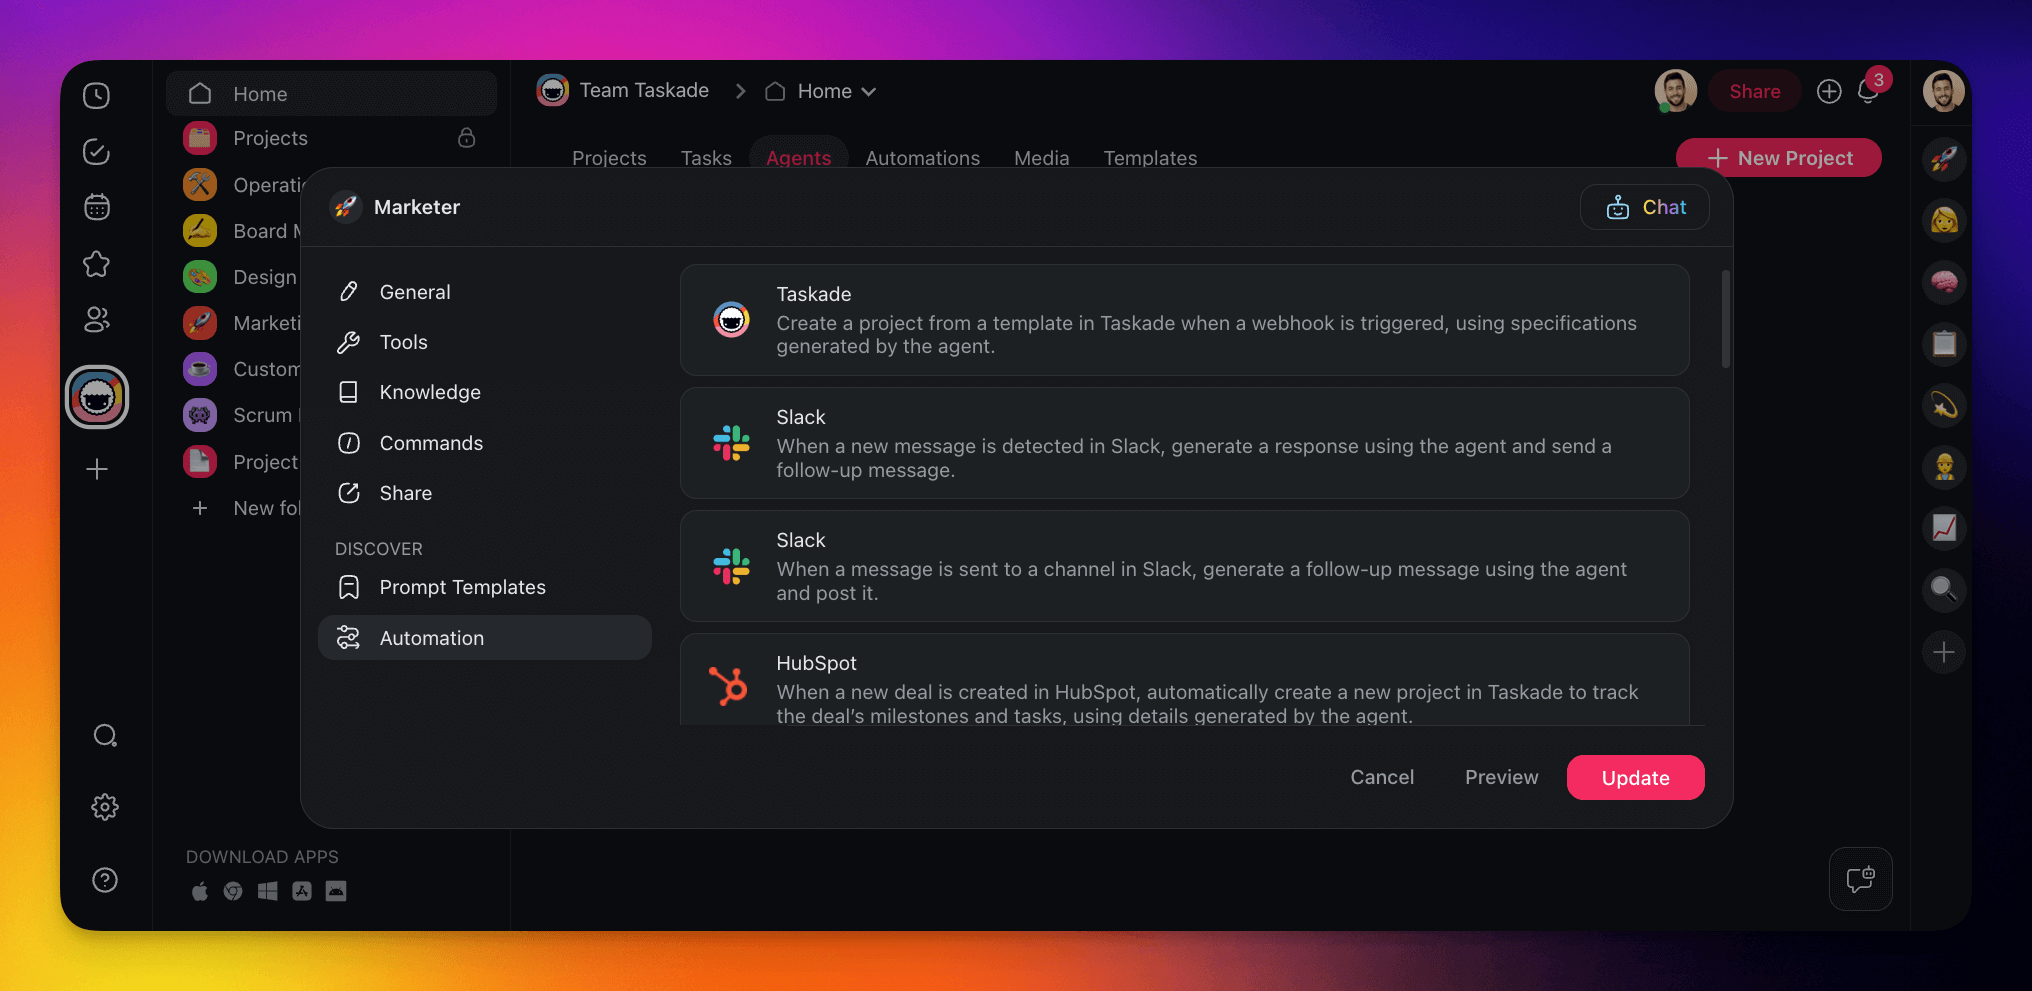
- Go to the Automation tab on the left.
- Choose one of the available connectors to instantly create an automation flow.
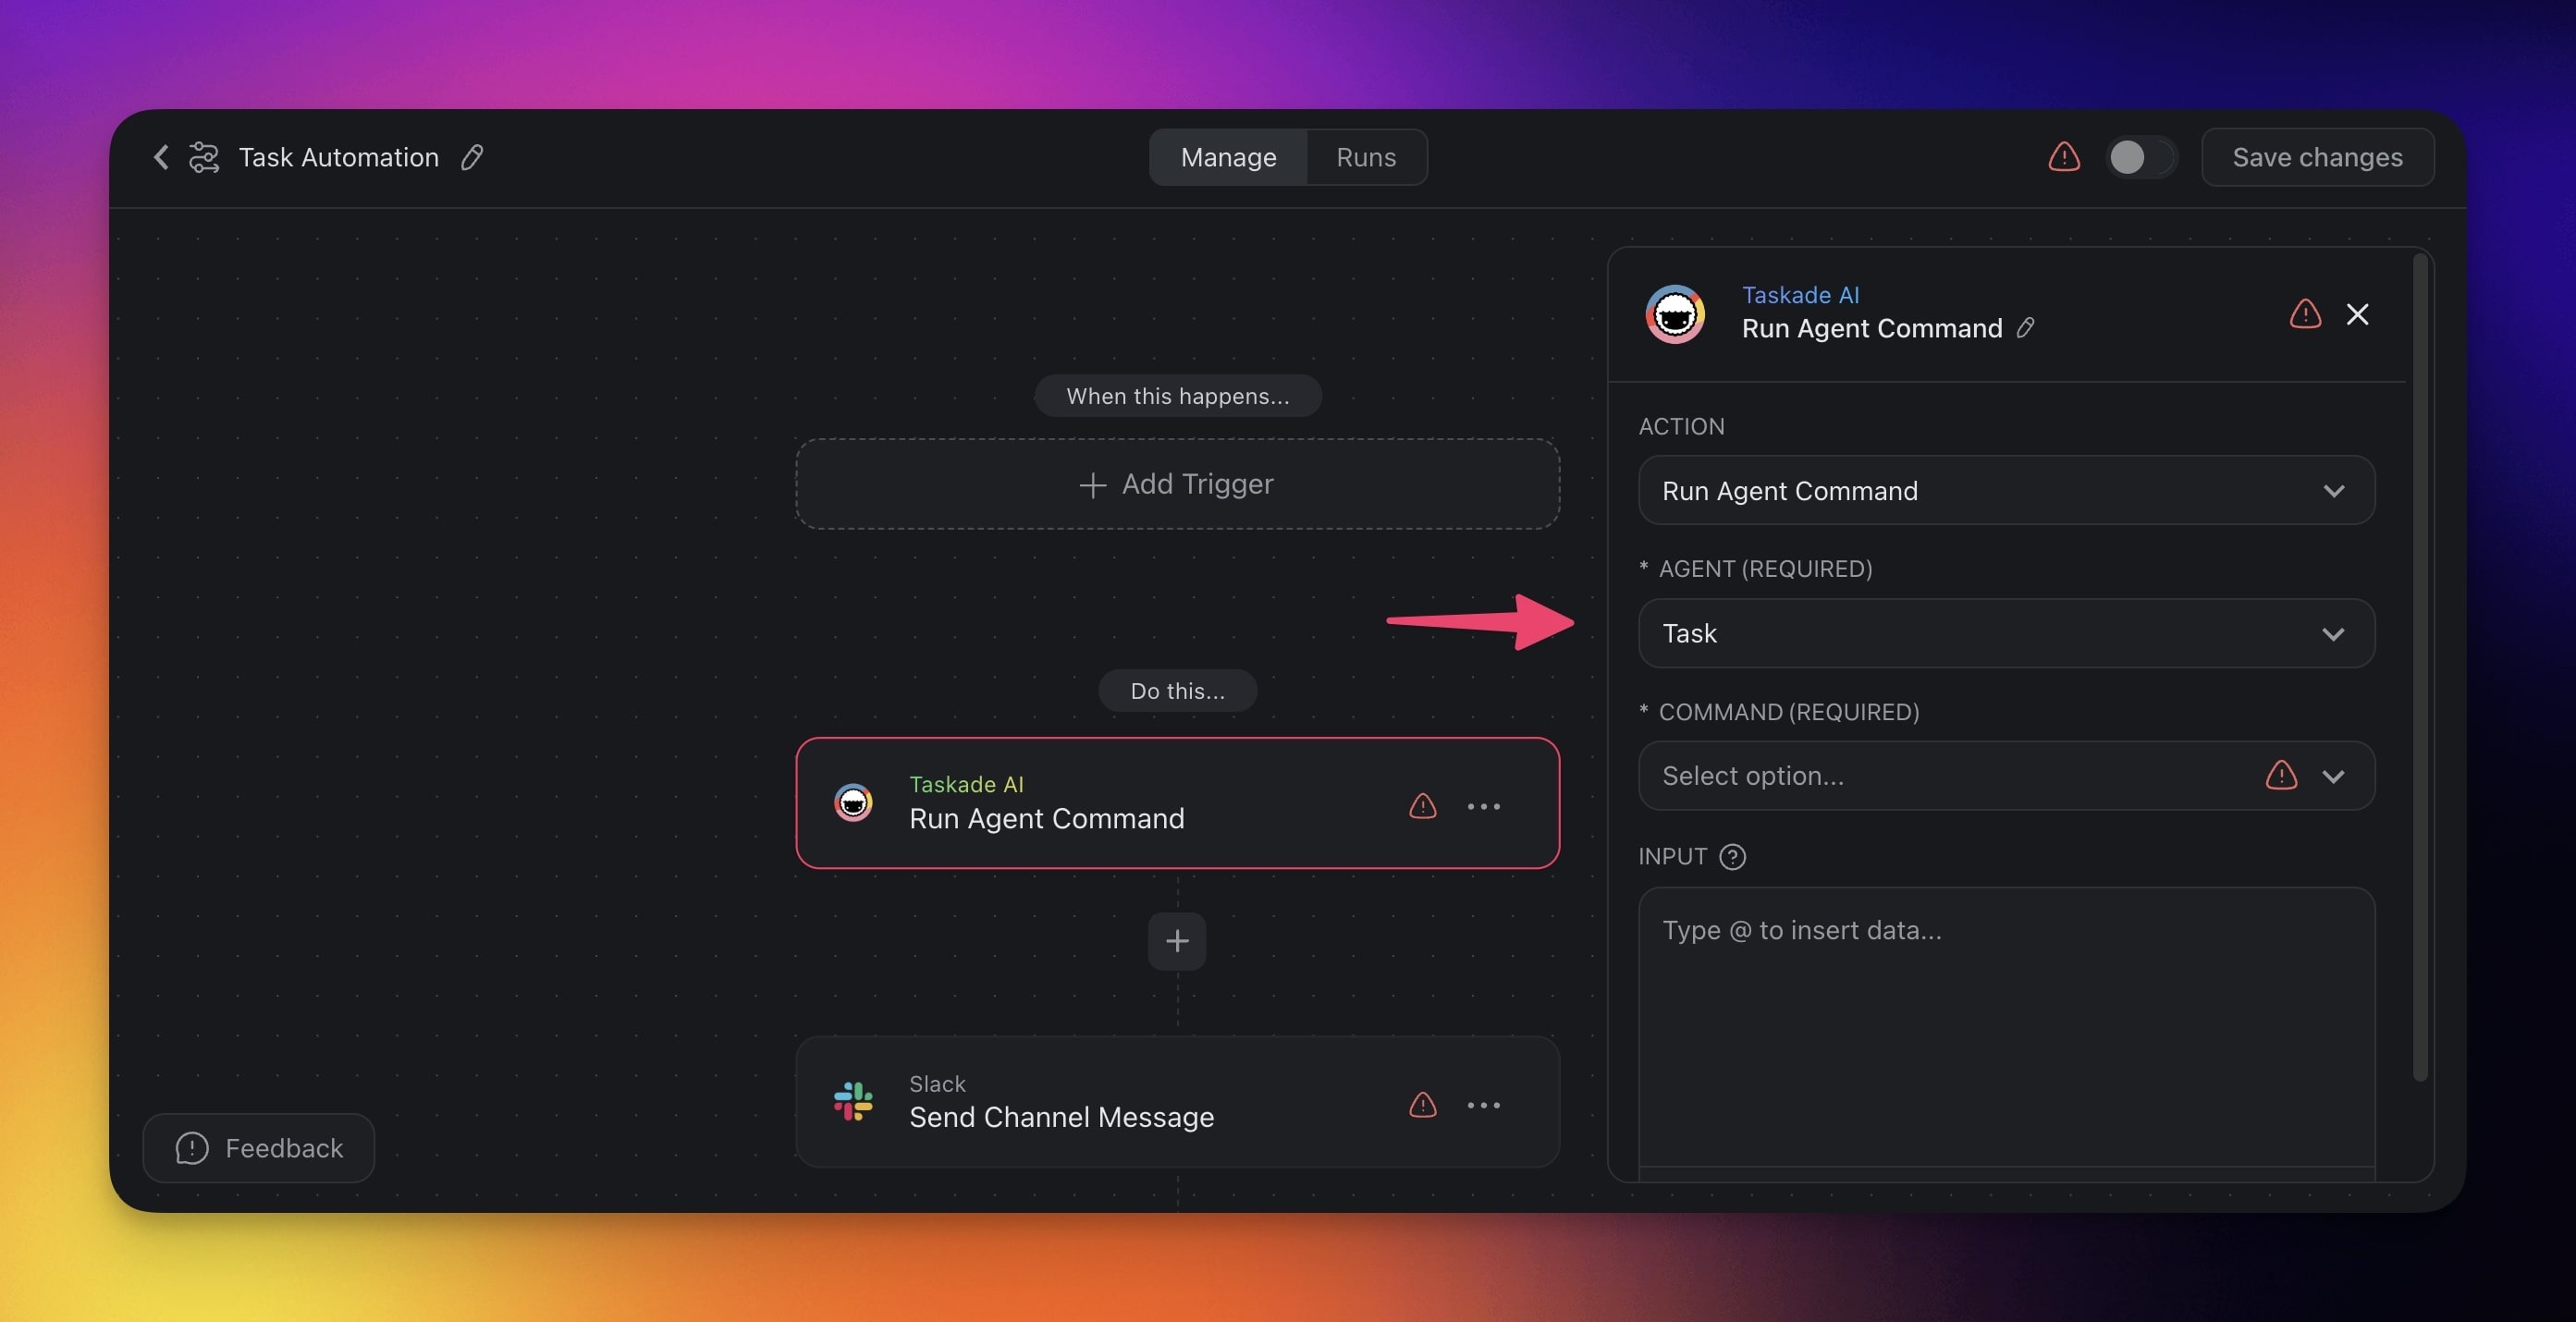
- Finish setting up your agent automation in the creator.
💡 Note: Visit our Getting Started Automation guide to learn more.
When to Use Agent Automation vs. Standard Automation
Taskade offers two types of automations. Here's when to use each:
| Feature | Standard Automation | Agent Automation |
|---|---|---|
| Logic | Fixed rules: if this, then that | AI decides what to do based on context |
| Best for | Repetitive, predictable tasks | Tasks that need judgment or language understanding |
| Setup | Select trigger → choose actions → done | Select trigger → configure agent instructions → choose actions |
| Example | "When a task is completed, move it to Done" | "When a support email arrives, read it, classify priority, and draft a reply" |
| Flexibility | Follows exact rules every time | Adapts to different inputs and contexts |
Rule of thumb: If you can describe the task as a simple if/then rule, use a standard automation. If the task requires reading, understanding, or making decisions, use an agent automation.
Step-by-Step: Build Your First Agent Automation
Here's a complete walkthrough to create an agent automation that drafts email replies from support tickets:
Step 1: Create the automation
- Go to your workspace and click the Automations tab
- Click + Add Automation
- Choose a trigger — for this example, select Email Trigger (fires when a new email arrives)
Step 2: Add an AI Agent action
- Click + Add Action after your trigger
- Select Ask Agent from the action list
- Choose which AI agent should handle the task
- Write clear instructions for the agent, for example:
"Read the incoming support email. Classify the priority as urgent, normal, or low. Draft a helpful reply that addresses the customer's question. Keep the tone friendly and professional."
Step 3: Add follow-up actions
- Add a Branch action to route based on priority
- For "urgent" → add a Send Slack Message action to alert the team
- For all paths → add a Send Email action with the agent's drafted reply
Step 4: Test and activate
- Click Preview to test with sample data
- Review the agent's output and adjust instructions if needed
- Toggle the automation On to activate
Writing Effective Agent Instructions
The agent's instructions determine how well your automation performs. Here are three proven patterns:
| Pattern | Template | When to Use |
|---|---|---|
| Classify & Route | "Read the input. Classify it as [category A / B / C]. Output only the category name." | Ticket triage, lead scoring, content tagging |
| Extract & Summarize | "Read the input. Extract: [field 1], [field 2], [field 3]. Format as a brief summary." | Email parsing, form processing, data entry |
| Draft & Respond | "Read the input. Draft a [type] response. Keep tone [formal/casual]. Include [key points]." | Support replies, follow-ups, acknowledgments |
Tip: Be specific in your instructions. Instead of "handle the email," write "read the email, identify the main question, and draft a 2-3 sentence reply." The more specific your instructions, the more consistent the agent's output.
Agents Can Use Any Automation Action in Chat
Beyond pre-built automation workflows, your agents can use individual automation actions as one-off tools during conversations. This means agents don't need a full workflow to take action — they can do things on the fly.
What agents can do in a single chat message:
| Action | Example |
|---|---|
| Send an email | "Send a follow-up email to [email protected] with the meeting summary" |
| Post to Slack | "Post this week's report to the #marketing Slack channel" |
| Create a spreadsheet row | "Add this lead to the Google Sheets CRM" |
| Create a GitHub issue | "Create a bug report in our GitHub repo for this issue" |
| Send a Discord message | "Notify the team on Discord that the deployment is ready" |
How to enable it:
- Open your agent's settings
- Go to the Tools tab
- Enable the specific automation actions you want your agent to use
- Your agent will ask for your approval before executing any action (human-in-the-loop)
Taskade EVE: Your Automation Orchestrator
Taskade EVE can assemble complete agent-automation workflows from a single prompt. Describe what you want:
- "Create a support agent that escalates urgent tickets to Slack"
- "Build a sales agent that logs qualified leads to Google Sheets"
- "Make a content agent that posts to Slack when a draft is ready for review"
Taskade EVE will configure the agent, enable the right tools, and connect the automation actions — all in one step.
Related guides
- Custom AI Agents — Build the agents that power these automations
- Agent Tools — 34 built-in tools agents can call
- Automations Overview — The full automation interface
- Multi-Agents — Chain specialist agents inside one workflow
- Taskade EVE Assistant — Build agents and automations with one prompt