


Client portals are high maintenance.
Every status update, every file upload, every progress report — it all falls on you. You update the portal, notify the client, then repeat tomorrow. The portal becomes another job, not a solution.
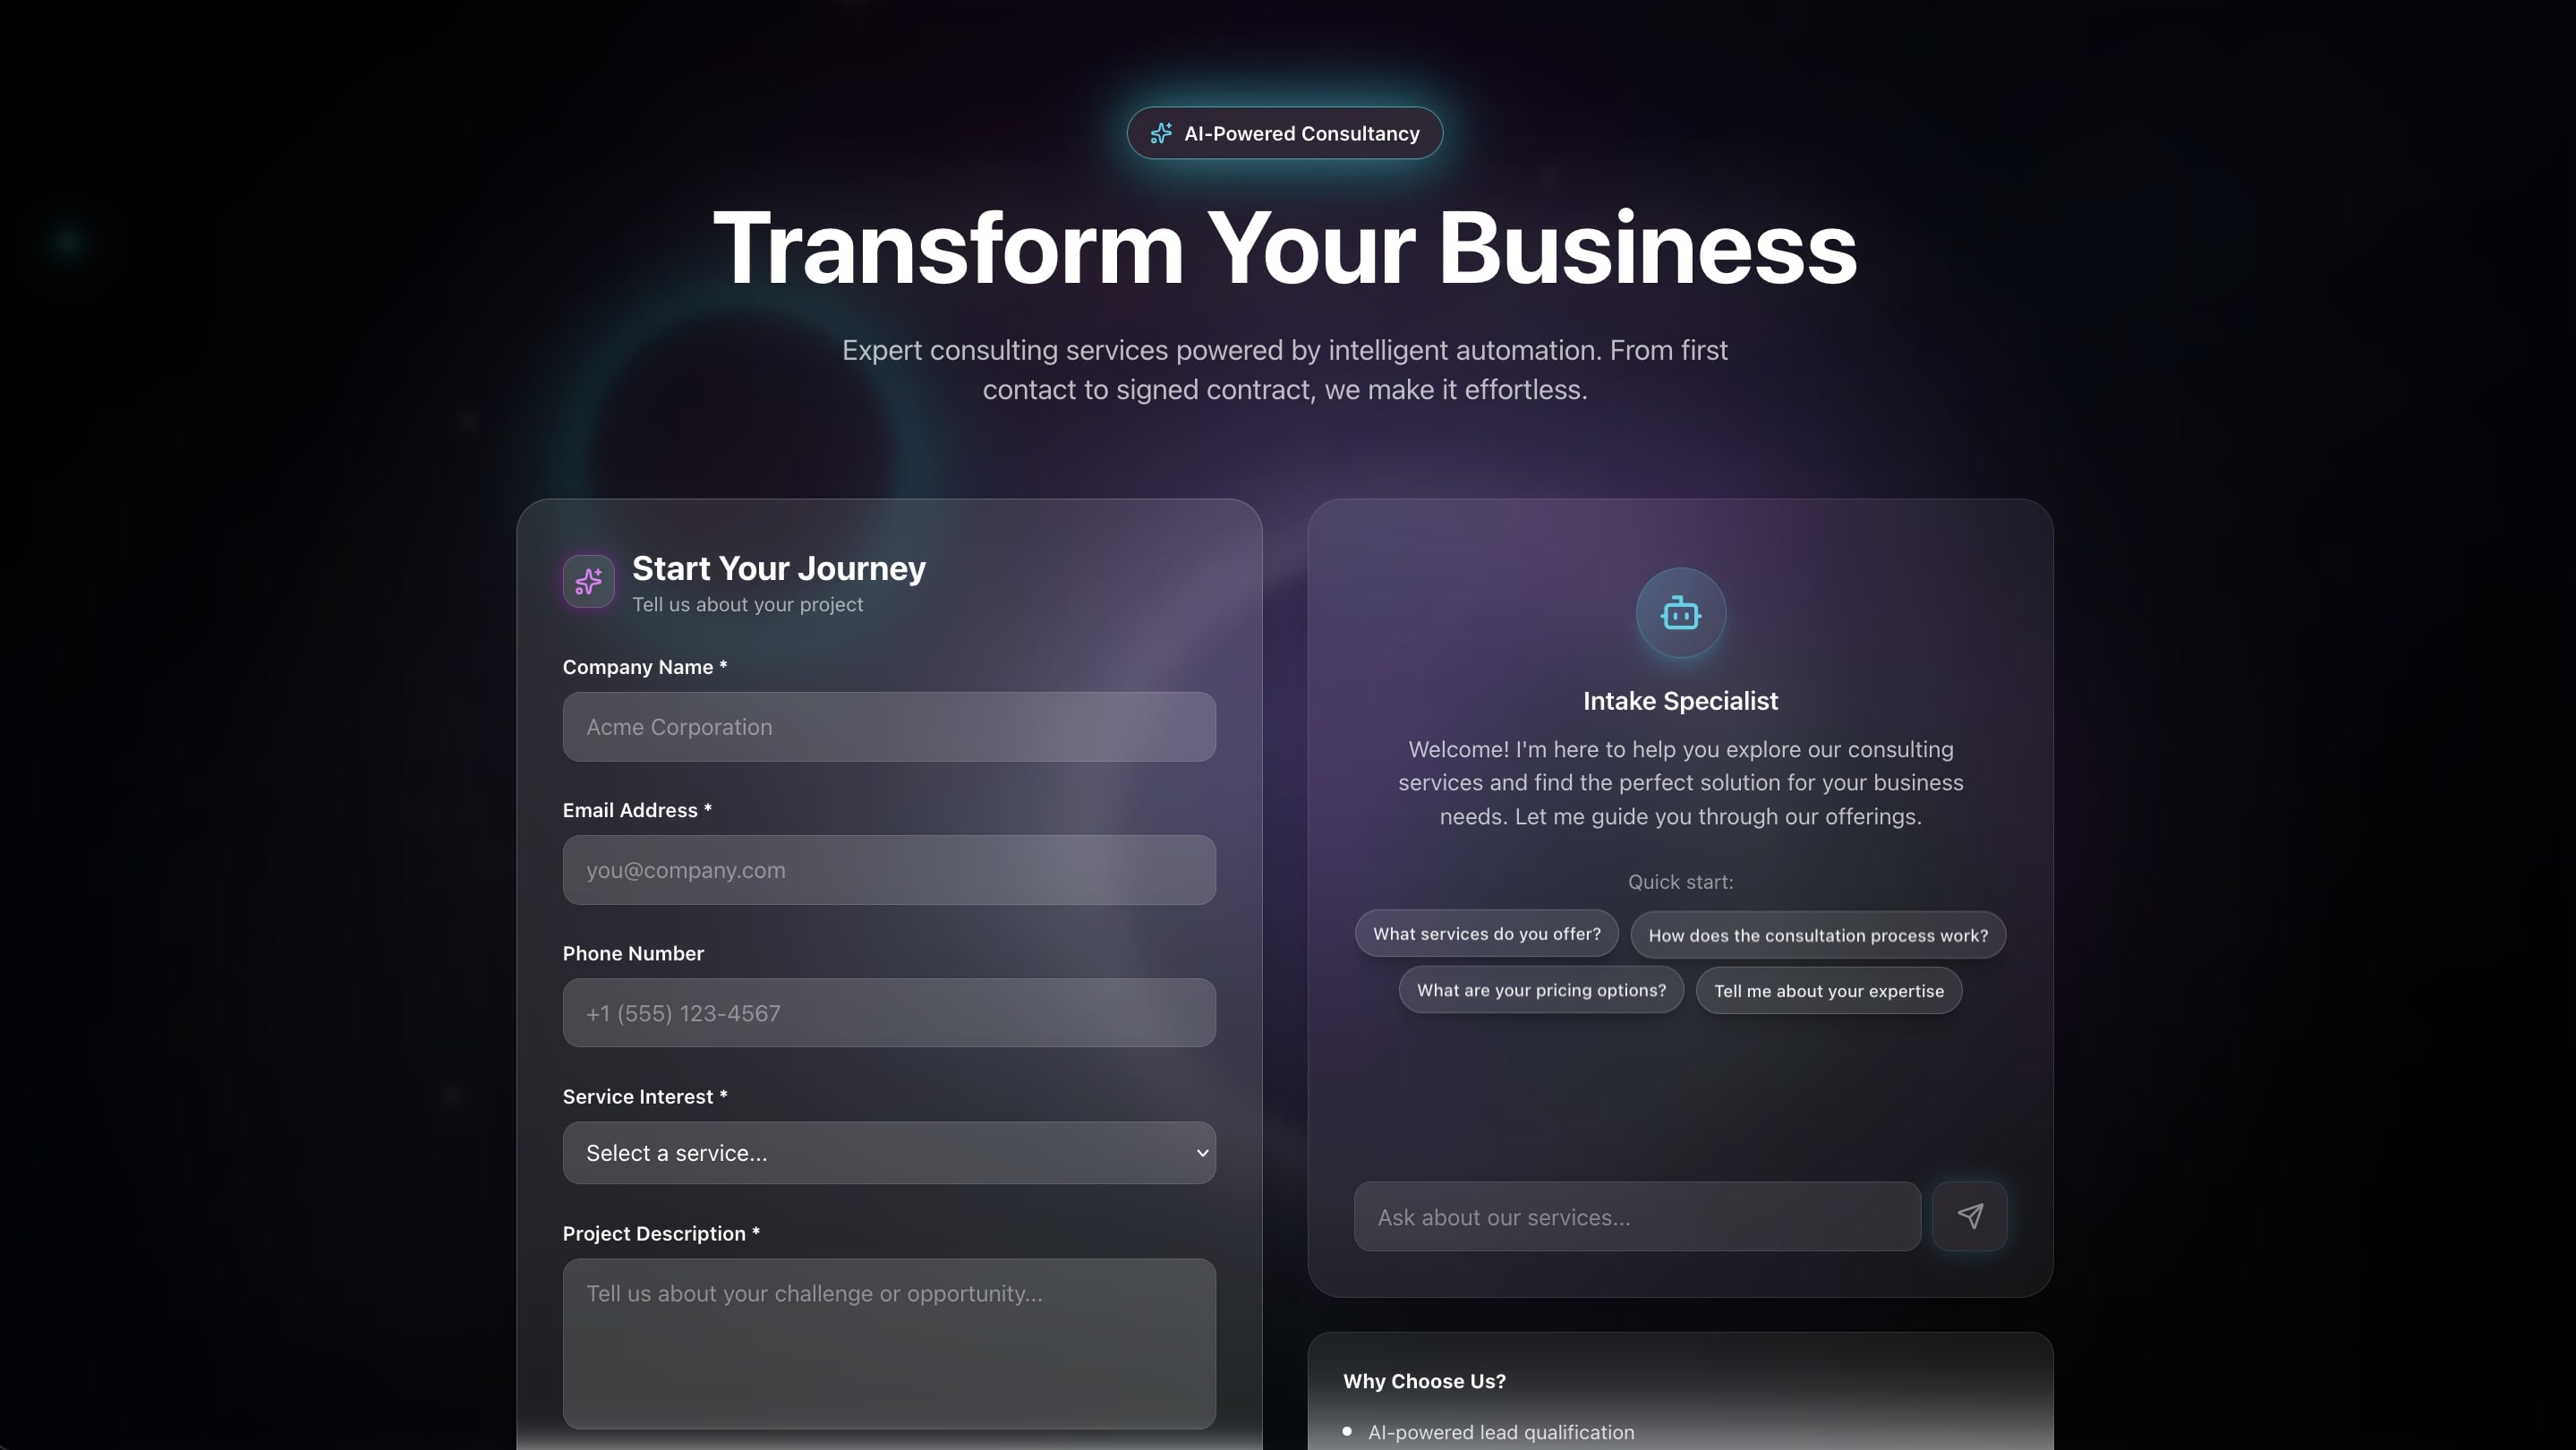
Taskade Genesis builds self-updating portals. Portals that notify, refresh, and evolve automatically. Here is how to build them with AI agents, automations, and 100+ integrations — so your portal works around the clock while you focus on delivery.
TL;DR: Taskade Genesis lets you build client portals that update themselves using Workspace DNA — Memory (Projects) stores client data, Intelligence (AI Agents with 34 tools) crafts responses, and Execution (Automations with 100+ integrations) triggers notifications and syncs external systems. Zero manual maintenance. Try it free →
What Makes a Portal Self-Updating?
A self-updating portal eliminates the manual work between "something changed" and "the client knows about it." Traditional portals require a human in the loop for every notification. Self-updating portals replace that human bottleneck with three automated components.
| Component | Role | Example |
|---|---|---|
| Triggers | Events that start workflows | Project status changed, file uploaded, milestone hit |
| Actions | Tasks that execute automatically | Send email, update dashboard, generate report |
| Connections | Links to external systems | Slack notification, CRM sync, calendar update |
When combined through Workspace DNA, the portal runs itself:
No manual intervention required. The three components map directly to Workspace DNA:
- Memory (Projects) stores every client record, status change, and file
- Intelligence (AI Agents) reasons about changes, drafts communications, and scores leads
- Execution (Automations) fires notifications, syncs calendars, and generates reports
Self-Updating vs. Manual Portals: A Side-by-Side View
Before diving into examples, here is the difference in daily operations:
| Dimension | Manual Portal | Self-Updating Portal |
|---|---|---|
| Status updates | You update manually | Status updates itself on trigger |
| Client emails | You write and send | Email sends automatically |
| File sharing | You upload and notify | Files notify on upload |
| Meeting reminders | You send reminders | System reminds client 24h before |
| Progress reports | You compile weekly | AI generates and sends weekly |
| Feedback collection | You create surveys | Feedback request sent at milestone |
| Time per week | 3-5 hours | Zero |
The rest of this guide walks through real portal examples, common automation patterns, conditional logic, integration blueprints, and a step-by-step build process.
Portal Examples You Can Clone Today
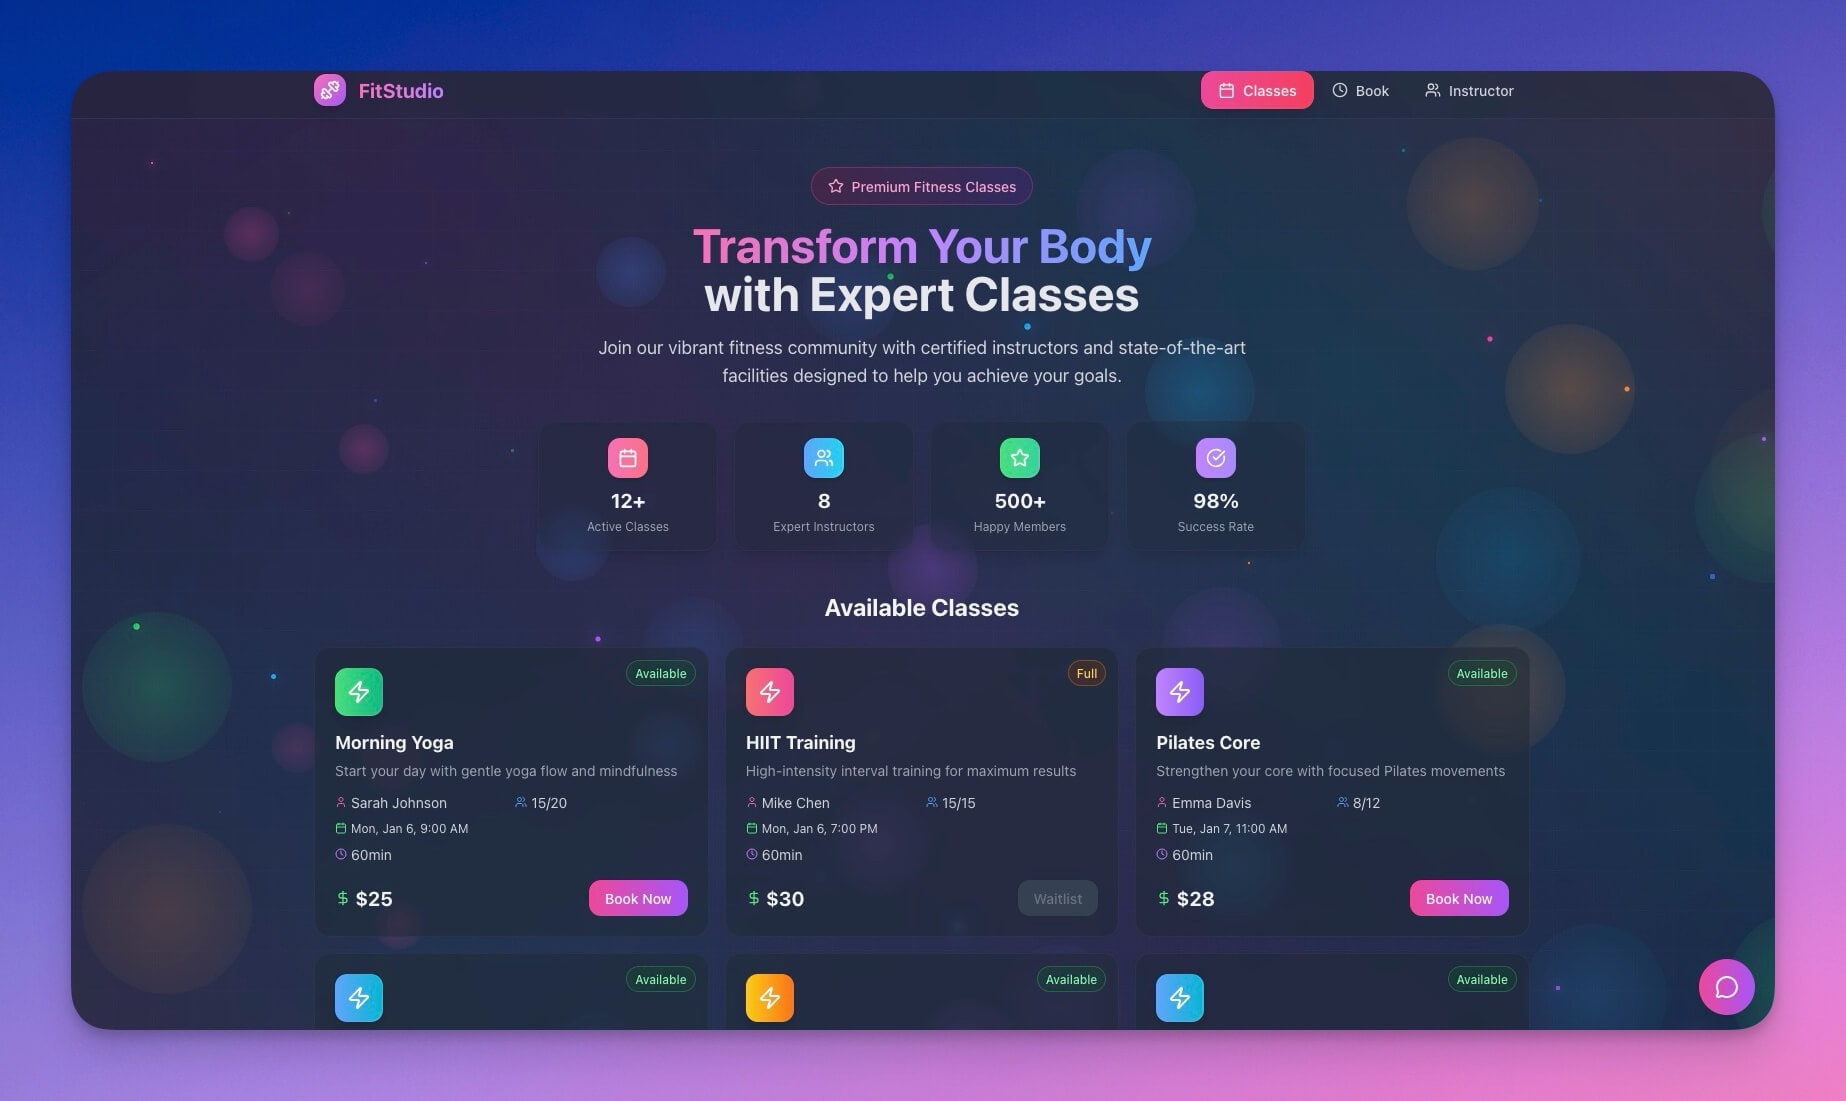
Class Booking Portal

Self-updating features:
- New booking → confirmation email sent
- Class full → waitlist enabled automatically
- 24 hours before → reminder sent to all attendees
- Class completed → feedback request sent
Best for: Yoga studios, fitness classes, workshops, tutoring centers.
Event Management Portal
Clone Event Management Portal →
Self-updating features:
- Registration → welcome sequence triggered
- Event details change → all attendees notified
- One week before → schedule reminder with logistics
- After event → survey distributed and responses collected
Best for: Conference organizers, workshop hosts, community events.
Testimonial Portal
Self-updating features:
- New submission → admin notified for review
- Approved → added to public display automatically
- Rejected → thank you email sent with next steps
- Featured → shared to social channels automatically
Best for: Agencies collecting social proof, SaaS companies gathering customer stories.
Consultancy Booking Portal
Self-updating features:
- Form submitted → lead qualification scored by AI agent
- High score → calendar link sent immediately
- Low score → resource email sent with relevant content
- Meeting completed → follow-up scheduled automatically
Best for: Consulting firms, agencies, B2B services.
The Automation Engine: How Workspace DNA Powers Portals
Every self-updating portal runs on Workspace DNA — the three-pillar architecture that connects Memory, Intelligence, and Execution into a self-reinforcing loop.
Each pillar feeds the others. Memory stores client data. Intelligence analyzes it. Execution acts on it. The loop runs continuously without human intervention.
Common Portal Automations
Status Update Automation
When a project status changes, the portal should update everything downstream:
| Step | Action | Target |
|---|---|---|
| 1 | Update portal status display | Client dashboard |
| 2 | Send email to client | Client inbox |
| 3 | Log change in history | Project timeline |
| 4 | Notify internal team | Slack channel |
No more manual "just wanted to update you" emails. The automation handles it every time.
File Sharing Automation
When a new file is uploaded to a client project:
| Step | Action | Target |
|---|---|---|
| 1 | Client notified immediately | Email or Slack |
| 2 | File added to project timeline | Portal history |
| 3 | Download link generated | Client dashboard |
Clients see files the moment they are ready — no delay, no forgotten notifications.
Progress Milestone Automation
When a milestone is marked complete:
| Step | Action | Target |
|---|---|---|
| 1 | Portal progress bar updates | Client dashboard |
| 2 | Completion email to client | Client inbox |
| 3 | Next milestone highlighted | Portal roadmap |
| 4 | Invoice triggered (if billable) | Billing system |
Milestones tracked and communicated automatically. Learn more about setting up triggers in the Automations guide.
Appointment Reminder Automation
24 hours before an appointment:
| Step | Action | Target |
|---|---|---|
| 1 | Email reminder to client | Client inbox |
| 2 | Calendar confirmation | Google Calendar / Outlook |
| 3 | Preparation checklist sent | Client portal |
Never have a no-show due to forgotten meetings. Connect your calendar via integrations.
Feedback Loop Automation
When a project or session is completed:
| Step | Action | Target |
|---|---|---|
| 1 | Wait 24 hours | Timer |
| 2 | Send feedback request | Client inbox |
| 3 | If positive → request testimonial | Testimonial portal |
| 4 | If negative → alert account manager | Internal team |
Feedback flows automatically at the right moment. The AI agent evaluates sentiment and routes accordingly.
Building Self-Updating Portals: Step by Step
Step 1: Map the Client Journey
List every touchpoint between your team and the client:
- Onboarding — First contact, intake forms, welcome sequence
- Project kickoff — Scope confirmed, team assigned, timeline shared
- Status updates — Weekly progress, milestone notifications
- Deliverables — File sharing, review cycles, approvals
- Feedback collection — Surveys, testimonials, NPS scores
- Offboarding — Final report, testimonial request, archive
Each touchpoint is a potential automation. The goal is to eliminate every manual notification.
Step 2: Identify Triggers
For each touchpoint, define what event should fire:
| Touchpoint | Trigger Event |
|---|---|
| Onboarding | Form submitted |
| Kickoff | Project created |
| Updates | Status changed |
| Deliverables | File uploaded |
| Feedback | Phase completed |
| Offboarding | Project closed |
Step 3: Define Actions
For each trigger, map the automated response:
| Trigger | Actions |
|---|---|
| Form submitted | Create contact, send welcome email, create project |
| Project created | Notify team on Slack, send client overview, schedule kickoff |
| Status changed | Update portal dashboard, email client, log in history |
| File uploaded | Notify client, add to timeline, generate download link |
| Phase completed | Send survey, update dashboard, trigger next phase |
| Project closed | Generate final report, request testimonial, archive project |
Step 4: Build in Taskade Genesis
- Open Taskade Genesis and describe your portal:
Build a client portal for a design agency with:
- Project pages showing status, files, and timeline
- Automatic email notifications when status changes
- Feedback requests sent when milestones complete
- Weekly progress summaries sent every Monday
- Client can book calls directly from portal
- AI agent that answers client questions about project status
- Genesis creates the portal with built-in Projects, AI Agents, and Automations
- Customize triggers and actions for your workflow
- Test with sample data using 7 project views (List, Board, Calendar, Table, Mind Map, Gantt, Org Chart)
- Set permissions for client access (Viewer or Commenter level)
- Deploy to clients and share the portal link
Learn more in Create Your First App.
Advanced: Conditional Logic and Smart Routing
Automations become powerful when you add conditions. Taskade automations support branching, looping, and filtering logic for complex workflows.
Priority-Based Ticket Routing
AI agents powered by 15+ frontier models from OpenAI, Anthropic, and Google can assess ticket urgency from the message content — no manual triage required.
Client-Tier Personalization
Different clients deserve different communication levels:
| Client Tier | Weekly Update Format | Delivery Method |
|---|---|---|
| Enterprise | Detailed report + call scheduling | Email + calendar invite |
| Professional | Summary report with key metrics | |
| Basic | Status dashboard link only | Portal notification |
The automation checks the client tier field in the project record and routes to the appropriate template.
Escalation Chains
When a client has not responded for 48 hours:
- Send follow-up email with a summary of pending items
- Wait 24 hours
- If still no response → escalate to account manager
- Log communication gap in project history
These chains ensure nothing falls through the cracks — even during busy periods.
Portal Types by Industry
Different industries need different portal configurations. Here is how to tailor your self-updating portal to specific verticals:
Agency Portal (Design, Marketing, Development)
| Feature | Configuration |
|---|---|
| Project pages | One project per client engagement with status timeline |
| Deliverables | File uploads with version tracking and approval workflow |
| Billing | Milestone-based invoicing triggered by phase completion |
| Communication | Weekly AI-generated progress summaries sent Monday mornings |
| Feedback | Post-deliverable review requests with rating collection |
Agency portals benefit most from the milestone automation pattern. When your team marks a deliverable as complete, the portal updates the client dashboard, sends a review request, and queues the next phase — all without a project manager touching anything.
Consulting Portal (Strategy, Finance, Legal)
| Feature | Configuration |
|---|---|
| Document sharing | Secure file exchange with Viewer-level permissions |
| Meeting scheduling | Calendar integration with automatic prep materials |
| Engagement tracking | Hours logged, budget consumed, remaining allocation |
| Reporting | Monthly engagement summaries compiled by AI agent |
| Offboarding | Final report generation, testimonial request, archive |
Consulting portals require stricter access control. Use the 7-tier permission system to give clients Viewer access to deliverables while keeping internal strategy documents restricted to Editor level and above.
SaaS Customer Success Portal
| Feature | Configuration |
|---|---|
| Onboarding | Step-by-step checklist with completion tracking |
| Health score | AI agent monitors usage patterns and flags at-risk accounts |
| Feature requests | Intake form that routes to product team |
| Renewals | 90-day advance notification with contract terms |
| Upsell | AI agent identifies expansion opportunities from usage data |
SaaS portals run on predictive intelligence. The AI agent analyzes customer behavior patterns — login frequency, feature adoption, support ticket volume — and generates health scores that trigger proactive outreach before a client churns.
Real Estate Portal (Buyer, Seller, Tenant)
| Feature | Configuration |
|---|---|
| Property listings | Database of active listings with photo galleries |
| Viewing schedule | Calendar integration with automated reminders |
| Offer tracking | Status pipeline from showing to closing |
| Document exchange | Secure upload for contracts, inspections, appraisals |
| Transaction updates | Automated status notifications at each milestone |
Real estate portals combine the booking system pattern (scheduling viewings) with the CRM pattern (tracking offers and closings). Each property becomes a project with its own automation timeline.
Five Mistakes to Avoid When Building Client Portals
Building the portal is easy. Building one that clients actually use takes planning:
1. Too many notifications. Clients do not want 10 emails per day. Group updates into daily or weekly digests using automation scheduling. Reserve instant notifications for urgent items only.
2. No clear next action. Every portal update should tell the client what to do next. "Your deliverable is ready for review" is better than "Deliverable uploaded." AI agents can draft action-oriented summaries.
3. Complex permission structures. Start simple. Most clients need Viewer or Commenter access. Add complexity only when clients need to contribute content or approve deliverables.
4. Missing the offboarding stage. Portals should close gracefully. Automate the final report, testimonial request, and project archiving so nothing lingers after the engagement ends.
5. No parallel testing period. Run the self-updating portal alongside your manual process for one to two weeks. Verify that automations fire correctly and clients receive the right notifications before retiring manual updates.
Portal Prompt Templates
Here are ready-to-use prompts for building different portal types in Taskade Genesis. Copy any prompt, paste it into Genesis, and customize the details:
Design Agency Portal Prompt
Build a client portal for a design agency with:
- Client dashboard showing project status, deliverables, and timeline
- File upload area with version tracking and approval workflow
- Automatic email when deliverables are uploaded for review
- Weekly progress summary generated by AI every Monday at 9 AM
- Feedback form triggered when each phase completes
- Milestone-based billing that generates invoices on completion
- AI agent that answers client questions about project status
Consulting Firm Portal Prompt
Build a client portal for a management consulting engagement with:
- Engagement overview with scope, timeline, and budget tracking
- Secure document exchange area with Viewer-level client access
- Meeting scheduler connected to Google Calendar
- Monthly engagement report generated by AI agent
- Hours tracking with budget consumption percentage
- Automated 90-day contract renewal reminder
- Offboarding workflow: final report, testimonial request, archive
SaaS Customer Success Portal Prompt
Build a customer success portal for a SaaS product with:
- Onboarding checklist with step-by-step progress tracking
- Feature adoption dashboard showing which features the client uses
- Support ticket submission form with priority routing
- Health score calculated by AI agent from usage and ticket data
- Quarterly business review template auto-populated with metrics
- 60-day pre-renewal notification with contract terms
- AI agent that identifies upsell opportunities from usage patterns
Each prompt creates a complete portal with Projects for data, AI Agents for intelligence, and Automations for execution. Customize the details to match your specific workflow.
Integration Patterns for Connected Portals
Taskade supports 100+ integrations across 10 categories. Here are the most common patterns for client portals:
CRM Integration
| Direction | Trigger | Action |
|---|---|---|
| Portal → CRM | New client added to portal | Create contact in Salesforce/HubSpot |
| CRM → Portal | Deal won in CRM | Create project in portal, send welcome |
Calendar Integration
| Direction | Trigger | Action |
|---|---|---|
| Portal → Calendar | Client books meeting | Create Google Calendar event |
| Calendar → Portal | Meeting cancelled | Update portal status, notify team |
Connect calendars through the Google Calendar integration.
Communication Integration
| Direction | Trigger | Action |
|---|---|---|
| Portal → Slack | Status changes | Post update in client channel |
| Slack → Portal | Team message tagged | Add comment to portal project |
Billing Integration
| Direction | Trigger | Action |
|---|---|---|
| Portal → Stripe | Milestone complete | Generate and send invoice |
| Stripe → Portal | Payment received | Extend portal access, notify team |
Permissions and Security for Client Access
Taskade uses a 7-tier role-based access system to control who sees what in your portal:
| Role | Portal Use Case |
|---|---|
| Owner | Agency admin — full control |
| Maintainer | Project managers — manage structure |
| Editor | Team members — update content |
| Commenter | Clients who need to give feedback |
| Collaborator | Clients who contribute content |
| Participant | Clients who attend meetings |
| Viewer | Clients who only need read access |
Most client portals use Viewer or Commenter level. This lets clients see updates and leave feedback without accidentally modifying project structure. Learn more about sharing and permissions.
For public portals, you can publish a shareable link — no Taskade account required for visitors.
Measuring Portal Effectiveness
Once your portal is live, track these metrics to measure automation impact:
| Metric | Before Automation | Target After |
|---|---|---|
| Client update emails per week | 10-15 manual | 0 manual |
| Average response time | 4-8 hours | Instant (automated) |
| Client satisfaction (NPS) | Baseline | +15 points |
| Hours spent on reporting | 3-5 per week | Under 30 minutes |
| Missed deadline notifications | Frequent | Zero |
AI agents can compile these metrics into weekly internal reports — so you measure portal health without manual tracking.
Start Building Your Self-Updating Portal
Create your first self-updating portal today:
- Open Taskade Genesis and describe your portal needs
- Clone a starting template from the Community Gallery
- Customize triggers and actions for your client workflow
- Set permissions and deploy
Resources:
- Explore Community Portals — Clone portal templates
- Create Your First App — Step-by-step tutorial
- Automations Guide — Workflow setup
- Custom AI Agents — Client communication agents
- Projects & Memory — Data storage
- Integrations Overview — Connect external tools
Read more:
- 10 AI Client Portals You Can Deploy Instantly
- 10 AI Booking Systems You Can Clone
- 10 AI Agency Workspaces
- How Workspace DNA Works
- 10 Agentic Workflows for Startups
- AI Workspace Builder: Turn Your List Into Live Software
Explore Taskade AI:
- AI Portal Builder — Create client portals
- AI App Builder — Build complete applications
- AI Workflow Automation — Automate processes
Build with Taskade Genesis:
- Browse All Generator Templates — Apps, dashboards, websites, and more
- Browse Agent Templates — AI agents for every use case
- Explore Community Apps — Clone and customize

Frequently Asked Questions
What is a self-updating client portal?
A self-updating client portal is a client-facing hub that refreshes status updates, sends notifications, and evolves automatically without manual intervention. Built with Taskade Genesis, it uses three components: triggers (events that start workflows), actions (tasks that execute automatically), and connections (links to external systems via 100+ integrations). The portal runs itself so agencies can focus on delivery instead of reporting.
How do I build a client portal that updates itself?
Use Taskade Genesis to describe your portal in a prompt. Genesis creates the portal with databases for client data, AI agents with 34 built-in tools for automated responses, and workflow automations for status updates, email notifications, and file sharing. When a project status changes, the portal notifies clients automatically with zero manual effort required.
What portal automations can Taskade handle?
Taskade automations handle status updates that notify clients, file uploads that trigger email alerts, milestone completions that generate reports, recurring check-ins, and escalation rules. Automations use durable execution for reliability and can include branching, looping, and filtering logic. AI agents powered by 15+ frontier models from OpenAI, Anthropic, and Google add intelligent decision-making to every workflow.
Can clients interact with my portal without a Taskade account?
Yes. Taskade portals can be published as public links or embedded in external websites, allowing clients to access their information without creating an account. For authenticated access, you can use the 7-tier permission system (Owner, Maintainer, Editor, Commenter, Collaborator, Participant, Viewer) to give clients exactly the right level of access to their projects.
How does Workspace DNA power self-updating portals?
Workspace DNA connects three pillars: Memory (Projects store client data and history), Intelligence (AI Agents reason about status changes and craft responses), and Execution (Automations trigger notifications, generate reports, and sync external tools). When one pillar updates, the others react automatically, creating a self-reinforcing loop that keeps the portal current.
What integrations work with Taskade client portals?
Taskade supports 100+ integrations across 10 categories including communication tools like Slack and Microsoft Teams, CRM platforms like Salesforce and HubSpot, calendar systems like Google Calendar and Outlook, payment processors like Stripe, and development tools. These integrations connect to your portal automations so external events trigger portal updates and vice versa.
How much does it cost to build a self-updating portal with Taskade?
Taskade offers a free tier to get started. Paid plans with expanded automation and AI capabilities start at $10 per month for Pro (up to 10 users) and $25 per month for Business (unlimited users), billed annually. All plans include access to 15+ frontier AI models and 100+ integrations.
Can I add conditional logic to portal automations?
Yes. Taskade automations support branching, looping, and filtering logic. You can route support tickets by priority level, personalize weekly reports by client tier (enterprise gets detailed reports while basic clients get dashboard links), and build escalation chains that alert managers when clients are unresponsive. AI agents add intelligent decision-making on top of rule-based conditions.