# Customize a Project: Background, Color, and Default View
> Customize a Taskade project: set a background or cover image, pick the link color, choose the default view, and add fields, sorting, and sharing.
- Source: https://www.taskade.com/learn/projects/customize-project
- Section: Projects
- Updated: 2026-11-09
- Index of all pages: https://www.taskade.com/learn/llms.txt
Customize a project so it opens the way your team works: a background, a color, a default view, and the fields that you track. The data stays the same when you change the look.
> **TL;DR:** Open **Project Settings** to set a cover image or a full background on the **Appearance** tab. Set the **Default View** on the **Settings** tab. The link color comes from the workspace or folder. Save a finished design as a [template](https://www.taskade.com/learn/projects/use-templates) to reuse it. Most options work on every plan. Some backgrounds need a paid plan.
One set of project data feeds every view and custom field. The look changes, the content stays the same.
```mermaid
flowchart TD
A[Your project data
tasks and fields] --> B[Customization
views and fields]
B --> C[Default view
List Board Table]
B --> D[Polished project
cover and color]
style A fill:#0d1b2a,color:#7dd3fc,stroke:#38bdf8,stroke-width:1.5px
style B fill:#2a1225,color:#ff8fa3,stroke:#ff2d60,stroke-width:2px
style C fill:#0d1a0e,color:#86efac,stroke:#22c55e,stroke-width:1.5px
style D fill:#1a140a,color:#ffb74d,stroke:#e65100,stroke-width:1.5px
```
## Customization at a Glance
Find the option, then go to its section.
| You want to change | Where | Plan |
| --- | --- | --- |
| Background or cover image | **Project Settings** → **Appearance** | Every plan. **Gradients**, **Artwork**, and **Upload** need a paid plan. |
| Link and accent color | Workspace or folder settings → **General** → **Color** | Every plan |
| Default view | **Project Settings** → **Settings** → **Default View** | Every plan. **Owner** or **Admin** role in **Project Settings**. An editor also sets it from the toolbar. |
| Fields | The **+** button in Table view | See [Custom Fields](https://www.taskade.com/learn/projects/custom-fields) |
| Sort and filter | The **More** menu and the filter bar | Every plan. Some sort options need a paid plan. |
| Who can edit | **Share** → **Share Link** → **Permissions** | Every plan. The Checker role needs a paid plan. |
| Text size | Your phone settings, or zoom on a computer | Every plan. See [Change Font Size](https://www.taskade.com/learn/projects/font-size). |
## Set Project Background
A background gives each project its own look, so your team finds it fast.
1. In the project header, click  **Project Settings**.
2. Open the **Appearance** tab.
3. Pick a tab: **Images**, **Colors**, **Gradients**, **Artwork**, or **Upload**.
4. Click a background. For a surprise, click **Random**.
An uploaded image must be at least 800 × 600 pixels, at most 6000 × 4000 pixels, and up to 11 MB.
## Display as Background
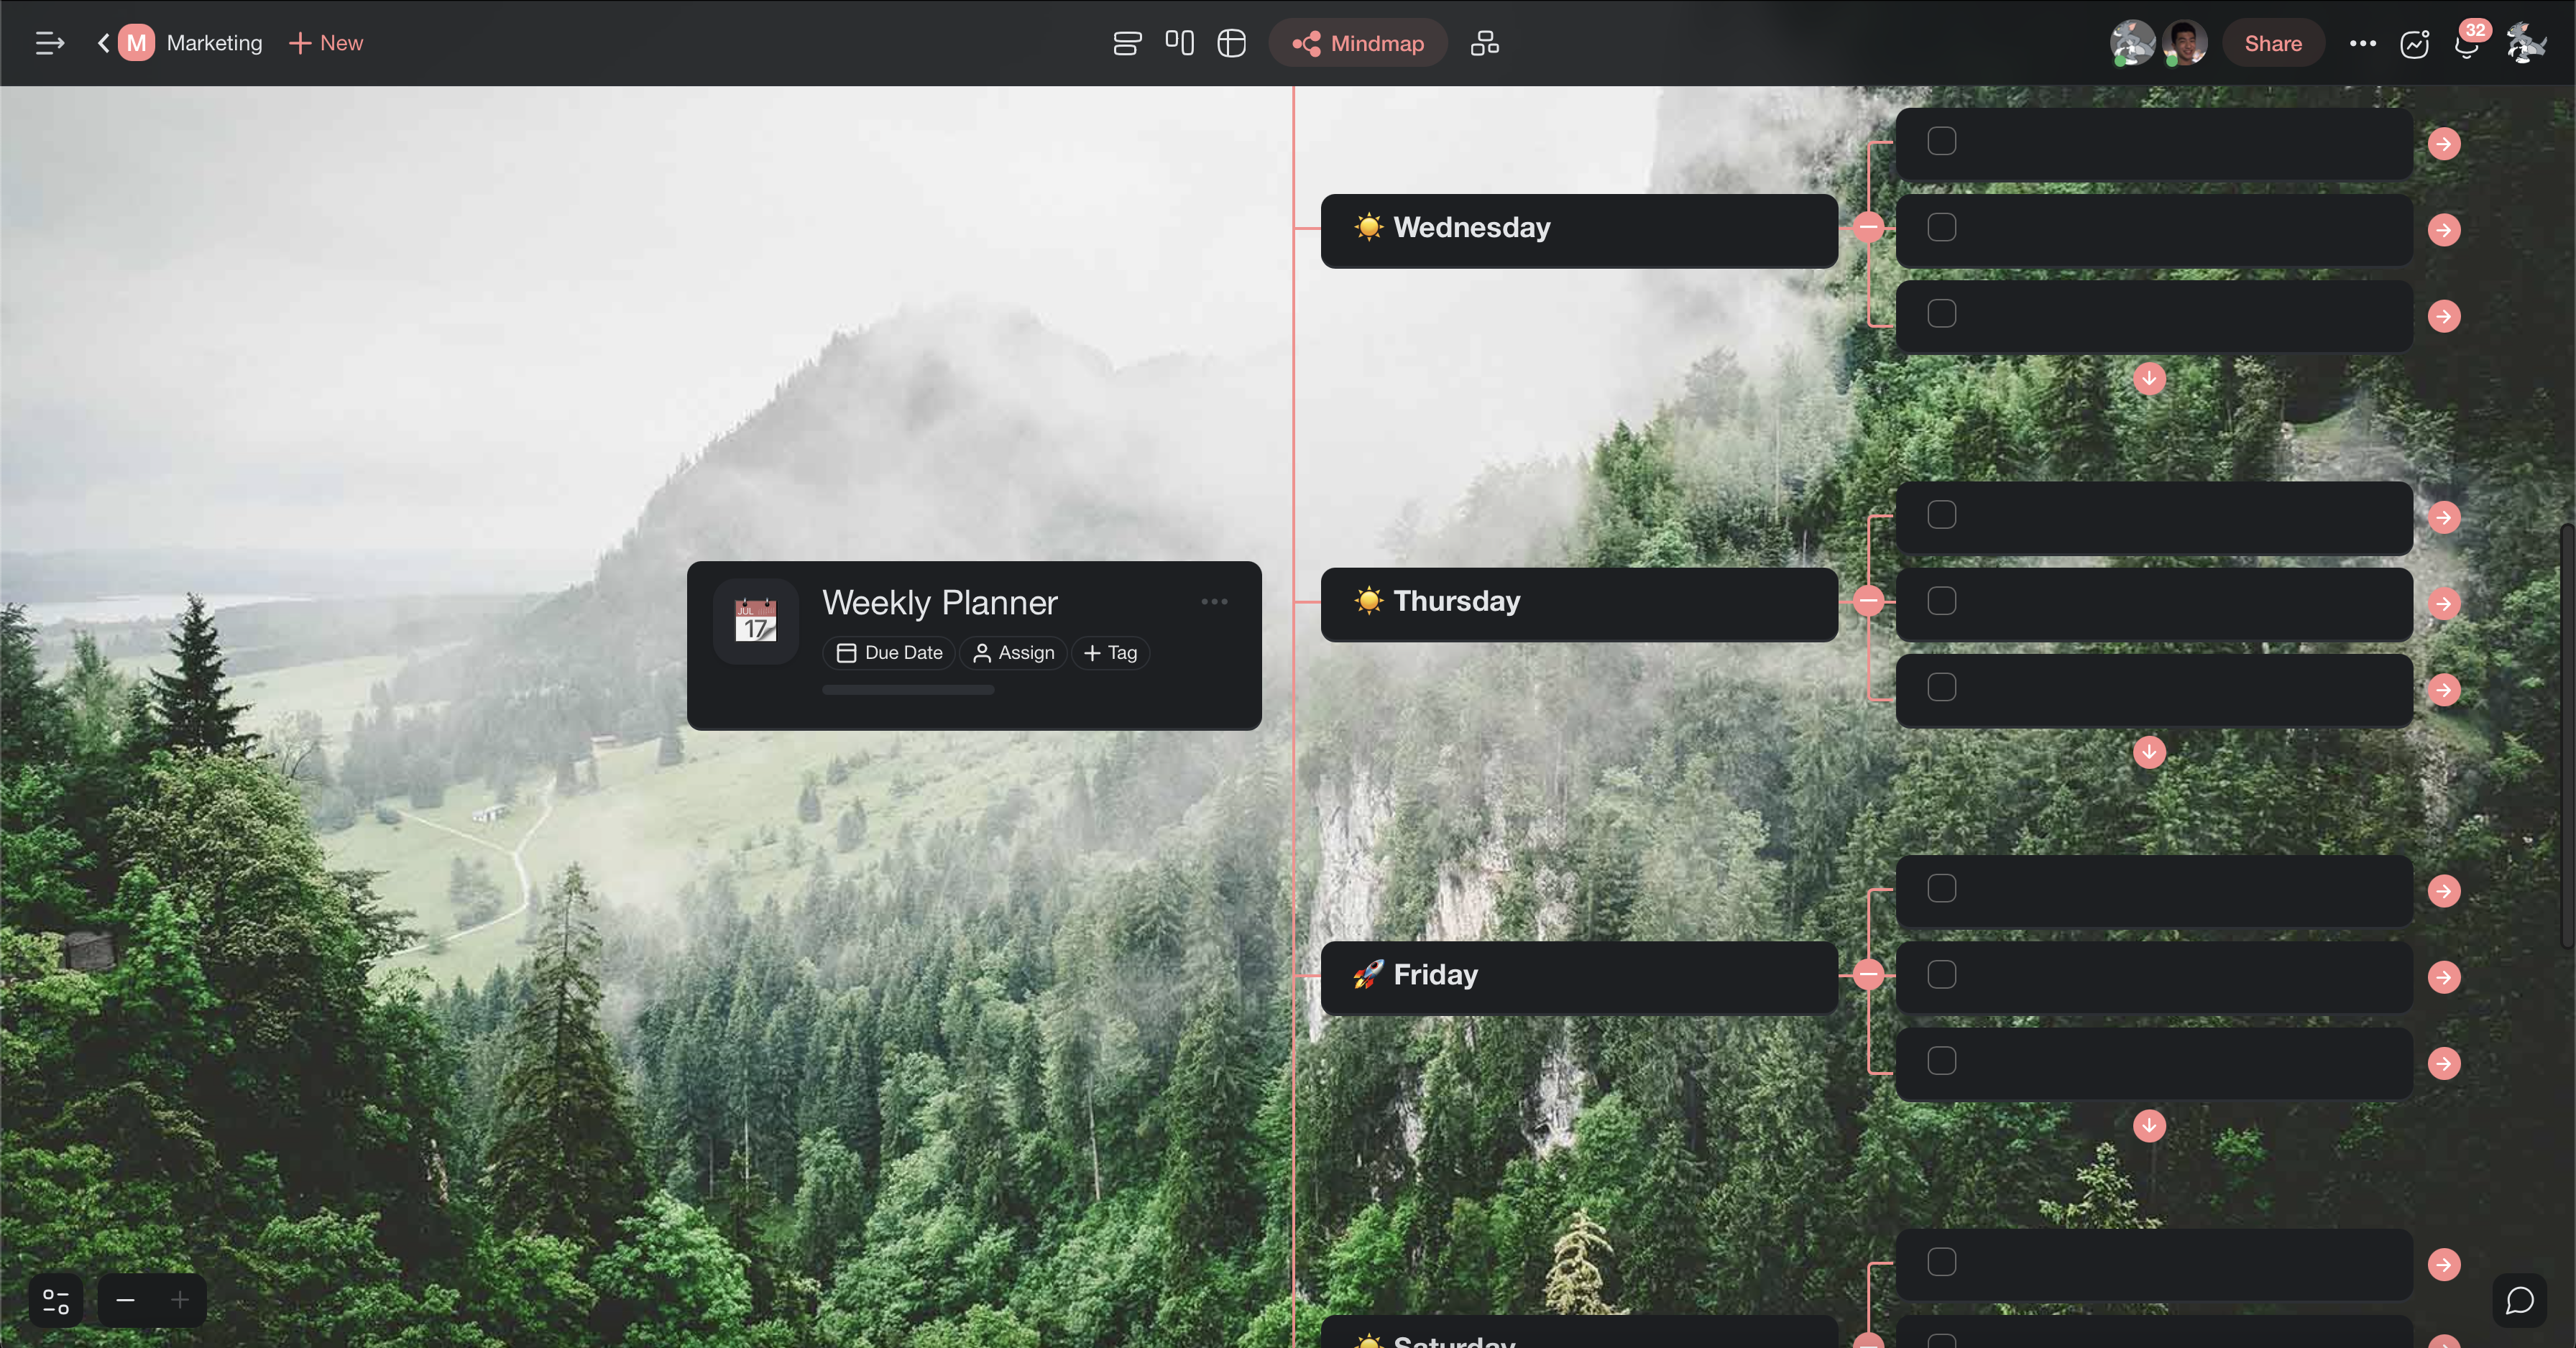
The cover image can show as a banner at the top, or fill the whole screen.
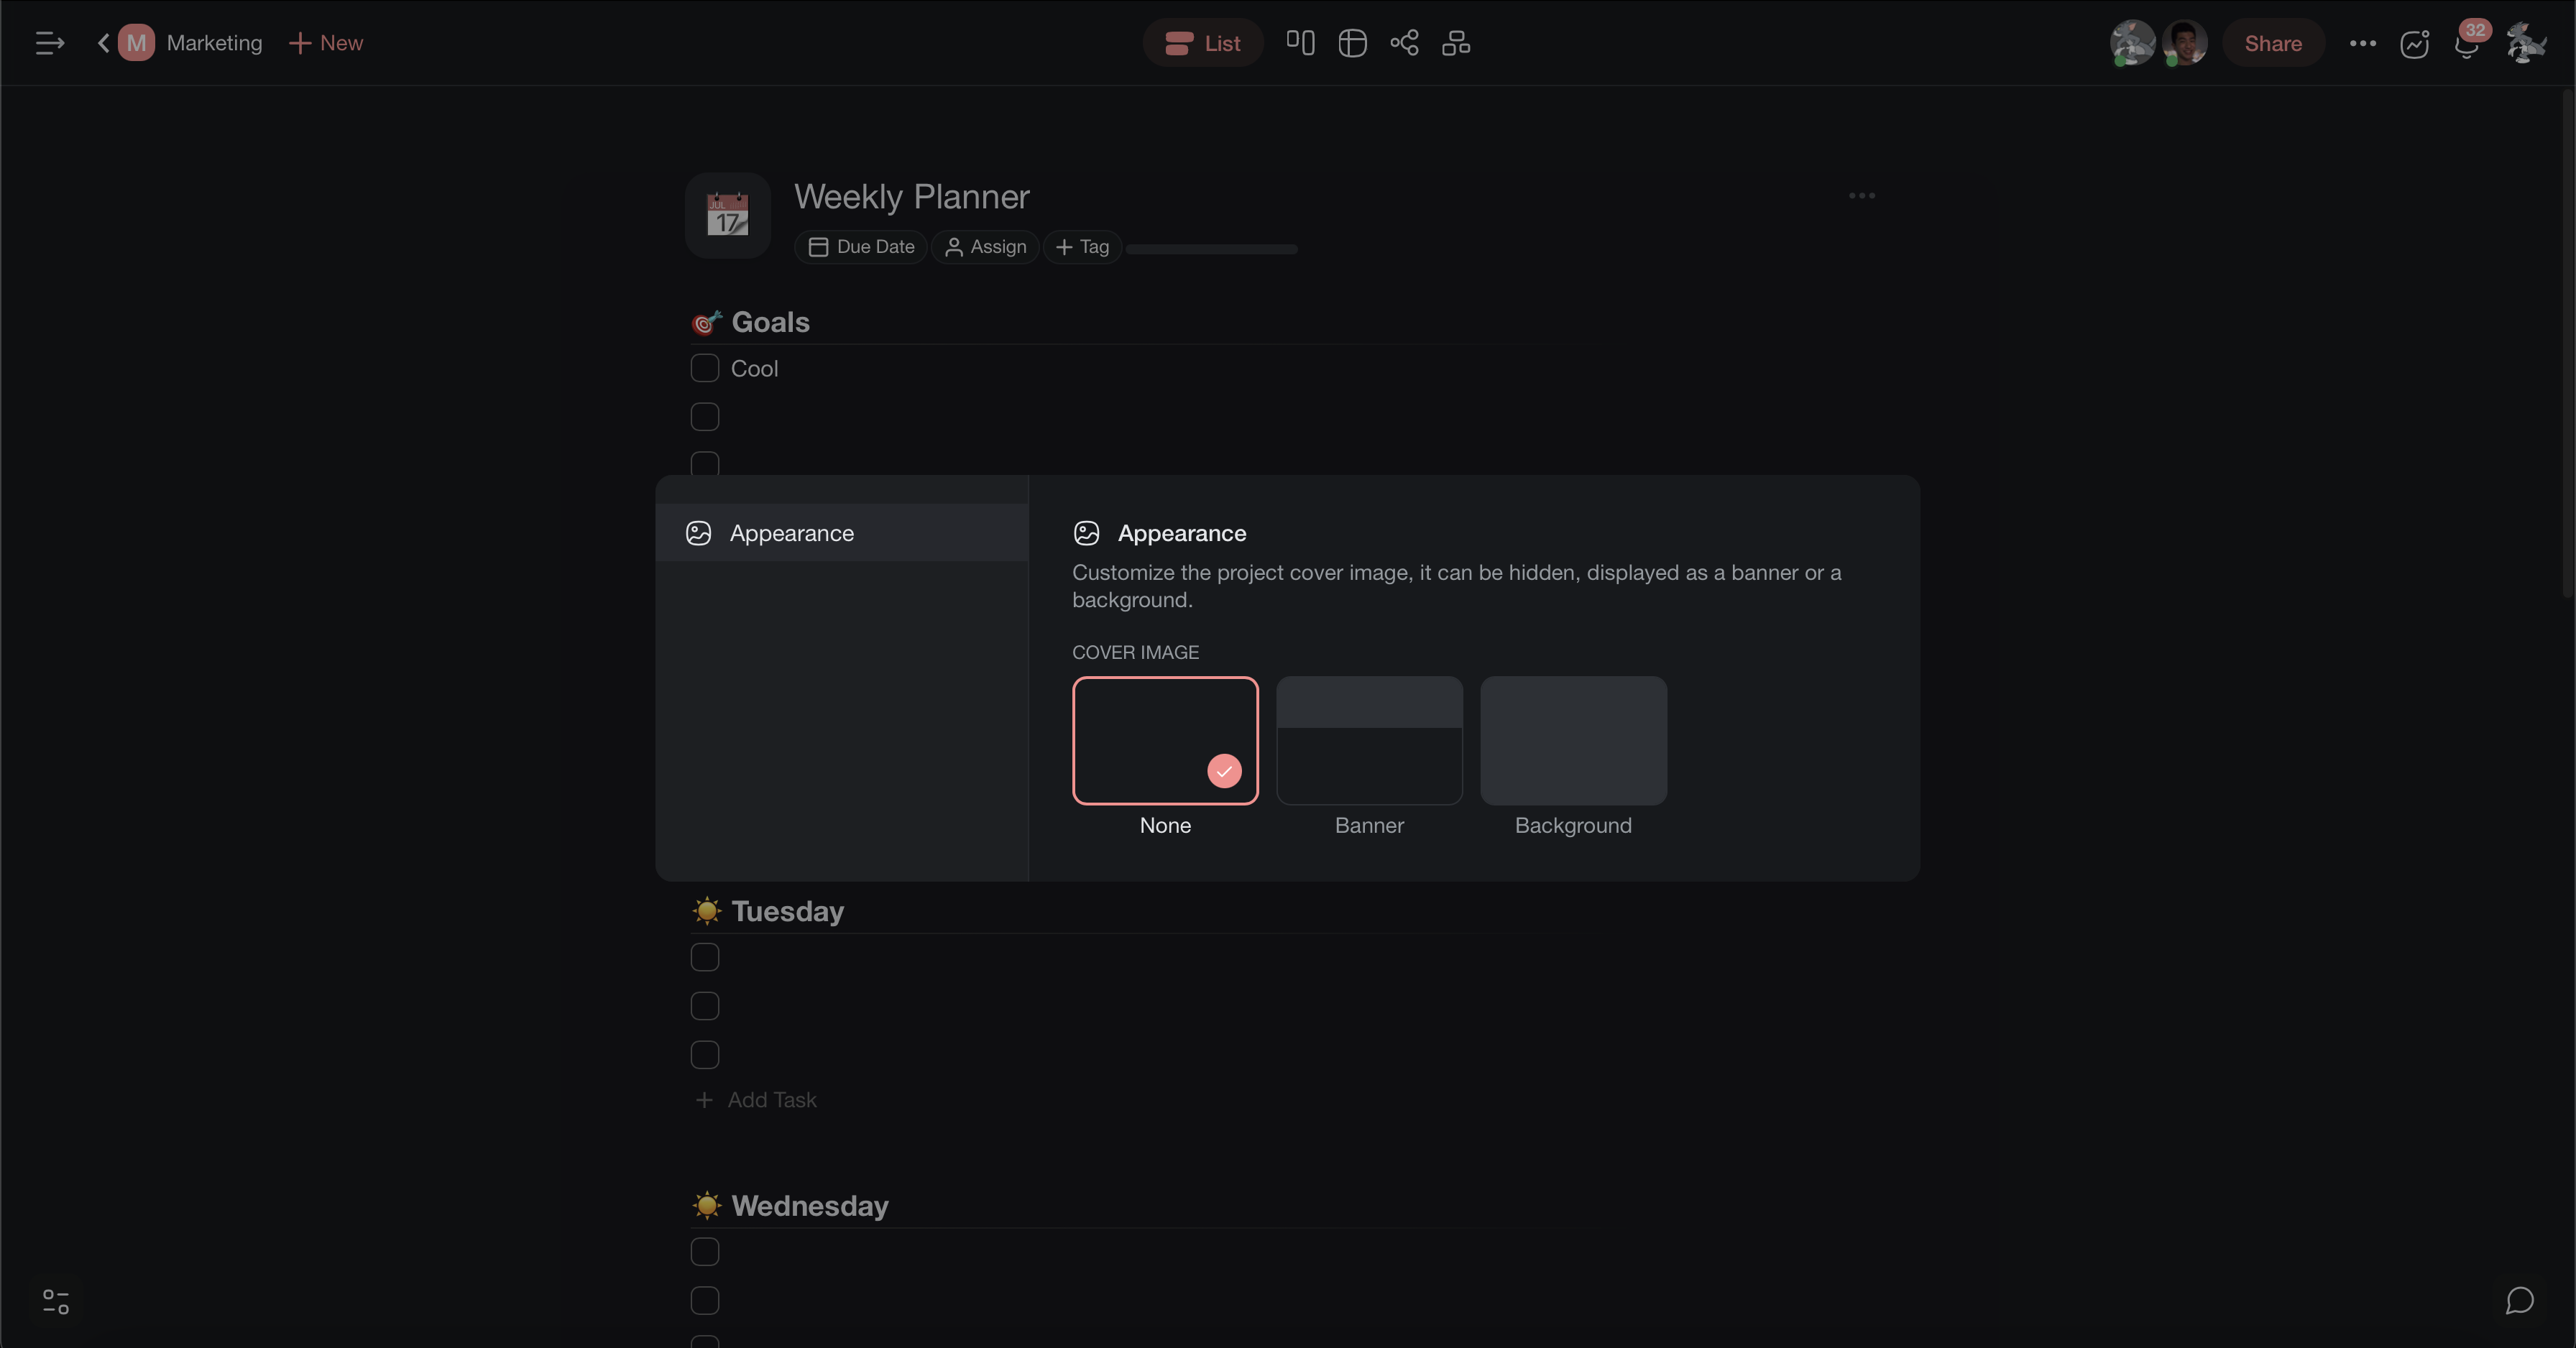
1. Open **Project Settings** → **Appearance**.
2. Under **Cover Image**, pick **None**, **Banner**, or **Background**.
Test a full background in the [Mind Map or Board view](https://www.taskade.com/learn/projects/project-views). Those views show most of it.
## Choose a Color Theme
A project takes the color of its workspace or folder. The color shows on links and navigation.
> **Note:** A new workspace or folder color changes the links and navigation in all projects inside it.
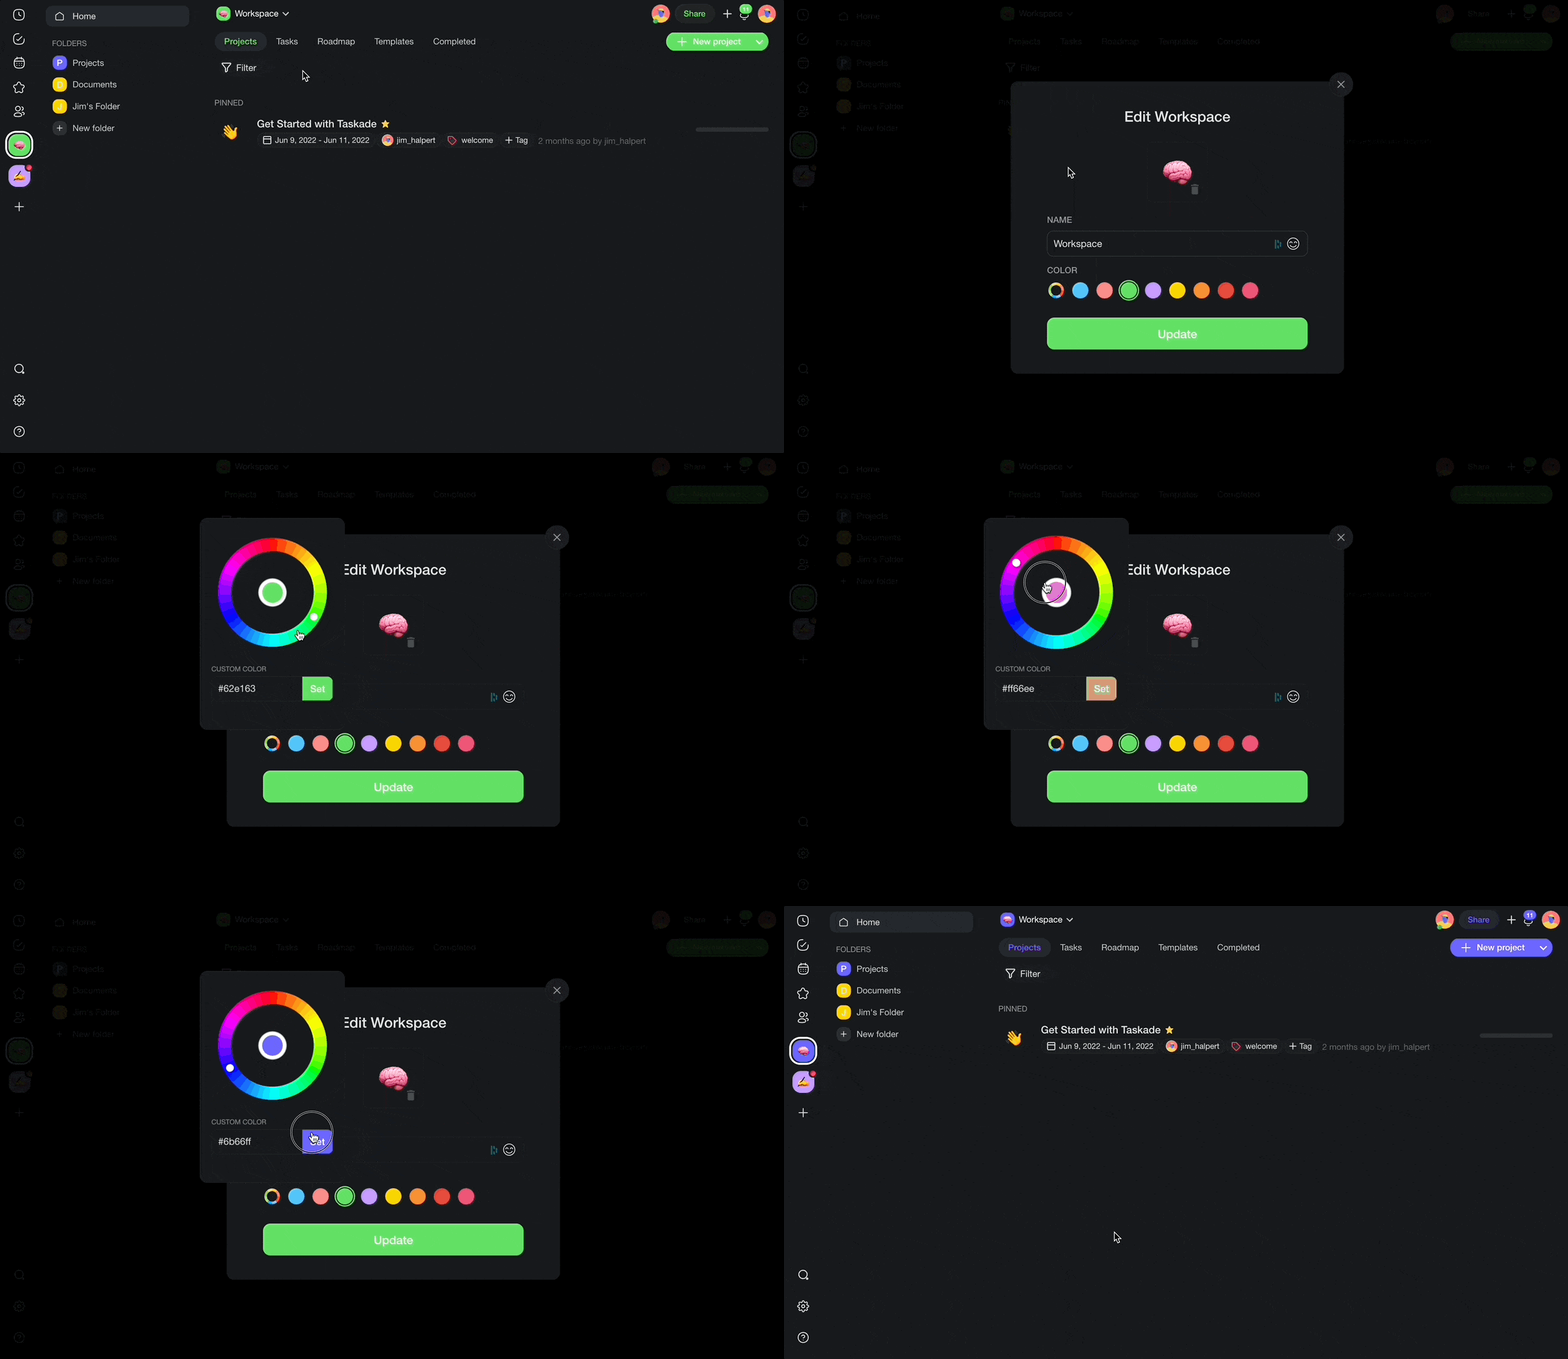
1. Open the settings of the workspace or folder.
2. On the **General** tab, find **Color**.
3. Pick a color. For your own color, click the custom color button, enter a hex code, and click **Set Color**.
The color saves when you pick it. A **Saved** mark shows next to **Color**.
See [Make a Link Clickable](https://www.taskade.com/learn/projects/hyperlinks) for more on link colors.
## Set Default Project View
The default view is the layout that everyone sees first when they open the project.
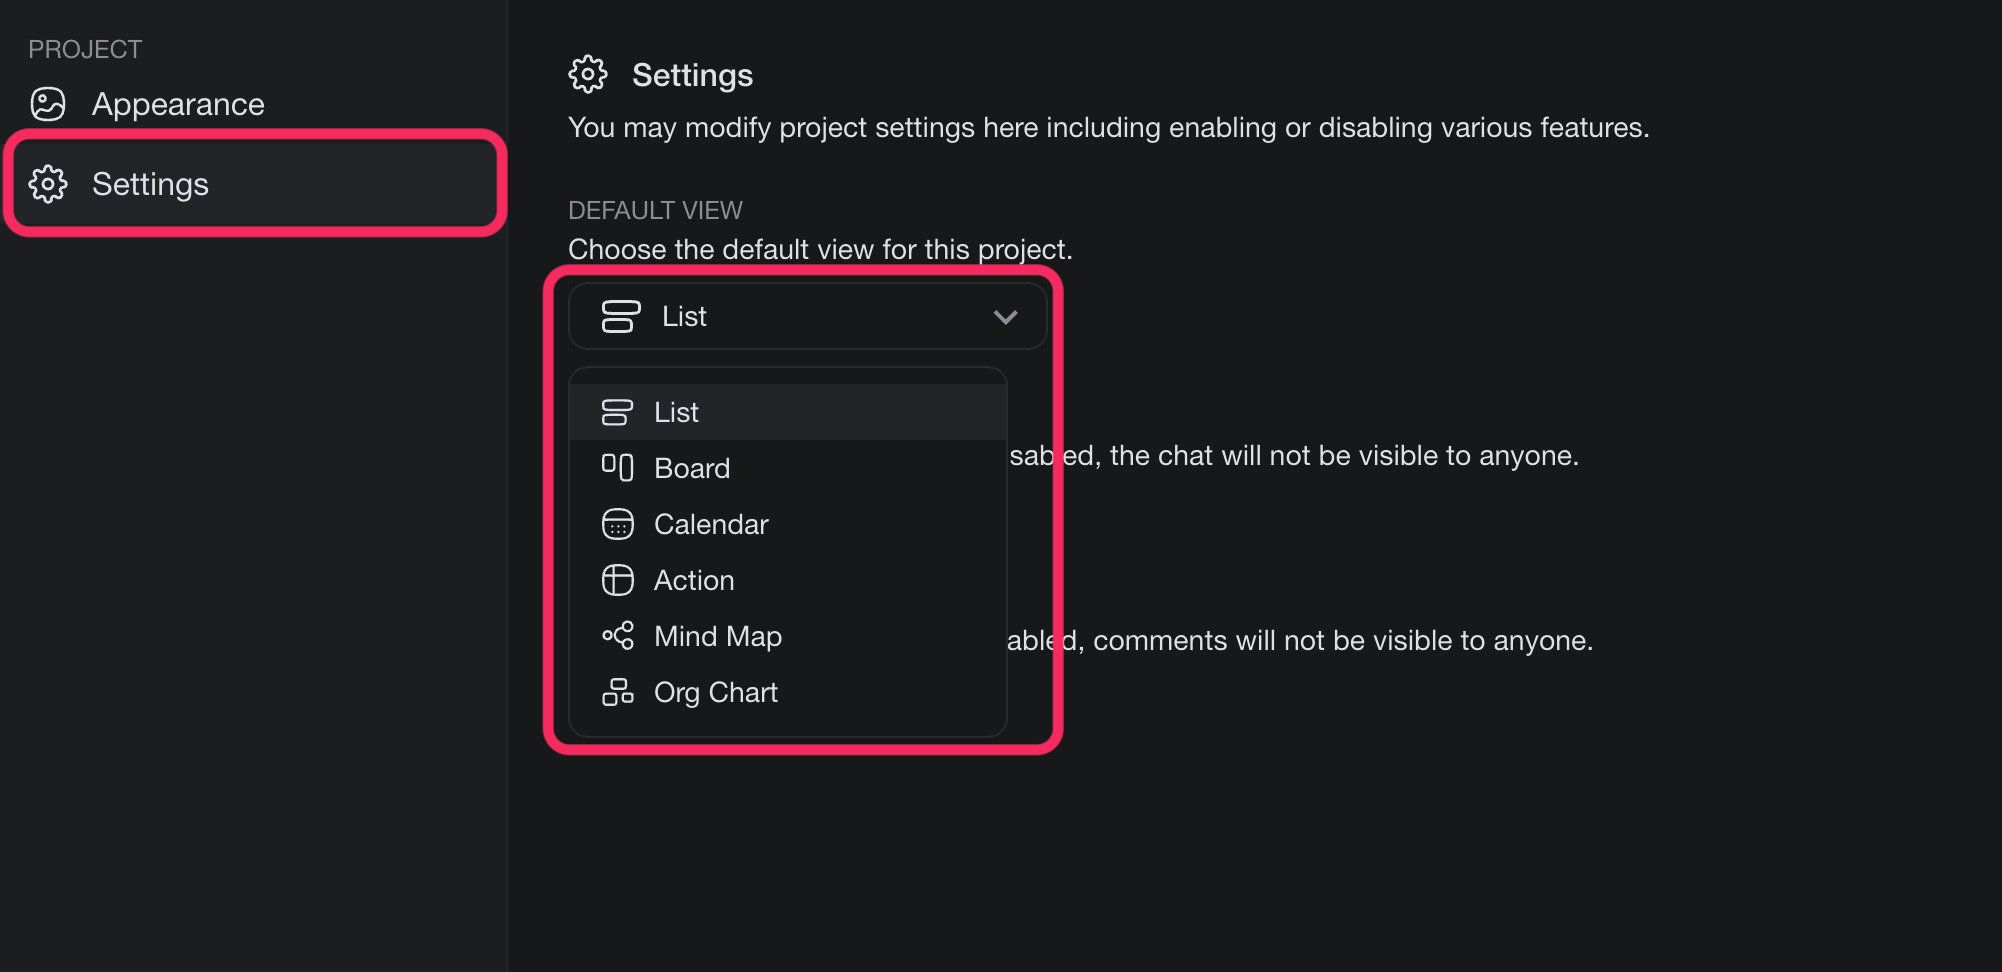
1. In the project header, click **Project Settings**.
2. Open the **Settings** tab.
3. Under **Default View**, pick a view. The change saves at once.
In **Project Settings**, only the **Owner** or **Admin** role can change the default view. A person who can edit the project also sets it when they pick a view in the toolbar. You can pick from these views:
- [List](https://www.taskade.com/learn/projects/list-view)
- [Board](https://www.taskade.com/learn/projects/board-view)
- [Table](https://www.taskade.com/learn/projects/table-view)
- [Mind Map](https://www.taskade.com/learn/projects/mindmap-view)
- Docs
- [Gantt Chart](https://www.taskade.com/learn/projects/gantt-view) (paid plan)
- [Calendar](https://www.taskade.com/learn/projects/calendar-view)
- [Actionsheet](https://www.taskade.com/learn/projects/actionsheet-view) (paid plan)
- [Org Chart](https://www.taskade.com/learn/projects/orgchart-view) (paid plan)
## Project Views Explained
Every project has multiple views. Switch at any time. Your data stays the same, and only the layout changes.
| View | Best for | Key feature |
| --- | --- | --- |
| List | Notes, documents, nested tasks | Unlimited nesting with folding sections |
| Board | Pipelines, sprint planning | Drag cards between columns |
| Table | Databases, CRMs, structured data | Fields, sorting, and filters |
| Mind Map | Brainstorming, visual plans | Branches that open and close |
| Docs | Long documents and specs | A page for writing |
| Gantt Chart | Timelines and dependencies | Bars with start and end dates (paid plan) |
| Calendar | Schedules, content calendars | Tasks placed by date |
| Actionsheet | Spreadsheet-style lists | A row for each task (paid plan) |
| Org Chart | Team structures, hierarchies | A top-down tree (paid plan) |
To switch views, click a tab at the top of the project: **List**, **Board**, **Table**, or **Mind Map**. The other views are in the **More views** menu.
## Custom Fields
Fields add structure to tasks. They show as columns in Table view.
1. Open the project in [Table view](https://www.taskade.com/learn/projects/table-view).
2. Click the **+** button at the right of the column headers.
3. Pick a field from a group.
4. Name the field.
| Group | Fields |
| --- | --- |
| **Build Your Own** | Single select, Number, Text, Date, Password |
| **Presets** | Status, Priority, Type of Task, Progress, Estimated Time, Department |
| **Addons** | Agents, Due Date, Assignee, Comments, Reactions, Timer, Attachments, Created Date, Created By, Completed Date, Completed By |
See [Custom Fields](https://www.taskade.com/learn/projects/custom-fields) for each field type.
## Project Templates
A template saves the design and structure of a project, so each new project starts the same way.
1. Next to **Projects** in the sidebar, click **+** (**Create project**).
2. Click **Use Template** to start from a ready template.
To save your own project as a template, open the project **More** (⋮) menu and click **Add to Templates**. Your templates live on the **Templates** tab of the workspace or folder. See [Taskade Templates](https://www.taskade.com/learn/projects/use-templates) for all the steps.
> **Tip:** Ask Taskade EVE in your workspace to generate a project from scratch. For example: "Create a product launch checklist" or "Build an employee onboarding tracker."
## Sorting and Filtering
Sort and filter to find the tasks that matter now. The data does not change.
**Sort (List view):** open the **More** menu, then **Sort By**. The options are:
- Completed or Uncompleted
- A to Z or Z to A
- Tag or Mention
- Due Date, Start Date, or Date Created
**Filter:** type in the filter bar ("Filter by word, @mention, #tag or assignee..."). In Table view, open a column menu and click **Filter**.
**Hide finished work:** open the **More** menu and click **Hide completed**.
Some sort options need a paid plan. On the Free plan, the menu shows an upgrade message for them.
## Sharing and Permissions
Roles control who can see and edit a project, from Owner to Viewer.
| Role | What the role can do |
| --- | --- |
| **Owner** | Fully manage and delete the project |
| **Admin** | Fully manage the project |
| **Editor** | Edit the project. Cannot manage the project. |
| **Checker** | Check, uncheck, and comment on tasks. Cannot edit tasks, projects, or templates. Needs a paid plan. |
| **Viewer** | Comment and chat only. Cannot edit the project. |
To share a project:
1. In the project header, click **Share**.
2. Open the **Share Link** tab and turn the link on.
3. Under **Permissions**, pick **Editor**, **Checker**, or **Viewer**.
4. Click **Copy Link**, and send it.
To invite by email, use the **Email** tab. See [Share a Project](https://www.taskade.com/learn/projects/share-project) for the **Embed** and **Publish** tabs.
> **Tip:** Ask Taskade EVE in your workspace to change a project for you. Try: "Add a status field to my task list."
## Frequently Asked Questions
**How do I change the wallpaper of a project?**
Open **Project Settings** → **Appearance**, and pick an image, a color, a gradient, or artwork. You can also upload your own image. Gradients, artwork, and uploads need a paid plan.
**Where does the link color of a project come from?**
The link color comes from the workspace or folder that holds the project. Change the **Color** in the workspace or folder settings and click **Update**.
**Who can set the default view of a project?**
The **Owner** or **Admin** role can set it in **Project Settings**. A person who can edit the project also sets it when they pick a view in the toolbar. The change saves as soon as you pick a view, and everyone sees that view first.
**Which project views need a paid plan?**
Gantt Chart, Actionsheet, and Org Chart need a paid plan. List, Board, Table, Mind Map, Docs, and Calendar work on every plan, Free included.
**Can I reuse a project design?**
Yes. Open the project **More** menu and click **Add to Templates**. New projects from that template start with the same structure.
## Next Steps
Grow the project after you style it.
1. **Pick the right view**: Compare layouts in [What Are Project Views?](https://www.taskade.com/learn/projects/project-views).
2. **Add structure**: Track more data with [Custom Fields](https://www.taskade.com/learn/projects/custom-fields).
3. **Reuse the design**: Save it in [Taskade Templates](https://www.taskade.com/learn/projects/use-templates).
4. **Style the workspace**: Set its icon and color in [Change Workspace Color & Icon](https://www.taskade.com/learn/projects/workspace-icon).
5. **Share it**: Invite your team in [Share a Project](https://www.taskade.com/learn/projects/share-project).