# AI Project Studio: Generate a Project with AI
> Use AI Project Studio to turn one prompt and your files into a structured Taskade project with tasks, sections, fields, and an optional AI agent.
- Source: https://www.taskade.com/learn/agents/project-studio
- Section: AI Agents
- Updated: 2026-09-29
- Index of all pages: https://www.taskade.com/learn/llms.txt
AI Project Studio is the project-making AI tool in Taskade. You describe a goal, add files or links if you want, and it builds a structured project that you can edit and share.
> **TL;DR:** AI Project Studio turns one prompt into a Taskade project with sections, tasks, and details. Add files, links, or pasted text as sources, and pick a view and a language. Turn on **Agent Mode** to get an AI agent for the project. It works on every plan. To build a whole app instead, see [Taskade Genesis](https://www.taskade.com/learn/genesis/overview).
In this guide, you will:
- Generate a structured project from one prompt
- Shape the result with sources, a view, and a language
- Add an AI agent that knows the project
- Generate new blocks and subtasks inside an existing project
## Before You Start
You need a workspace and a clear goal for the project.
| Requirement | Details |
| --- | --- |
| Plan | Every plan, Free included. Each generation uses AI credits |
| Cloud sources | Google Drive, Dropbox, Box, and OneDrive need a paid plan |
| Who can do this | Any workspace member who can create projects |
| Time | About 5 minutes |
## How It Works
AI Project Studio reads your prompt and your sources, then builds a project. **Agent Mode** also creates an AI agent that learns from that project.
```mermaid
graph TD
A[Your prompt] --> C[AI Project Studio]
B[Sources
files, links, pasted text] --> C
C --> D[Preview of the project]
D --> E[Create project]
E --> F[AI agent trained on the project
when Agent Mode is on]
style A fill:#2a1225,color:#ff8fa3,stroke:#ff2d60,stroke-width:2px
style E fill:#0d1a0e,color:#86efac,stroke:#22c55e,stroke-width:1.5px
```
## Step 1: Open AI Project Studio
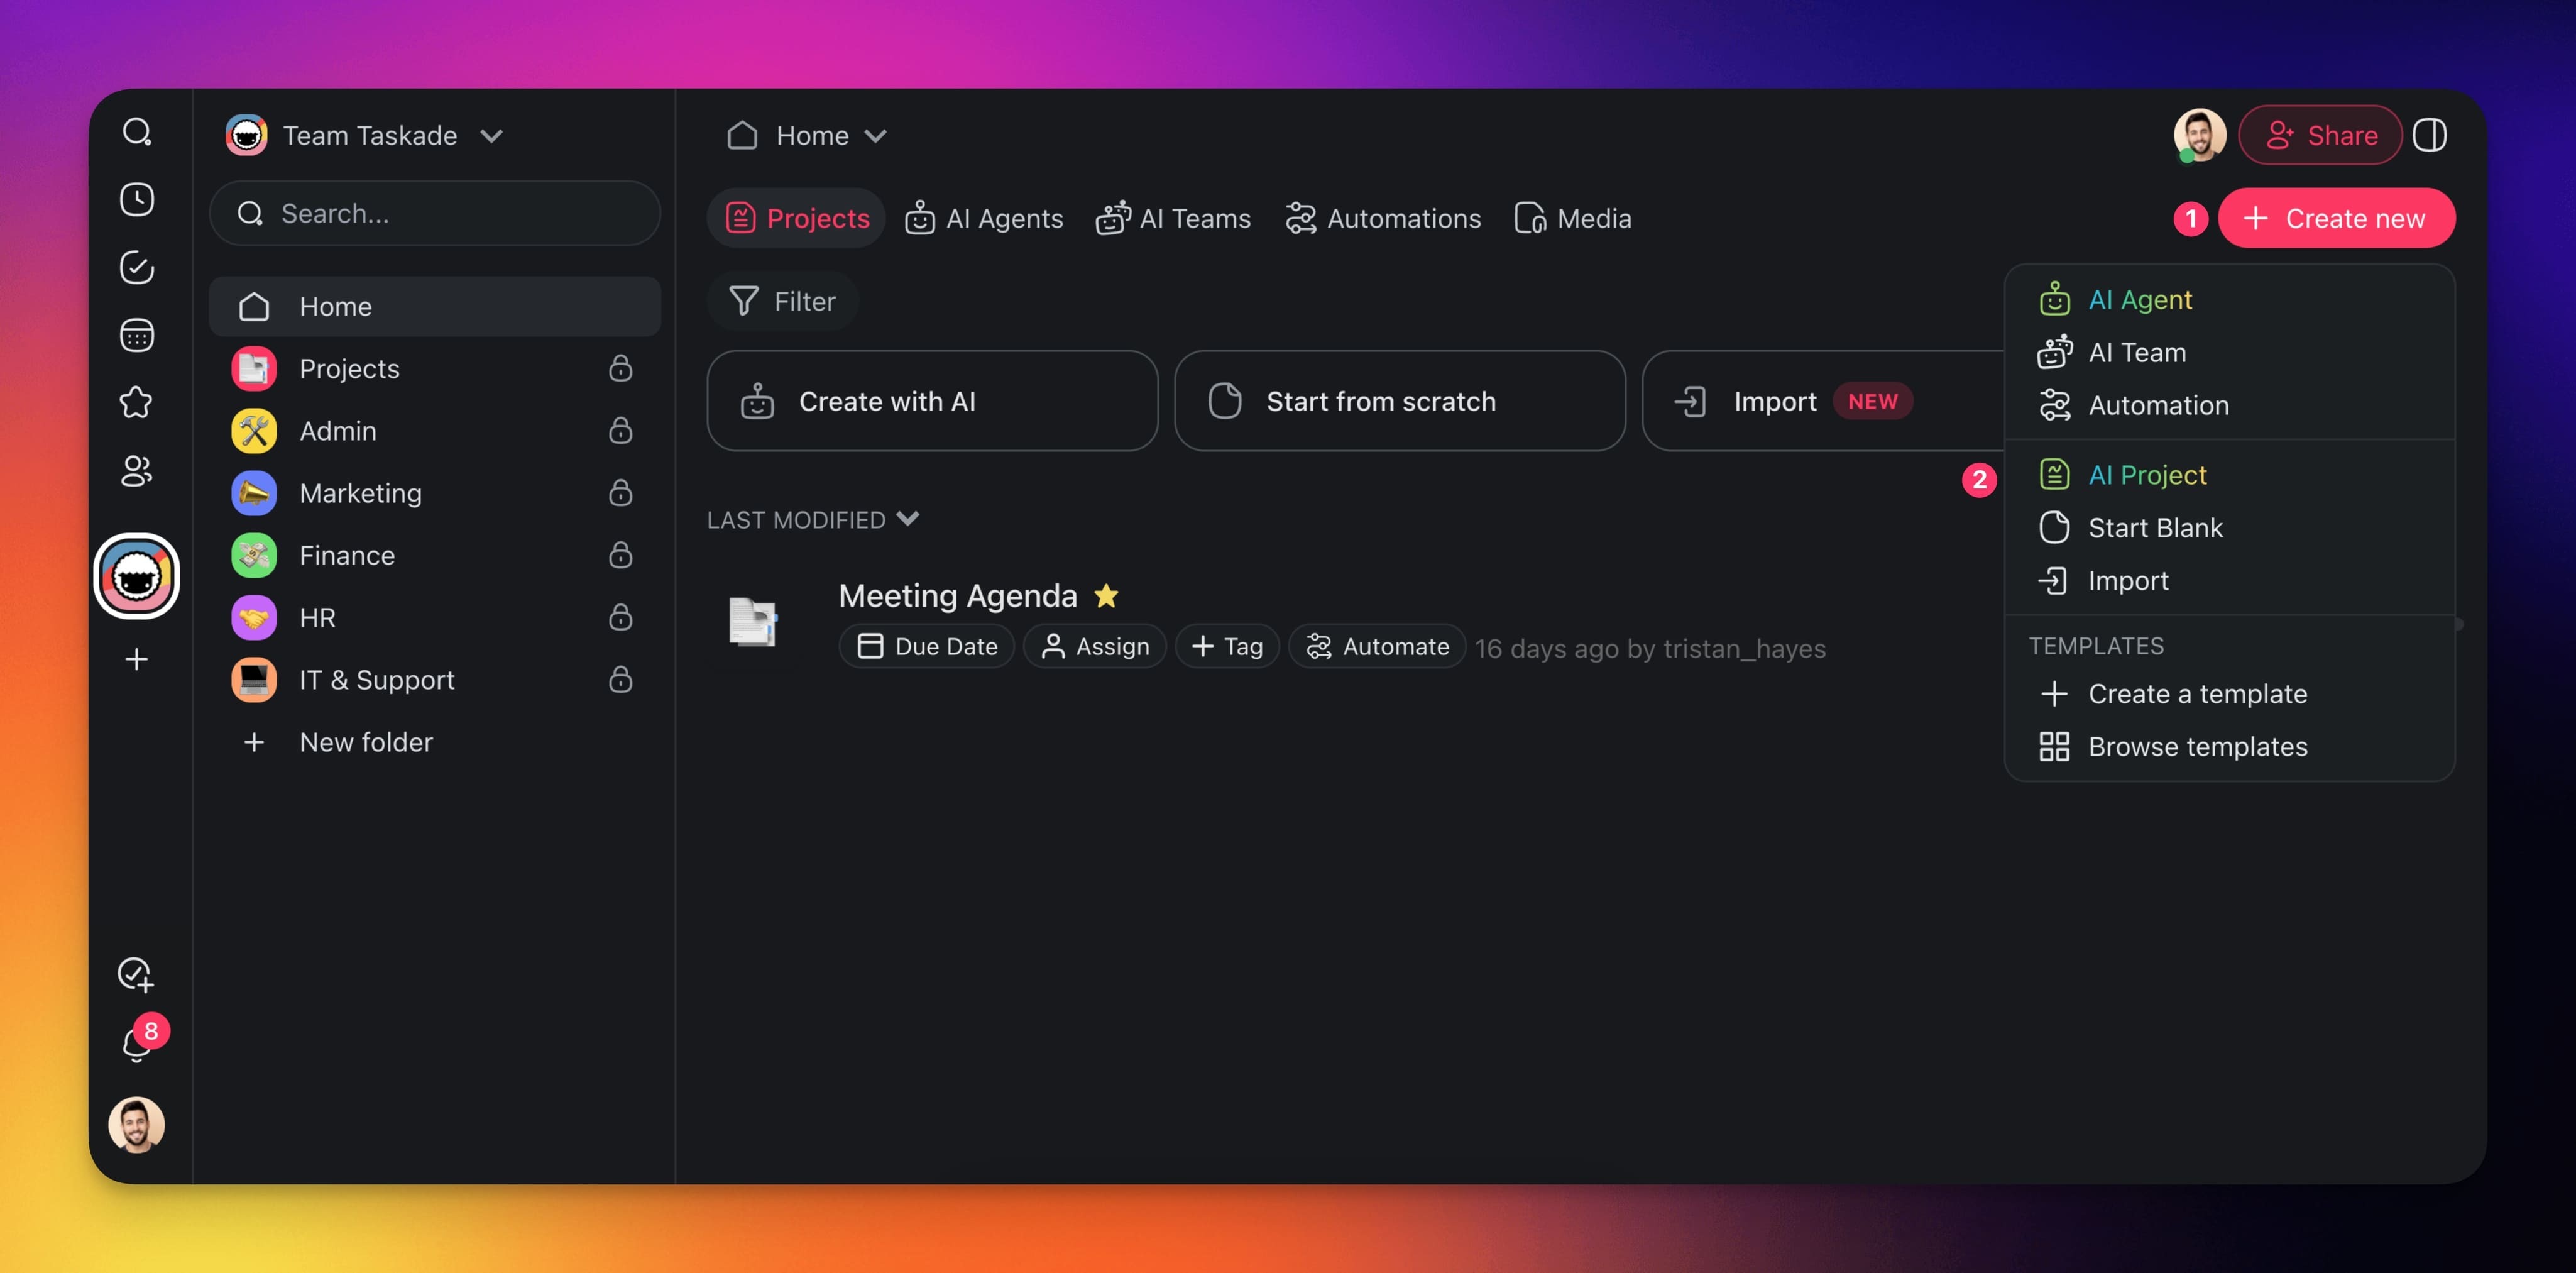
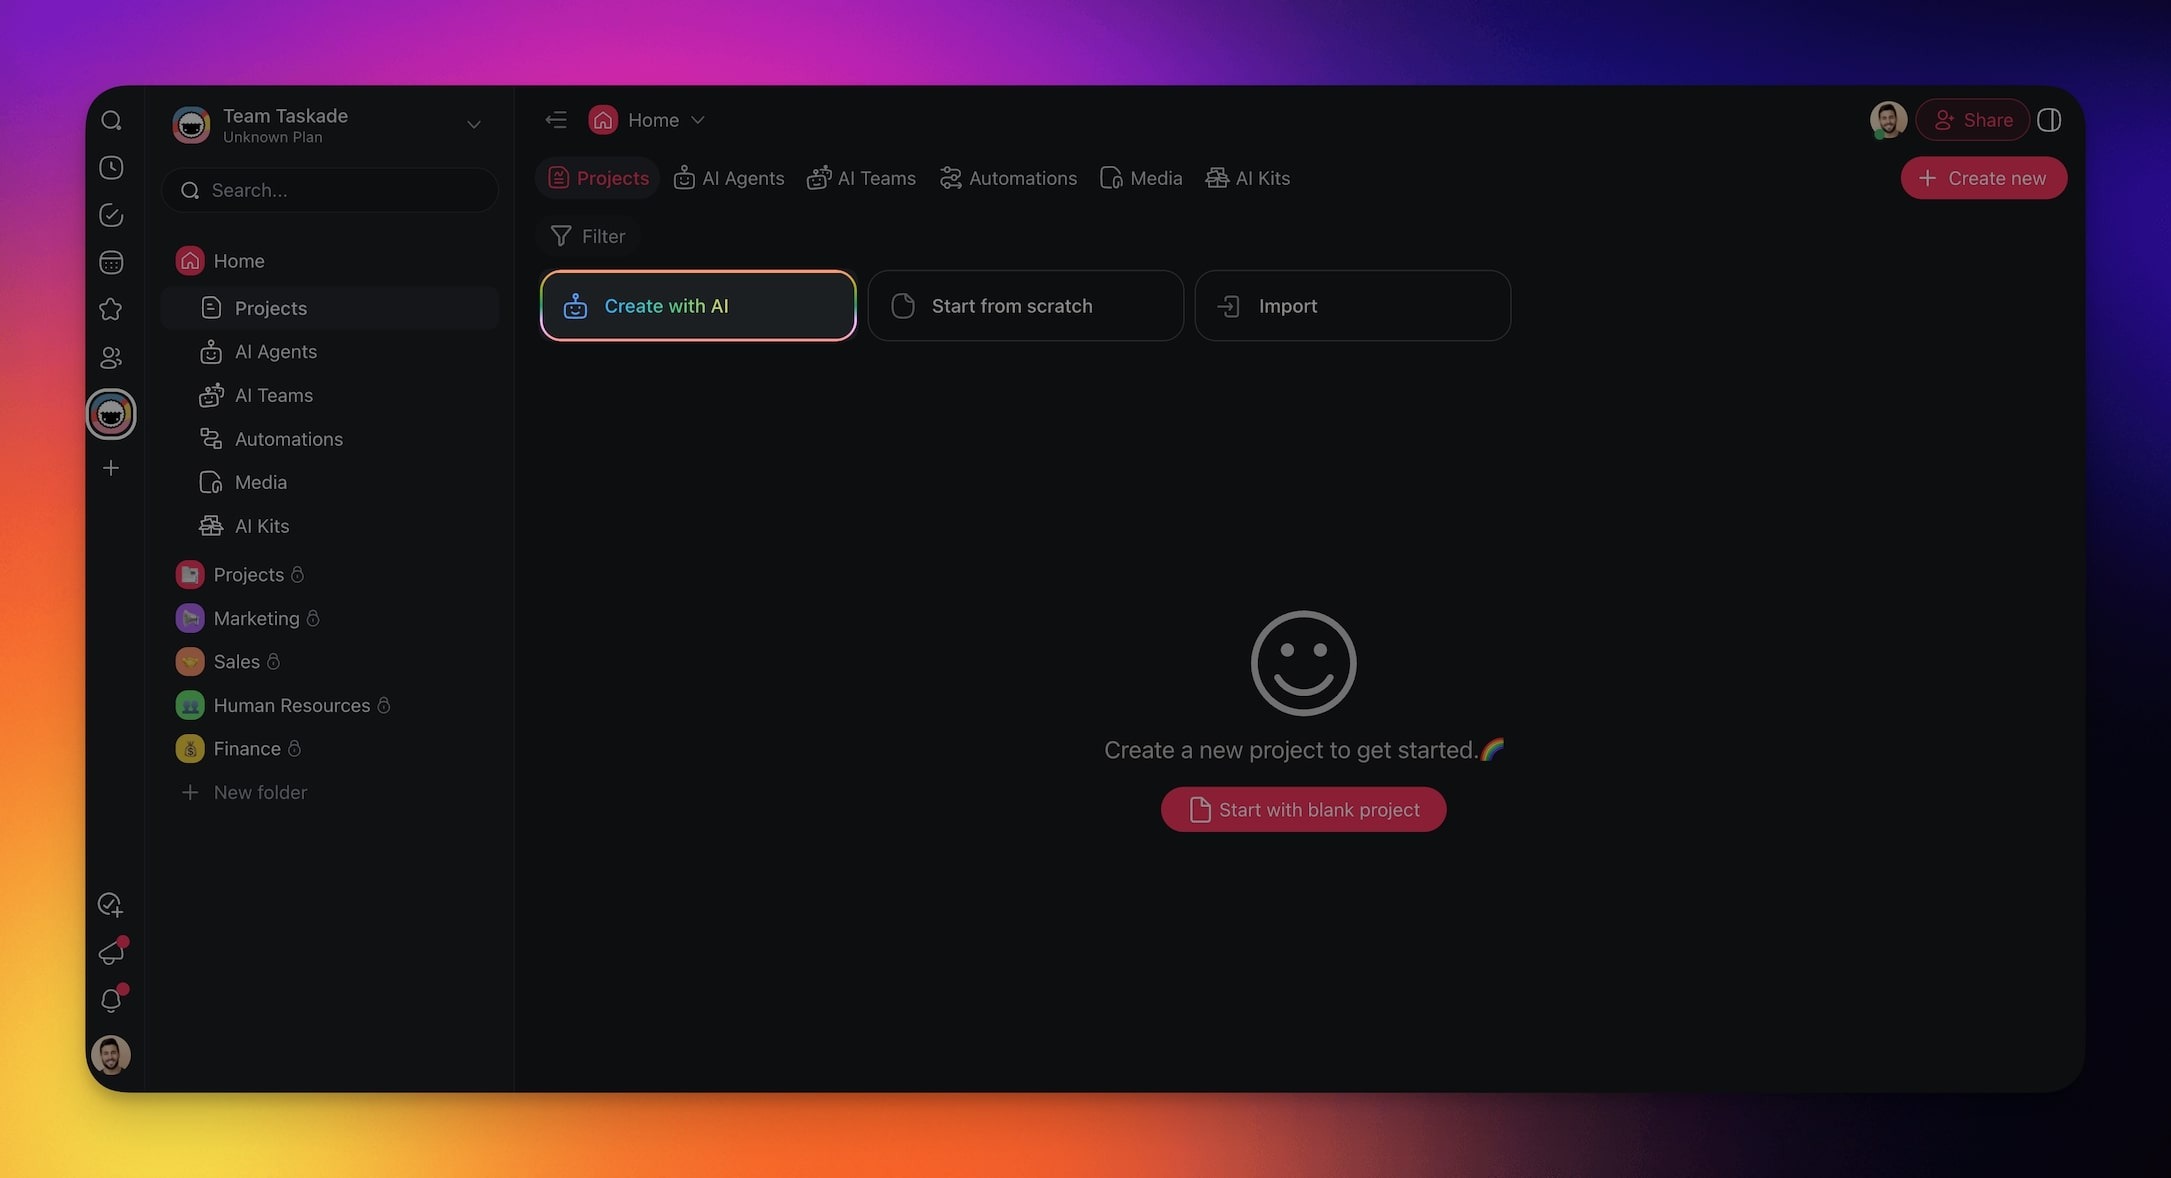
AI Project Studio opens from the **Projects** section of your workspace.
1. In the left sidebar, point to **Projects**.
2. Click the **+** button. Its tooltip reads **Create project**.
3. Select **AI Project**. The AI Project Studio window opens.
On the **Create** page, the **AI Project** card opens the same tool. Its label reads "Create task lists, mind maps, and outlines."
## Step 2: Describe the Project
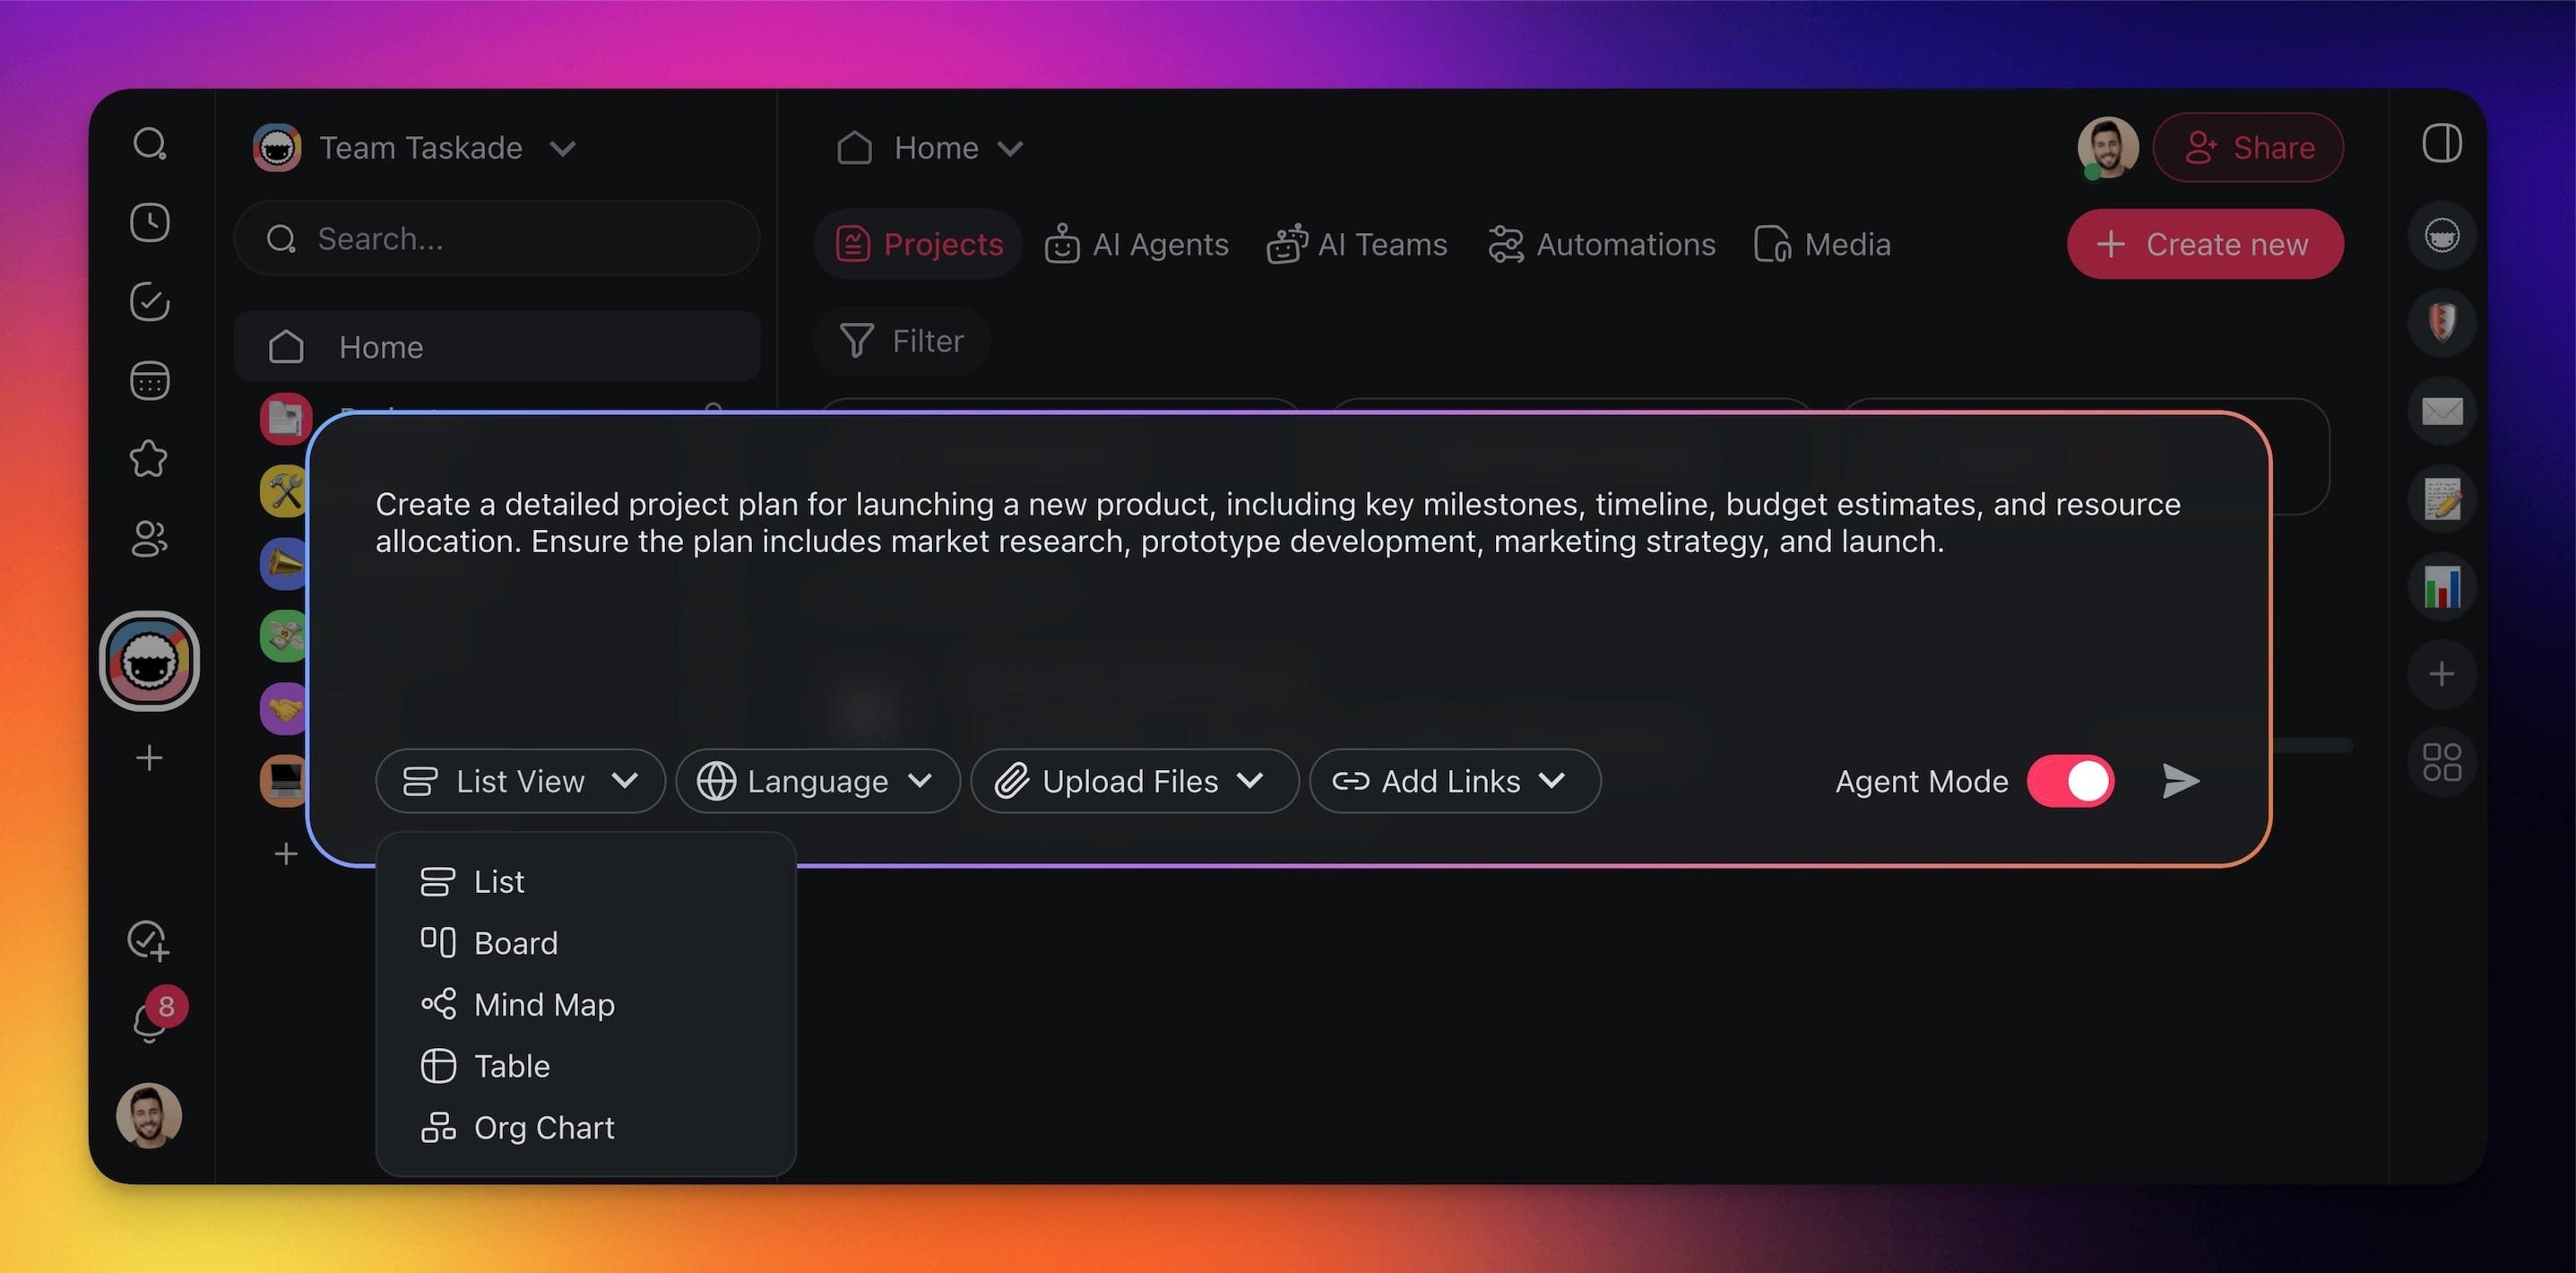
A prompt that names the outcome gives a project that you can use at once.
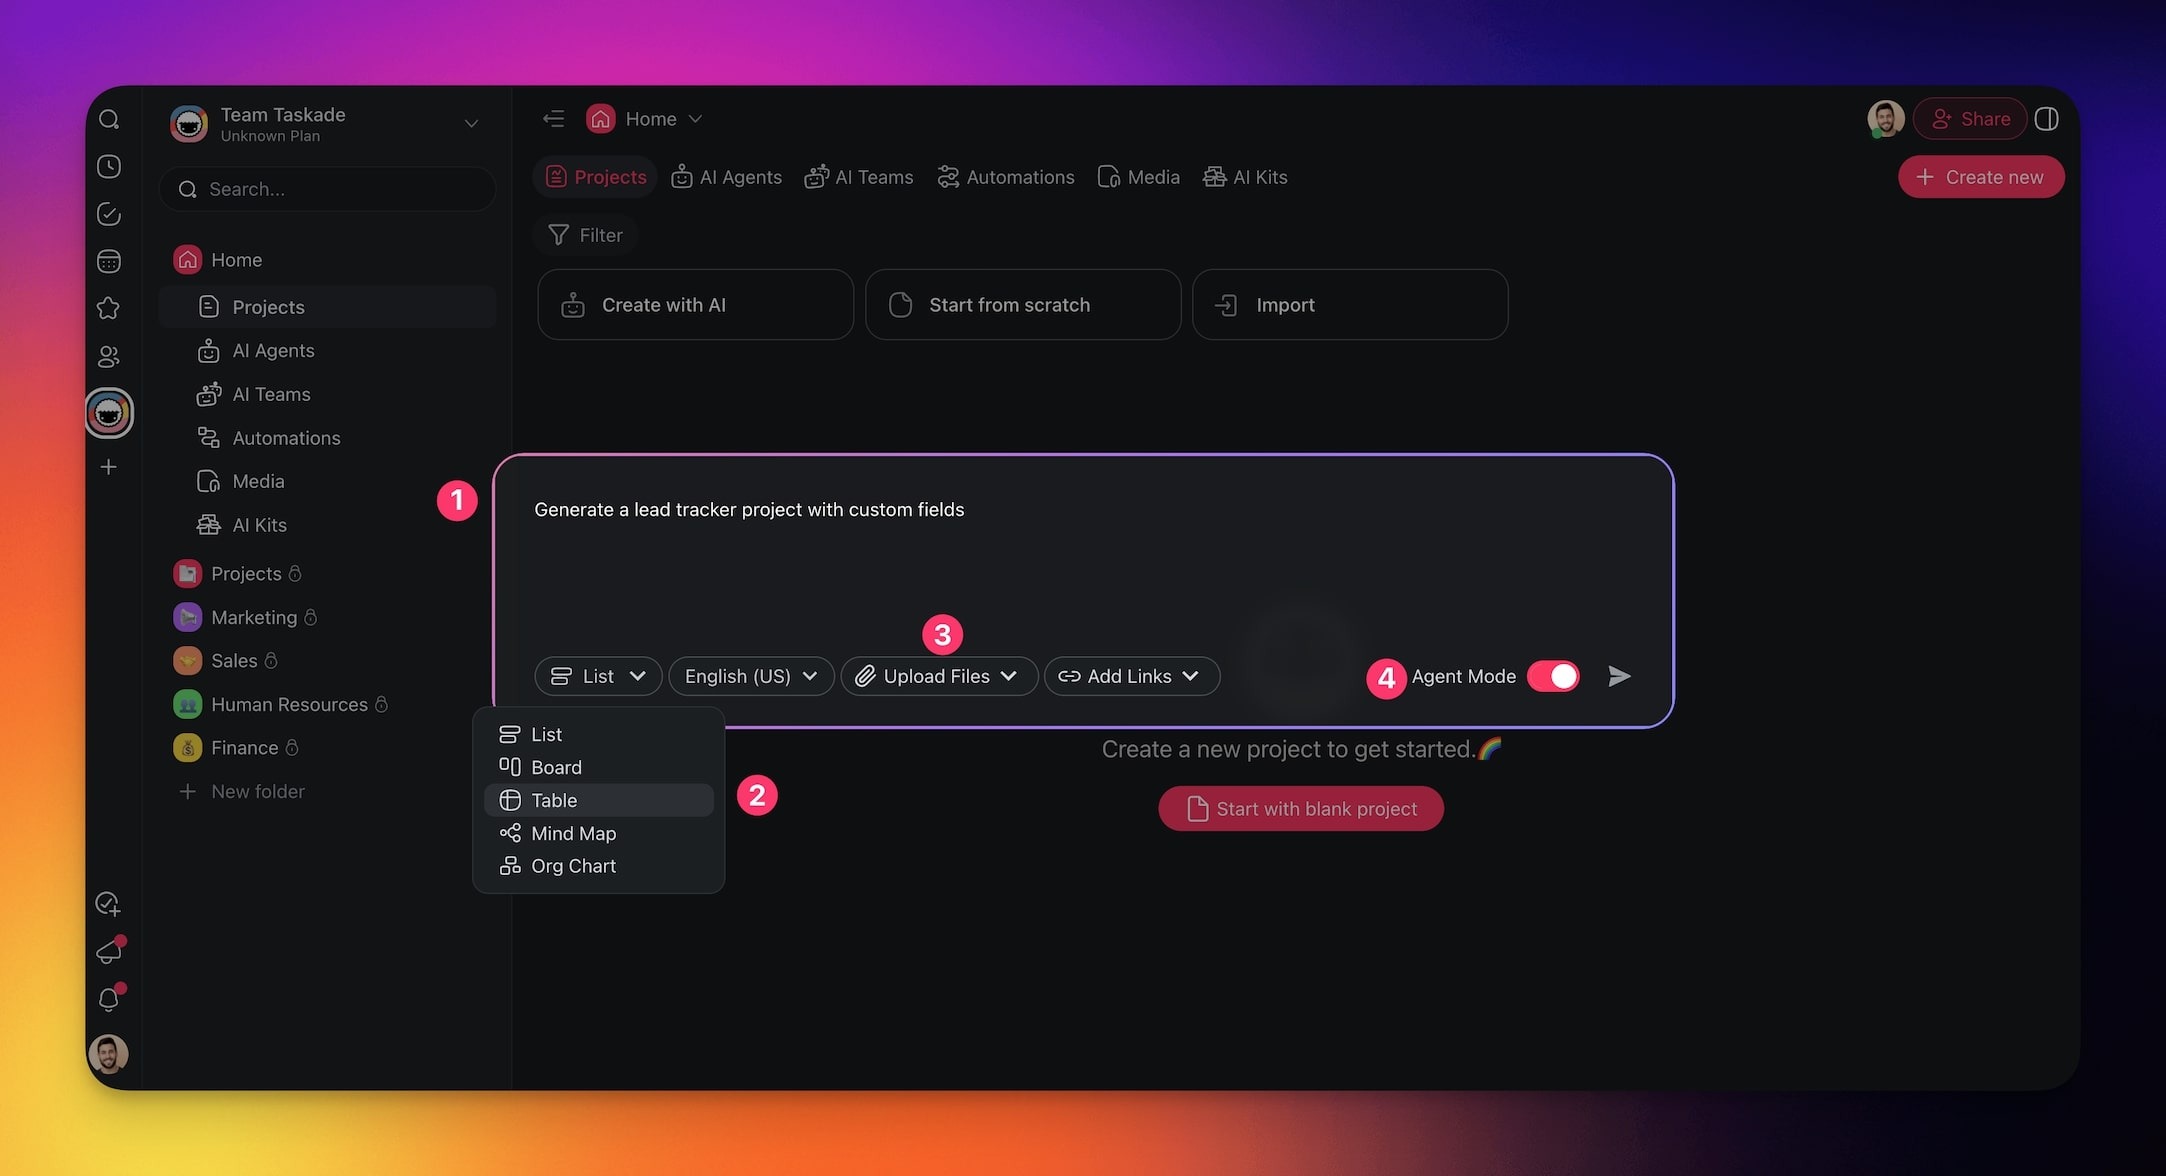
1. Click in the prompt box. It reads "Enter your goal, task, or next big project ...".
2. Paste a prompt that names the goal, the deadline, the team, and the structure.
```text
Create a Q2 product launch plan for a 5-person team. Split it into phases: research,
build, beta, launch, and follow-up. Give each task an owner role and a due date in
April, May, or June. Do not add a budget section yet.
```
*Why this works:* The prompt names the phases and the details for each task, so every section has a clear shape.
Use this formula when you write your own prompt:
| Part | Example |
| --- | --- |
| Goal | "A Q2 product launch plan" |
| Deadline or time frame | "Due dates in April, May, or June" |
| Team or owner | "A 5-person team, with an owner role for each task" |
| Structure | "Phases: research, build, beta, launch" |
| Boundary | "Do not add a budget section yet" |
## Step 3: Add Sources and Settings
Settings under the prompt box shape the project before you generate it.
```text
┌──────────────────────────────────────────────────────────────────┐
│ ┌────────────────────────────────────────────────────────────┐ │
│ │ Enter your goal, task, or next big project ... │ │
│ └────────────────────────────────────────────────────────────┘ │
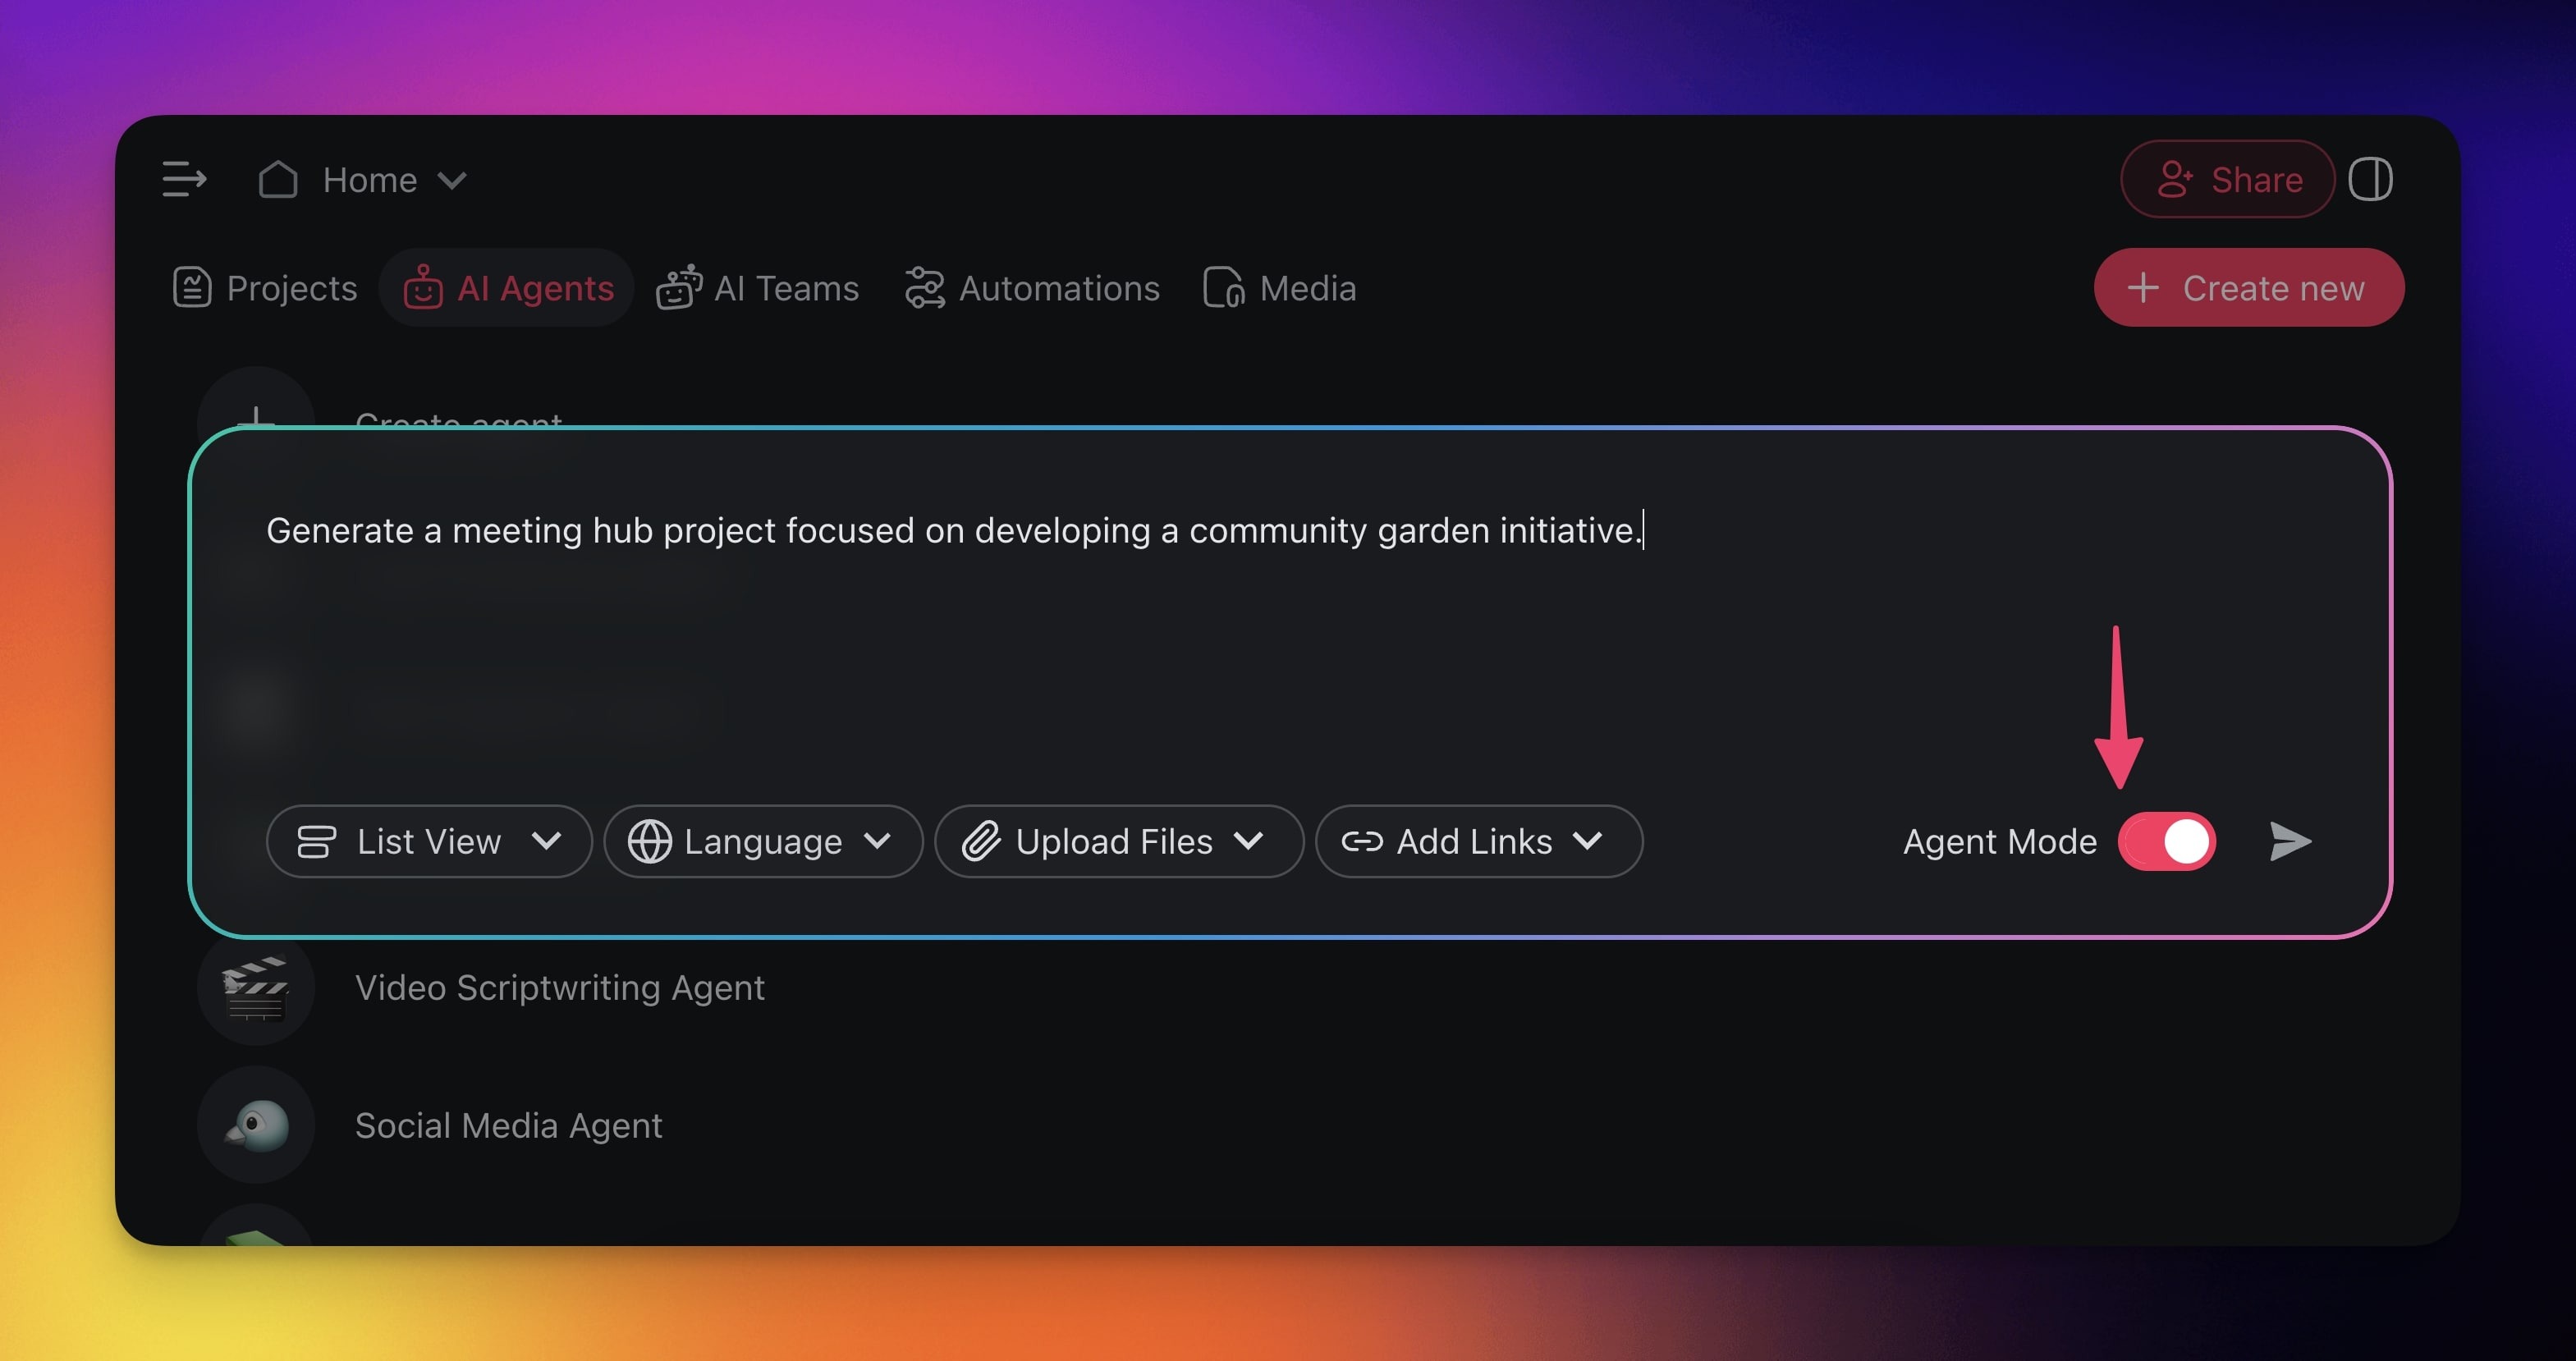
│ ( List ▾ ) ( Language ▾ ) ( Upload Files ▾ ) ( Add Links ▾ ) │
│ Agent Mode ○ │
└──────────────────────────────────────────────────────────────────┘
```
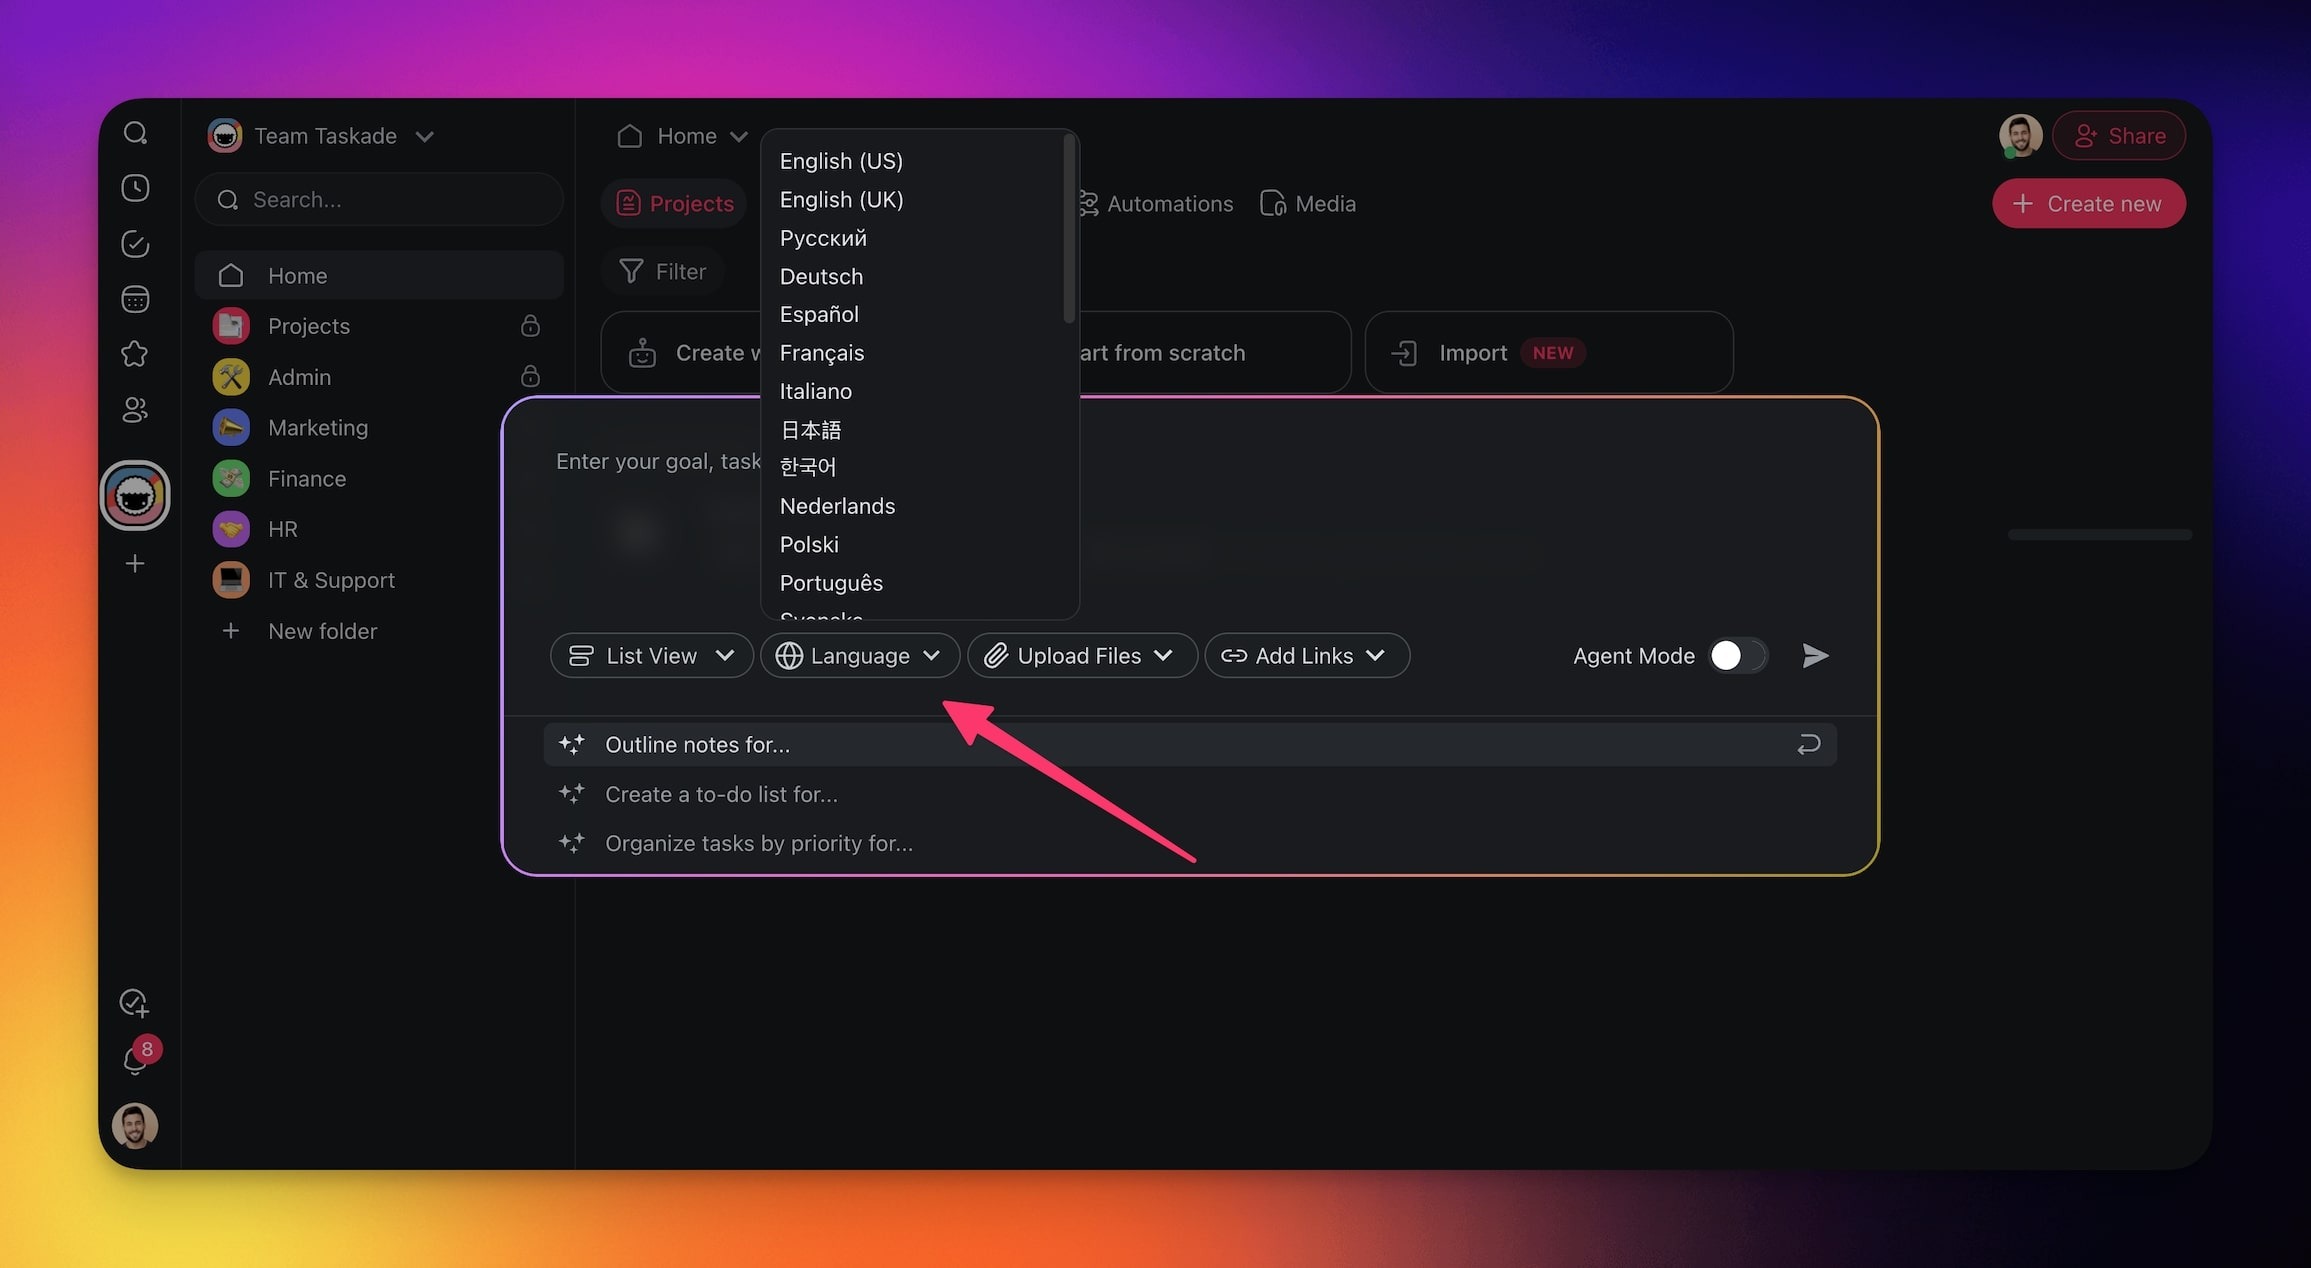
1. Click the view picker (it shows **List** or another view) to pick the default [project view](https://www.taskade.com/learn/projects/project-views).
2. Click **Language** to pick the language of the project.
3. Click **Upload Files** to add a document, a file from the workspace, or pasted text.
4. Click **Add Links** to add a website, a YouTube video, a blog article, a research paper, or a social post.
5. Turn on **Agent Mode** to generate an AI agent with the project.

### Supported Seed Formats
A seed source gives AI Project Studio your own material to build from.
| Source | Where to add it | Formats or examples |
| --- | --- | --- |
| Documents | **Upload Files** | .pdf, .docx, .txt, .md, .pptx, .epub |
| Spreadsheets | **Upload Files** | .xlsx, .xls, .csv |
| Workspace files | **Upload Files** → **Add from Workspace** | Files already in your Media |
| Cloud files | **Upload Files** → **Google Drive**, **Dropbox**, **Box**, **OneDrive** | Paid plans |
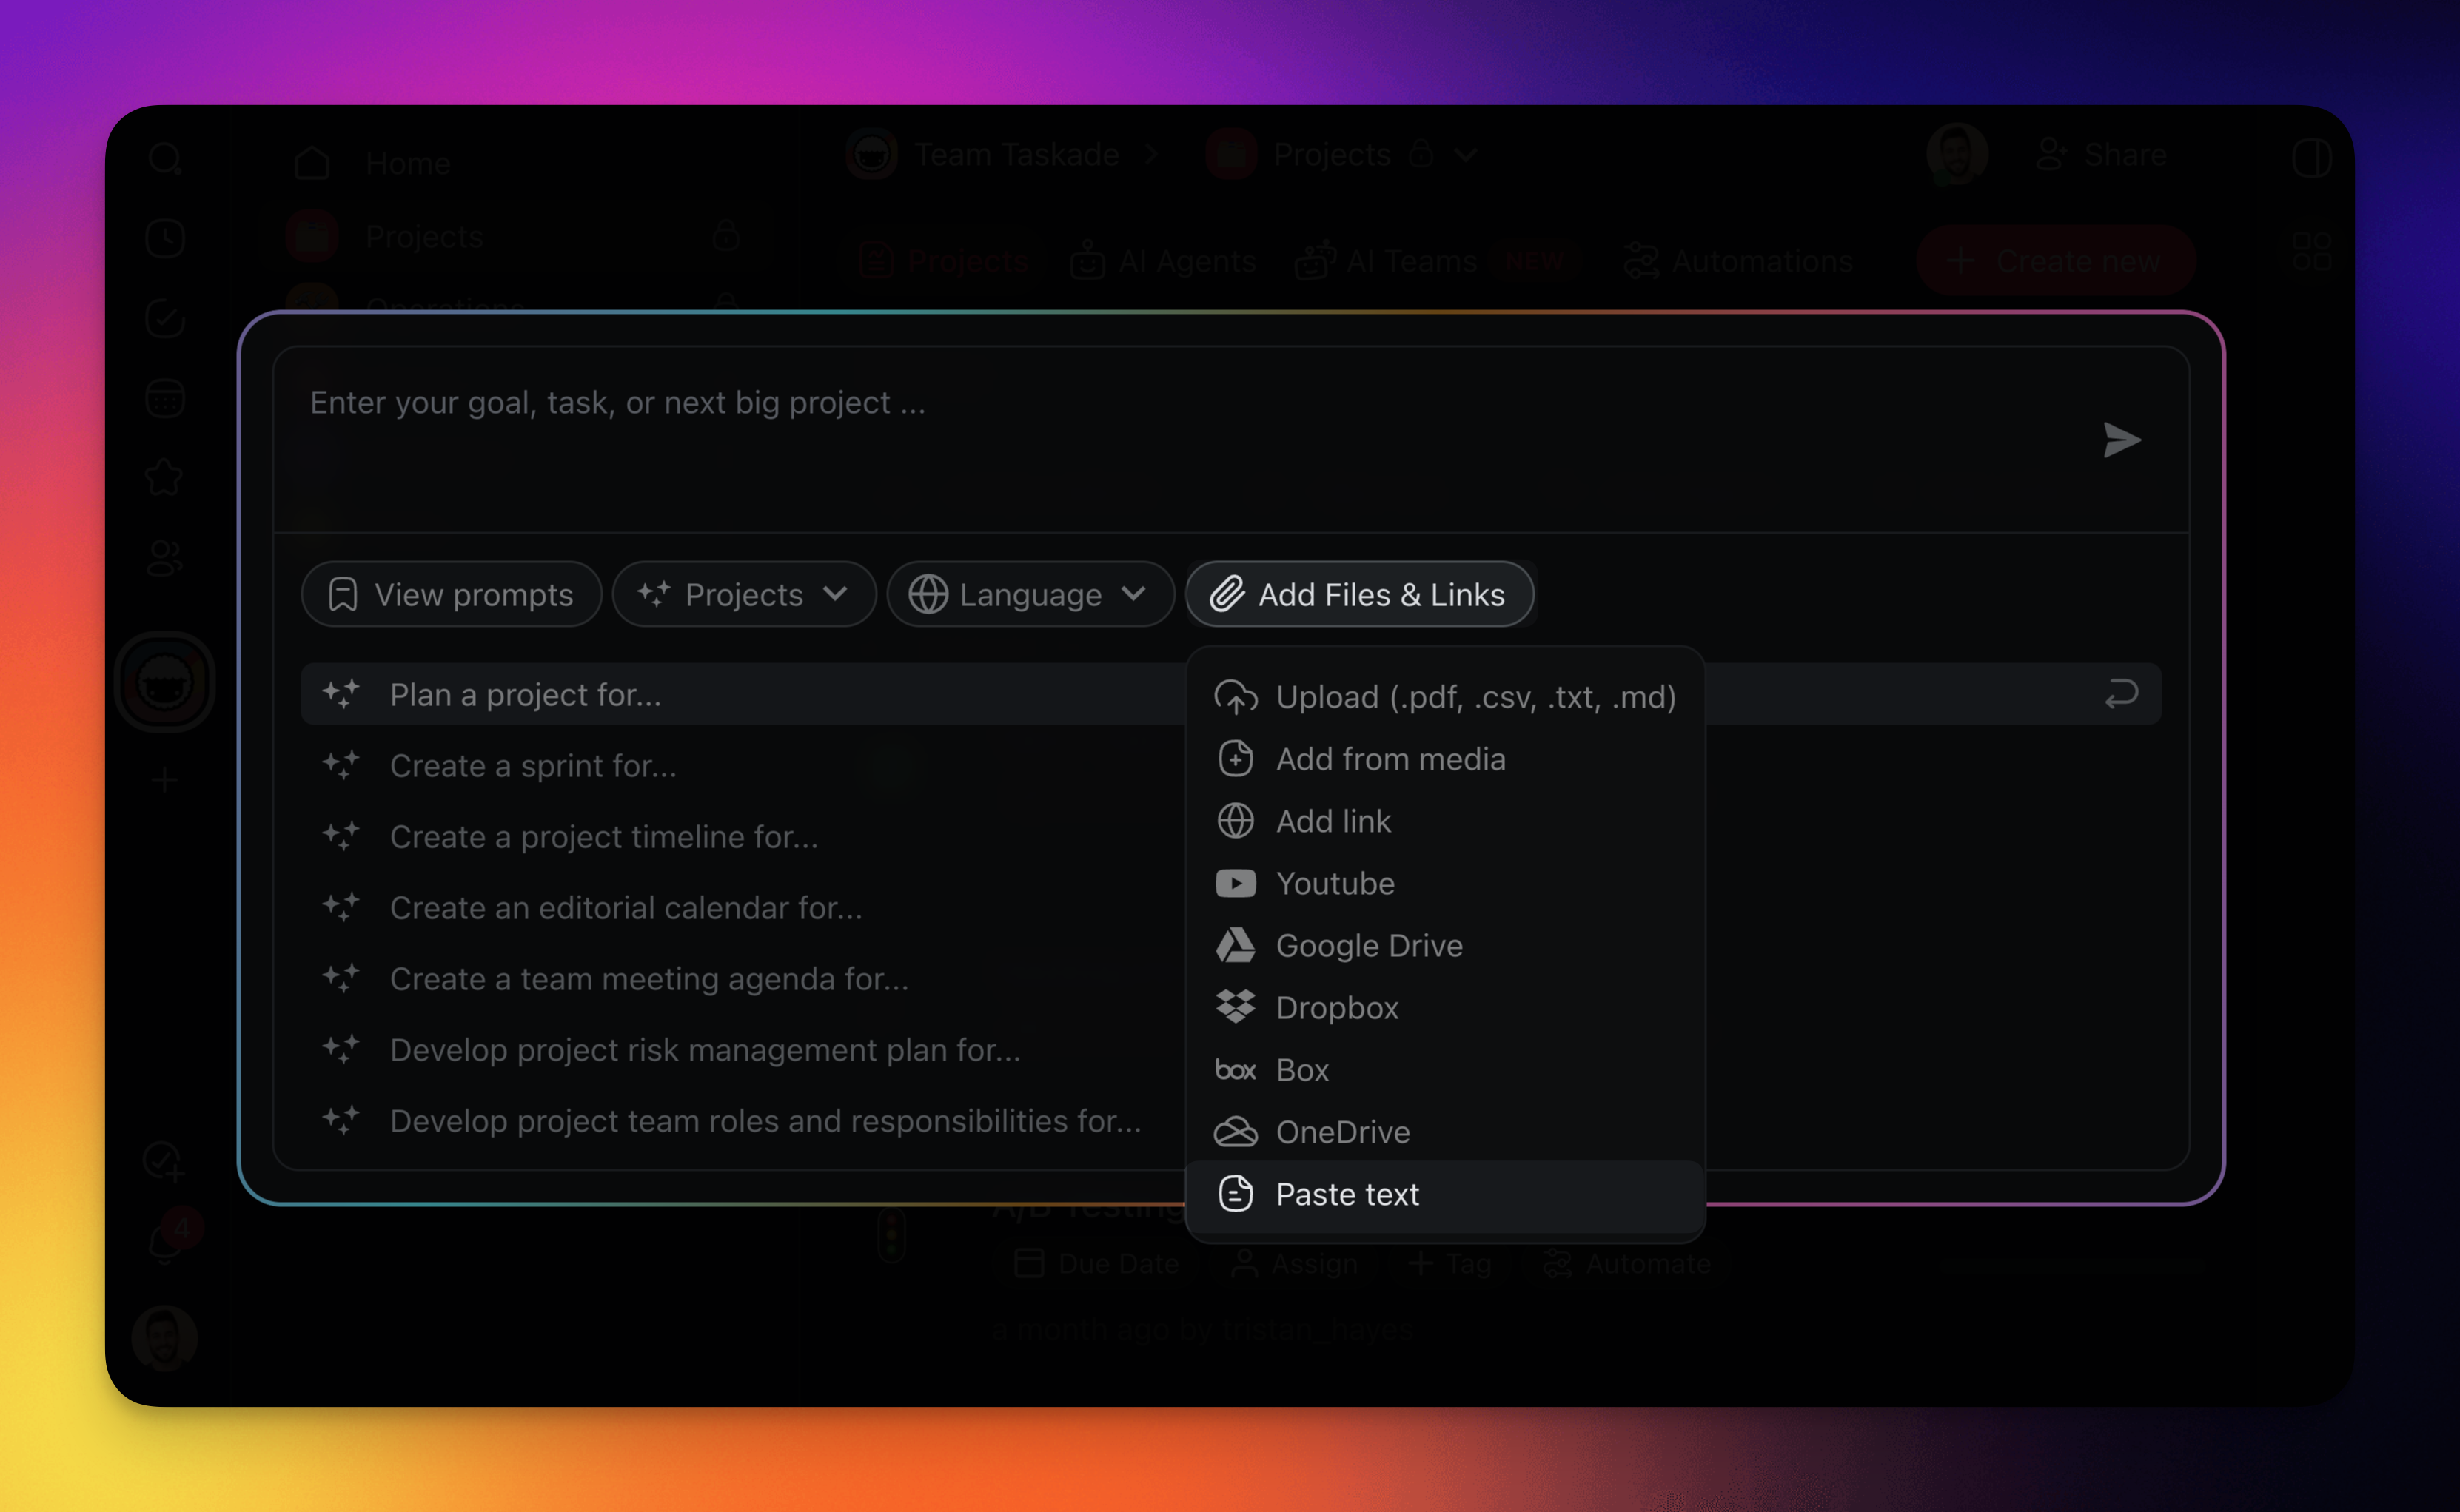
| Pasted text | **Upload Files** → **Paste Text or Markdown** | Notes, Markdown |
| Web pages | **Add Links** → **Website Link**, **Blog Article**, **Research Paper** | Articles and papers |
| Videos | **Add Links** → **YouTube Video** | The video transcript |
| Social posts | **Add Links** → **Social Post** | A public post |
### Choose a Language
The project uses the language that you pick, or the language of your prompt.
1. Click **Language**, then pick a language from the list.
2. If you do not pick one, write the prompt in the target language, or add "Respond in Spanish".
### Agent Mode
**Agent Mode** creates an AI agent for the new project. The switch reads "Enable to generate an agent with your project."
1. Turn on **Agent Mode** before you generate.
2. After the project is created, open the agent in the [AI Agents tab](https://www.taskade.com/learn/agents/custom-agents) to edit it.
### Create a Source
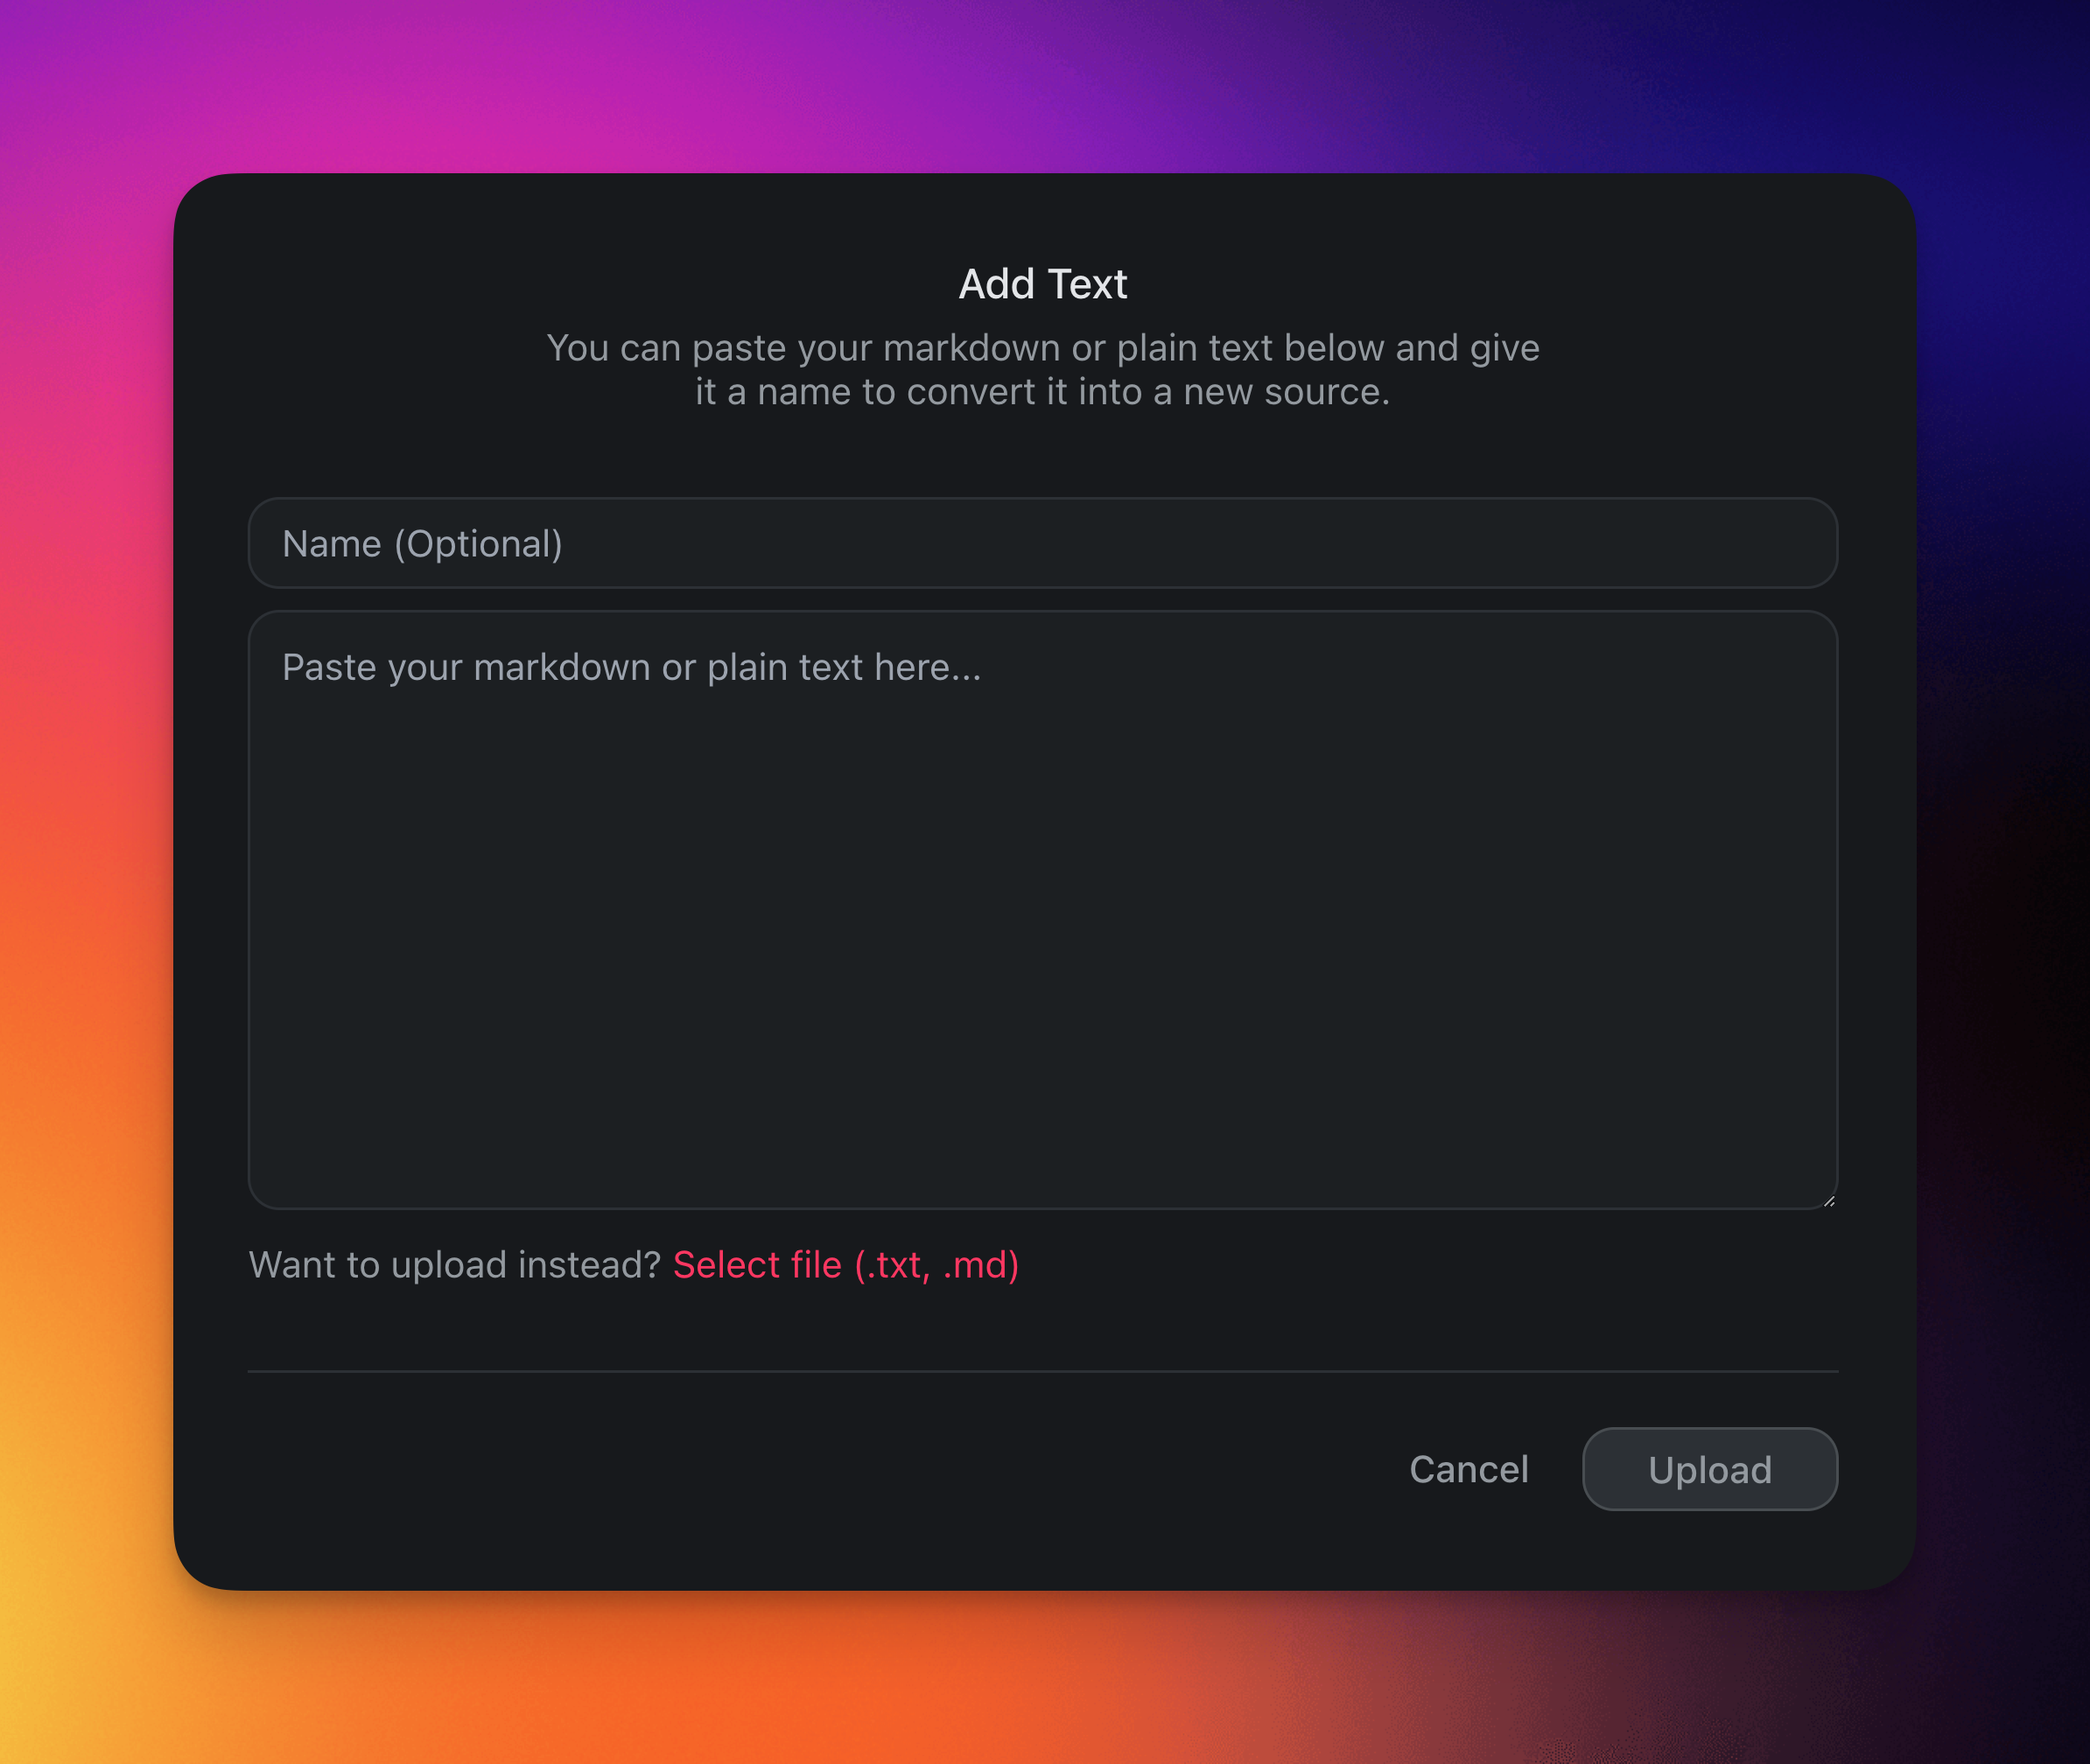
Pasted text becomes a Markdown source for the project.
1. Click **Upload Files**, then select **Paste Text or Markdown**.
2. Paste your text and save it. The file also goes to your [Media Files](https://www.taskade.com/learn/agents/media-tab).
## Step 4: Generate and Create the Project
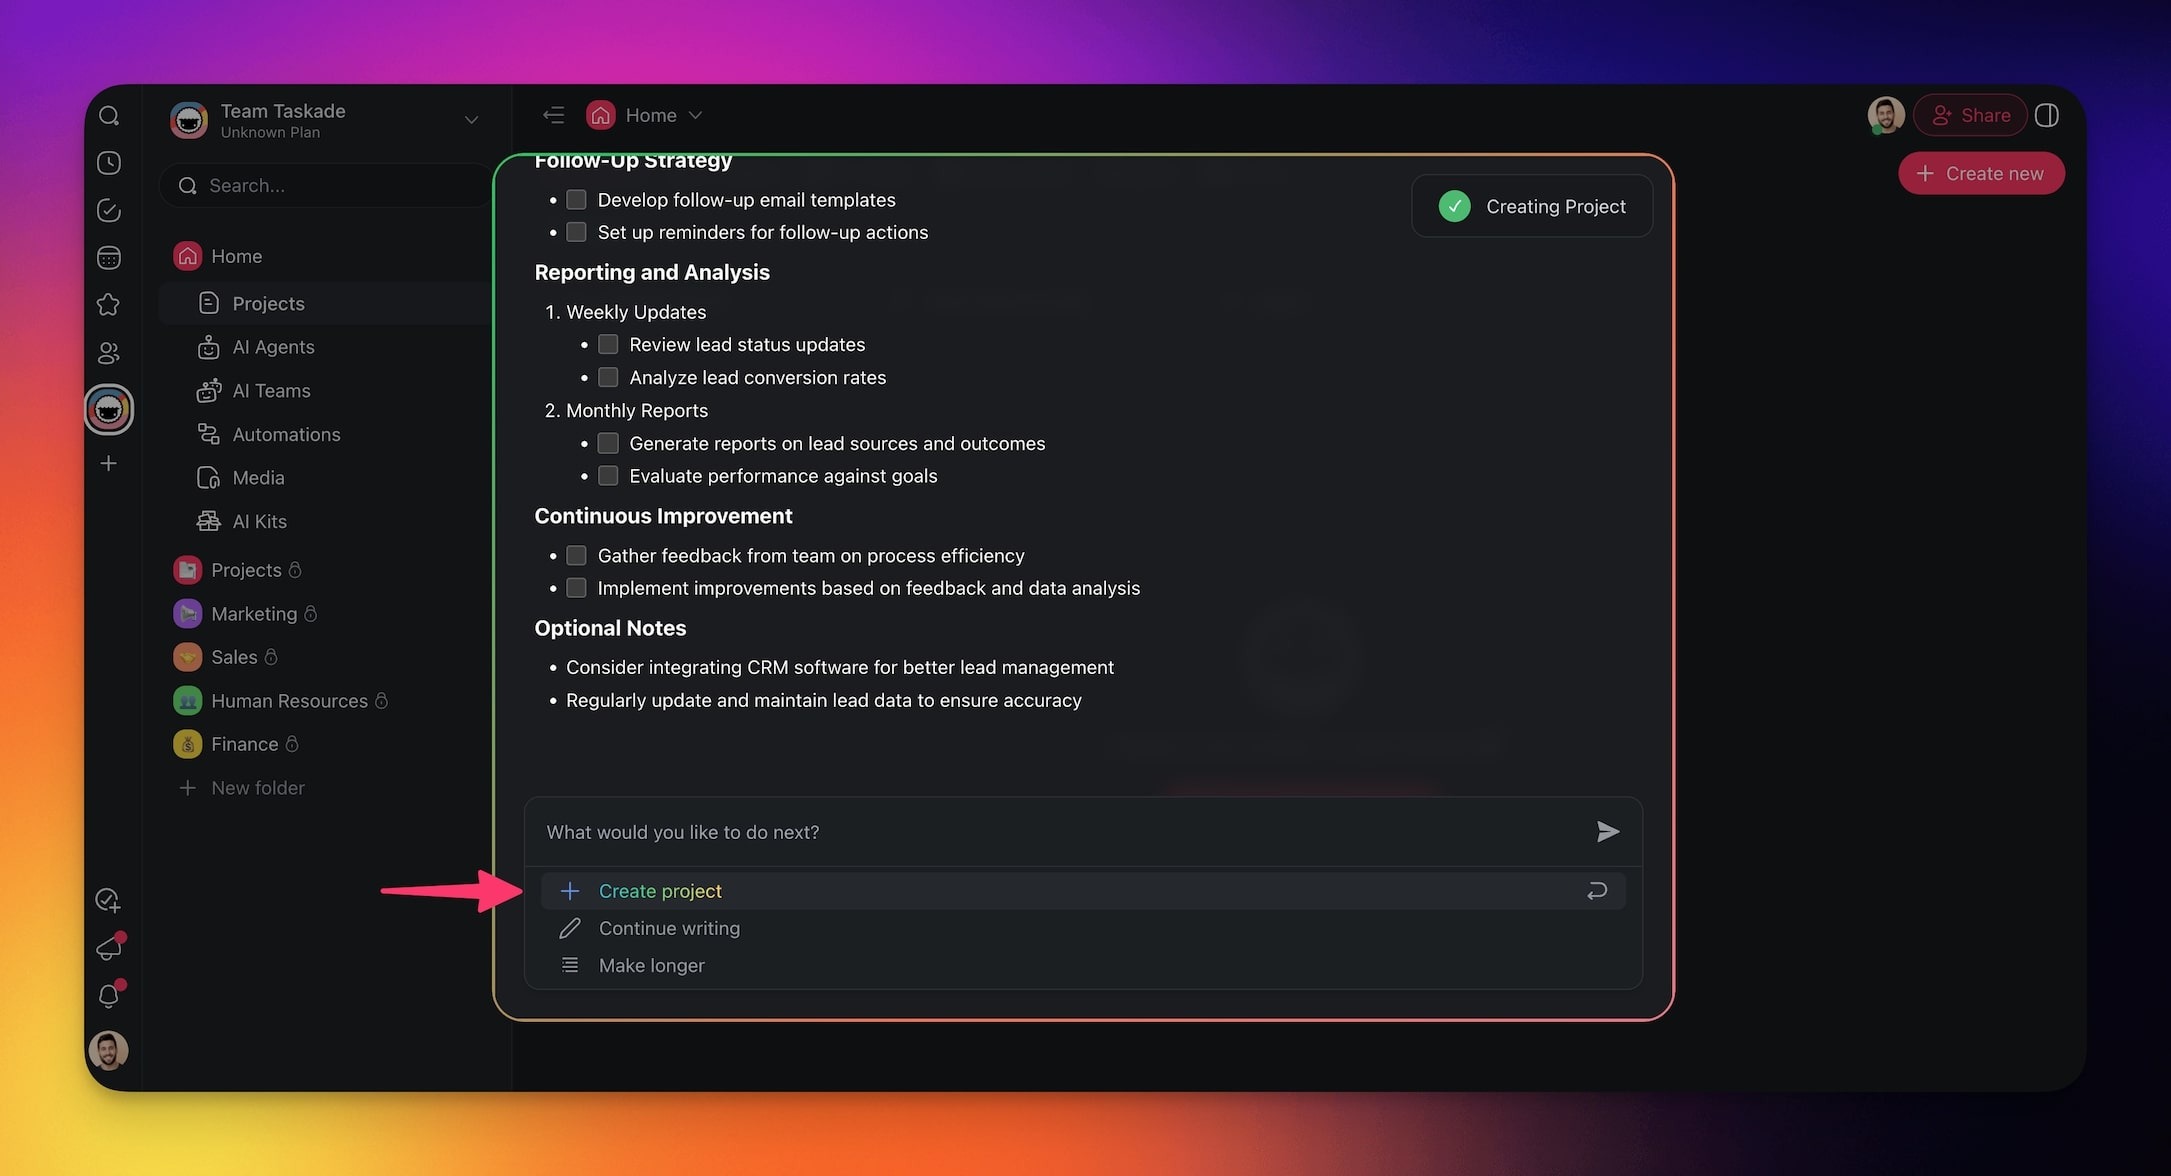
AI Project Studio shows a preview first. You then choose what to do with it.
1. Press **Enter**, or click the send button  to generate.
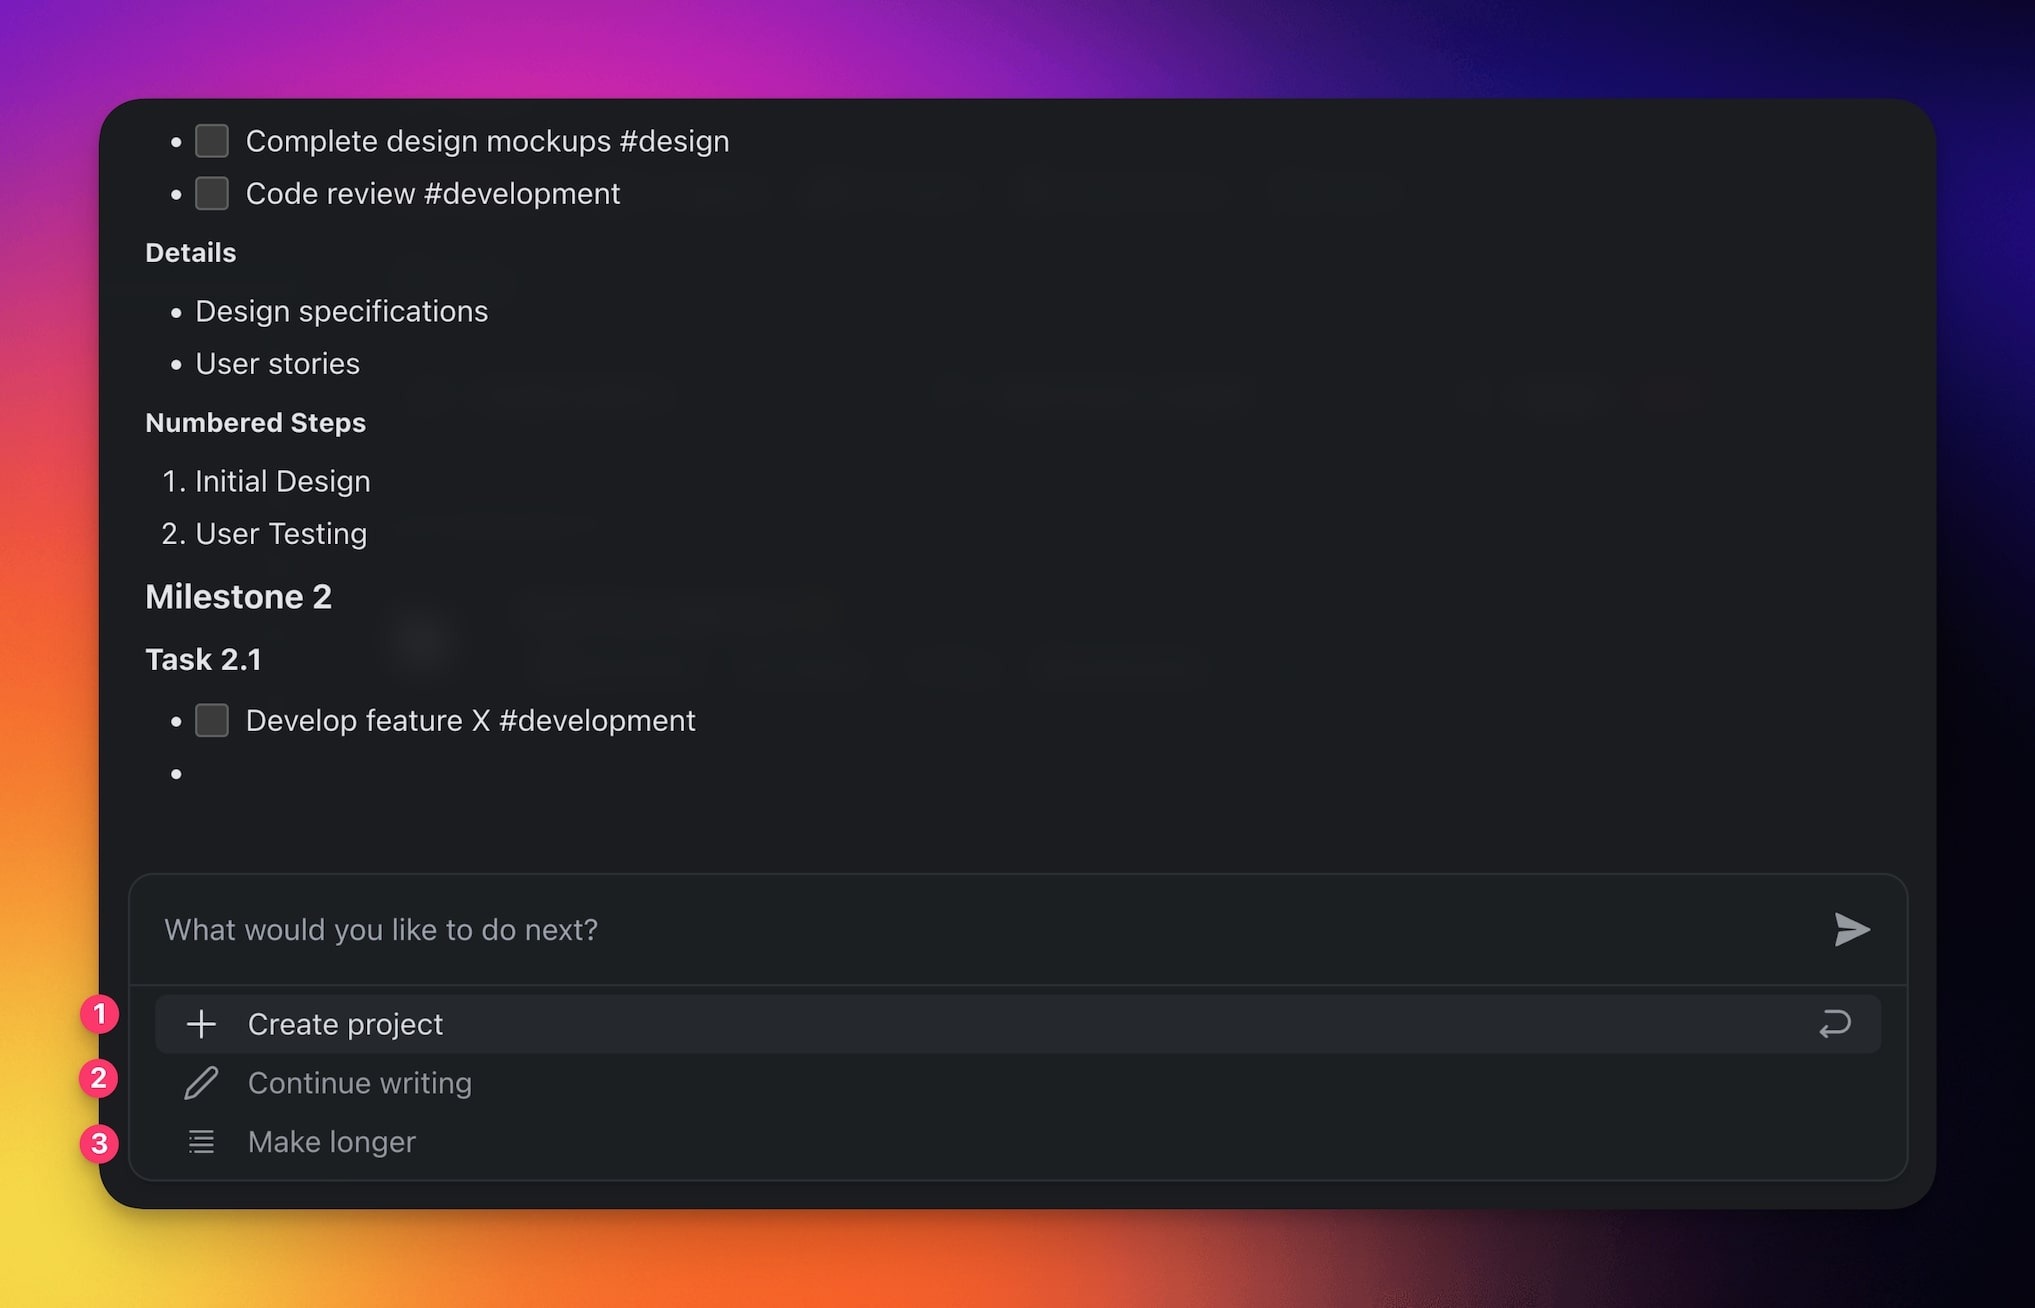
2. Read the preview. To stop early, click **Stop generating**.
3. Pick one action:
- **Create project** turns the preview into a new project.
- **Continue writing** adds more to the preview.
- **Make longer** expands the preview.
### Advanced Project Generation
A detailed prompt can add due dates, custom fields, and assignees to the new project.
1. Name the details in the prompt: "Add a Status field, a Priority field, and a due date for each task."
2. Pick a view and add sources as in Step 3.
3. Press **Enter**, then click **Create project**.
## You Are Done When
The new project opens in your workspace with its sections and tasks. If **Agent Mode** was on, the new agent is in the AI Agents tab.
## Generate More Inside a Project
AI can also add blocks and subtasks to a project that you already have.
### Generate Blocks
The block generator adds AI content in the project editor, such as checklists and bullet lists.
1. Point to the top or the bottom of the project editor.
2. Click **Add Block**.
3. Select **AI Generator**, or select **AI Agent** to use one of your agents.
4. Describe the block. The box reads "Create a block for ...". To start from a ready prompt, click **View prompts**.
5. Press **Enter**, then click **Insert Block**.
[AI Project Studio overview video](https://www.youtube.com/embed/PohJMa979fU?rel=0)
### Generate Tasks
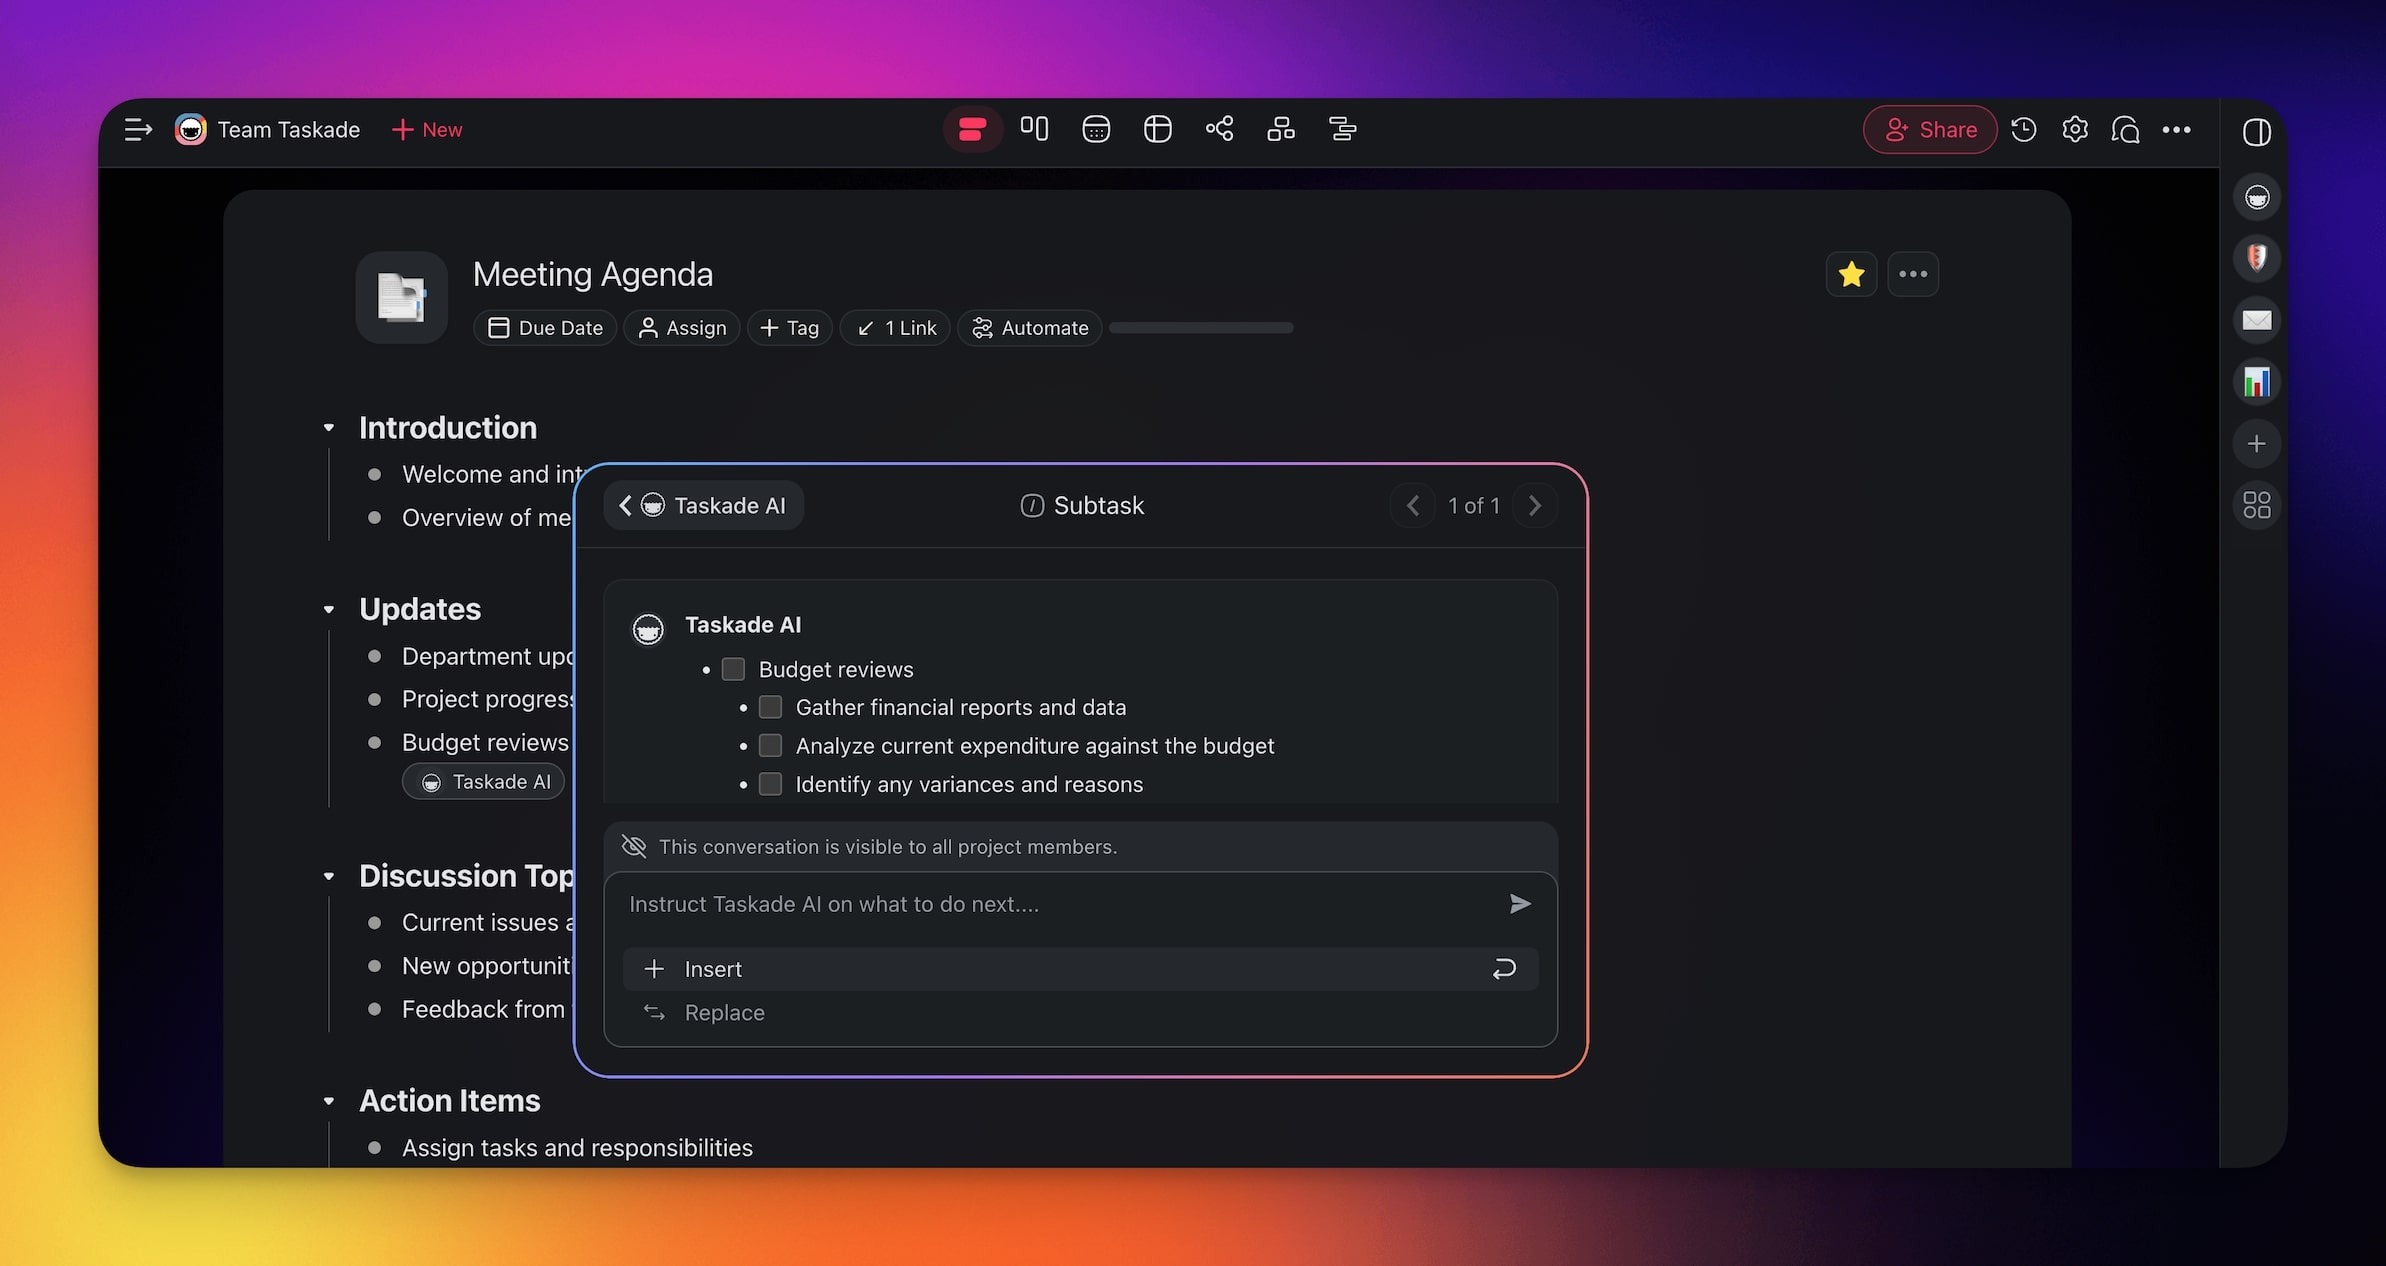
The **Subtask** command writes a list of subtasks under one task.
1. Open a project and select a task.
2. Type **/** and then "subtask".
3. Select **Subtask**.
4. Click **Insert** to add the subtasks below the task, or **Replace** to replace the task.
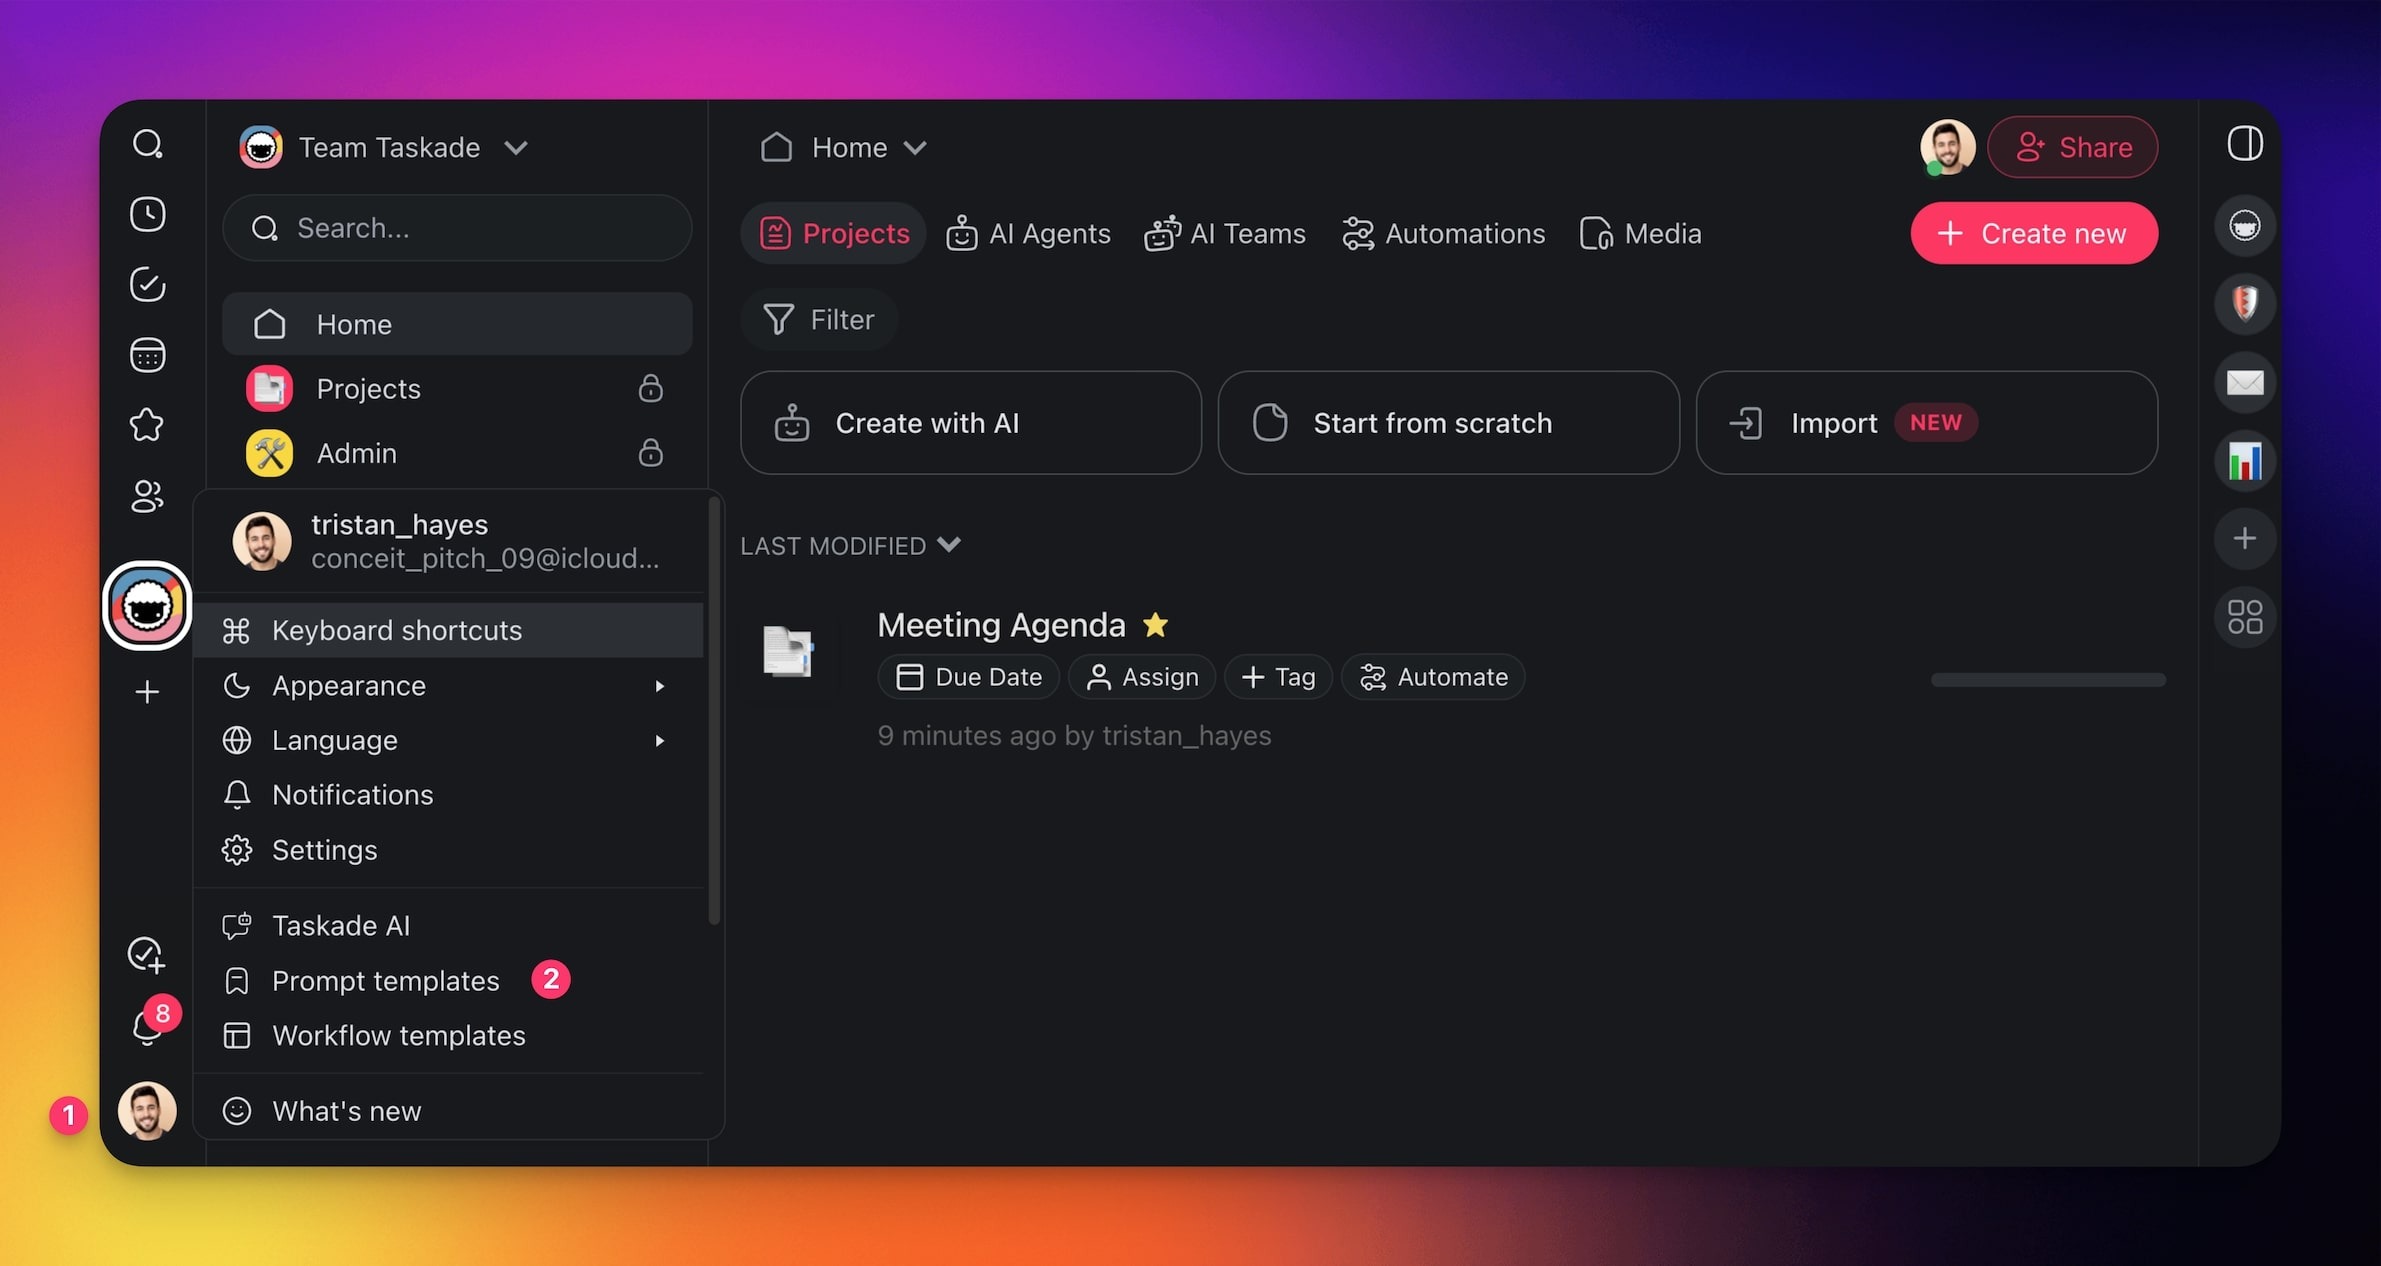
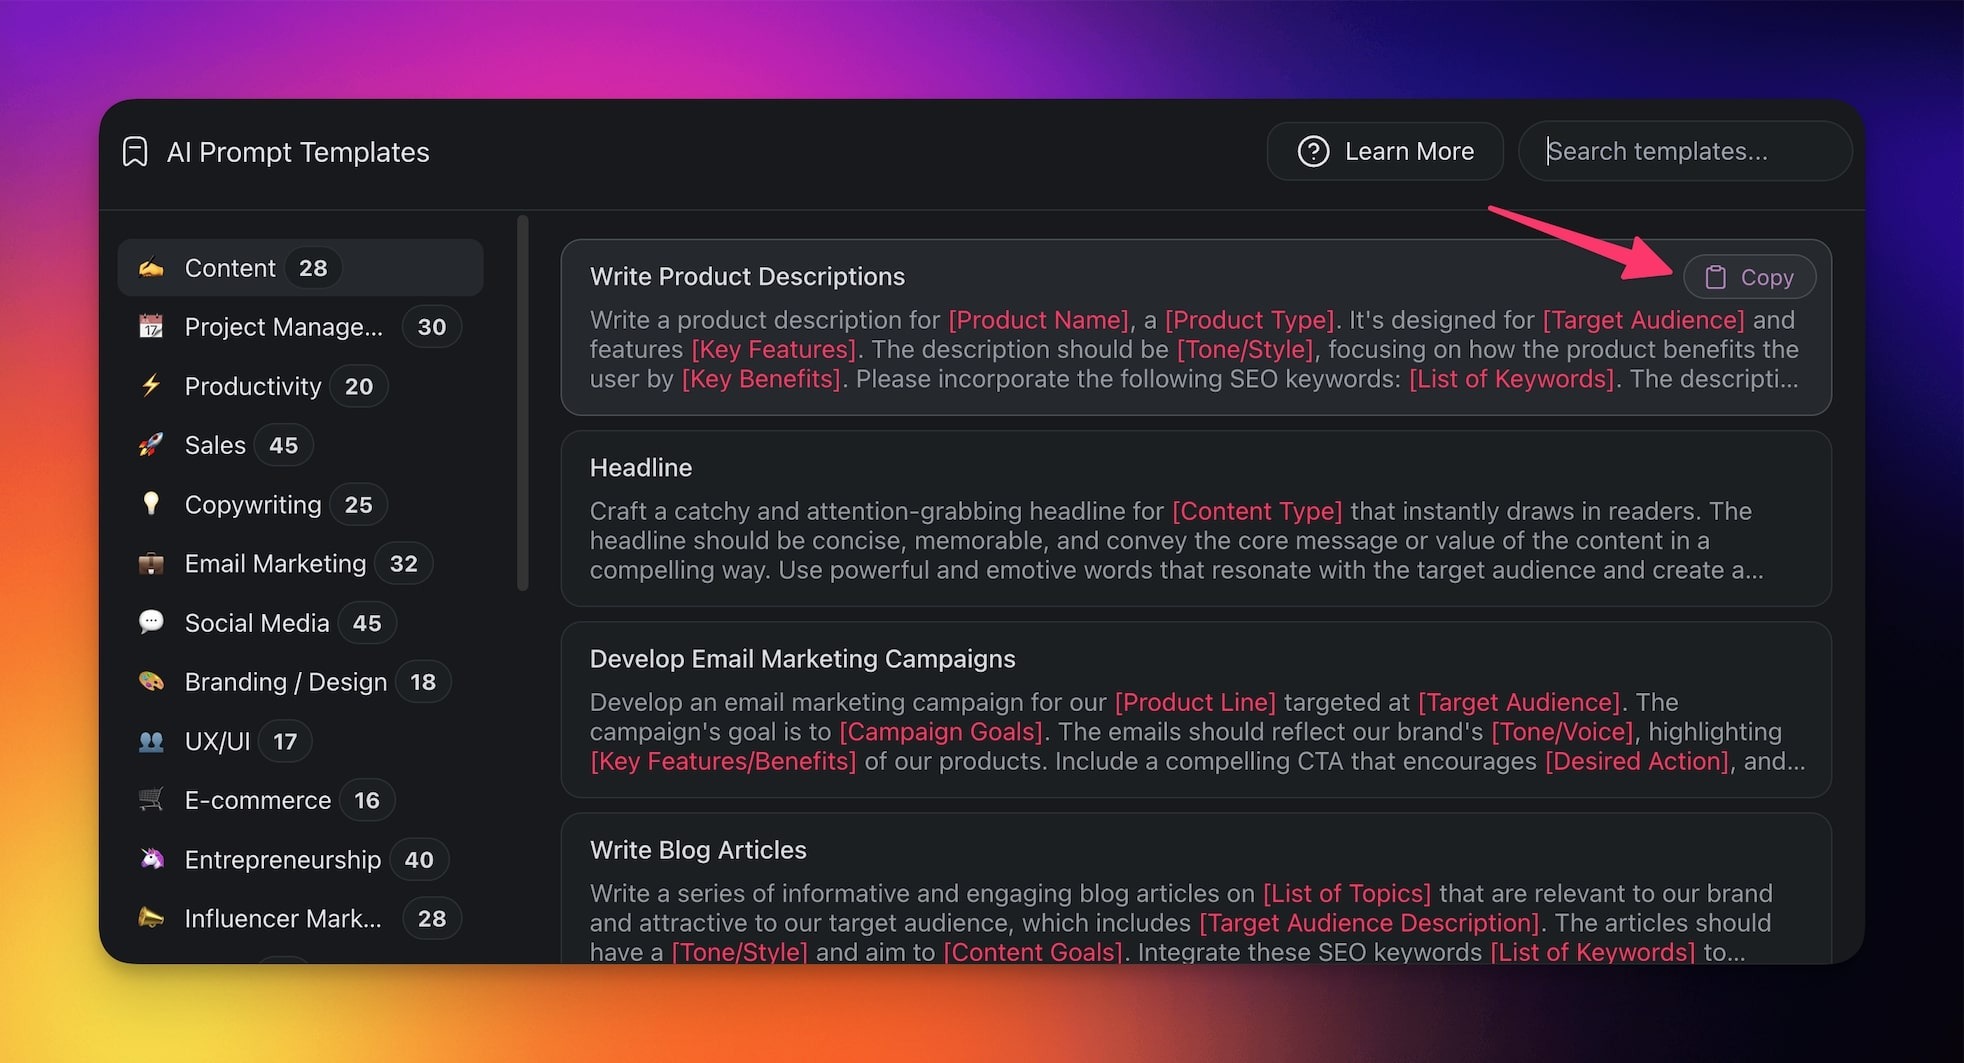
### Prompt Templates Library
Prompt templates give you a ready prompt to copy.
1. In the Taskade EVE chat box, click the **Add** button.
2. Select **Prompt templates** . Its label reads "Start from a ready-made prompt".
3. Pick a prompt, then paste it into AI Project Studio or the chat.
See more prompts in [Project Prompts](https://www.taskade.com/learn/agents/project-prompts).
## Prompt Examples
Send one prompt, look at the preview, then try the next.
### Content calendar
```text
Create a content calendar for a small bakery's Instagram for May. Give each week a theme,
three post ideas, and a caption draft for each post. Do not add paid ads yet.
```
### Client onboarding checklist
```text
Create a client onboarding checklist for a web design studio. Group tasks into Kickoff,
Content, Design, and Launch. Add a due date offset in days for each task. Do not add
invoicing steps yet.
```
### Study plan from a source
```text
Using the attached PDF, create a 4-week study plan. Give each week 5 tasks with a short
summary of what to read. Do not add quizzes yet.
```
*Why this works:* The third prompt points at a source, so the project follows your own material.
## Troubleshooting
Find what you see, then do the fix.
| What you see | Why | Fix |
| --- | --- | --- |
| The project is too shallow | The prompt names only a topic | Add phases, owners, due dates, and fields to the prompt |
| The structure does not fit the work | The default view does not match the task | Pick a different [view](https://www.taskade.com/learn/projects/project-views) before you generate |
| The project ignores your material | No source was added | Add files, links, or pasted text as a source |
| The cloud file sources show a **PRO** badge | Cloud sources need a paid plan | Upload the file from your computer, or upgrade |
| You want more detail after the preview | The preview is a first draft | Click **Continue writing** or **Make longer** |
## Tips
- Write the outcome, not the topic. "A Q2 launch plan with phases and owners" beats "product launch".
- Pick the view first. A board suits stages, and a table suits many fields.
- Turn on **Agent Mode** when you want a helper that knows the project from day one.
## Frequently Asked Questions
### How do I generate a project?
In the sidebar, click **+** next to **Projects**, then select **AI Project**. Describe the outcome, add sources if you want, and press **Enter**. Click **Create project** to save the result.
### Can AI build from my files?
Yes. Add PDFs, Word documents, slides, spreadsheets, EPUB files, pasted Markdown, website links, or YouTube videos as sources. AI Project Studio builds the project around that material.
### Project Studio vs a template?
A [template](https://www.taskade.com/learn/projects/use-templates) is a fixed layout that you reuse. AI Project Studio builds a new structure from each prompt, and it can add a matching AI agent.
### Can I turn it into an app?
Yes. A project can be the data for a [Taskade Genesis](https://www.taskade.com/learn/genesis/first-app) app with pages, agents, and automations.
### Is AI Project Studio free?
Yes. AI Project Studio works on every plan, Free included, and each generation uses AI credits. Cloud file sources need a paid plan. See [AI Usage and Credits](https://www.taskade.com/learn/agents/ai-usage).
### Can an AI agent learn from the generated project?
Yes. Turn on **Agent Mode** before you generate, and AI Project Studio creates an agent with the project. You can also add any project to an agent as knowledge later.
## Next Steps
Grow the project in this order: views, agents, automations, then an app.
1. **Organize the result**: Switch layouts in [Project Views](https://www.taskade.com/learn/projects/project-views).
2. **Build an agent from a description**: Use the [AI Agent Generator](https://www.taskade.com/learn/agents/agent-generator).
3. **Generate a whole team**: Create several agents at once with the [Team Generator](https://www.taskade.com/learn/agents/team-generator).
4. **Automate the project**: Add triggers and actions in [Automations](https://www.taskade.com/learn/automation/automations-execution).
5. **Turn it into an app**: Build pages on top of the project with [Taskade Genesis](https://www.taskade.com/learn/genesis/overview).